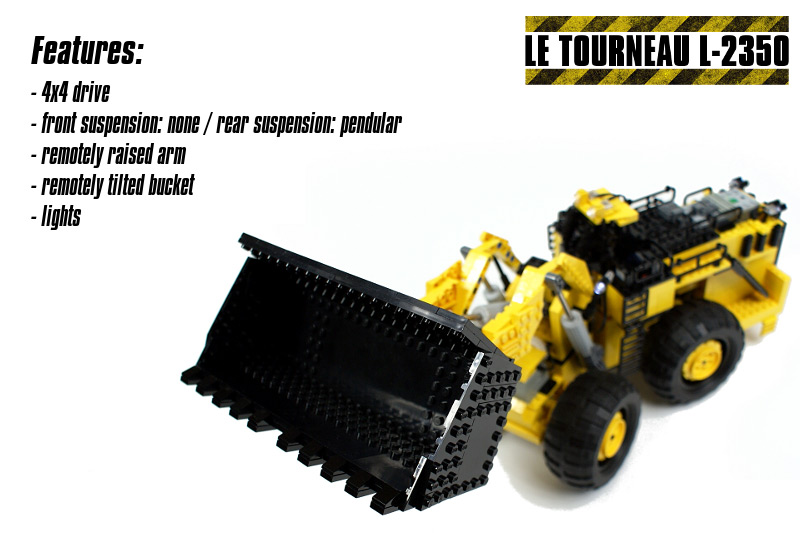
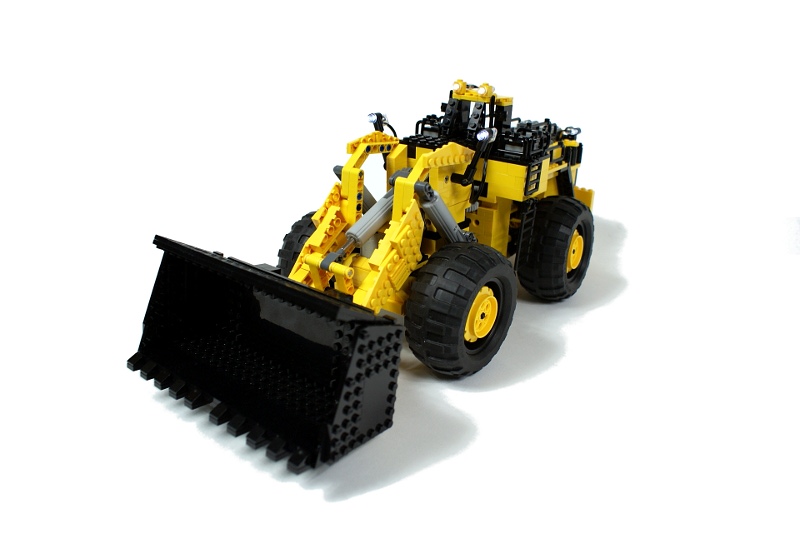
Le Tourneau L-2350

Model of the world’s largest wheeled front loader. Features 4×4 drive, realistic suspension, lights and arm & bucket controlled remotely with linear actuators.
Datasheet:
Completion date: 30/08/2009
Power: electric (Power Functions)
Dimensions: length 58 studs / width 22 studs / height 23 studs
Weight: 1.57 kg
Suspension: front – none / rear – pendular stabilized with shock absorbers
Motors: 1x 71427, 2x PF Medium, 1x PF XL
Articulated 4×4 vehicles seem to be my soft spot. So far I’ve built three front loaders and an articulated bulldozer, only to find out that I still have a reason to build another front loader – that is, I’ve never used linear actuators with a front loader until now.
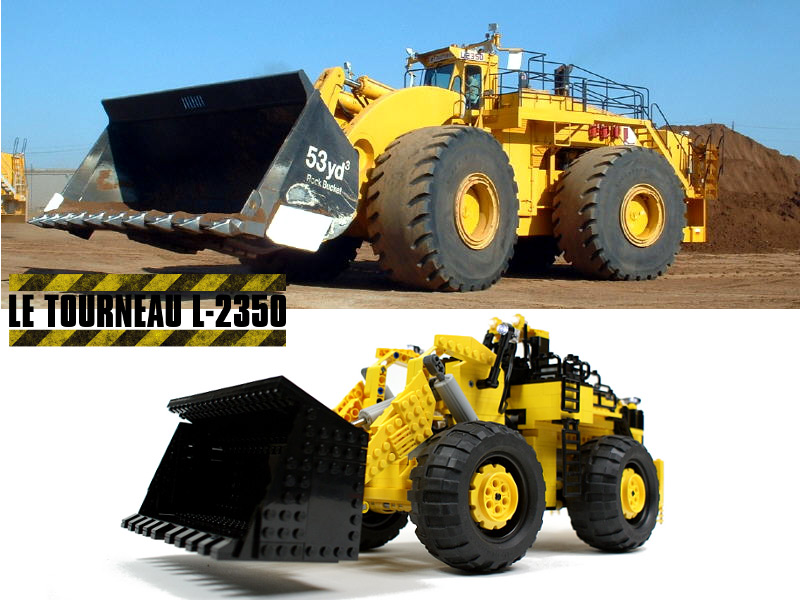
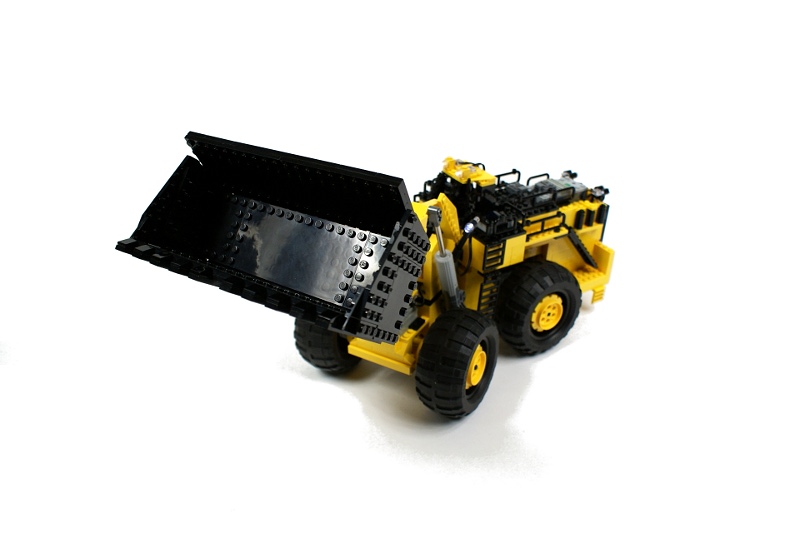
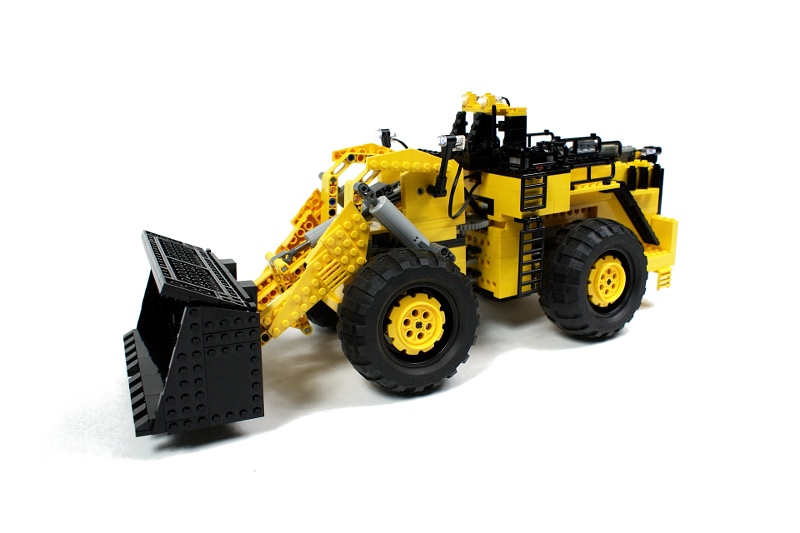
The machine I’ve picked this time is the world’s largest wheeled front loader. Le Tourneau L-2350 (sounds French, but it’s actually USA-produced) was designed to co-operate with the largest mining dump trucks (such as e.g. Liebherr T282B whose model I’ve built some time earlier), and at a gross weight over 250 tonnes it is able to move 75 tonnes of load at a time. I was initially attracted by its immense size, hoping that it would allow me to build a large model with plenty of room for internal mechanics. It did not.
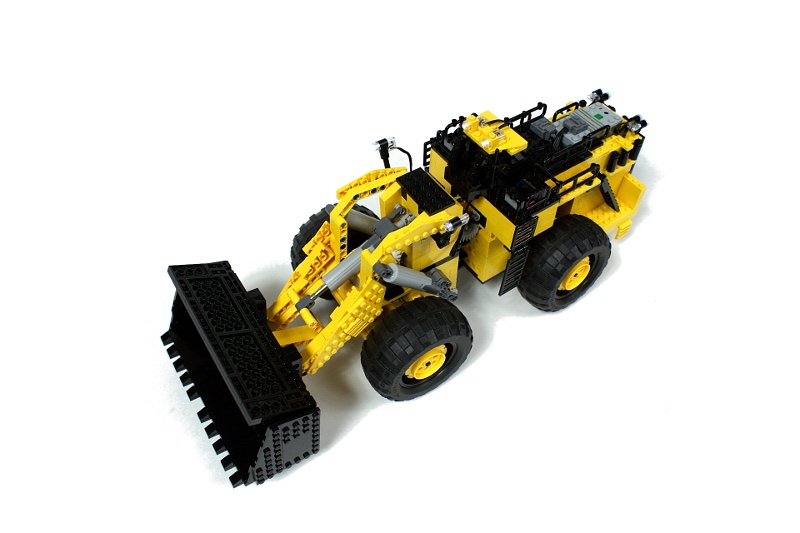
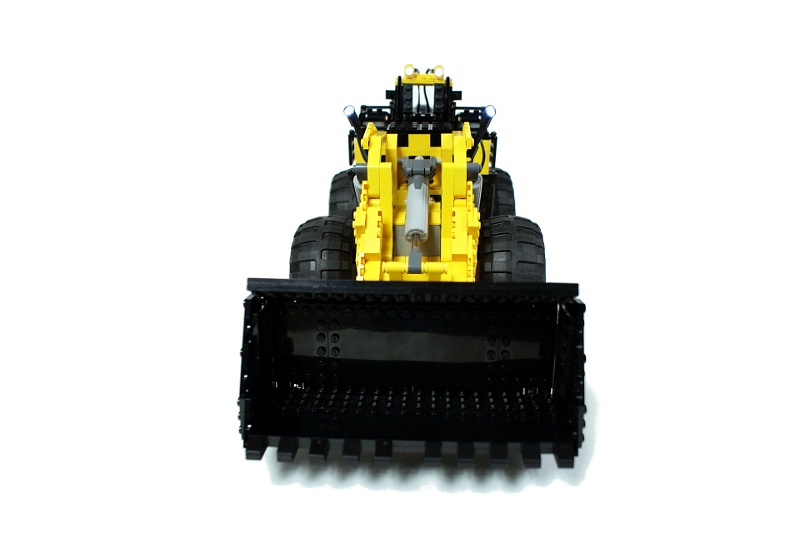
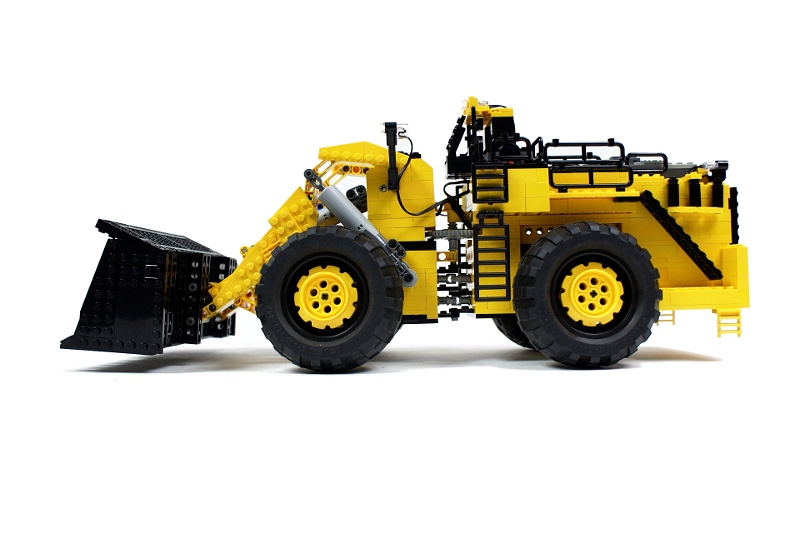
As usual, the model’s size was limited by the wheels. The original L-2350 is a huge machine, but unfortunately its wheels are huge too. With Lego 94mm wheels being the largest wheels available for this model I was forced to build it just 22 studs wide. 22 studs may seem like a lot, but only until you look closely at how a regular front loader is usually built: the bucket is 22 studs wide, while the vehicle with wheels is 20 studs wide. The hull without wheels is only 14 studs wide. It still sounds like a lot of place, but almost half of it is made with various small side bulges. The central part of the hull is merely 8 studs wide, and this is where the entire mechanics has to be placed.
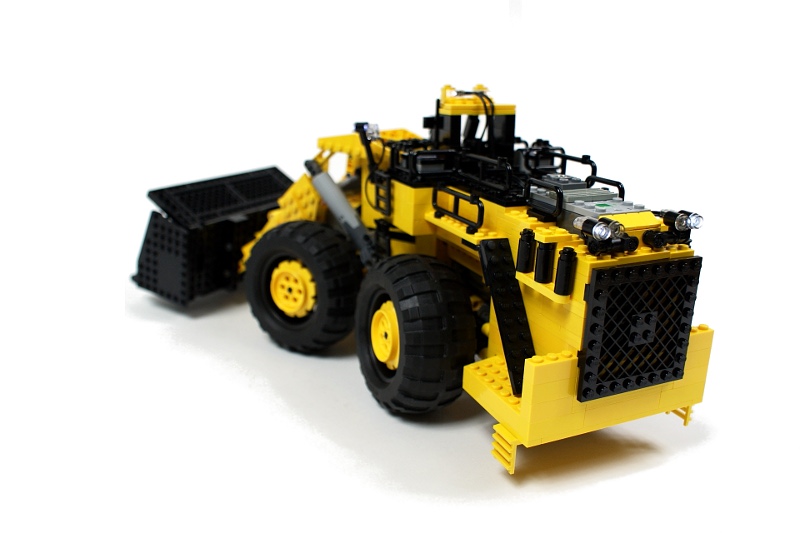
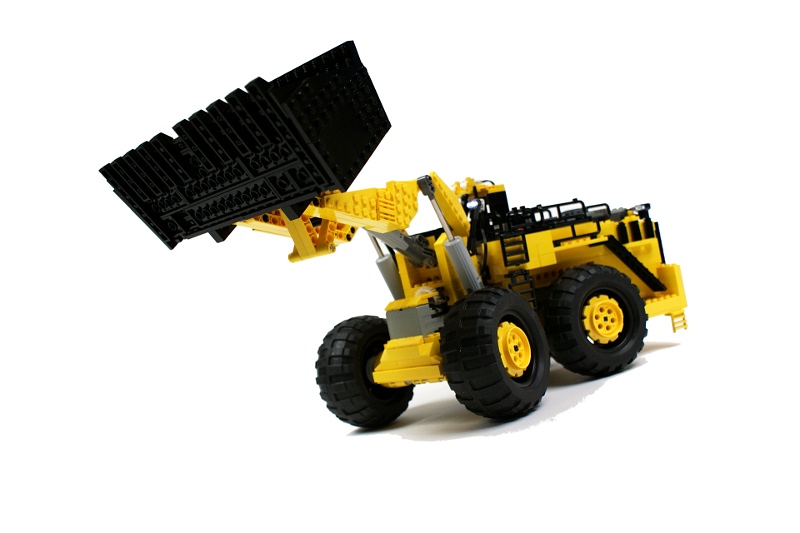
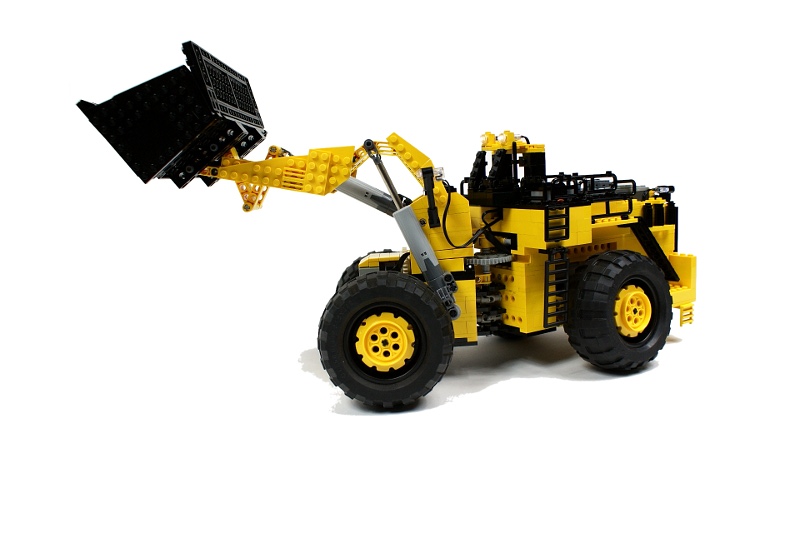
The model is really compact – to the point where it would be impossible to build it without the 8878 battery – the standard PF battery box is way too large. It’s driven by a PF XL motor housed in the lower rear part of the hull. The rear axle consists of my usual 3-studs wide differential bracing, which serves as a pendular suspension stabilized by 4 shock absorbers (2 at each side). At the same time it transfers the drive further, through an universal joint, to the front axle which consists of the same, but fixed, bracing. The drive motor is also connected to a large fan that can be seen through a grill plate at the back of the vehicle. Front loaders usually have large radiators in the back, and I liked the idea of placing there a big fan that rotates as the vehicle drives.

The steering mechanism in such a model is always tricky because of the size limitations and a substantial gear reduction necessary. It’s impossible to use turntables in a model that small, and I found even the liftarms to be too large for the central joint structure. The structure was compacted as much as possible and is held together almost exclusively by a single vertical axle. The steering is achieved by a horizontal 40-teeth gear placed on this axle, which is driven by a PF Medium motor through a worm gear. The central joint is traversed by two universal joints – one driving the front axle, the other driving the arm elevation mechanism – and three wires, two of which power the front lights while the third one powers a 71427 motor located above the front axle.
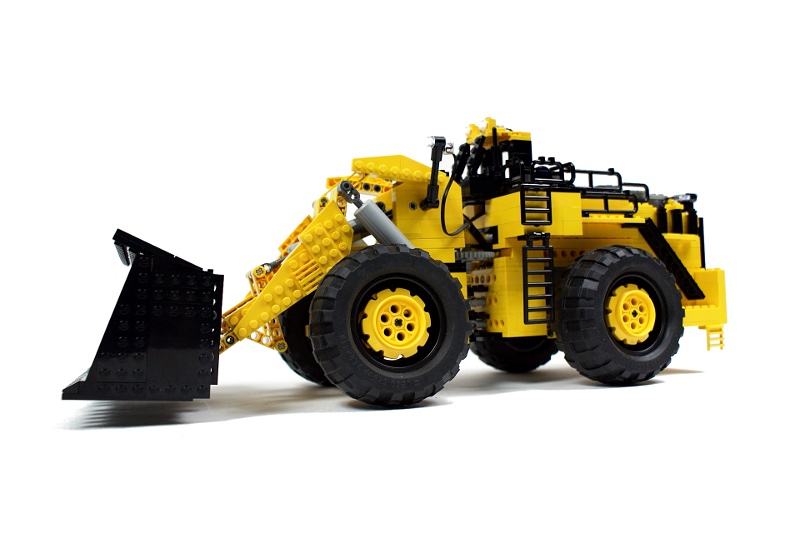
Since it was literally impossible to house all the four motors inside the rear half of the vehicle (I was barely able to fit two IR receivers in there), I was forced to place one motor inside its front half. The motor had to be as short as possible, so the 71427 motor was an obvious choice – it’s two studs shorter that a PF Medium motor while providing similar speed (and much lower torque, but it was not needed for its function). Thus, the bucket is tilted by the 71427 motor via a safety clutch, and the arm is raised by a PF Medium motor housed in the rear part of the model.
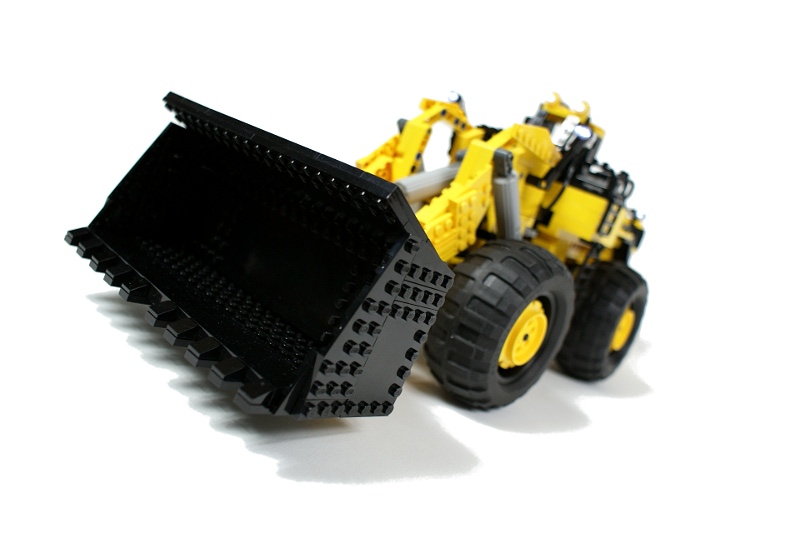
The use of linear actuators was the very reason this model was built for, and it proved a significant advantage. Not only the linear actuators are far more accurate and stronger than pneumatic cylinders, but they also make the central joint free of any troublesome pneumatic hoses. There are three actuators used, only one operating the bucket – the real machine uses two hydraulic cylinders for that purpose, but the available space was simply too narrow for two actuators.
As for the look of the model, it suffers from a number of compromises for the sake of functionality – the most apparent of which is the battery box protruding upwards from the rear part of the hull. On the other hand I find the wheels quite neat. I couldn’t find any Lego wheels that would look like the real ones, so with a bit of inspiration from a fellow LUGPol builder M_longer, I’ve used black 94mm wheels with black tires and yellow sprocket wheels placed inside.
I consider it to be an average model. I must admit it performed somewhat better that I expected, but I still had the feeling that it could be much better if only I could make it a little bigger. It was also my first model with a high quality video – I made an effort of filming and rendering it in a quality that would comply with the YouTube HQ standard just to see what it would look like. I was pleased with the effect and decided to make all my future videos in that standard.


@Javi
You do realize all models on this website are custom and not available for sale, right?
I’ve been looking for one of these is there anywhere that they sell please send me an email if you have anything
@ron
The standard XL bucket is slightly too small for the model, but I don’t think it will be wrong for you to use it.
Hi Sariel!
Super model! Im fascinated by it and plan to build one myself in the near future. However, the bucket presents a little problema. Could you give me some ideas as to how you built it? Is the standard XL LEGO bucket too small for the model?
Thanks and keep up your superb building!
@Sariel
Thanks. Found them. Partsref has different numbers, maybe. Check out the build of my Manitowoc 6400 Dragline here:
http://www.stripmine.org/gallery/main.php?g2_itemId=42069
@Ausphil
Perhaps switching to Bricklink for reference would be a good idea: http://www.bricklink.com/catalogItem.asp?P=44772c02
@Sariel
Partsref = all Lego parts at Peeron, Lugnet etc. So what is the part number of the 94mm tires please. Thanks.
@Ausphil
81.6x38R tires are 81.6 mm, hence the name. 94 mm tires are obviously bigger. I don’t know what you mean by partsref.
A very well made model of the 2350. Congratulations. I am inspired by your model to make one too. I am to start building a L-2350 myself. You say the tires are 94 mm – is that the 81.6x38R or is there a larger Lego tire. I cannot find a larger one on partsref?
Thank you.
Ok dave, how about you slow down with the comments?
sorry i ment wish you all the best not “wiss” (-:
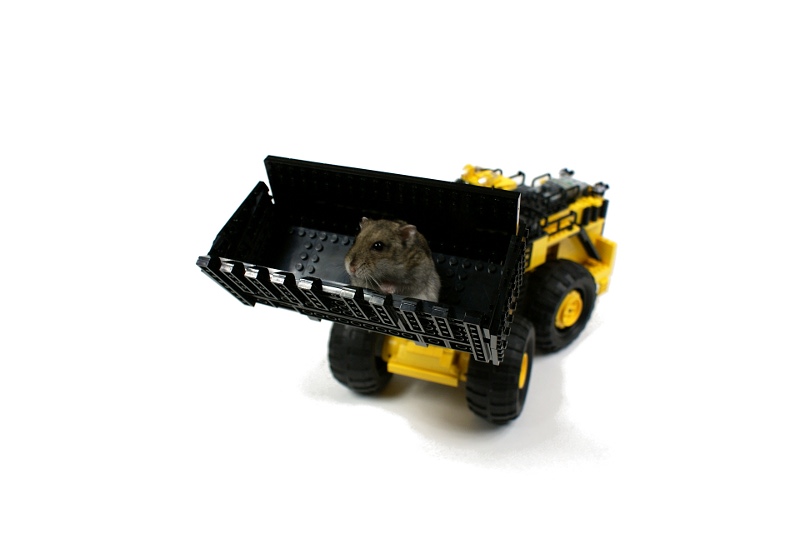
i think your hamster is very cute.
you put it almost in every movie (-:
I have hamster too. usualy i put it on my lego creation.
I’m in a middle of building a linear actuatored excavator.
when its will be done i will give you some photos and videos.
wiss you all the best, keep building…
the wheels are very bent
@Beppe
A lot of people uses Technic turntables in their trial trucks, but not at the wheels – they use it to connect the whole axle to the chassis, so that the axle is pendular and the weight rests in the turntables.
The floating axle system is an interesting concept, but I was more thinking of using something like a Technic Turntable (http://www.bricklink.com/catalogItem.asp?P=2856c03), but not so bulky of course. However with the same principle of two circular plates connected to one another that can rotate freely. One plate would be connected to the wheel and the other one to the chassis. That would totally offload the drive axles connected to the wheels. They would not need to carry any weight at all.
@Beppe
Thank you 🙂
As for the suspension issue, it can be solved either by the parts you’ve shown (or their older counterparts), thus making an independent suspension, or by using floating axles where the entire axle is supported by a suspension system that takes load off the drivetrain. There are many floating axle concepts, and most of them more complex than the typical independent suspension. I’ve created some pretty simple concept, available here: http://sariel.pl/2009/01/sandrail/
Hope it helps.
How are the wheels connected to the chassis? Only with axles? Are there any other solutions than the Technic Steering Arm with 4 Ball Joints (http://www.peeron.com/inv/parts/x873cx1) for offloading the axles the weight of the entire vehicle? I’d like a solution where I can deliver the torque to the wheels with ordinary axles, but where the weight of the vehicle is carried by something similar to the above referenced steering arm.
As with all your models, this one is really a piece of art! I’ve recently started to buy some Technic LEGO after a minor recess of 20 years! And yes, it is now a father/son thing and I can’t tell who’s most excited! Anyhow, I’ve looked around on the Internet and I’ve seen some really mind-blowing (most because of their size) models, but your models have some kind of finish that the other one lacks. I think you’ve found a really good niche/scale for your models and the overall good quality of all your builds and this site makes it really interesting to follow your projects!
/B
@Willis dee
Thank you, I appreciate your opinion. Still think it could have been much better if built bigger, though.
I run loadedrs like that for a living, but if a scooped a bucket like that i would likely get my ass fired. This thing awsome though; Way better than the new lego one.
@RjbsNXT
There are black wheels with black tyres, and yellow sprocket wheels inside. I have explained it in the description.
How are the tyres held rigid with the axle because I don’t see the usual hub for that wheel in there?
@Alan Antepenko
That sounds reasonable and I’ll have to consider it. However, it will require a very different disassembly process, because instead of focusing on just taking something apart, I would have to focus on reverting the building process in a comprehensive way. So, it would still slow me down. Besides, I believe that Lego is all about creativity, that’s why I tend to show some mechanisms and working principles and to let people figure out the rest, rather than to create step-by-step instructions.
I am impressed with the skill you have in building LEGO technic variations.
However, although you claim to share. You do not share very well.
So here is what I recommend you to try.
When you dissasemble a new creation, make a photo shoot of the dissasembly process.
In this method people can reverse the order of the pictures you make to recreate your build. Also, you will not have to think about or be slowed down by making instructions.
If you offer to email people copy of your photo detail that would ennable us to copy your model(s), I would be willing to send a small ($5 or $10 US) donation by PayPal for your photo session. Perhaps other people would be willing to do the same.
@arnau
I can’t honestly think of one that would be better than the Lego 8455 set.
I’ve seen all your construction equipment part. It’s very good but I believe it’s missing a backhoe loader. Are you thinking in making one?
@Adi
If you want torque, then you should use Sariels approach, one XL PF Motor drives the differential via a worm gear, but you can also put the XL PF Motor to just drive the differential without any gears at all. But If you want speed, then you should put the PF M Motor to drive the differential.
But if you don’t want to do anything from above, then you can gear it up.
@Adi
No.
I have made a rc car and it works really well, but it isn’t very powerful. It is powered by a PF XL moter. do you know how to fix it?
@Adi
Here: http://en.lmgtfy.com/?q=truck+trial+race
what is a Truck Trial race?
@Boris
No, I don’t have the new front loader set and I didn’t buy a new camera, I just used the one I have to its full extent. I would love to use two LAs for steering, in fact I have developed a whole setup already, but it was way too big. A single LA is very long and needs ability to move to sides, and two LAs need horribly large amount of space. Guess I should look for a front loader with small wheels, so it could be a basis for a large model.
P.S. I really don’t like giving too much comments in a row, but I forgot to say something in the first comment, I love all the attention to details in this MOC, especially the ladders, also the fan is good. Have you maybe purchased the new LEGO Front Loader set?
I see that your newest video is in HQ, I guess that you have bought a new camera, or a camcorder maybe? However, the loader is really big, and I really like it, especially how you used those track sprockets as rims. Also, this is just a suggestion, you can try using 2 Linear Actuators for vehicles that use articulated steering, because that should contribute to stability, because the two halves are connected with more than one place.
However awesome MOC! I can’t wait for the bucket wheel excavator.
Awesome. Great MOC.
@owen
Yes. I have to complete Alvis first and take it for a Truck Trial race. After that I’ll be working exclusively on the excavator.
ASWOM! it’s COOL!:)
are you still working on the big bukket excavtor that im dieing to see. i love the modle you should really take some pics of the bottem and show the mechanisms when you take it apart. gret work
@Kathryn Brown
I don’t make instructions. I’ve explained it in the FAQ section.
Please tell me you might have a step by step on making this, this is great I would love to make one and have fun with it.
@Sam
I’ll try to keep that in mind, but here most of the bottom area is covered with plates, with the exception of the axles. Some bottom images, however, can be seen on the video.
Can you show the bottom of your vehicles next time? It shows the mechanisms and how the vehicle works. I can picture how you made vehicle’s mechanisms from your words, but a picture of the inner workings would clarify it.