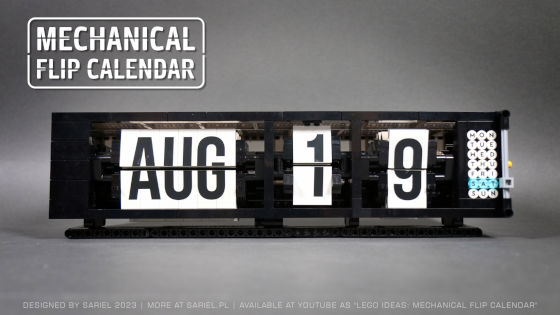
Mechanical Flip Calendar
My second LEGO Ideas project featuring a flip mechanism.
Datasheet:
Completion date: 18/08/2023
Power: none
Remote control: none
Dimensions: length 47s / width 16s / height 13s
Last year I have submitted a Mechanical Flip Clock project to LEGO Ideas where it became unexpectedly popular, reaching 10,000 votes within a month of submission. This came as a complete surprise to me, but the LEGO group has ultimately rejected the project. It occurred to me that since the idea was so popular, perhaps it deserves a second try but with a project that would be free from issues that I could identify as making the LEGO group less likely to accept it as an official set.
I’ve come to think that the clock project was:
- bad-looking and half-finished in appearance
- too complex, requiring a motor and prone to inaccuracy
- required too many unorthodox building techniques e.g. to build a dodecagon
- required placing stickers over multiple pieces, which is something the LEGO company is trying very hard to avoid
With these points in mind, it occurred to me that a device that can use a flip mechanism without requiring a motor and worrying about accuracy is a calendar, since it’s usually operated manually and its accuracy depends solely on the user. An actual starting point for the project was coming across the recently introduced 4×4 LEGO tiles, which solved the issue of stickers placed over multiple pieces: I could use just one such tile for upper flap and another for lower flap. This solved the stickers problem for digits, and as for the months, which needed flaps three times as long, I have used three 4×4 tiles and shortened all month names to three letters, so that margins between stickers/prints could simply fit between the letters.
On the mechanical side, I have abandoned circular structures in favor of a sort of a conveyor belt built using 3L Technic beams and wrapped in a closed loop around a liftarm of specific length. This formed a flattened loop which could be easily moved by rotating a 3L beam on an axle so that it meshed with gaps between 3L beams on the conveyor belt. Moreover, by rotating that axle by exactly 90 degrees at a time, it was possible to move the conveyor belt by a single flap at a time. The resulting “counter” was also relatively small and much lower than circular structures in my clock project.
The central counter, showing tens of days, was an exception because it didn’t require a conveyor belt. With only 4 flaps required for this counter, I was able to simply build a connector rotating on an axle and holding all 4 flaps.
I went through several iterations of flaps before arriving at two tiles joined back to back using a modified plate piece. Additionally, each flap had two spacers on its back side that would lean against the next flap, thus keeping the flap nearly vertical when in upper position. Without the spacers, the upper flaps had a tendency to lean back against the next upper flap.
To keep the calendar simple, small and clean, I didn’t synchronize the three counters in any way, instead making each operated by turning a knob sitting on an axle going through a modified brick that was squeezed from two sides by Technic connectors connected with a rubber band. Thus simple stepper mechanisms were created, breaking the rotation of the knobs into steps of 90° each, which in turn translated into moving each respective counter by one flap – and that was possible both forward and backward. Any kind of mechanical synchronization would dramatically increase the complexity level (considering synchronizing months of various lengths mechanically) while also keeping the counters further apart. For the same reason I kept simple knobs for operating the counters, because I’ve tried adding several various lever/button mechanisms instead, and each of these would require plenty of space, introduce significant structural stress due to rubber bands, and then it would end up jamming frequently. In the end I’ve decided that knobs are more reliable thanks to their simplicity.
Finally, I put the whole mechanism inside a simple, clean housing with large trans-black sections that allowed to see the inside, and I’ve added a simple manual indicator for day of the week on the housing’s front.
This project can be supported here: https://ideas.lego.com/projects/5f7b16ea-2abb-4278-aed2-0c8036280139


