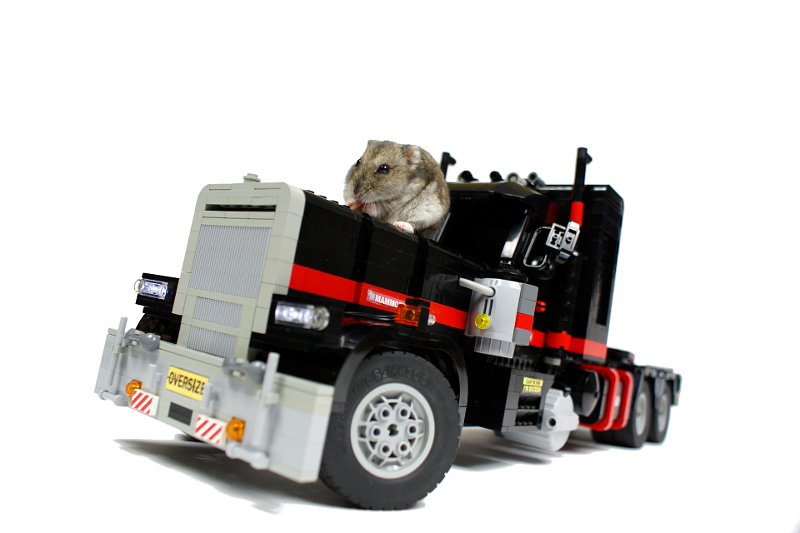
Kenworth Mammoet

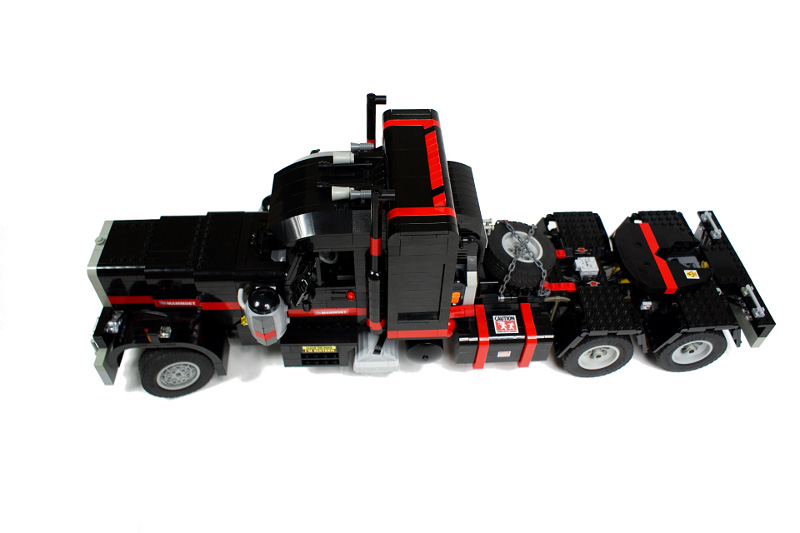
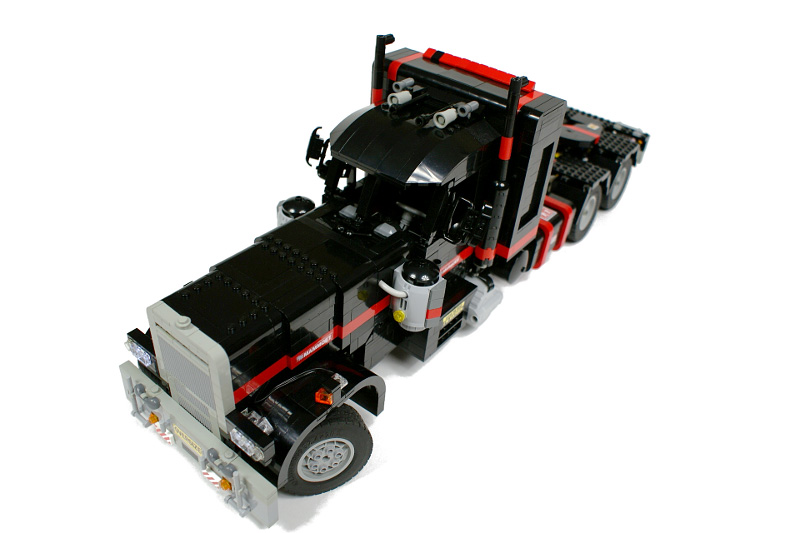
Model of the Kenworth W900 in a version customized by the Mammoet company. Features full pendular suspension, functional steering wheel, R4 piston engine, openable bonnet, sleeper’s roof and doors, remotely controlled front and rear lights, automated reverse lights and trafficators, remotely locked catch and custom stickers. My first construction powered by the Lego 8878 rechargeable battery.
Datasheet:
Completion date: 29/06/2009
Power: electric (Power Functions)
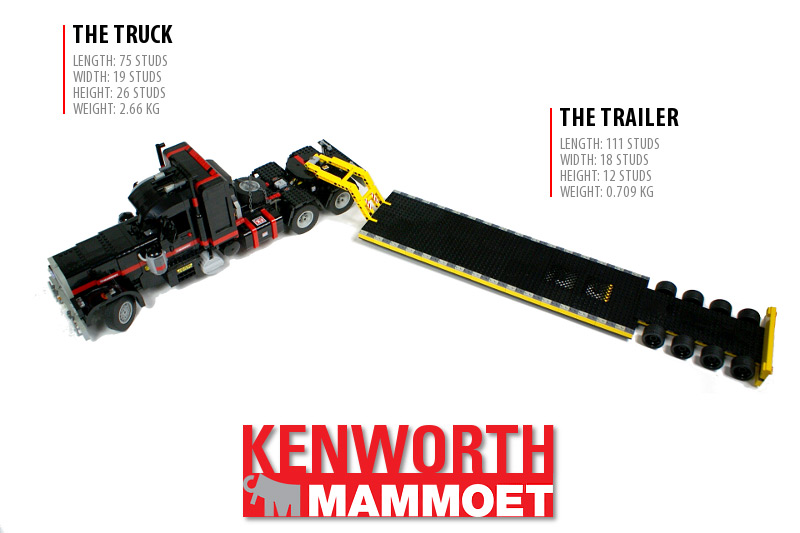
Dimensions: truck – length 75 studs / width 19 studs / height 26 studs, trailer – length 111 studs / width 18 studs / height 12 studs
Weight: truck – 2.66 kg, trailer – 0.709 kg
Suspension: truck – full pendular, trailer – none
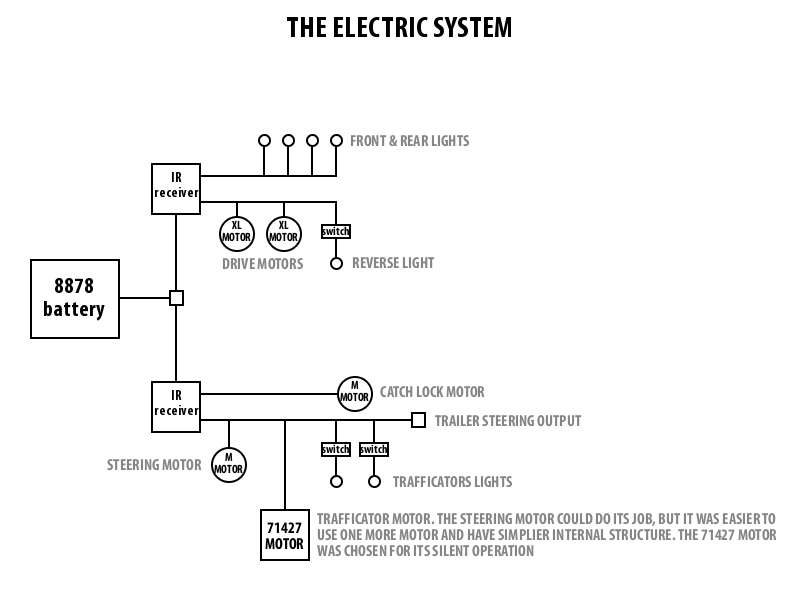
Motors: 2 x 71427, 1 x PF Medium, 2 x PF XL
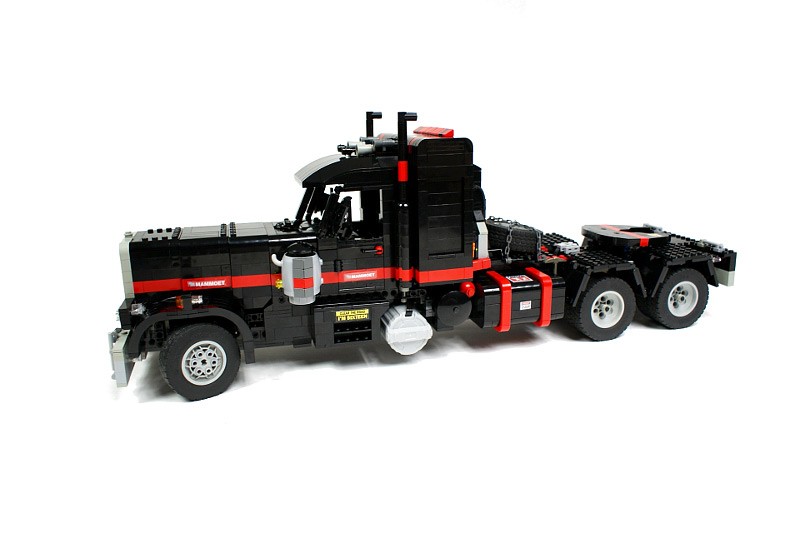
Kenworth W900 is one of the most iconic US-type trucks, and the Mammoet is one of the most impressive companies ever, handling stuff like transportation of bridges or houses on a daily basis. Moreover, it is a Dutch company, just like the Lego, and it uses almost entirely black livery for its vehicles which is very appealing for me. Finally, the Mammoet fleet, which consists of some of the world’s biggest and most powerful vehicles in their class, contains a number of customized vehicles, which makes them even more interesting.
There is one obvious point of reference for this model, that is my Tow Truck, completed almost a year earlier. I have assumed that it would be difficult to exceed its level of technical complexity, and if I tried to, it would most likely result in a vehicle of even bigger size and similiar look. That is why Kenworth was meant to be simplier and built with more focus on its aesthetic side.
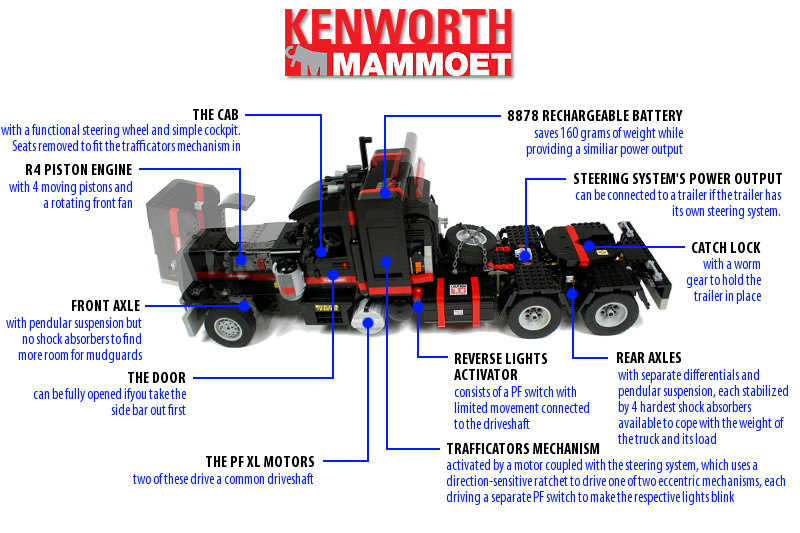
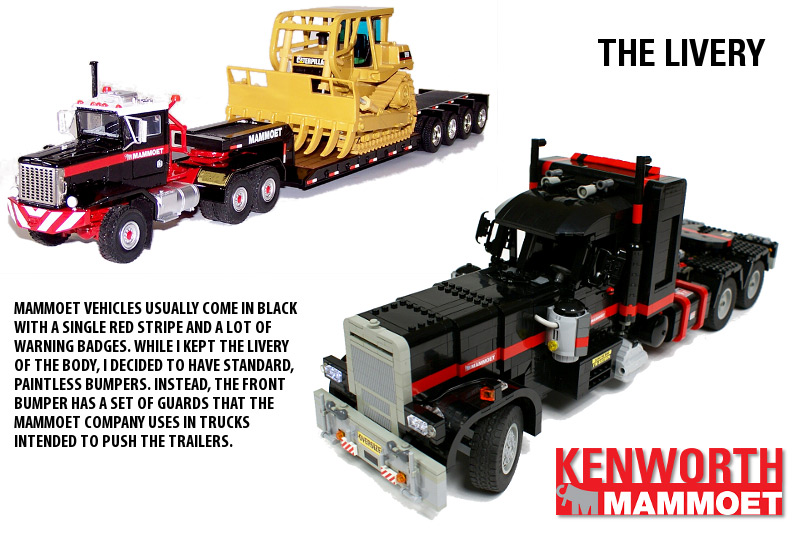
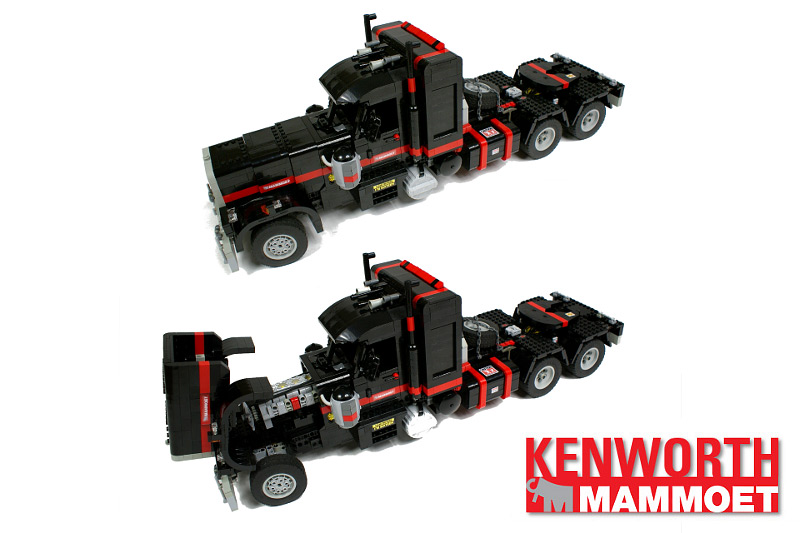
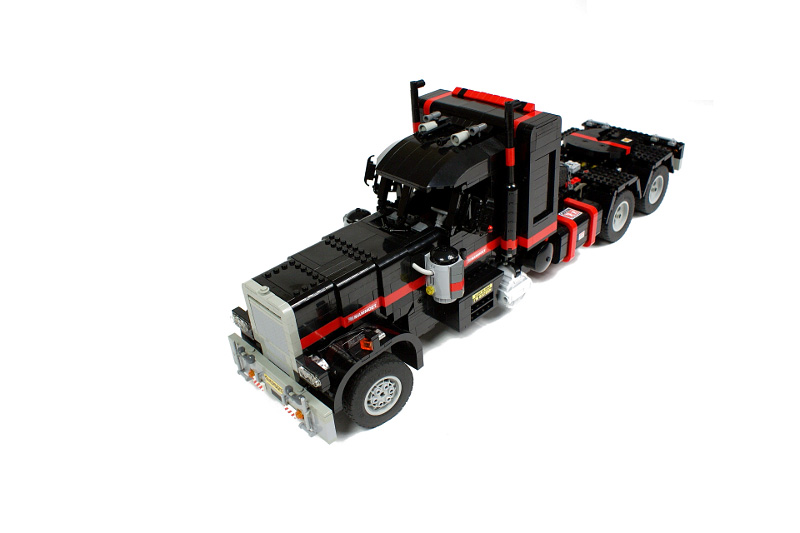
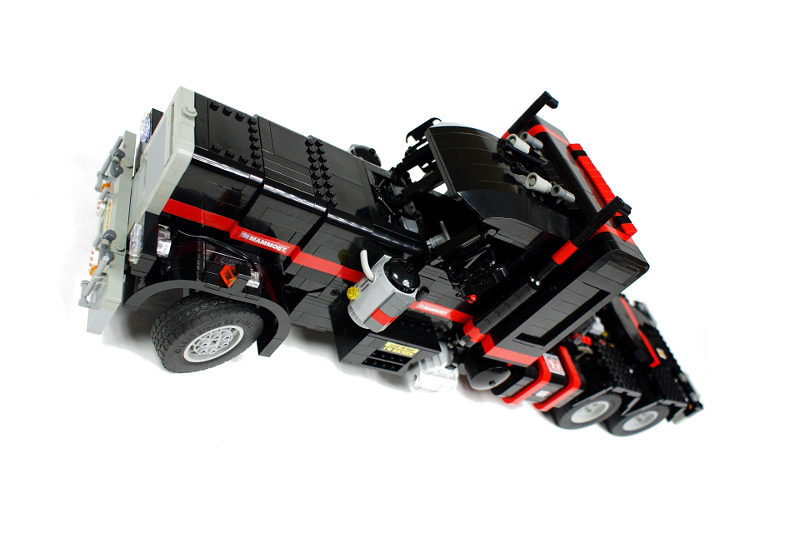
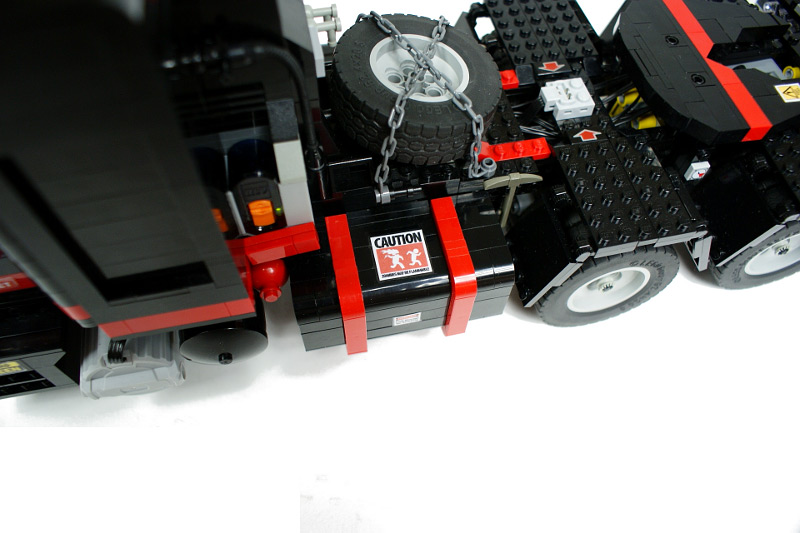
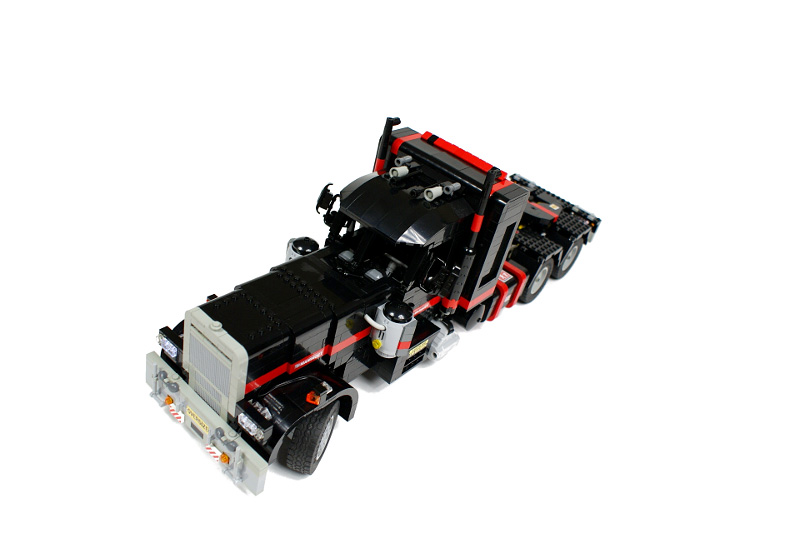
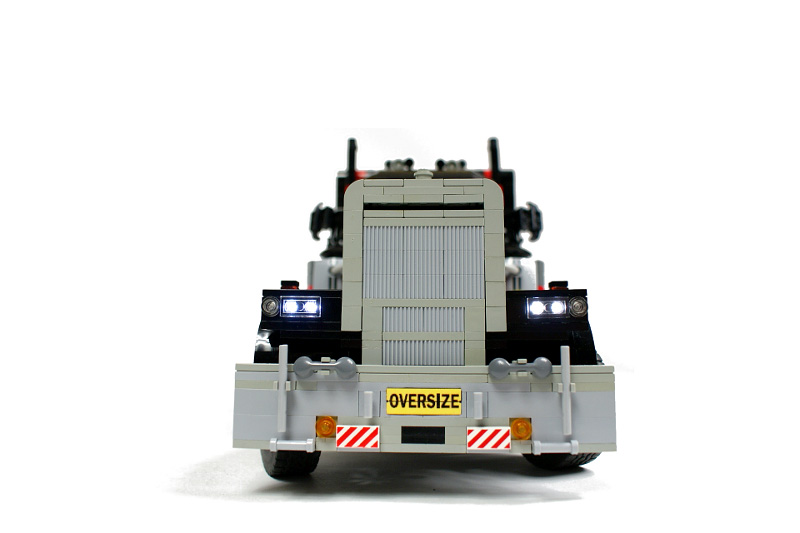
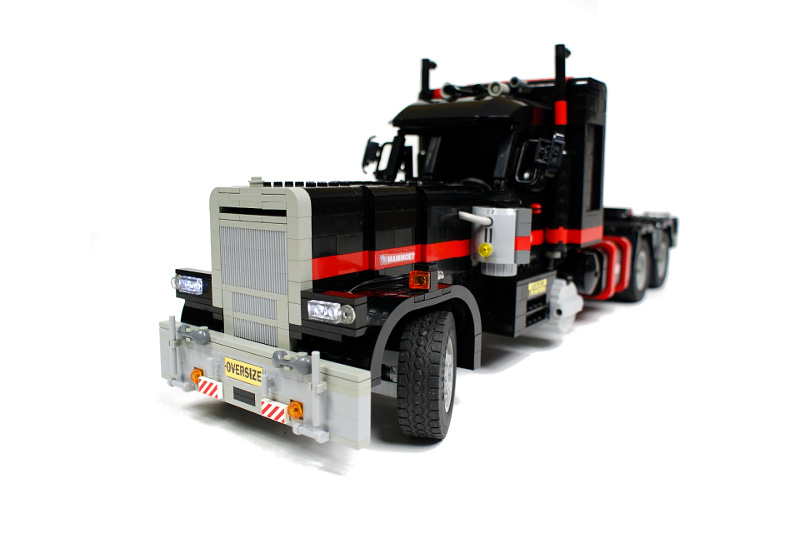
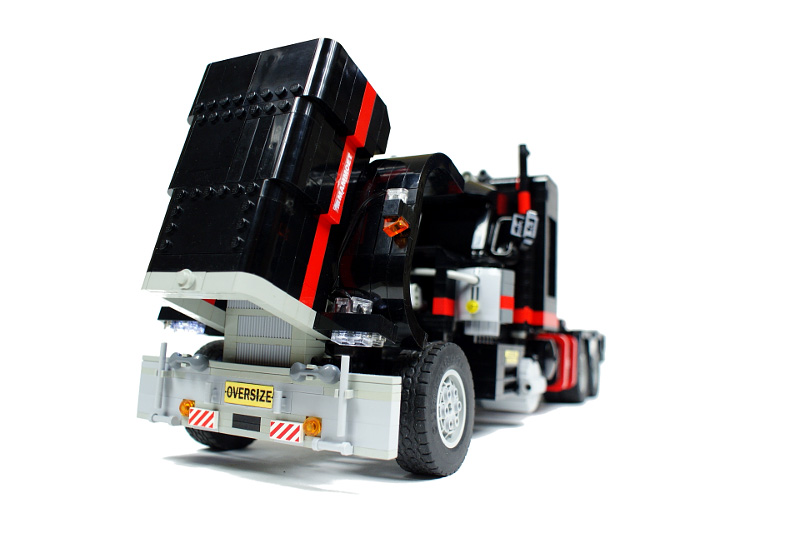
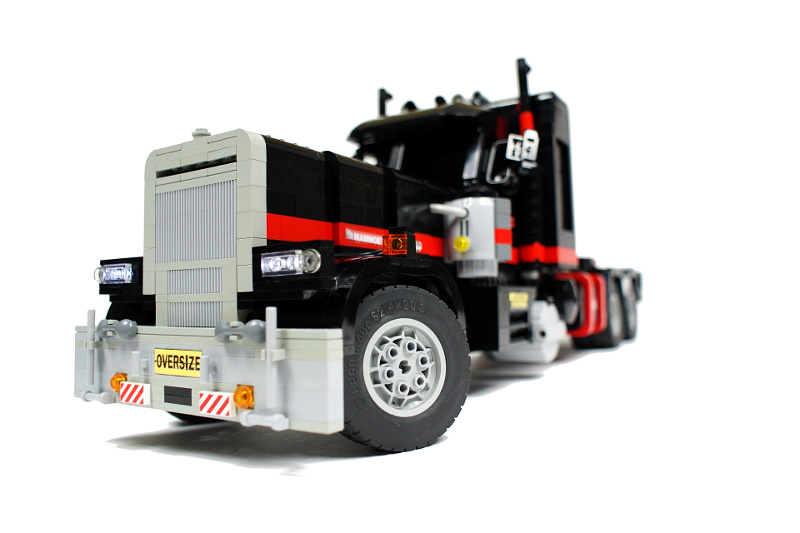
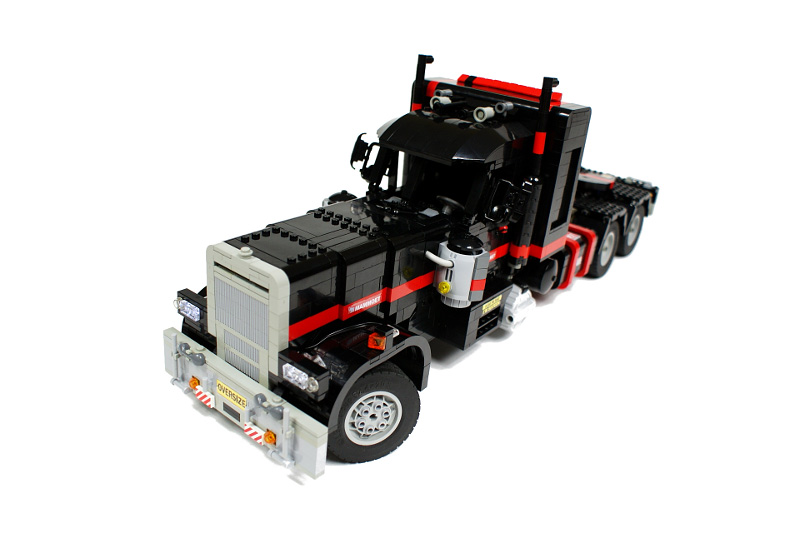
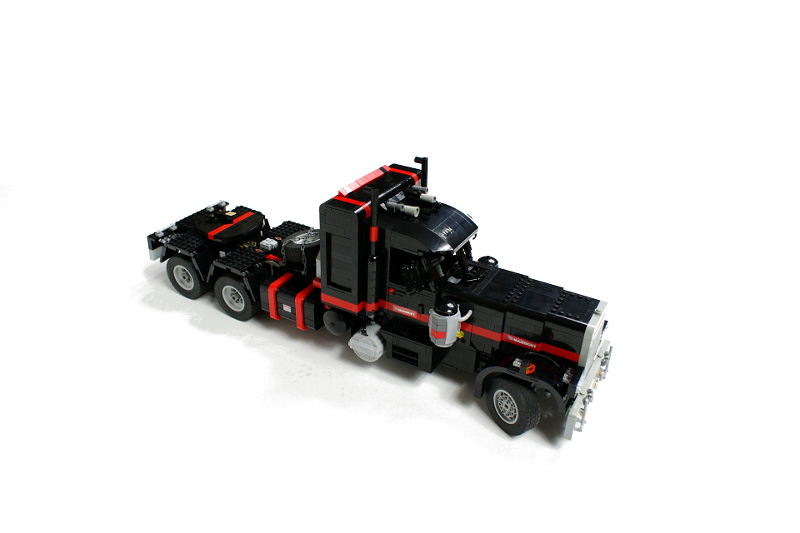
First thing about the aesthetics are somewhat missed proportions – although according to Mammoet’s blueprints only the bonnet is 2 studs too long, and the rest of dimensions is more or less correct. Nevertheless, the truck looks long and narrow. I have recreated Mammoet’s livery on the body, but not on the bumpers, preferring to keep them free from paint job. Instead, they were fitted with small warning badges, and on the front bumper has a set of guards that Mammoet company uses in trucks intended to push some loads. There are no warning lights, either. I’ve put a lot of work into the bonnet, which can be opened up together with the front mudguards, which is a realistic solution unlike the one used in my earlier Tow Truck. The sleeper was made taller to fit the mechanics in, the catch was increased in size to achieve more accurate shape, and rear mudguards were added.

The model was designed for use with a standard Power Functions battery box, and only in the last stage of building it received the Lego 8878 rechargeable battery instead. The battery decreased sleeper’s height and truck’s weight (by considerable 160 grams) while not impacting the performance in any apparent way.
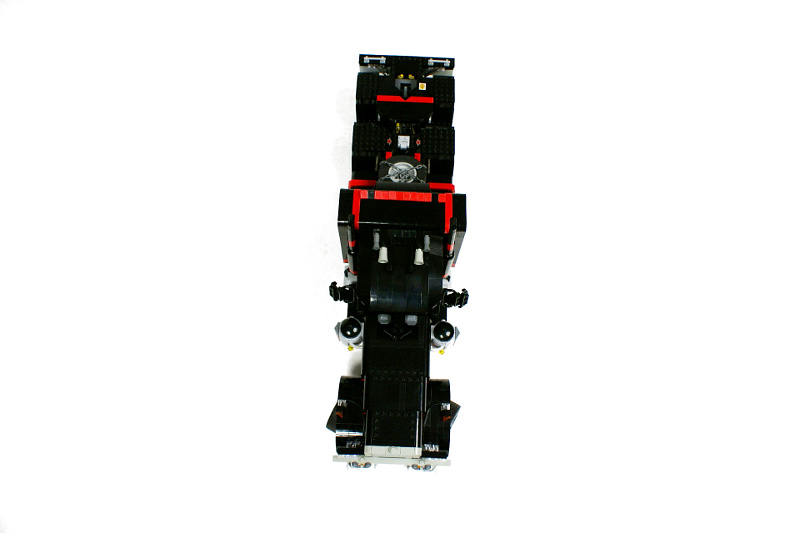
The suspension system consisted of three simple pendular modules, with axles #2 and #3 using my 3-studs wide differential bracings, each stabilized by four hardest 6.5L shock absorbers available to handle the truck’s weight and load. The front axle had no shock absorbers at all, because too much place was taken by the bonnet and front mudguards. Since the entire suspension is pendular, the truck is susceptible to a transverse tilt resulting from the driveshaft’s load, but it is greatly limited by the hard shock absorbers.
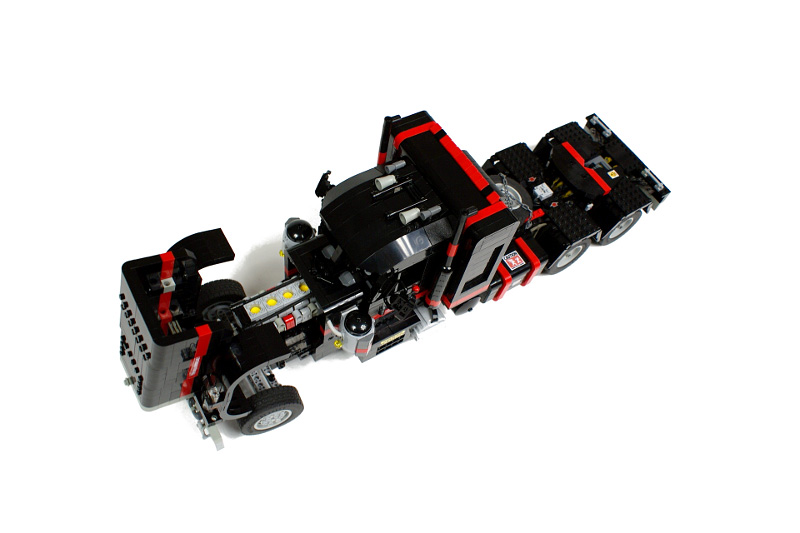
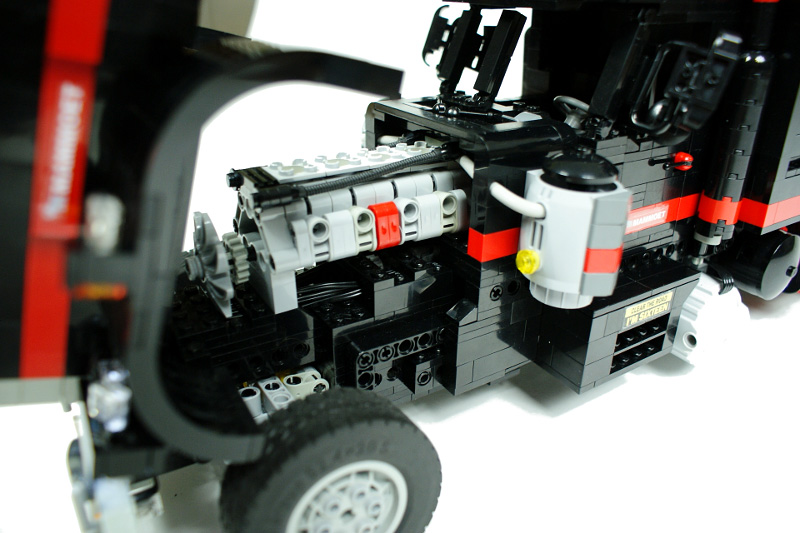
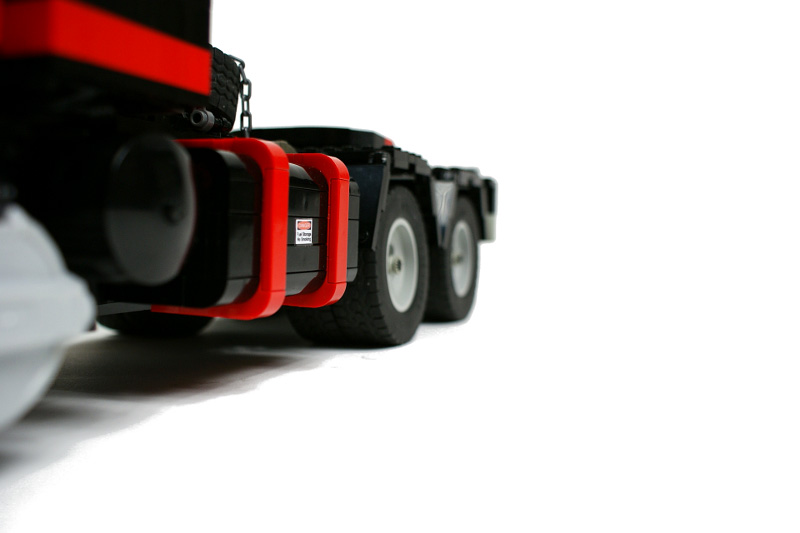
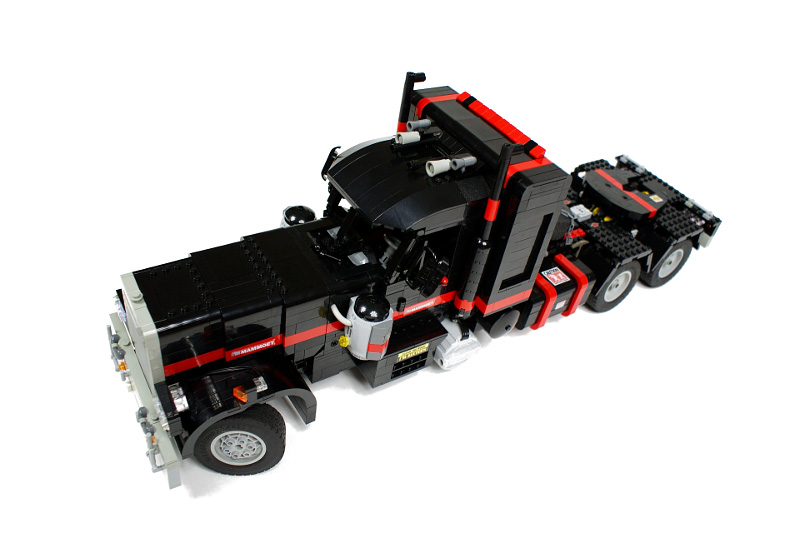
The model is driven by two PF XL motors facing each other and connected by four bevel gears. I have tested this setup before, and I liked how simple and effective it was. Additionally, the use of two motors facing each other substantially reduces the strain on the drivetrain. When I tested it with a single motor, it had a tendency to pull the driveshaft down or up if it was not reinforced properly. With two motors, the driveshaft remains in place because while one motor pulls it up, the other pulls it down. One of the four bevel gears is an idler gear, used only to keep the other three gears in place. It can be easily noticed that the motors would look better if they were located along the body – they would then look just like the fuel tanks. It’s a nice solution, but it makes the vehicle’s frame and transmission much more complex, and so I gave it up. I have to mention that the truck turns surprisingly smoothly, most likely thanks to the long span between the steered axle and the driven axles. And it feels very pleasant and realistic to drive it with the speed control-enabled 8879 handset.
It may come as a surprise, but there is no gearbox whatsoever. I’ve done a lot of tests with a linear 3-speed manual gearbox, which seemed most adequate due to it size and robustness, but it proved somewhat loose and the model performed much better with no gearbox. I intended to use the speed control feature anyway, so the gearbox was eventually removed.
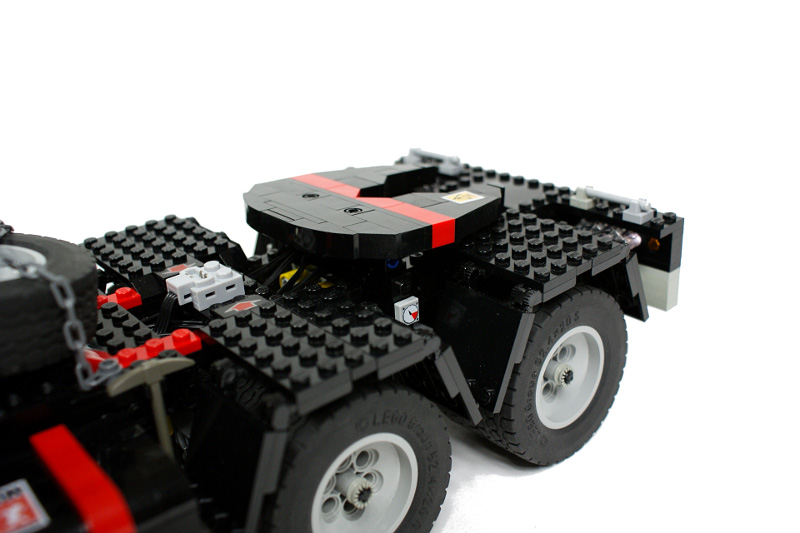
The catch lock mechanism is very simple and compact. It uses a worm gear to hold the trailer in place, and a linear clutch to avoid damage. It was located just above the last axle, which is why I’ve used a custom casing (the standard Lego casing wouldn’t fit in), and it was driven by a motor located in the chassis, directly in front of the second axle.

Slightly in front of the second axle, there is also the steering system’s power output, intended to be connected to the trailer’s own steering system to couple it with the truck’s steering. I have tested a trailer with such a system, but I eventually faced the choice whether to make the trailer with steered axles or to make the trailer which is strong and looks realistic. I have chosen the latter.
Between the fuel tanks, there is a reverse lights activator in the chassis. It consists of a single PF switch whose movement is limited to a neutral and one extreme position , and which is connected to the driveshaft through a clutch. The reverse lights are powered from the same output as the drive engine, thanks to which they go out as the truck stops.
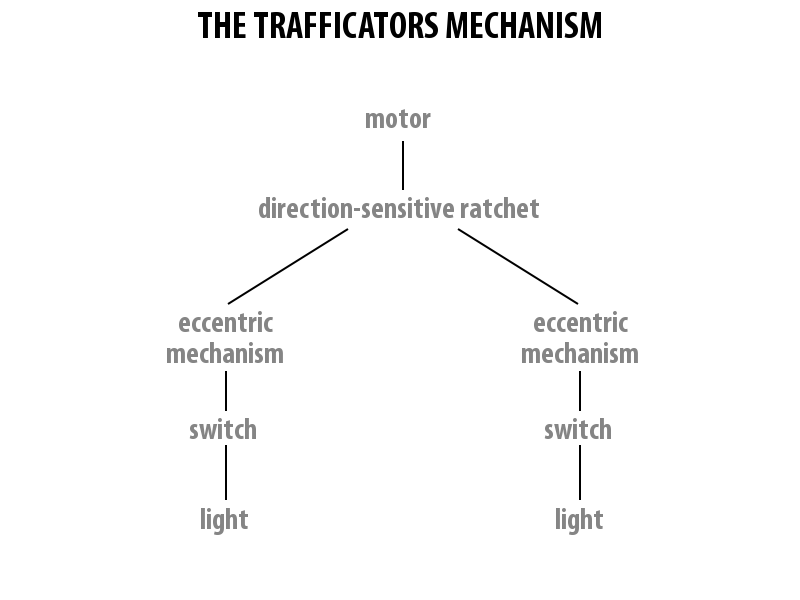
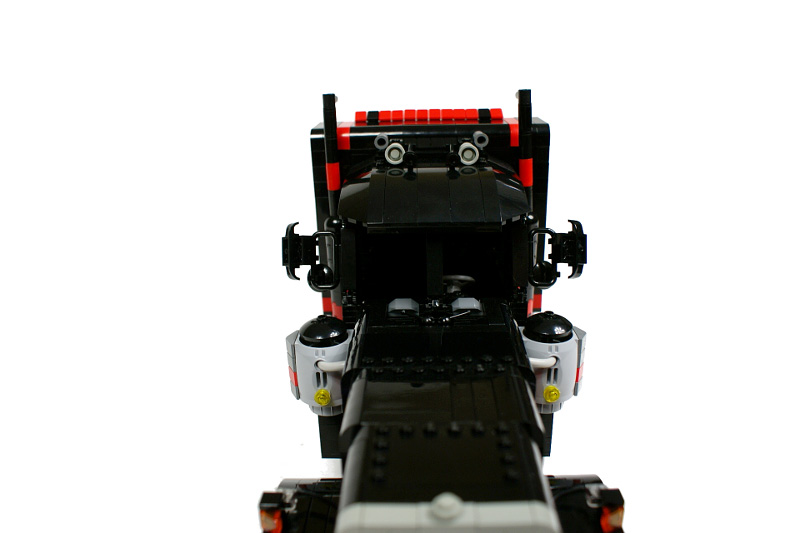
The doors of the cab can be fully opened after removal of their side bars. Inside the cab, there is a functional steering wheel and a simple cockpit. There are no seats, because the respective space is occupied by the trafficators mechanism. I will now explain how it works. Imagine a PF light powered through a PF switch – it blinks as the switch’s position changes. Such a motion can be easily motorized by means of an eccentric mechanism – that kind of solution was already used in the forementioned Tow Truck, and can be well seen in my Snowgroomer. Now, imagine a ratchet that is sensitive to the direction of rotation – it has been used in my direction sensitive gearbox. We can attach the motor to the ratchet, and then prepare two separate eccentric mechanisms with two separate PF switches and two separate set of lights (of any size – in fact, I would make the rear trafficators work too if I had 9 lights instead of just 7). It will result in a mechanism when only one eccentric mechanism is driven at a time, and it changes as the direction of rotation of the steering motor changes. Thus, it is perfectly possible to use the steering motor for it, as it can easily control one more mechanism, and I have used a separate motor here only to be able to locate the trafficators mechanism independently of the steering motor’s location. The trafficators’ lights are powered from the same output as the steering motor, so they go out when it stops working, regardless of the wheels’ position.
One drawback of this solution is that the eccentric mechanism remains in whatever position it was when the ratched moved to the other one. It means that there is a high risk of having all trafficators come up at the same time, because the ones that should be off will have the PF switch stopped in ‘on’ position. It can be prevented with rubber bands that pull the eccentric mechanisms to a specific position once they no longer mesh with the ratchet, but I did not use such means of prevention because of the available space limitations. Please note that the truck already houses approximately 5 meters of electric wire.
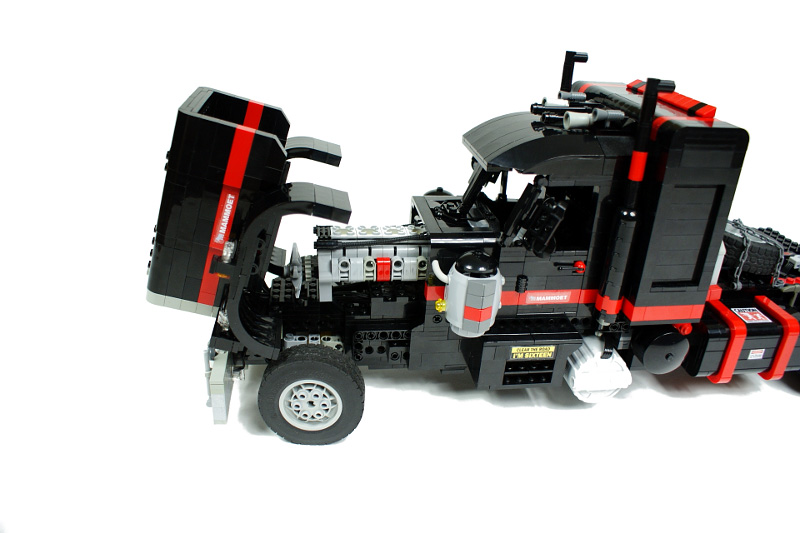
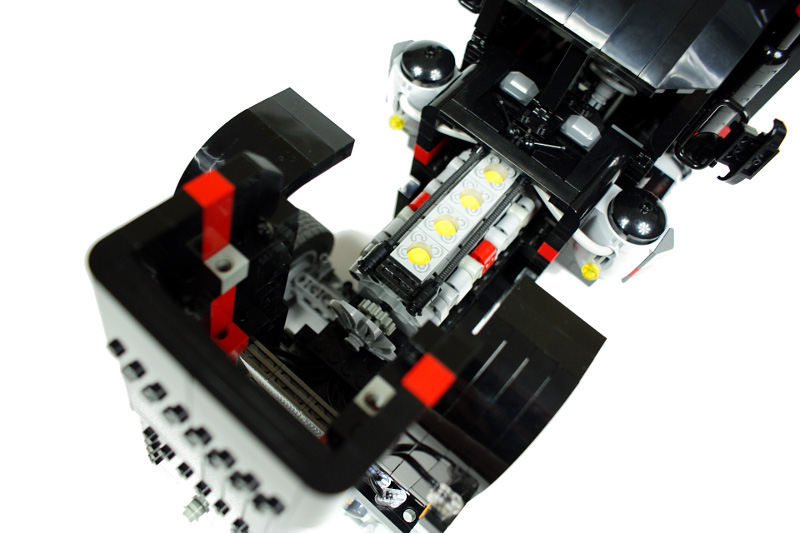
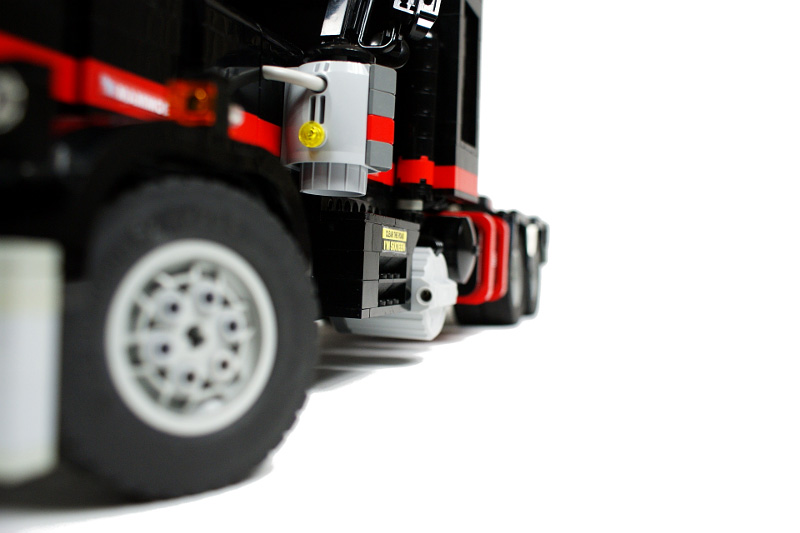
Under the bonnet, there is a R4 piston engine with moving pistons and rotating front fan. It is small because of the limited space under the bonnet which results from its specific construction. As you can see on the photo below, there is an interesting area near the front axle where the model’s smooth external surface ends and a Technic structure can be seen beneath it.

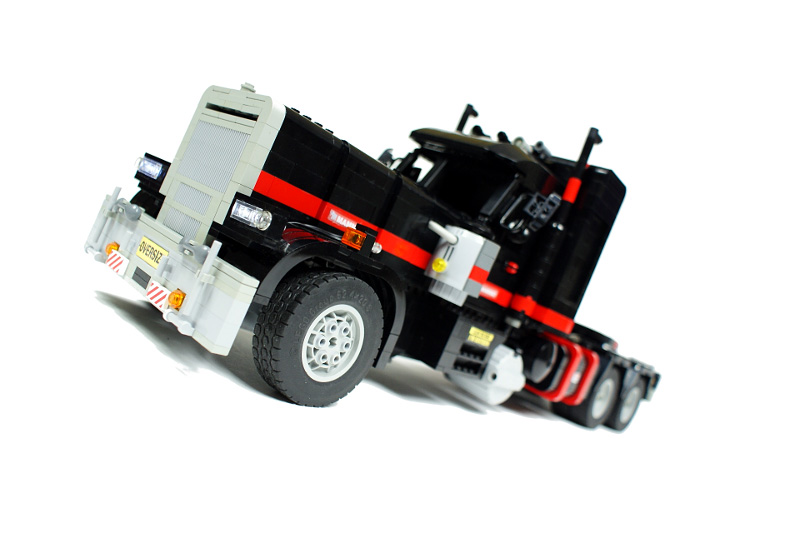
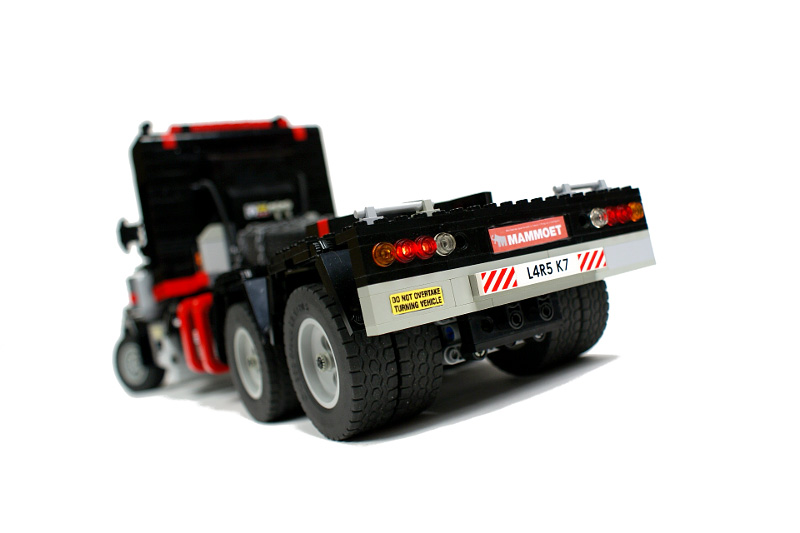
Finally, the trailer. I wanted it to wear a different colour scheme. Trailers of this type usually have red and white warning stripes on the edges of main platform. I didn’t have the needed number of red and white parts, and I disliked the look of these colours combined so I replaced them with two shades of grey. The trailer has no steering system nor suspension of any kind, and it is attached to the truck in a fairly simply way. I have to admit that the truck took a terrible amount of work to build and I really didn’t like the idea of even more work with the trailer, especially since it was difficult to show or film together with the truck due to its length. Therefore the trailer is an addition to the truck rather than a proper model.
Overall, the model enjoyed a fairly good reception, despite many people pointing the proportions issue out. The trafficators feature was widely acclaimed, and there was even a number of people who were very critical about the proportions and accuracy of the truck, but still regarded it as an impressive model. Few people declared that the focus on the truck’s aesthetic aspect was much greater than expected of me, and that its functionality was degraded because of this.


@technikfreak
My ex.
who is the lady in pink ?? 😀
thamks muchly thanked
The suspension is full pendular, as stated in the description. Yes, there are shock absorbers on each axle for stability.
just wondering what suspension did you use in this model, and are there any shocks used on the front of your model
@Beppe
danish
Very nice build! But LEGO is a Danish company, not a Dutch. 😉 I’m sure you knew that.
@Dirk
No, it’s not.
Hey Nice truck!! Is it for sale??
Nice truck only one thing wrong about it, its a Kenworth. It needs to be a Peterbilt.
strangely familiar yet again. i dropped my first kit tractor, put it back together but mid way thru i found out i made one section 2 bricks long instead of 1. then i made my unimog…
Really amazing !! I think this is my personal favorites of all your fantastic models. It gives me a lot of inspiration too. Thank you for all that you share 😎
@Sariel
I have the NXT 1.1, not the new 2.0, but, the programing “language” is really simple, and the only problem is that the nxts intelligent brick is bigger then the old pf battery box! But, I made a car lights demo, to check all lights (because I have just ordered new lights): headlights, rear lights (those red light in the back), reverse lights, trafficators front left and rear left, trafficators front right and rear right. All works, and only by a push of a button. When you count everything, like in your truck, I think that you would save a bit more space, because the nxt doesn’t take so much space as the traff system, and the rear lights system and everything else. But I gues you are right. Because you are building MOC’s, and that takes a lot of time already, then you would have to program it… I gues that the nxt is more of a “build a walking robot/car transformer kinda type”.
@Boris
It was more like ‘my DA activity is going to drop to near zero’. I like the XNT set, but the problem is I already have a long line of projects and ideas just with Lego Technic, so it simply leaves no time to deal with NXT (which would probably prove even more time-consuming).
@Sariel
Well, casual or not, they’re still great. Just one question, i noticed on devart, your “note” about something you disappearing? I mean it sounds more like “i’m gonna kill myself” note. :S However, have you ever taken into consideration on buying the LEGO NXT set?
@Boris
PS3 or even GIMP sometimes. Thanks, but it’s still not the level of photos I’d like to achieve, these are more like just some casual shots I happened to make.
@Sariel
lol, not particularly impressive? I don’t really like the cementairy, but the pics are awesome, especially the “from behind the reeds”.
What program do you use to edit your pics? PS4?
@Boris
I post some here, but it’s nothing particularly impressive: http://nasgar0th.deviantart.com/
@Sariel
yeah, I know how you feel… I am an addict too, but with macro lenses, and also some bigger ones, the camera comes with the stock 18-50mm lens, but i have already purchased the 180mm. The camera bag is pretty big, and it has space for I think 5 lens + the one on the camera body. Also, I love Mr. Fluffy, I love hamsters too, and I had one, but she passed on recently. 🙁 :'(
But however, you can see some of my pics here if you’re interested, but most of them are made with my lamer camera, Olympus F-something…:P
http://www.pticica.com/korisnici/b0kY
I was wondering, because I saw that your hobby is photography, do you post your pics online somewhere (maybe flickr or something similar) or…? 🙂
@Boris
Sweet. I just fell victim to ‘need more lenses’ addiction, I’m trying to afford some longer lens, like 70-300 mm one. And then I’ll have to buy a larger bag, because there’s no way my camera with that lens fits the one I already have. And there goes another salary…
@Sariel
I love sony, I recently have bought the T900 camera, but I am only using it when I’m walking around the city and find something interesting to photograph, but usually I use my Cannon D50 Mark I
@Boris
It’s a300k. Yes, the LCD is excellent, it makes taking pics from the floor level sooo easy 🙂
@Sariel
Wait, is it the A300K or the A300X, because I can’t find any other.I’ve seen both, and they’re pretty cool, especially with the tilting Xtra Fine LCD. =D
@Boris
It’s Sony a300 with 18-70 mm lens.
Ohhh yeah, I missed that bit, thanks. Just another question not related to LEGO, what camera are you using (just for pictures)?
@Boris
There is a full description in the text.
How did you make the trafficators system? Because I am making a Demolition Derby with two pf cars, but I am going to use the traff system in a vehicle that I have been working on quite a bit.
zawsze z moich części lego próbuje zrobić coś takiego,nawet wychodzi ale nie ma bajerów i takich kół
@adison
I just took it apart. And it would have to be really, really expensive considering that I’ve paid $75 for the battery alone.
i love it!! how much can i buy it off you for.
@alex
It’s geared down 27 times (three sets of t8 & t24 gears). The Lego t24 with clutch is used as the t24 gear nearest to the motor. I must admit that given the load on the front axle, it could use even greater reduction.
How did you gear the PF M motor used for the steering wheels? Did you use a safe clutch there as well? Thanks
awesome model, as always!
@horst
Here: http://peeron.com/inv/parts/62821
hi
cool
i can`t find the differential as in your buildings. whats the set of it or where i can buy it?
@alex
No, but since it gathered so much attention, I’ll try to publish photos and a video on this mechanism in a couple of days.
Could you post an LDraw picture of the trafficators mechanism?
@robotics130
They are all here: http://sariel.pl/2009/01/direction-sensitive-gearbox/
Do you have pictures of the ratchet mechanism?
@manuell
I don’t know the exact number of hours, but it took a whole one month altogether.
again an very nice new Modell.
how many hours you spent to build it ?
@Eric Albrecht
Omg lol
@Sariel
He also simulates the black cat hood ornament on 5571. He’s a bit out of scale though!
I like the fact that the XL motors look like fuel tanks.
You have that huge flatbed trailer, but there is nothing on it!
@themaniac
This is no ordinary hamster. This is mr Fluffy, who likes to test my constructions from time to time.
why is there a hamster on it
Wo oh oh it’great,nice big holy hell it’s fantastic!! I like it very much:)