Mark V Tank
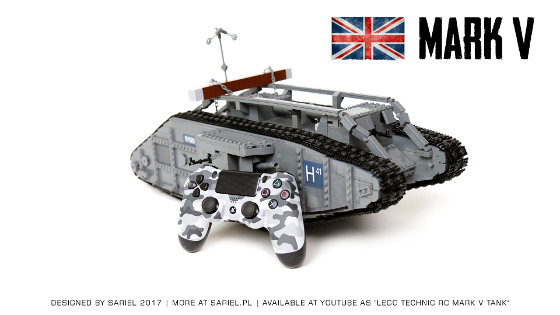 Model of a WW1 British tank. Features remotely controlled drive and steering, remotely panned and tilted side guns, partial interior and custom stickers.
Datasheet:
Completion date: 30/08/2017
Power: electric (Power Functions)
Dimensions: length 62 studs / width 36 studs / height 22 studs
Weight: 2.673 kg
Suspension: none
Propulsion: 2 x PF XL motor geared 5:1
Motors: 2 x PF XL, 5 x PF M
I haven’t built a tank model in nearly a year, so this was about time I made one. The original Mark V was built exactly 100 years ago and saw combat 99 years ago. It was the last of the British “parallelogram tanks” to participate in the Great War – the Brits would go on all the way to Mark X, but the war was already over by then. The V isn’t drastically different from Mark I, whose model I’ve built in 2008 as my first actual model of a real tank – it was more of an improvement, fitted with a stronger engine, new transmission and new brakes. It was the first Mark tank to need just one driver – quite an achievement by 1917 standards.
The goal of my model was to look accurate and perform well. The performance part was actually easy, given that the original tank’s shape is already optimized for handling obstacles. All I had to do was to equip the model with powerful propulsion system and ensure good traction, and to that end the tracks were fitted with rubber attachments recently released by LEGO. This, in combination with model’s significant weight and with two heavily geared down PF XL motors , was sufficient to allow the model to cross 22 cm wide trenches, climb 9 cm tall vertical obstacles, and drive up 31° slopes. It was the looks part that proved tricky, mostly because in order to approximate the complex curves of the tank’s bottom, I had to build it partially upside-down. Thus the hull was split in two parts, roughly equal to lower 1/3 and upper 2/3, with the lower part built upside-down and kept together with the upper, upside-up part from the inside. That made the entire build quite challenging, especially since the middle of the hull was difficult to access, being squeezed in between the massive tracks, and since the tracks had to be really tense to prevent slack. In order to keep the drivetrain simple and robust, I haven’t driven any of the extreme sprocket but the front bottom sprockets instead – what could be considered as the front road wheels. Because of their location, they had very small area of contact with the actual track, and a proper tension of the track was crucial in making them drive it.
Other than that, the Mark V was my first step in the direction I want my tank models to follow: it didn’t just look well on the outside and worked, it also had some interior. It consisted of manually openable driver’s, rear gunner’s and fuel compartments, all of them with interior which was small and simple, and yet closely based on the actual tank’s interior which I’ve researched using plastic Mark V kits, due to lacking documentation of the 100-years-old tank’s inside. There was also an engine compartment with a straight six piston engine which was driven by a PF M motor activated by a hidden switch using a “screw” on hull’s side. The engine was actually much higher than in the original tank, simply because the original Mark V had its engine at the bottom and it would be difficult to access it in a model, plus the bottom was already taken by the drivetrain and side guns mechanisms.
The mechanisms, by the way, were quite unusual. The two side guns were panned and tilted independently, using two PF M motors each. One motor would rotate a gun using something that can be called a partial right-angle pulley. It consisted of a vertical wedge belt wheel and horizontal turntable, coupled together by two sections of string, so that rotating one made the other rotate as well. The wheel would be rotated by a motor, pulling one section of the string and loosening the other. This caused the turntable to rotate in the same direction by the same angle, and it was sufficient to allow roughly 90 degrees of rotation. At the same time, another motor would lower or raise the gun by pulling a string. The string went through the middle of the gun’s turntable and was attached to the gun’s back, so that pulling it raised the gun and loosening it allowed the gun to lower under its own weight. These were simple mechanisms with limited range of movement, but they were sufficient and surprisingly accurate.
There were also four machine guns, all set in ball mounts which I’ve developed for my Tiger XL model, including the rear machine gun which could actually me moved from inside the rear gunner’s compartment. Finally, there was an unditching beam which I was worried about because I couldn’t find any field manual for the original tank showing how to attach it to the tracks (probably, again, because it’s a 100-years-old tank), so I attached it in the simplest way I could think of, and it worked – the tracks were perfectly able to pull the beam all the way around the tank. I didn’t test the beam inside an actual ditch because it would surely break in half, being made of simple bricks.
The remote control was provided by two SBricks and a beta version of the SBrick app, allowing use of a gaming pad. It was very enjoyable to drive the tank using two analog joysticks.
The model proved to be quite a challenge, due to being so different from “standard” tanks, but I’ve enjoyed building it and I thought the result was well worth it.


