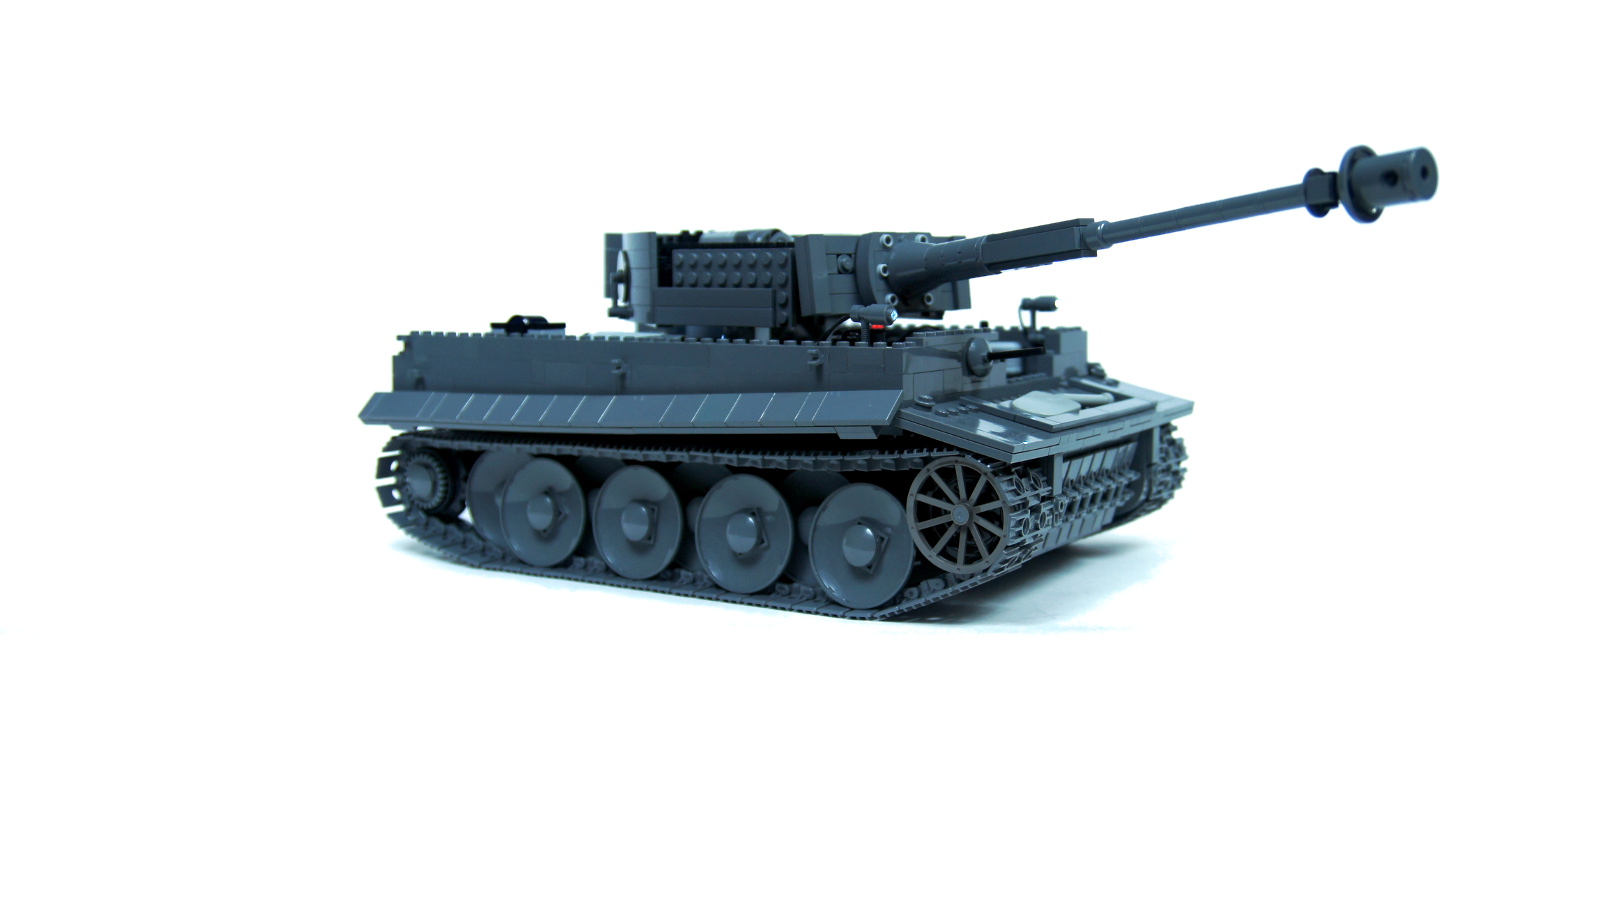
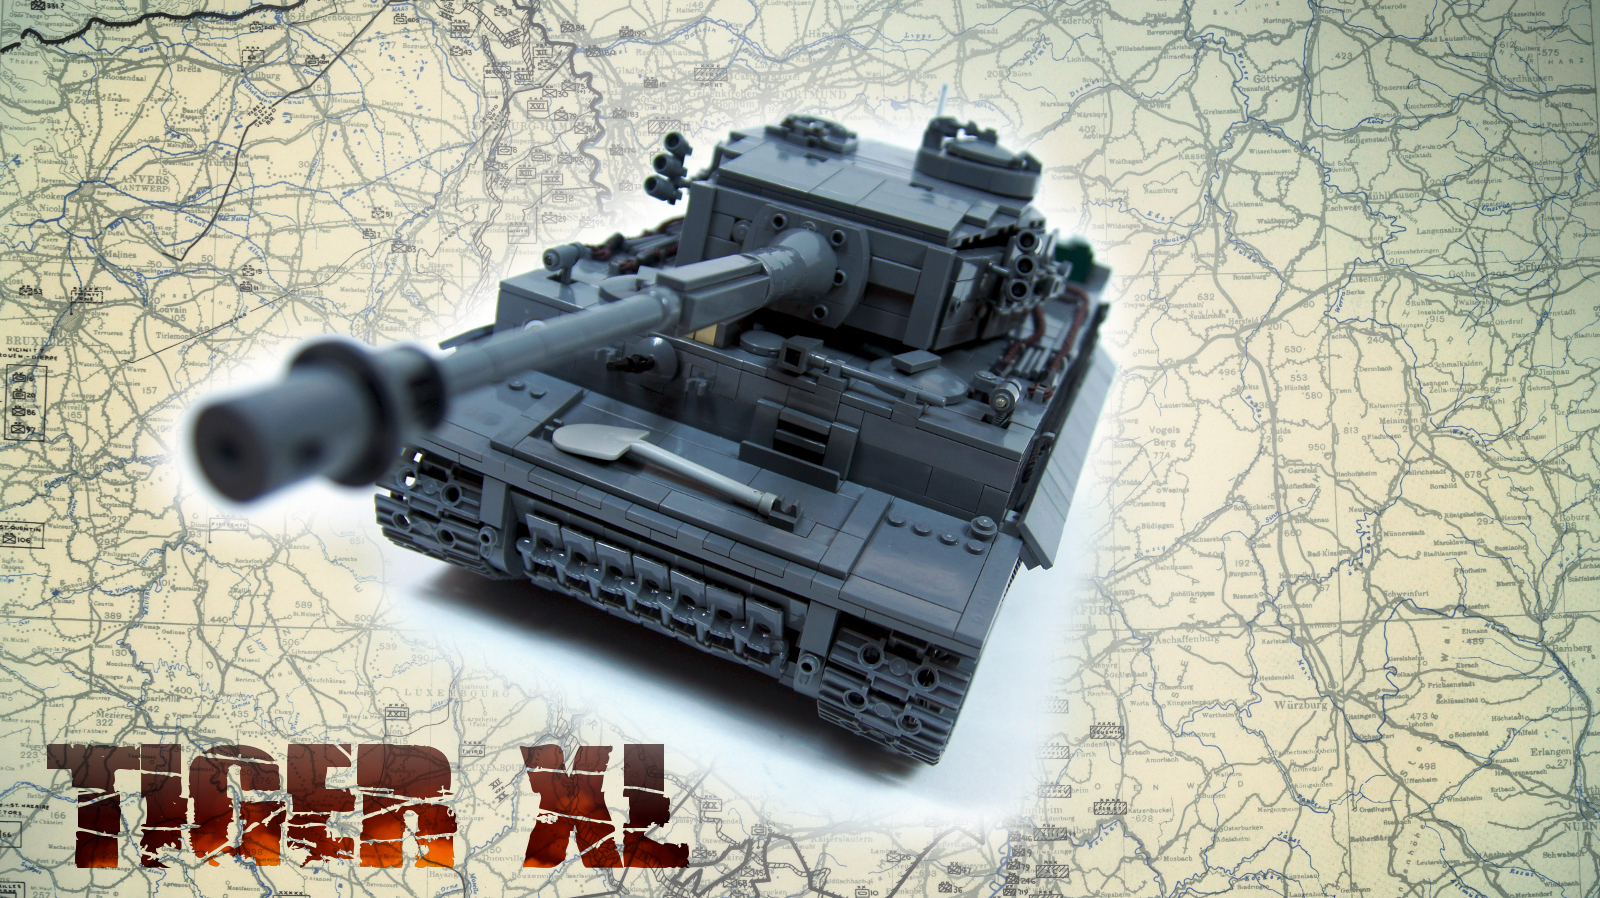
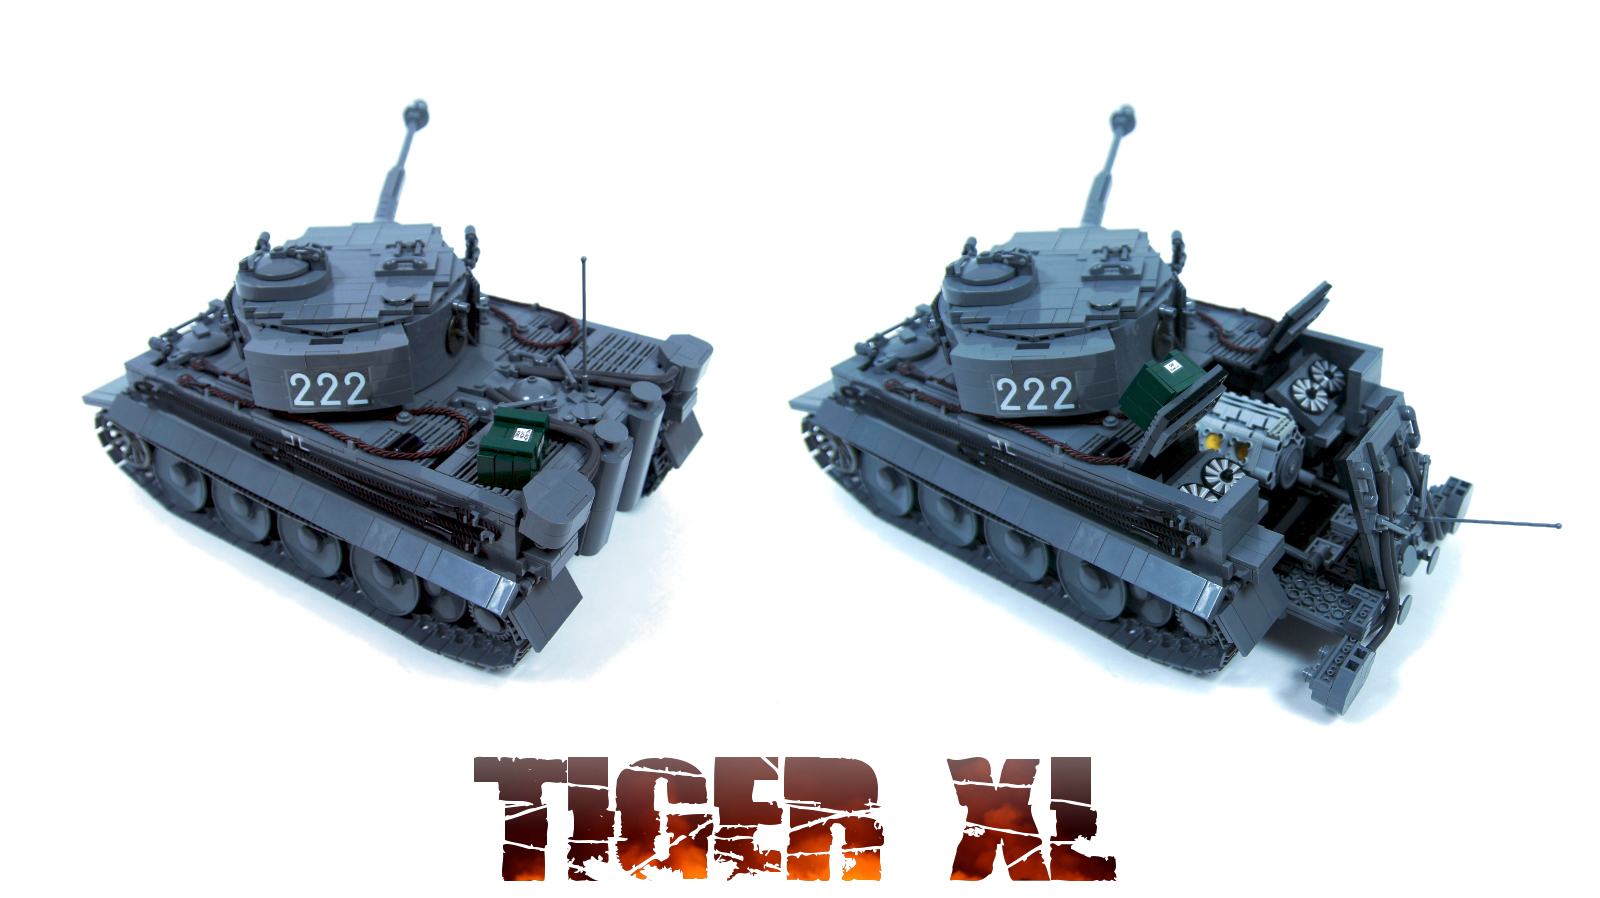
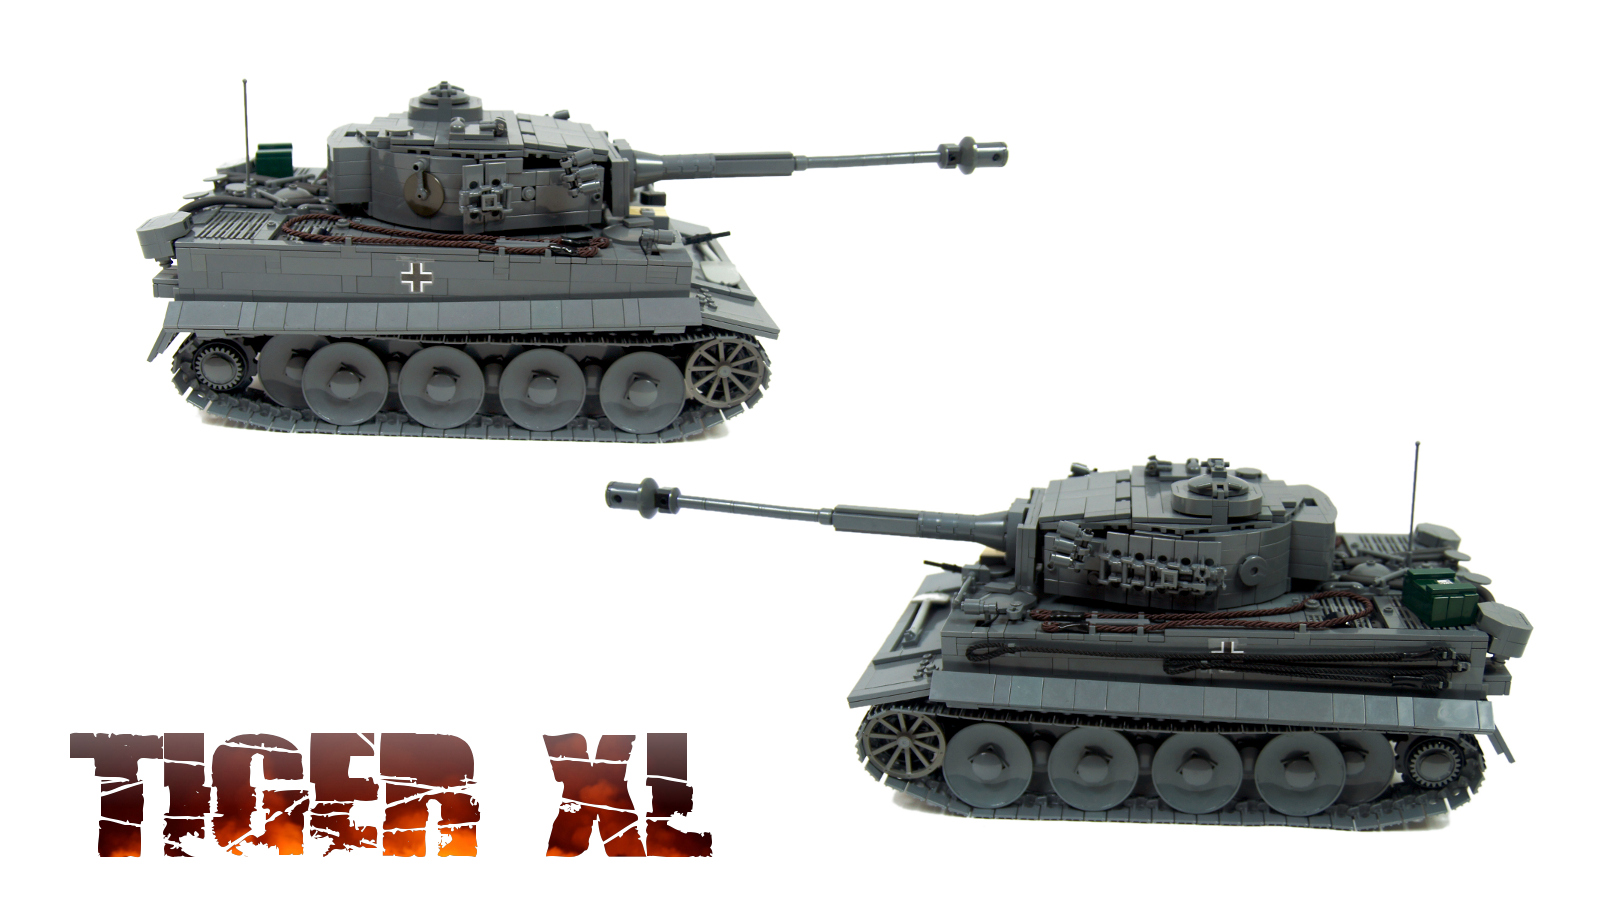
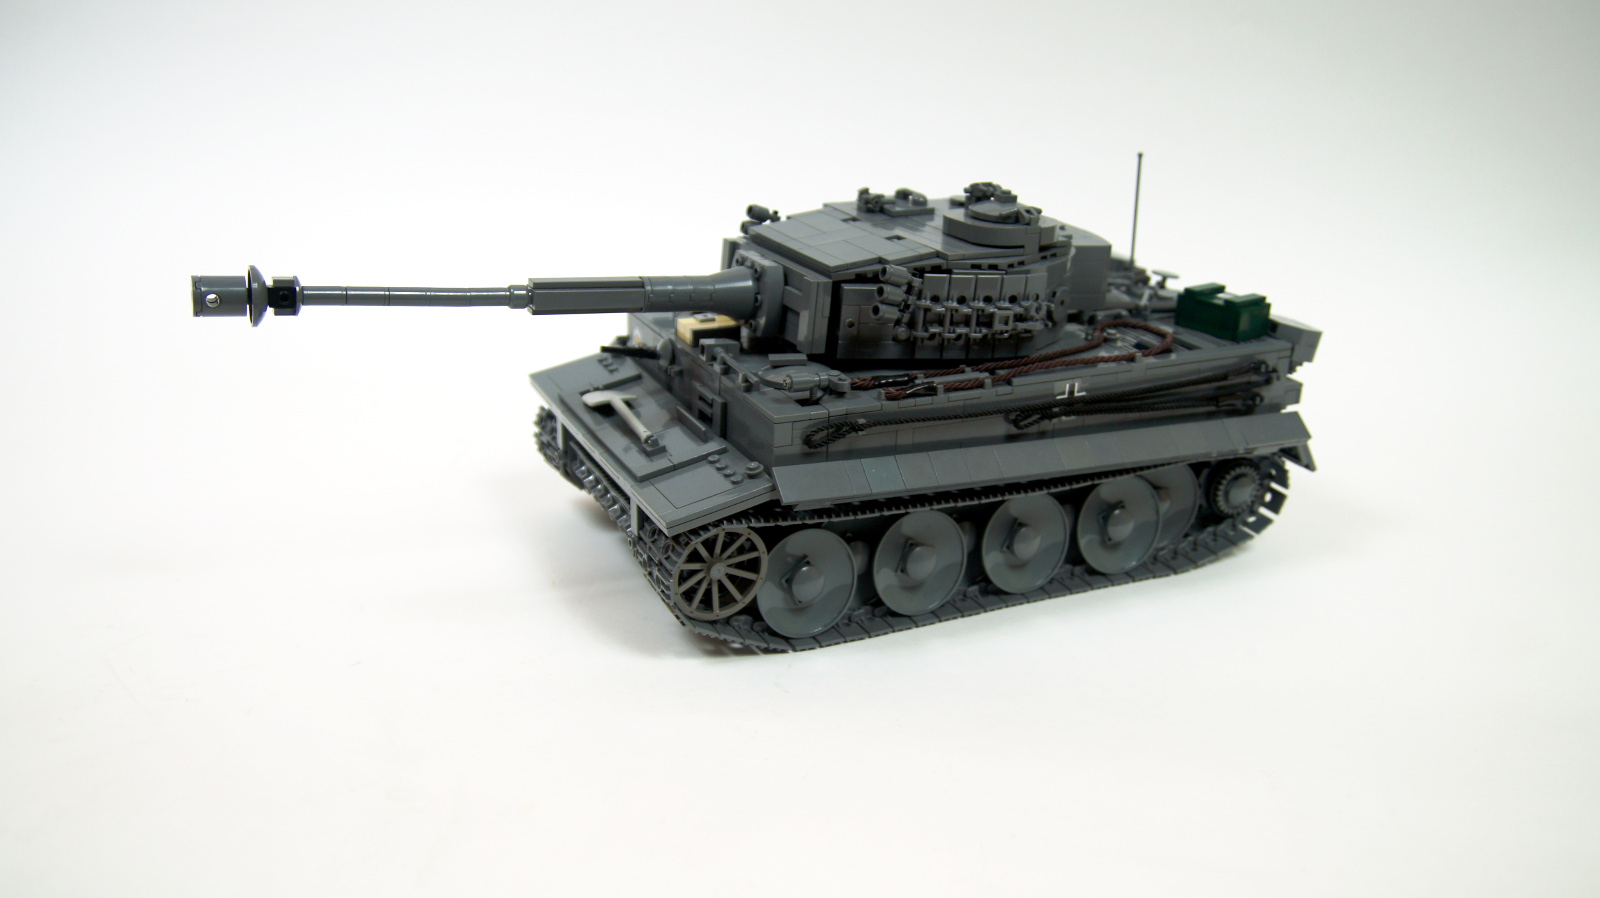
Tiger XL
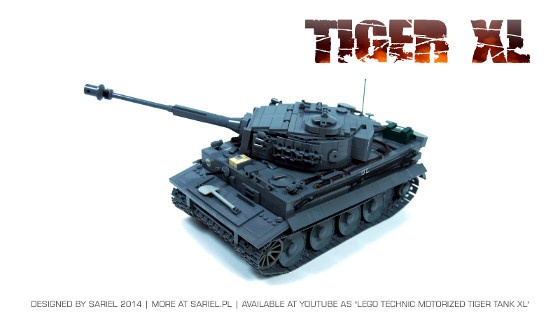
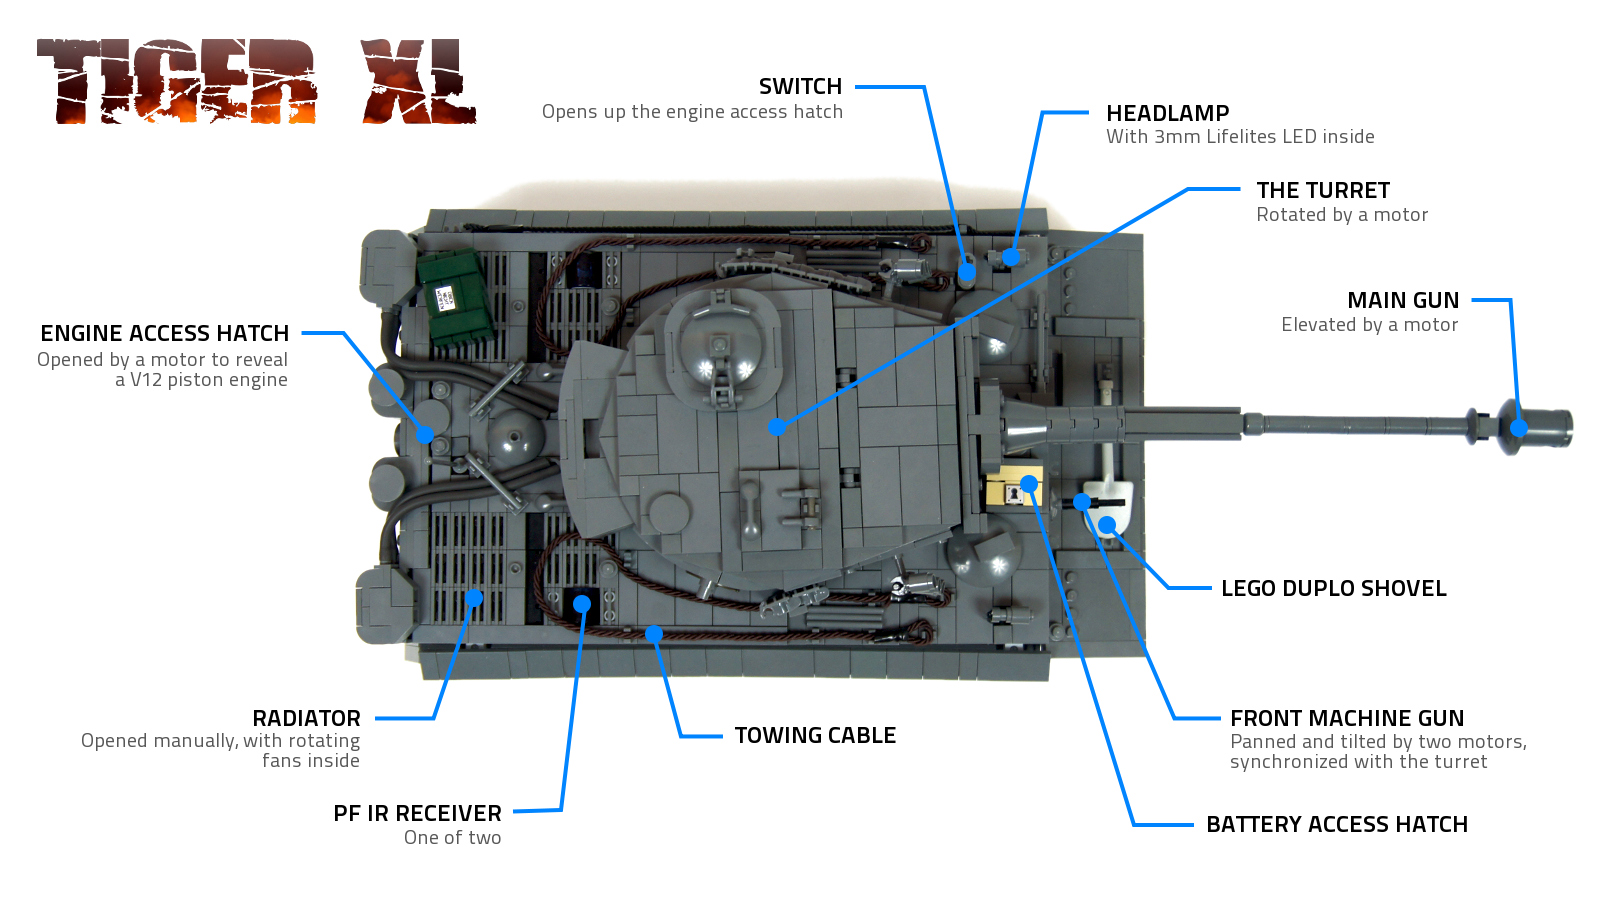
Model of the famous WW2 tank. Features drive, steering, suspension, rotating turret, elevated main gun, panned and tilted front machine gun, V12 piston engine, openable hull, radiators with rotating fans, custom stickers and Lifelites LED kit.
Datasheet:
Completion date: 07/09/2014
Power: electric (PF 8878 battery)
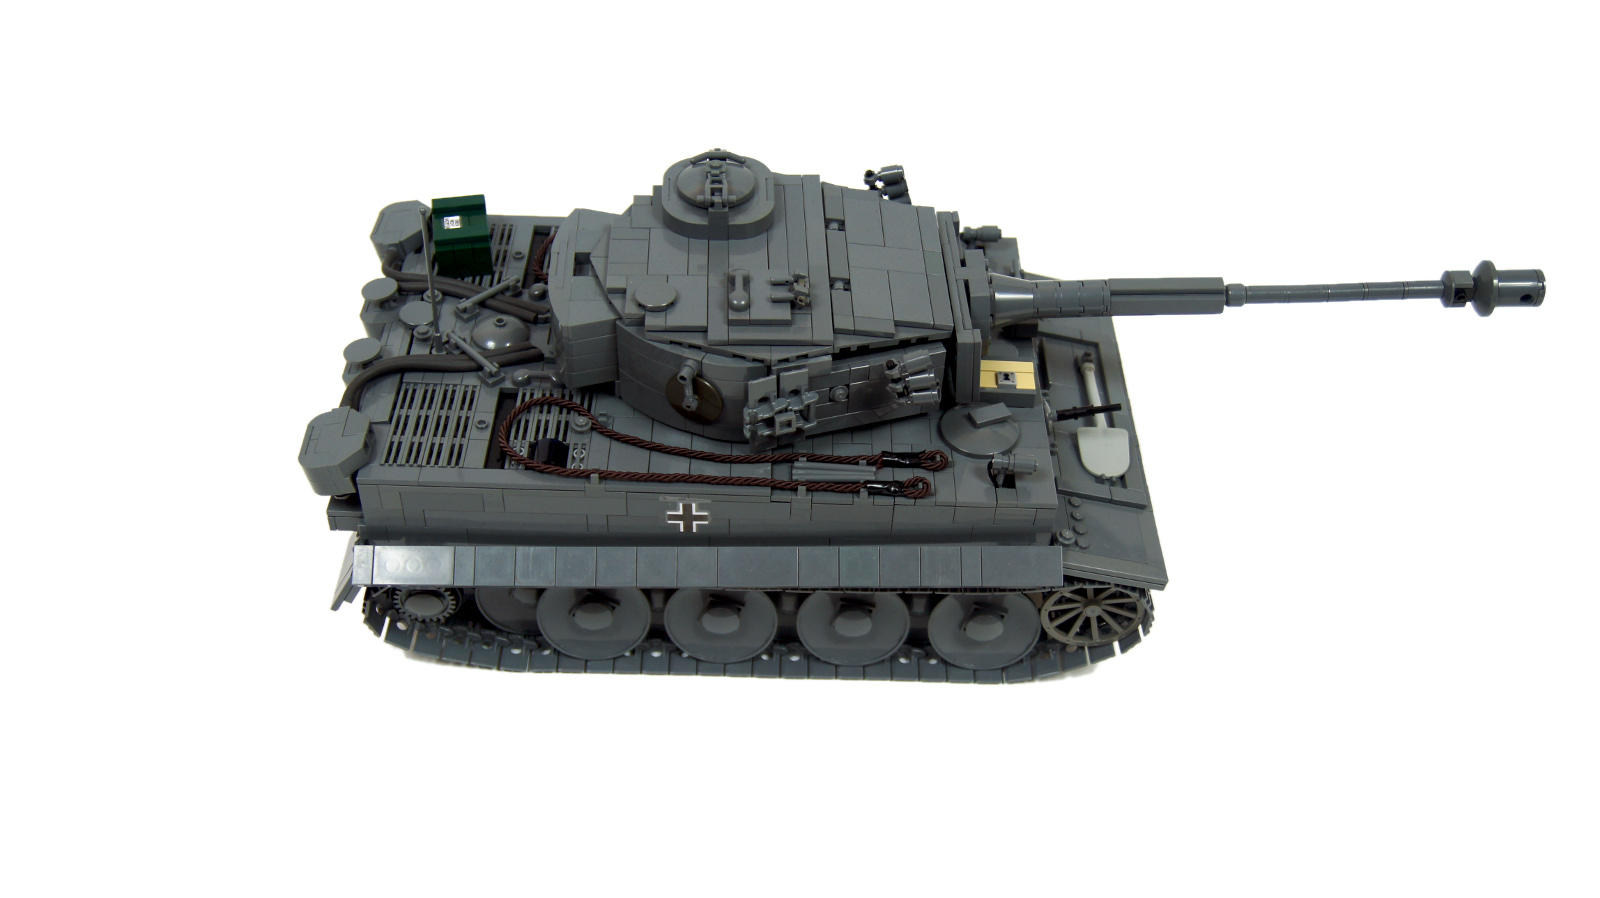
Dimensions: length 44 studs (plus the barrel) / width 26 studs / height 22 studs
Weight: 2.238 kg
Suspension: oscillating bogies
Propulsion: 2 x PF L motor geared 2:78:1
Motors: 2 x PF L motor, 4 x PF M motor, 1 x 71427 motor, 2 x Micromotor
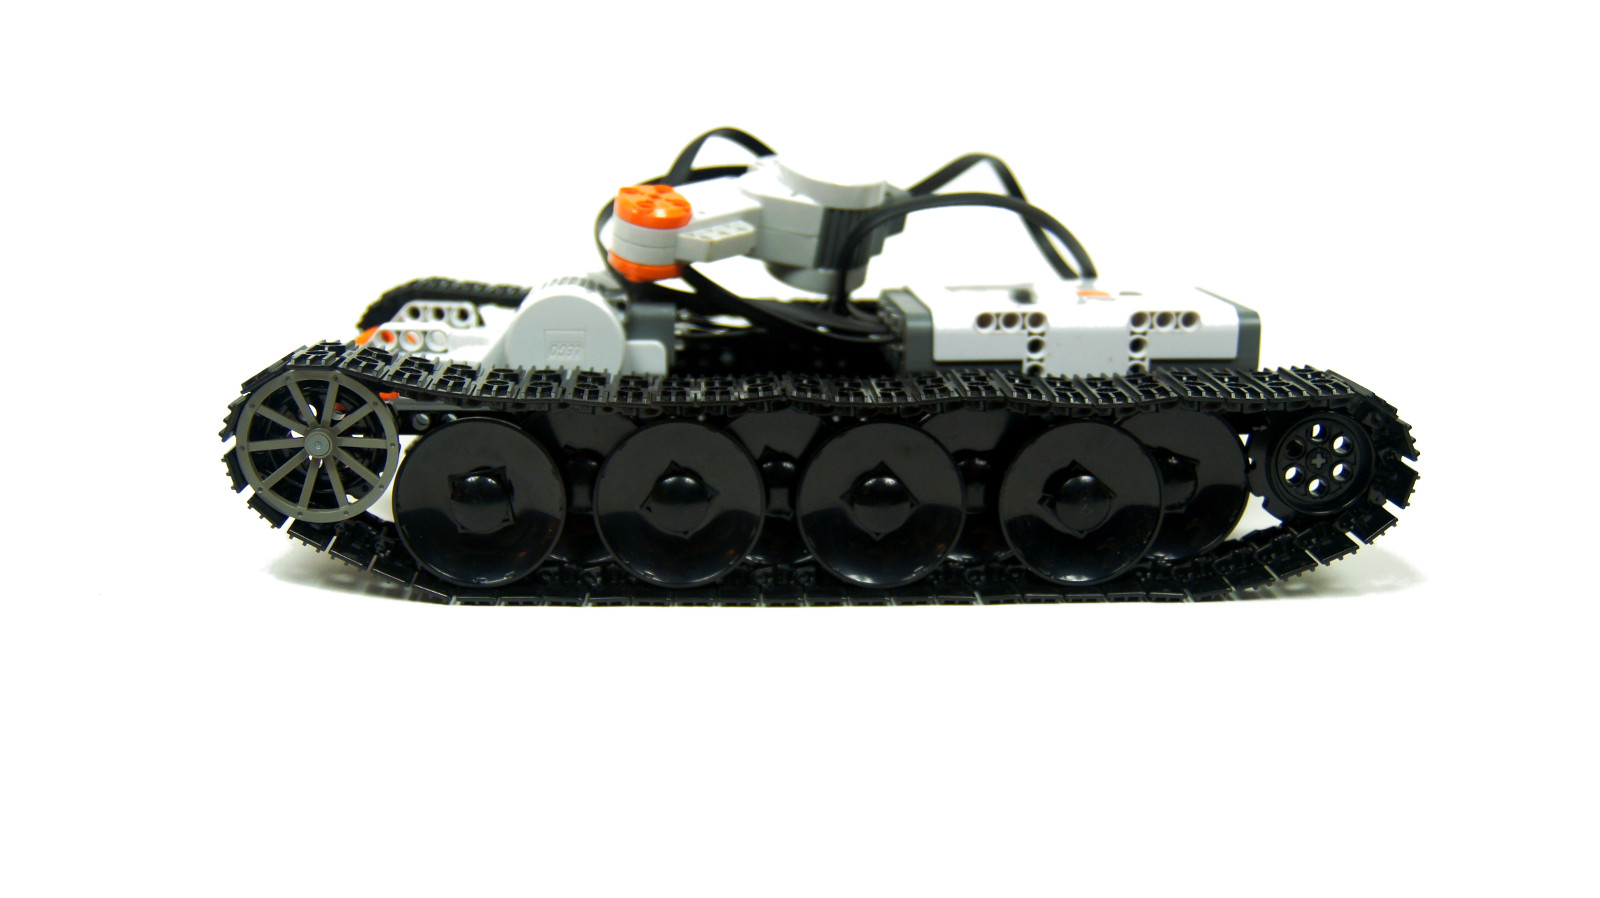
It’s been a few years since I’ve built my little Tiger tank model, just to check how many functions I can squeeze into a minifig-scale tank, and I never expected to build a Tiger again. Being an immensely popular tank, it has been built time and time again at every possible scale and style. About a year ago it occurred to me that I can’t recall having ever seen a LEGO Tiger with properly re-created road wheels, so I sat down and made a basic chassis utilizing 6×6 dishes. This started a long and tedious creation process: the chassis was initially equipped with NXT motors and NXT unit, because I felt like controlling the tank with my Xbox controller. Then I left it standing for months, and then I converted it to Power Functions system, because I felt like filming the tank outdoors – and that would be tricky with NXT control.
An important moment was when load tests proved that two PF L motors are perfectly capable of driving the model, in place of the usual XL motors. This was actually a drastic change: with the L motors being narrower by nearly a half, I suddenly had enough space to connect the motors, the transmission and the 8878 battery into a single compact unit that left most of the hull unoccupied. So much for “what are the L motors good for, anyway?”
A few months followed and sometime around June I’ve seen some more Lego Tigers and felt determined to give this tank my best. Starting in early July, I set out to create a model that was supposed to look as accurate as possible and to utilize the extra available space in a creative way.
All told, the model took 3 months of work, over 30 Bricklink orders and one fried Micromotor (NEVER use your Micromotor without the gray pulley attachment). The ammo box alone took 4 orders, including one that had to be re-sent because the seller got the colors wrong, and one of the other orders got lost, which has never happened with Bricklink to me before. The road wheels took about 10 orders, because there was only one 6×6 dish in this particular color in one rare, expensive set from 2003. At one point I was considering using light gray dishes on one model’s side just to save some money, but decided against it – the result is, at the moment of writing this article there is maybe a dozen of the dark grey dishes left in entire European part of the Bricklink, and you would have to buy them one by one.
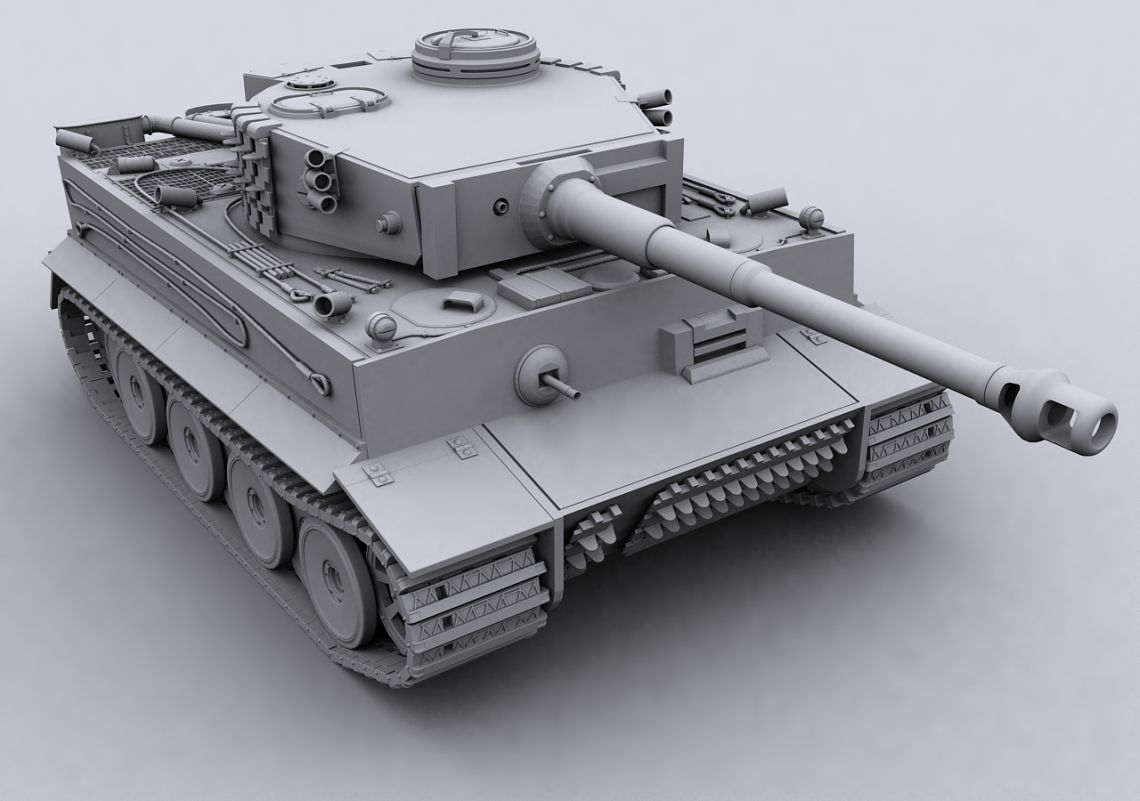
The original Tiger became an iconic tank, and perhaps the most recognizable tank in history, which should mean that everything about it is known, and everything about it was built. But it is not so. Upon closer inspection, one can discover that the seemingly simple tank is actually full of traps for an inattentive builder. For example the thin towing cable was only present on left side, not on both sides, the upper glacis plate is not vertical but slightly inclined, the side skirts are mounted lower in the back and higher in the front, the turret had a slot below its front part, and the spare tread links were only mounted on turret in five-on-left/two-on-right set-up. Then there’s the fact that the Tiger has changed a lot between early and late production version, with some elements moved (e.g. on turret’s top) and some gone altogether (e.g. air filters in the back), not to mention the Zimmerite covering the late Tigers’ armor.
A well-known and popular tank, the Tiger’s history is actually a complicated one, and filled with contradictions. It was monstrously effective in right (or rather wrong) hands, yet it was rushed into service in a way that wasted much of its combat potential. Designed as a heavy offensive breakthrough tank, it was mostly used as a mobile defensive artillery unit. Highly complex and requiring a great deal of resources to manufacture, yet initially lost mainly to mechanical failures rather than enemy fire. Heavily praised by Nazi propaganda and feared by Allies, yet – at this point of war – overengineered and incredibly resources-costly (average fuel consumption was 430 liters per 100 kilometers, with sometimes twice as much in rough terrain – all of it right when fuel was in short supply in Germany). Designed according to an already outdated concept, as a king of 1:1 skirmishes, with strong armor and a gun far superior to any non-German gun, yet losing battles to packs of Soviet medium tanks or lurking tank destroyers. First tank in the history to have automatic fire suppression system or anti-personnel mine launchers on the hull, yet fitted with box-like armor that would have been dramatically more efficient if set at angle. Initially equipped with state-of-the-art snorkeling system, yet facing difficulties mostly from snow and mud of the Soviet front.
It was a tank that triggered rushed response in Soviet army, with new guns and then new tanks being introduced, eventually leading to the development of the IS heavy tanks. And the same tank was being hunted by specialized elite “beast-hunters” units of the same Soviet army just two years later. It was also a tank that triggered no real response with Allies, who have rightly assumed that constantly bombed German industry won’t be able to deliver a significant number of Tigers. All in all, a tank with many aspects and no simple summary.
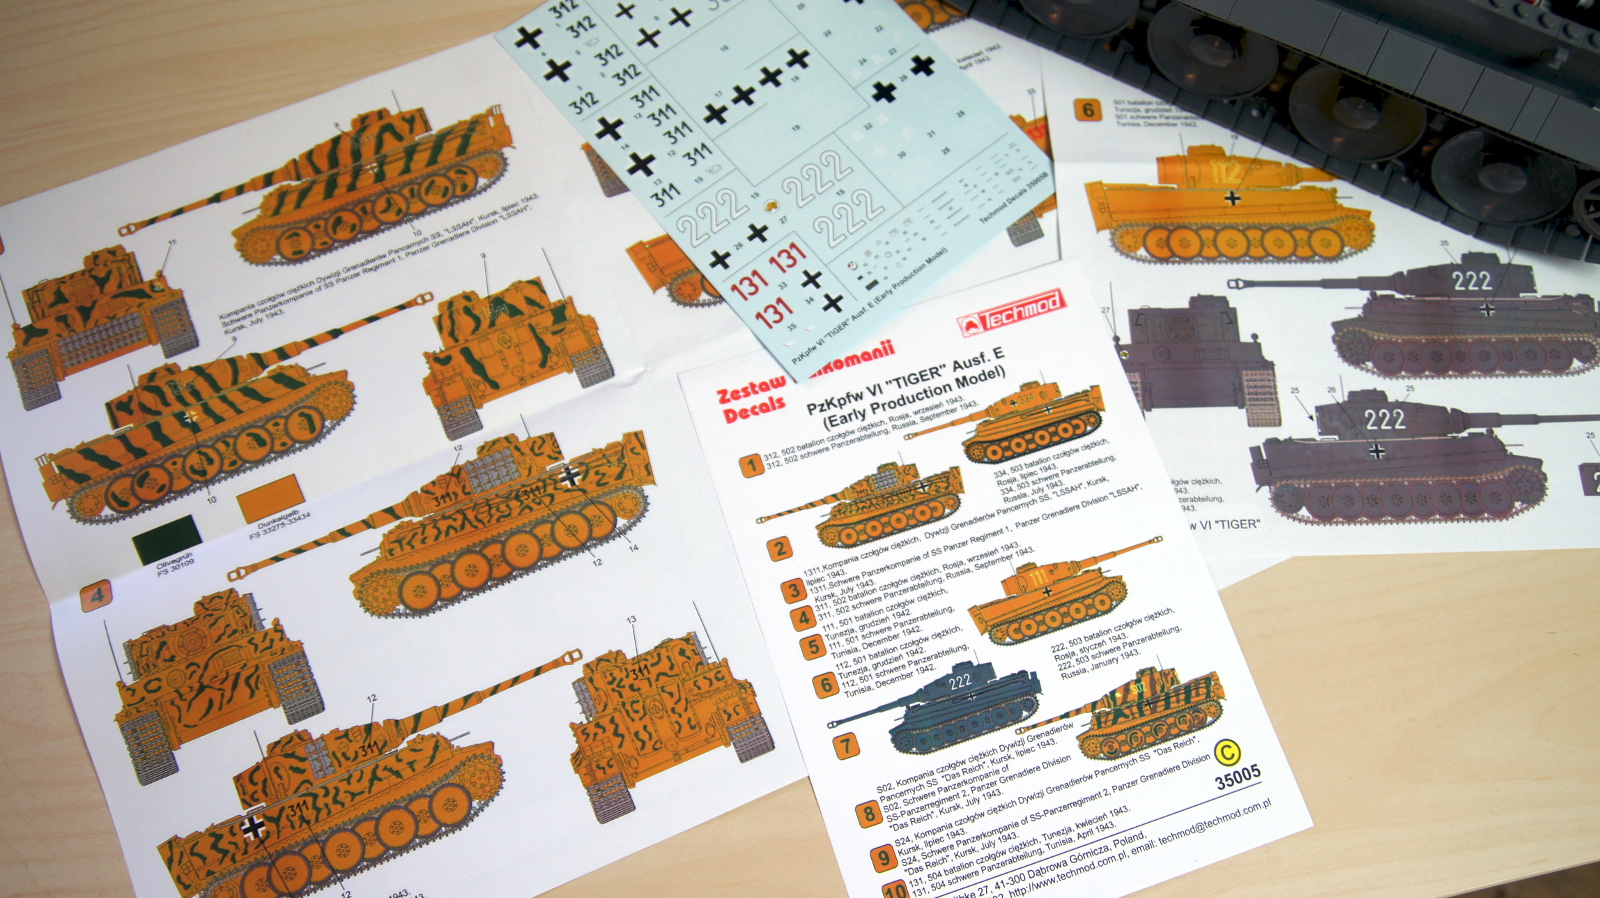
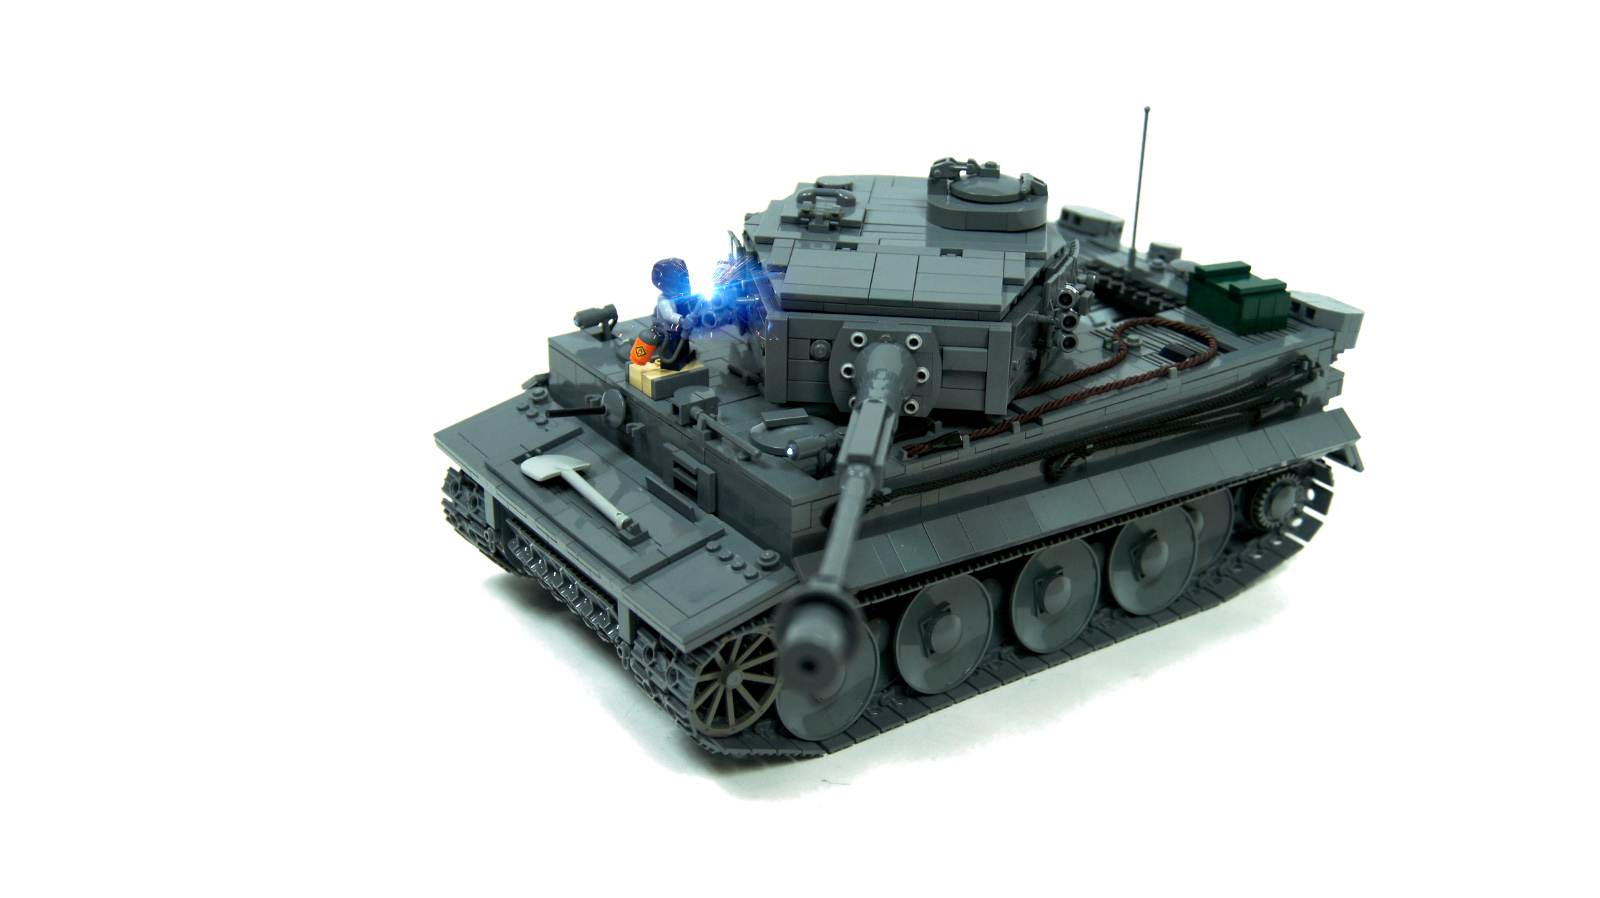
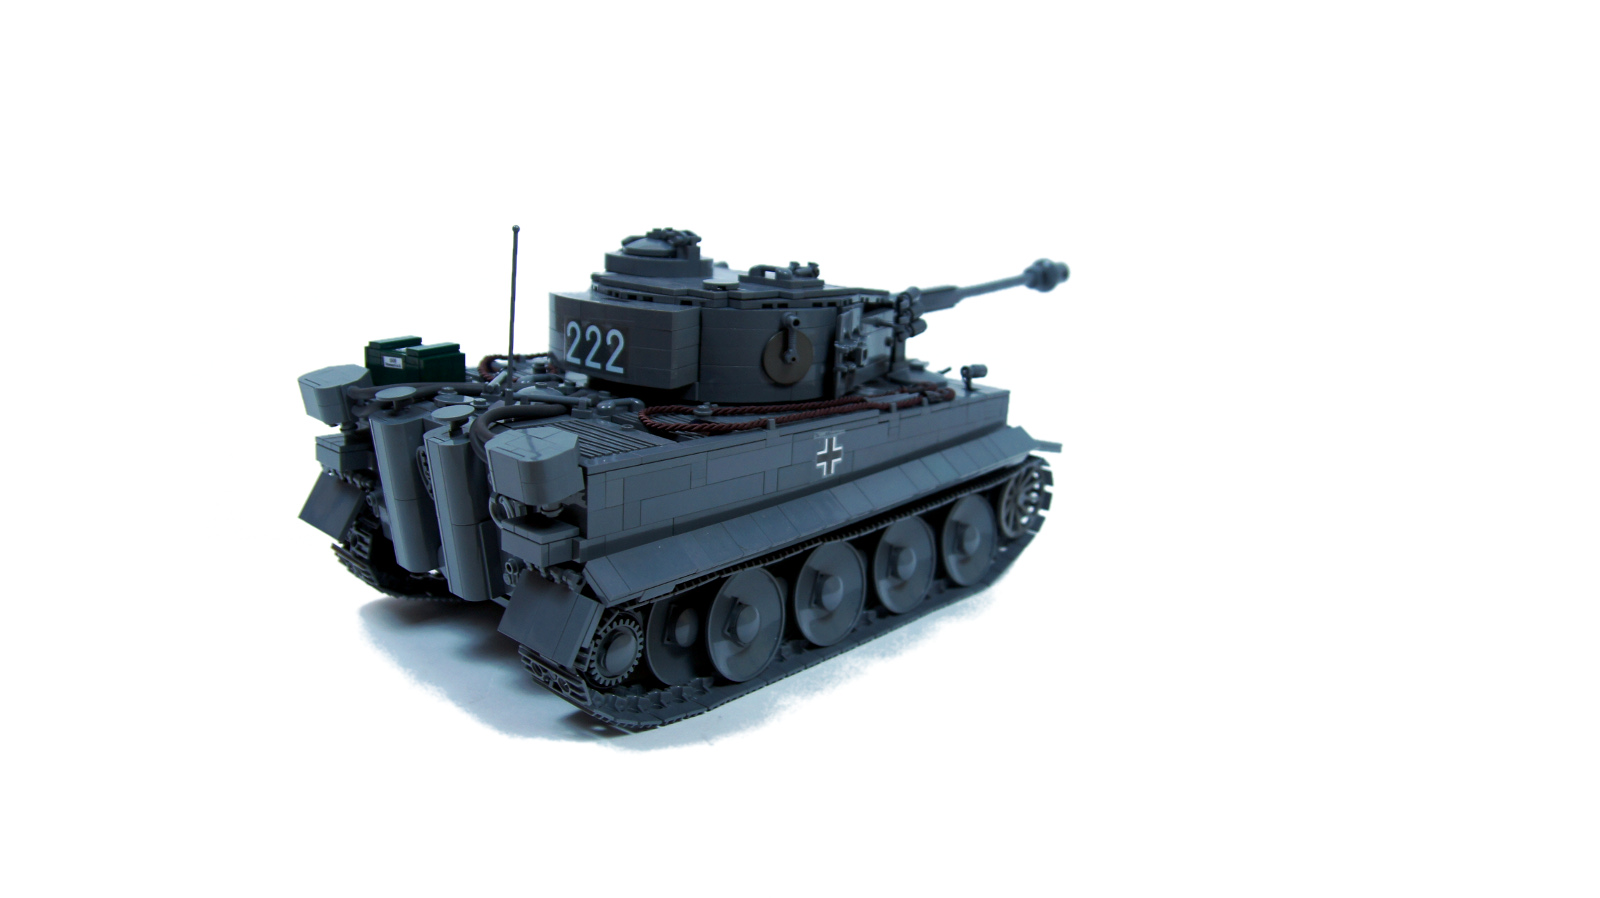
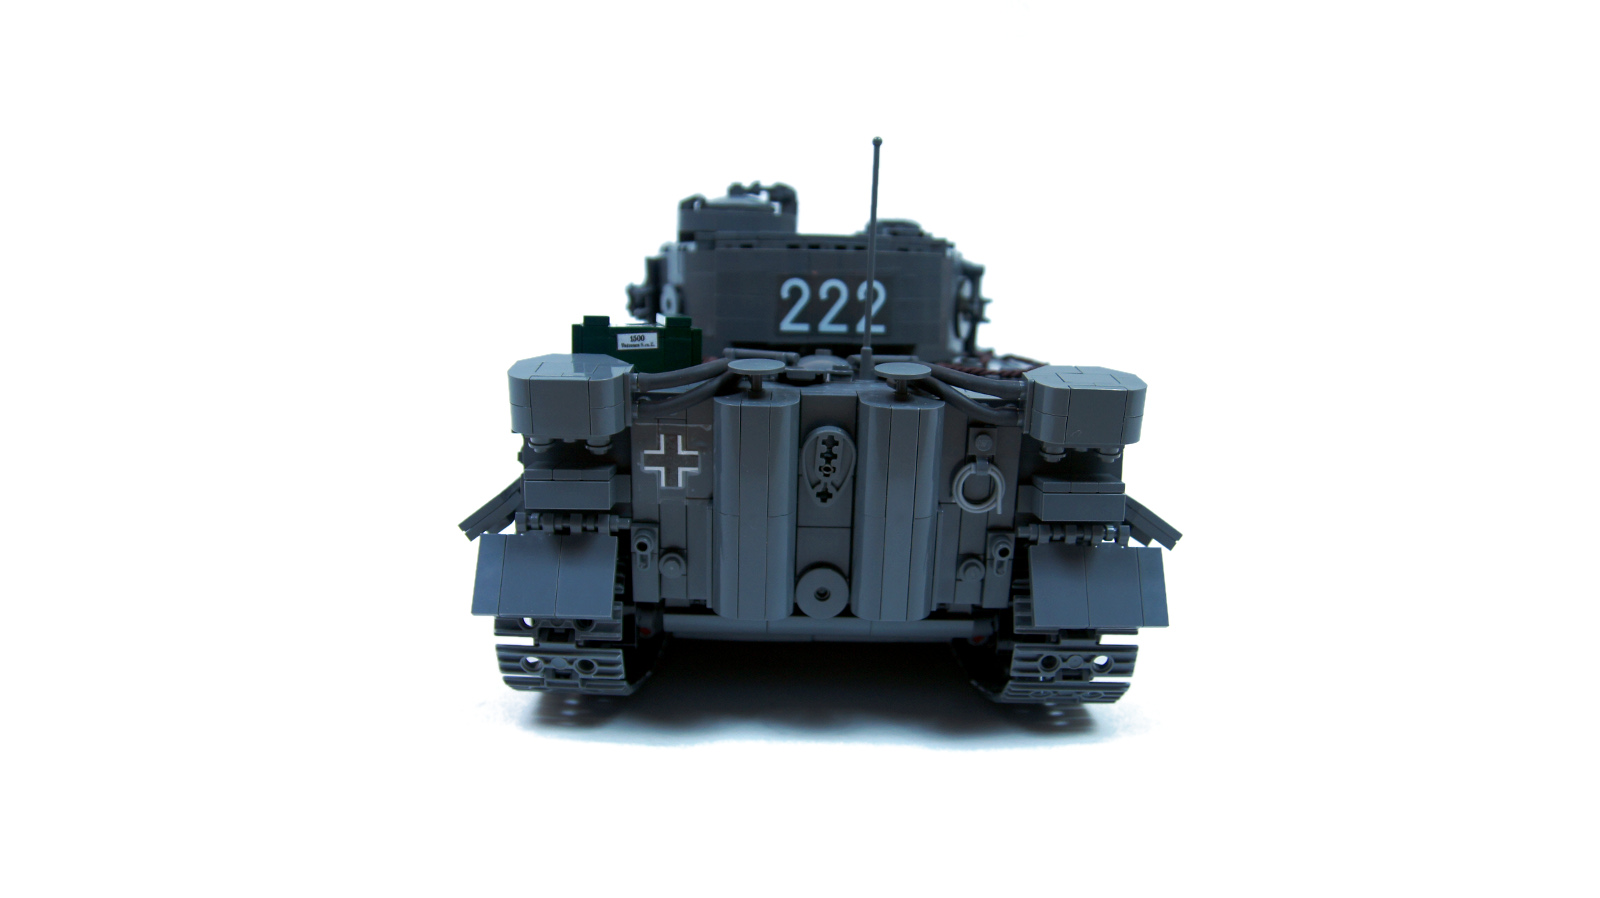
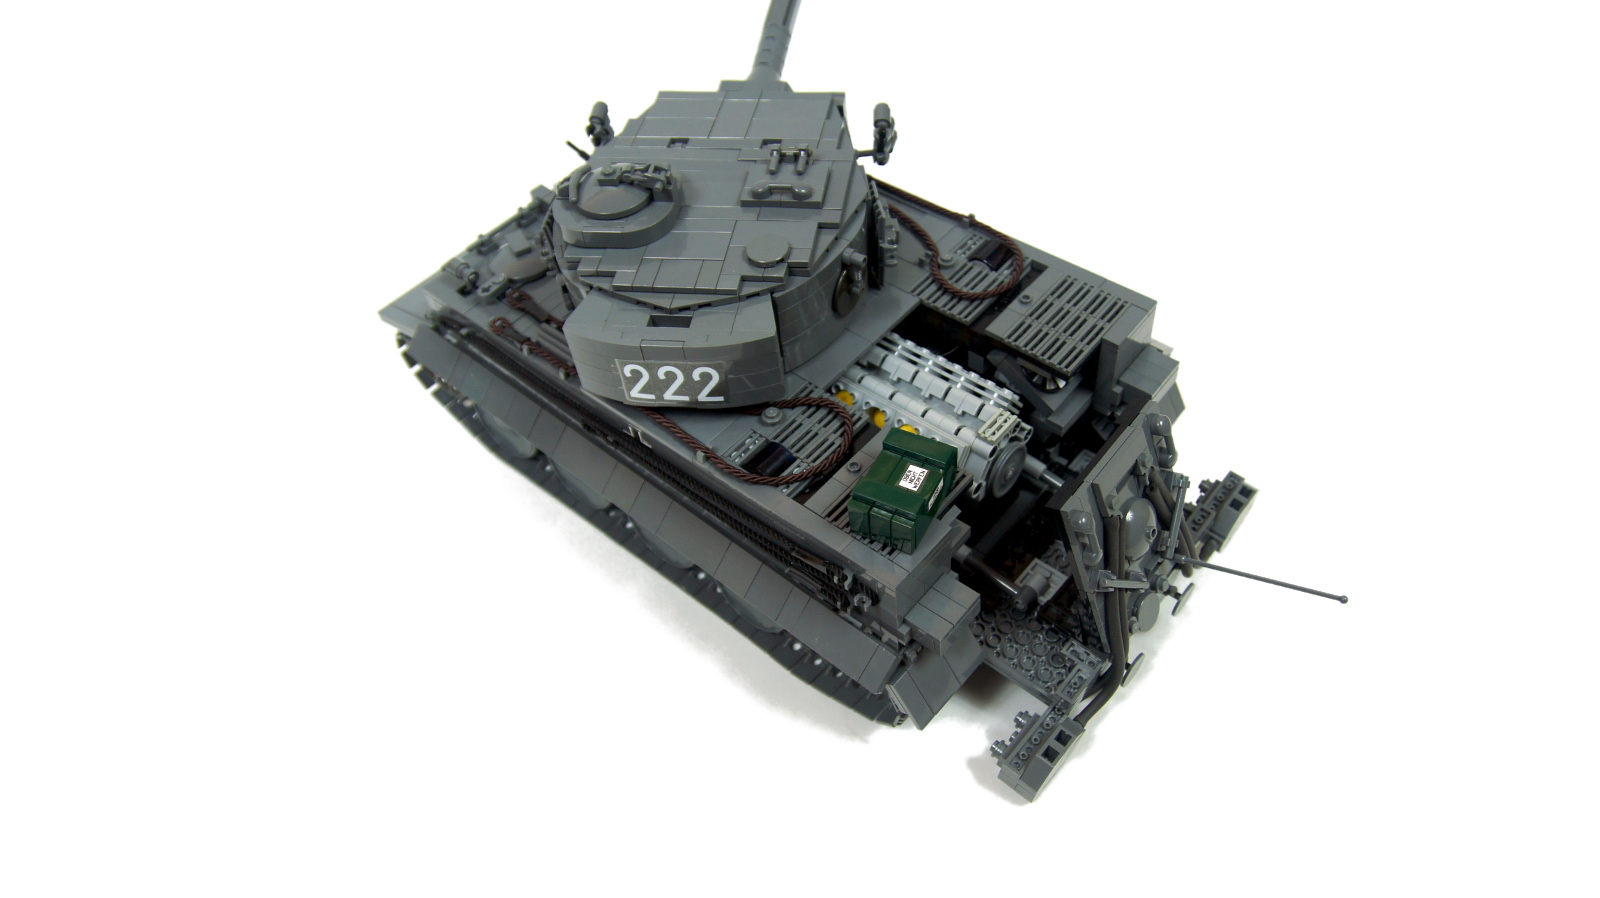
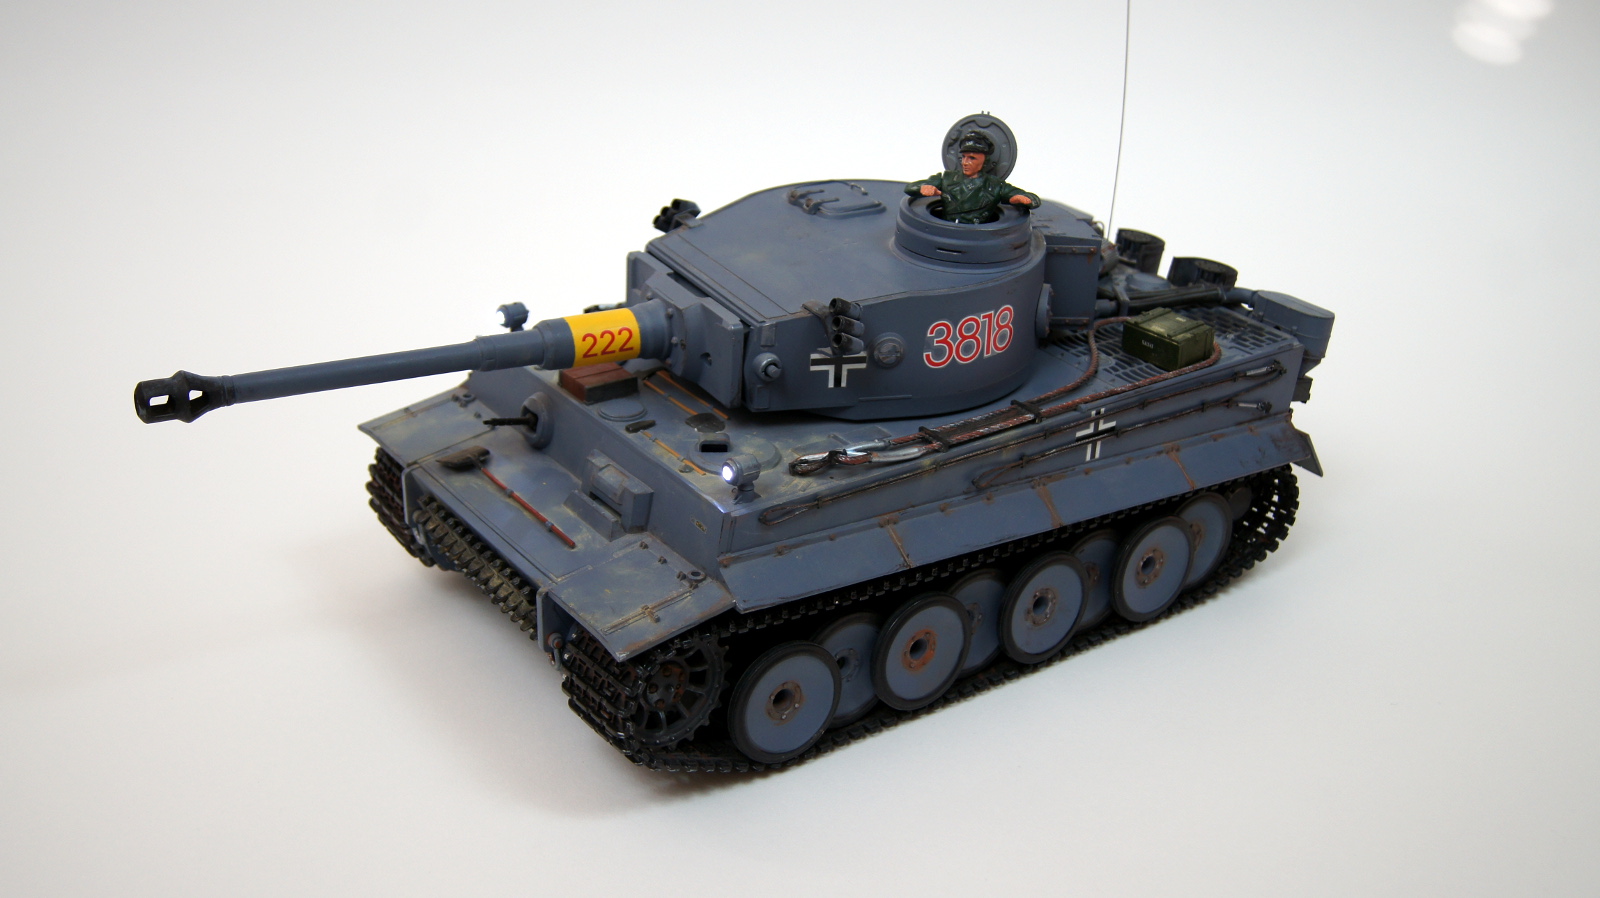
Even if its introduction to the battlefield was unfortunate, the Tiger proved its worth, especially when handled by a skilled commander. The Tigers’ death-to-kill ratio at the Soviet front averaged at 1:10, and in some areas was many times higher. It is estimated that top “tank ace” among Tiger commanders destroyed no less than 168 tanks, and a number of other commanders were credited with over 100 kills each. Among them was Michael Wittmann, know as the Black Baron, who among his several Tigers used one with 222 number – the one whose markings I’ve copied in my model. The 503rd heavy tanks battalion, whose part 222 was, terrorized Soviet front destroying 501 tanks, over 400 cannons and 8 planes (!) while losing only 10 Tigers.
At the same time, it was tank whose design simply did not meet the reality of modern tank combat, extremely costly to make and devouring enormous amounts of resources from the already crumbling Nazi war machine. It is difficult to determine where its legendary status comes from – is it the technical sophistication, the initial fear it caused, the echoes of Nazi propaganda, or maybe simply the distinctive silhouette that made it stand out among many similar-looking German tanks? The truth is, for all its status it had little impact on the war, especially next to the tanks such as Sherman or T-34.

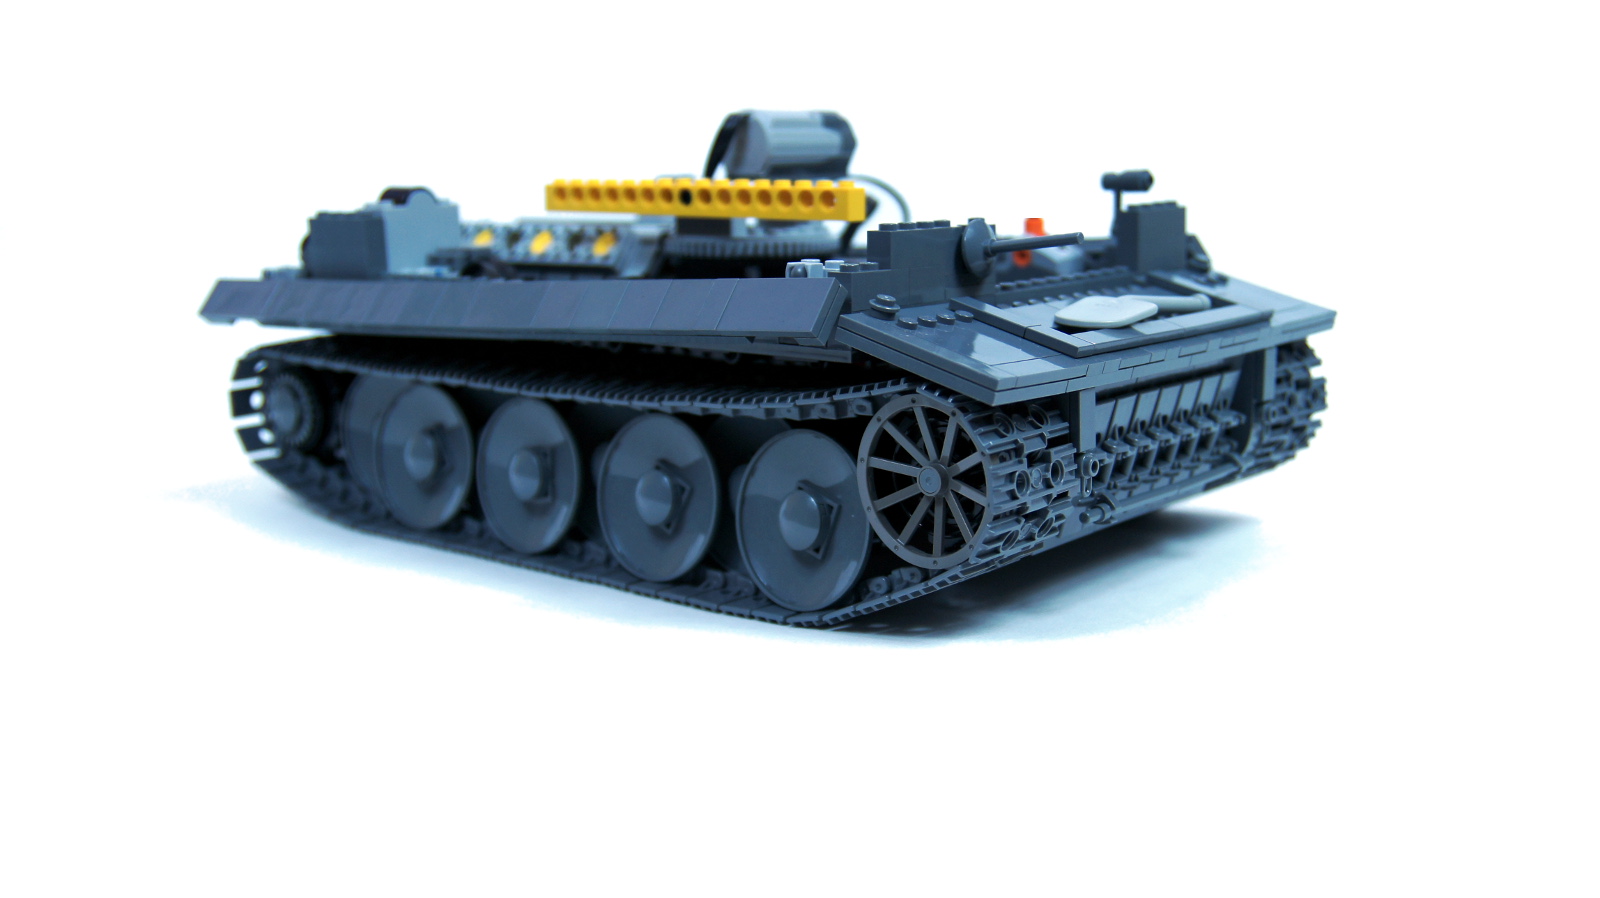
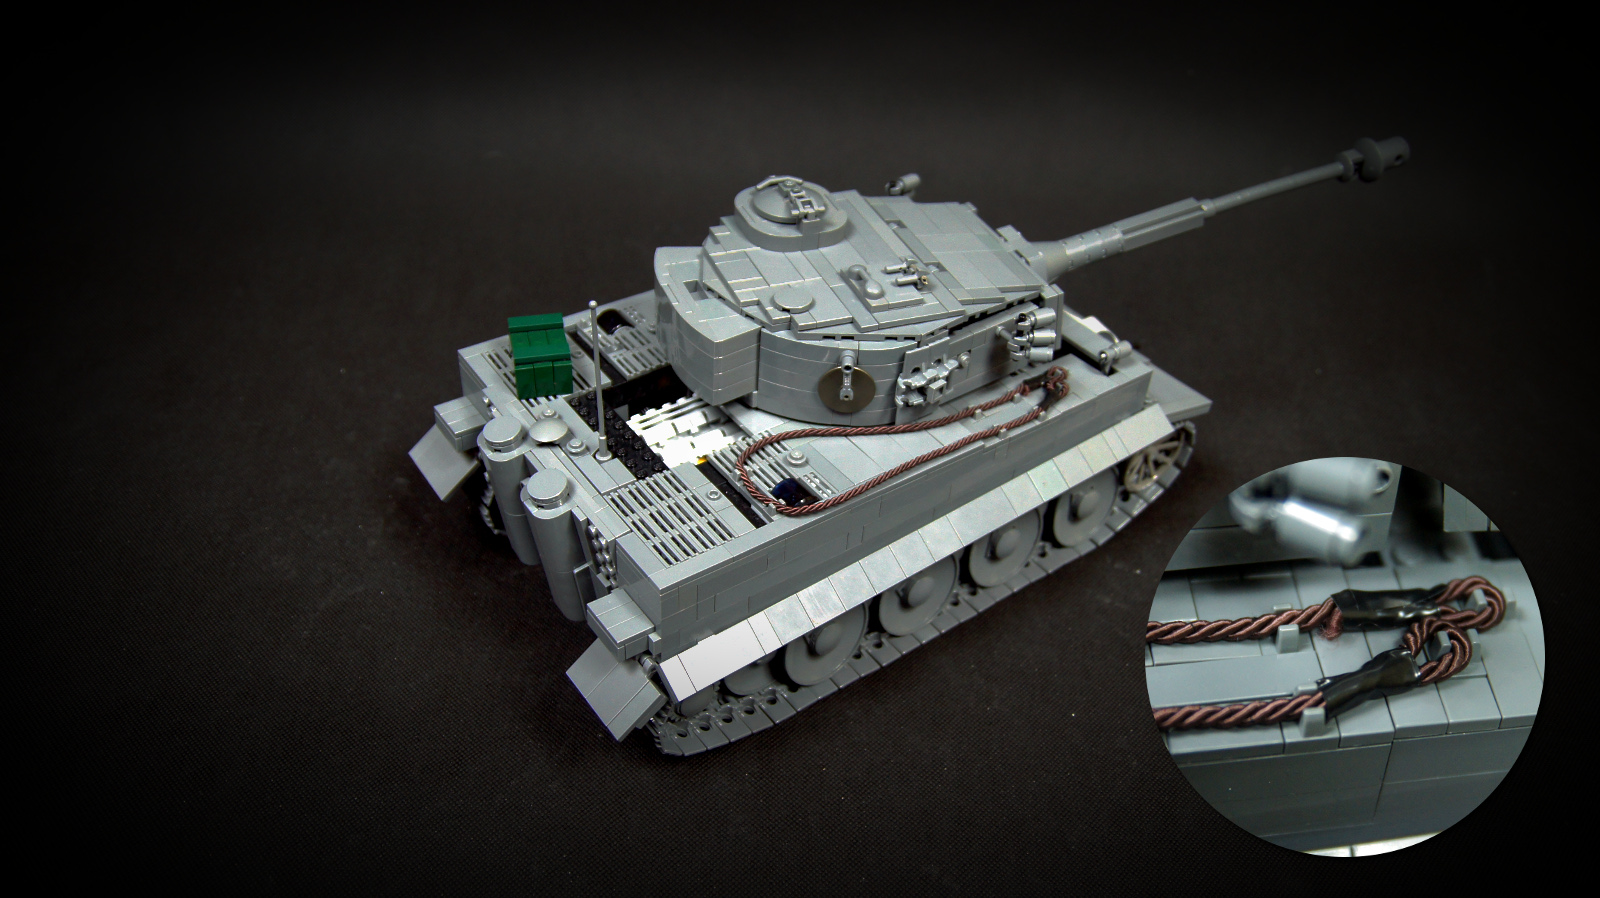
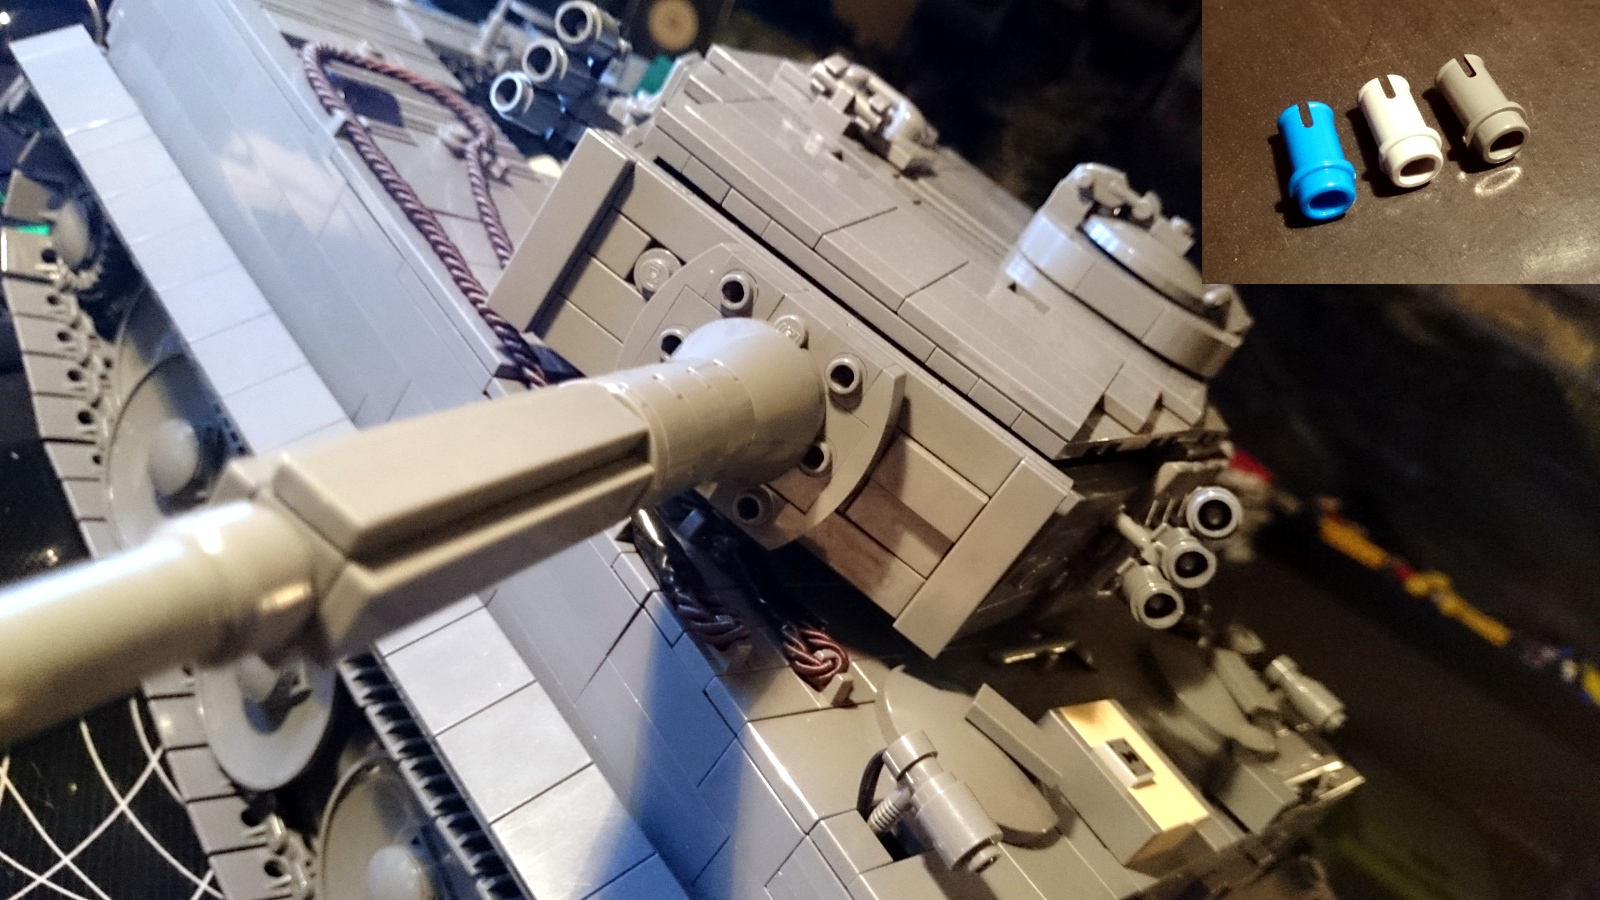
My model was based on early production version, with spare tracks on turret taken from later versions. It was built at almost exactly 1:18 scale, and it was imperfect and not fully acceptable by LEGO purists. Long story short, I would say it had 110% of the functionality and 90% of the aesthetics I was hoping for. As for LEGO purism – it used Lifelites LEDs because LEGO LEDs did not fit inside pieces I wanted to use as headlamps, it had custom twisted strings used as towing cables, and it utilized some unusual LEGO pieces that were probably produced to test molds and were not included in any LEGO sets – for example dark grey half-pins and unpainted round minifig shields. Tired with failures to get results with combinations of LEGO pieces, I have re-created the towing catches with a single LEGO piece: the extreme link from a LEGO chain. That means that I cut off rest of the chain, but the extreme links were technically unmodified.
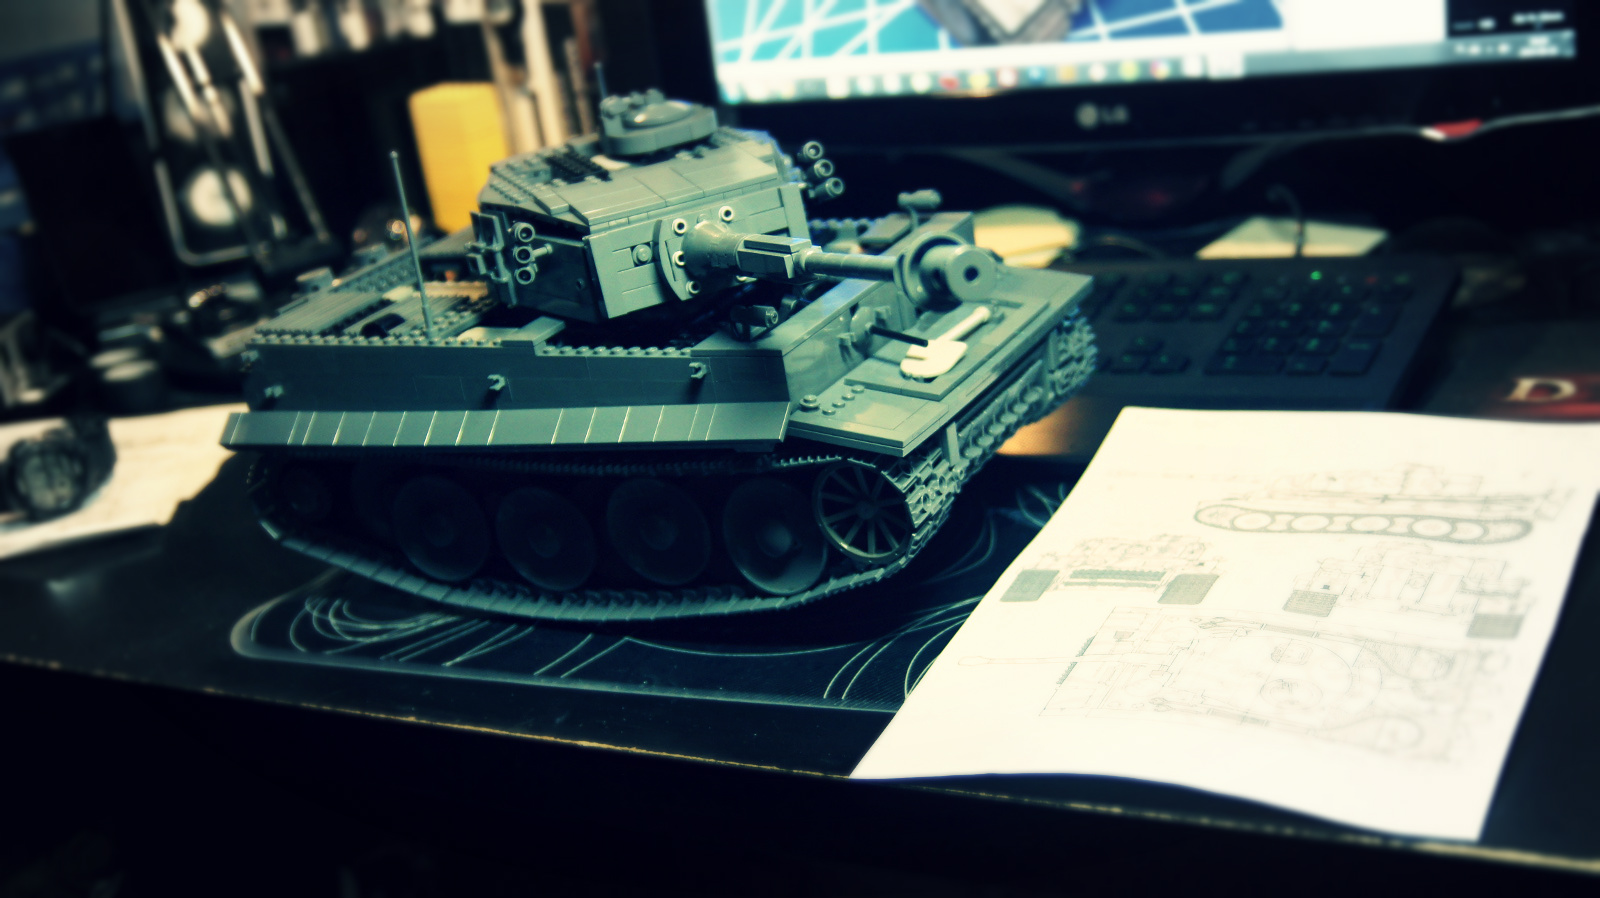
From the very start my goal was maximum accuracy, and to that end I’ve measured not only distances in the model, but angles too. Early in the building process I have dropped the idea of installing a firing mechanism in the turret, and focused on re-creating its shape faithfully instead. The functions followed a “what’s the craziest thing I can do with so much space inside?” routine 😉
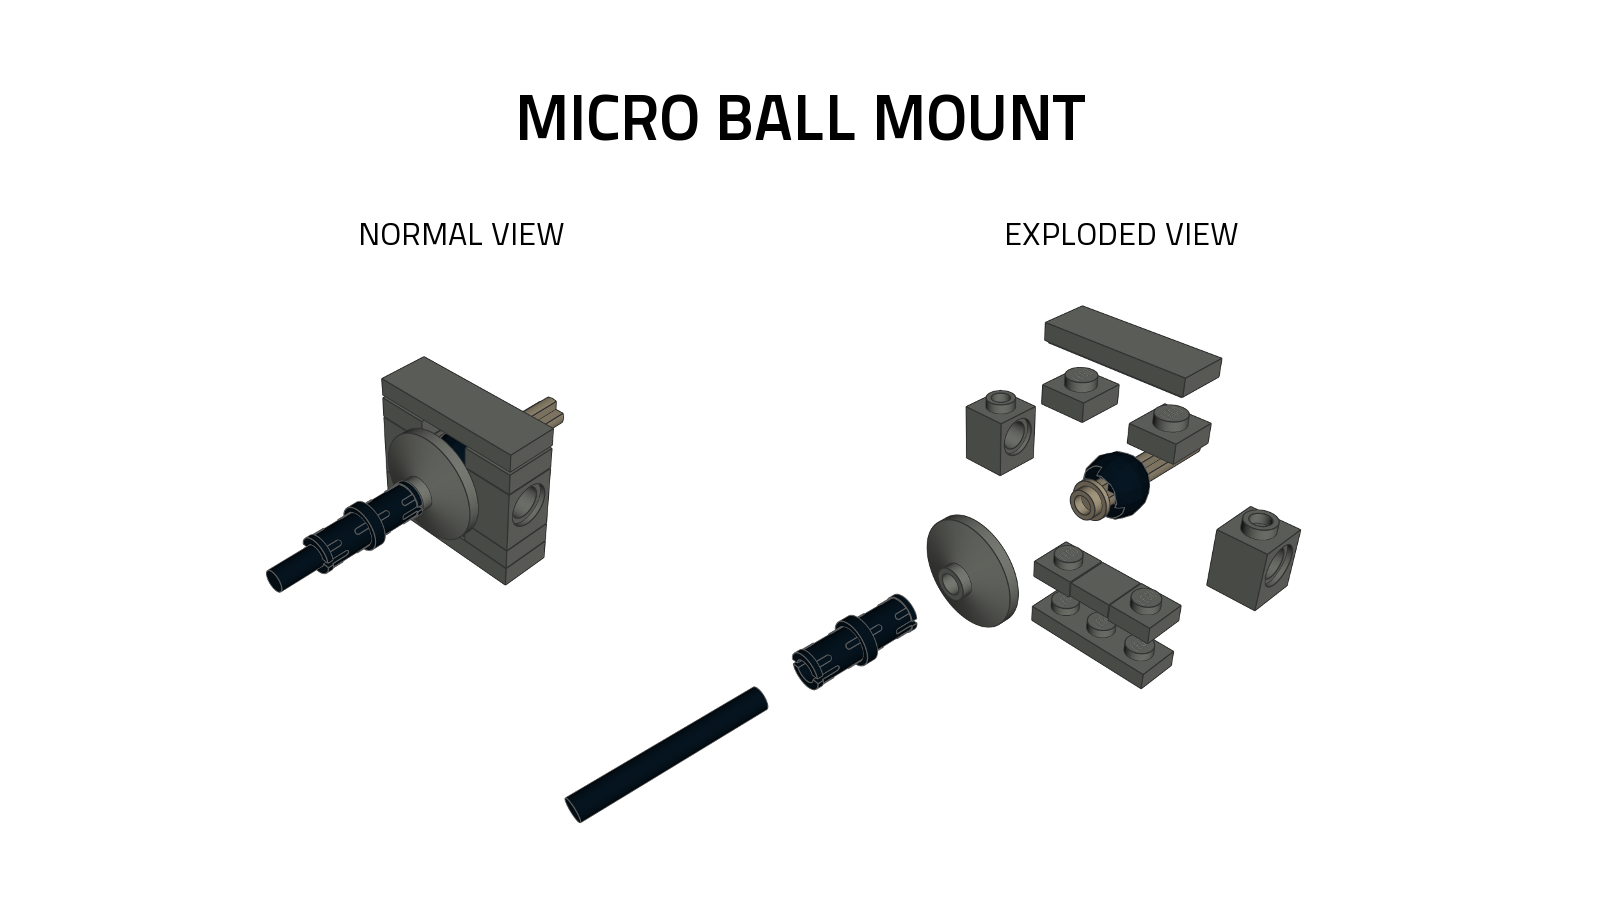
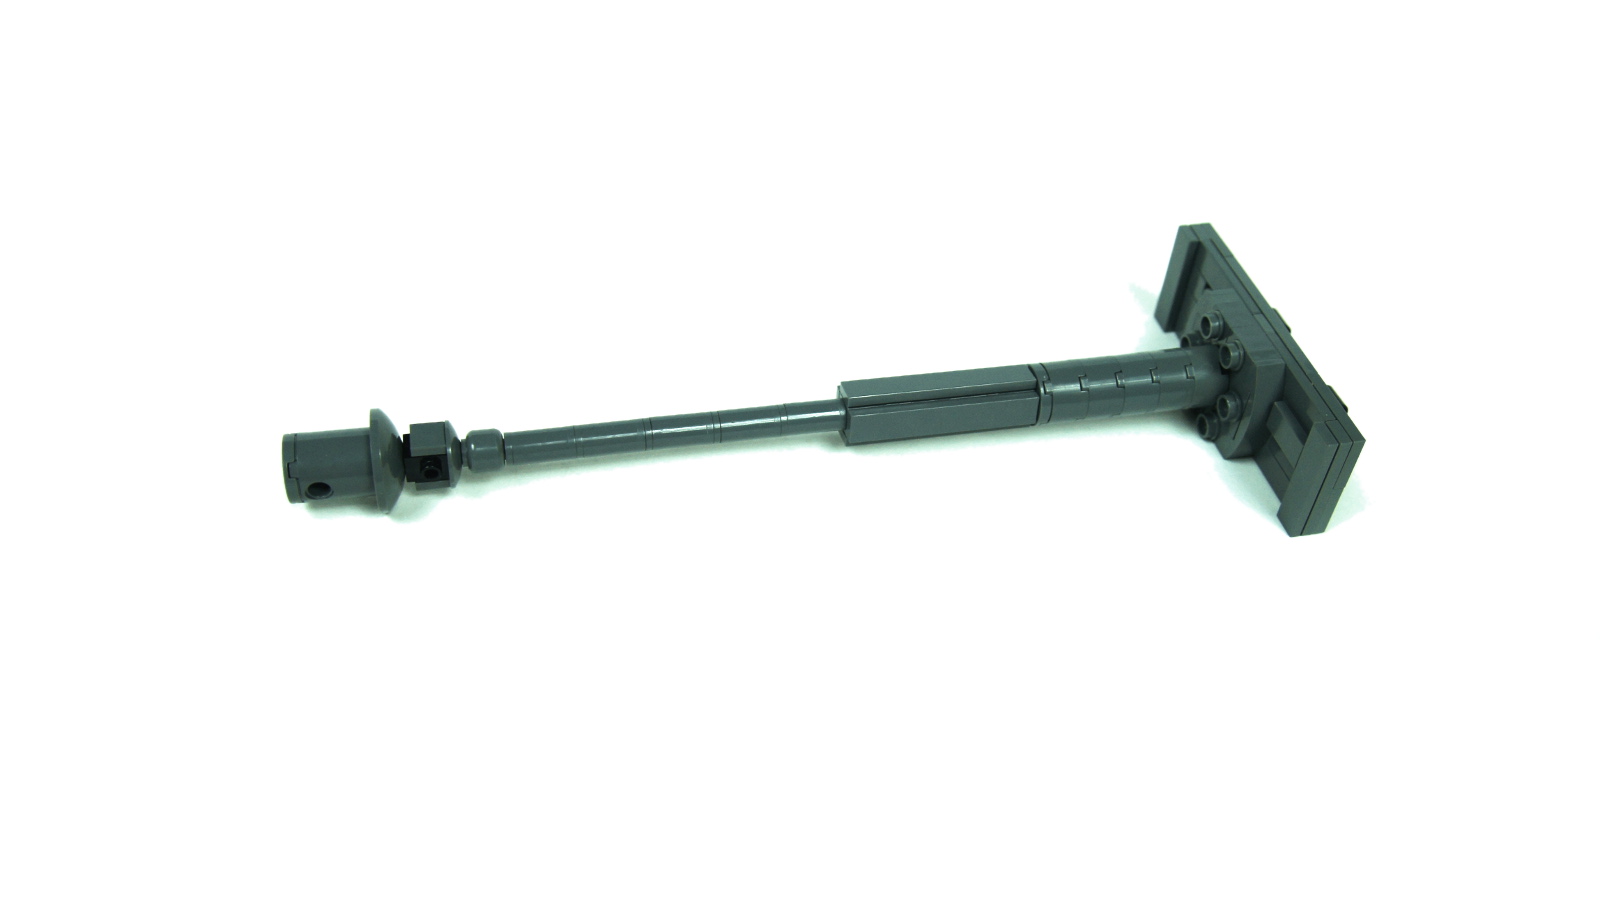
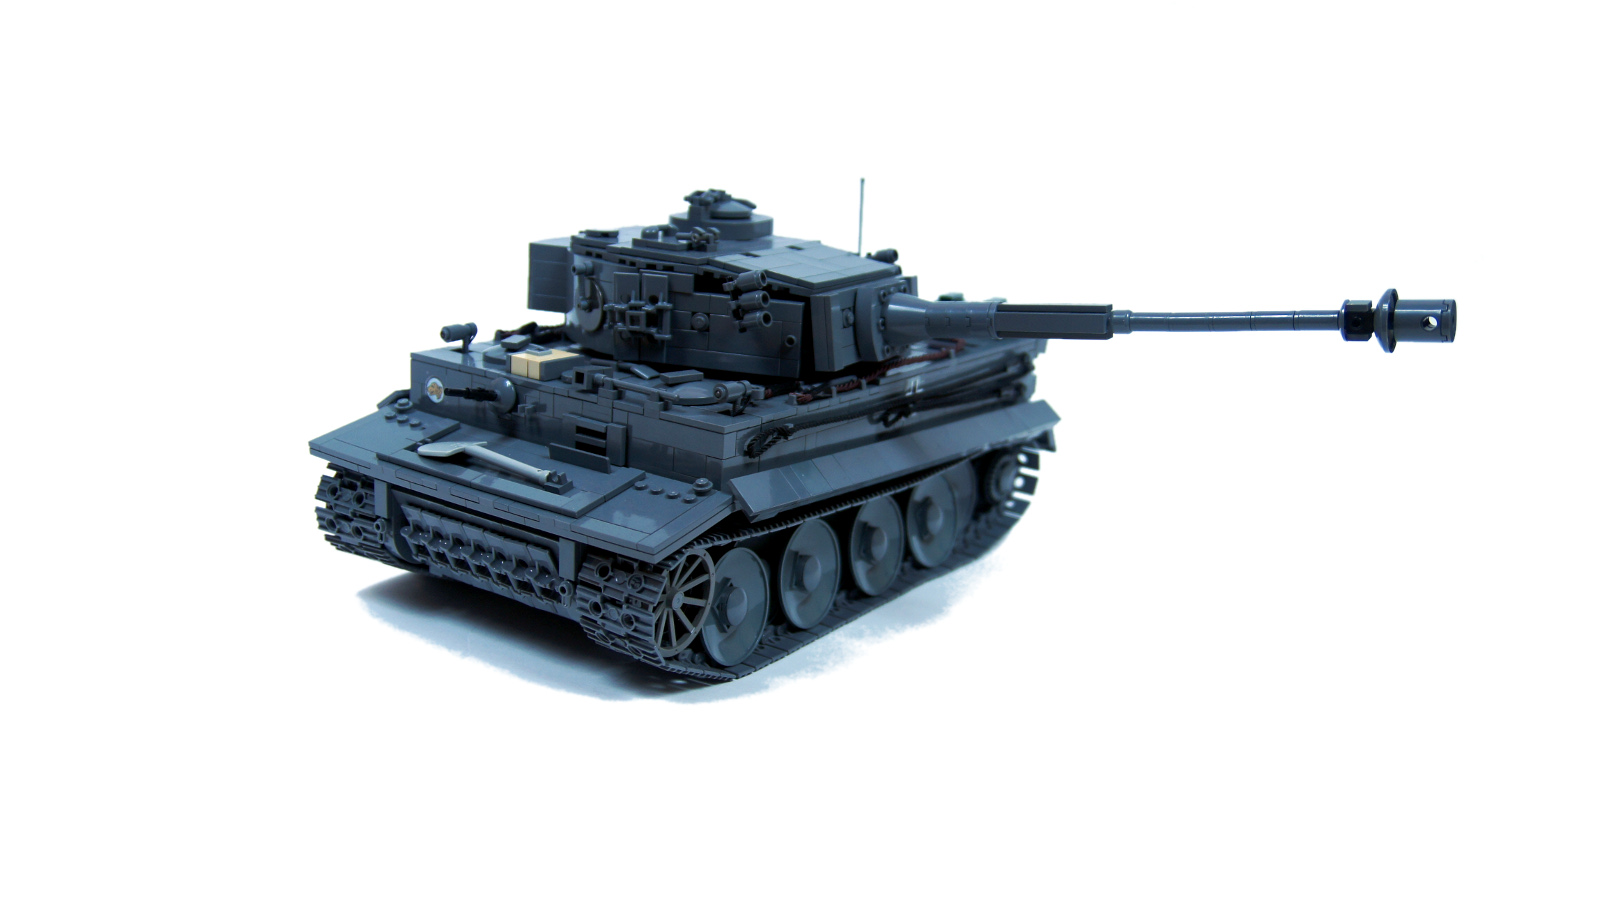
As for aesthetics, there was a number of solutions I was happy with, such as the front machine gun’s micro ball mount (below), but there was a number of shortcomings as well. Some of these resulted from the lack of some LEGO pieces available (e.g. gaps between plates that form turret’s front, which would require a wedge plate with 1×6 slant), some resulted from the lack of LEGO pieces in specific colors (e.g. the muzzle brake would look much more accurate built around a trans-clear 1×1 brick with studs rather than around a black one), and others resulted from my running out of ideas (e.g. the lack of a crossbar holding the spare track on the lower front glacis plate).
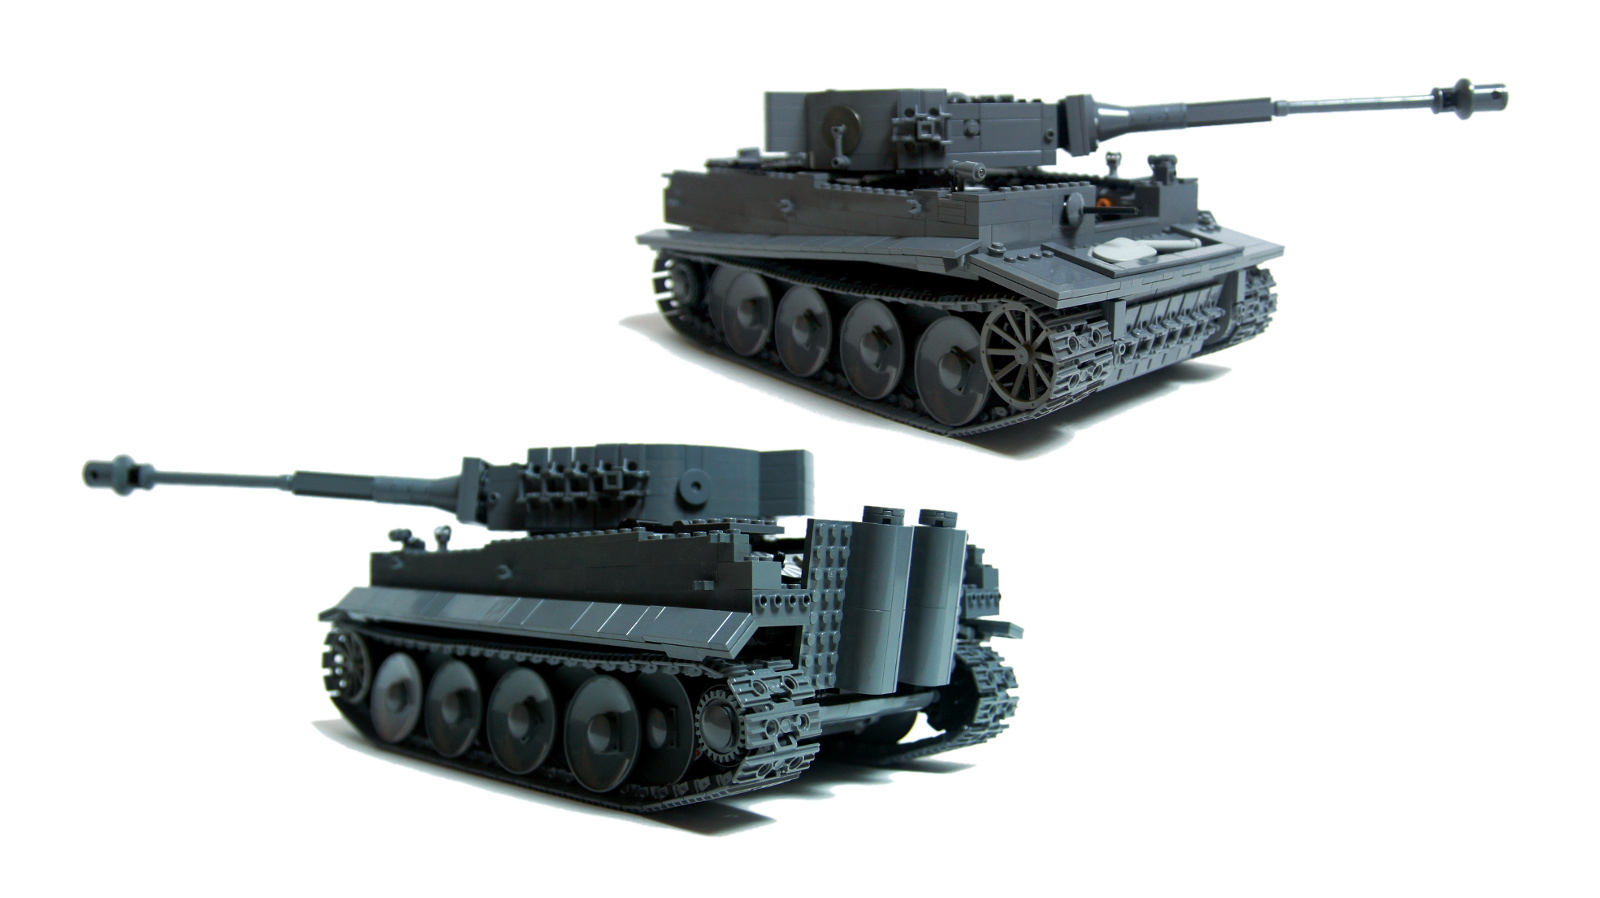
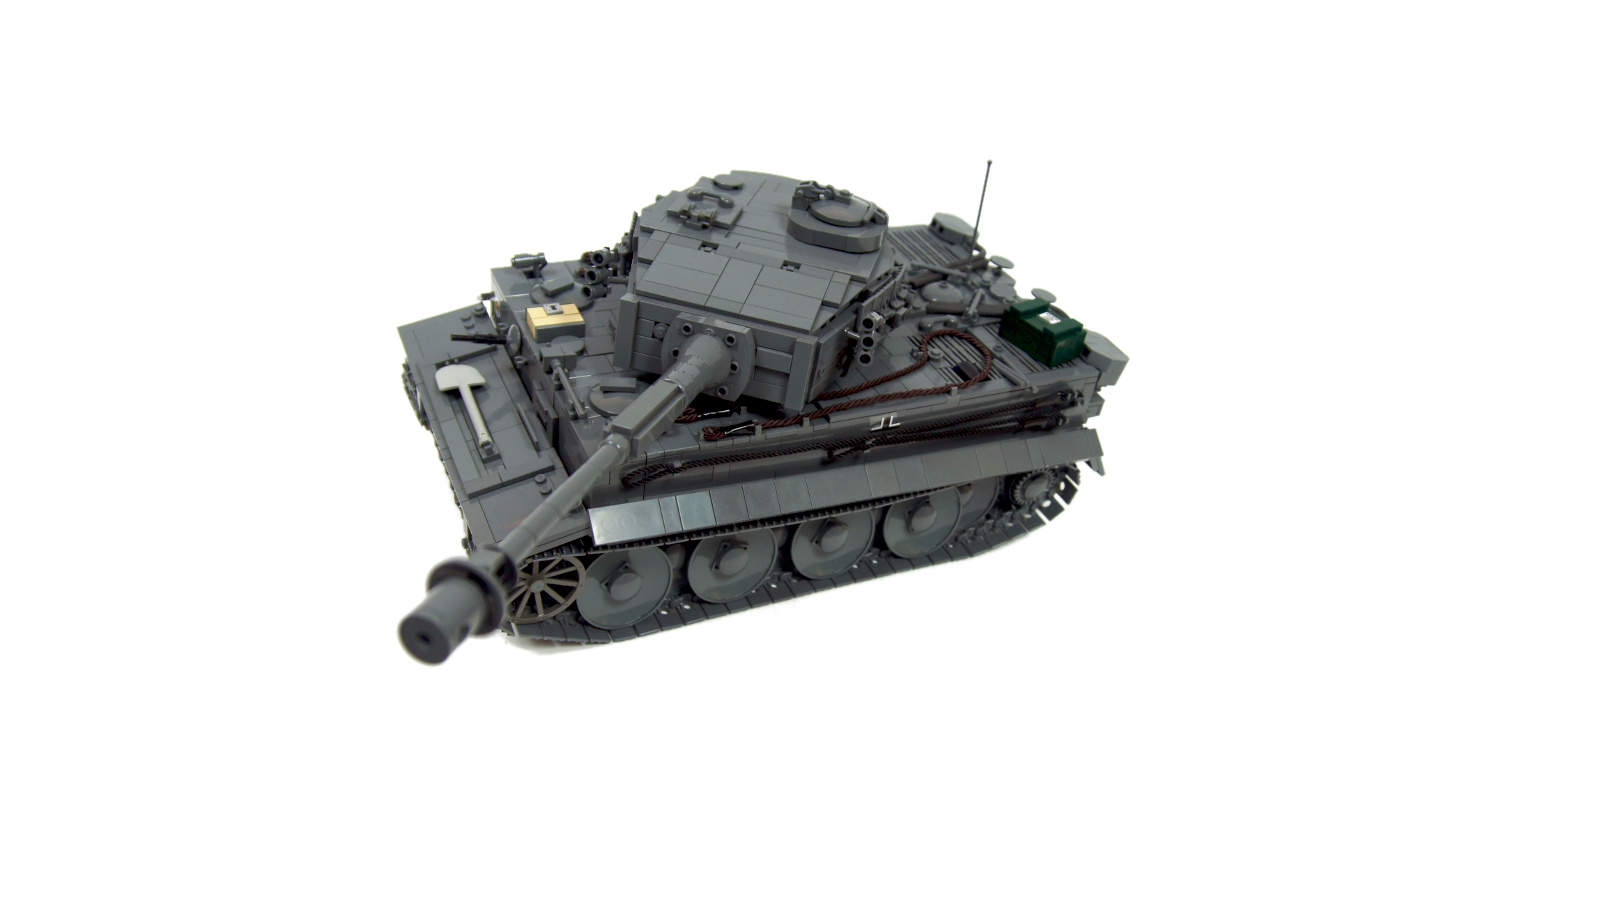
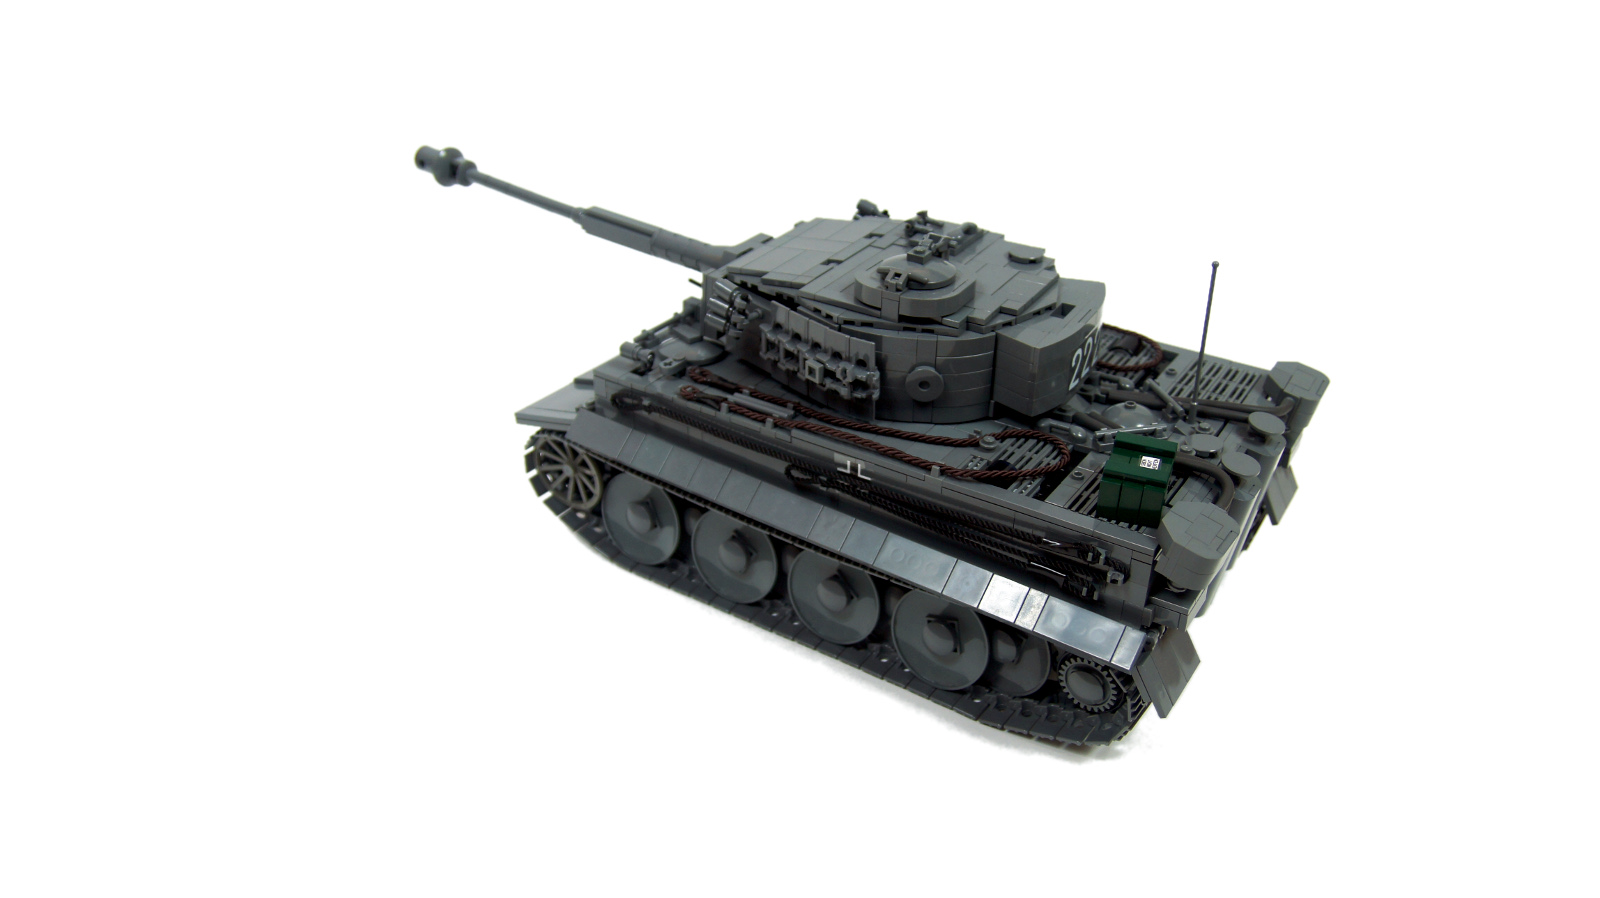
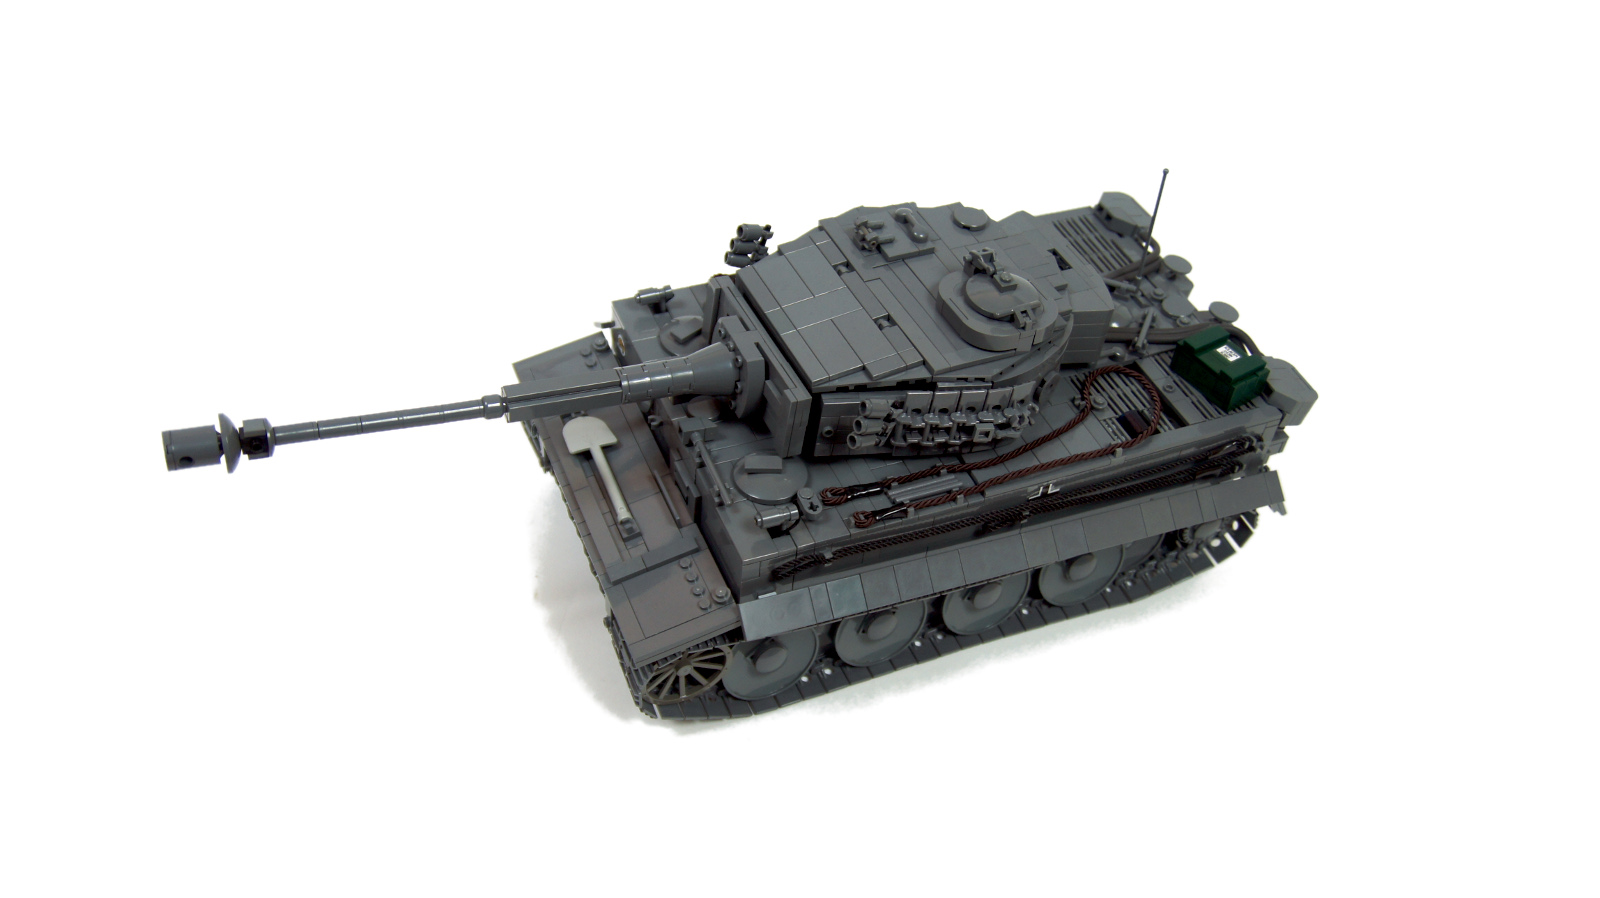
I’ve spent some time trying to use stickers to mimic rubber bands on the road wheels, but the curvature of dishes made it extremely difficult, and I didn’t want to resort to painting. And rightly so, because it turned out that shortages in materials forced using full-metal road wheels in later Tigers. Plenty of time was devoted to trying out various strings, because the towing cables on top and side of Tiger’s hull have specific plait, color and thickness, while string manufacturers lack consistency in declaring colors and thicknesses. The thickness was especially crucial to making the string stay on the model at all. The final towing cables made me happy – they looked good, added some extra colors, and were functional: meaning it was possible to take them off, tow something and put them back on. For a time the model was fitted with black tracks to add some color diversity, but close inspection of the few color photos of the WW2 era revealed that the original tracks were anything but black. And I have very quickly decided to put a LEGO Duplo shovel on the hull’s front, because shovels made with small LEGO pieces didn’t look good enough to me. In the end, I tried to pick interesting details, while intentionally omitting others: for example, I have ignored a manual fire extinguisher on the right radiator and the aforementioned mine launchers because they made the hull’s top look cluttered.
As for functionality, the road wheels idea that got the whole model started made suspension system not only possible, but in fact necessary – and that’s because of the complex way of getting just the right spacing between adjacent wheels. It is a little known fact that there are not two but three rows of the road wheels in each track of the real Tiger – which is fortunate, as I have replaced one of them with the suspension. Since torsion bars suspension did not allow me to place the road wheels close enough to one another, I have used oscillating bogies which proved to work quite well.
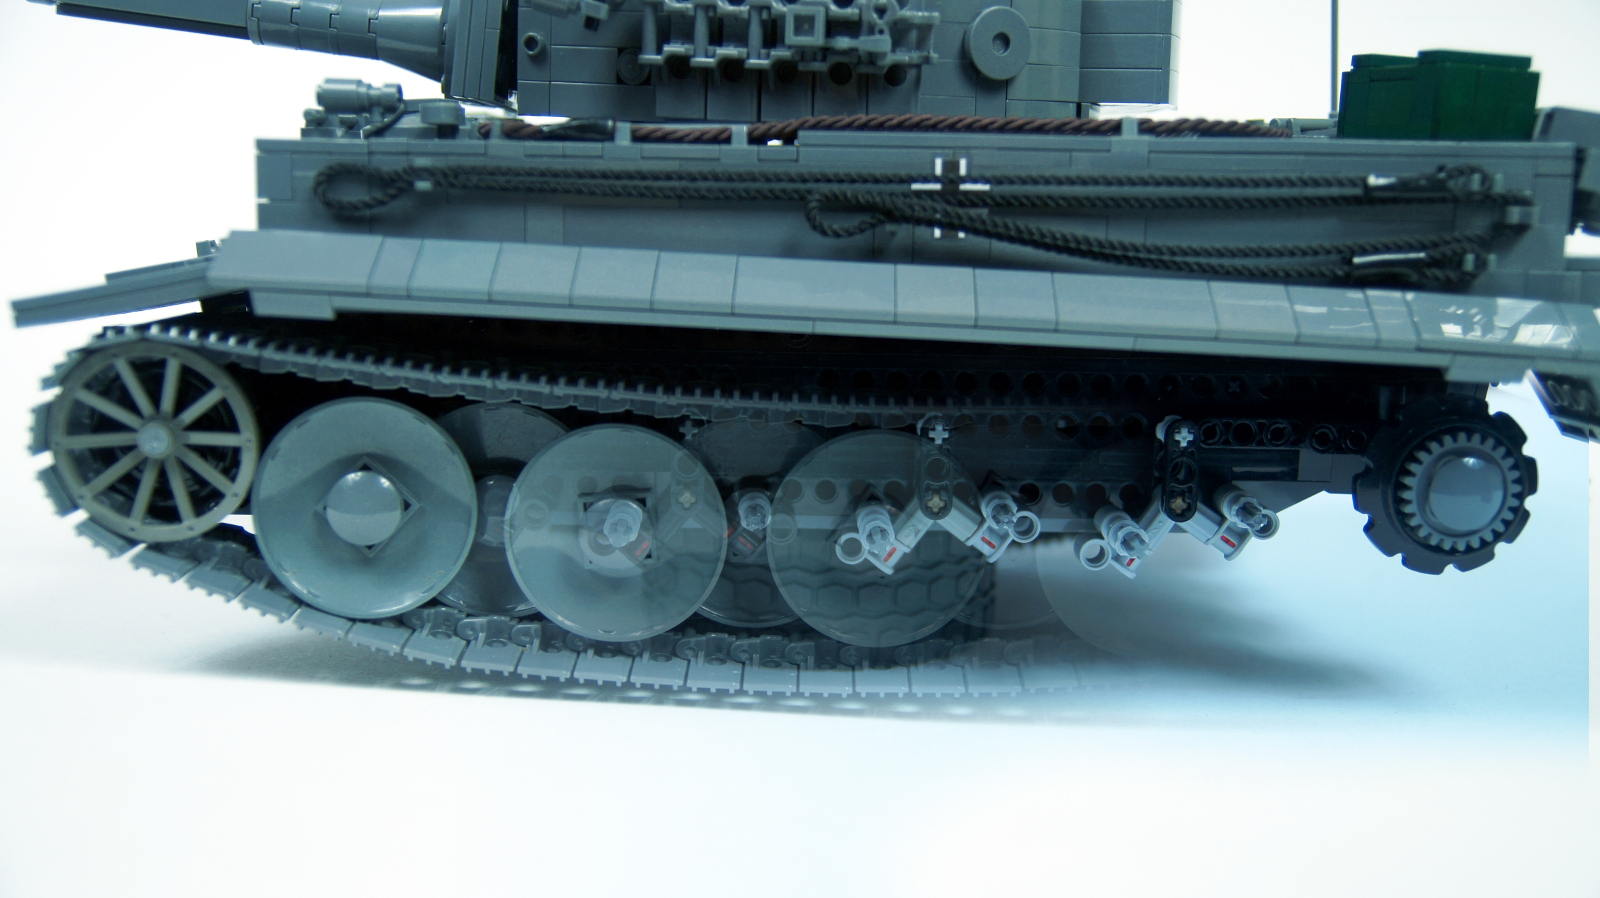
The road wheels, other than being extremely difficult to come by, were also concave, difficult to mount and not exactly fitting the track. In the end, the outer wheels are a bit lower than the inner ones, with the suspension bogies tilted slightly forward, but the entire set-up worked better than expected and performed flawlessly during any maneuvers, even when driving on soft towel.
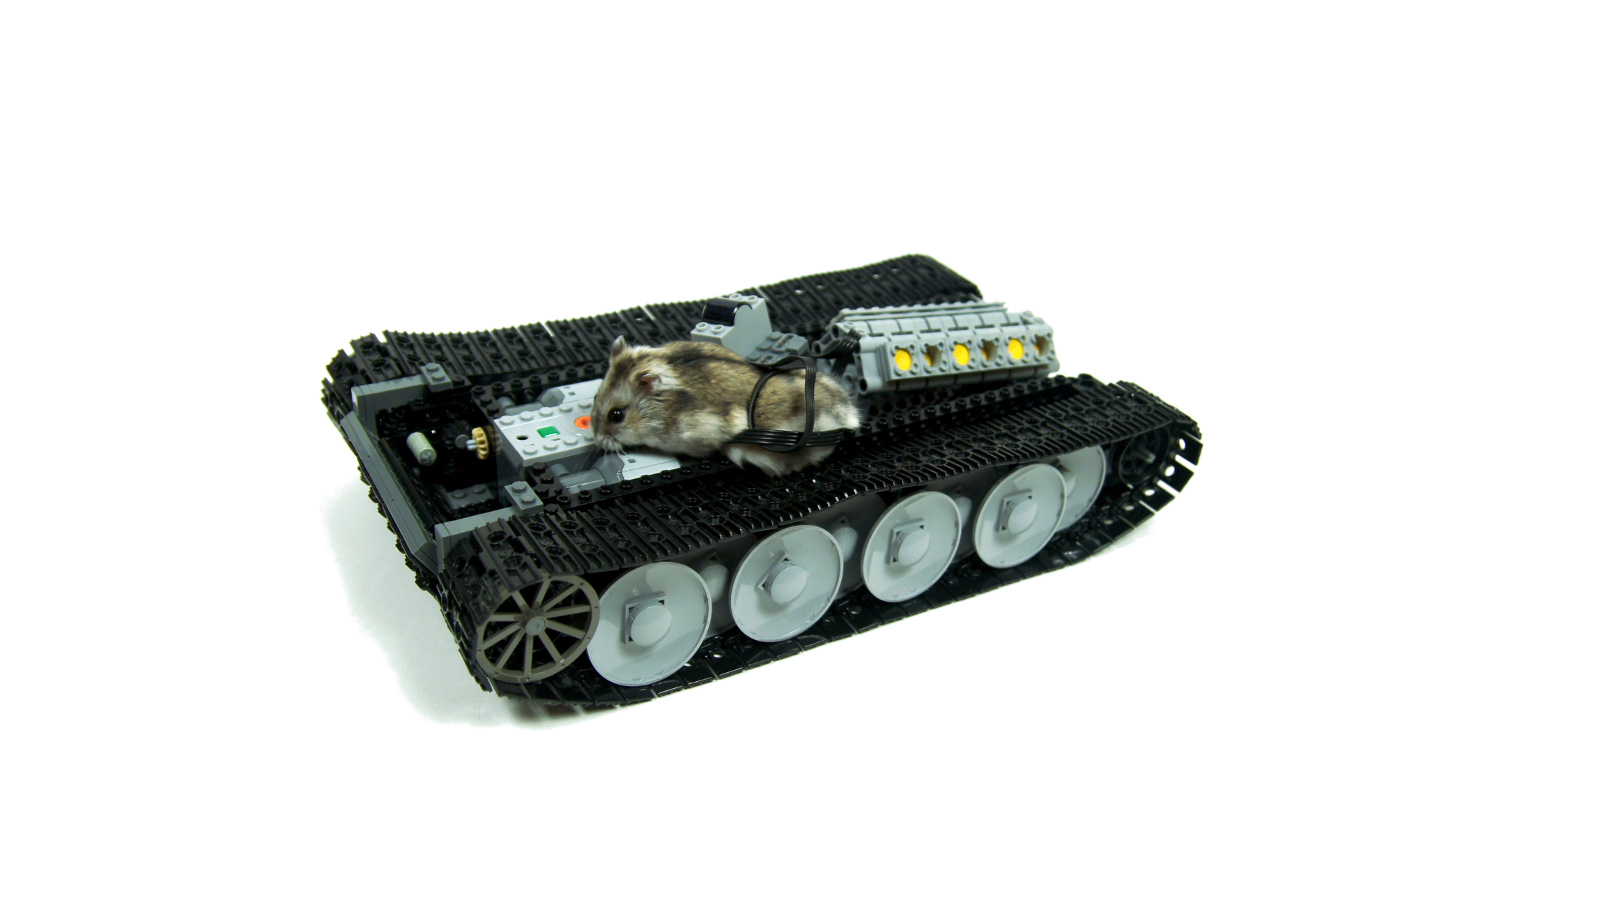
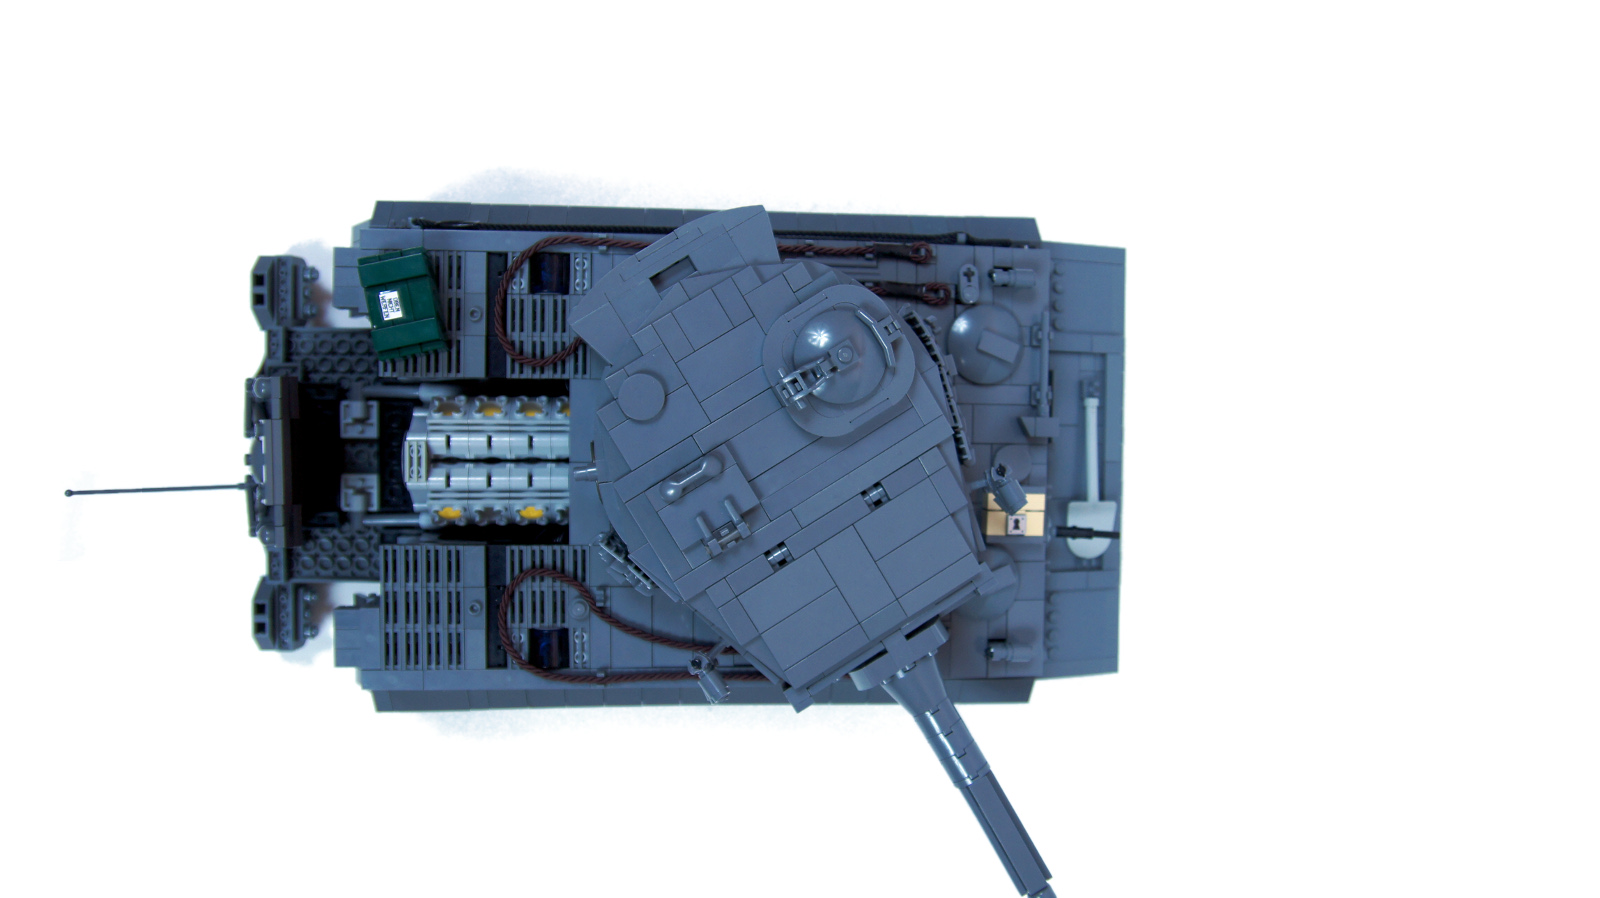
With the propulsion and suspension working just right, I have proceeded to utilize the remaining space creatively. I have installed a V12 piston engine in the back of the hull – as the propulsion was in front, just like in the original Tiger. Eight of the engine’s pistons showed when hull was opened, while the remaining four could be seen deeper, reaching deep under the turret. I have installed two Lifelites LEDs behind the engine hoping to make these four pistons more visible, but apparently it didn’t help much. The V12 was driven by a 71427 motor, which was short and ran quietly, and beneath it was a PF M motor used to open up the back/top portion of the hull to display the piston engine. Since the hull’s rear part was a fragile combination of plates and hinges, it was necessary to match the movement range of two small linear actuators opening it perfectly, so that clutches in the actuators stopped them from tearing the hull apart.
There was some space available on the inner “shelves” above the tracks, so it occurred to me that I could include radiators in my model. There are two radiators at the back of the real Tiger, each with two fans set at angle – I have re-created them carefully, with one fan in each radiator rotating permanently, and the other rotating occasionally, when the friction between fans was sufficient. The “fans” were actually Technic discs with fan-like stickers on them, coming from the old and rare 8269 set. Being rare pieces, they were difficult to buy, so I managed to buy the 8269’s sticker sheet instead and placed the stickers on plain discs. Both radiators were driven by PF M motor located above the left track – it was not possible to drive them and the V12 by a single motor without removing either the turret’s turntable or part of the V12.
Speaking of the turntable, it was rotated by another PF M motor, this time sitting above the right track. The mechanism was geared down to match the famously slow speed of Tiger’s turret rotation – something that probably saved life of many Allied soldiers. There was just a single wire going through the turntable, connected to yet another PF M motor inside it. This particular motor powered a small linear actuator controlling main gun’s angle. Even though the turret seemed large, I had a hard time fitting the motor and the actuator inside it, because most of the space was taken by a structure required to model the turret’s outer shape.
The last mechanism was the motorized panning and tilting of the machine gun in the upper glacis plate, which was controlled by two Micromotors. Both motors were synchronized with the turret, they moved the gun using towball connections, and their very low torque acted as a natural movement limiter. Unfrotunately, this low torque also meant that the motor controlling elevation of the machine gun was getting stuck a lot – it worked fine with the gun aimed straight ahead, but not so well with the gun aimed to the side.
All in all, I was happy with the model – it was good enough to make me proud, but not good enough to make me stop trying to do better. It has also convinced me that even with over a dozen tank models already built, I can still come up with something new and innovative. On the downside, I really didn’t like having two motors running all the time, especially the noisy M motor driving the radiators. It made playing with the model bothersome, it made me want to turn it off as soon as possible, and it drained the lone battery pretty quickly – which was ironically similar to the real Tiger’s fuel consumption.


@Tazzmani
Or you know, my first book has extensive chapter on proper reinforcing, as well as many others.
@Sariel
I didn’t even know, M motors exist 😉 Would you mind if I send you some pictures of it? I don’t know how to fix it, because it happened on the previous model aswell. Maybe you can help me with that cause you’re more prefessional than me. I’ve been building Lego Technic since I’m 6y old, but there are some things i just can’t solve.
Tazzmani
@Tazzmani
Servos are steering motors. My Tiger was driven by L motors, which are weaker than your XLs. You evidently didn’t reinforce the drivetrain properly.
@Sariel
Well, they do work forward and backwards. I just don’t know why the tracks can’t go independent preperly when there’s weight on it. They work if I lift it up. That’s why I’m thinking that the length of the tracks is to long for only 2 motors in the front. You only used 2 in the Tiger, but they are servos, right? I don’t own those “new” pieces.
@Tazzmani
Looks like your gear wheels are not reinforced properly.
@Sariel
Exactly, that’s what i meant, sorry i forgot to meantion it. Do you have any solution? i only have 5 wheels instead of 7 on the Leo, but that’s my limit =)
@Tazzmani
Depends on what exactly is “cracking”. It’s not the whole tank, it’s some specific element. My guess would be some of the gear wheel between your motors and sprockets.
Hey Sariel, it’s me again. I completely rebuild it using the pendular suspension, working pretty good. But now i have the preblem again, that i can’t turn/rotate my tank because it starts “cracking”. I had this on my previous design aswell. I’m still using the Leo’s engine design, but i only have 2 XL motors in the front. do you think, that they can’t handle the length of the vehicle when trying to use only 1 track?
Tazzmani
@Tazzmani
Suspension is pendular bogies, clearly shown at the photos. As for fitting so many mechanisms, well, that’s just the old good trial & error method.
Hey Sariel,
this reminded me of my try to build a tiger, never finished it tho. I’m always pretty impressed, how you fit all the stuff into a model that size, do you have any tips for that? Furthermore, could you explain the suspension system a little? I used the Leo 2’s torsion bars.
Thanks
@Battlelamia
Not going to happen. I’m not going to spend months creating instructions for something that will be too expensive to build for 99% of people.
When I found the video of this I was very impressed so I followed the link here to see if there was any guide of here to build it. I was really hoping there was a LEGO Digital Designer file to download but there seems to be none. Just tossing it out as an idea so that other people might be able to build the impressive items you have made.
@Yeazz
Nie, a nawet gdyby, to części byłyby praktycznie nie do dostania i kosztowały majątek.
Witam! A czy istnieje jakakolwiek szansa na publikację listy użytych części oraz instrukcję złożenia tego modelu? 🙂
Pozdrawiam
Yeazz
@SeaGer
Thank you. This is not a set and there are no instructions.
Hello man. This is an awesome set. Is there any way I can buy the instructions from you? Thank you for this awesome set. It’s a pleasure to watch the video
@Tim
Thank you, but it doesn’t really work that way. They are very picky about whom they hire and they are very picky about what sets they want to have designed. You nor me don’t get to decide. And they don’t make tanks on a principle.
Ohh and the super rare pieces would no longer be rare because lego would have to start making the pieces again to make your model
Is lego employing you because if they’re not they are losing out on a brilliant designer. You could and would make them millions, I would love to buy that if they sold it it looks epic
Keep up the amazing work
@Cody
Thank you 🙂
Really an Amazing build. Only dislikes personally being:
– Barrel of the main gun compared to real thing, hard to get the sizes right, but muzzle looks a bit unwieldy to me.
– Shovel. Light gray doesn’t contrast with the darker gray very well.
Apart from that. This thing is as spot on as it’s going to get. Great work man.
Ok, thank you.
@EV3fan
I don’t know yet, this will need experimenting with the turret. It’s important for me to make tank’s barrel look realistic.
These are both good ideas. Another two questions: Will the rounds emerge besides the turret as in the K2 Black Panther and will the gun be tilted?
@EV3fan
I intend to have the clip moving horizontally. Another option would be to have it start from beneath the turret, inside the hull, and move upwards, exiting through turret’s top.
@Sariel
Some time ago you said you were going to use the tripod gun’s autoloader mechanism(I rebuilt it myself and it’s awesome ) in the abrams tank. Now my question is Will the gun be mounted upright like in the tripod gun or will the clip be tugned to the side to gain more space in the low turret? I believe the gun could be adapted so that the clip is facing sidewards. Thanks in advance, sariel!
@EV3fan
Yes. And my Leonard had self-leveling main gun.
Oh I see: it was the Abrams. Cool feature.
Did you realize the kickback function, too? Interesting. Where can I find that tank? And for the sound thing: I didnt know that the sound is so bad, it was only a suggestion anyway.
@EV3fan
I realized such ideas mechanically in my earlier tanks already, without NXT. Not the sound, of course, but then the NXT’s sound quality is crappy at best.
I know why but I still dont like that you finally settled to the PF System here because with NXT Control you could have realised Functions like Kickback simulation when firing (When you press a butttton on the remote, the motors make the tank roll backwards for a short time and a shooting sound is being played by the NXT) or, with a gyro sensor, a self-levelling function for the turret.
Just some ideas I had recently. I do not claim to be the first who had these ideas.
@Bart
Um…. the motor in the turret is connected to IR receiver in the hull. You can put a motor’s wire through the turntable, you know…
How did you manage to make the turret without an IR reciever for the motor inside of it?
I have been building tanks for a while and i have some trouble with the turret,
you are a great example for me!
@olaf
I don’t know what you’re talking about.
hey sariel thank you and Charles for the passport I couldn’t trust you first that you will do it but now I trust u thanks once again
Thank you. Hope you would like my Abrams when I complete it @Sariel
@Lego fan
No, it will be shooting Lego axles. The autoloader mechanism is shown here: http://sariel.pl/2009/01/tripod-gun/
When are you building your Abrams tank. Coincidentally, I am also working on it. May I know how are you going to build your firing mechanism with autoloader in the turret. By the way, what is the ammo that you are using? Rubber bands? Thanks
Great model, very cool details. The welding guy worked a lot…
I love the model-and the microball mount is SO clever!Also useful for other models, I think.
wow.. just wow
O_o What a masterpiece!