Pagani Huayra
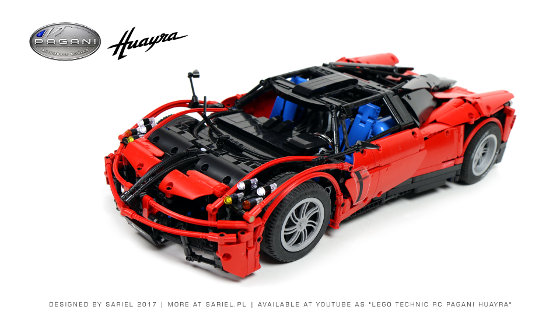 Model of an exotic Italian supercar. Features drive, transmission, steering, suspension, active aero flaps, working brakes, lights, turn signals, reverse lights, manually opened gullwing door and custom stickers.
Datasheet:
Completion date: 15/01/2017
Power: electric / pneumatic (Power Functions + SBricks / manually pressurized airtank)
Dimensions: length 69 studs / width 30 studs / height 16 studs
Weight: 2.66 kg
Suspension: independent, with adjustable caster angle in front
Propulsion: RWD, 4 x Lego RC motor via a 2-speed remotely controlled transmission
Motors: 4 x RC, 2 x PF Servo, 2 x PF M, 2 x Micromotor
I can’t say I enjoy building Lego supercars. Tanks or trucks with studfull bodies are a pleasure to build – building a supercar is an endless torment of insufficient room, bodywork that requires setting most pieces at weirdest angles, and in the end somebody will surely call the resulting model too slow. That did not, however, stop me from creating this tribute to the awesome Pagani Huayra supercar with the following functions:
- full independent suspension
- RWD with a 2-speed, remotely shifted transmission (taken almost intact from my F1 car model)
- front axle with steering and manually adjustable caster angle
- pneumatic remotely activated brakes on the rear axle
- working front & rear aero flaps, connected to the steering and braking systems; steering raised one front and one rear flap on the respective side of the car and braking raised all of them simultaneously
- lights, including working turn signals created using SBrick’s sequences, and automated reverse lights created mechanically
- interior with seats, a steering wheel rotated by a Micromotor, and working turn signals indicators in the dashboard
- manually opened gullwing doors
First of all, why a Pagani car again? This had less to do with the actual car and more with the company that created it. The Pagani cars aren’t the fastest, best-handling cars out there, nor they create any technological breakthroughs. On the contrary, they’re honest mid-engined V-12 Italian cars with as little electronics as possible, and while they may not be the absolute best cars performance-wise, they’re at the very top, putting many household name car makers to shame. The thing about the Paganis is that unlike Ferraris or Lamborginis, they are not created by big companies with hundreds of designers, they are mass-produced by robotized assembly lines, and they are not accompanied by the same company’s other products such as T-shirts or shoes. The Pagani company remains today what Ferrari and Lamborghini used to be decades ago, but they no longer are – a one man’s property and a one man’s vision. It’s a company where the owner designs the cars himself, where spending a decade developing a new car is completely acceptable, and where cars are produced in limited quantities (there are only 100 Huayras in existence), and assembled by hand – including e.g. entire engines, which are built from start to finish by one technician, who then signs the engine with his name. This kind of philosophy is unique in today’s automotive world and the cars it results in combine top-notch performance with craftsmanship of masterful quality. Just the interior alone will have you thinking of cars built back in the 30’s rather than in 2010’s.
My model looked as shown in the photos below, and I think it wasn’t perfect, mainly due to being overengineered. My goal in building it was to try something a little different; Lego supercar models are typically either functional or fast. Models with multiple functions, motors etc. are usually heavy, slow and move sluggishly. My goal when building the Huayra was to try and find a middle ground – a supercar model with many functions that is still agile. The resulting model wasn’t as fast as my Pagani Zonda model from a few years earlier, for the obvious reason that it’s well over 1/4 heavier, but it could definitely move – in fact, it was faster in real life than in many shots in the video, because only after the filming I’ve found that loose cables made 2 of the 4 RC motors not work in several shots. Yes, there are shots in the video where the model drives at half of its full power.

Functionally speaking, there was a number of functions that didn’t really add much, they were just added because I had an idea on how to make them work. This includes first and foremost the front axle with adjustable caster angle. The entire front axle unit was mounted to the chassis via a joint going through its middle, and two small linear actuators could tilt it forward or backward. It wasn’t a very practical function, and it made the model needlessly complicated. For example, I couldn’t connect the steering wheel to the actual steering system, and I had to use a secondary PF Servo motor to control the aero flaps. Since the entire rear half of the chassis was taken by the RC motors, it left just enough room to connect a PF Servo in the chassis to the front axle using a CV joint that could stretch if needed, depending on the front axle’s angle. The chassis was simply too short to connect anything else to this particular Servo motor, so I’ve added another one, atop the actual steering system, and ran the long shaft that controls front and rear flaps through it.
Another technical curio was the braking system – it wasn’t much needed or much helpful, but I’ve added it because I wanted the aero flaps to react to something more than just the steering system. The actual brakes consisted of 2 small pneumatic cylinders build into the rear suspension so that they could work regardless of its position, and each cylinder would press a rubber axle joiner against the inner side of a rear tire when activated. This was reasonably effective, but more when driving backwards than when driving forwards, due to cylinder’s asymmetrical position relatively to the tire. In order to make the entire complex pneumatic system, which included 2 more small cylinders (1 in the front aero flaps unit, 1 in the rear aero flaps unit), act instantly, it was powered from an airtank which had to be previously filled using a manual pump behind the driver’s seat. Then the brakes could be activated remotely thanks to a PF M motor which controlled a pneumatic valve coming out of the airtank. They reaction of the entire system was very quick thanks to the high pressure in the airtank and small volume of the pneumatic cylinders, but it depended on the airtank being pre-filled by hand. A full airtank was sufficient for 4-5 activations of the brakes.
The other motors included a single PF M motor that would shift the transmission between high and low gear (ratios 1.4:1 and 3:89:1, respectively) and a Micromotor which was controlling a 9V electric switch and thus turn the reverse lights on or off depending on the direction of driving.
Building the model was an interesting, if tedious experience, and I was very grateful for help from Chrome Brick City (custom chromed Lego pieces) and Seven Studs (3D-printed covers for Lego wheels) and of course for the ability to use SBrick. The model, however, was clearly overengineered and would be probably better with a few functions less.
Work in progress photos:


Photos:


Video:
Media coverage:
AutoKult (Polish), Hobby Media (Italian), The Brothers Brick, The Lego Car Blog
