Crawler

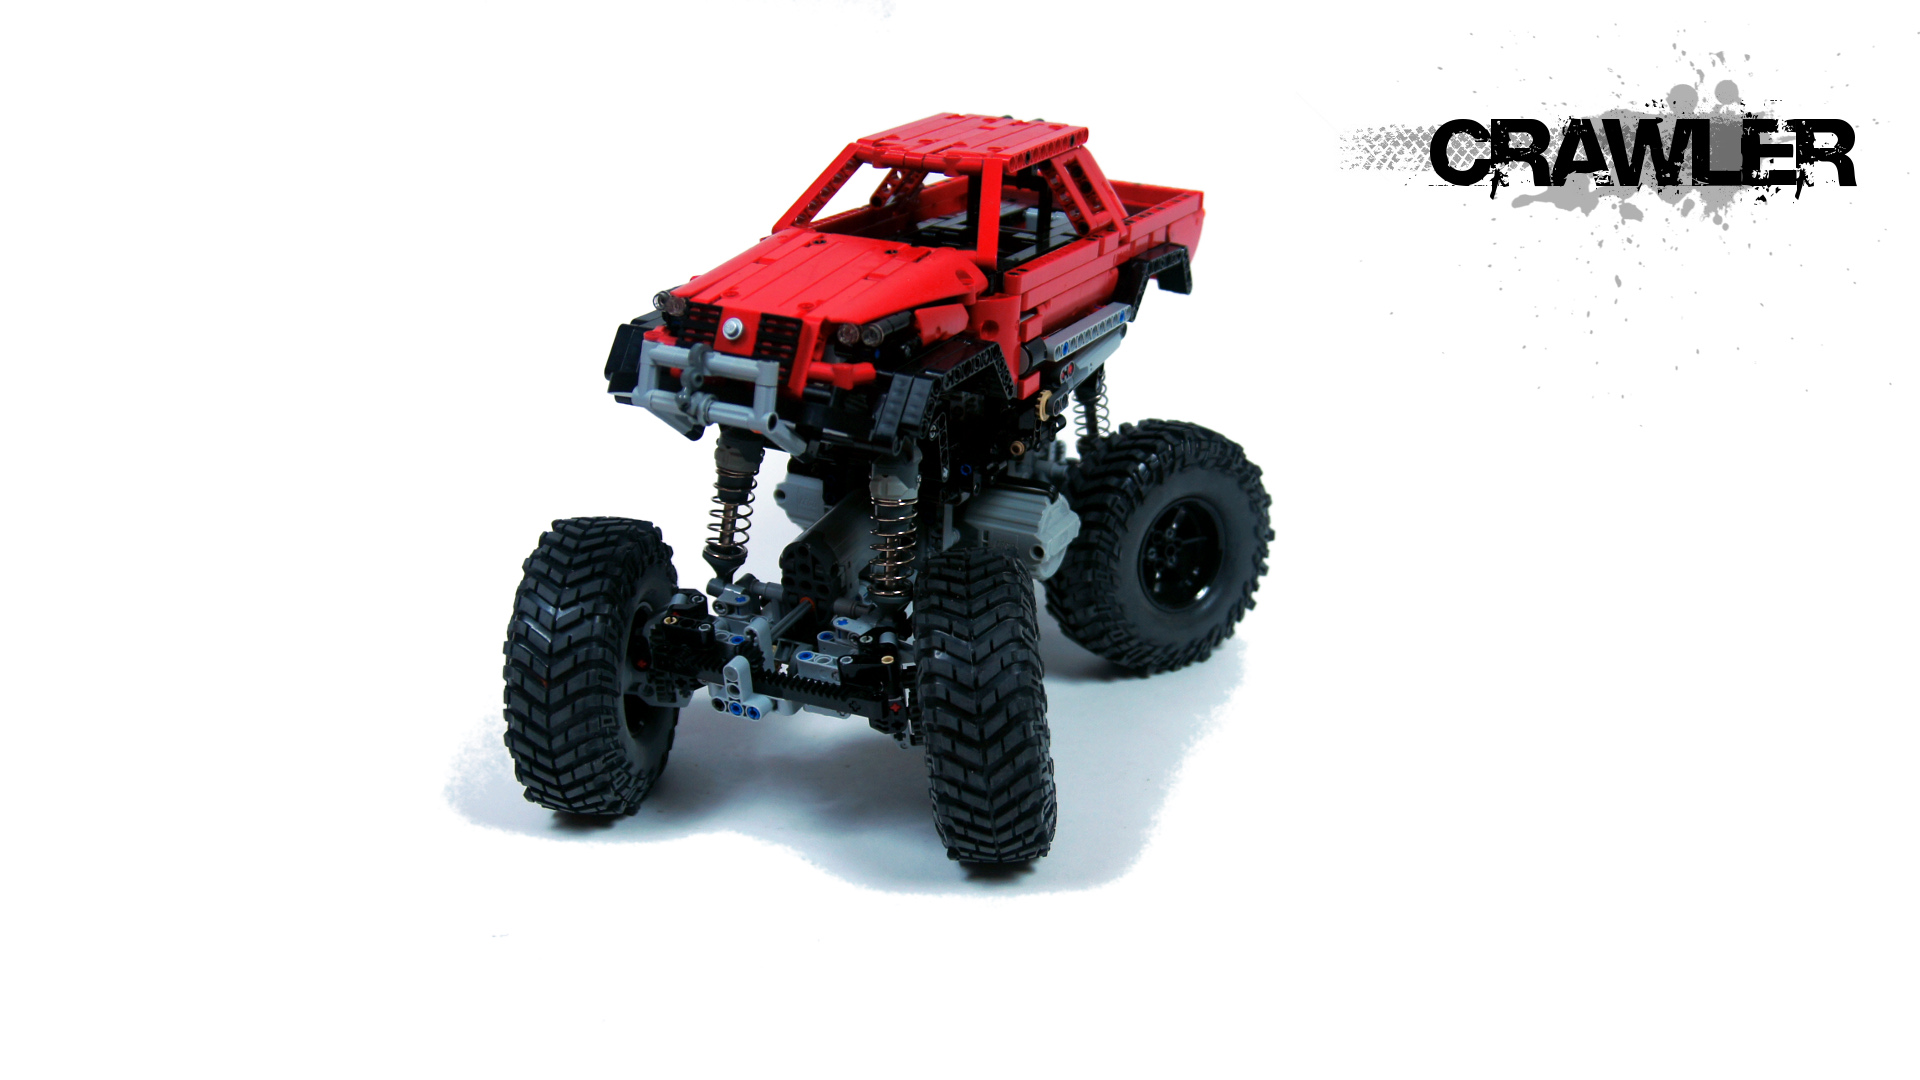
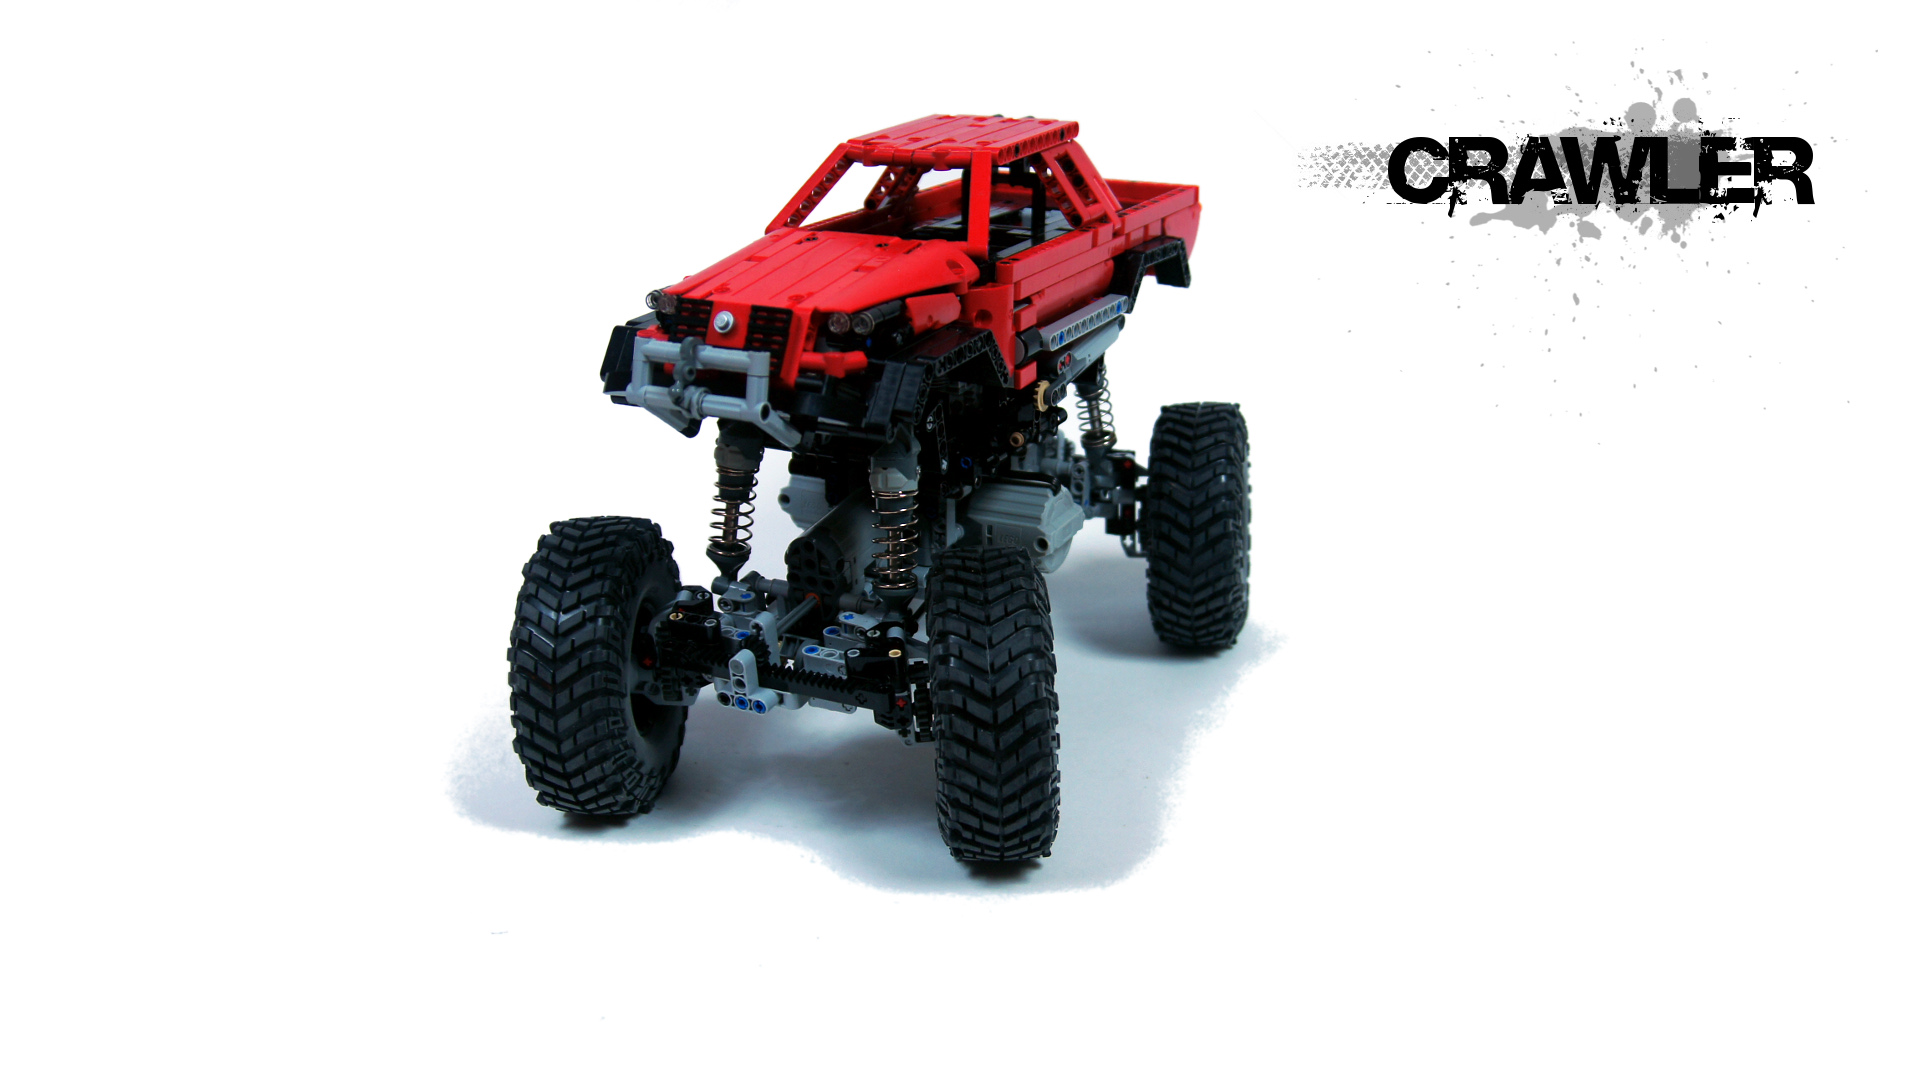
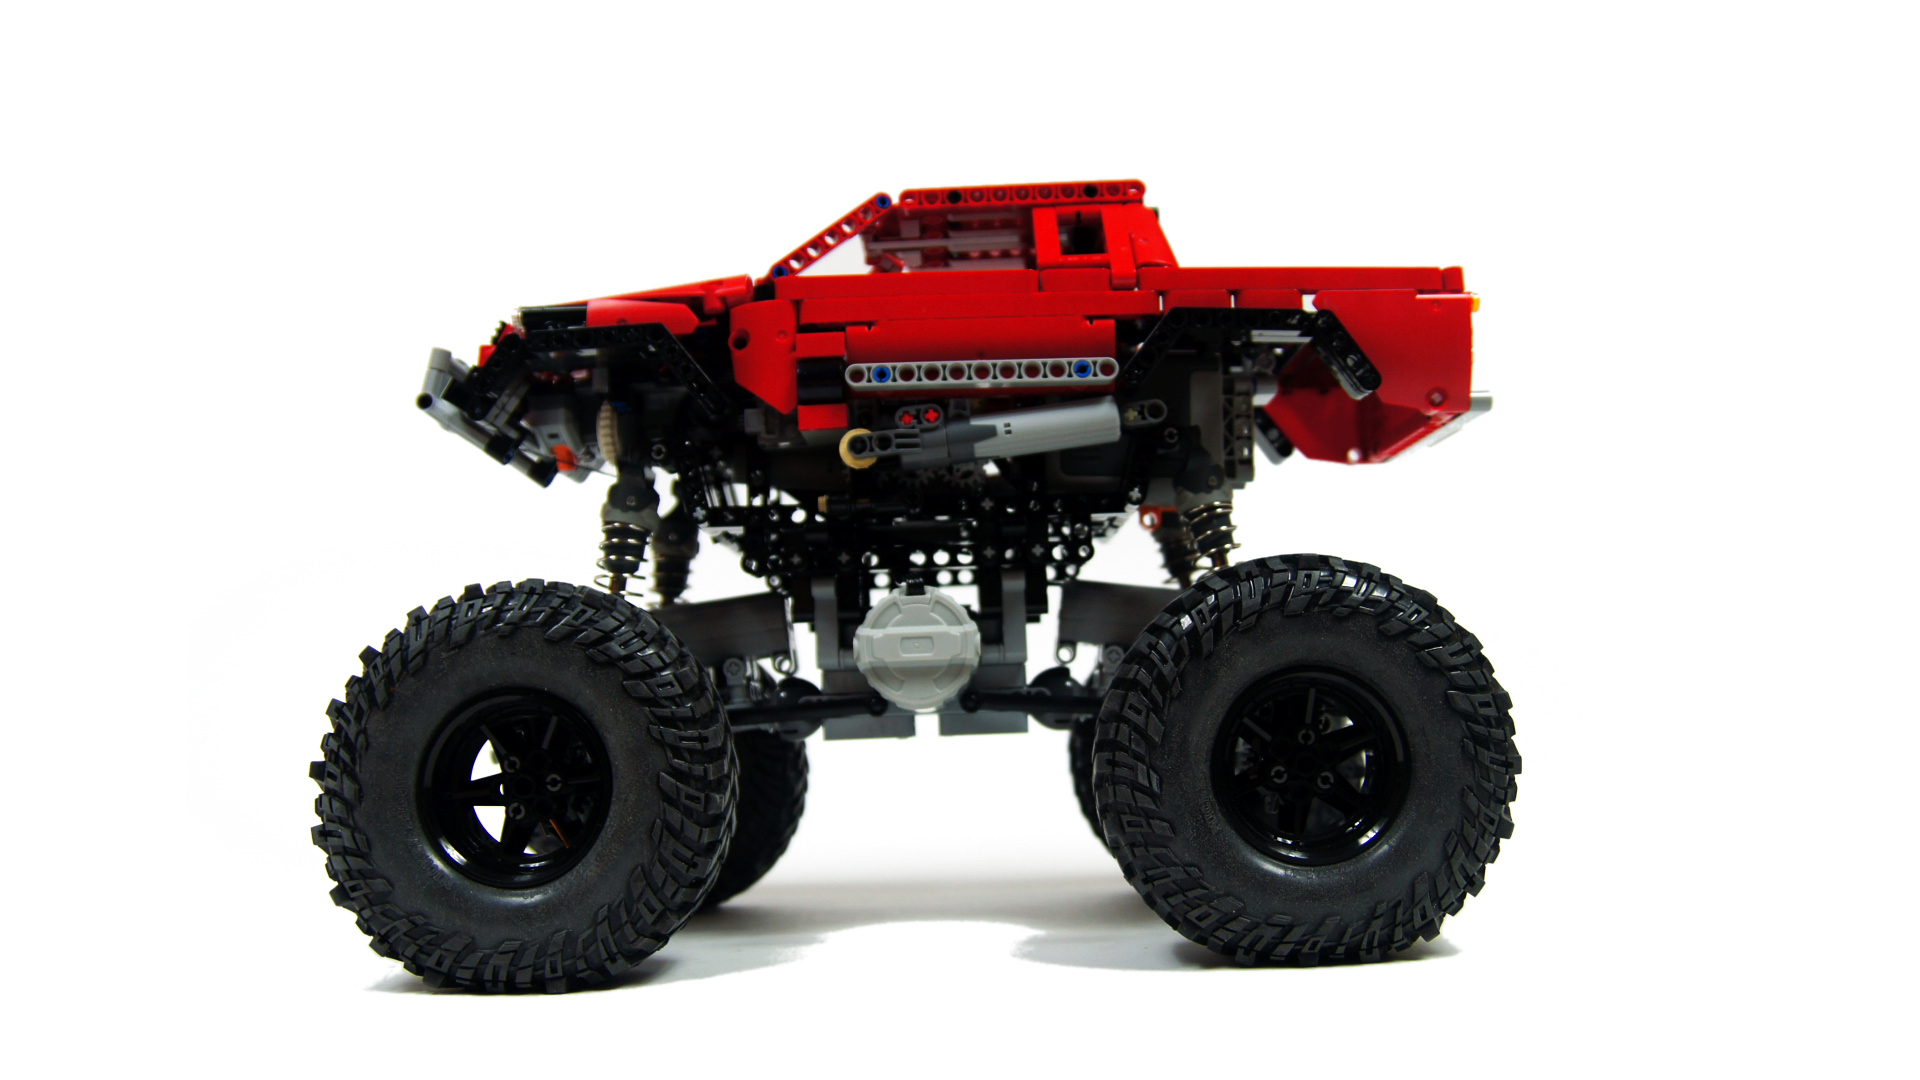
My first proper crawler built to test custom tires and adjustable Lego shock absorbers. Features 4x4x4 drive and steering, full suspension, 2 steering modes, and adjustable ground clearance.
Datasheet:
Completion date: 10/12/2014
Power: electric (Power Functions)
Dimensions: length 46 studs / width 27 studs / height 33 studs
Weight: 1.933 kg
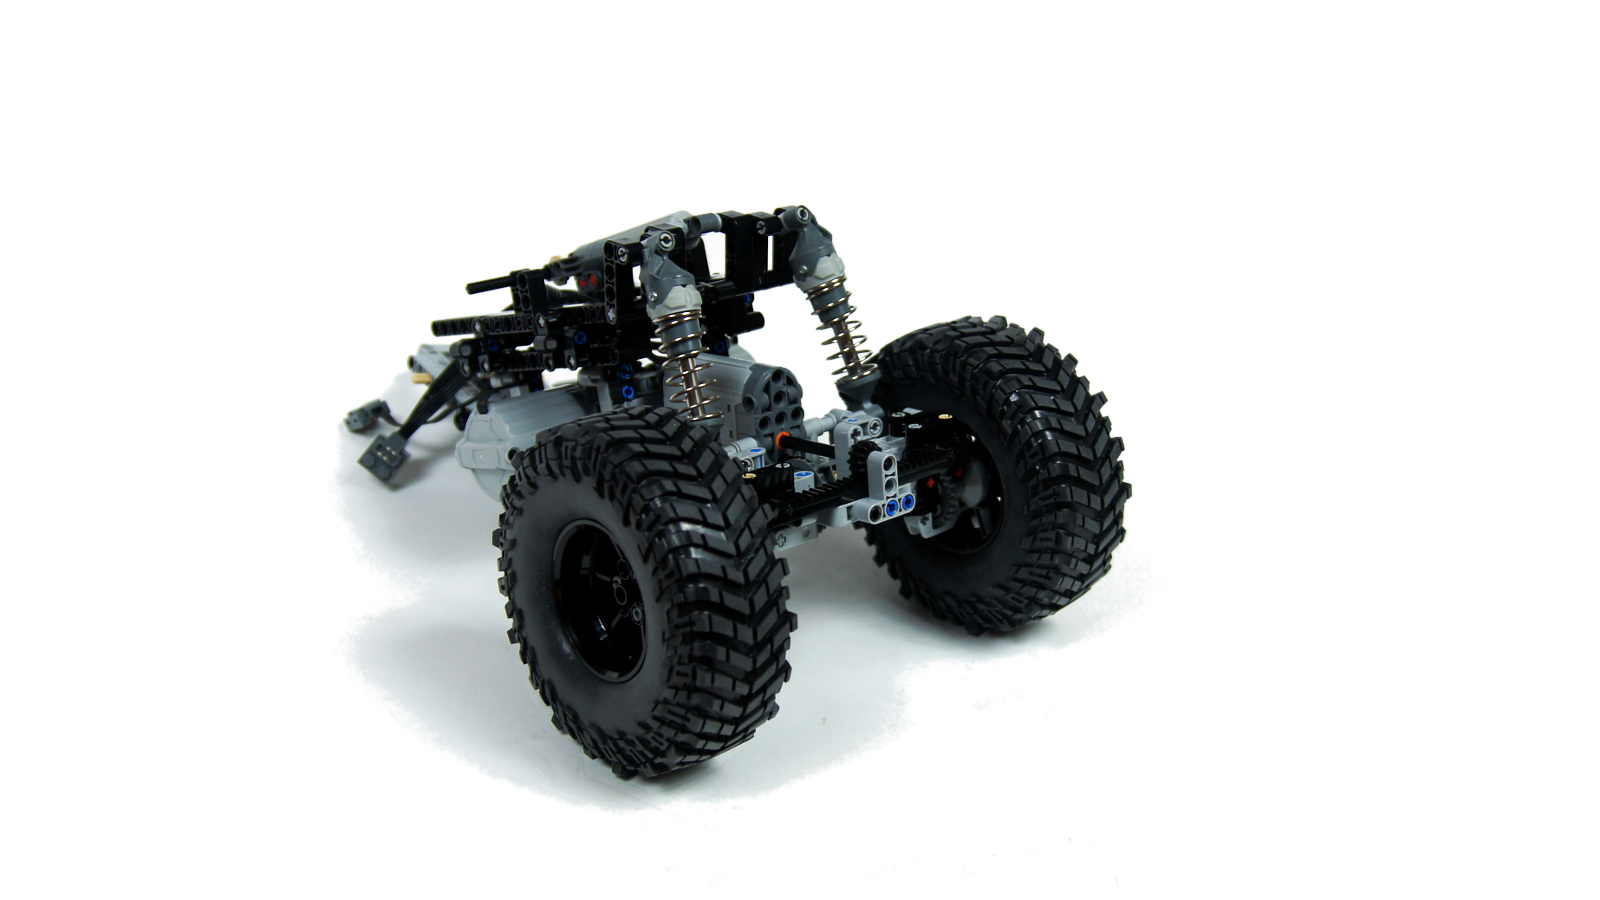
Suspension: live axles
Propulsion: 2 x PF XL motor geared 7:1
Motors: 2 x PF XL, 2 x PF M, 2 x PF Servo
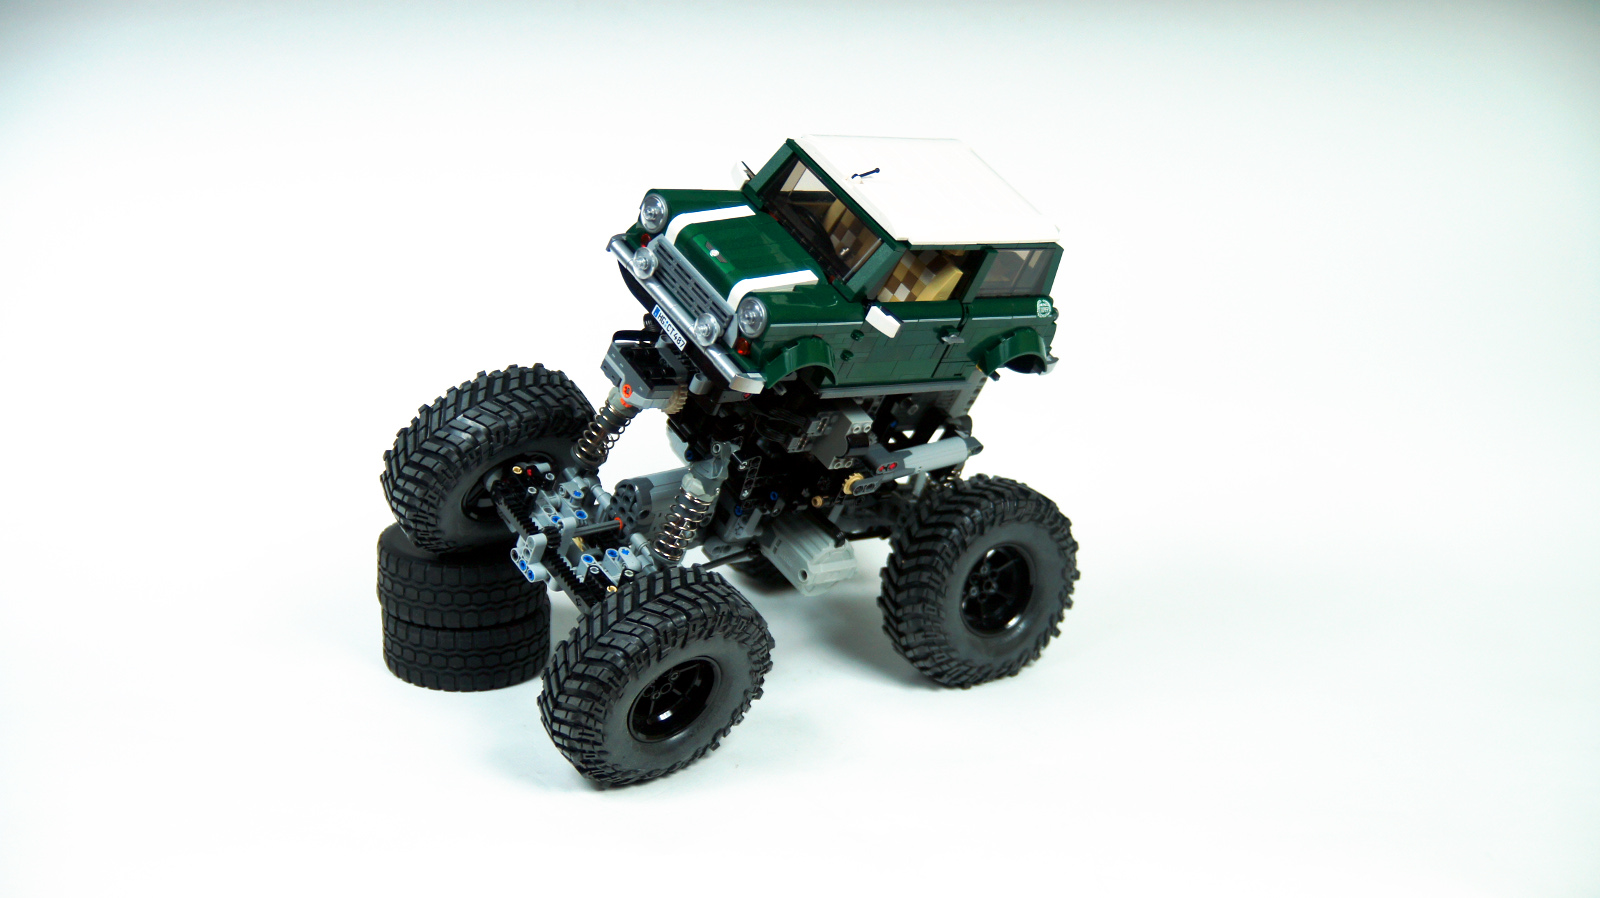
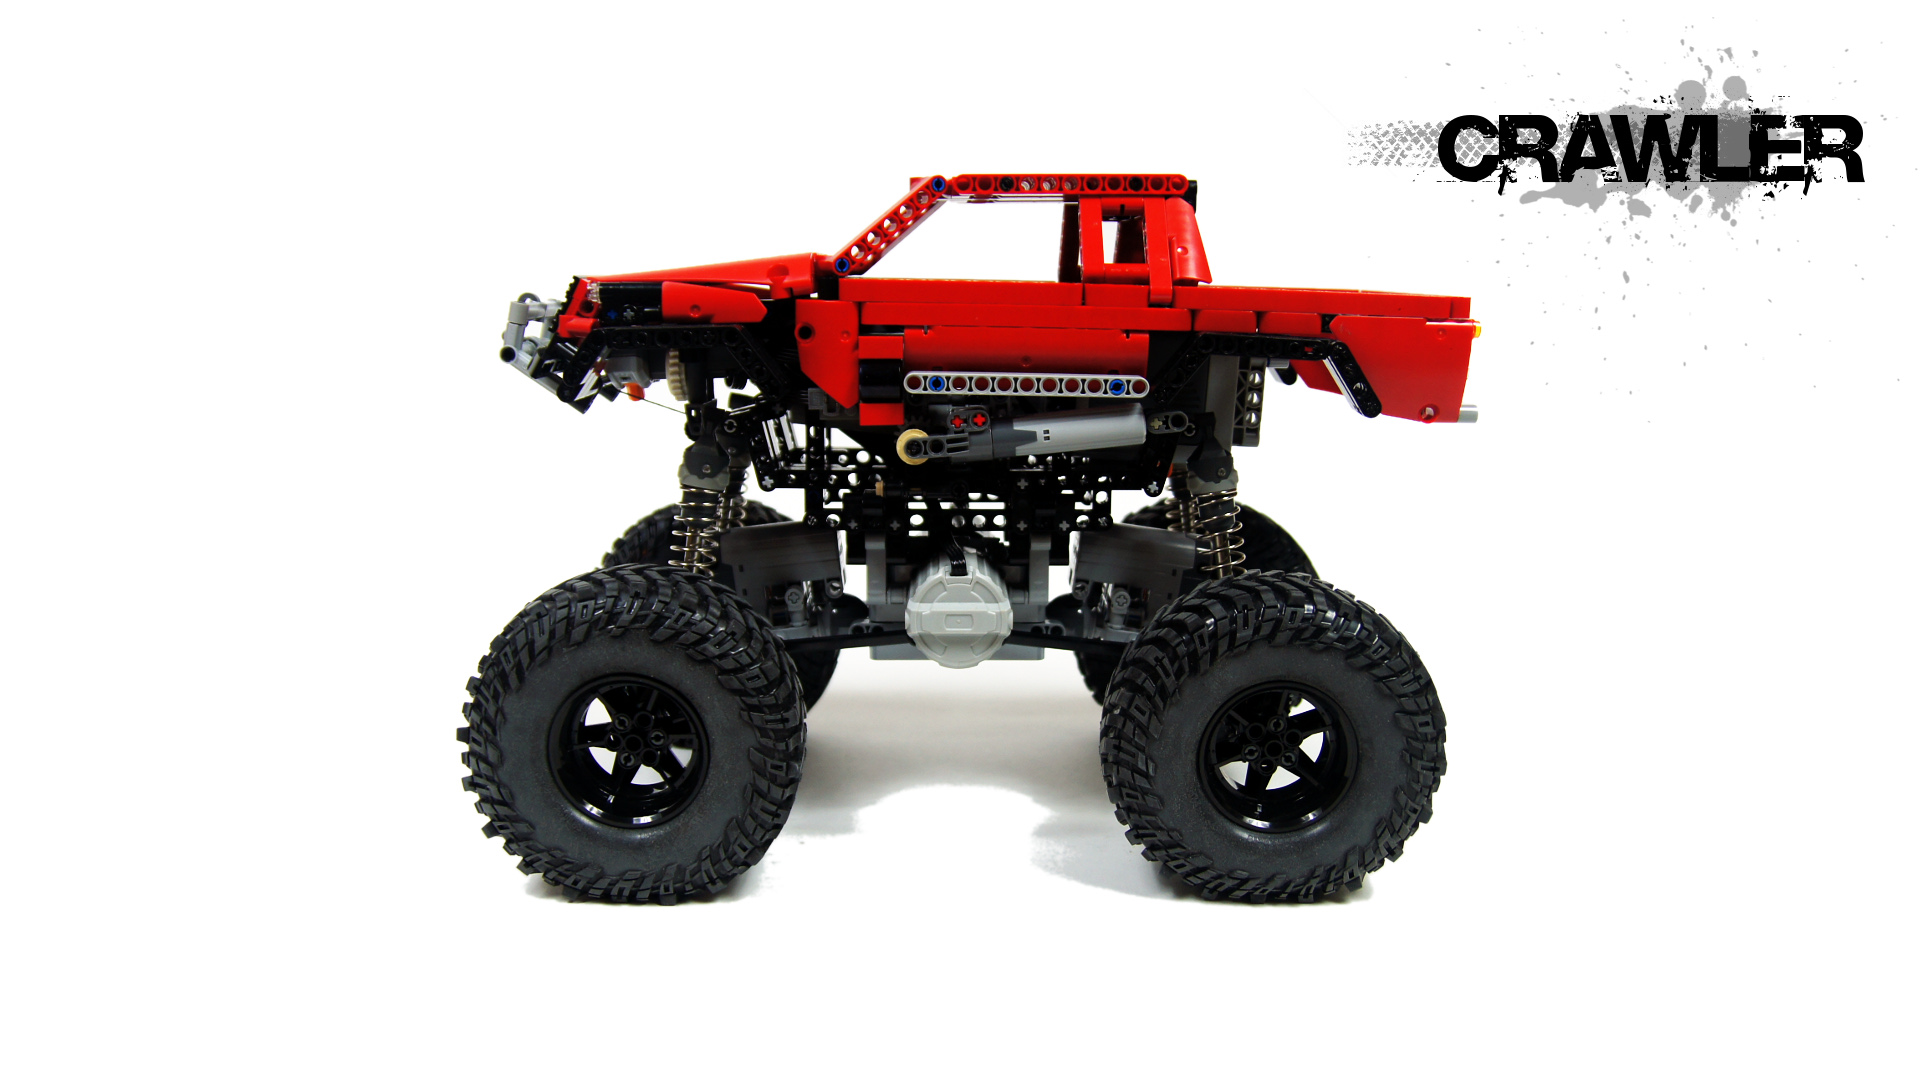
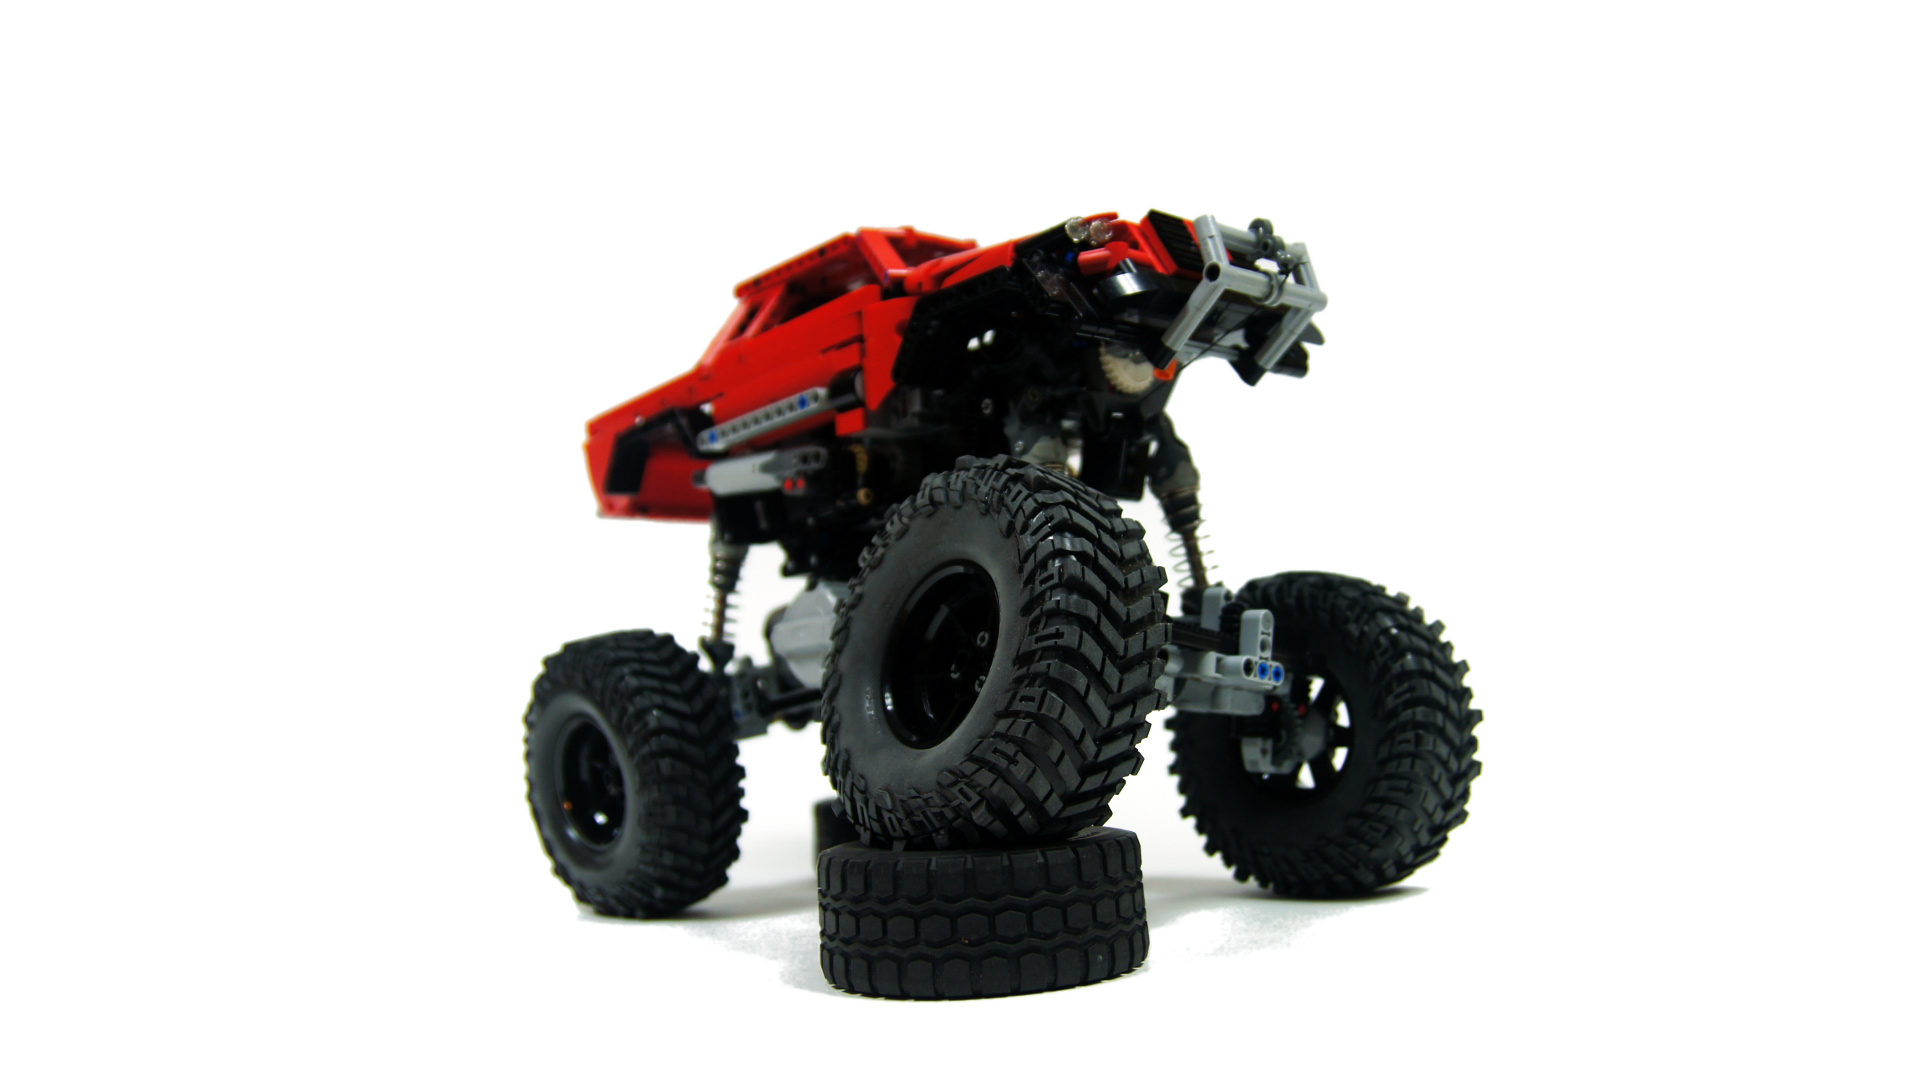
For a while now I’ve been testing custom tires. It has been discovered by someone that most tires for RC cars in 1.9″ standard fit Lego 56mm rims quite well. In this particular case, I wanted to test Baja Claw TTC tires by RC4WD, which are enormous, rather soft and very, very grippy. At the same time, I used this opportunity to test Lego 11.5L adjustable shock absorbers which I only acquired recently.
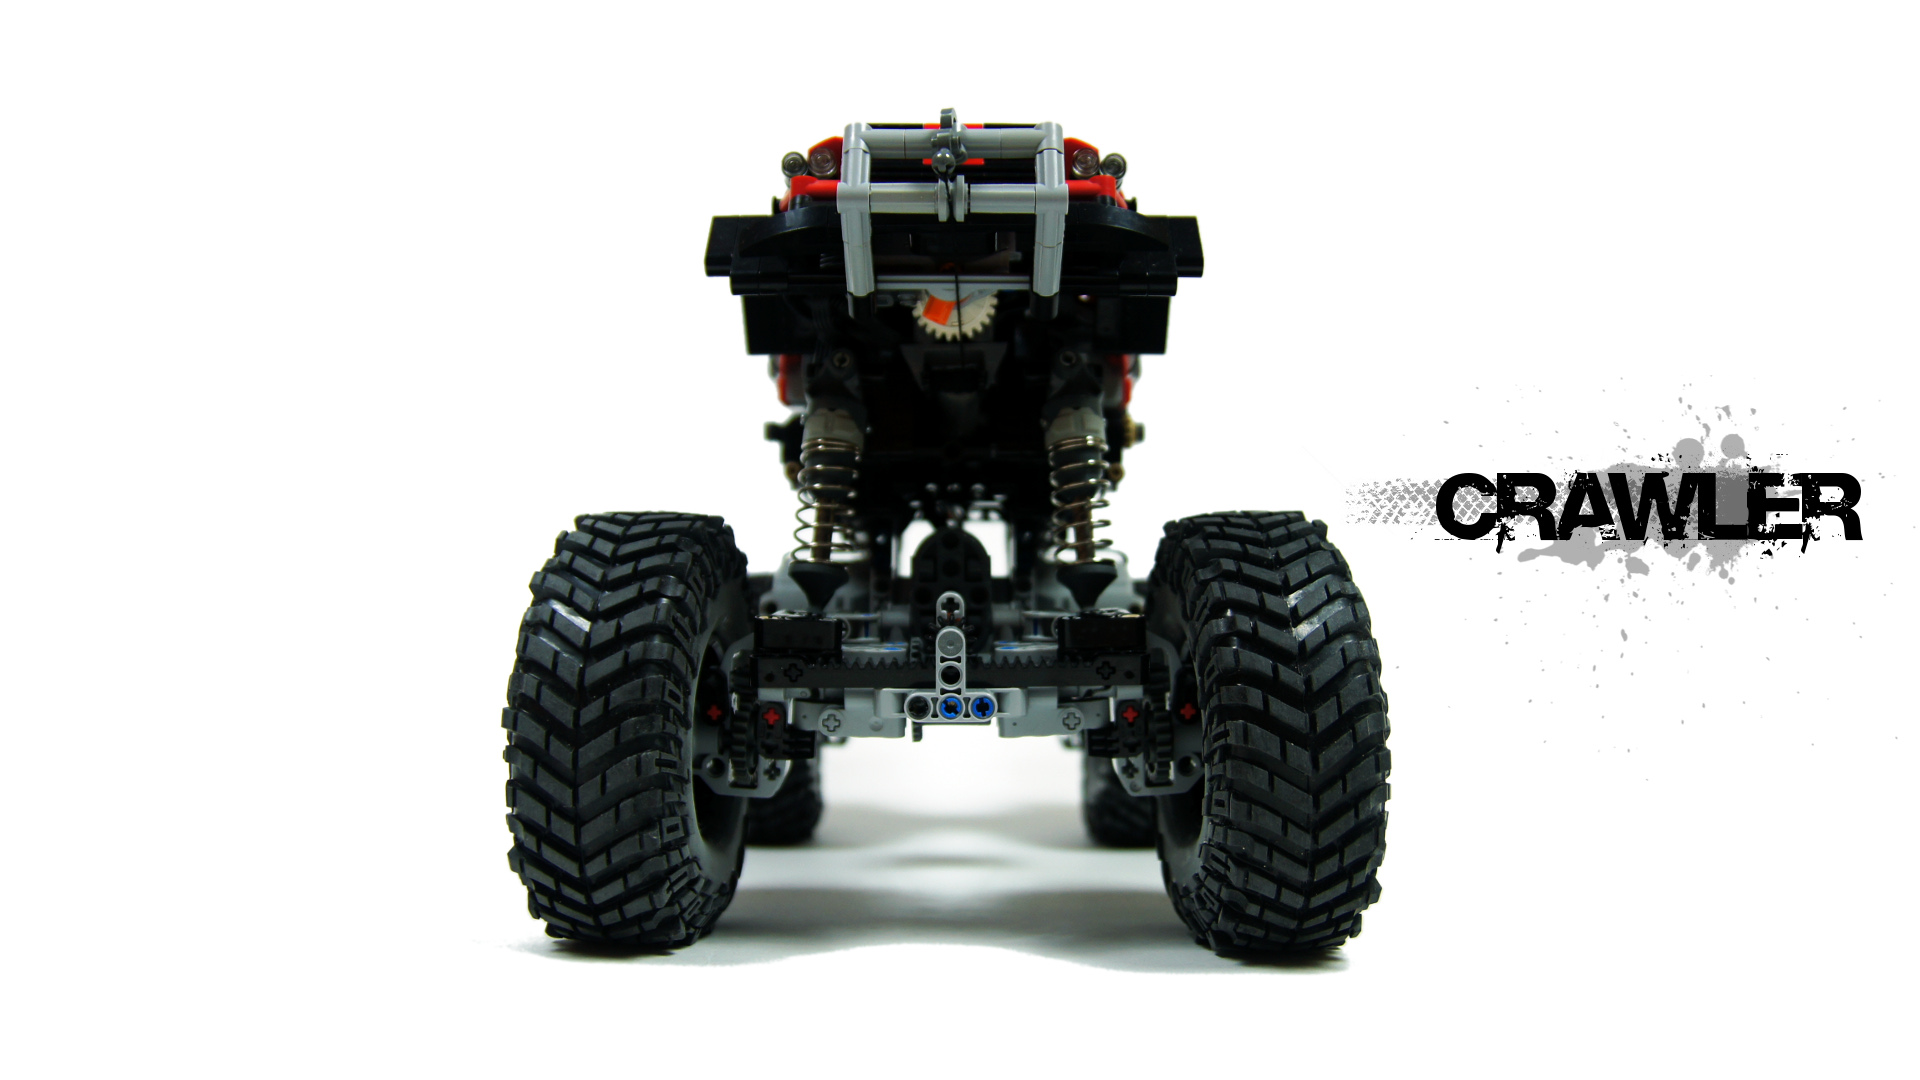
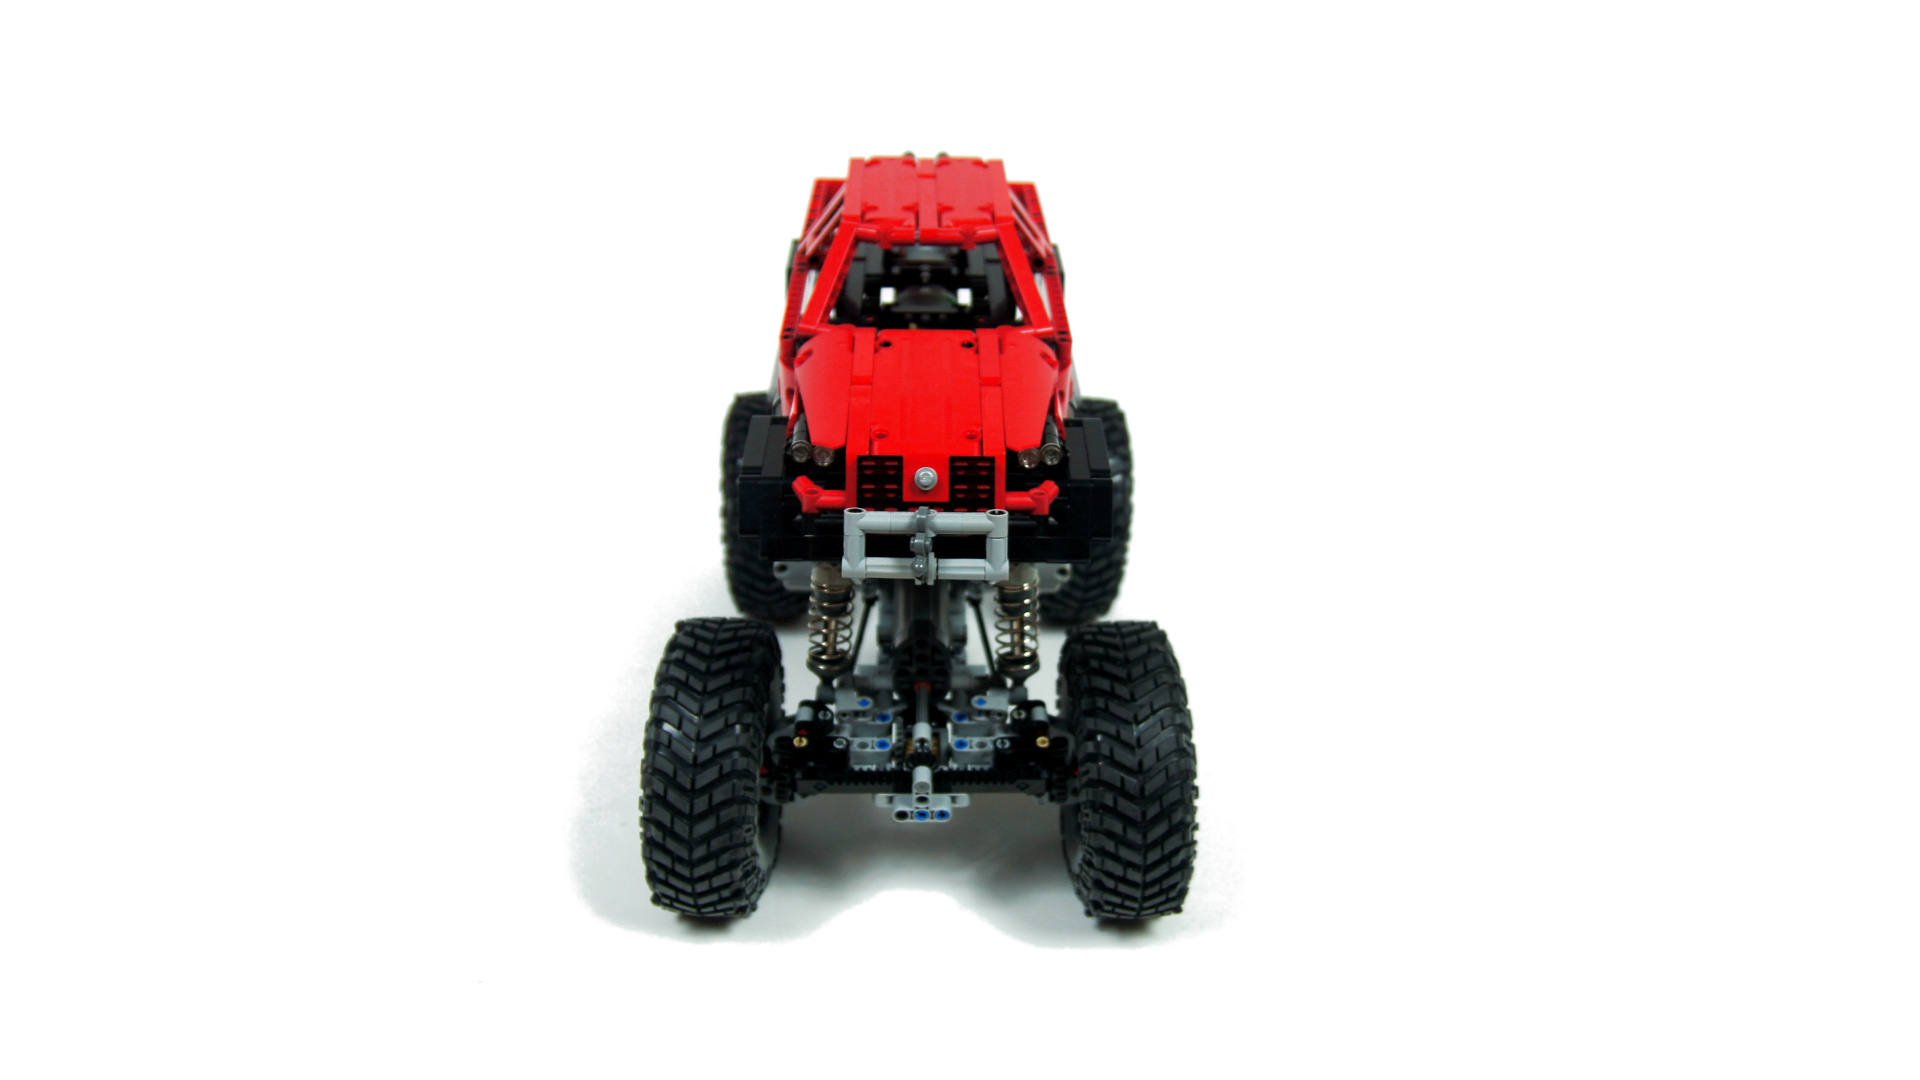
The chassis was typical for a crawler, with two live axles connected to the body by power joints and 9L links. The configuration looked pretty much like inverted version of the Lego 9398 Crawler, with two propulsion motors sitting in the middle of the chassis and one steering motor integrated into each axle. The two Servo motors were coupled, but the rear one was connected to a switch which could be switched remotely by a PF M motor. This allowed two steering modes: regular and crab steering, changed remotely on the fly, and since the switch was easy to access, it could be switched off manually, disabling the rear axle’s steering and making the model steer like a regular car.
The shock absorbers were easy to access for adjustments. The adjusting was easy enough, but had to be done manually and on each absorber separately. The difference in hardness after changing it was huge, but the problem with the 11.5L shocks is that they have only soft and hard setting, with nothing in between. The upper ends of all absorbers were connected to levers held at angle by three large linear actuators. All three actuators were synchronized and controlled by another PF M motor, thus allowing to change the ground clearance remotely. The difference in clearance wasn’t big, just under 4 studs, and the entire mechanism made the chassis taller, so the adjustment worked actually between tall/very tall positions.
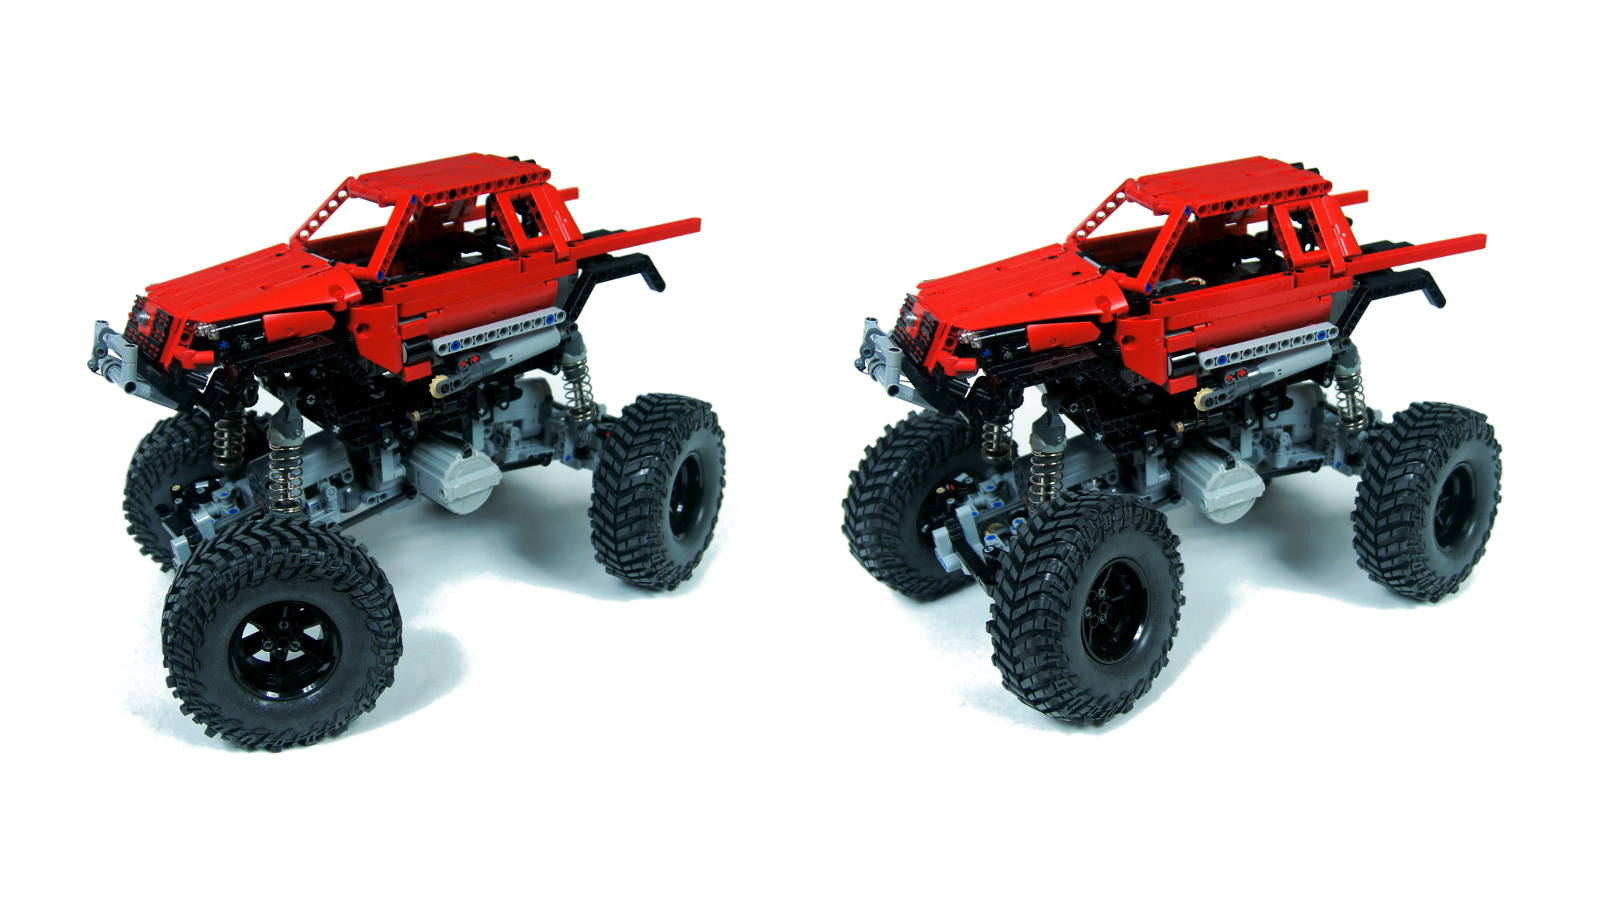
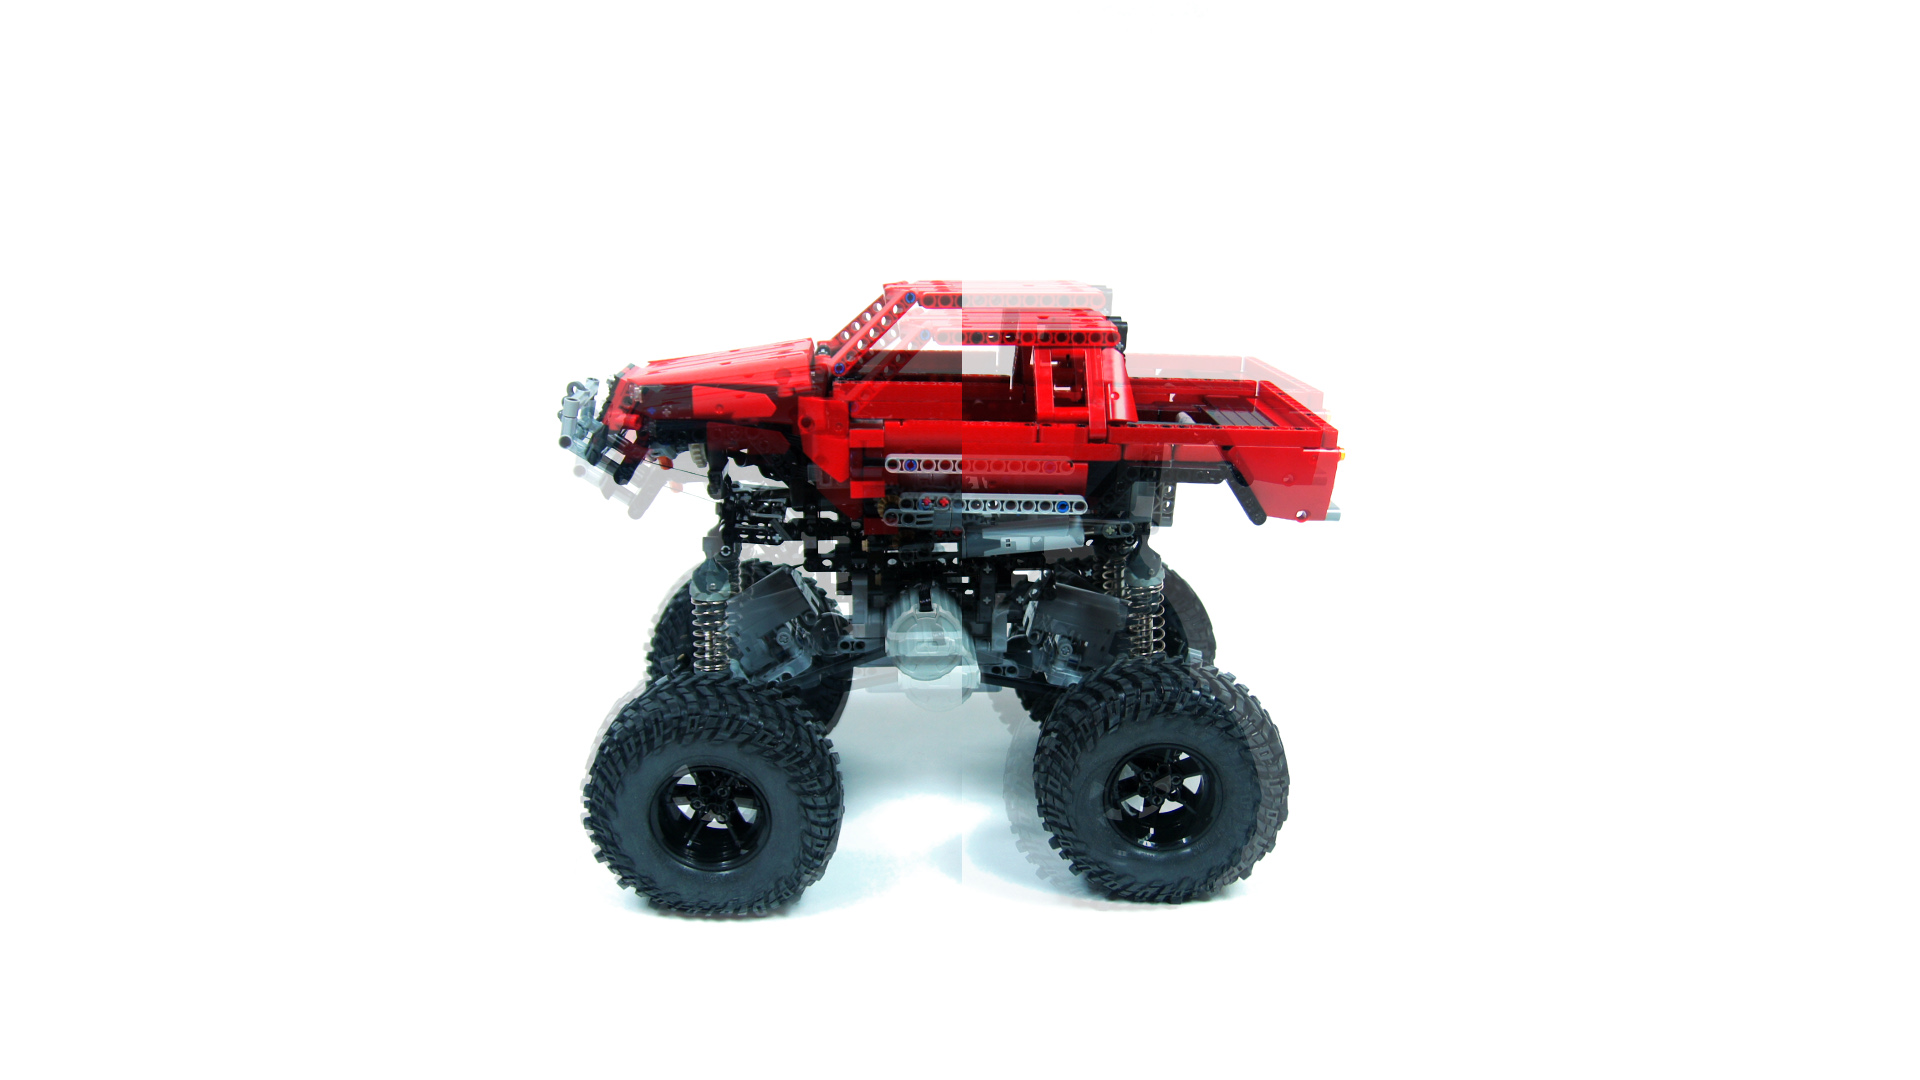
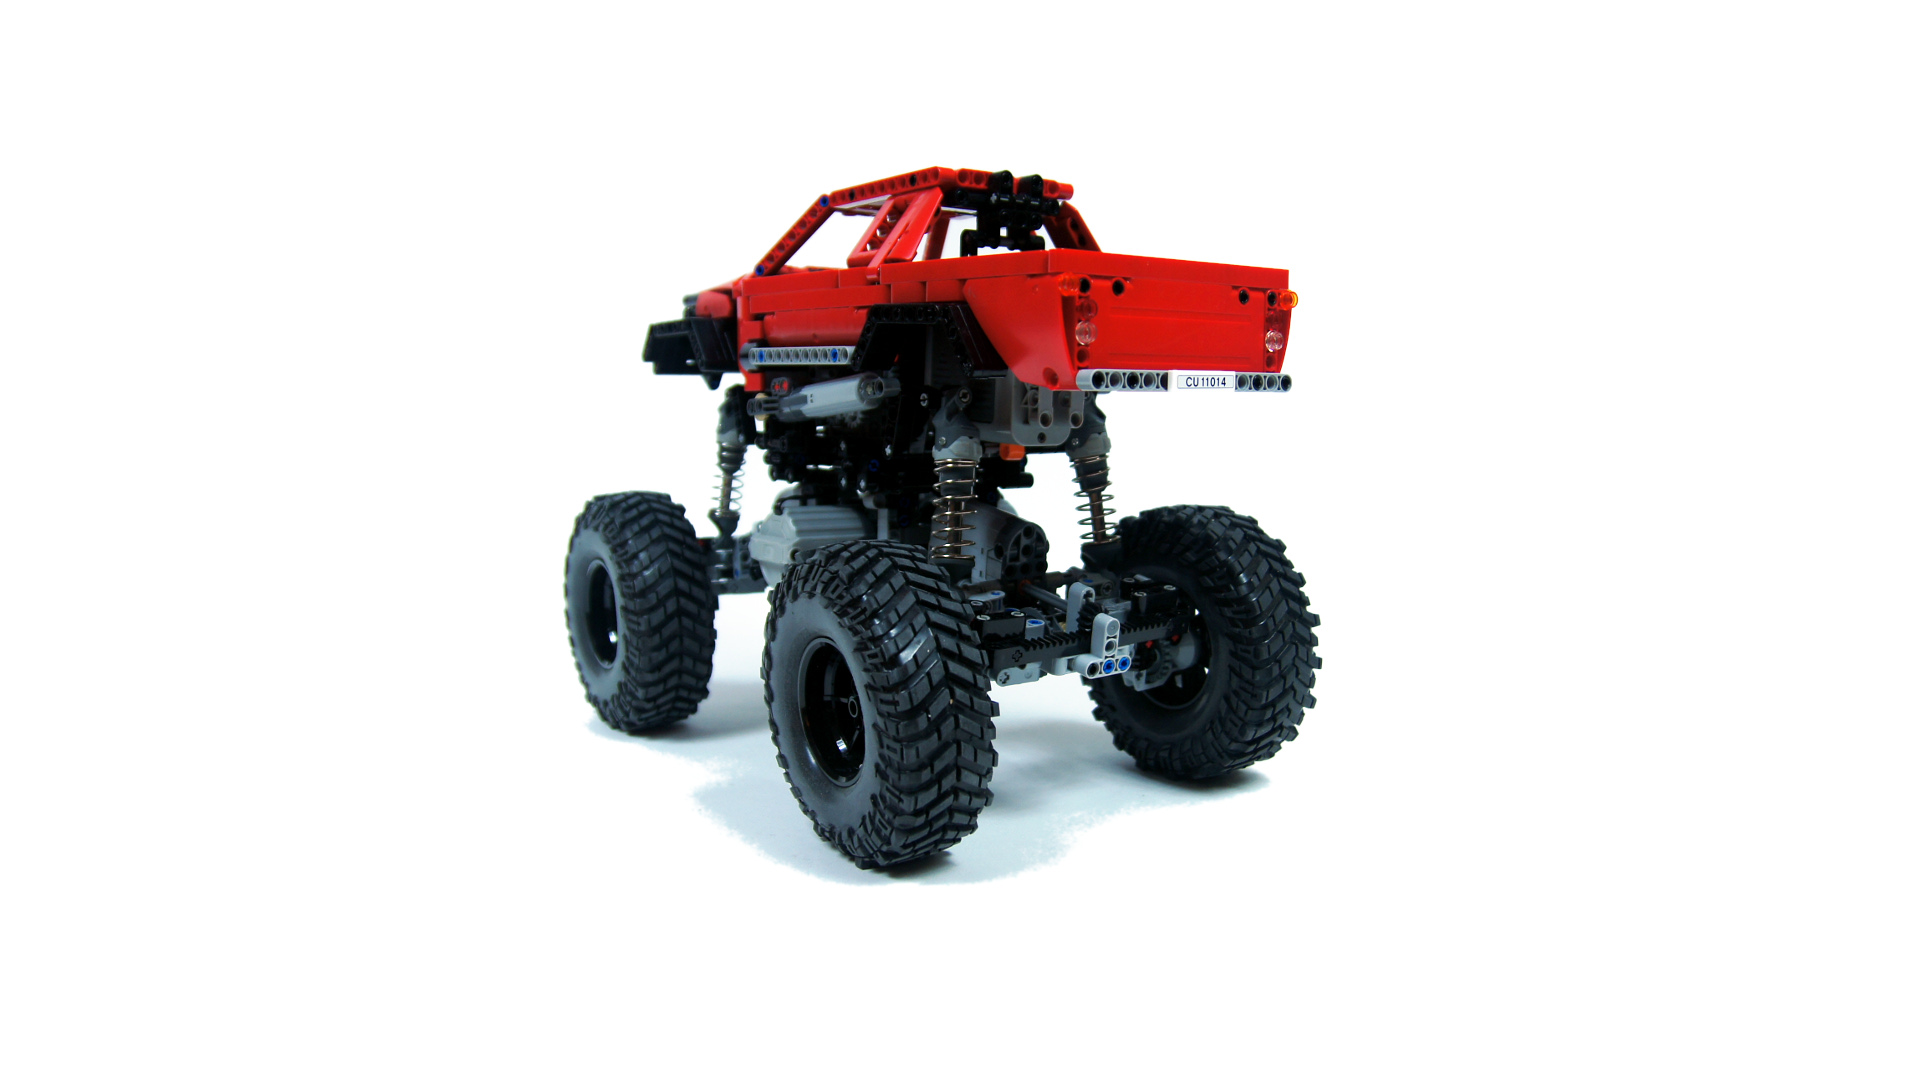
Choosing the body was a long process. Initially, I got inspired by the recent Mad Max 4 trailers to use a Volkswagen Bug body, which would look cool with the enormous wheels. However, upon seeing some Technic-styled Volkswagen Bugs I decide I can’t make it look well enough. I have then tried to install the body of the Lego 10242 Mini Cooper set on top of the chassis, and it looked great but turned out very top-heavy and wobbly. Eventually, I settled on a simple generic pickup truck body that was lighter than the Mini Cooper and could be installed lower on the chassis. The winch in front was fake, added only for the looks – in fact, the only space where it could be installed was taken by the steering modes switch.
I did not expect superb performance from the model, given its tall silhouette and the presence of differentials, which proved necessary, and the fact that the giant wheels exerted enough stress on the drivetrain to bend one u-joint in half during tests. When tested outdoors, though, it actually surprised me. It was stabler than I anticipated, the traction provided by tires was far superior to that of any Lego wheels, the suspension worked correctly (although clearly it would work better under heavier body) and the drivetrain proved trouble-free and unstoppable. Not a sinle piece got damaged, and no mechanical failures occurred. When tested indoors, the V2 receiver sometimes cut the power off from the two PF XL motors when under a lot of strain. Outdoors, when driving at -3ºC (26.6 ºF), this effect did not appear. The power supply, which relied on rechargeable AA Eneloop batteries, seemed unaffected by the temperature (I can’t say the same about my camera’s battery). The decision to put IR receivers on the sides of the body proved surprisingly good, too – I was able to drive comfortably outdoors by standing next to the model instead of following it.
All in all, while this model wasn’t particularly pretty nor innovative, I feel it met its goals. It performed quite well in difficult conditions and turned out to be a sound test bed for the tires as well as the shocks.


@Sewgway
3:1 ratio would surely help a lot, especially since it needs a very common and cheap parts.
@Sariel
I do use portal hubs of course and I am thinking as well that a high ratio there might help.However since I don’t have 4 pairs of 3:1 ratio gears I used the next 1:1667.I will check if I can salvage those gears from elsewhere and replace them.
@Sewgway
Sounds like you’re not using portal hubs with gear reduction at the wheels, are you?
@Sariel
Thanks for the swift reply!I am using the 5×5 frame and a drivetrain based on your 4-speed gearbox but modified to allow for 2 PF XL motors and up until now the U-joints failed,after fixing that now that happens.Any Ideas?
@Sewgway
It doesn’t happen to me, the gears remain meshed at all times. Either you’re not putting differential in the 5×7 frame properly, or you have some incredibly high torque there, enough to distort Lego elements.
Does the differential driving gear and differential outer gears always stay in contact?In one of my crawlers if the load is too high the two gears(gear and outer rim of differential) slip ,thus restricting me from making the most out of the torque.I do not see any structure to prevent that, so does it happen to you?How can you get around it?
I’m thinking of making ev3dev (http://www.ev3dev.org/) run on my ev3 because then I could control Sbrick with it, which would open exciting oportunities, for example the one I want to show you here. The Idea I’m having im my mind for some weeks now is a crawler like your one, but without diffs. Instead, each side’s wheels( both left/both right ones) would be powered by one Xl, and the motors speeds would be automatically calculated by the ev3, to prevent friction and wear when cornering. And that “Virtual Diff” system would alow to use the grat tires you used, too. Of course driving front/rear wheels with the same speed would make a steering like the one you used here necessary.
I think such a beast would be quite good offroad, because of the good grip AND the avoidance of diffs.
@Sariel
So far, no deformations, although the MOC has mainly been sitting on my desk. We’ll see whether the tires continue to hold up later this week, when I begin extensive field trials.
@Exobotics
Good to know 🙂 Did they deform much?
Sariel, I followed suit on your Crawler design, and recently used the Baja Claw tires on a heavy (3.18 kg) MINDSTORMS MOC; I was very pleased with how they performed. As always, thank you for your work, words, and inspiration!
I also built an offroader with unimog’s tires and only one XL. I’ll maybe make a Youtube video of it.
Merry Christmas Sariel!
@Czarek
Jest tyle różnych ciężarówek że to nie zawęża poszukiwań. Wszystko zależy od tego jakiego koloru i jakich kształtów szukasz, a koniec końców i tak najtańszy jest Bricklink.
@Sariel
Dziękuję, ale właśnie liftarmy właśnie mam tj: 9695 i 8547 i właśnie chciałbym się zabrać bardziej za modelowanie ładnej karoserii (może Truck Trial :)), bo patrząc na Twoje świetne konstrukcję np. ciężarówka Volvo FH12 do budowy używasz właśnie skosów i brick’ów.
PS: Przepraszam za zaśmiecanie strony jednak do lugpol’u nie spełniam warunków 🙂
@Czarek
Jeśli chodzi Ci o zestawy Technic to żaden. W Technicu nie występują płytki, skosy ani bricki, są tylko liftarmy i panele. Bardzo dobrym ich dawcą na chwilę obecną jest np. zestaw 42029.
Witam, chciałbym spytać Cię jaki zestaw w tym momencie jest najlepszym dawcą części, nie musi posiadać Power Functions, chodzi mi raczej o klocki konstrukcyjne np. płytki, wszelkiego rodzaju skosy i najzwyklejsze brick’i. Przepraszam, że po polsku jednak chyba lepiej tak , niż po niezrozumiałym angielskim 🙂
nice! i like how u used the 1.9 baja claws
Nice, the Dirt Crusher/Outdoor Challenger (8369/8675) springs, I love them. I like how you put so many functions in small areas, without disrupting the looking. The only thing is, that this model is not very good for Truck-Trail because of its really high balance point. but anyway, I love our builds!;)
Keep on building,
NGP
Thank you!
@Tristan Ableson
The problem is, I only have one differential of each type and this thing needs two.
Very nice model! Did you consider using the 3D-printed differential that you used for the dune buggy?
@EV3fan
Yes, Lego tires are known to hold the rims poorly. Custom RC tires have foam inserts, so they hold rims much better. No, a PF M + diff lock would take a lot of space, making the axle much larger.
When driving my friend’s 9398 I experienced that sometimes the rims spun inside the tires when driving up a hill.(the area where the rims touch the tires is very small) Did this happen to you, too?
Thank you 🙂
Did u also consider removing the rear servo and put a m motor and lock diff in there? Or was there no space?
@EV3fan
Yes, it would tear these fragile u-joints to shreds if not for the differentials.
Now, as I’ve watched the video, it’s evident to me why it has diffs: the difference of speed between inner and outer wheels is HUGE!
@EV3fan
Thanks, I put more work in the video than in some parts of the model 😉
Greatly filmed bro!