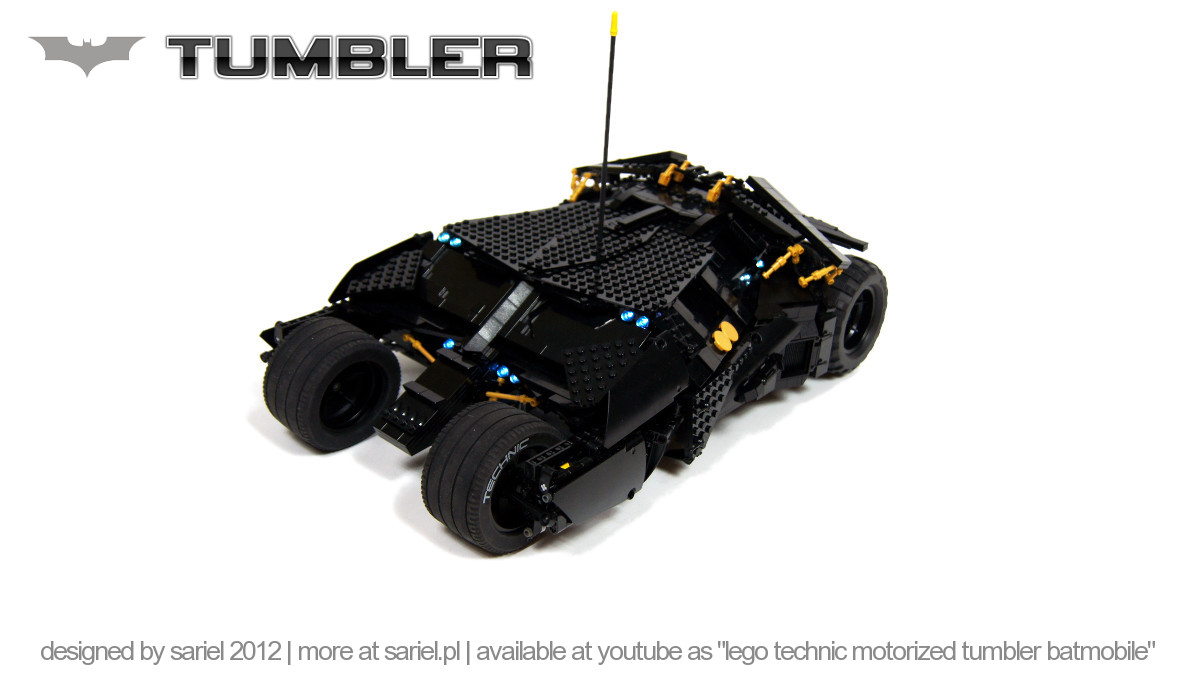
Tumbler

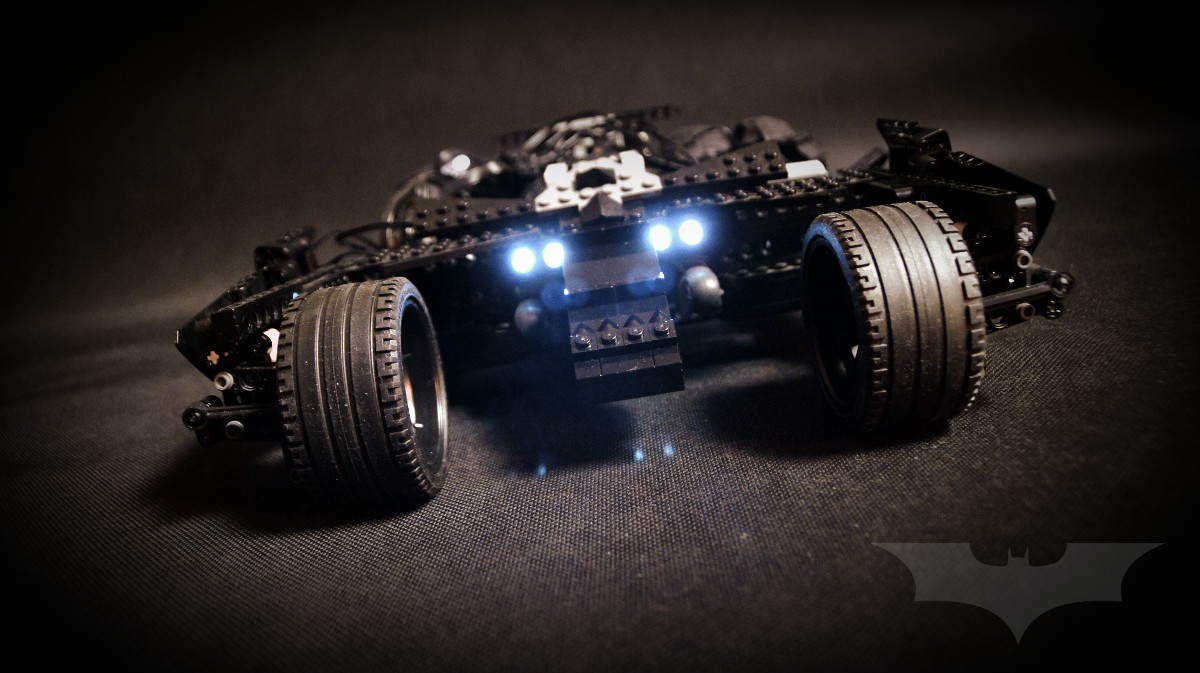
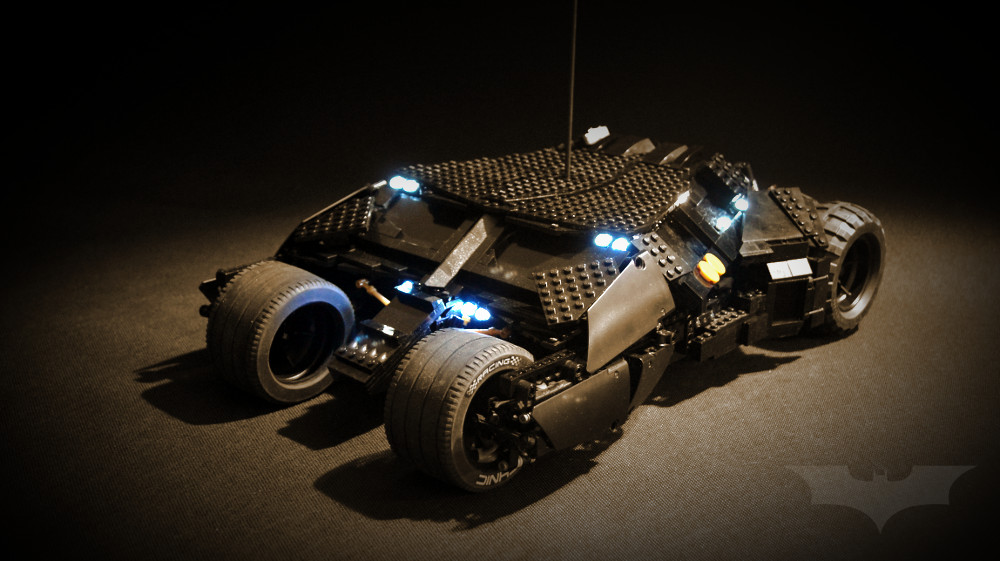
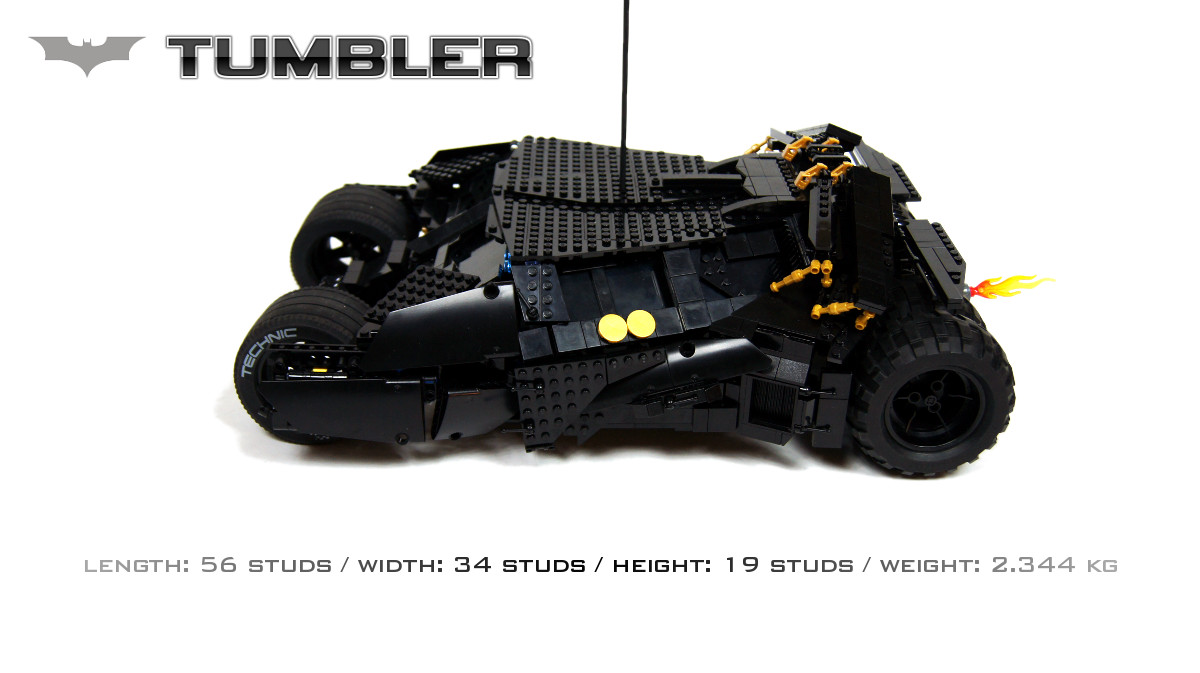
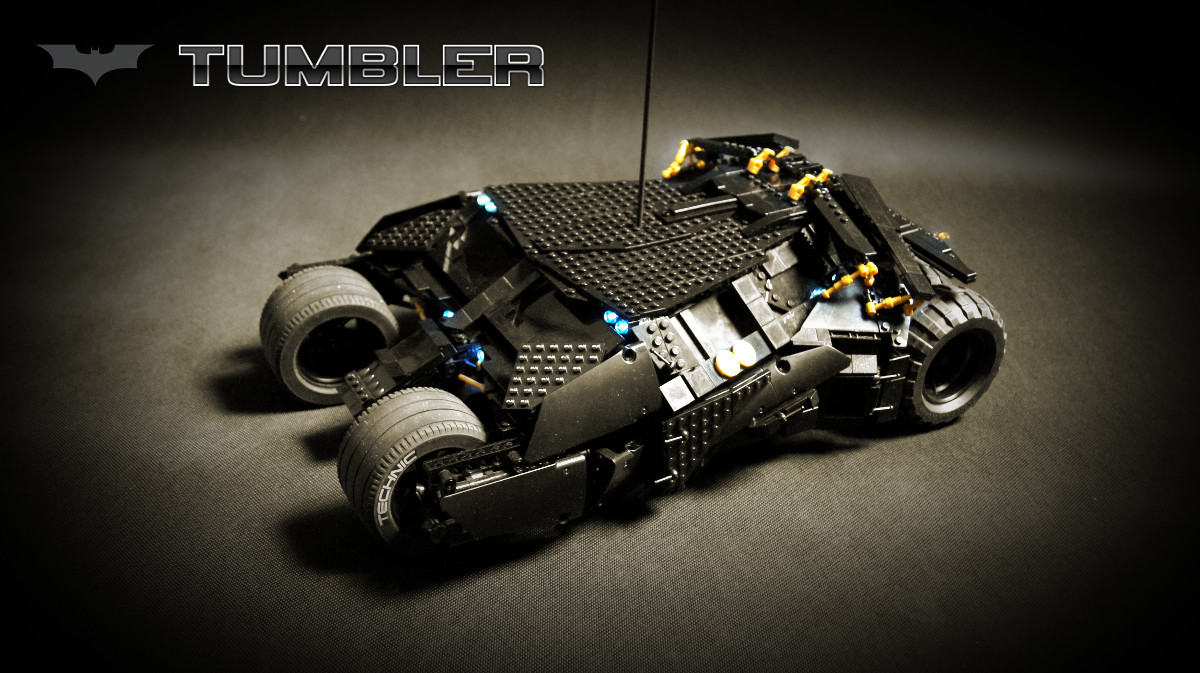
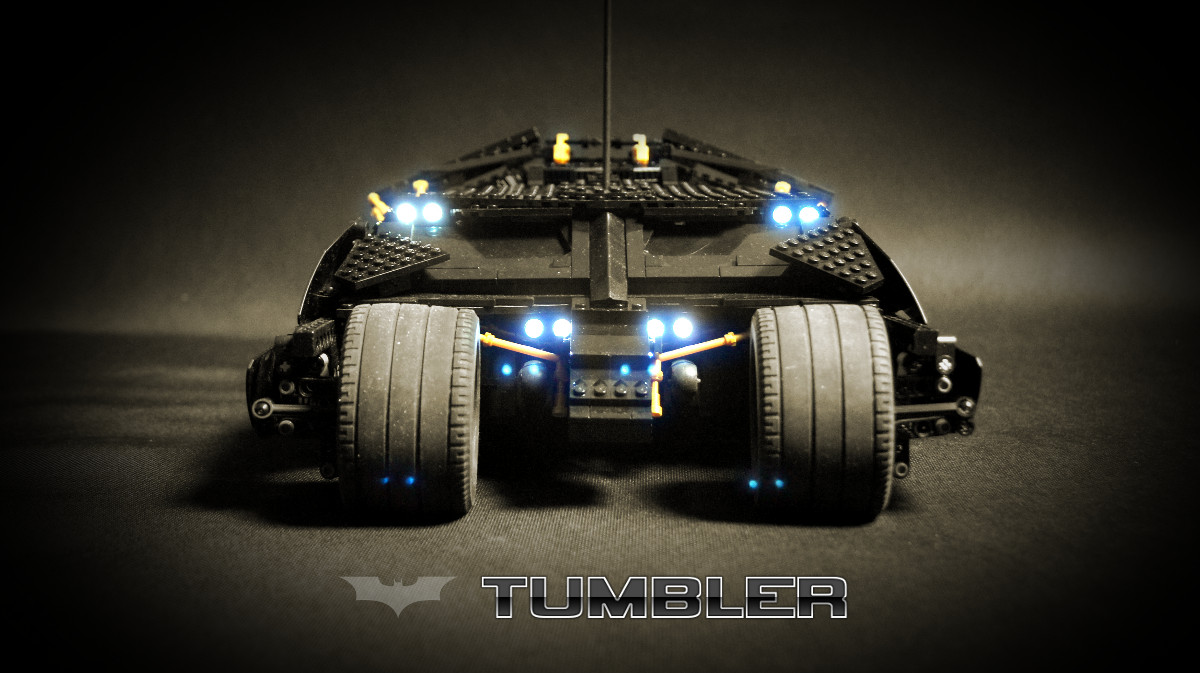
Model of the Batmobile from Chris Nolan’s Batman universe. Features full suspension, realistic steering, jet engine effect and remotely fired front cannons.
Datasheet:
Completion date: 30/11/2012
Power: electric (RC unit / battery box)
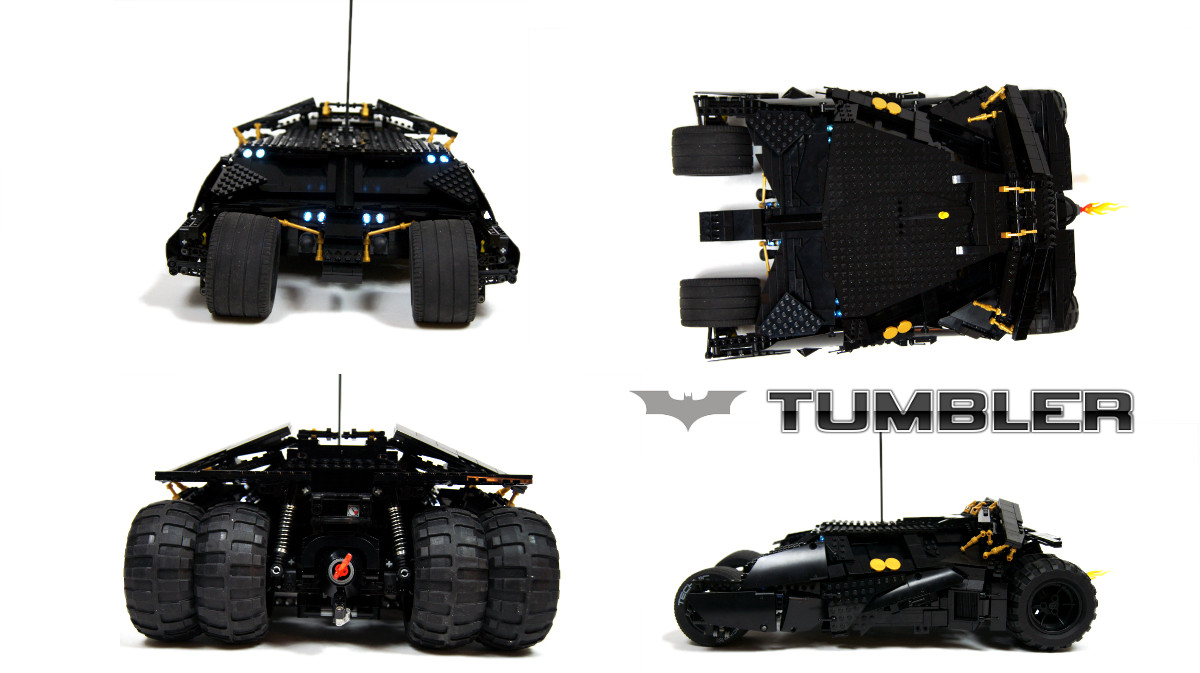
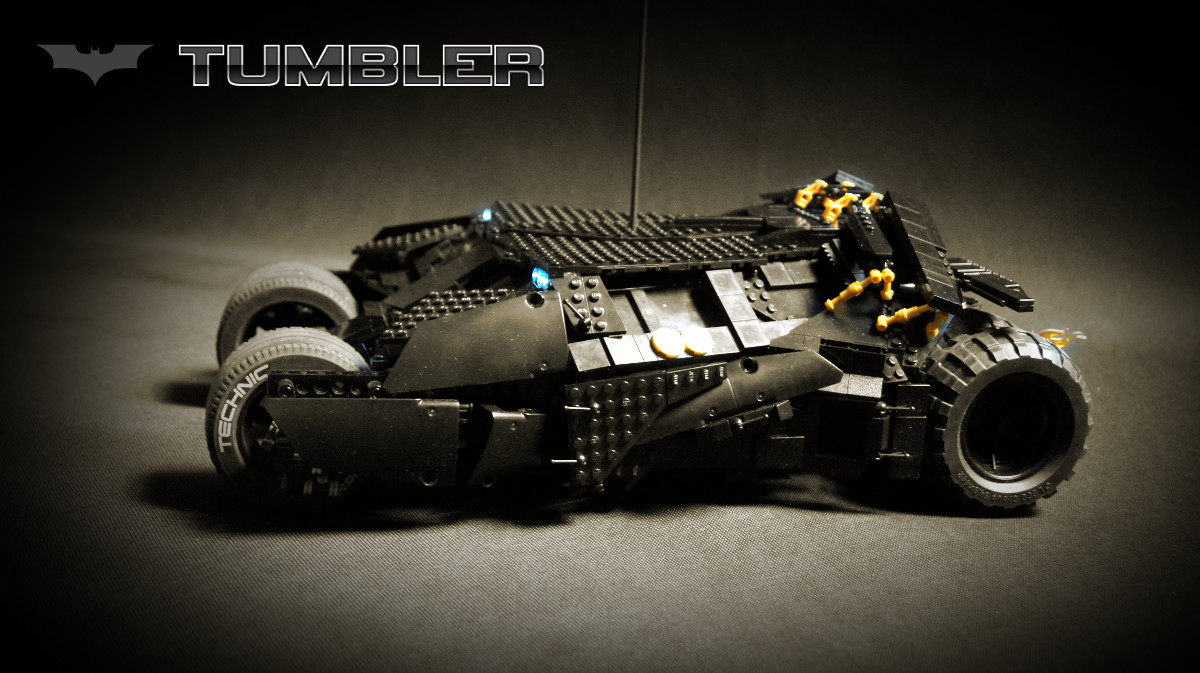
Dimensions: length 56 studs / width 34 studs / height 19 studs (not including antennae)
Weight: 2.344 kg
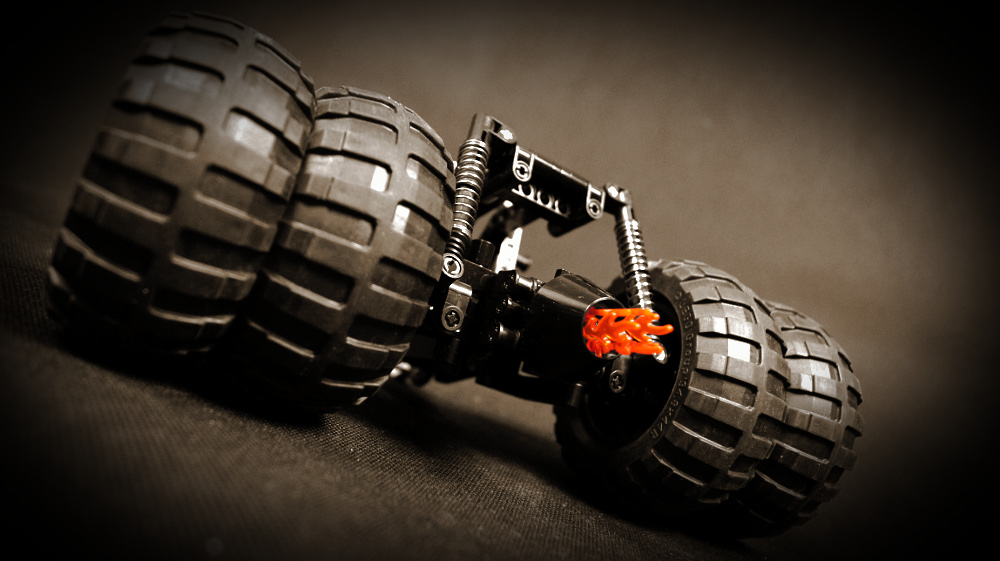
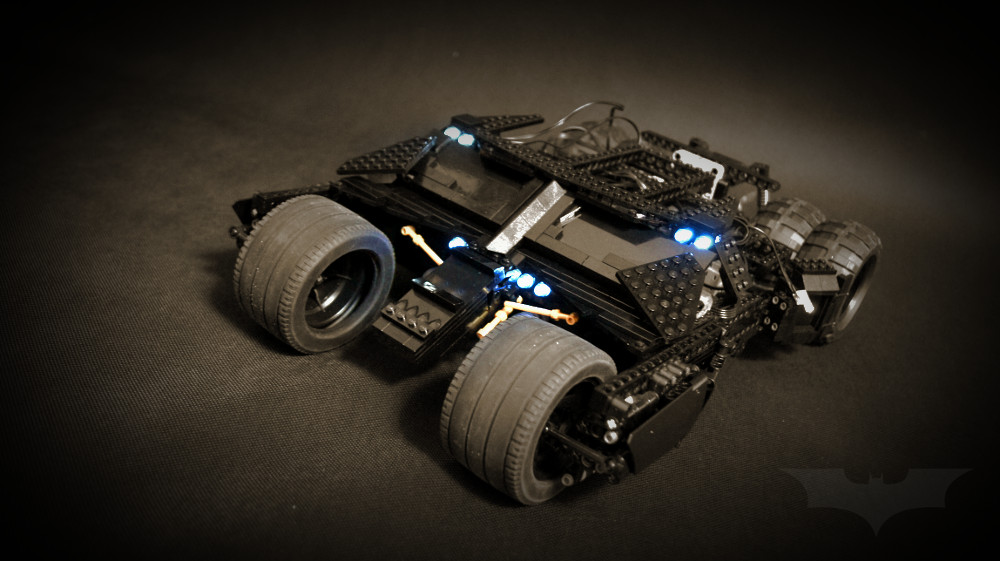
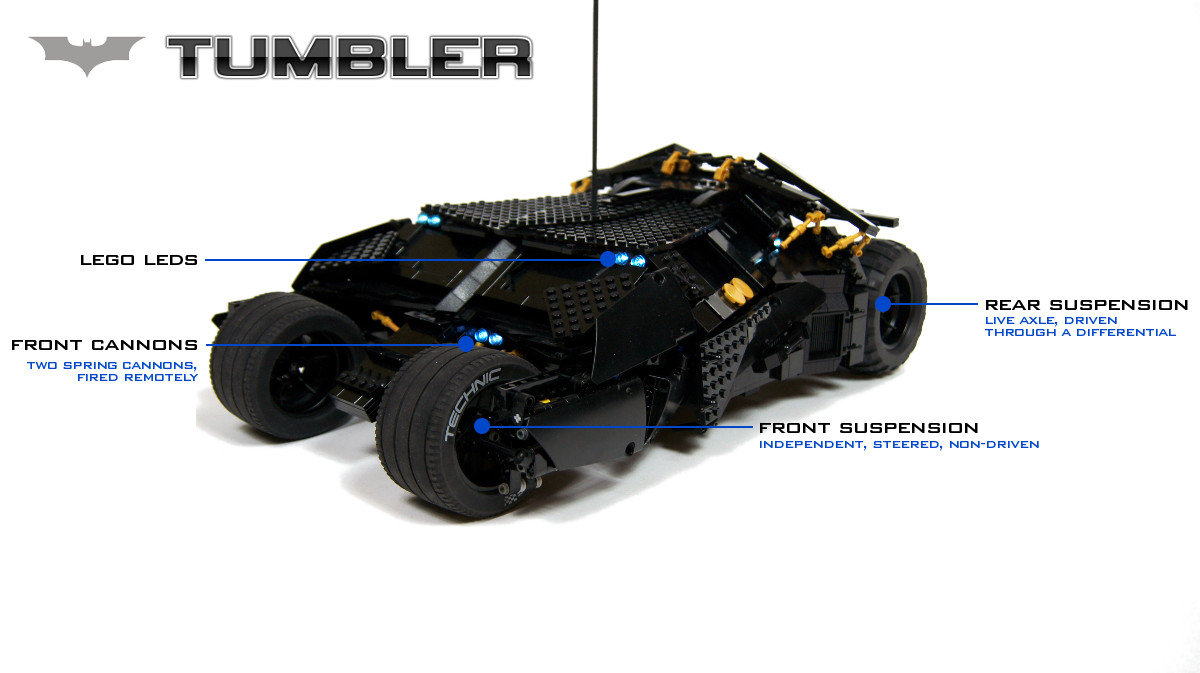
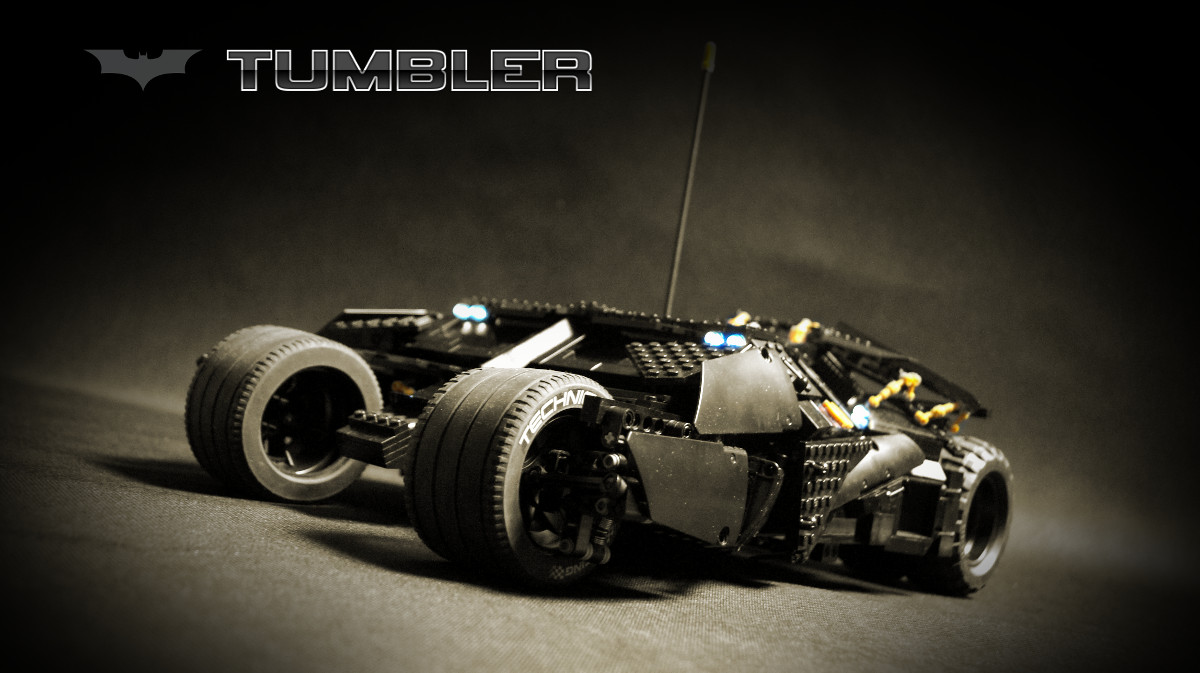
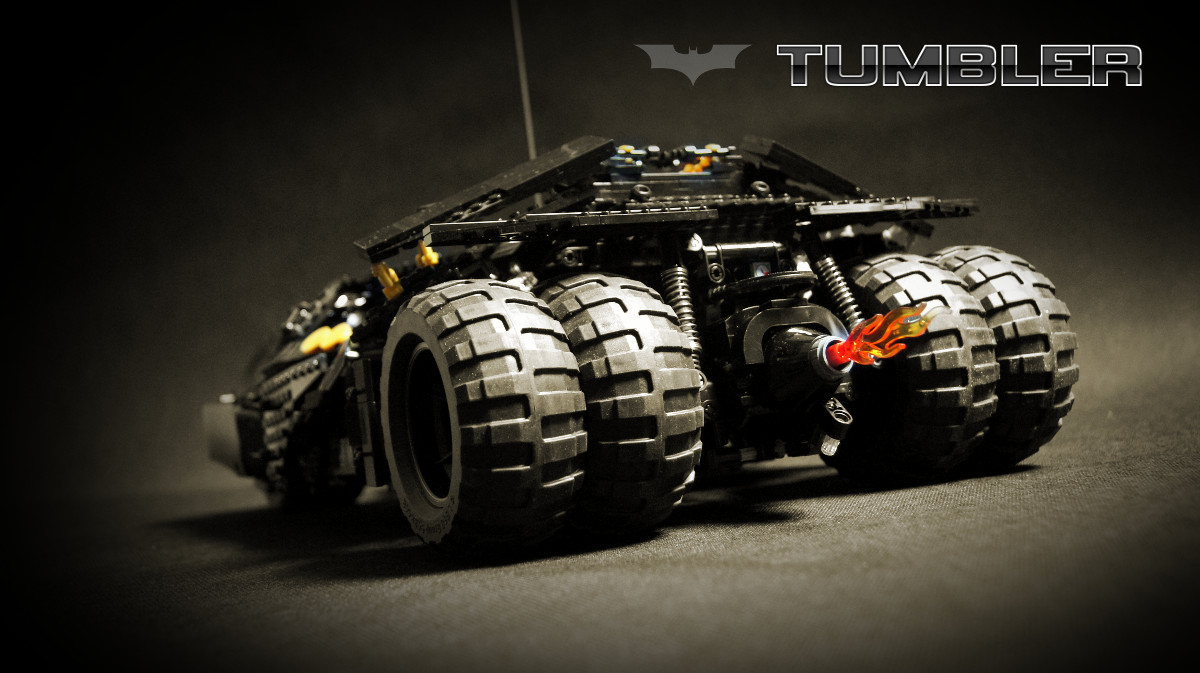
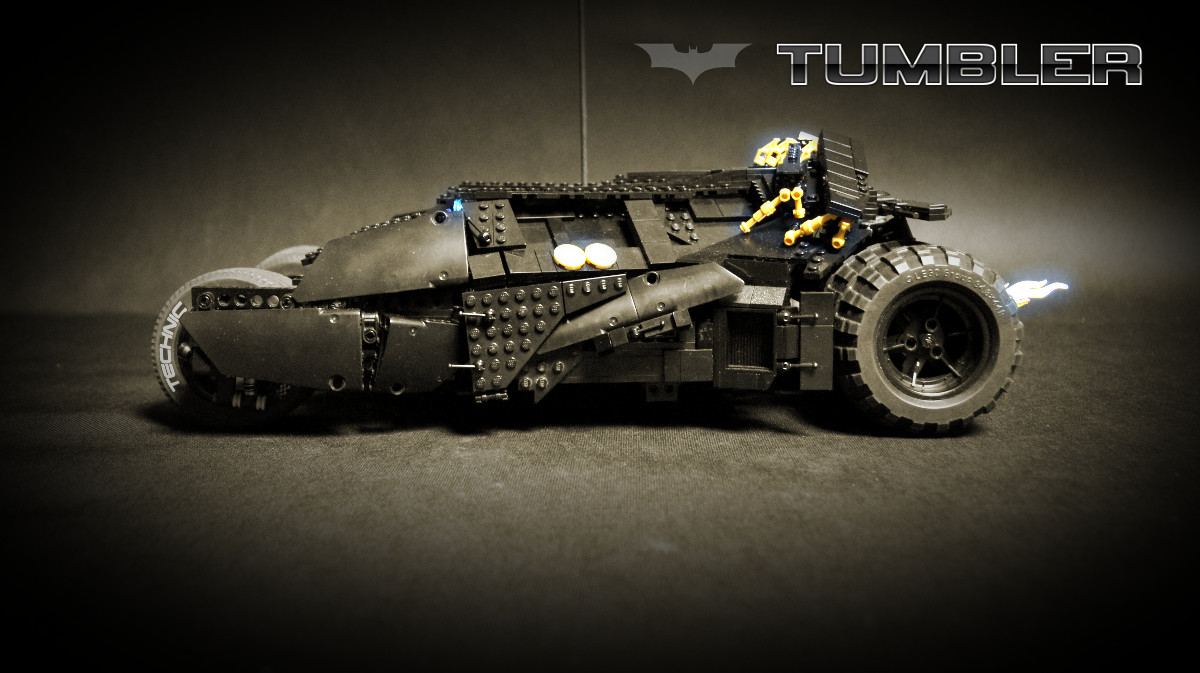
Suspension: front – full independent / rear – live axle
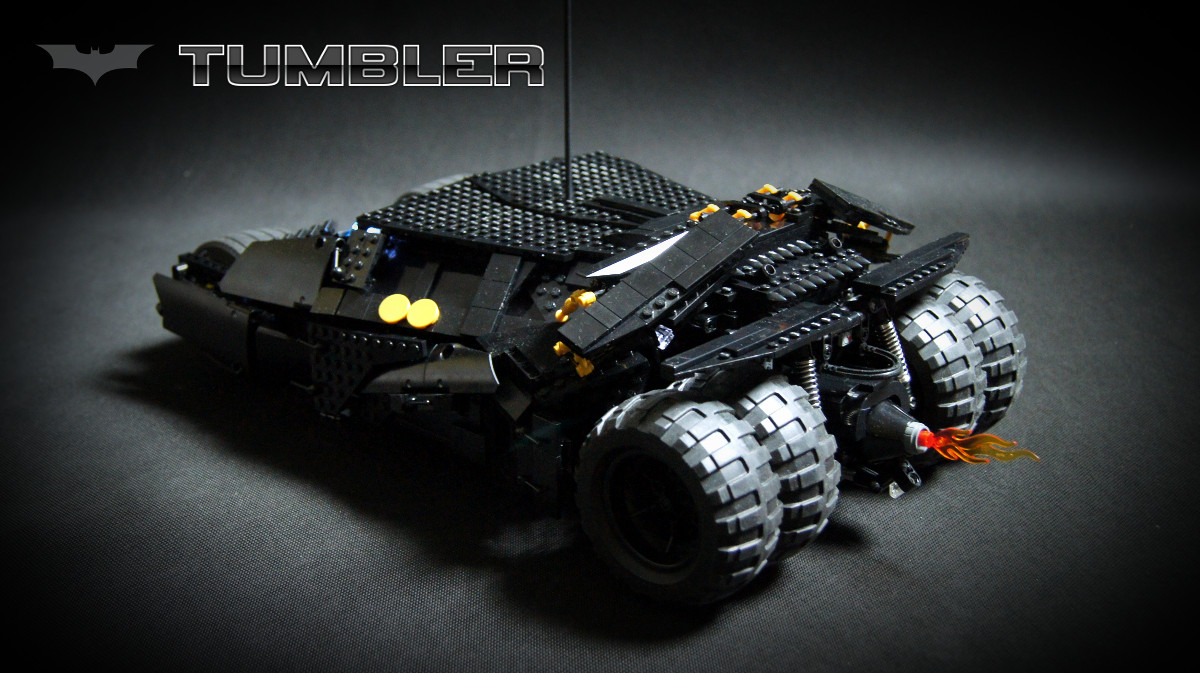
Propulsion: 2 x RC motor geared 3:1
Motors: 2 x RC motor, 1 x PF Medium
“- What’s that?
– The Tumbler? Oh, you wouldn’t be interested in that.”
This sentence from the Batman Begins reboot has introduced one of the most amazing and authentic purpose-built vehicles ever featured in movies. Back in 2005, when Christopher Nolan was a fresh, aspiring director, he went great lengths to make sure his batmobile is unlike any other.
What you ought to know, is that the car and stunts are all real, no CGI involved. So is the sound of this monster, as you can see from this video:
http://www.youtube.com/watch?v=D-Ab-1mzOV4The entire vehicle was built for the movie from a scratch, as several slightly different units, each costing over 1.7 million dollars. The first prototype took six months to develop, and much of this time was spent pushing a 2.5-tons heavy monster with a 500 HP engine to its limits. That included jumps – the chassis was being improved for months, until it could handle a 12-meters long jump without any damage. The top speed exceeds 170 km/h, and part of the movie’s police chase sequence was filmed at this speed. As a matter of fact, the Mercedes-Benz ML55 AMG cars used as camera carriers had struggled to keep up with the Tumbler – so much, that the following Batman movies made use of supercharged ML55s instead. For me, in comparison to overstyled, ridiculously unreal batmobiles from the old Batman movies, the Tumbler was a revelation.
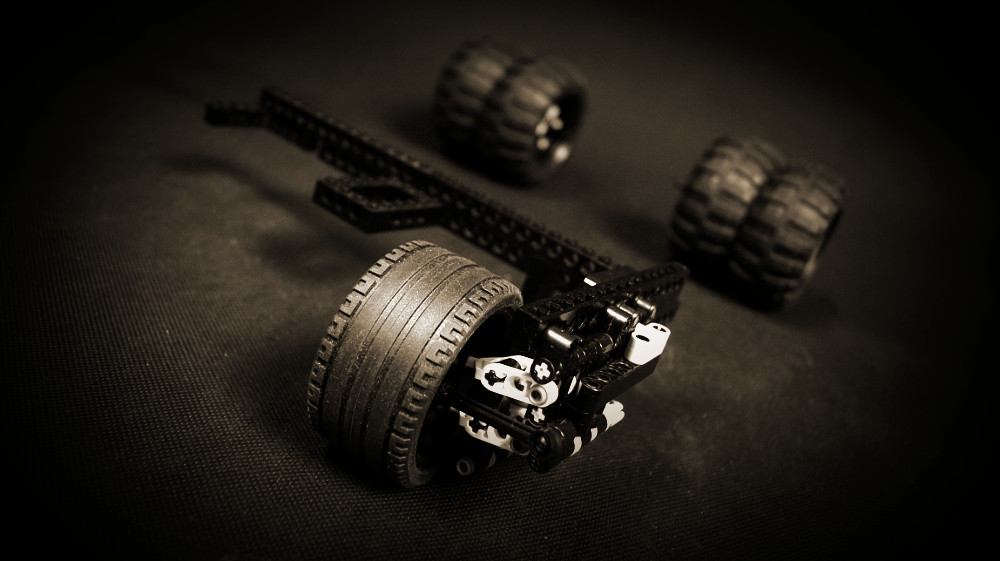
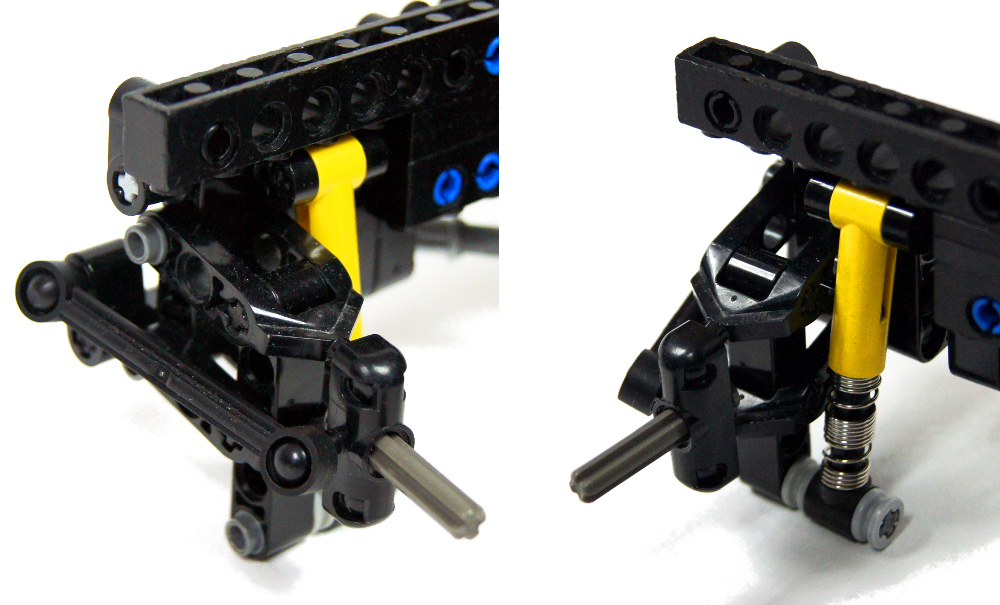
The model was an enormous challenge – I was actually trying to build it ever since the movie was released. The biggest problem always was the front suspension, which I wanted to work exactly like in the real vehicle. I believe the front suspension actually took some 95% of the time spent on this model. The difficult of the task was that it required to mount suspension of a thin protruding arm, which will be strong enough to keep wheels straight, which will support the large and heavy model as it drives, which will provide a decent turning radius, and which will stay together when it meets and obstacle. This literally took years to work out.
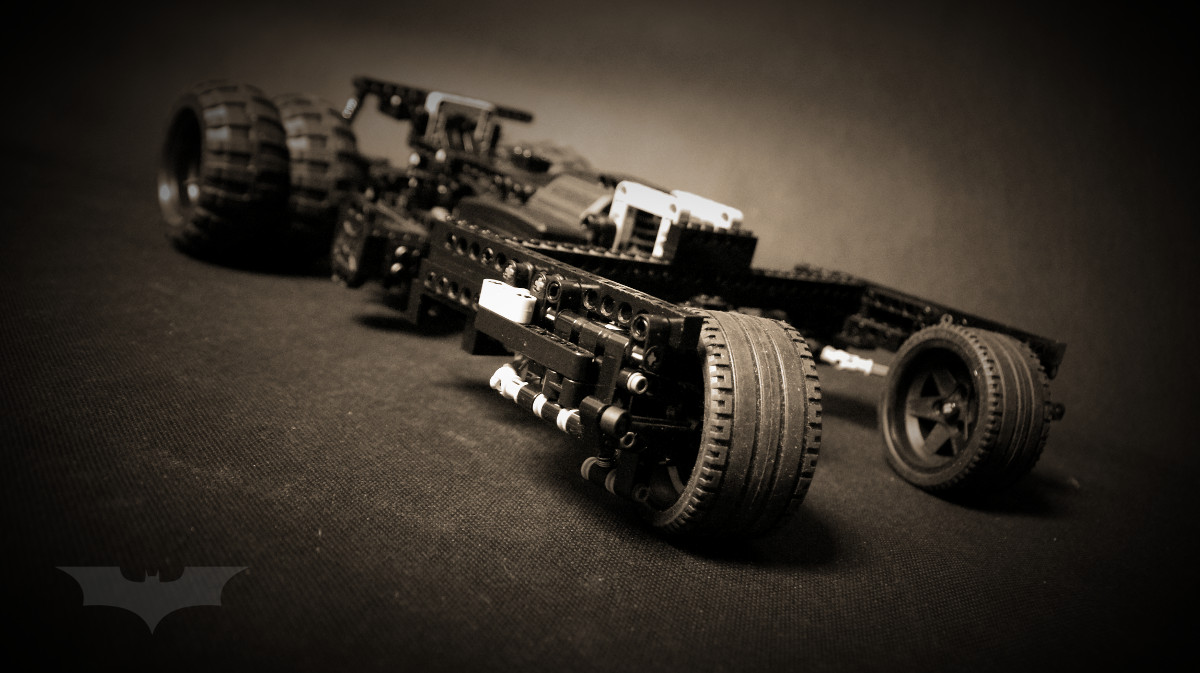
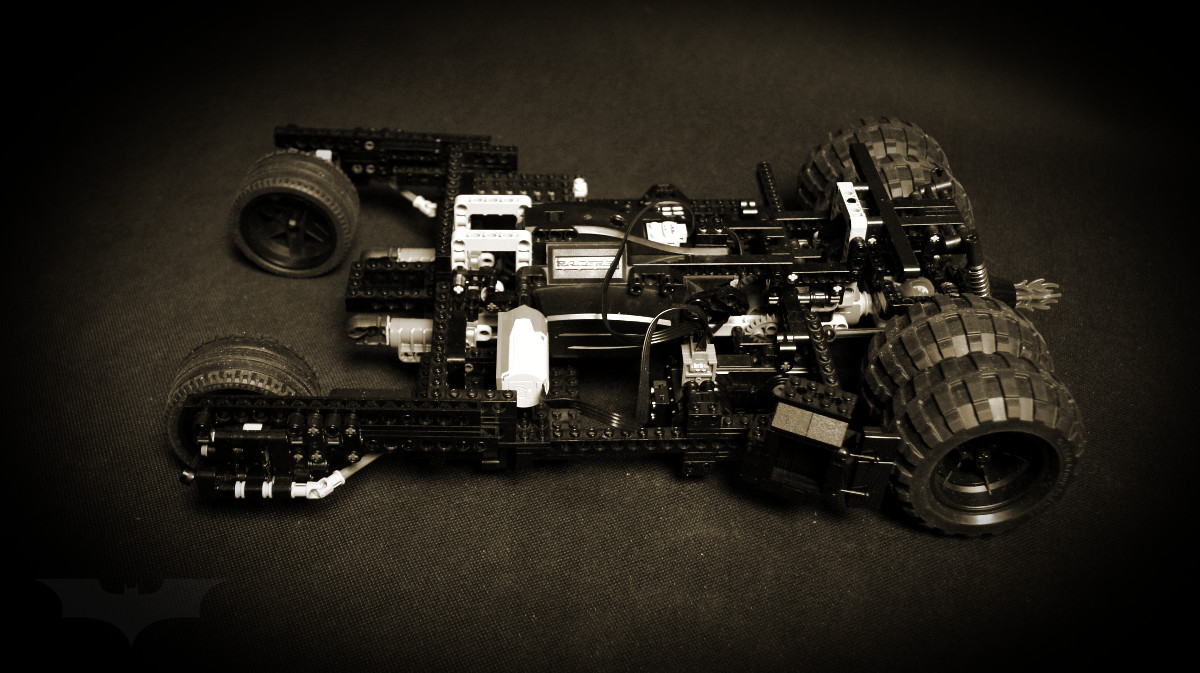
The whole front part of the chassis was very heavily reinforced. The suspension arms were built around 16-studs long Technic bricks, turned upside-down to allow some suspension components below. The arms were reinforced at many points, and connected to a massive front of the chassis at no less than 5 various points. Only this kind of structure was rigid enough to prevent any bending and to keep wheels straight at all times. The model’s frame was extremely complex itself, with the RC unit in the middle, two RC motors used as part of the bearing structure, and a scaffolding of axles and connectors to support the tapering sides of the hull’s middle section.
Steering the front wheels was another matter – they could not be connected in any simple way, e.g. with a rack, and any more complex connecting mechanism created backlash sufficient to misalign left and right wheel. In the end, I found a solution that did not eliminate the backlash, but evened it out between the wheels. It made use of universal joints and a simple beam with levers, connected to the RC unit’s steering output. This way, the Tumbler was as easy to steer as any standard RC model.
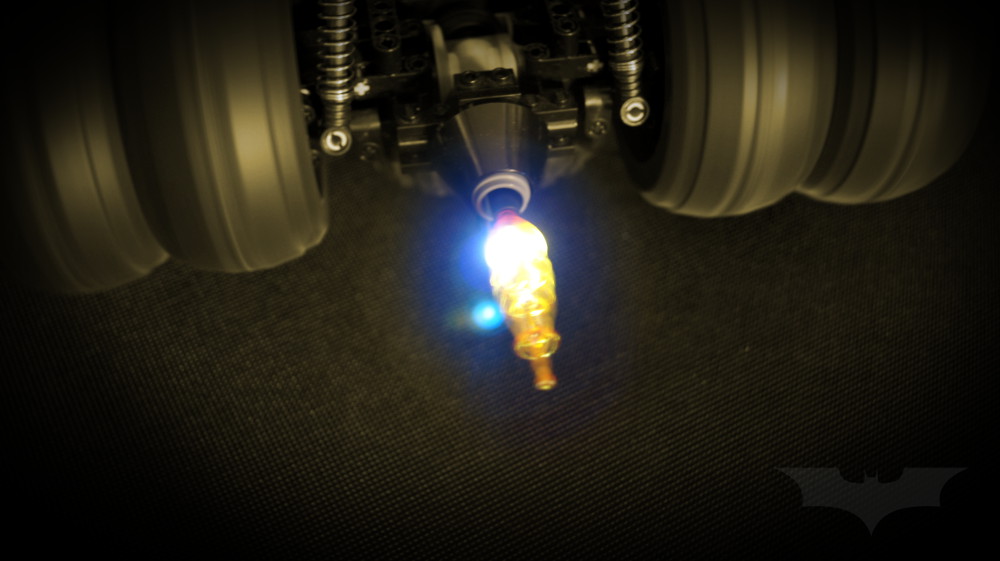
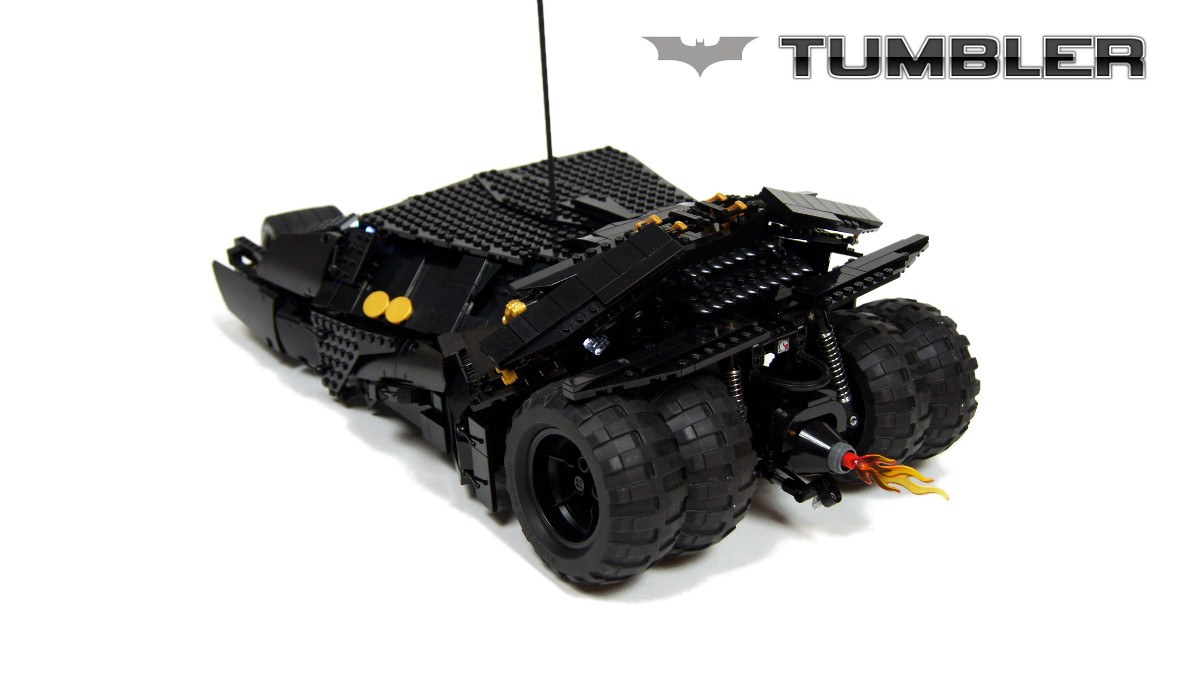
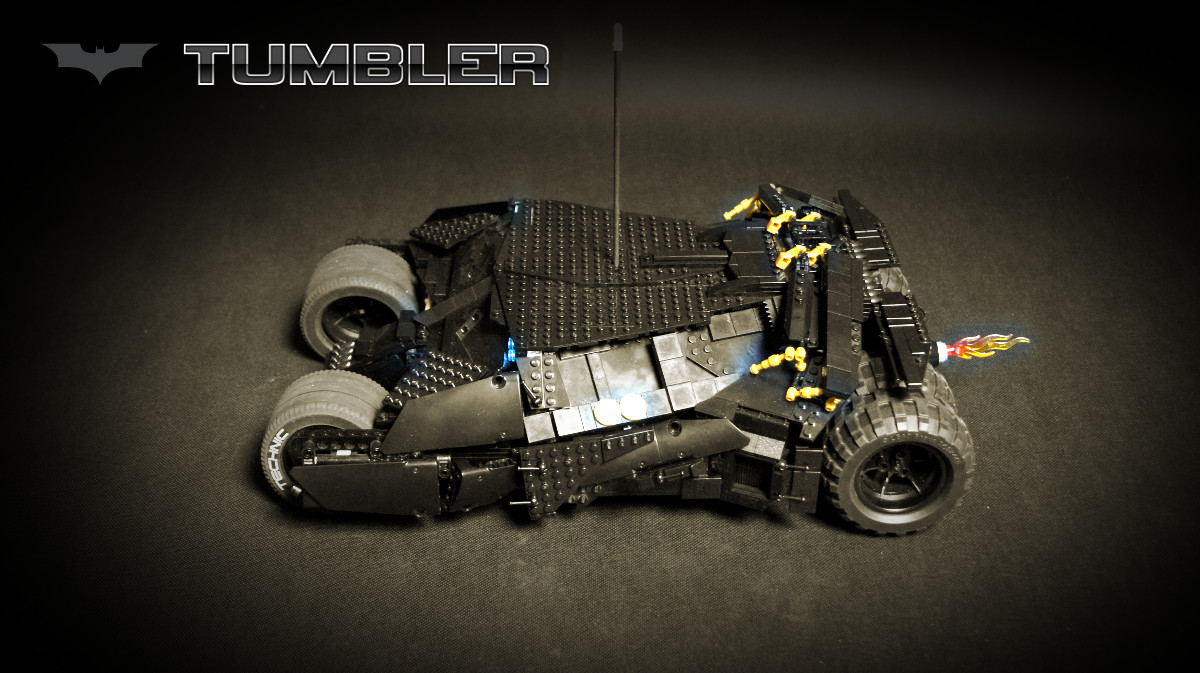
The propulsion system consisted of two RC motors geared down 1:3 and coupled through an adder, and the drive was transferred to the rear axle’s differential through a ball joint. At the back of the rear axle, there was a mock-up of a jet engine, with a flame rotating as the model drives, and lit up by a single LEGO LED that lights up when the drive motors work. This was not only the recreation of the real vehicle’s jet engine, but also a tribute to the LEGO 7784 Batmobile UCS set, which was a great influence in non-Technic building for me.
In front, there were two LEGO spring cannons, triggered remotely by a PF Medium motor connected to the RC unit’s auxiliary output. The motor was located on the left side of the hull, while the right side housed small LEGO Trains battery box powering all the LED lights.
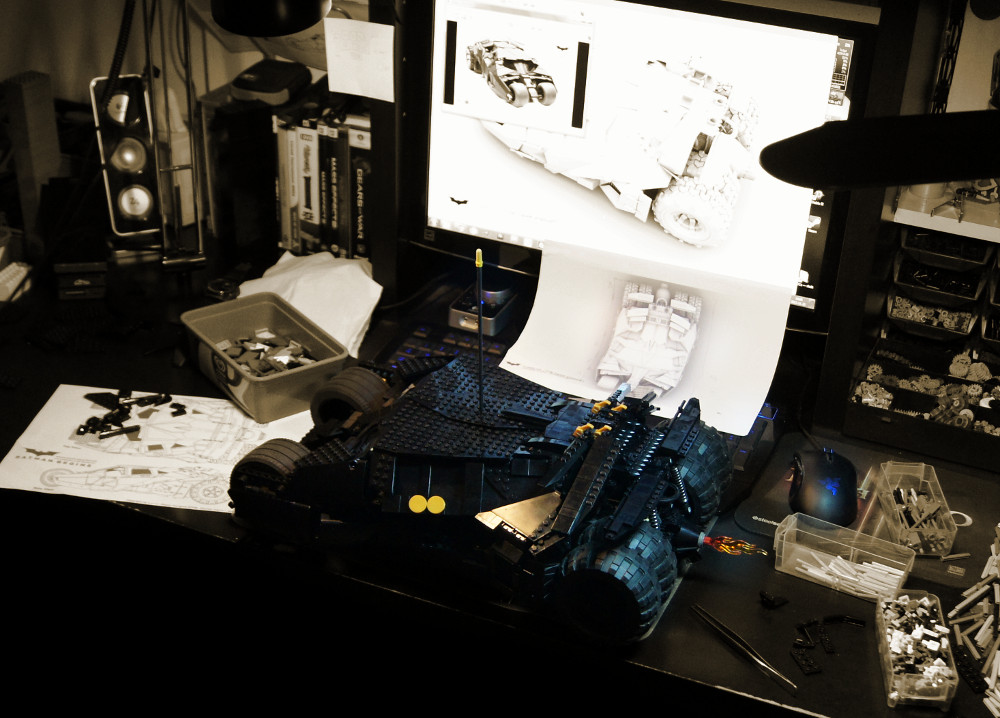
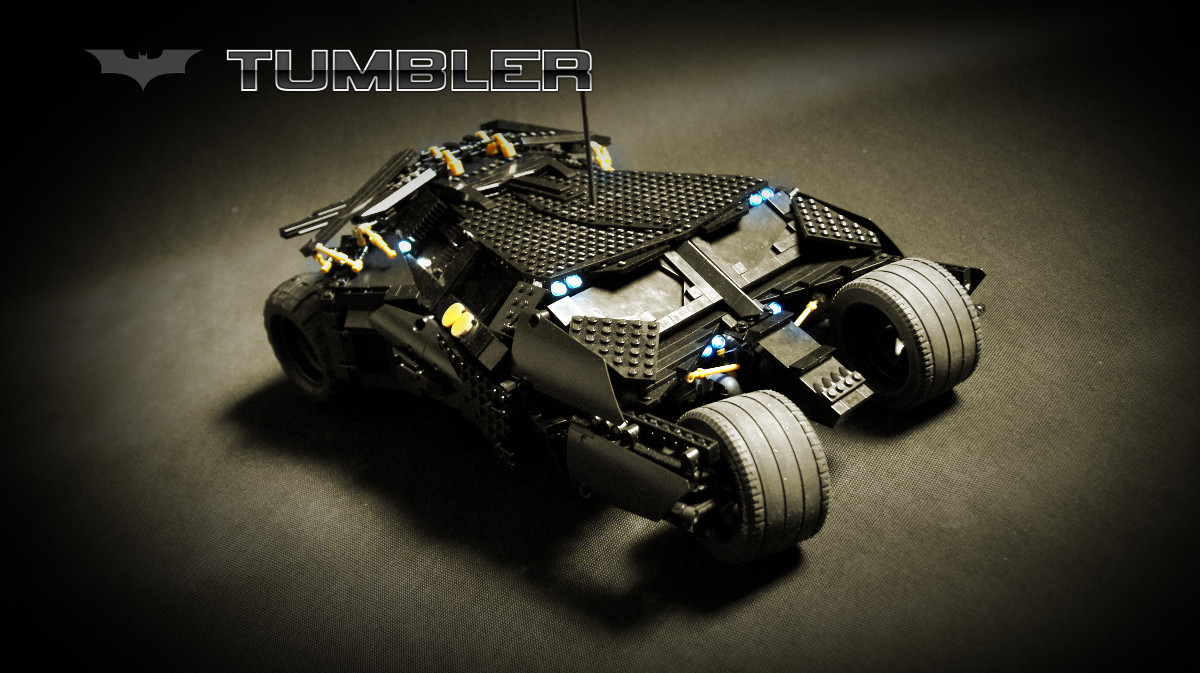
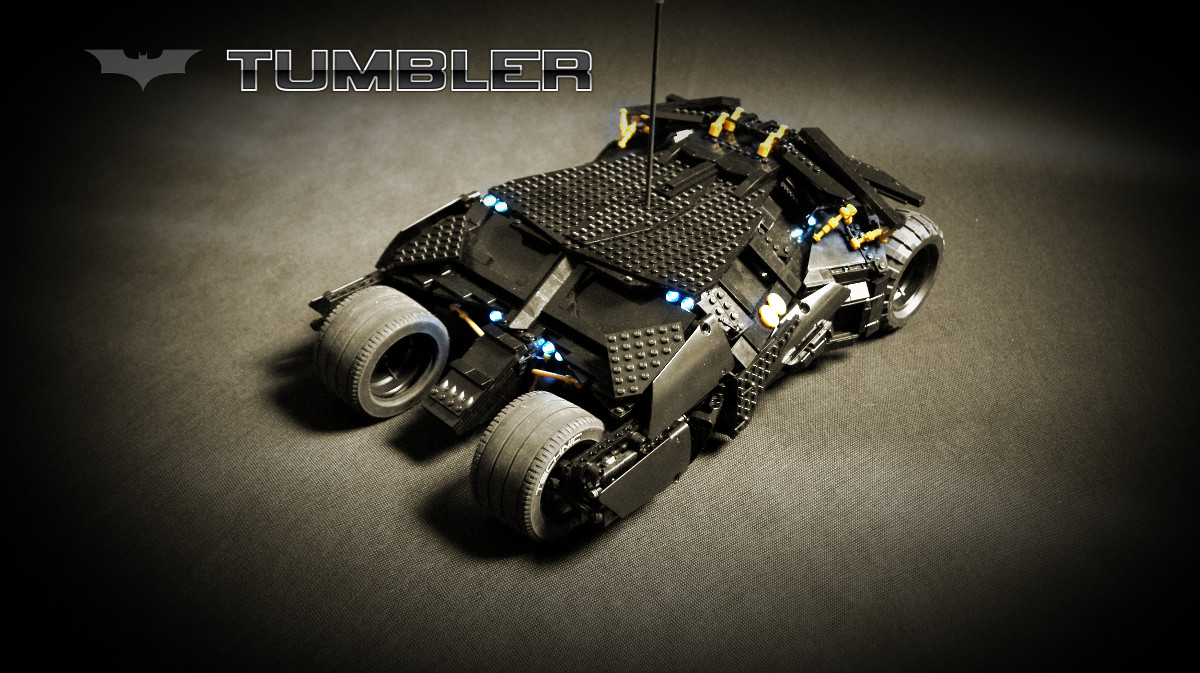
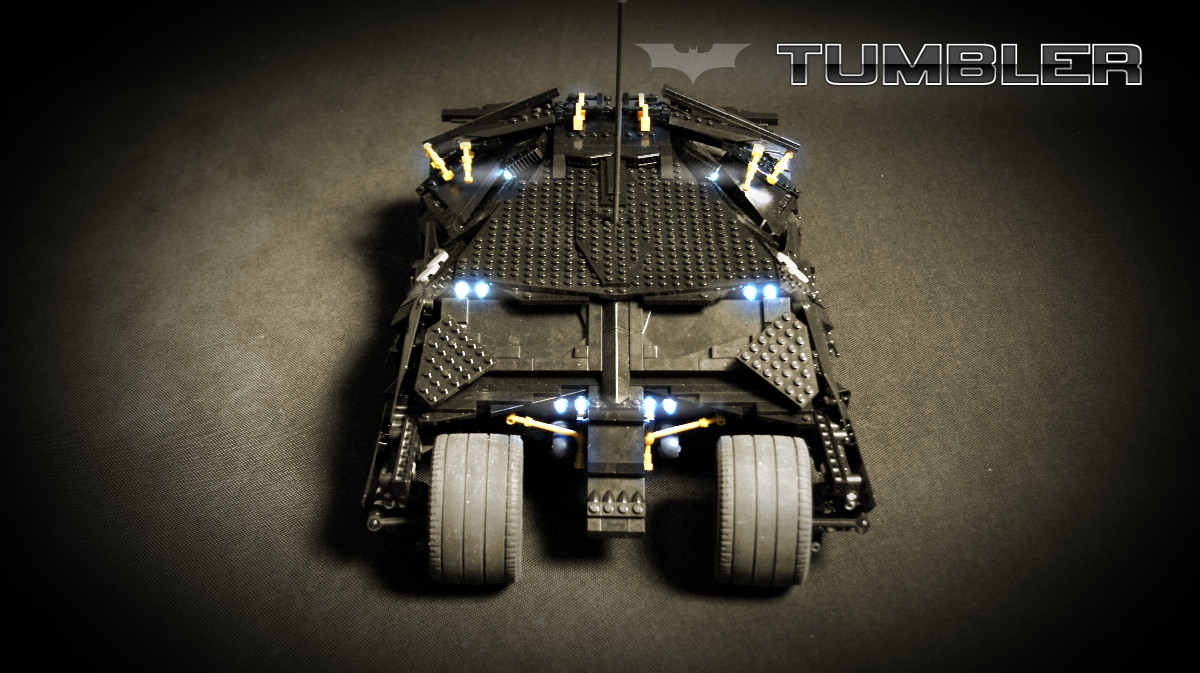
As for the look of the model, I’ve spent over a month on the bodywork, and it led me to believe that Chris Nolan secretly hates model builders and created Tumbler so as to make them hate themselves. Except for a part of the roof, the body does not include any typical shapes or angles, but instead consists mainly of a wide variation of triangles set at very various angles. Many parts and surfaces are inclined at two planes at once, and some are inclined at three – for example the middle pair of flaps. Such a body was extremely difficult to model and to maintain all proportions, and the task wasn’t made any easier by the lack of an official blueprints and by small differences in the fan-made ones. I was relying, among others, on the official Batmobiles book, but that wasn’t as much help as it could be either.
Early when working on the bodywork, I have come across the question of the studs. It was impossible to make the body with studless pieces and have all the details I wanted to include, so the use of studfull pieces was necessary. As large part of the body was made of plates, I have extensively used wedge plates and wing plates, which for reasons unknown are produced in a studded variant only, and not as tiles. Eventually, I decided to leave the studs uncovered, as adding tiles on top of them would make the body surfaces look thick, and create serrated edges on all wedges and wings. Only the front of the model was covered in plates, mainly to match the appearance of the studless “windshields” and also because its edges were concealed and did not look thicker with tiles added. I have actually made deliberate use of studs in several places, for example on flaps, to show their aerodynamic profile. I have also used smooth Technic panels wherever possible. Many surfaces took an enormous amount of work to be properly positioned and held in that position – I was using connectors with ball joints and small turntables mounted on hinge bricks on regular basis.
The model’s look wasn’t perfect, but I know it was my best shot, and on the aesthetic side it was the most difficult thing I have built up to date. At the same time, it was working very well, with great acceleration and decent speed, flawlessly working cannons and a soft suspension that made the body float in a realistic way. As a matter of fact, combination of the powerful propulsion and the soft independent suspension made it possible to roll the body to the point where areas near the rear wheels started disintegrating – as the video below shows.
All in all, I was happy with how I handled this exceptional challenge, while I still think that the same vehicle can be modeled very differently, and possibly better.
Work in progress photos:


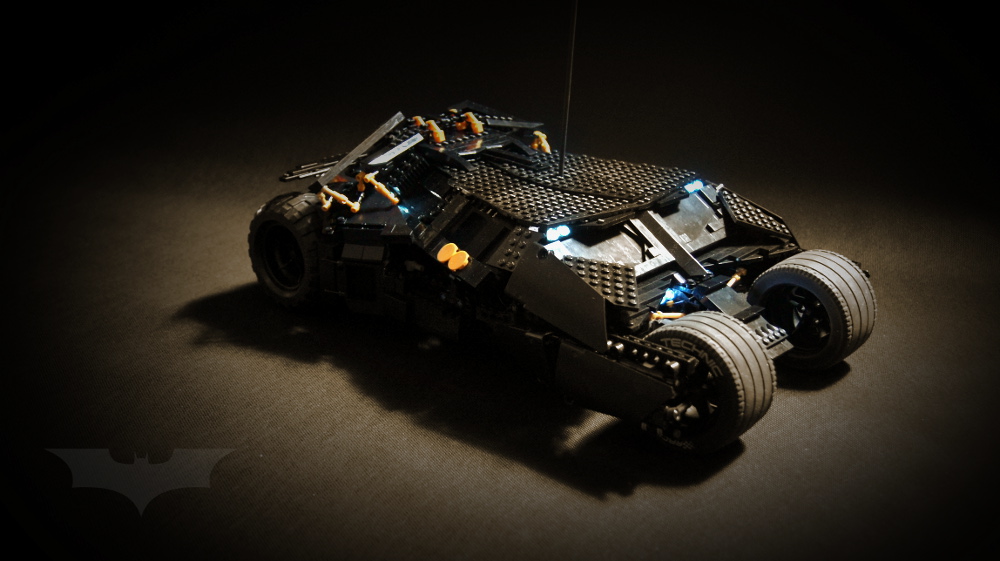
Photos:


Video:
Media coverage:
8studs (Polish), Auto Chunk, Brick Heroes (French), Esto Apesta (Spanish), Feber (Swedish), GadgetBlog (Italian), Games Pro (German), Gaming Gadgets (German), Gizmodo, Kotaku, Klocki (Polish), Le Journal du Geek (French), Nerd Approved, Nerdgasmo (Spanish), NerdPix (French), Nerdzonfire (German), Technabob, The LEGO Car Blog, Top Gear

@Stevenson
No.
Do you by any chance have building instructions?
@Old Man Jenkins
Um, I wish I had these front tires when I made mine?
What do you have to say about the Lego Official Tumbler?
@devilman84
I don’t sell anything. That’s why it says “not for sale” in my every video.
Hi, i see your lego custom of the batman’s tumbler!
Is greatest and very fashion!You sell it?
How much did you want for the batman’s tumbler?
I’m waiting your news!
Best regard!
@Witherley
I don’t know how much it cost and it should be relatively easy to make it PF. But the performance will probably be worse without RCmotors.
@Witherley
Also would it be easy to make it with Power Functions instead of the old Lego RC system?
How much did it cost to make? I want to buy the right parts and make a Tumbler chassis which I can use to make a vehicle of my own.
@Ethan24
Not a chance.
Please do instructions i love this thing
@Sariel
Okay, thanks. Sorry I didn’t read your FAQ first! I probably couldn’t afford the model right after “negotiations” anyways. 🙂
@BrianG
Sorry, I don’t make instructions and I don’t sell any models.
Hi Sariel, this is obviously the most impressive LEGO Tumbler ever created. I read that you didn’t have instructions at one point. Has this changed? Have you tried creating a 3D file or instructions that you’re willing to share or sell? Or would you have these units for sale? Thanks!
@David
This song comes from the Batman soundtrack and no, it’s not free.
Where do you get the music for the video? Is it for free?
@David
David, all the tips I have are right in front of you: video, photos and description.
I’m not talking about that, but the frame itself. Also, do you have any tips on how to create the roof and sides and rear?
@David
You mean how does it return to center? The RC unit does it.
But how do you align on the tumbler? Not trying to nitpick.
@David
There is no easy way to answer either of these questions. My book has plenty of tips that could help you here, though.
Dear Sariel,
How do you align the steering system? Also, how do you seamlessly switch between stud full and stud less? Thanks.
@Samuel S. Hallman
No, I don’t know any other pictures than the ones shown here. As for the real world suspension – I don’t think that my experience with Lego entitles me to be a judge on real world mechanisms. It’s a different kind of forces and structural stress.
Dear Sir: I bought your book off Amazon today. I am in the preparation stages for building a personal full size Batman Tumbler. I watched your Tumbler video. Have looked at a lot of ways to do the front suspension. How well do you think your R/C Tumbler’s steering and suspension would translate to a realworld suspension? Do you have any detailed pictures or drawings of your R/C Tumbler’s steering mechanism from steering input to wheel actuation. Any information would be greatly appreciated.
Sam
Thank you for confirming. Most importantly, it’s not to nitpick, but for me to confirm that I understand the mechanics correctly. Tried reading it in your book but it wasn’t explicitly mentioned.
The link is very close to parallel. Its being just a bit off has only a minimal effect on wheels.
According to some of your WIP pictures, the steering link (is that what it’s called?) connecting the steering arm is moved using rocking motion, which causes the link to be not parallel to the suspension arms (is that what it’s called?).
From my basic understanding, these should always be parallel, else the wheels will turn when the height of the suspension changes.
My questions:
1. Am I making sense?
2. Was this issue taken care of or ignored?
(I hope I don’t have to draw anything to make sense)
Hej Pawel, dzieki za swietne modele i inspiracje. Zamowilem sobie twoja ksiazke, aby skorzystac z twojego doswiadczenia i przyswoic sobie troche wiedzy. Dzieki rowniez za to, bo jak widzialem w innym komentarzu malo co widzisz z tych pieniedzy 😉
Yes, I built it from a scratch. Yes, my book explains how adder works.
Awesome job on the Tumbler! I have been a bit obsessed about building one since watching your video. I am pretty confident about building a front end that works well, however, I am curious about how you came up with the gear ratio and the use of the adder. I have researched the adder and its use. Did you build your own from scratch? Does your book explain these in detail? I have been looking at all of the pics you have trying to figure it out. Any help or advice would be awesome. I admire your lego talent! Thanks for your time.
Ok dzięki wielkie! Pozdrowienia ( dla chomika również ) 🙂
http://www.bricklink.com/catalogItem.asp?P=6272c01
A co konkretnie?
To nie jest silnik.
Witam Sariel! Mam pytanie, jak nazywa się ten silnik z anteną, który zamontowałeś m.in. w Batmobilu i Pagani Zondzie?
You, sir, are an artist.
You have something wrong.
Hi, I tried to build your steering mechanism, but it looks like that wheel rub on the 3L axle with Stop, located in the shock absorber when the car steer. Is that right, or have I something wrong ? I worked with your WIP picture…
No, thanks.
this construction is awesome….A MASTERPIECE!!!!!!
i believe that just because BATMAN AND TUMBLER have millions of funs you have to think to
give instructions for this construction and the pieces you need to finish it!!
any logical price would be accepted!!
No.
wanna put it on http://lego.cuusoo.com
: ) ?
@MHB
Vous ne pouvez pas utiliser Servomoteur avec l’unité RC directement. Aussi, je ne me sens pas la nécessité de lancer les canons séparément.
Excellent !
Une petite idée pour les missiles : tu pourrais utiliser le servo moteur (Crawler 9398) afin de lancer celui de droite puis celui de gauche… si tu vois le truc.
Qu’en penses tu ?
C’est vraiment super
Wonderful !
It would be so great if you create an instruction for this impressive set.
As said Pedro, would be happy to pay for ;o)
@Ben
Yes, I did.
Now all you need to do is include the function where it splits itself in half and becomes a motorcycle. 😛
I’m pretty sure that you used the same wheels as the ones in the 9398 Rock Crawler for the rear axle. Did you?
@Lusmore
Wolę nie liczyć 🙂
Ile cie kosztowało zrobienie tego cuda?? 😀
Well done! Awesome!
@Sariel
It’s ok. I didn’t expect it, but it was worth a try 🙂
@JP HACK
Is there anything you can’t see on the photos and video?
Hey can you show better detail on the front suspension and steering? You literally need to have a cool 3d Cad model just for that part as it is SO hard to build.
@Pedro
Sorry, no. There are no instructions.
Is there any chance we can get instructions for this (even if payed) ? Please
@Sven
Sorry, corrected that. Thanks!
Thanks for link back, but I have a german site – not Dutch. 😀 However – great project, really! I love it!
@John
Nowhere.
where can I buy this
@Marin
Their tread looks completely wrong.
Did you ever even consider Unimog tires and why did you rule them out?
(Great model BTW.)
@gabry
There is a studless Tumbler already, that’s how I know that a studless body doesn’t suit my needs: http://www.brickshelf.com/cgi-bin/gallery.cgi?f=231828
As for dimensions, 1 stud is 0.8 cm.
really cool, but I imagined it with a full studless body… You’ve done a great job, but I think you could study the body better… But like all the times you’ve done an amazing moc! Could you tell me what are the dimensions in cm please?
@Mike
No, I think the radius is worse than original.
Thank you for the detailed pictures – I am inspired to try a mechanism of a similar style (not to copy, but to work along the same principles).
tell me the red Ferrari was ok after the video shoot 🙂
Great great great.
Do you think you have a tighter steering radius than the original? 🙂
Stunning work.
Just WOW
Awesomeness! Pure awesomeness!!!
@Aaron
I don’t think it exactly meets the definition of a supercar. It’s more of a military vehicle.
You gave such detail on the speeds and advanced suspension ability supplied by the tumbler in the movie, is it not considered a supercar?
wow like the real thing! interesting steering design.
Awesome! I love it! 🙂
i’d love to have a closer look at that front suspension! oh wait – you already posted pictures =D – great moc and you’ve passed quite a hurdle with that suspension, it must have been a problem.
Love it!