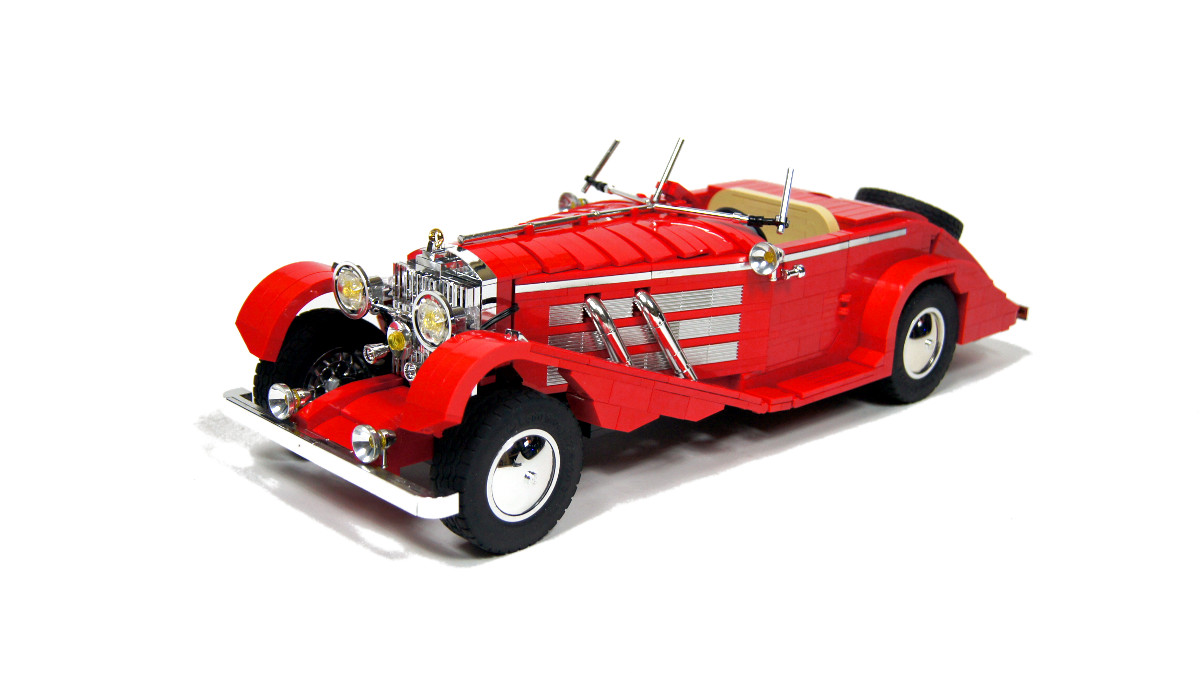
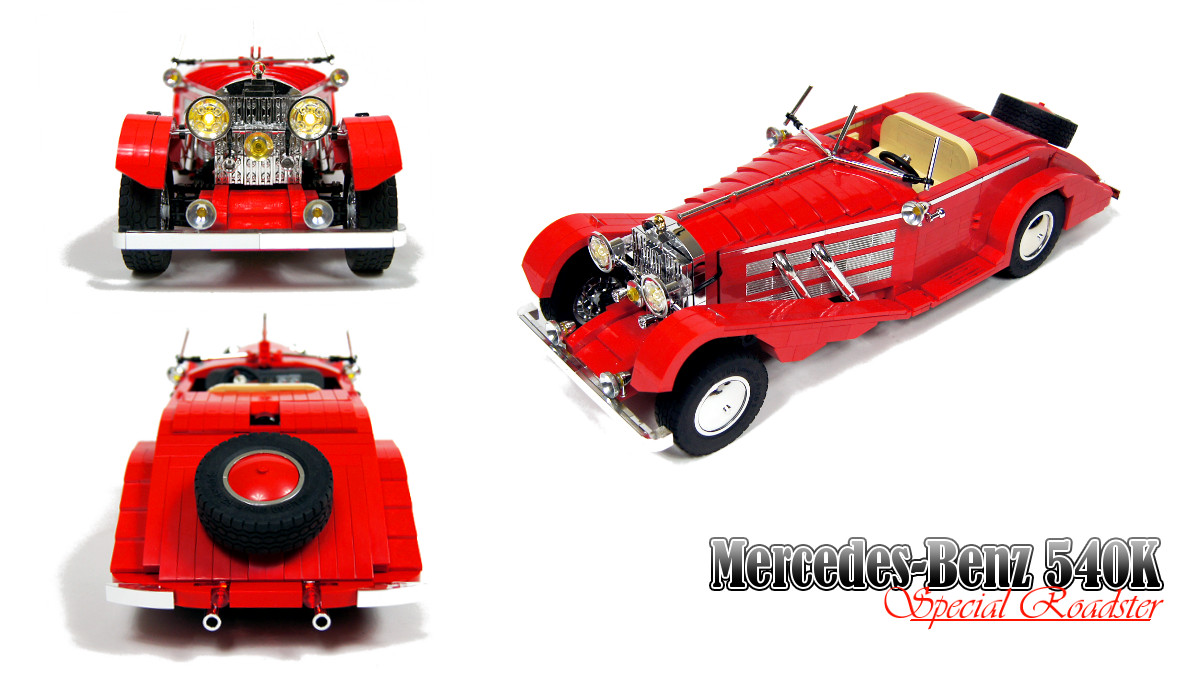
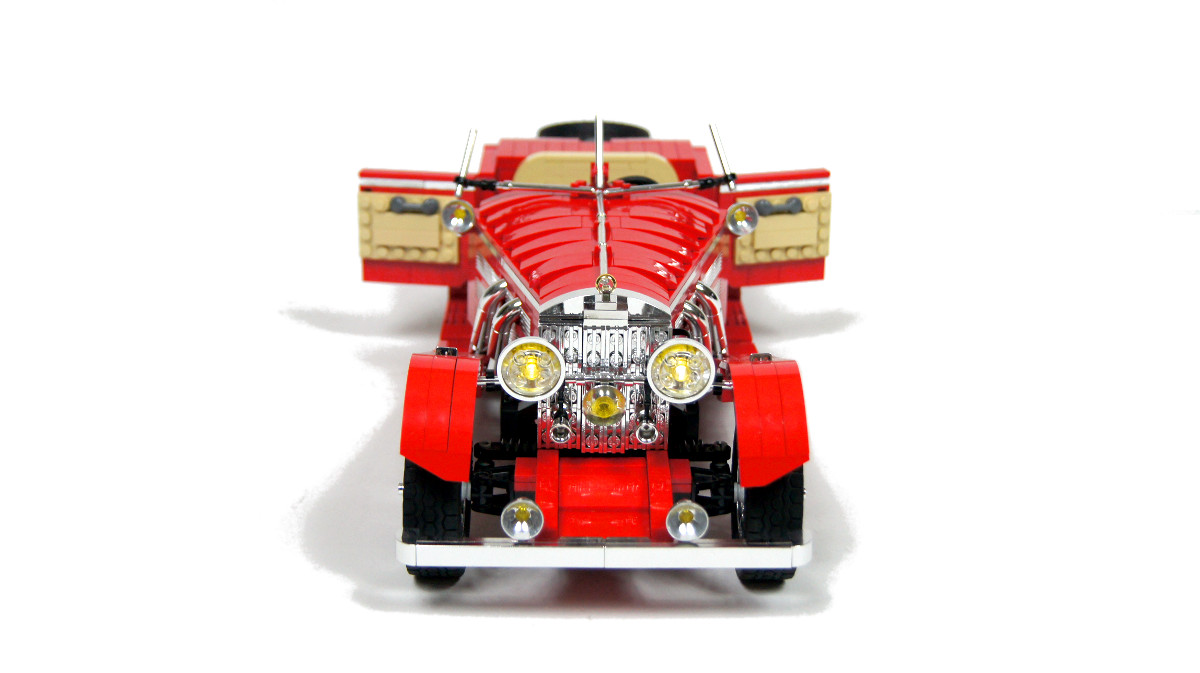
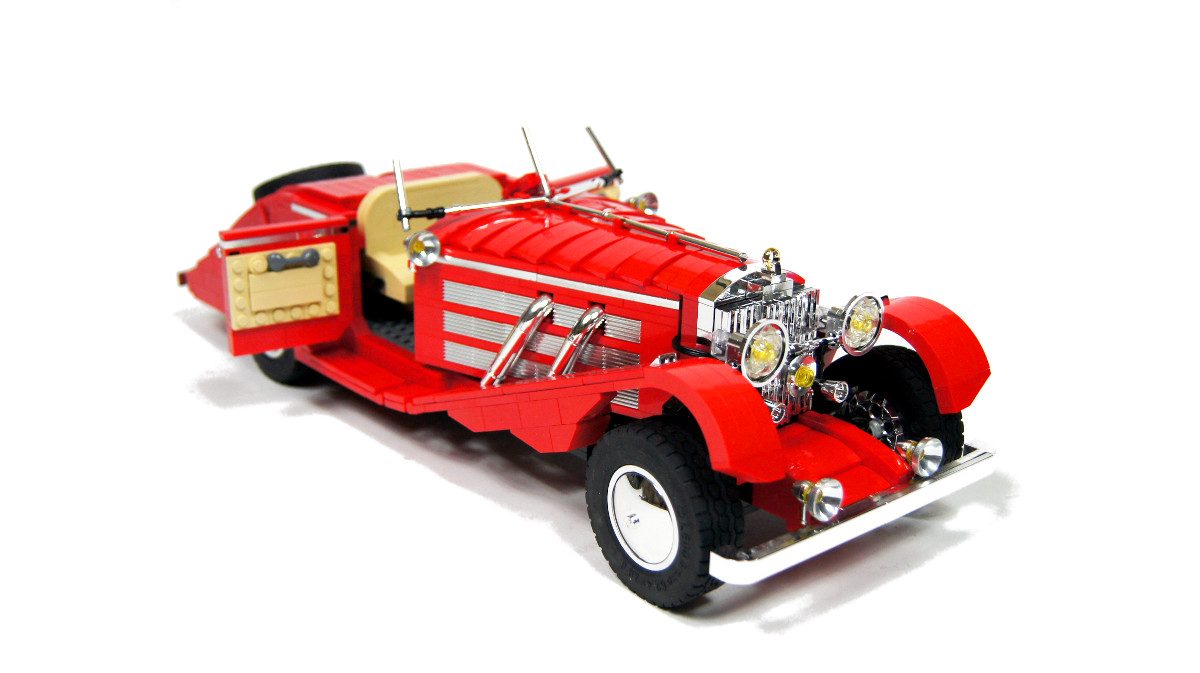
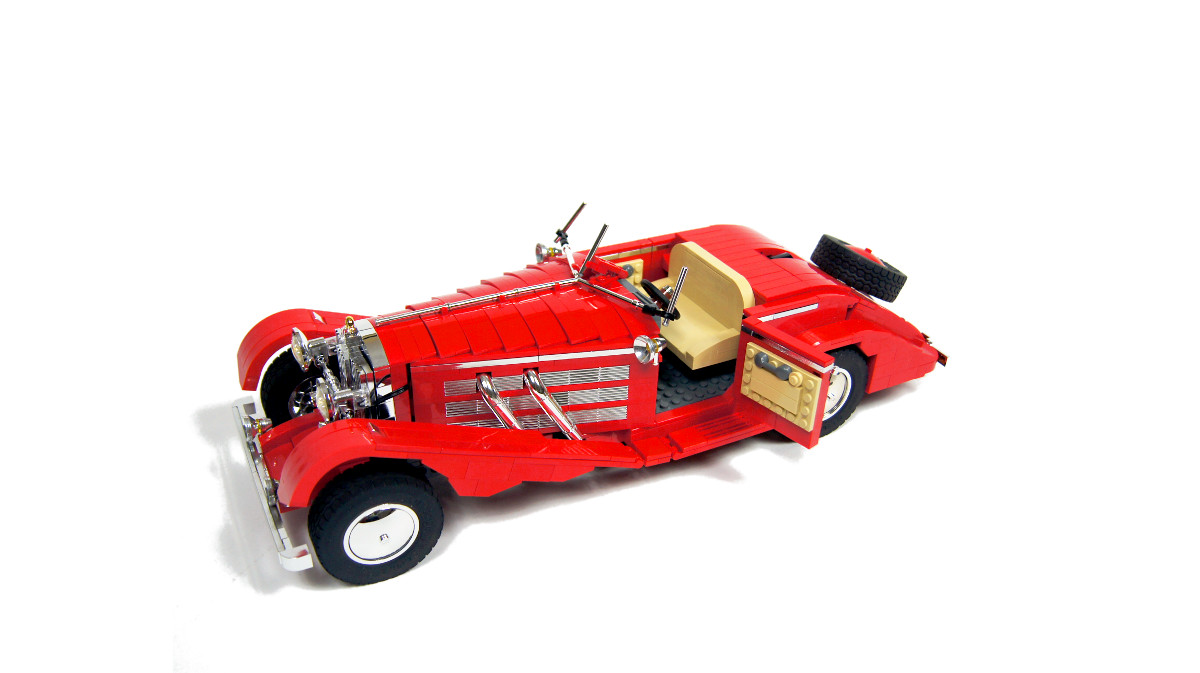
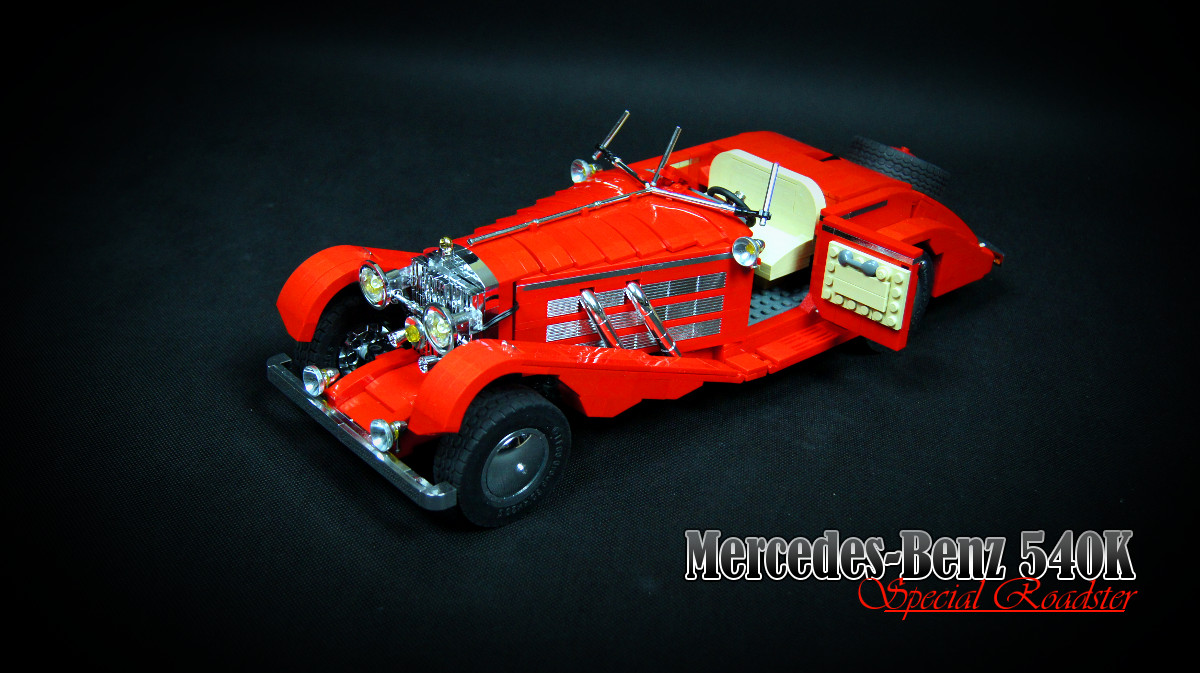
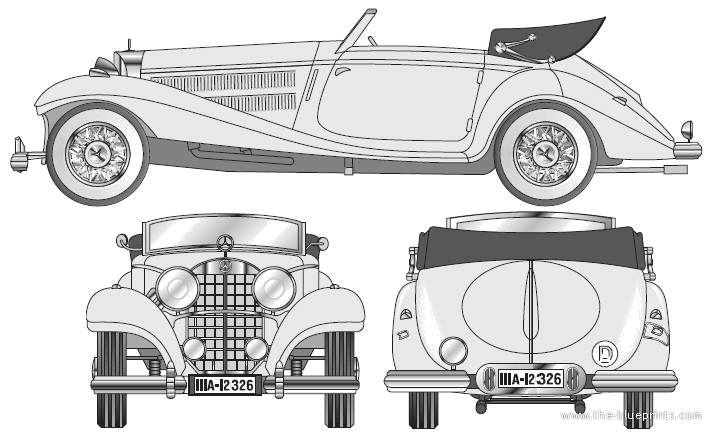
Mercedes-Benz 540K Special Roadster

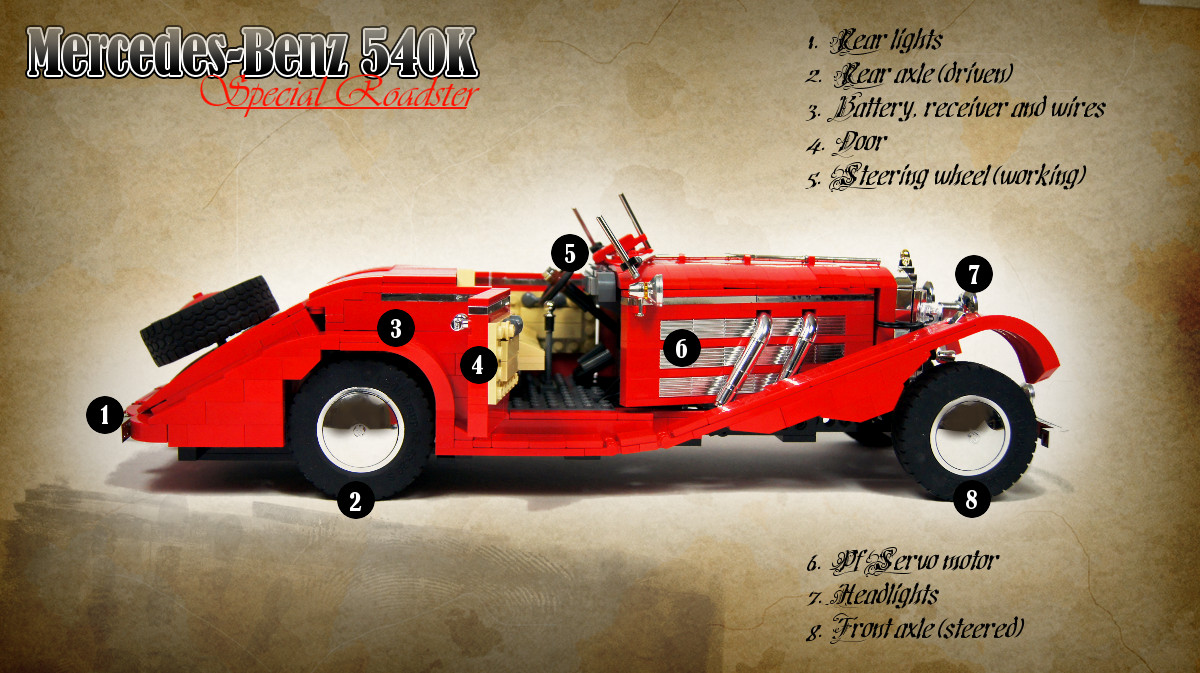
Model of one of the most beautiful cars of the 30’s. Features drive, steering, working steering wheel and lights. Update: full building instruction available in Downloads section.
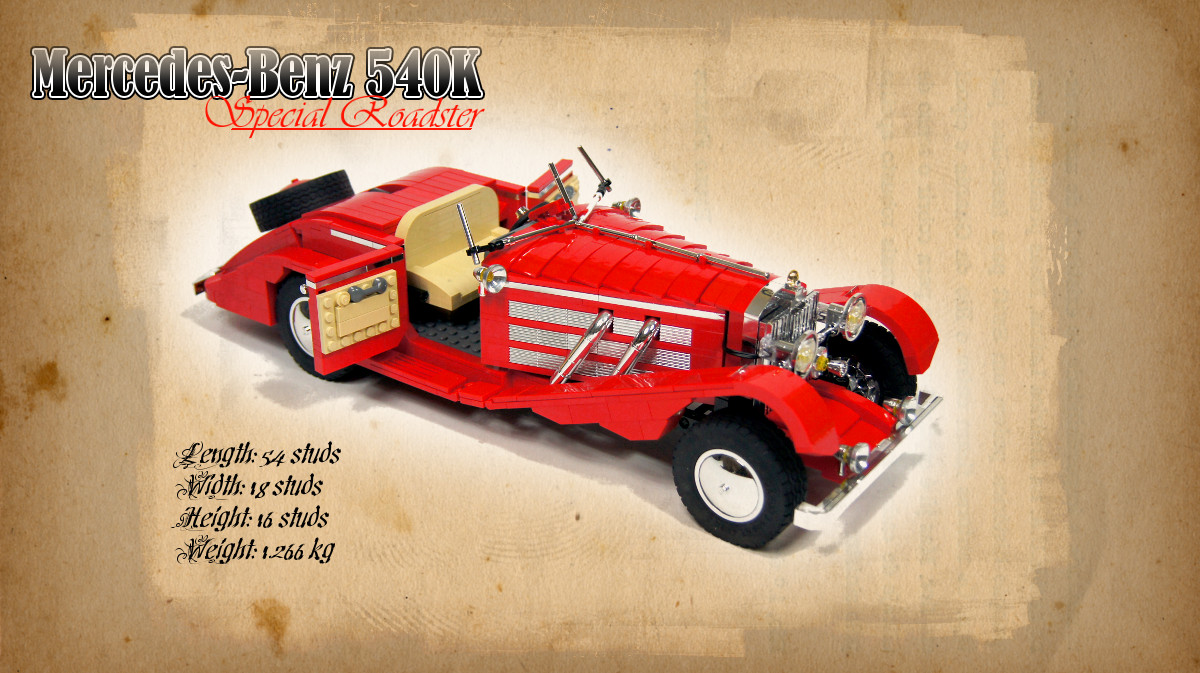
Datasheet:
Completion date: 11/12/2012
Power: electric (8878 battery)
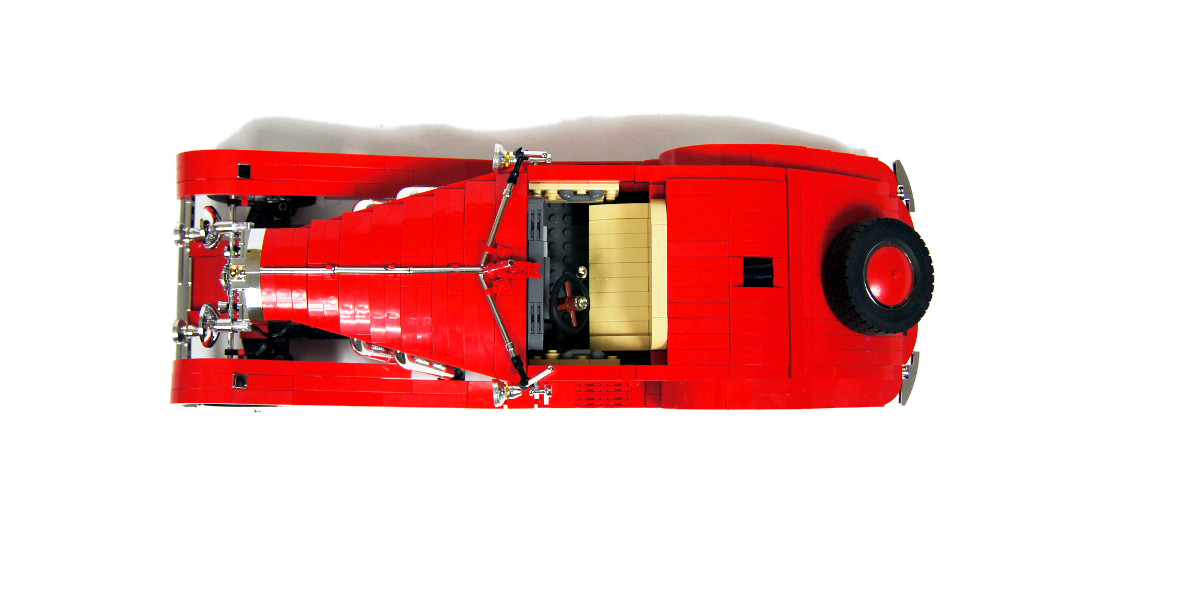
Dimensions: length 54 studs / width 18 studs / height 16 studs
Weight: 1.266 kg
Suspension: none
Propulsion: 1 x PF L motor geared 1:1
Motors: 1 x PF L, 1 x PF Servo
Ever since I’ve seen the One Ring from the LEGO Lord Of The Rings sets, I wanted to use is as a Mercedes bonnet emblem. Once I won the ring from Gollum, I decided to go for an astonishingly beautiful car from early years of motorization: Mercedes-Benz 540K in the Super Roadster version.
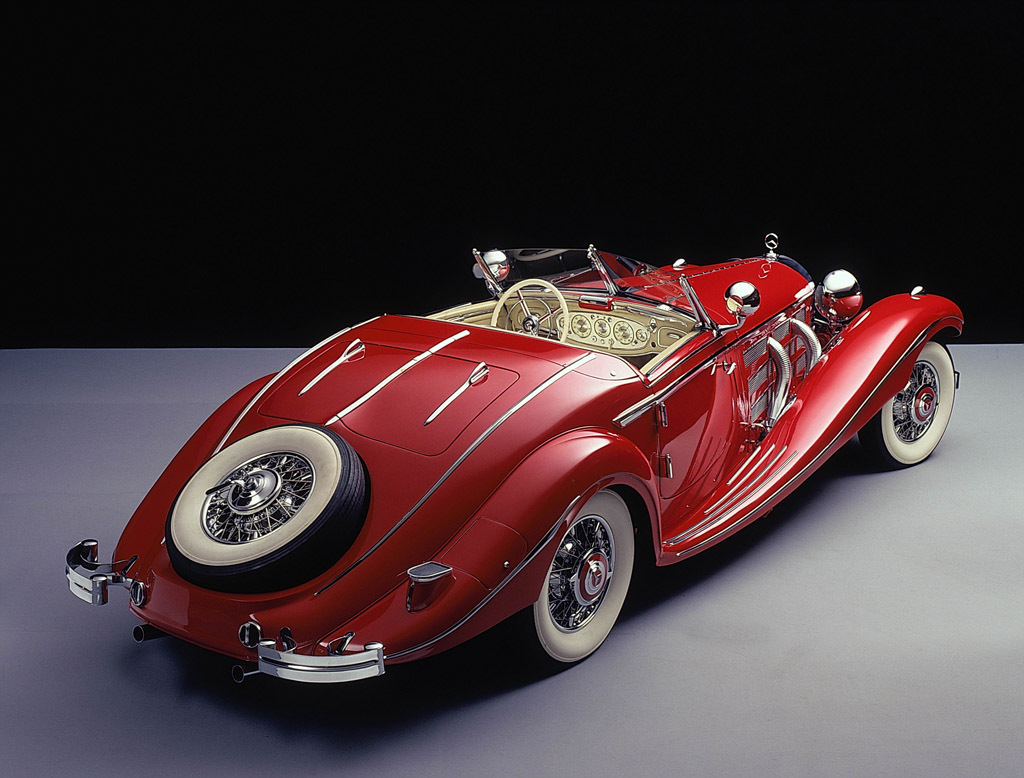
The Mercedes-Benz 540K was first shown at 1936 Paris Motor Show, in several body variants, and with a great deal of customization options available (typical for times when cars were manufactured manually by skilled craftsmen rather than using an assembly line). Despite the fact that it was created just a few decades after invention of the car, its look, its craftsmanship, and the luxury it offered can still rival pretty much any car. Its performance wasn’t left behind: below the beautifully crafted bonnet, there was a 115 HP engine and a supercharger that could increase that power to 180 HP for short periods of time, allowing top speeds of 170 km/h. There was a 580K variant of the car in the working, with the engine bored-out for greater power, but its production was aborted with the outbreak of World War II.
Sometimes, when testing car in the wind tunnel, a power of 180 horses and 1 hamster was achieved.

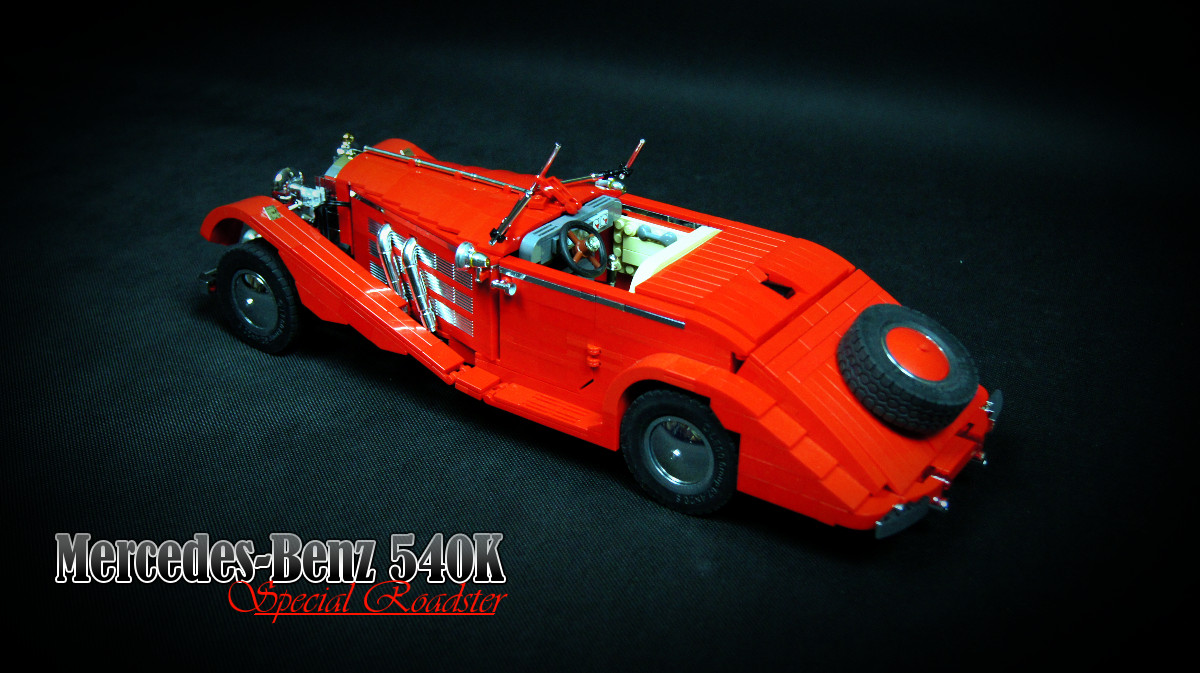
The model was actually kind of a leisure build after long and tenuous work on my Tumbler Batmobile model. Moreover, it was an interesting opportunity to see if it could top my very similar model of the Morgan car built nearly four years earlier. It was very simple mechanically, with no suspension whatsoever – as the look of the model was my top priority – and with the rear axle’s differential driven by a single PF L motor with no gear reduction. The front axle was steered by a PF Servo motor, which was also connected to the steering wheel. Using this motor negated the need for any substantial gear reduction and for limiting the steering lock, while providing a return-to-center function. It was interesting to see how well a single, ungeared L motor handles this not exactly lightweight model. The model proved that the L motor’s inner gear reduction is probably minimal, because it was very easy to backdrive it, and the model was severely affected by inertia when stopping, to the point where it was almost impossible to brake with the motor. Despite all that, the model was surprisingly agile, which shows that the L motor is a very interesting alternative for the much bigger XL motor.
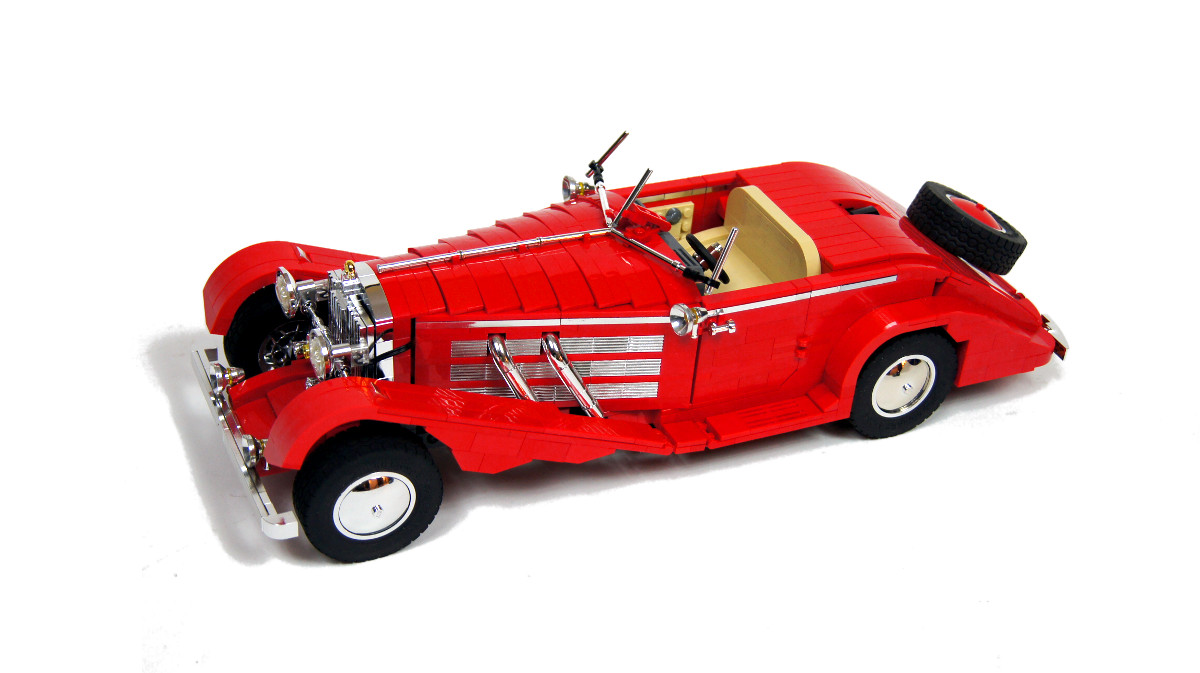
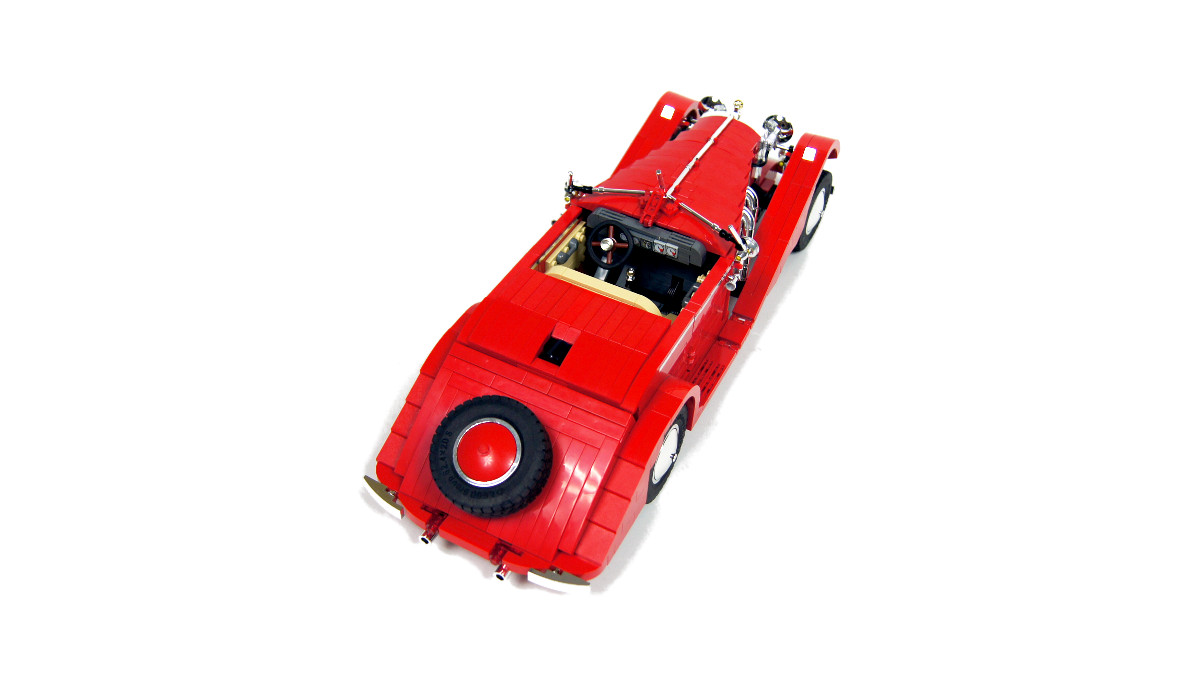
The look of the model was not modeled after any particular version of the Super Roadster (which vary a lot due to the aforementioned customization options), but rather combined details from several versions that caught my attention. There was a number of elements I did not particularly like, such as the pieces holding the windshield, the bottom line of the front fenders, the rear line of the rear mudguards, the “break” on top of the trunk and the lack of chrome bars on the trunk, but all in all, the model turned out looking much better than I anticipated. It was great fun to drive it despite its simplicity, especially with a hamster behind the steering wheel. The only thing I really regretted is the lack of LEGO whitewall tires, and the difficulty in trying to make some. I have experimented with paint and stickers, but to no avail.
Work in progress photos:


Photos:


Video:
Media coverage:
8 studs (Polish)

Wow it’s so beautiful! I think the one thing that indicates a builders expertize the most is the ability to build really beautiful models.
@efjie
Now all we need is suspension! 😀
I’ve said that least 4839249 times. SCK was here
I wish I had all the lego I wanted so I could make awesome models like this
Awesome. I saw the video about it. Ur hamster was funny I like it when u use him/her in your videos. Overall nicely detailed too
@efjie
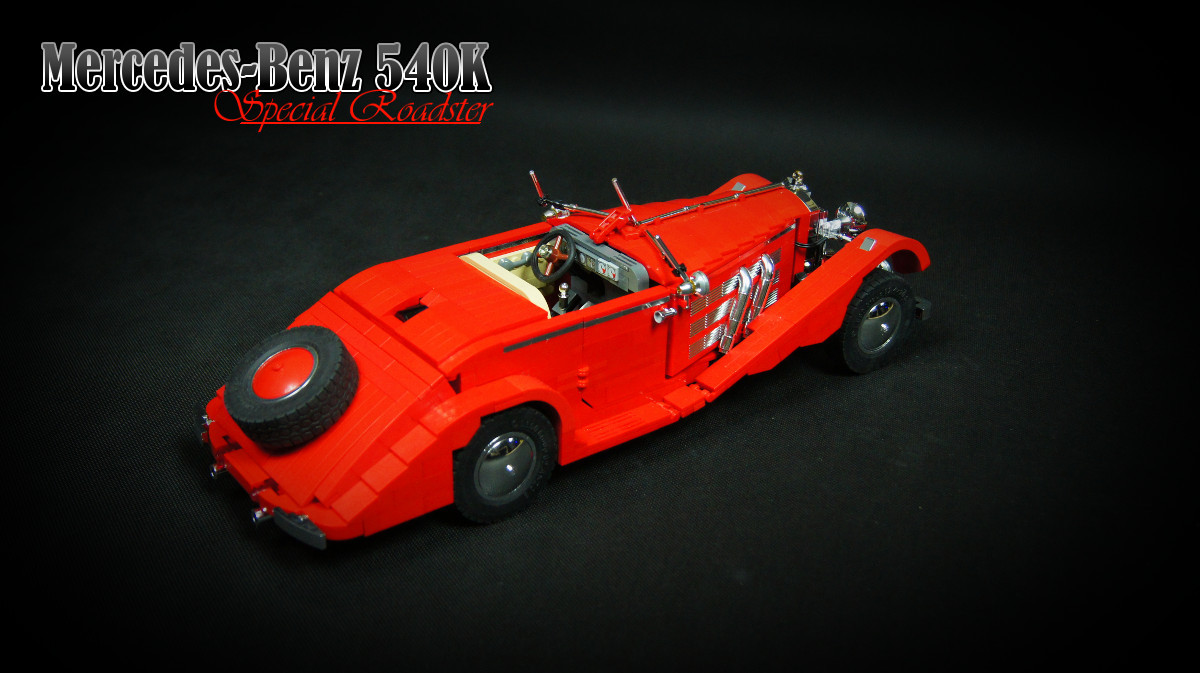
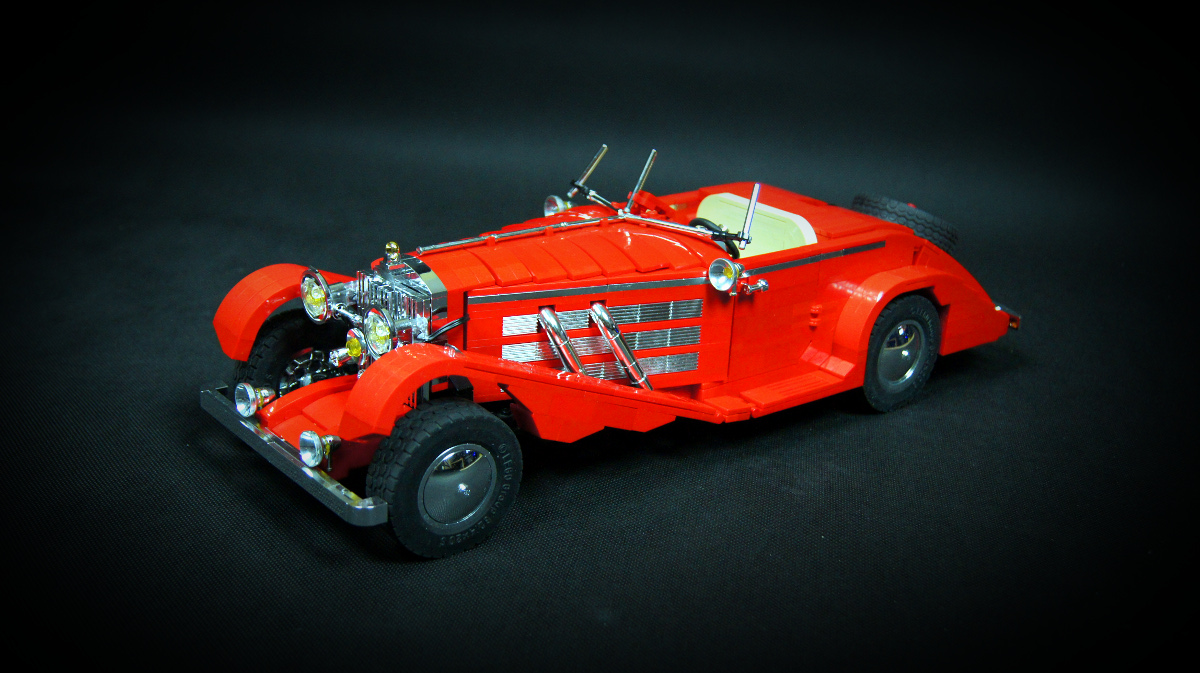
Wow, it does look good in black 🙂
Et voila ! Sublime in black
http://www.brickshelf.com/gallery/efjie2002/collection2/img_6526.jpg
http://www.brickshelf.com/gallery/efjie2002/collection2/img_6527.jpg
http://www.brickshelf.com/gallery/efjie2002/collection2/img_6528.jpg
http://www.brickshelf.com/gallery/efjie2002/collection2/img_6529.jpg
http://www.brickshelf.com/gallery/efjie2002/collection2/img_6530.jpg
bricolage rapide de deux photos:
http://www.brickshelf.com/gallery/efjie2002/collection2/rouge_et_noir1.jpg
@Sariel
work in progress 😉
@efjie
Thanks! Looking good 🙂 I’m still hoping to see a black version.
@Sariel
pictures in my brickshelf gallery:
http://www.brickshelf.com/cgi-bin/gallery.cgi?f=522452
http://www.brickshelf.com/gallery/efjie2002/collection2/img_6332.jpg
http://www.brickshelf.com/gallery/efjie2002/collection2/img_6333.jpg
http://www.brickshelf.com/gallery/efjie2002/collection2/img_6334.jpg
http://www.brickshelf.com/gallery/efjie2002/collection2/img_6335.jpg
http://www.brickshelf.com/gallery/efjie2002/collection2/img_6336.jpg
http://www.brickshelf.com/gallery/efjie2002/collection2/img_6337.jpg
http://www.brickshelf.com/gallery/efjie2002/collection2/img_6339.jpg
http://www.brickshelf.com/gallery/efjie2002/collection2/img_6341.jpg
@efjie
Thank you. Feel free to share some pics of your build, for example at Eurobricks.
wondeful car!
much more beautiful in reality than in picture: I made it with your instructions ! it’s amazing !
thanks merci
@Kurt
Use short sections of pneumatic hose. You can see these on photos, I missed then in the instruction, sorry.
Hi Sariel, well done! But how did you build the windshield? I can’t find out how you connected the window bars at the sides although I carefully watched the video and studied the parts list and the manual. Thank you for your answer!
@Alex
Can’t you just use standard LEGO piston and engine pieces? You know, like these: http://img.auctiva.com/imgdata/1/5/2/2/2/0/0/webimg/460051167_o.jpg
Absolutely divine. I have one question also. Do you know how to make a inline three cylinder out of normal lego engine pieces?
@Filipe
Thank you. This is a complete list of parts, there are no “other ones”. Yes, there are 3 motors in the first WIP photo – and not in the video – because they were later removed. If Work In Progress photos shown 3 motors and final photos show 2, I think it’s clear what happened.
All the information you need is either in the video or in the instruction. Just read & watch carefully.
Abo
@Sariel
Thank you for your reply. Yes of course the remote is obvious, but for a rookie like me a list of parts “essentially complete” is not enought to build a monster like this one. I really would like to have a Complete list of parts” and I dont mean with remote 🙂 but the other ones… Do you have one complete?
The part with the tape design I must had confused with another one When I was creating my wanted list on Bricklink…
About the motors I was mention your first photo on “Work in progress photos” section. It seems to have 3 motors…
Thank you for the Chrome information.
Apart this, I would like to tell you that this is one of the most beautifull models I saw in Lego and that you are in fact a master builder.
@Filipe
The parts list is essentially complete. I don’t know where you’ve seen some tile with a tape design – sure there is none in this model, and using the remote is kind of obvious, isn’t it?
There is no way any video shows 3 motors in this model, because there are just 2.
As for chromed pieces – kindly read 3:17 in the video.
Congratulations on this model. It is really a beauty piece of art.
I was trying to build it and to begin I download a part list I found on your website. File name is “Parts List for mb540_BI_partslist_mpd”.
Can I ask you, this part list is complete? I analyze it and it seems to miss some parts as for example the light bluish gray 3069 tile with the tape design. And where is the remote control?
Also you have a video where you use 3 motors on this model but the instructions on PDF just show two motors.
Other thing is the chrome bricks. O know we can substitute some of them by gray color, but I would like to have them all chrome like the original model. The fact is that I cant find them on Bricklink or in any other part of the world… did you chrome them yourself?
Can you help me on this? I need to do it :))
@Chris Bolton
Yeah, thanks, but I’m afraid that no contest is going to make me start using Flickr.
I would like to encourage you to enter the Tennessee Valley LEGO Club’s February 2013 contest of “Rides, Roads and Rods: A Tribute to Car Culture!” (http://www.flickr.com/groups/tnvlc_feb2013_contest). You obviously have an eye for cars and detail and we would love to see what you come up with for the contest.
@tony stone
Yes, probably.
oh, ok. well say if you were able to, would you?
@Tony Stone
No, it’s too small.
Hey, is it possible to make the car have full or even pendular suspension?
@MadtownLems
That’s because the platform isn’t part of the model.
The video features this car on an awesome rotating platform, but I didn’t see that part in the instructions PDF. Are there instructions for this somewhere else, or more pictures or information? Thanks, and great builds!
@Tony Stone
Read 3:17 in the video.
Where did you get the chrome peices? Also, do you know of any problems with the PF reciever
@Sariel
cool! hope lego make this to real set!
On of the best things you ever builded! Good Job! I LOVE it 😀
@Nick
At Bricklink, you can purchase anything separately.
You did a nice job on the car! I noticed in the pics you integrated the new PF motors. Do you know if I can purchase the motors “separately” from the set 9398, or do I have to buy the actual set to get the NEW motors? I am really looking forward to getting my hands on them! You are lucky to have the set and motors:)
@Kwon8429channel
I got them at Bricklink, and I used the right pieces for the body.
love it all your projects – in this roadster – where did you get these cool wheels also how to make Curved body design?
well a 1930’s model. wow interesting body style!
it sure is fast with the L motor it looks good with the chrome pieces.
😀 Noodles
The car looks so… elegant while driving.
Astonishing 🙂
I noticed in the last picture (blueprint) that the original had independent from suspension? In the thirties. Wow.
Great build on great inspiration.
Gotta love the hamsters 🙂
Well, simply… awesomeness!! Great job Sariel, you’re a “BOSS”!!
@grag
No, the differential position does not have an effect. There are real-life cars where differential is moved to a side too: http://www.allpar.com/photos/dodge/trucks/power-wagon/differential.jpg
hi, love the mercedes, i noticed that the differential is not mounted in the center of the rear axle, it is to one side (the right side i believe) this means the axles from the differential are different lengths, i was wondering if this affects the vehicles turning circle? does it turn in a smaller radius in a right turn than a left turn? or does the differentials position have no effect at all? thank you!
@Qwertyuiop
That’s a typo, I corrected it.
Also, in the datasheet you said there is two PF L motors for propulsion, but in the description and video there is only one. Did you originally plan to use two or is that a mistake?
Great work, as per usual! I love seeing such detailed bodywork made with studded pieces – it really shows that there are truly no limits to LEGO.
Wow! Thats a fantastic design!