TRON Bike
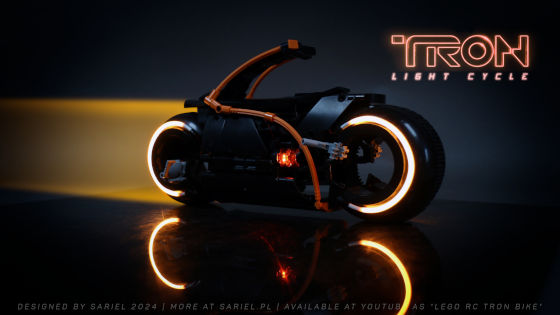
Model of a fictional motorcycle from the “TRON: Legacy” movie. Features drive, steering and custom lighting.
Datasheet:
Completion date: 06/11/2024
Power: electric (BuWizz 2.0)
Remote control: BuWizz 2.0
Dimensions: length 37 studs / width 15 studs / height 20 studs
Weight: 0.686 kg
Suspension: none
Propulsion: 1 x RC buggy motor from outer output on the rear wheel
Motors: 1 x RC buggy motor, 1 x PF Servo
I have already built an RC model of the TRON bike back in 2016, but it looked all wrong, with terribly miscalculated proportions, and it only drove thanks to tiny wheels hidden under the big, fixed wheels. But ever since LEGO has introduced 11 x 11 round liftarm rings, I felt like maybe I can build properly working TRON bike with these. And it took me a while, but I got there eventually.
The bike was modelled as close as possible after the bike shown in the 2010 “TRON: Legacy” movie and because my 2016 model used blue lighting, this time I went with orange one. I started by trying to put the 11 x 11 rings inside a 94.3mm D. x 38mm Motorcycle Racing Tread tire, which looked pretty cool but drove pretty poorly. The issue was the poor fir between the rings and the tire, with gaps that caused the tire to wobble around the rings and which made actually driving such a wheel tricky. In short, the only reasonable solution at this scale was to have a small wheel pressed to the outside of the tire, driving it, but because of the gaps it was necessary to press it with a lot of force, which in turn increased friction, made the wheel harder to rotate, and required pressing it even stronger.
While trying to come up with a better solution, I reached out to my friend Rob who runs Brickstuff and continually develops all sorts of LEGO-compatible lighting products, to see if he had an idea of how to illuminated the wheels of the model. It seemed to me that the best approach was to use long 3mm rigid LEGO hoses, bent to form nearly complete circles, but I didn’t have any way to light these hoses up. Rob came through, as he always does, and delivered identical hoses with LED filament inside, that could be built to specific length and lit up at specific color.
With the lighting solved, I went back to building the wheels. It was my goal to make the wheels work as closely as possible to the “real” ones, and in the schematics from the movie it can be seen that the “real” bike uses three-piece wheels. There is an inner roller ring, then there is a very thin tire rotating around it, and then there is a housing that covers the tire entirely from all sides, except for a small cutout at the bottom, which is where the tire comes in contact with the ground. I wasn’t sure I can build a good-looking LEGO housing around a tire at this scale, but I wanted to at least have a thin tire rotating around a fixed ring.
Eventually I found that if I build the ring from 6 x 6 curved gear racks, the holes on the side of this ring will have different spacing than holes on the side of the 11 x 11 ring – a spacing that will allow me to use half-pins to attach the 6 x 6 x 2 round corner brick quite securely to the resulting ring. Both of these pieces were available in black, and together they formed a nice, rounded wheel that looked pretty close to the wheels seen in the TRON movie. The only issue was that the resulting wheel was almost completely smooth on the outside, with barely any attachment points, so in order to keep it securely attached to the chassis, I have covered 3/4 or the ring with round bricks and kept 1/4 free to access the pin holes in the ring.
Now, there was a 3-studs-wide, shallow groove running around the outside of the wheel, between the round bricks on one side and the other. I’ve tried putting a number of elements inside that groove, including a LEGO chain which was too thin to protrude outside of the diameter of round bricks on the ring, and I was just about to drop this idea when it occurred to me that a LEGO 3-studs-wide track may not be of the same height as the chain, despite being closely related to it. And this turned out to be true – when I wrapped that track around the ring, the outer diameter of the track was marginally larger than diameter or the round bricks on ring’s sides, allowing the track to protrude out of the groove and touch the ground below the wheel. This also made driving the wheels quite trivial – I simply wrapped a shorter section of track loosely around the front wheel’s ring, and then a longer section of track around the rear wheel’s ring AND a gear wheel, so that the gear wheel meshed with inside of the track.
Steering the front wheel was a little tricky because the ring had pin holes facing only to the sides, not up or down, so I couldn’t pivot it around a vertical axle. Instead, I attached a system of parallel levers to the sides of the rings, creating a virtual pivot that was operated by a vertical PF Servo motor. I’ve also managed to fit an RC buggy motor to drive the rear wheel’s track and to squeeze in a BuWizz 2.0 to power the whole model The lighting system of the wheels was powered from the BuWizz too, using a regular Power Functions plug, and so was the Brickstuff LED beacon that I managed to fit on one side of the bike (the other side had the RC motor in that spot).
The resulting model looked way more accurate than my 2016 attempt, it was able to drive and steer, and the illumination looked great. The traction was an issue because the tracks had contact with the ground over a very limited area, and the stability wasn’t that good – the bike had a tendency to flop to a side when trying to turn at high speed. But it drove just fine on a carpet, and in fact was quite fast in a straight line on it.
Due to the fairly low scale, the model’s body looked way more blocky than it shoud have, and was missing inward curves seen in the original bike simply because these would expose the motors, the BuWizz and the internal mechanisms. It also took me a while to build the “roof” that’s supposed to cover driver’s back, because it had to be rigid, curved and very thin. I’ve played around with 3mm hoses kept bent by a string, but I was eventually able to build it using hinge plates with fingers.


