A39 Tortoise
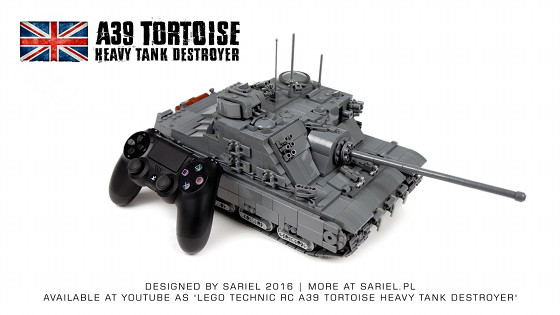 Model of British WW2 heavy tank destroyer. Features drive and steering via a subtractor, a V12 mini piston engine, full suspension, remotely panned and tilted main gun, turret with motorized rotation and guns elevation and remotely panned machine gun.
Datasheet:
Completion date: 12/10/2016
Power: electric (Power Functions)
Dimensions: length 39 studs (54 studs including the main gun’s barrel) / width 23 studs / height 18 studs (not including antennas)
Weight: 1.728 kg
Suspension: oscillating bogies
Propulsion: 1 x PF XL motor geared 1:2.78 via subtractor
Motors: 1 x PF XL, 4 x PF M, 2 x Micromotor
Sometimes the whole model is just about one element, and this is one of such cases. When I first saw the Tortoise, what immediately caught my attention – other than the interesting shape of the front armor – was the small turret with two coupled machine guns. I thought it would be quite a challenge to make the turret’s rotation motorized while keeping the ability to control the guns’ elevation remotely at all times.
As for the original Tortoise, it looks similar to the famous US T28/95 super heavy tank, and for a reason – both were designed during late phase of WW2, and both were designed with the same purpose: punching through German defenses. Such a purpose favored massive, heavily armored vehicles that sacrificed speed and agility for protection and firepower.
The look of the model was based mostly on historical sources, which is why it differs slightly from the World of Tanks’ version. One of the noticeable differences is different arrangement of the spare track links on the right side of the hull. There was a number of details I was unhappy with, including the shape of the front armor around the main gun, which was a necessary compromise to allow panning and tilting the gun from inside. I would also prefer to be able to put the machine gun inside an armored ring, and to tilt the front part of the hull’s top slightly. I did enjoy building a model with no stickers, for a change.
In terms of the technical side, the model was very different from my usual tank models and it packed a lot into a relatively small package. The front of the chassis was where the subtractor was, coupling 1 PF XL motor for drive and 1 PF M motor for steering. These two motors were located in the middle of the chassis, with a mini V12 piston engine behind them. The piston engine was driven by the PF XL motor, too, and below it were two SBricks. I have also used the limited space above the tracks in the back for wires and plugs. The main challenge was fitting everything I wanted inside the casemate. To make things more difficult, the center of the casemate was occupied by the battery (the only place with enough room for it) and its rear wall had curved corners, which limited the amount of space inside even further. Thus the casemate was sort of “wrapped” around the battery, which could be turned on and accessed through the grille on casemate’s top. In front of the battery was the mechanism for panning and tilting the main gun. The panning was controlled by a Micromotor, geared down and squeezed in right behind the front armor’s right panel, and tilting was controlled by a PF M motor with a clutch and a worm gear, located low on the left casemate’s side. Because of the narrow armor around the main gun’s mount, panning and tilting was effectively possible only within range of 10-15 degrees.
Thh turret, which was just 2 studs tall and only 1 stud wide inside, was rotated by another Micromotor driving its small turntable directly using a 8t gear. The turret could rotate infinitely, and its two guns could be elevated at any moment using a mechanism shown below. The mechanism relied on a single small linear actuator going through the turntable and driven by a PF M motor, using a rubber belt to save space. Inside the actuator’s upper end was a towball pin, with its towball inserted half a stud deep inside a pin hole in a connector marked red on the image below. Thus the pin hole kept the actuator’s top from rotating left or right, so it could extend, and when it extended, the towball would rotate the connector upwards or downwards.

The only other mechanism was a ball-mounted machine gun on the casemate’s left side, which could be panned by a PF M motor and tilted manually. I wanted very much to control the tilting remotely too, but there just wasn’t enough room left. In fact, the PF M motor controlling the panning had no gear reduction whatsoever, because I had to use the little room that was left for a clutch that prevented this motor from ripping the machine gun away from its mount.
One of the flaws of the model was jittery motion when driving. This was caused not my the drivetrain or the propulsion motor, but by the road wheels – apparently they were spaced so that they all hit the gaps between the track links at exactly the same moment. There was no solution to this except using inaccurately-sized road wheels or changing the scale of the entire model, so I left it unchanged.
Finally, I have used the SBrick Controlled app to control the model’s SBricks remotely using a PS4 gaming pad – a method explained in detail here. The pad worked very well, offering more than enough buttons to control all functions, and its two joysticks allowed for proportional control of the drive, steering and also the main gun’s movements.
In the end I was happy with the model, which straightforward and relaxing to build, but its appearance was clearly better than its performance. Its speed was realistic (that is, very slow) and the many functions that required multiple motors and took plenty of room inside actually produced very little effect on the outside – such as the machine gun’s panning. I was, however, proud of the turret’s mechanism which worked exactly as intended inside an extremely limited space.
Work in progress photos:


Photos:


Video:
Media coverage:
Dom1n (Polish), The Armored Patrol, The Awesomer, The Lego Car Blog

@Alkan Anafarta
Most blueprints are free, some are paid. And the custom figure comes from BrickArms.
@Sariel
But they are are asking me to pay for the blueprints. Also from where you got this custom military minifigure.
@Alkan Anafarta
I get pieces from Briclink and blueprints from The-Blueprints.com
This is a nice tank really cool and awesome. I wonder from where you get such old lego parts like micromotor and all.Also please share the website from where you got the blueprint of the tank.