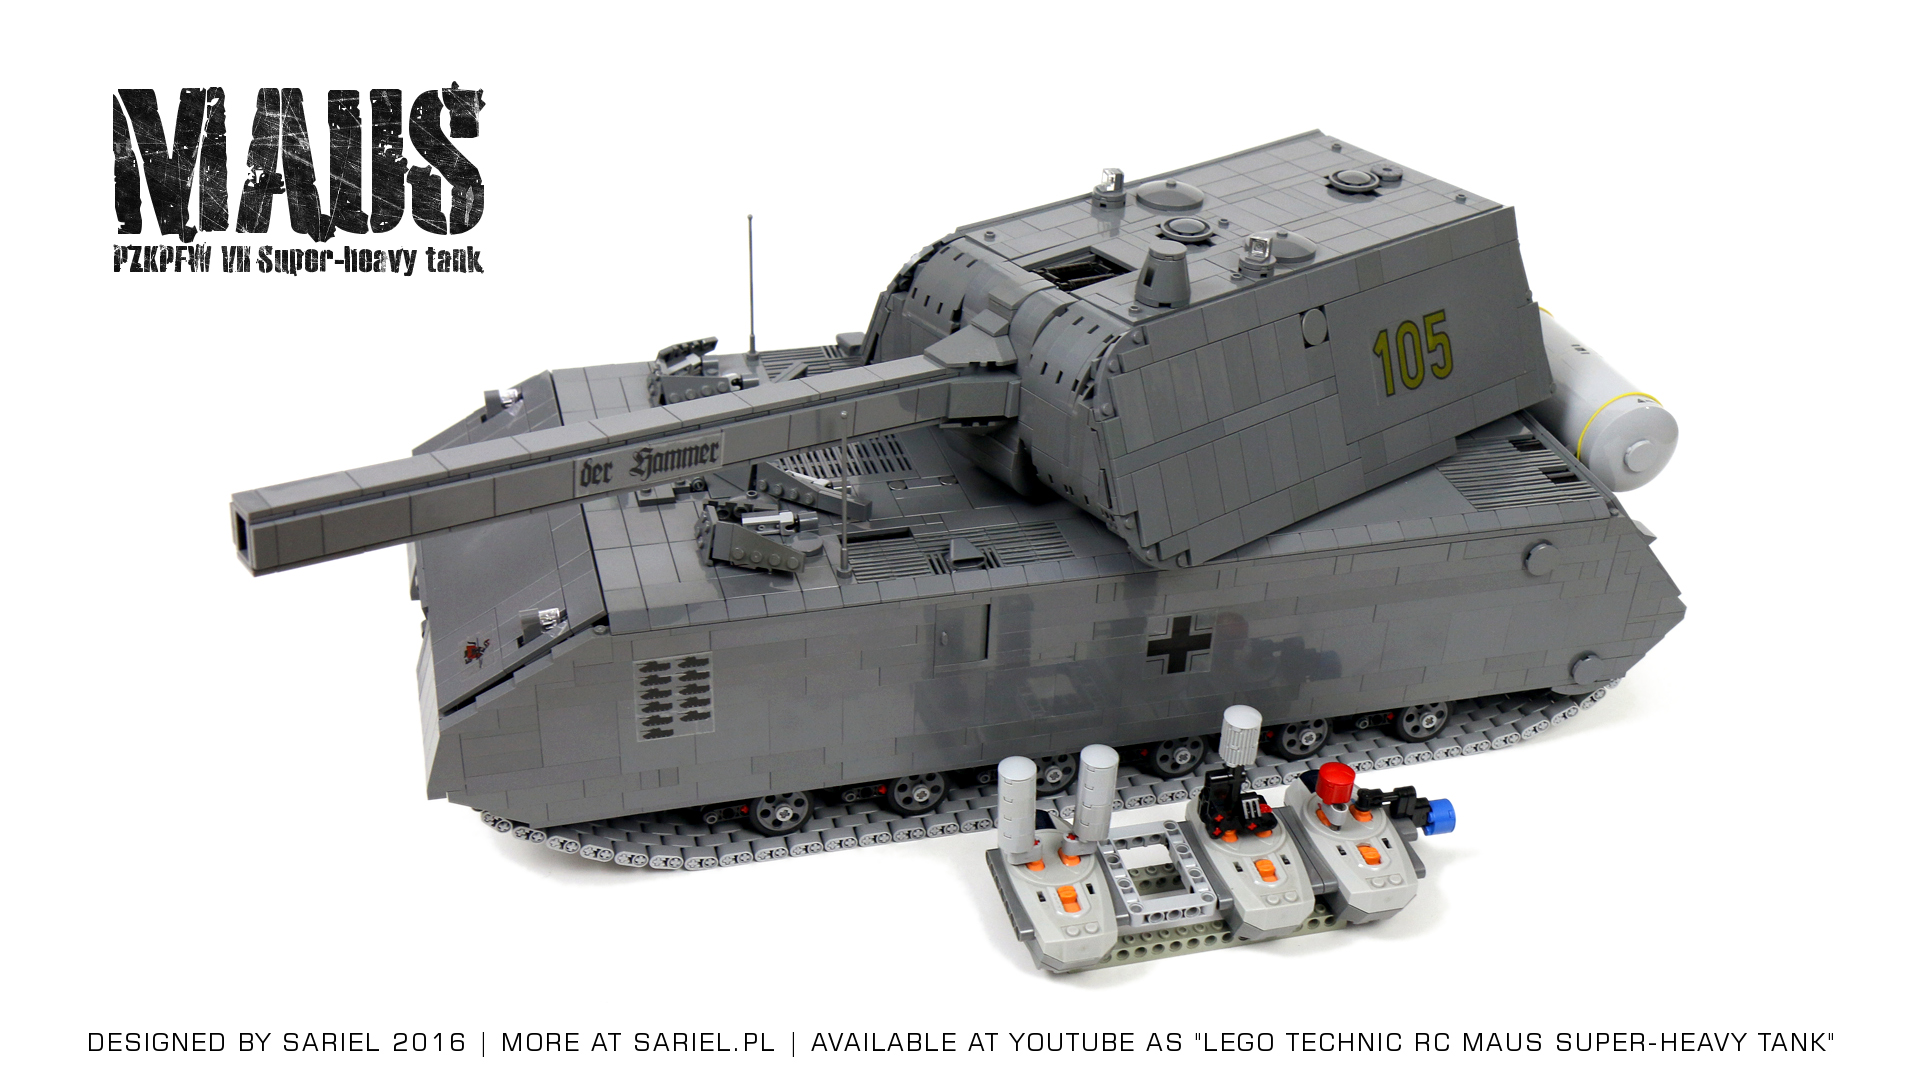
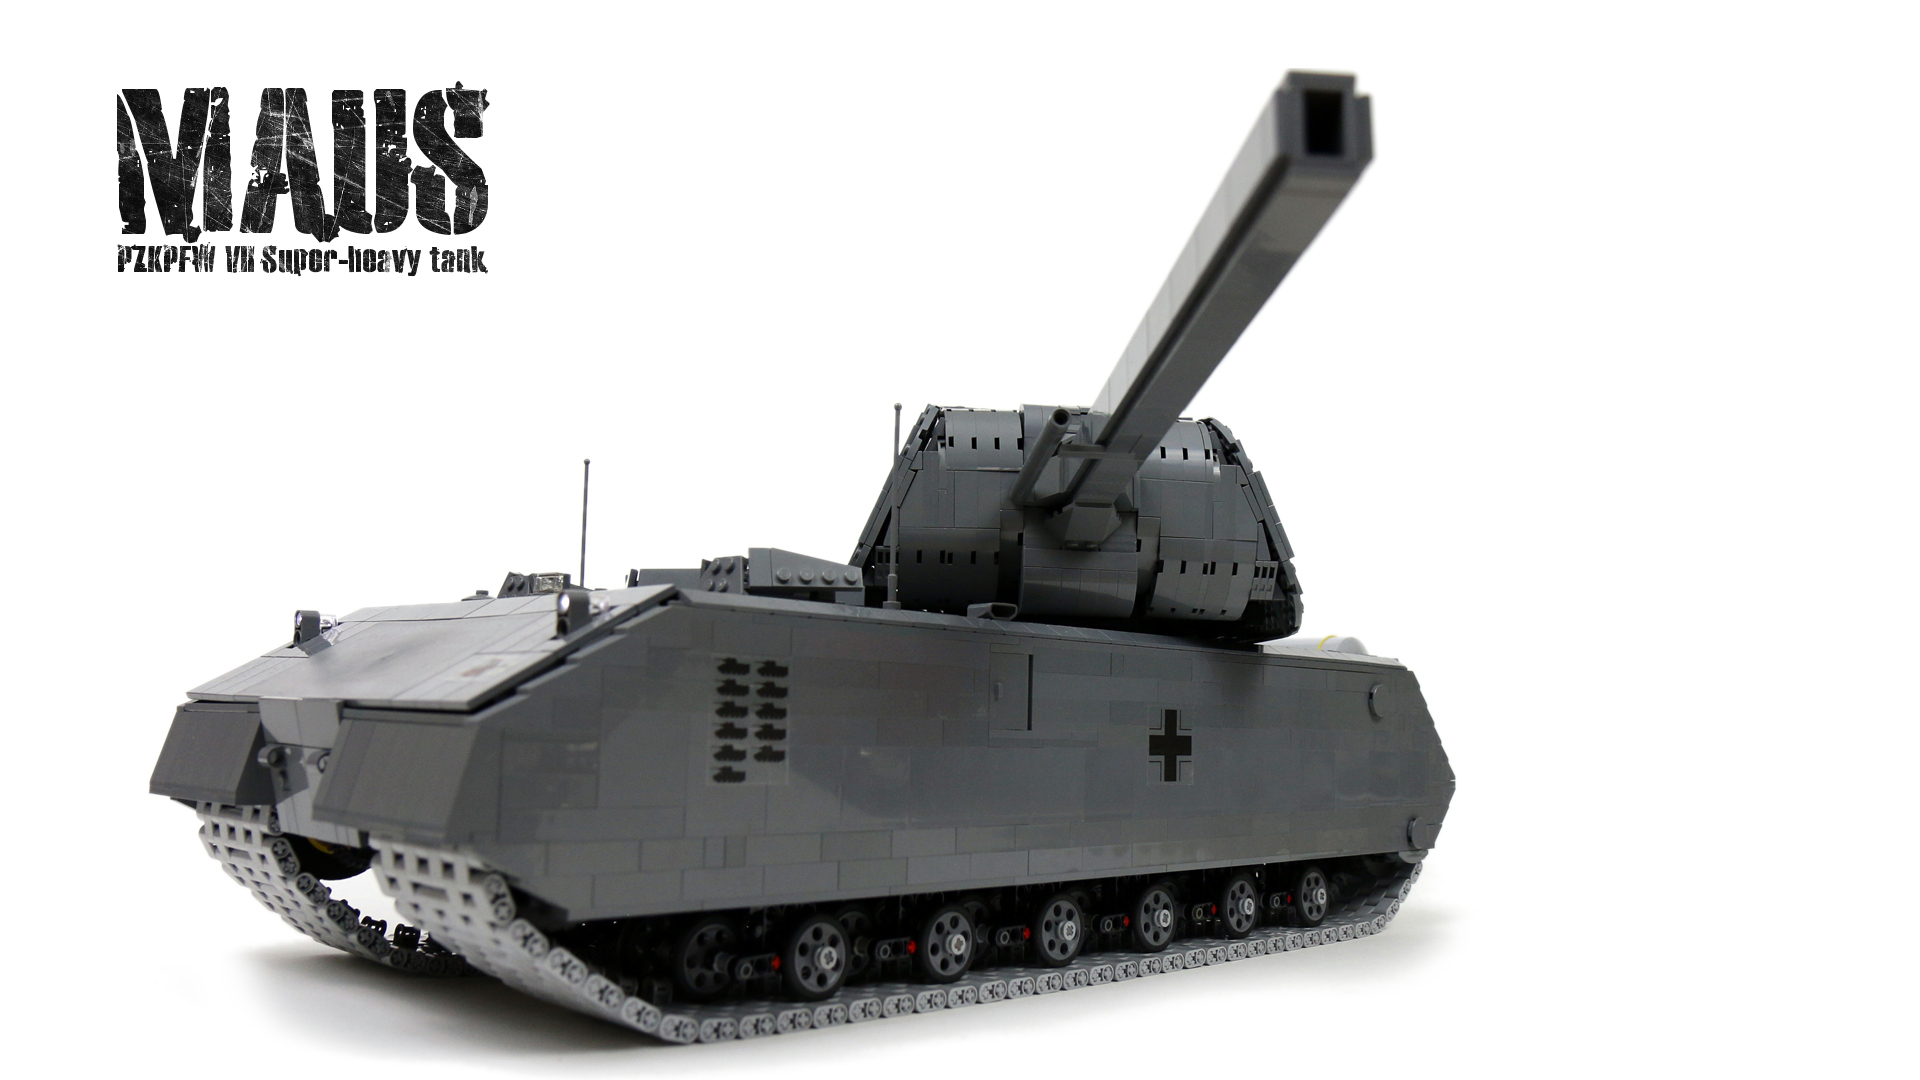
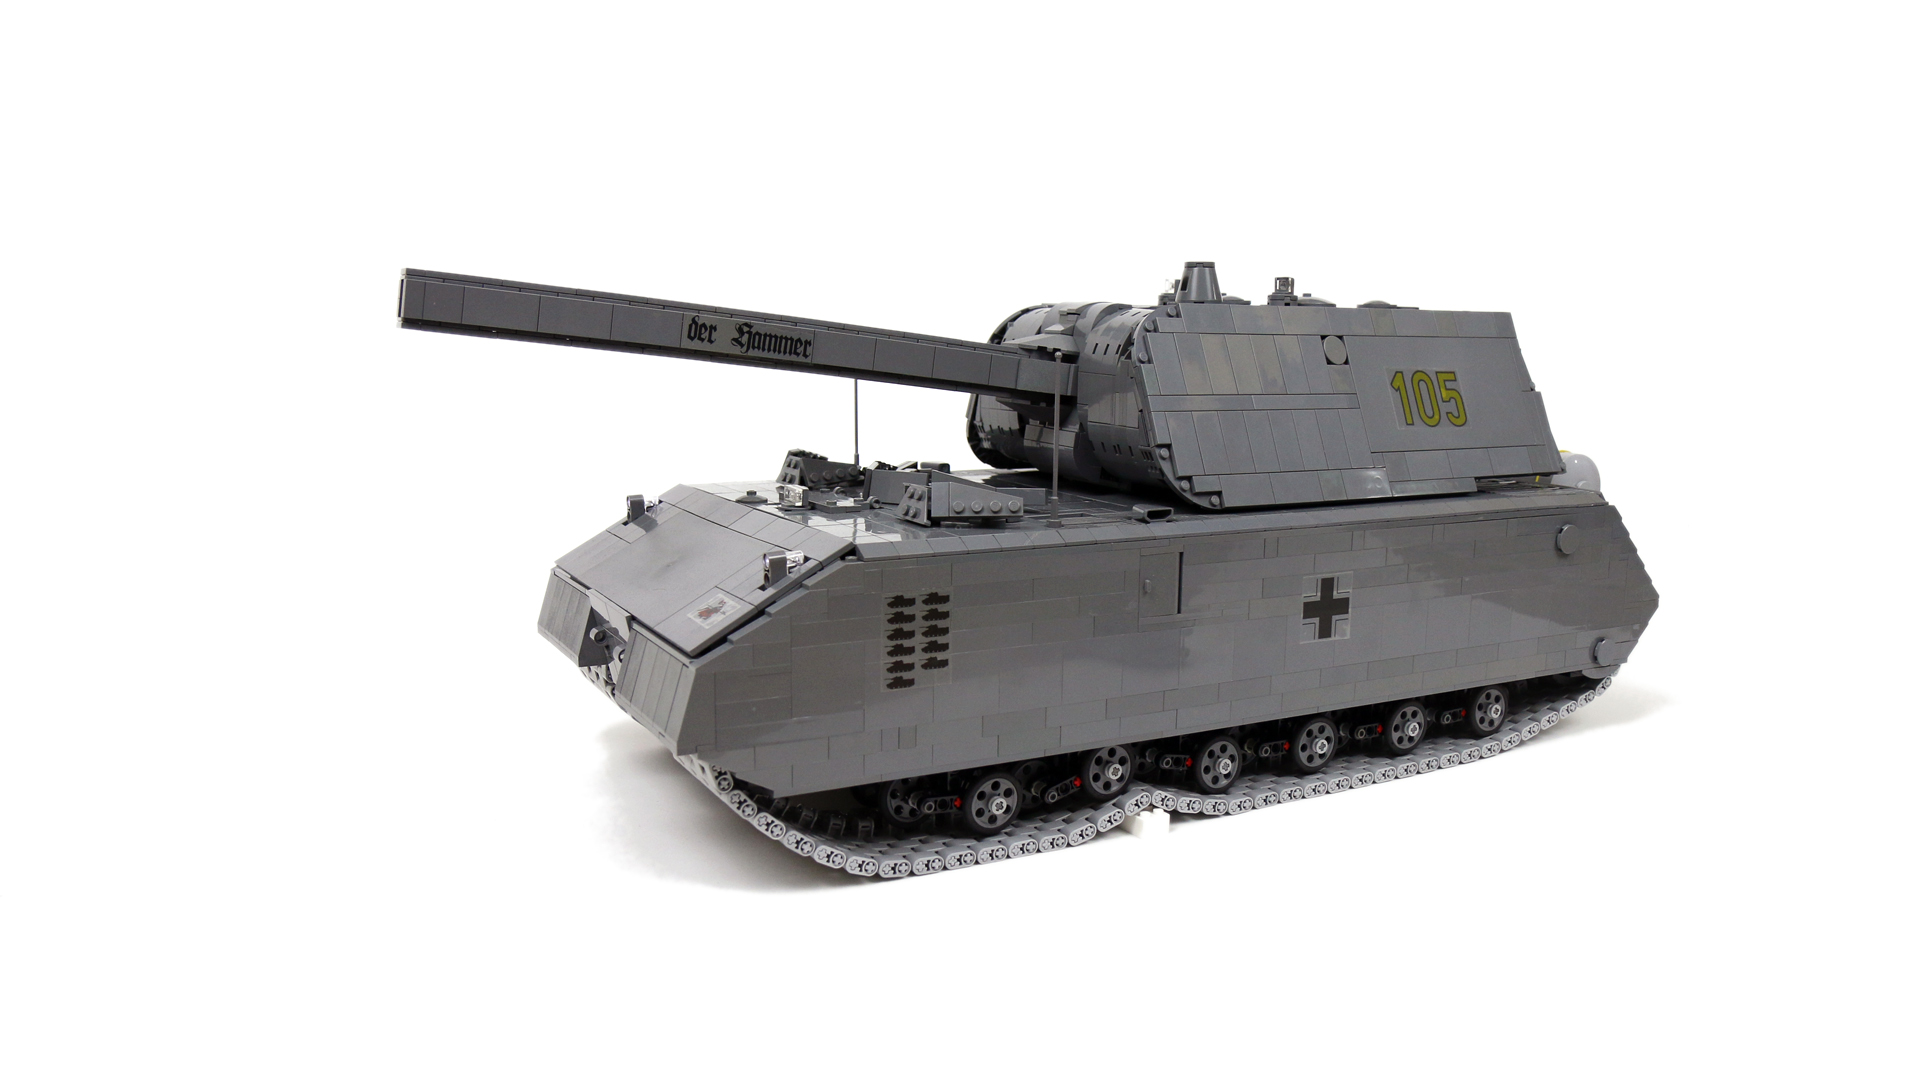
Maus Super-heavy Tank
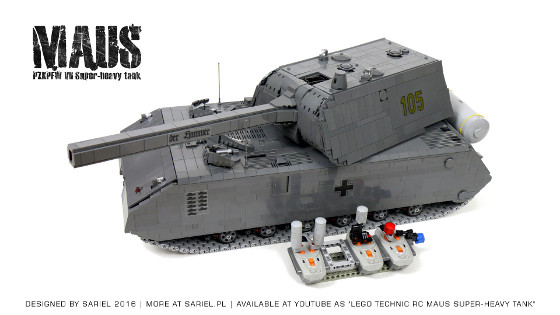
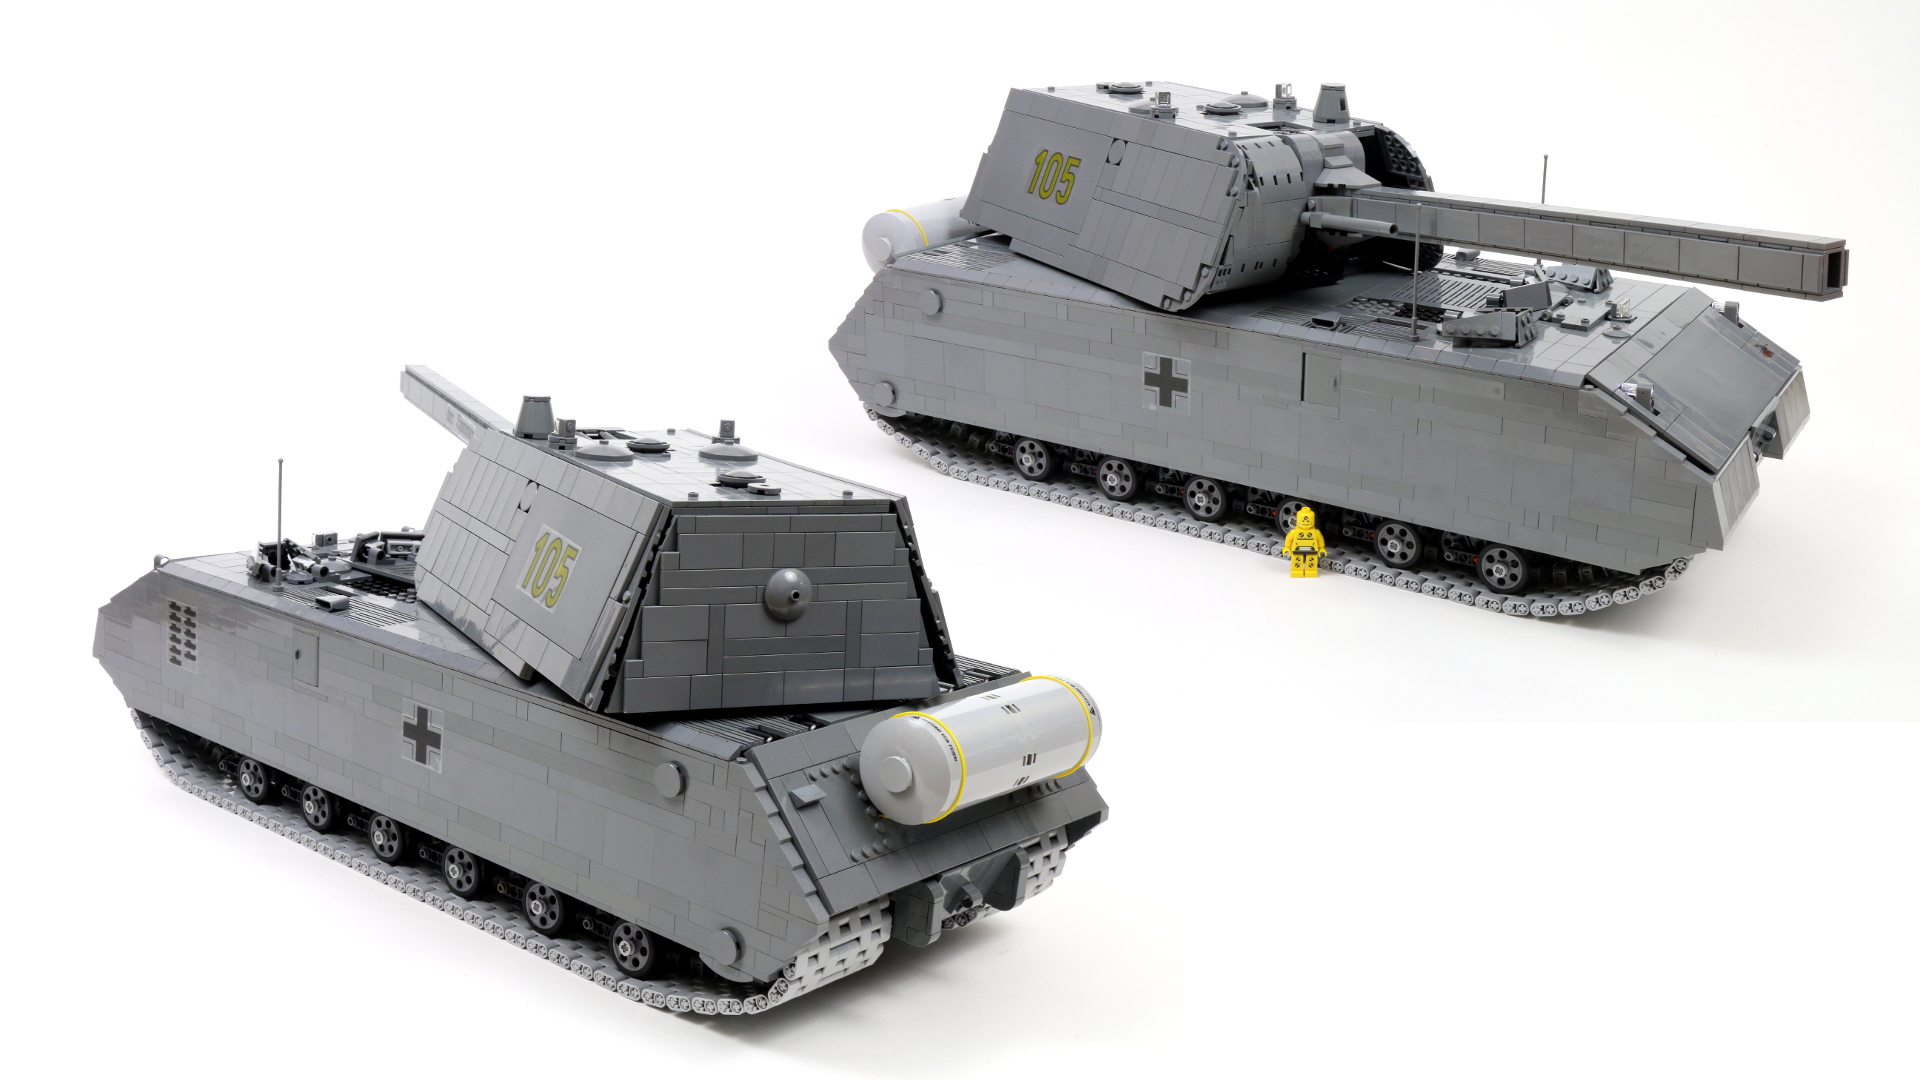
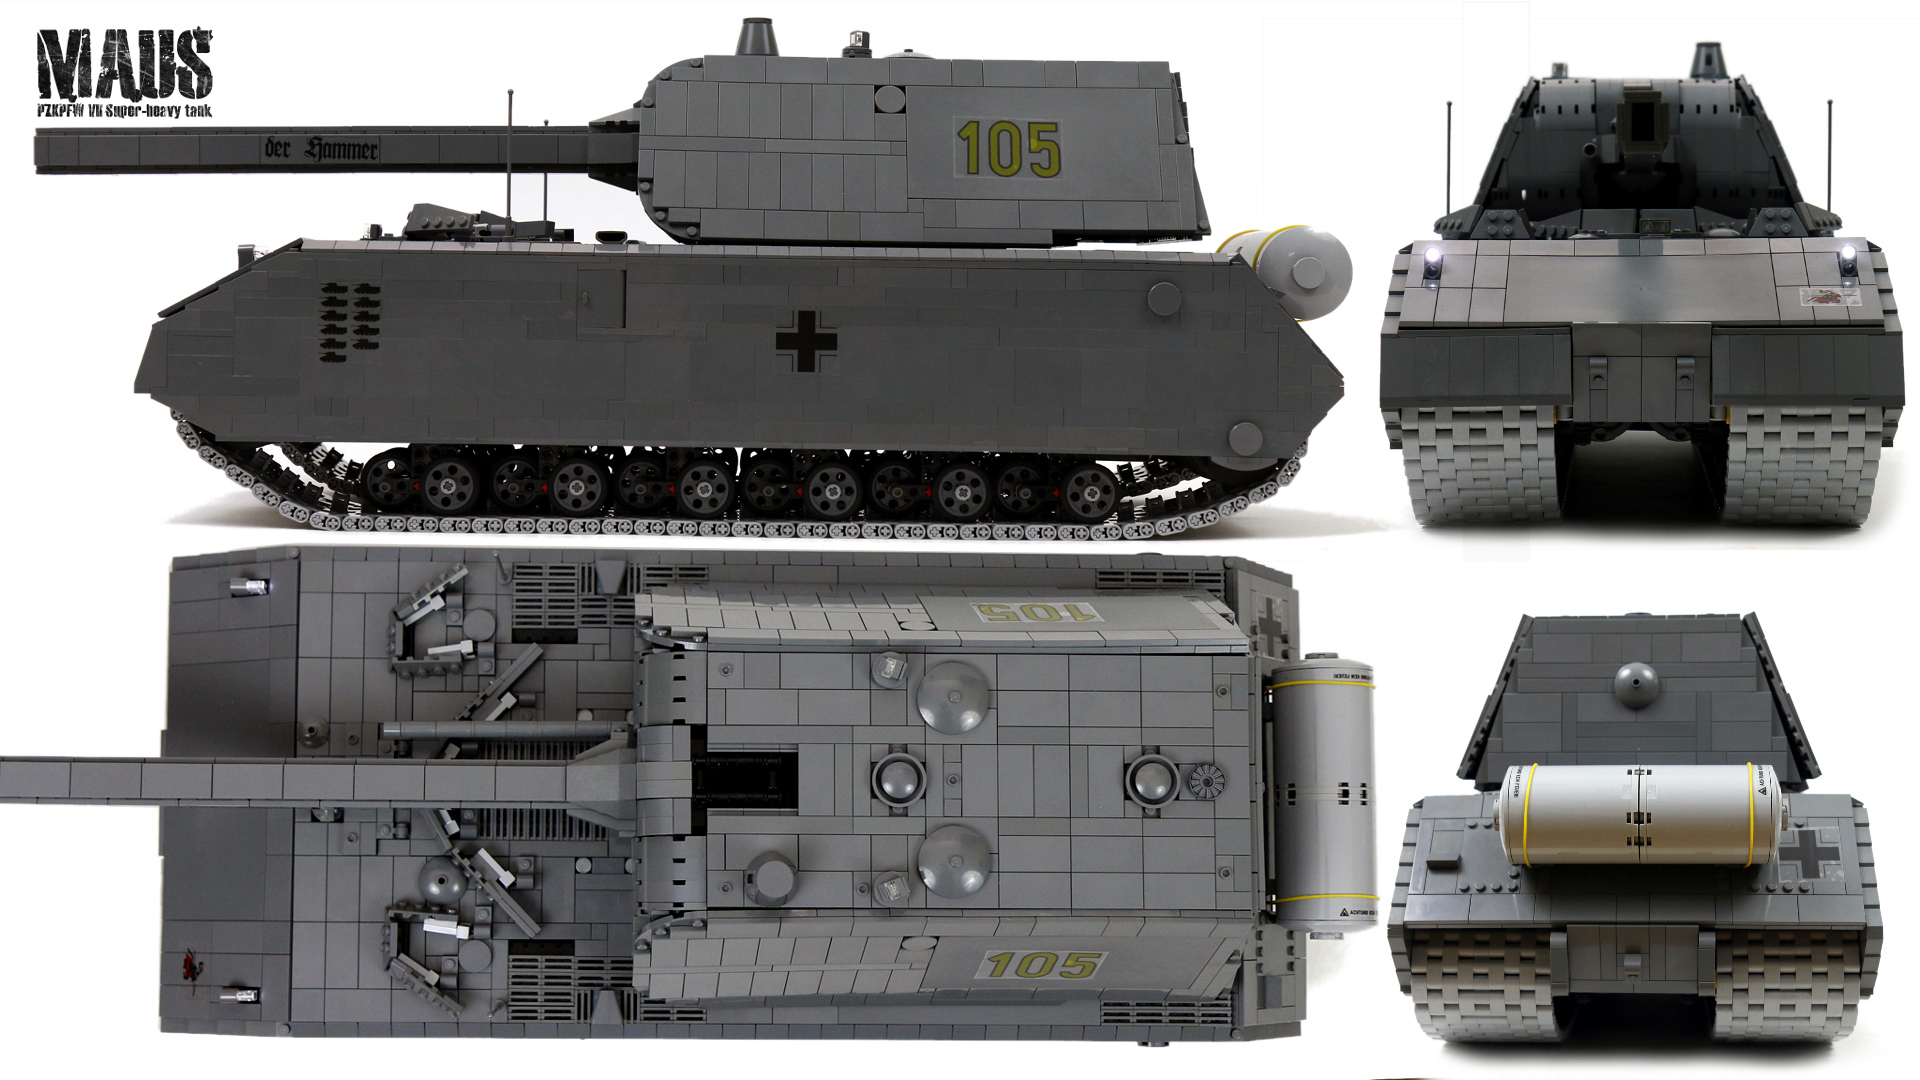
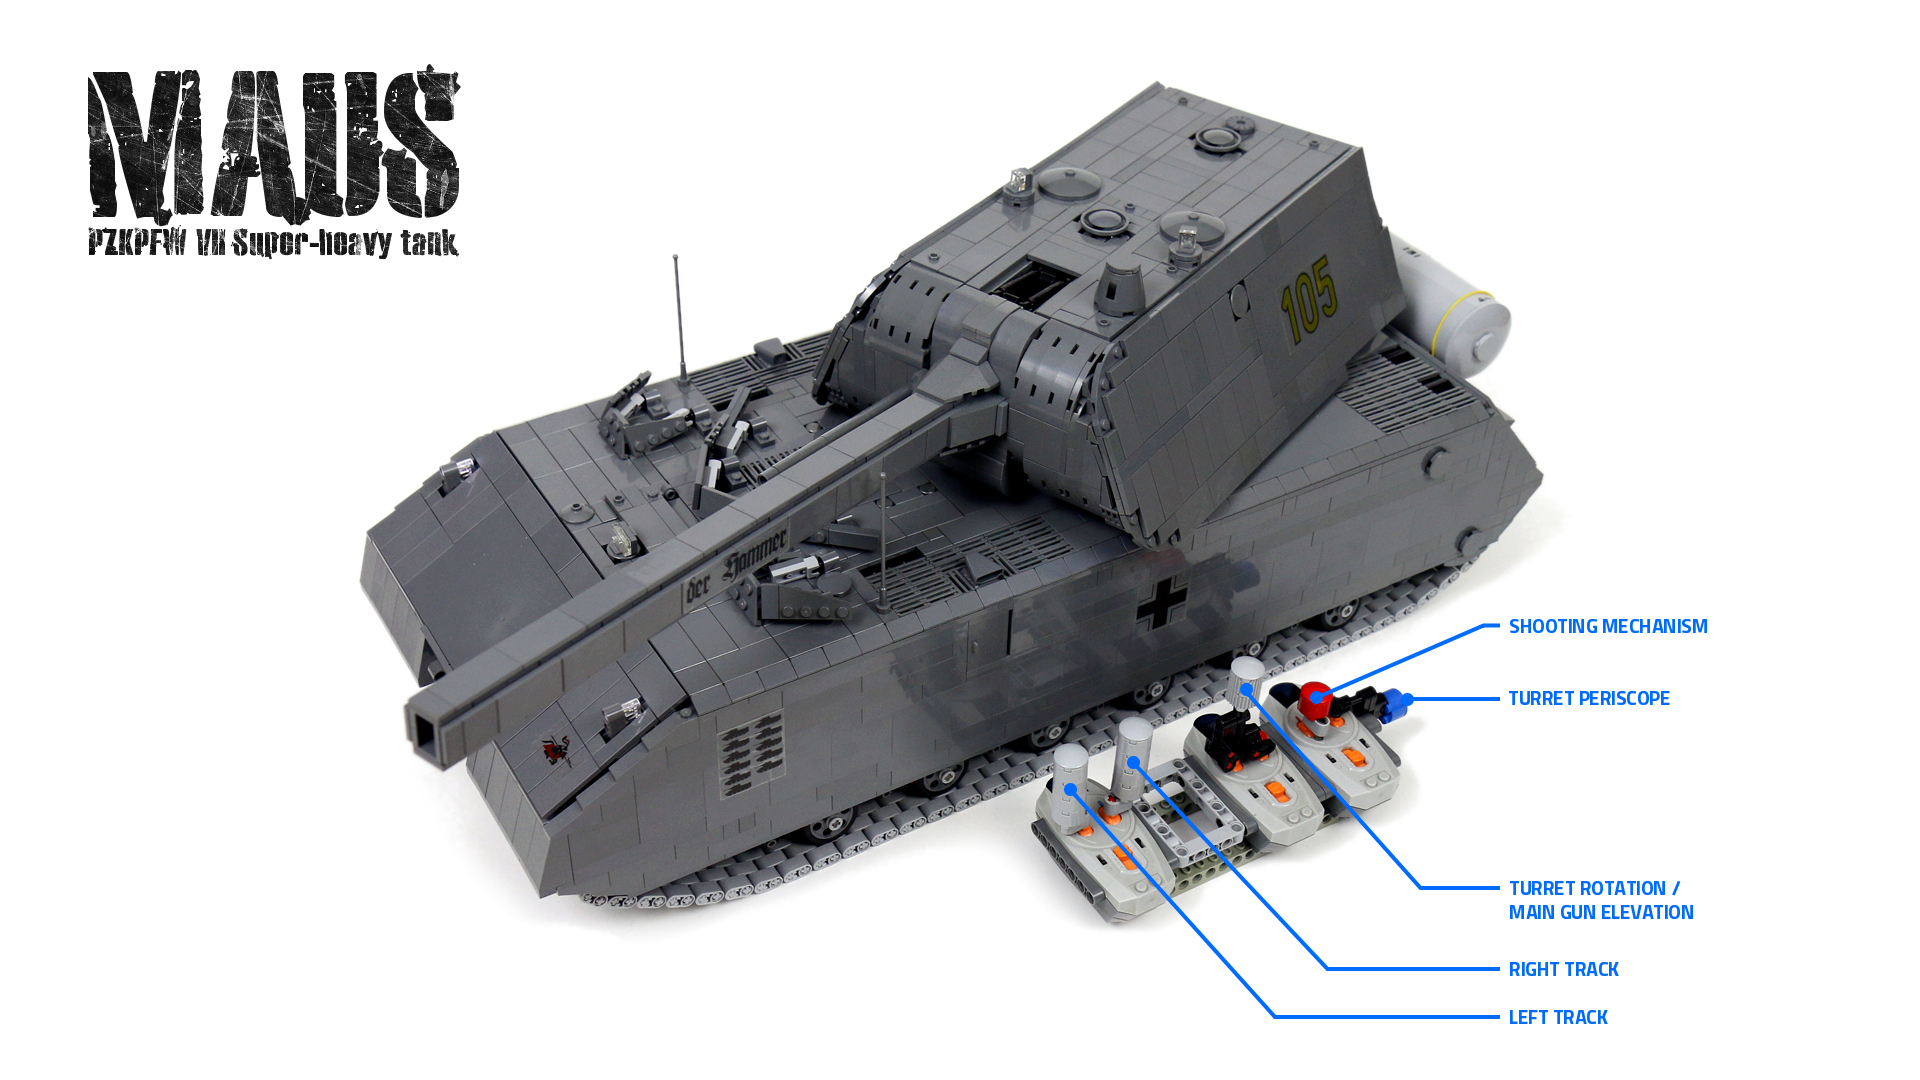
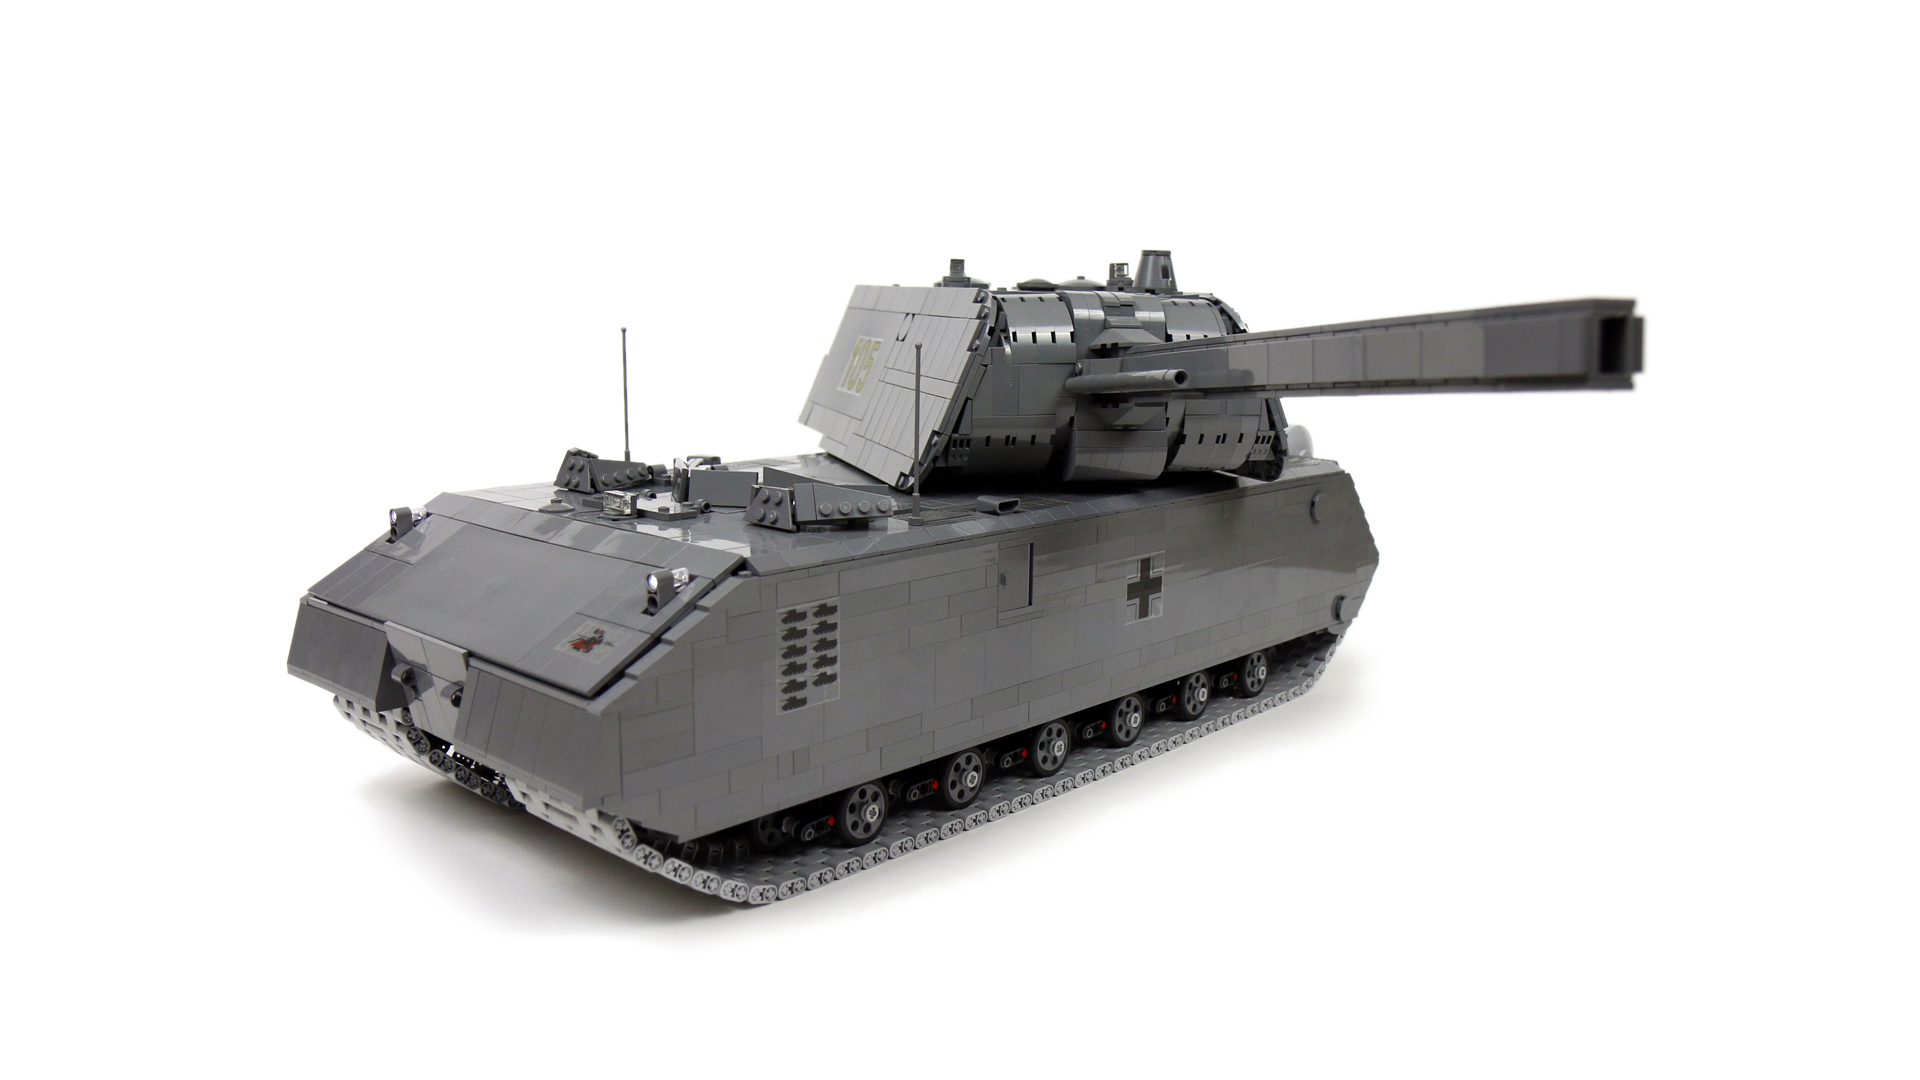
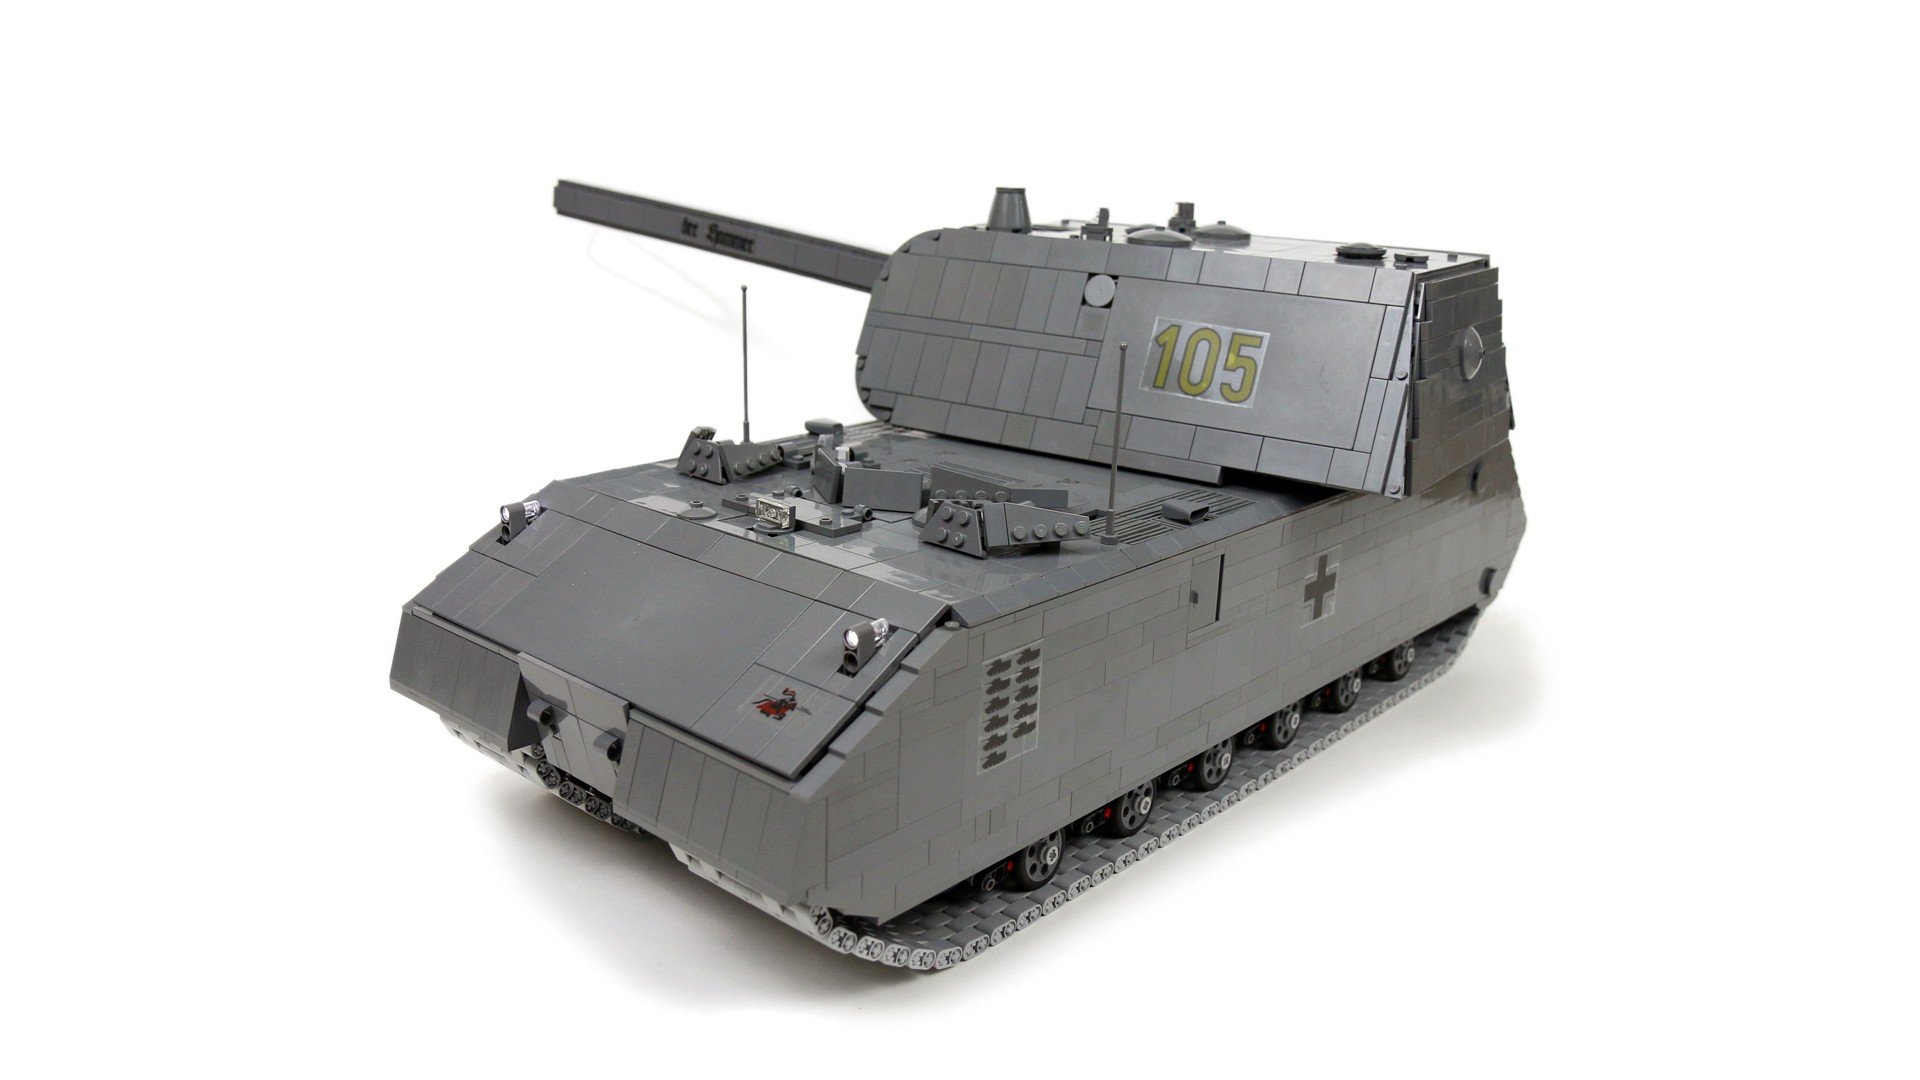
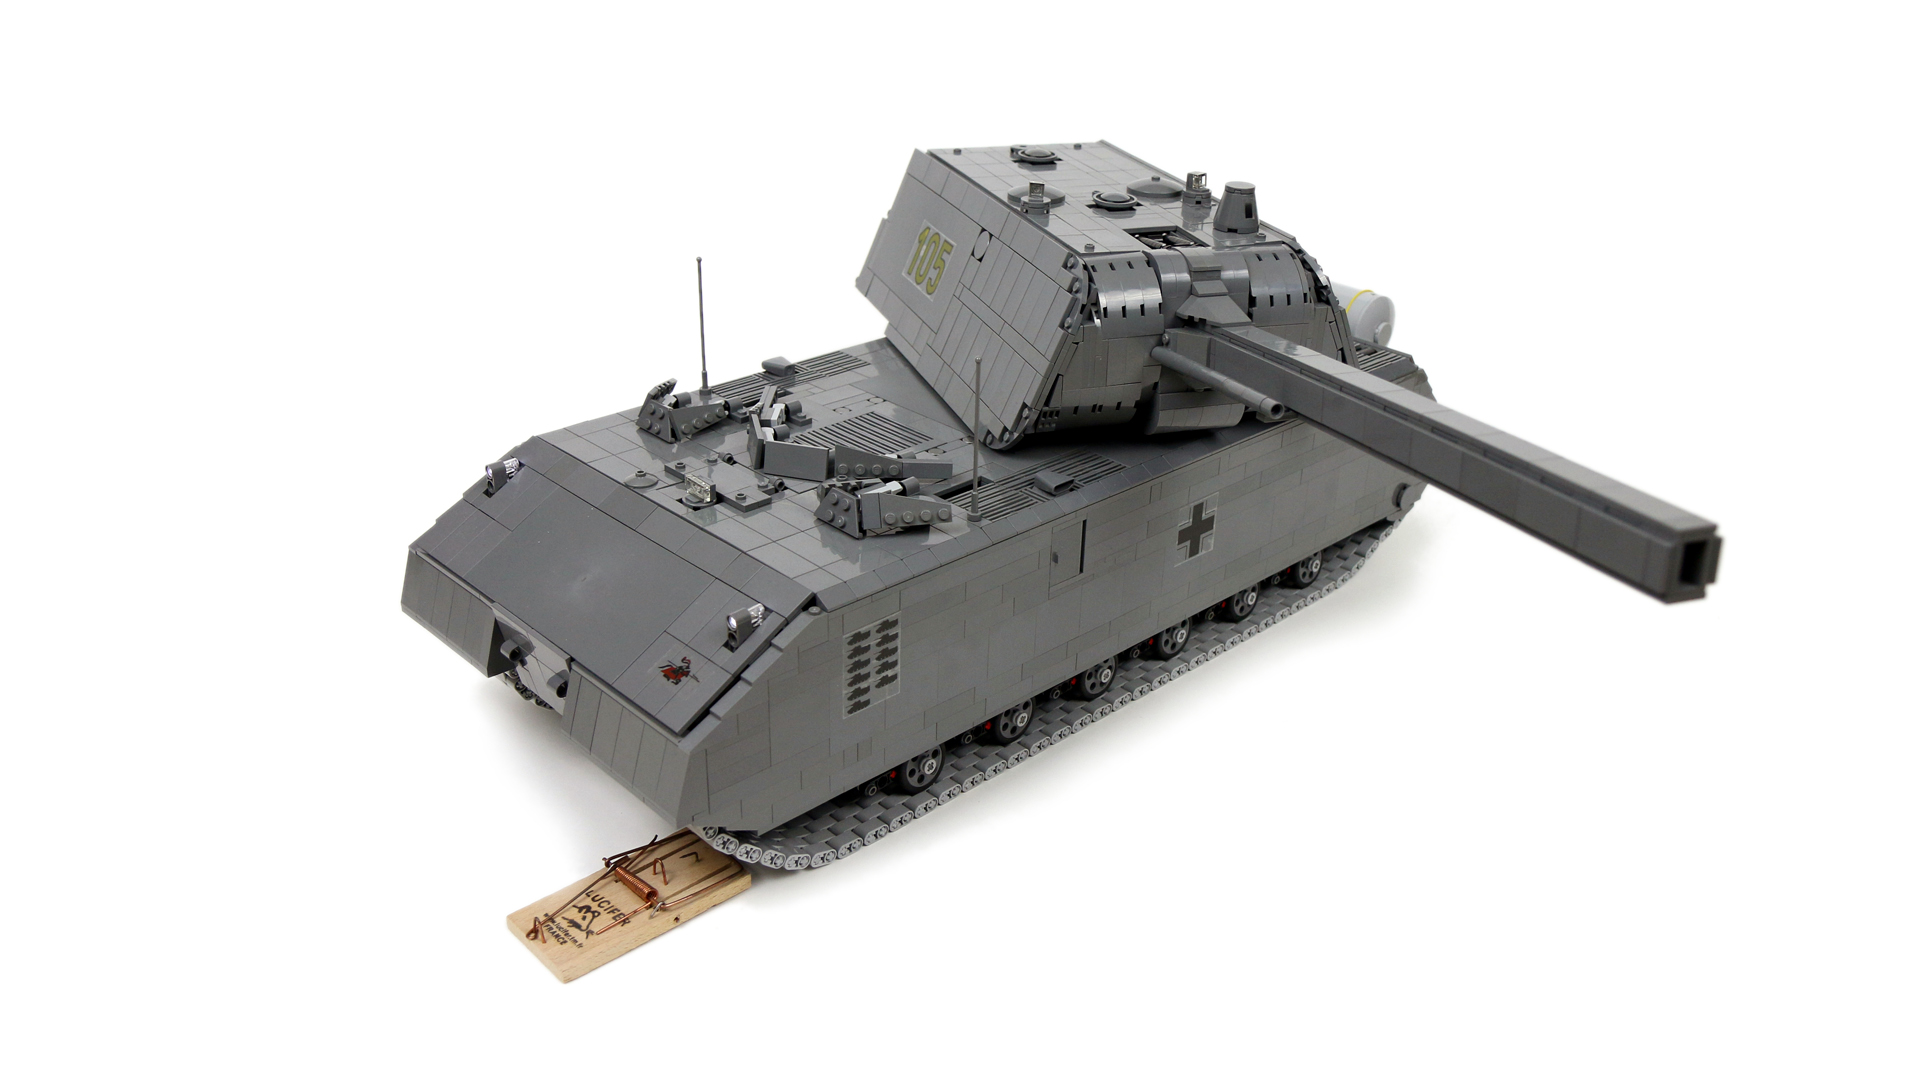
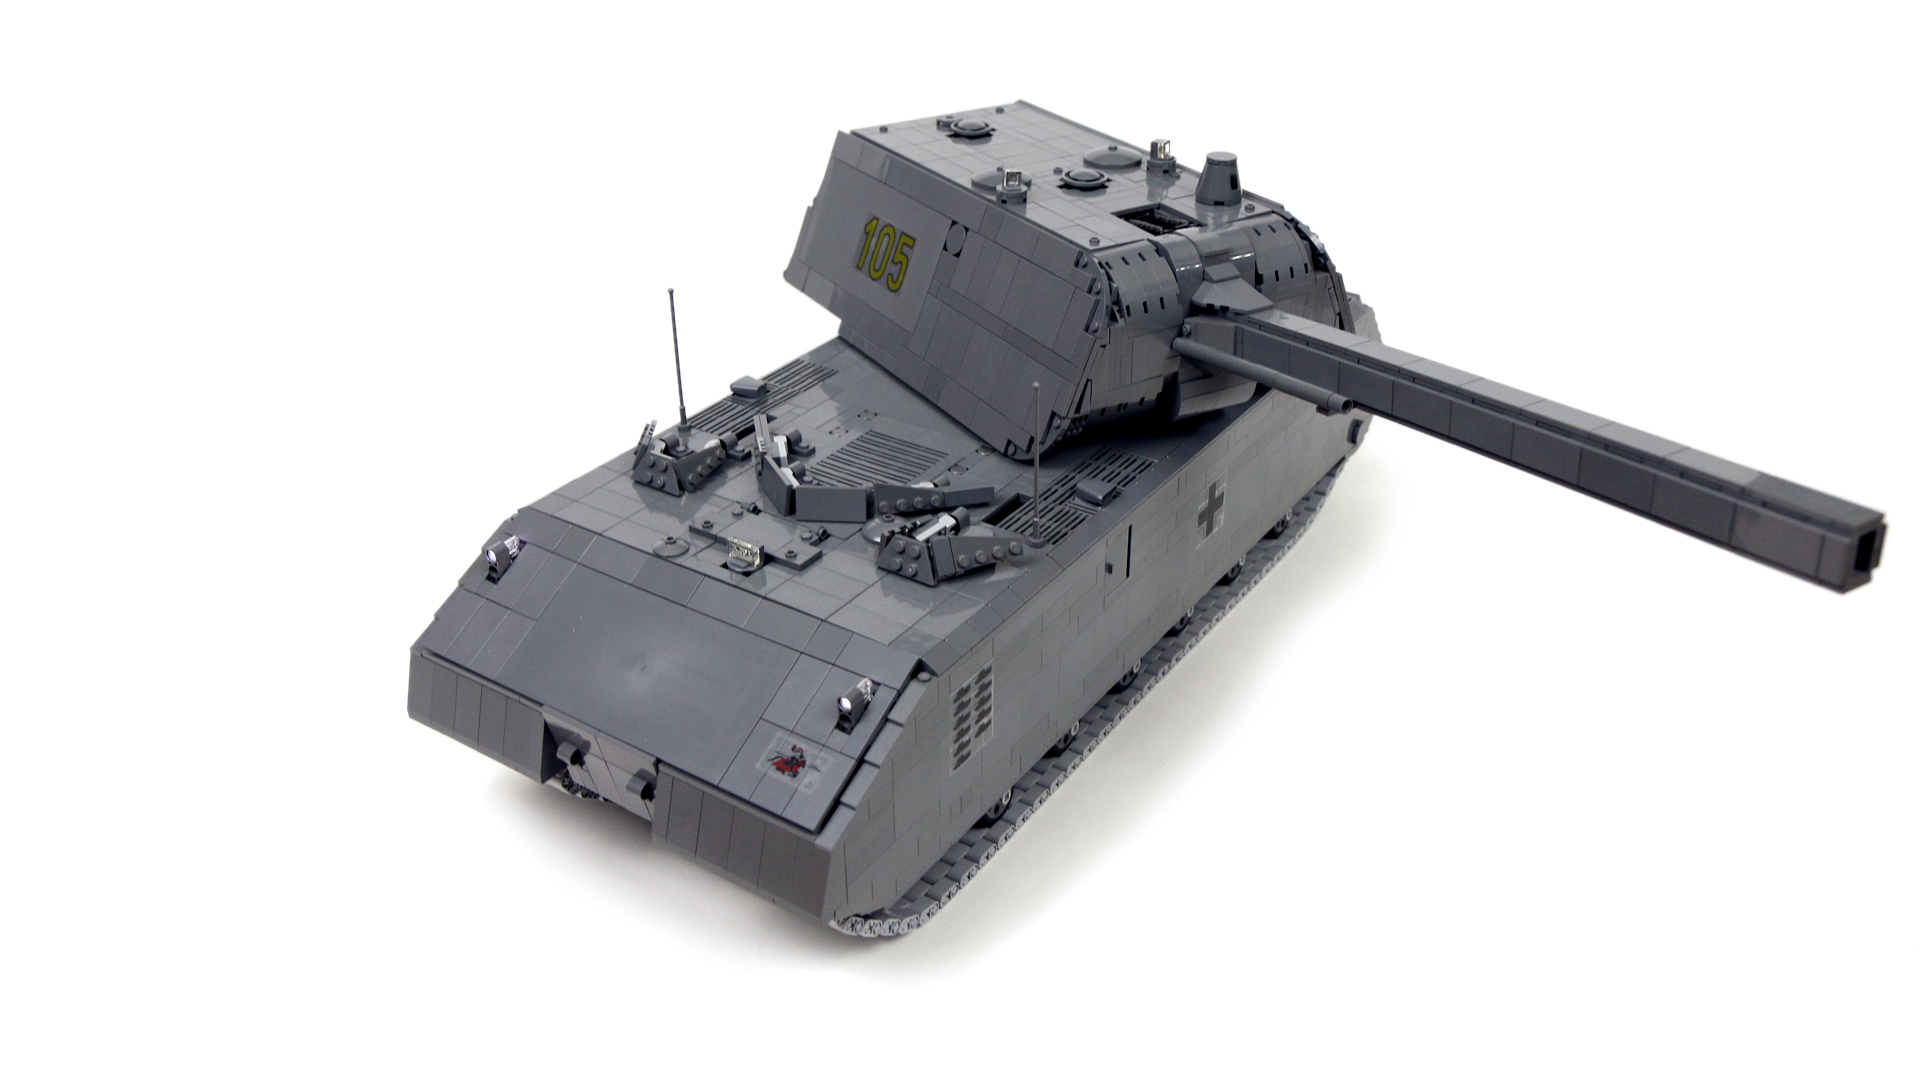
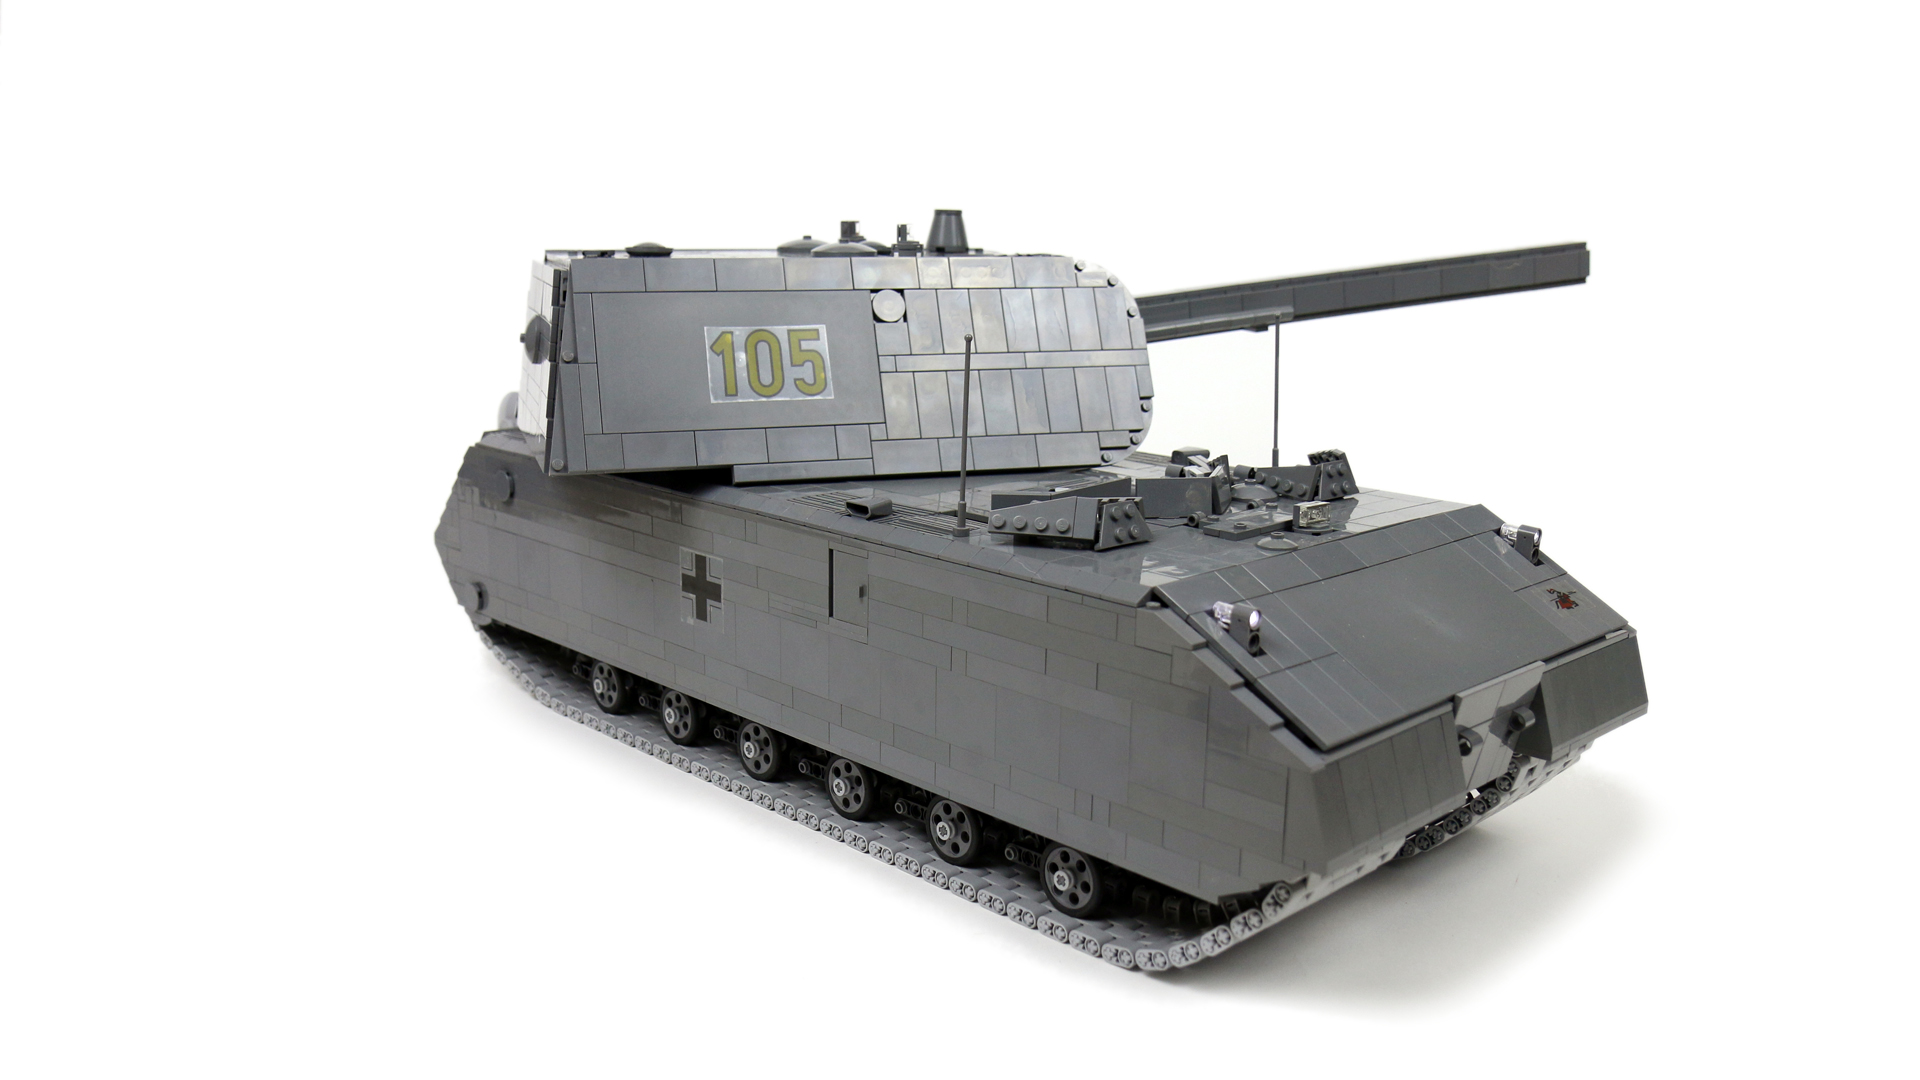
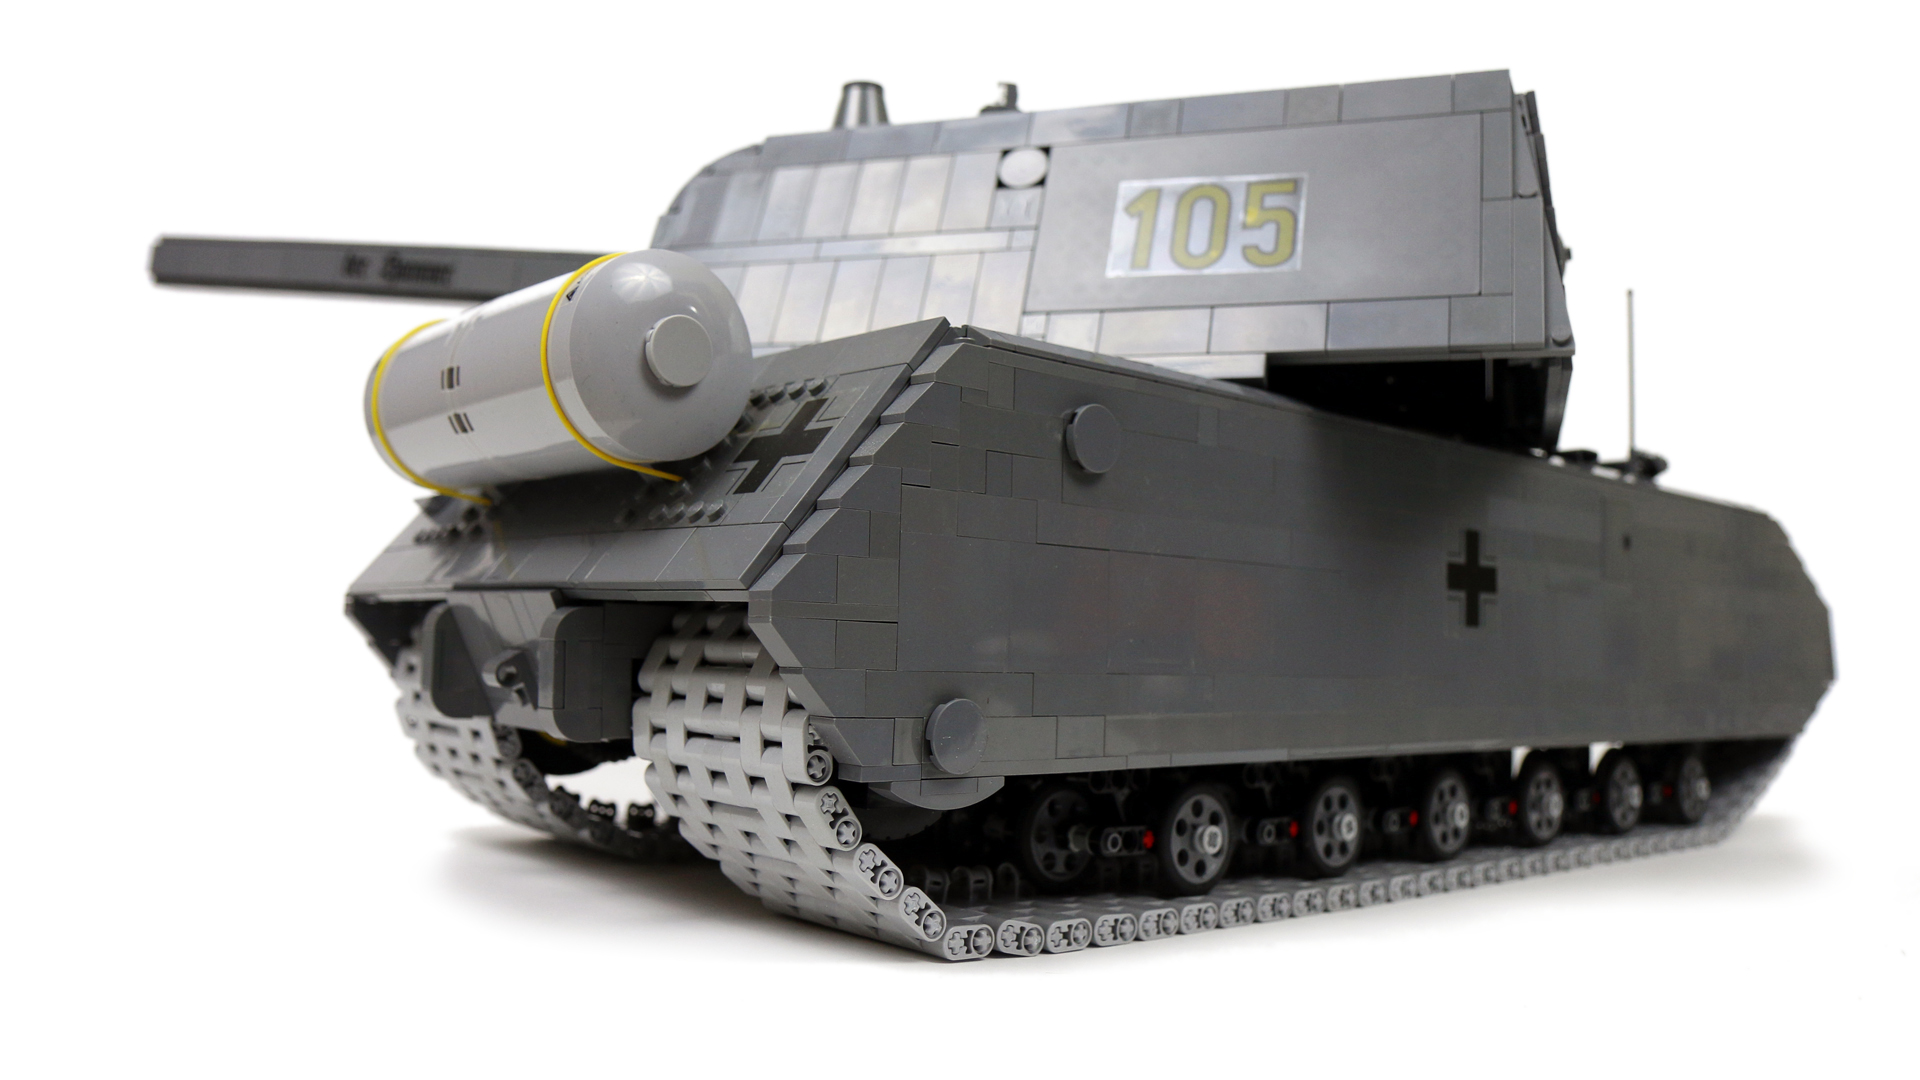
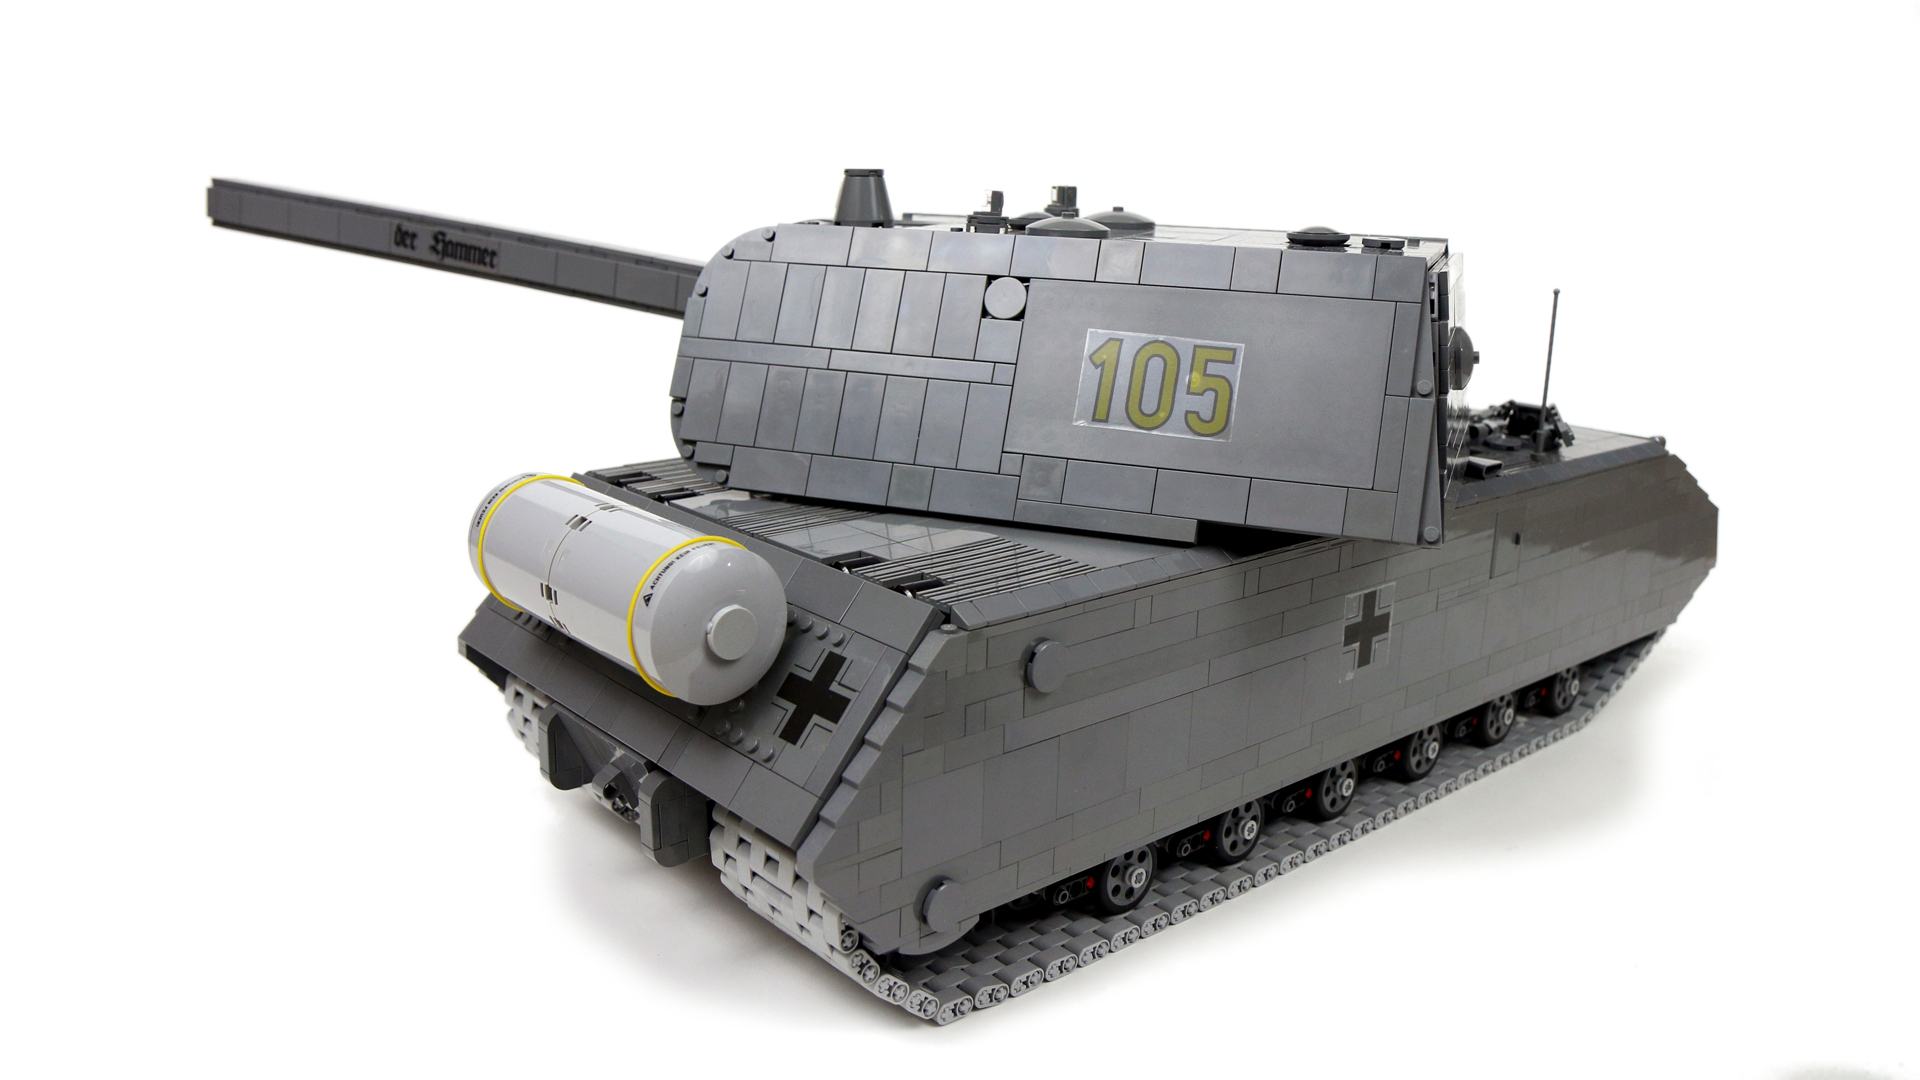
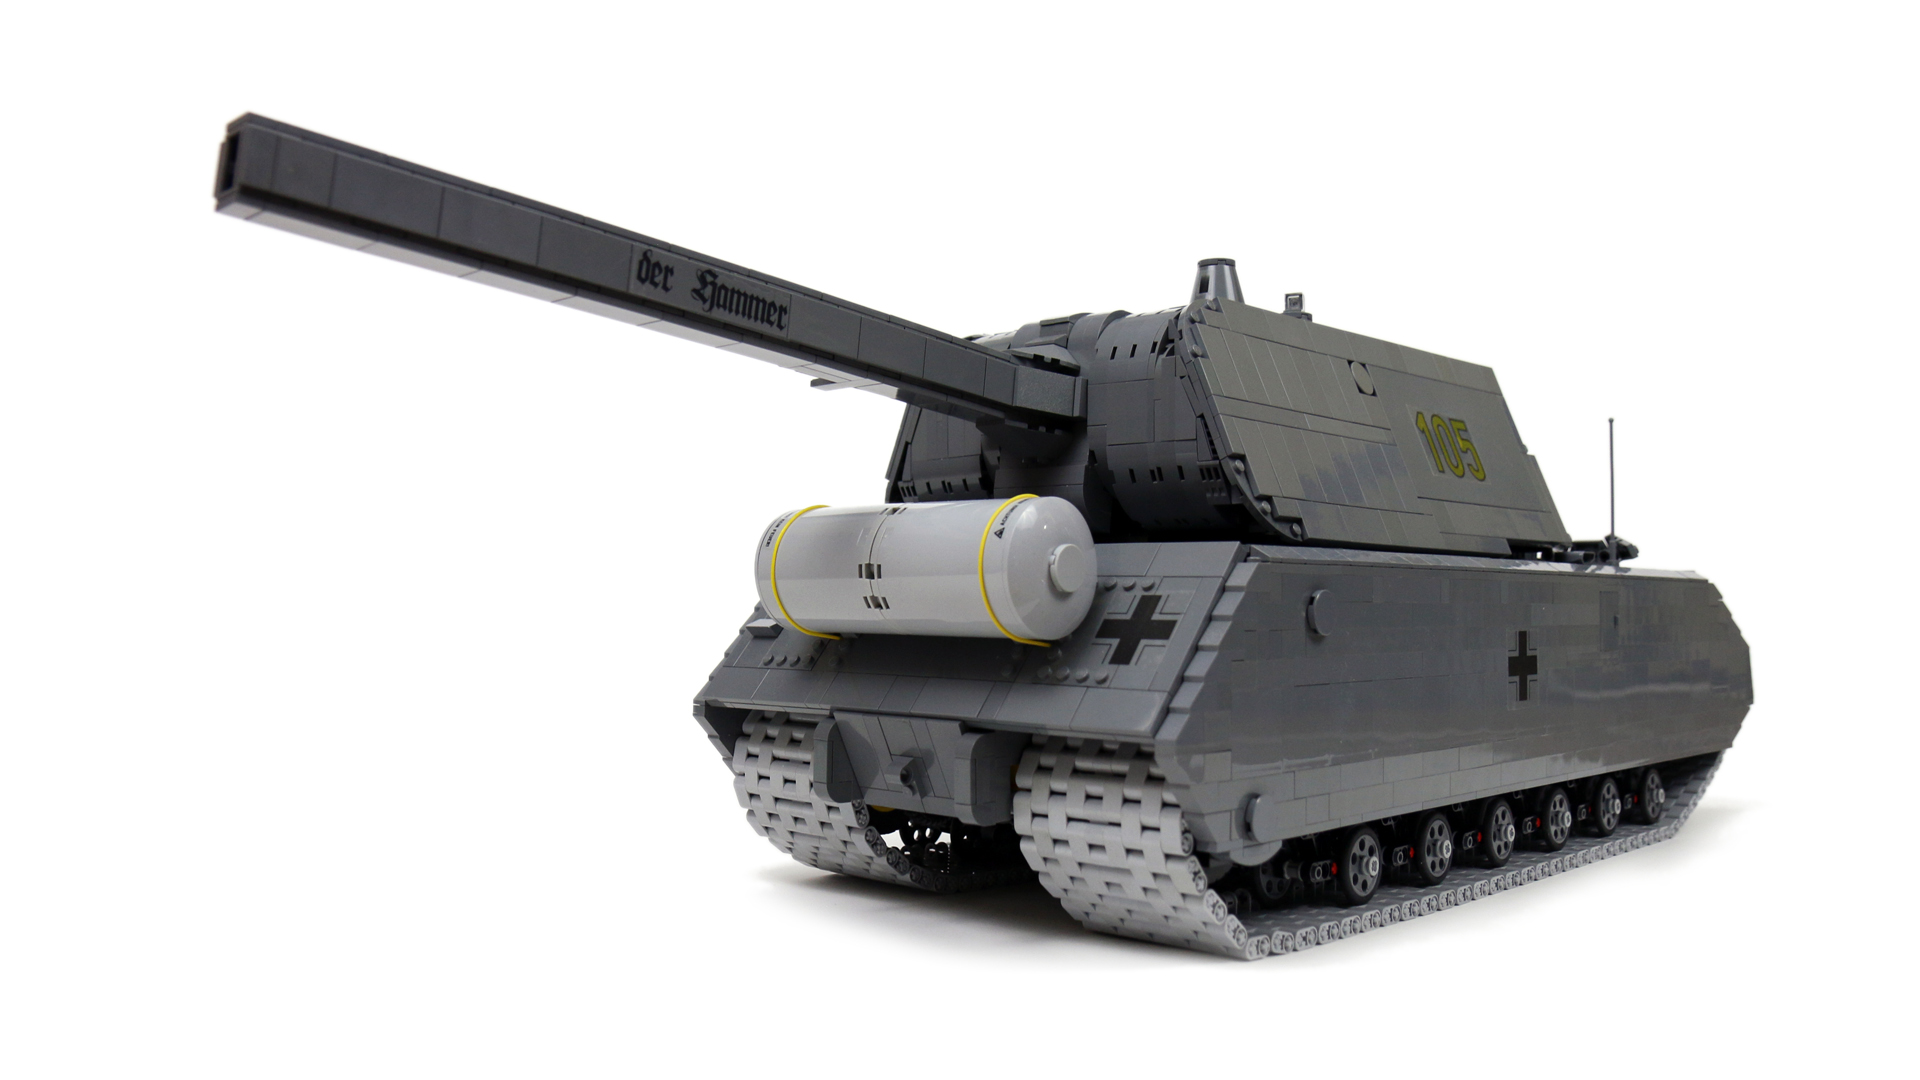
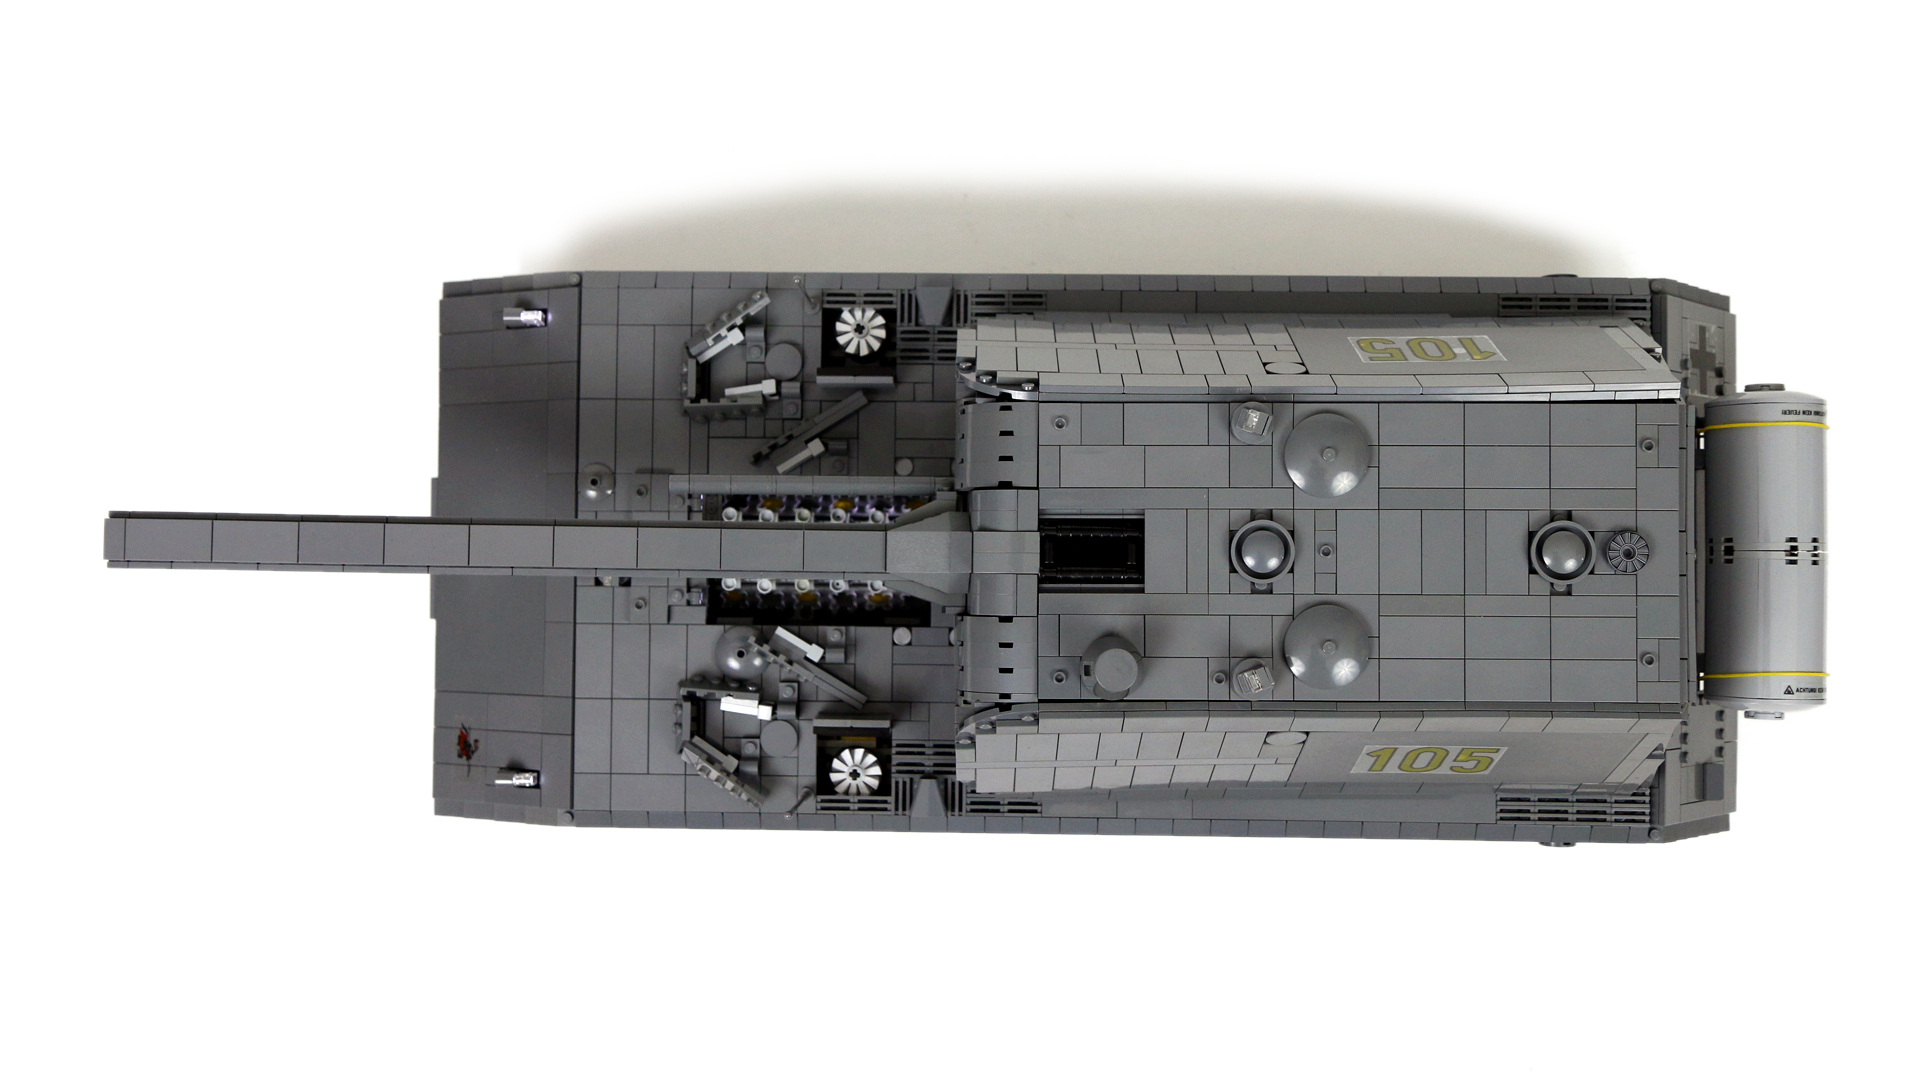
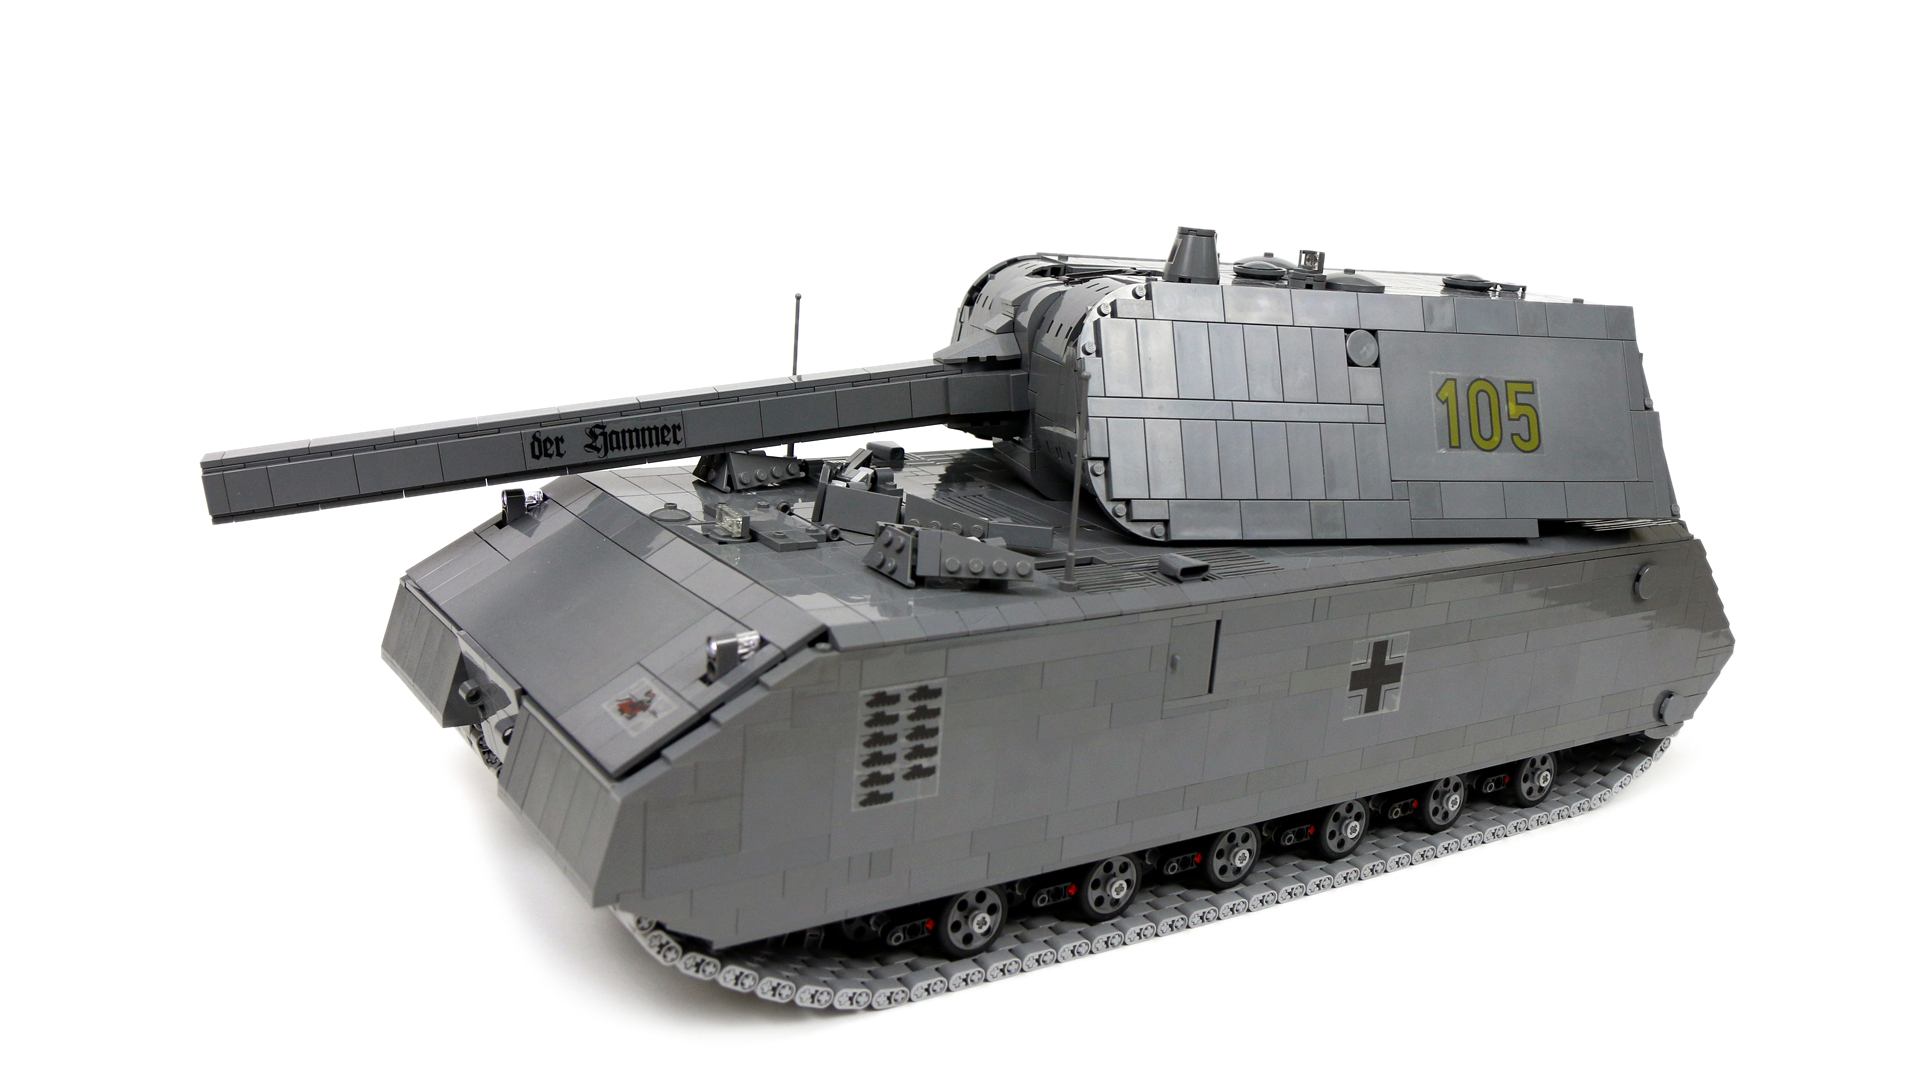
Model of the Maus super-heavy tank. Features drive, steering, elevated cannon with a shooting mechanism, rotating turret, rotating periscope, opening engine deck with a V12 piston engine and radiators, full suspension, lights, and custom stickers.
Datasheet:
Completion date: 22/01/2016
Power: electric (Power Functions)
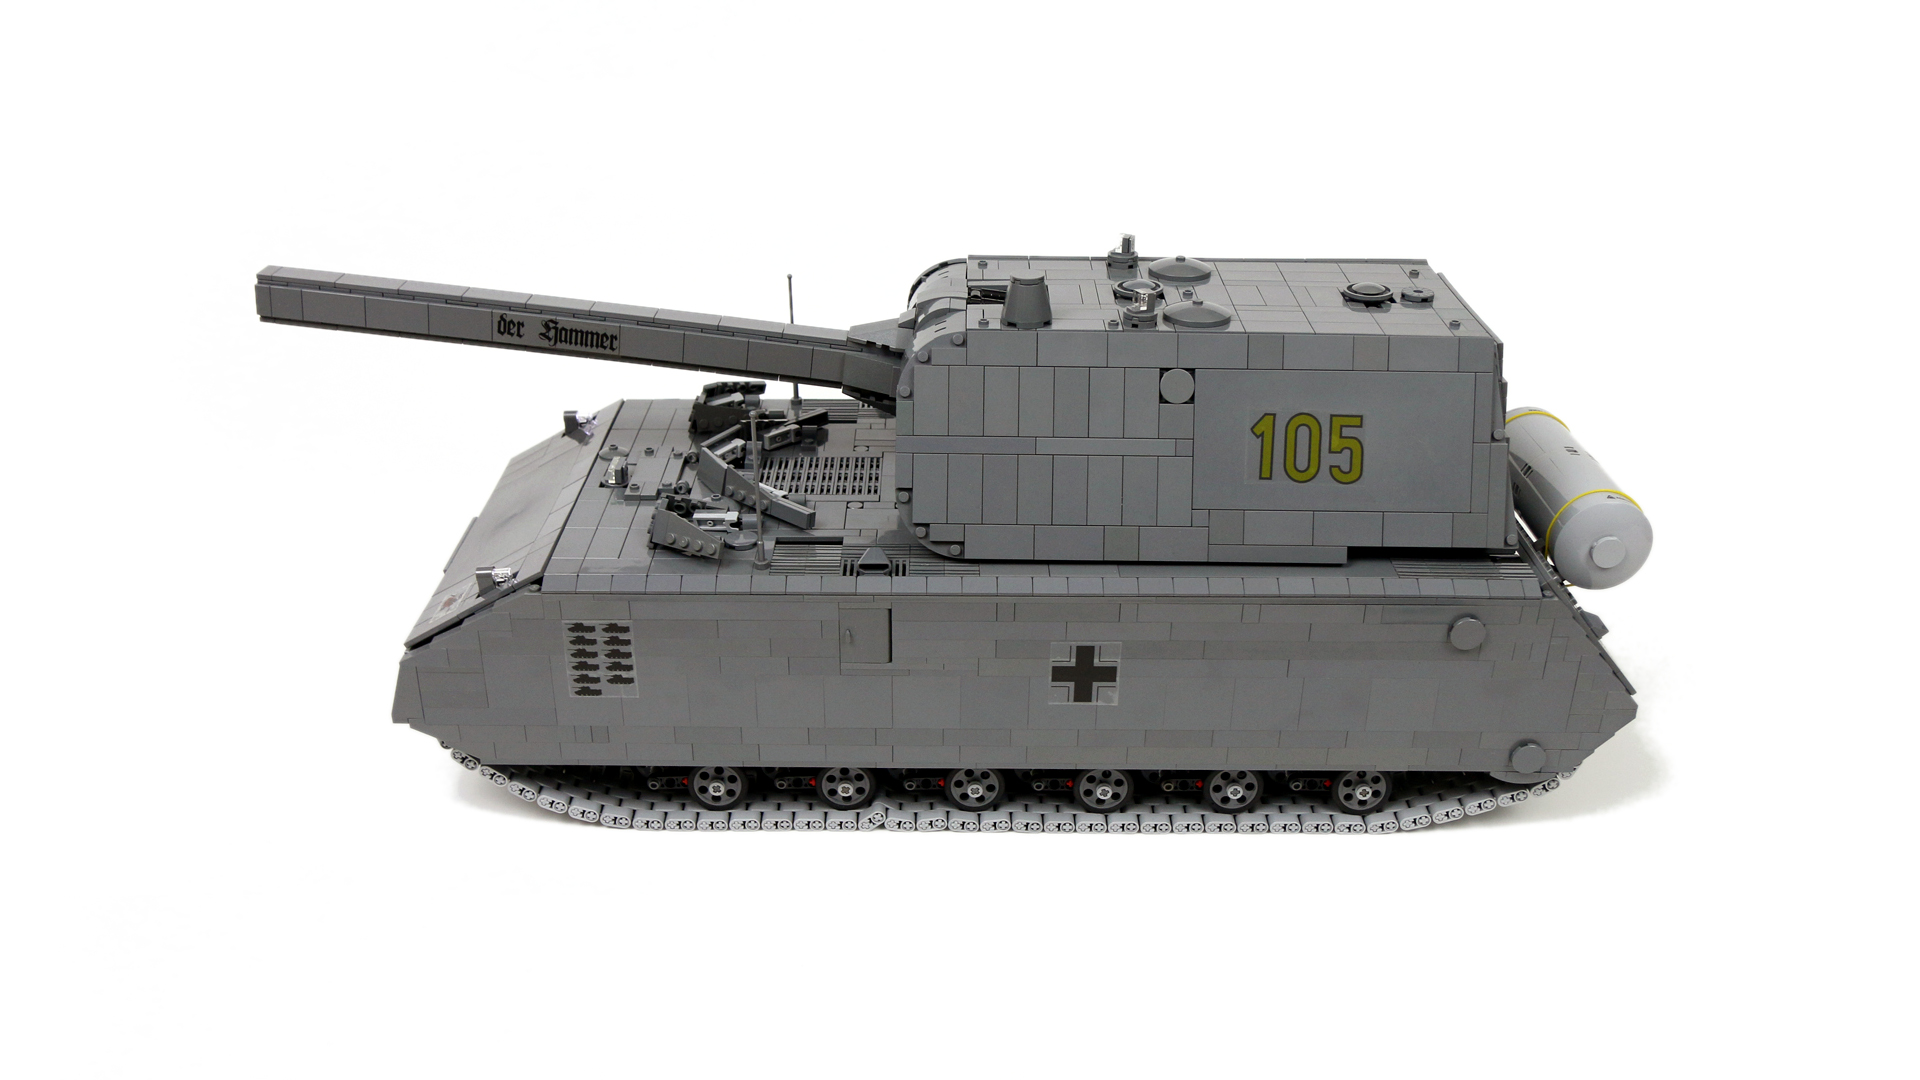
Dimensions: length 87 studs (including barrel) / width 30 studs / height 32 studs
Weight: 5.7 kg
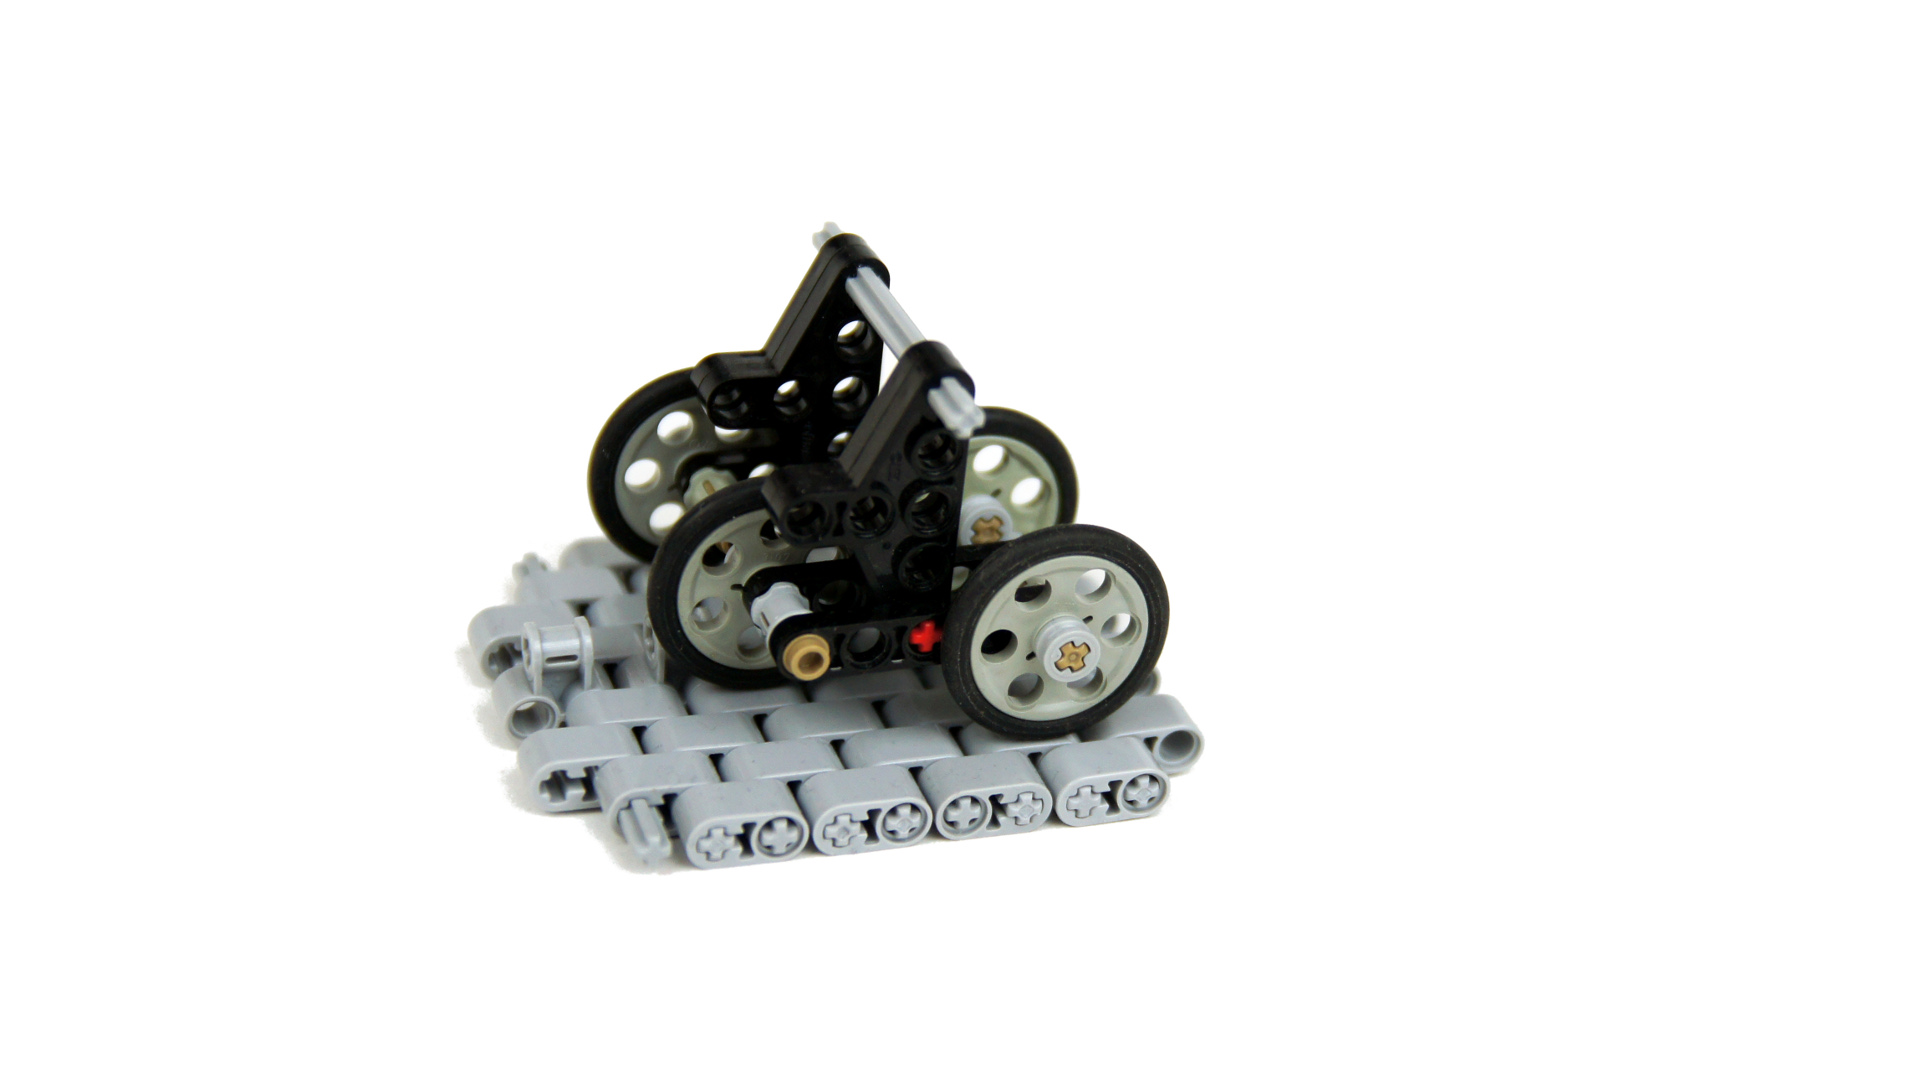
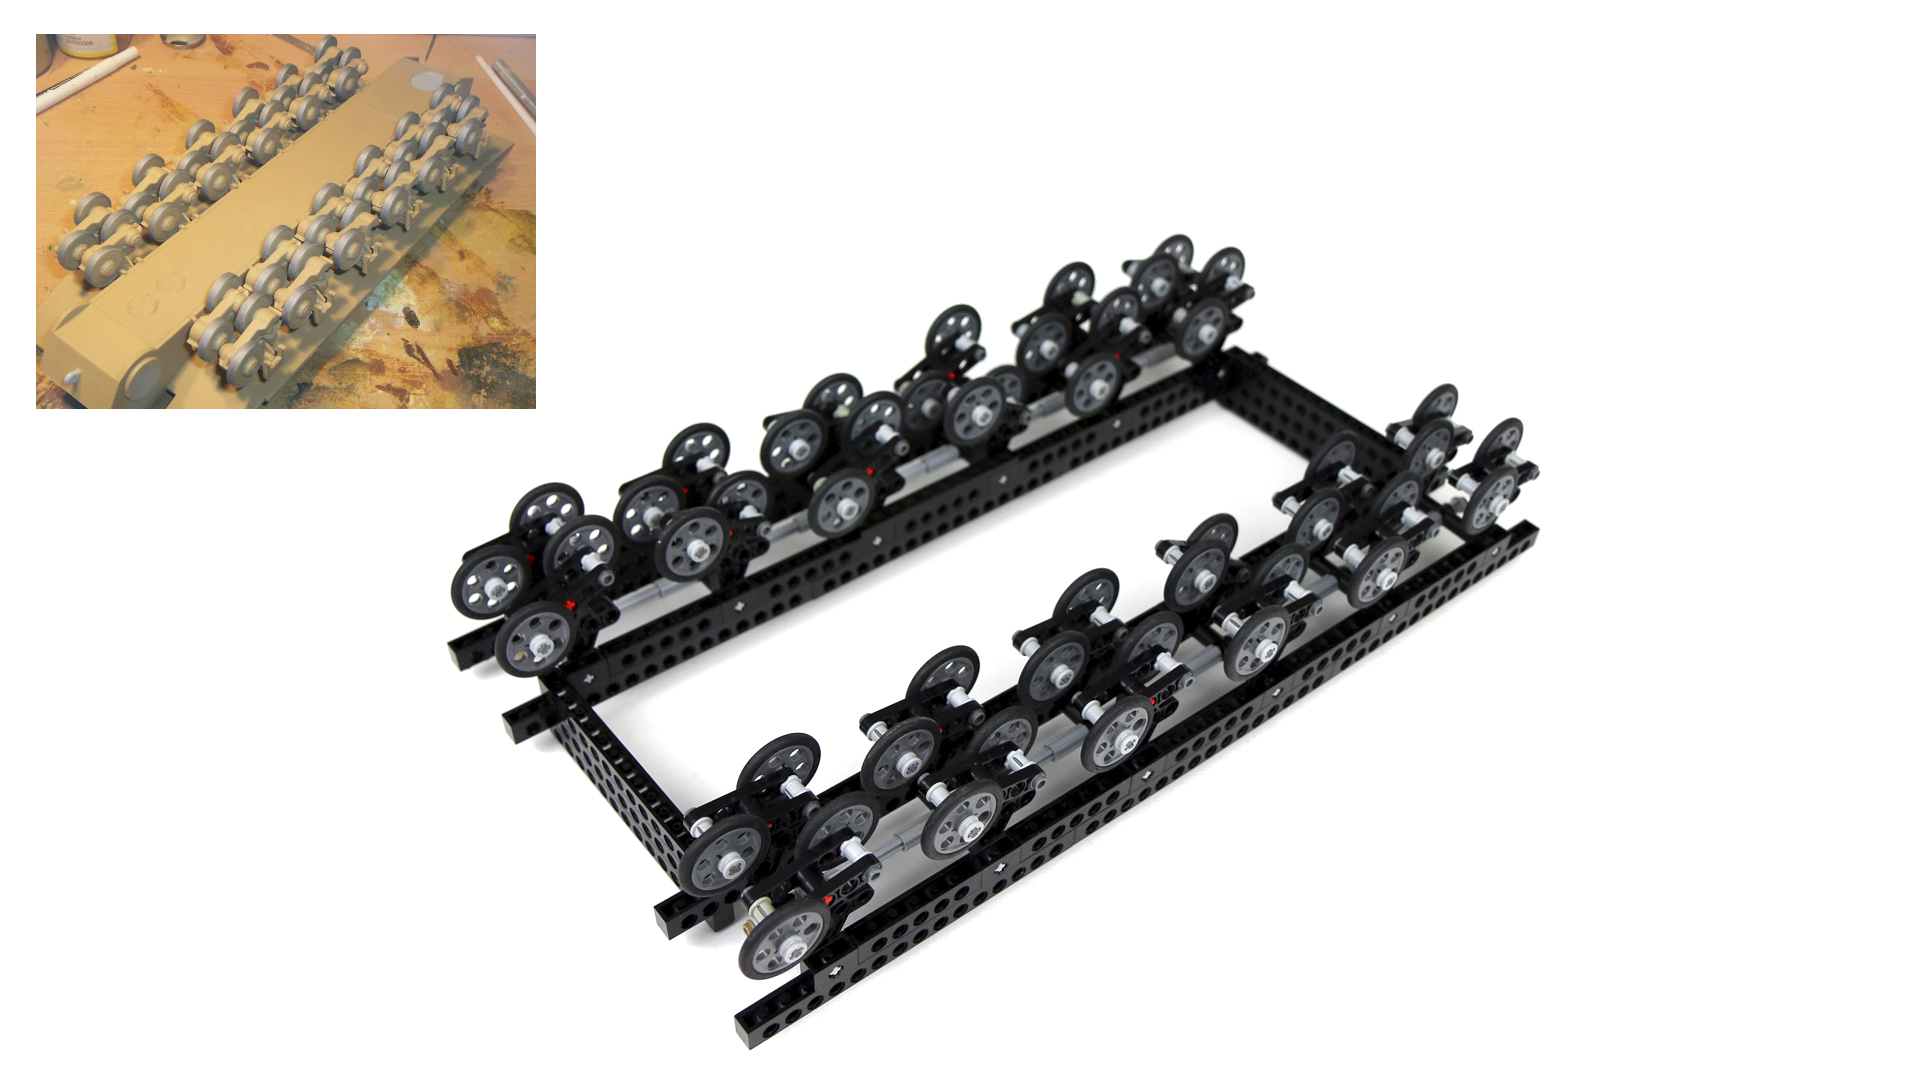
Suspension: oscillating bogies
Propulsion: 4 x PF XL motor geared 3:1
Motors: 4 x PF XL motor, 3 x PF L motor, 3 x 71427 motor, 1 x Micromotor
I have never intended to build model of the Maus tank, in fact I have no real interest in the original vehicle – it seems pretty dull to me. But for years, every time I’ve published a Lego tank, I was asked again and again to build a Lego Maus model, and in the end I’ve decided to do just that, in a (probably vain) hope that the all this asking will stop.
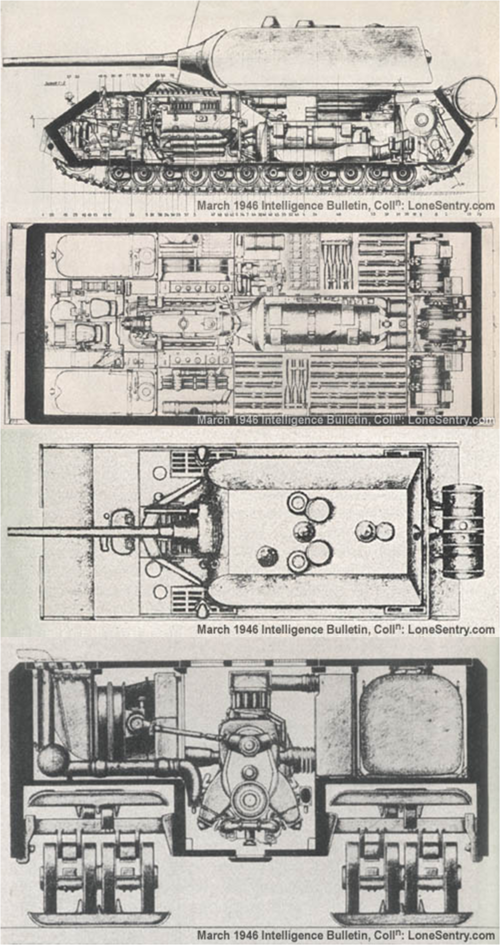
I will skip the story behind the original tank, because it seems to be quite well-known judging from the amount of people asking for a Maus model. It was, in any case, a dead-end in evolution of the tanks and it had no real impact on the outcome of the World War 2. But I guess it illustrates some people’s obsession with size, which is very telling.
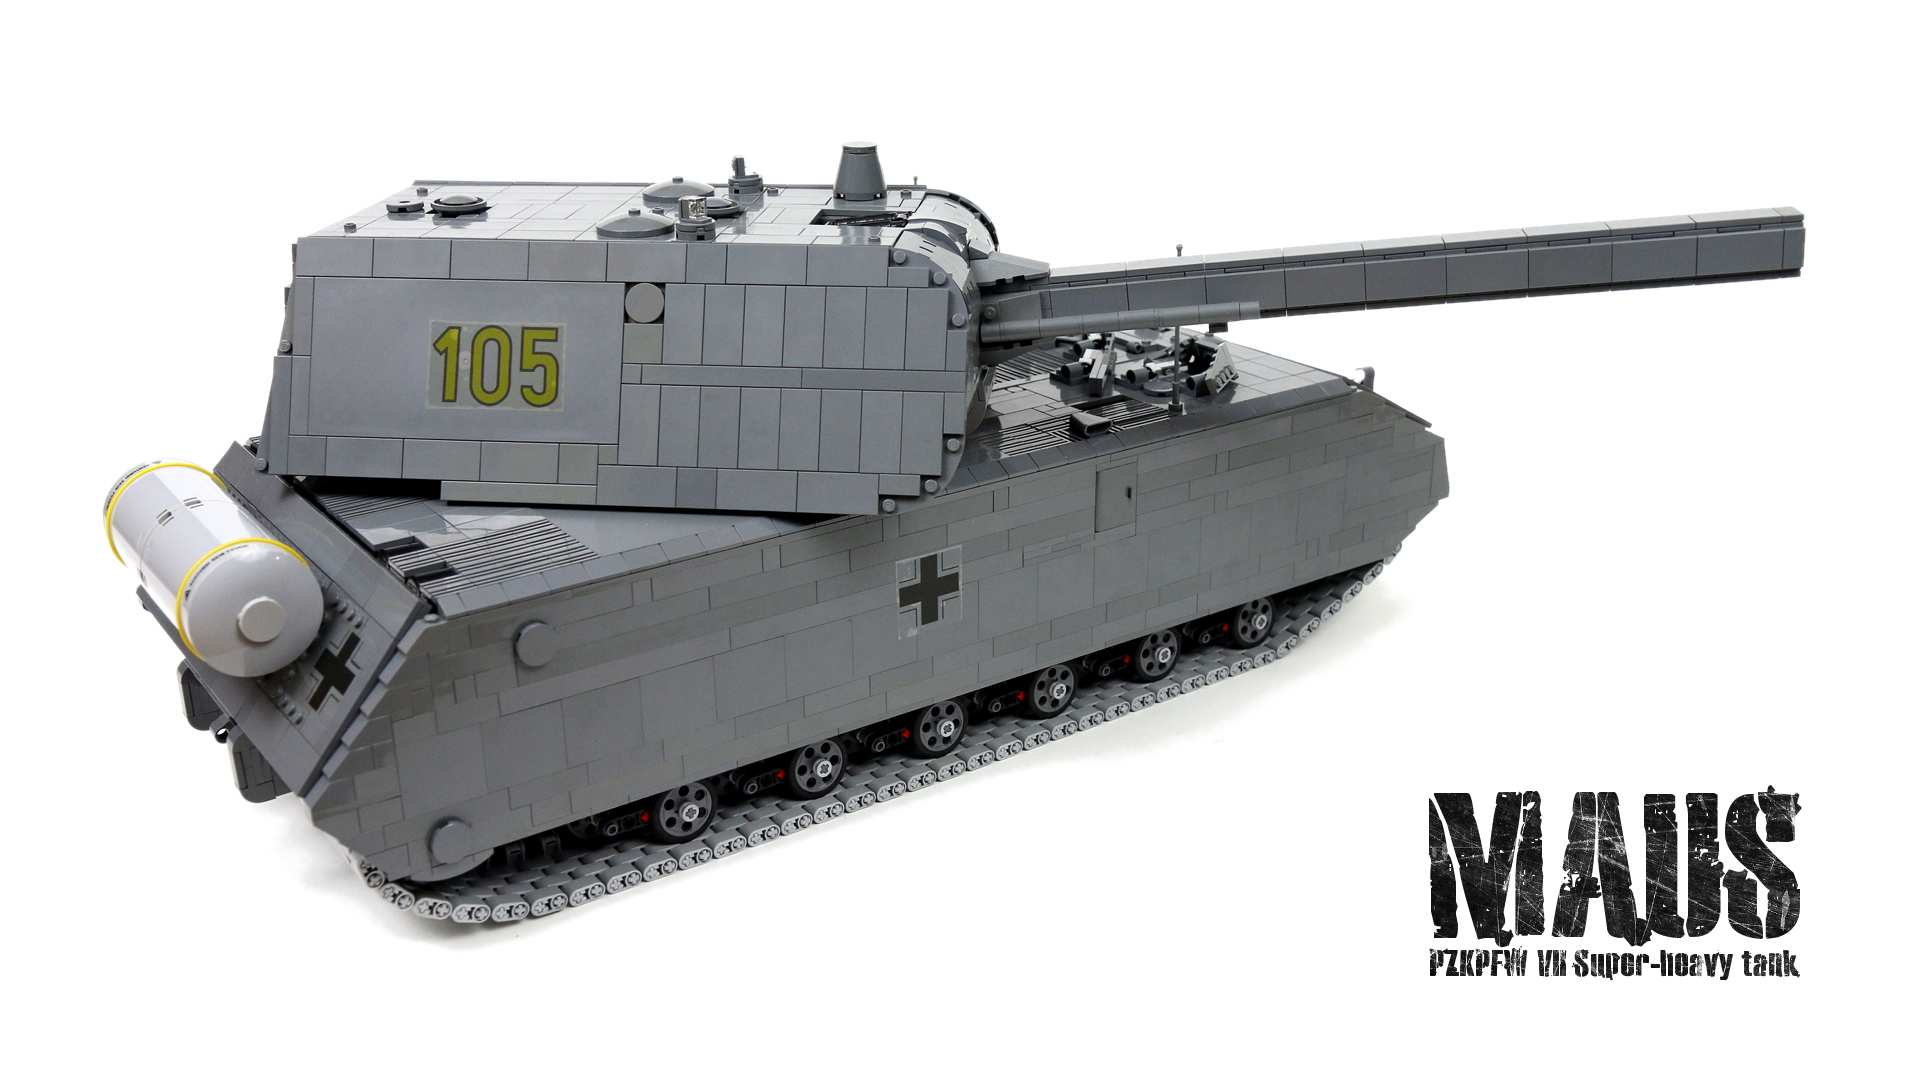
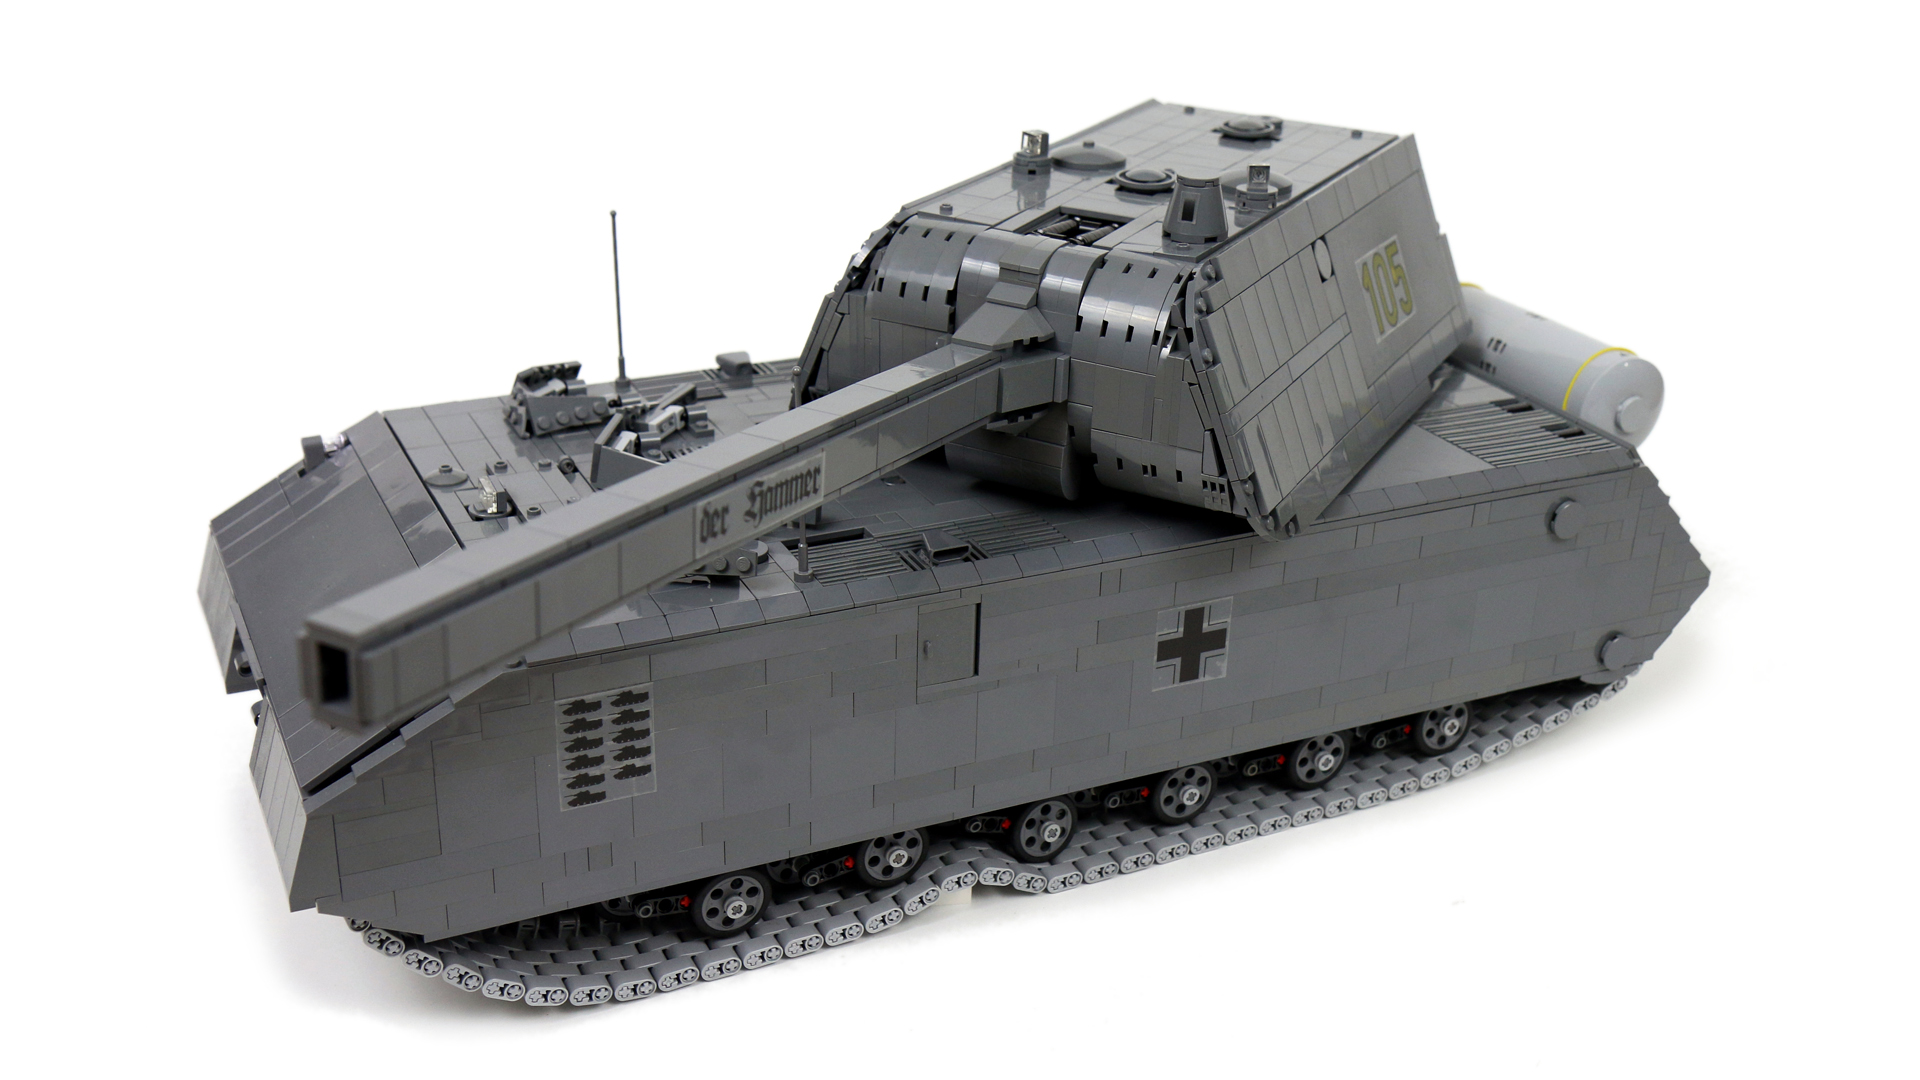
On the aesthetic side, this model had a couple of flaws, the most important being the turret which was 2 plates (6 mm) too tall by my count. The reason for this was how its sides and rear wall were made. At this scale, the rear wall should be inclined so that its upper edge is 2 studs closer to the front than its lower edge. To make this wall come together with turret’s sides, which are built with plates, it was necessary to use a wedge plate whose edge is “cut” at 2 studs. Unfortunately, only one kind of such a Lego wedge plate exists – piece #47397 (left) and #47398 (right) – and it is 12 studs long. If we add to this the fact that there is a gap below the back of the Maus’ turret, this gives a side wall that is 13 studs tall in total, but it’s inclined and thus a little lower – just under 12 studs tall. The accurate height of the turret is 11 studs, and hence the difference – if there was a similar wedge plate, only 11 studs long, this would not be a problem.
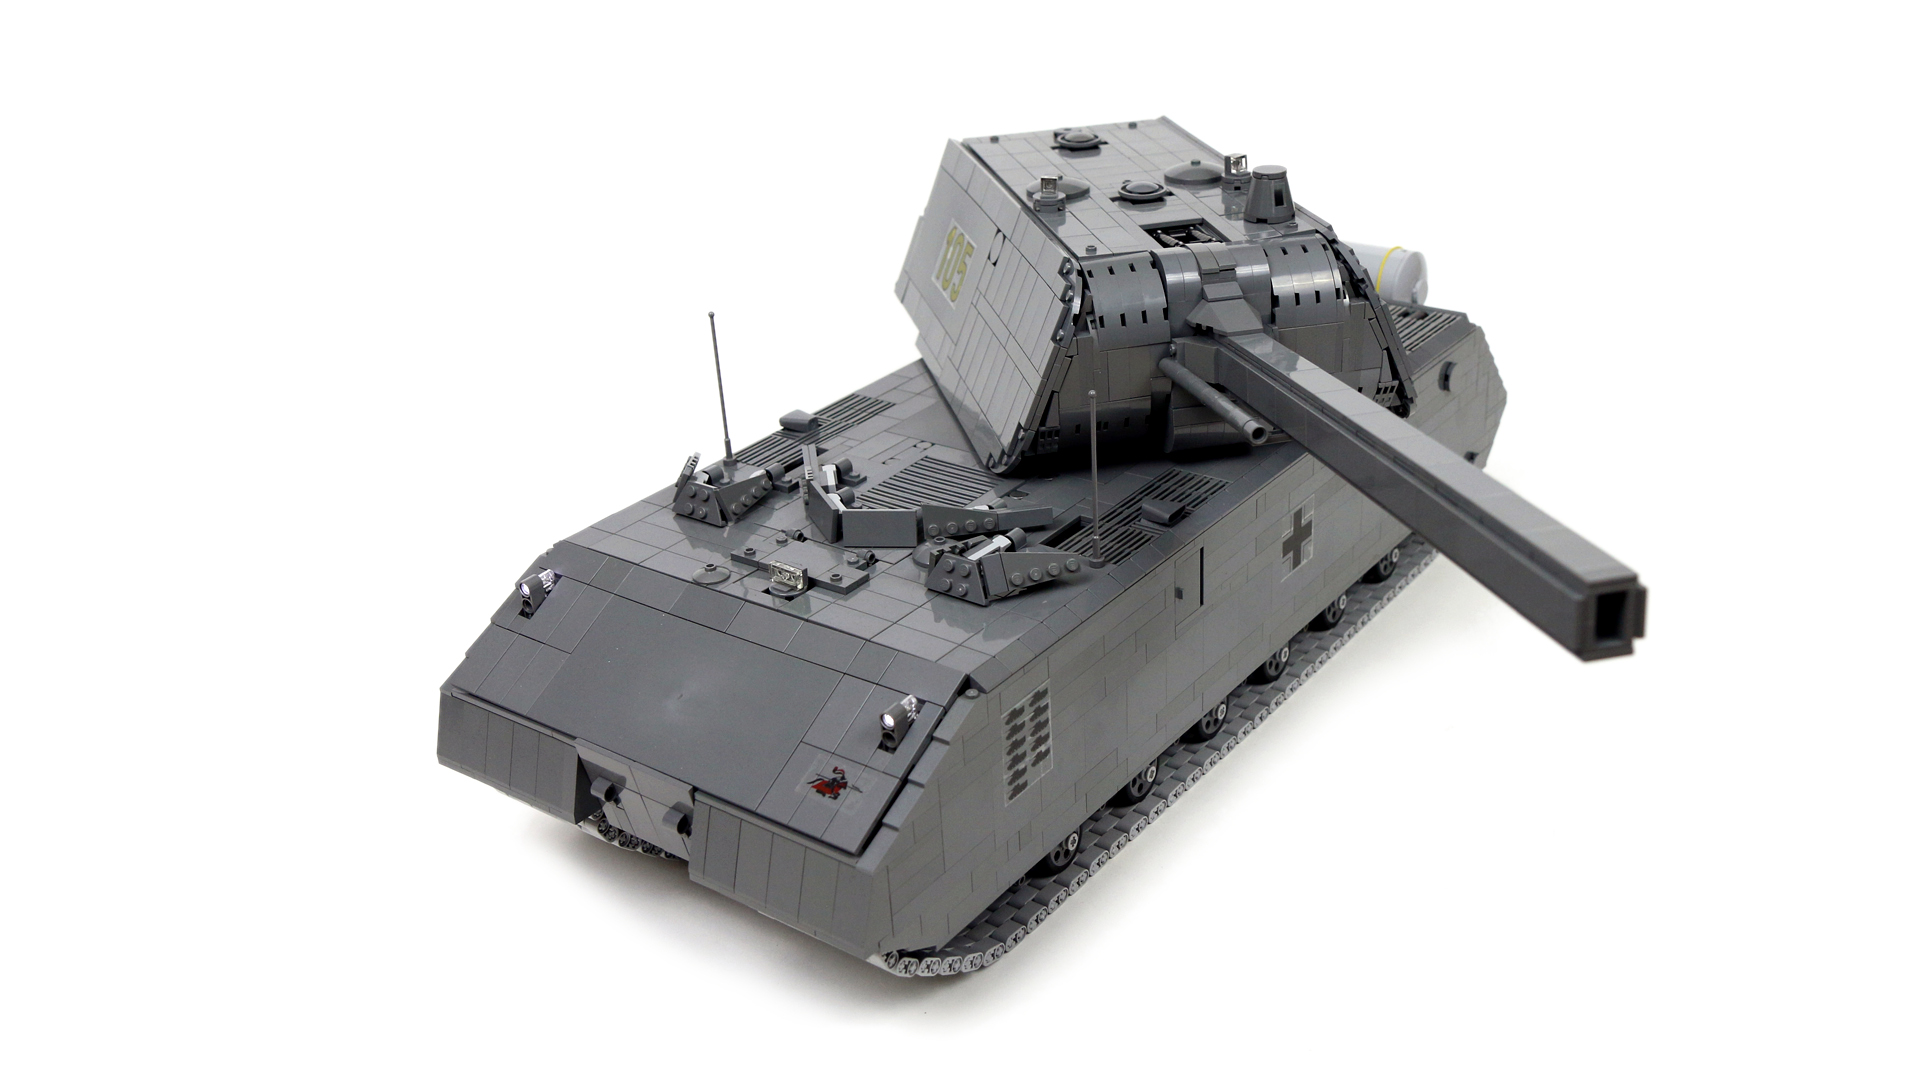
Another large flaw were the shields on the front deck, protecting hatches and radiators from projectiles coming from the front. There were three of these: two smaller side shields, which were reasonably accurate, and one larger central shield, which was not accurate. The reason for this were, again, wedge plates. I didn’t want to use slopes for the shields – they’re very thick – so I went with wedge plates standing on their sides instead. Since wedge plates aren’t narrower that 1 stud, this meant at least 1 studs tall shields. At the same time if was important for me to make the turret’s armor go all the way down to the hull, without any gap between, and to allow the turret to rotate through 360 degrees. This forced me to make the central shield end at larger distance from the turret than it originally did, because being 1 stud tall, it would collide with rotating turret if it was any closer to it. It was simple case of sacrificing some details in favor of others.
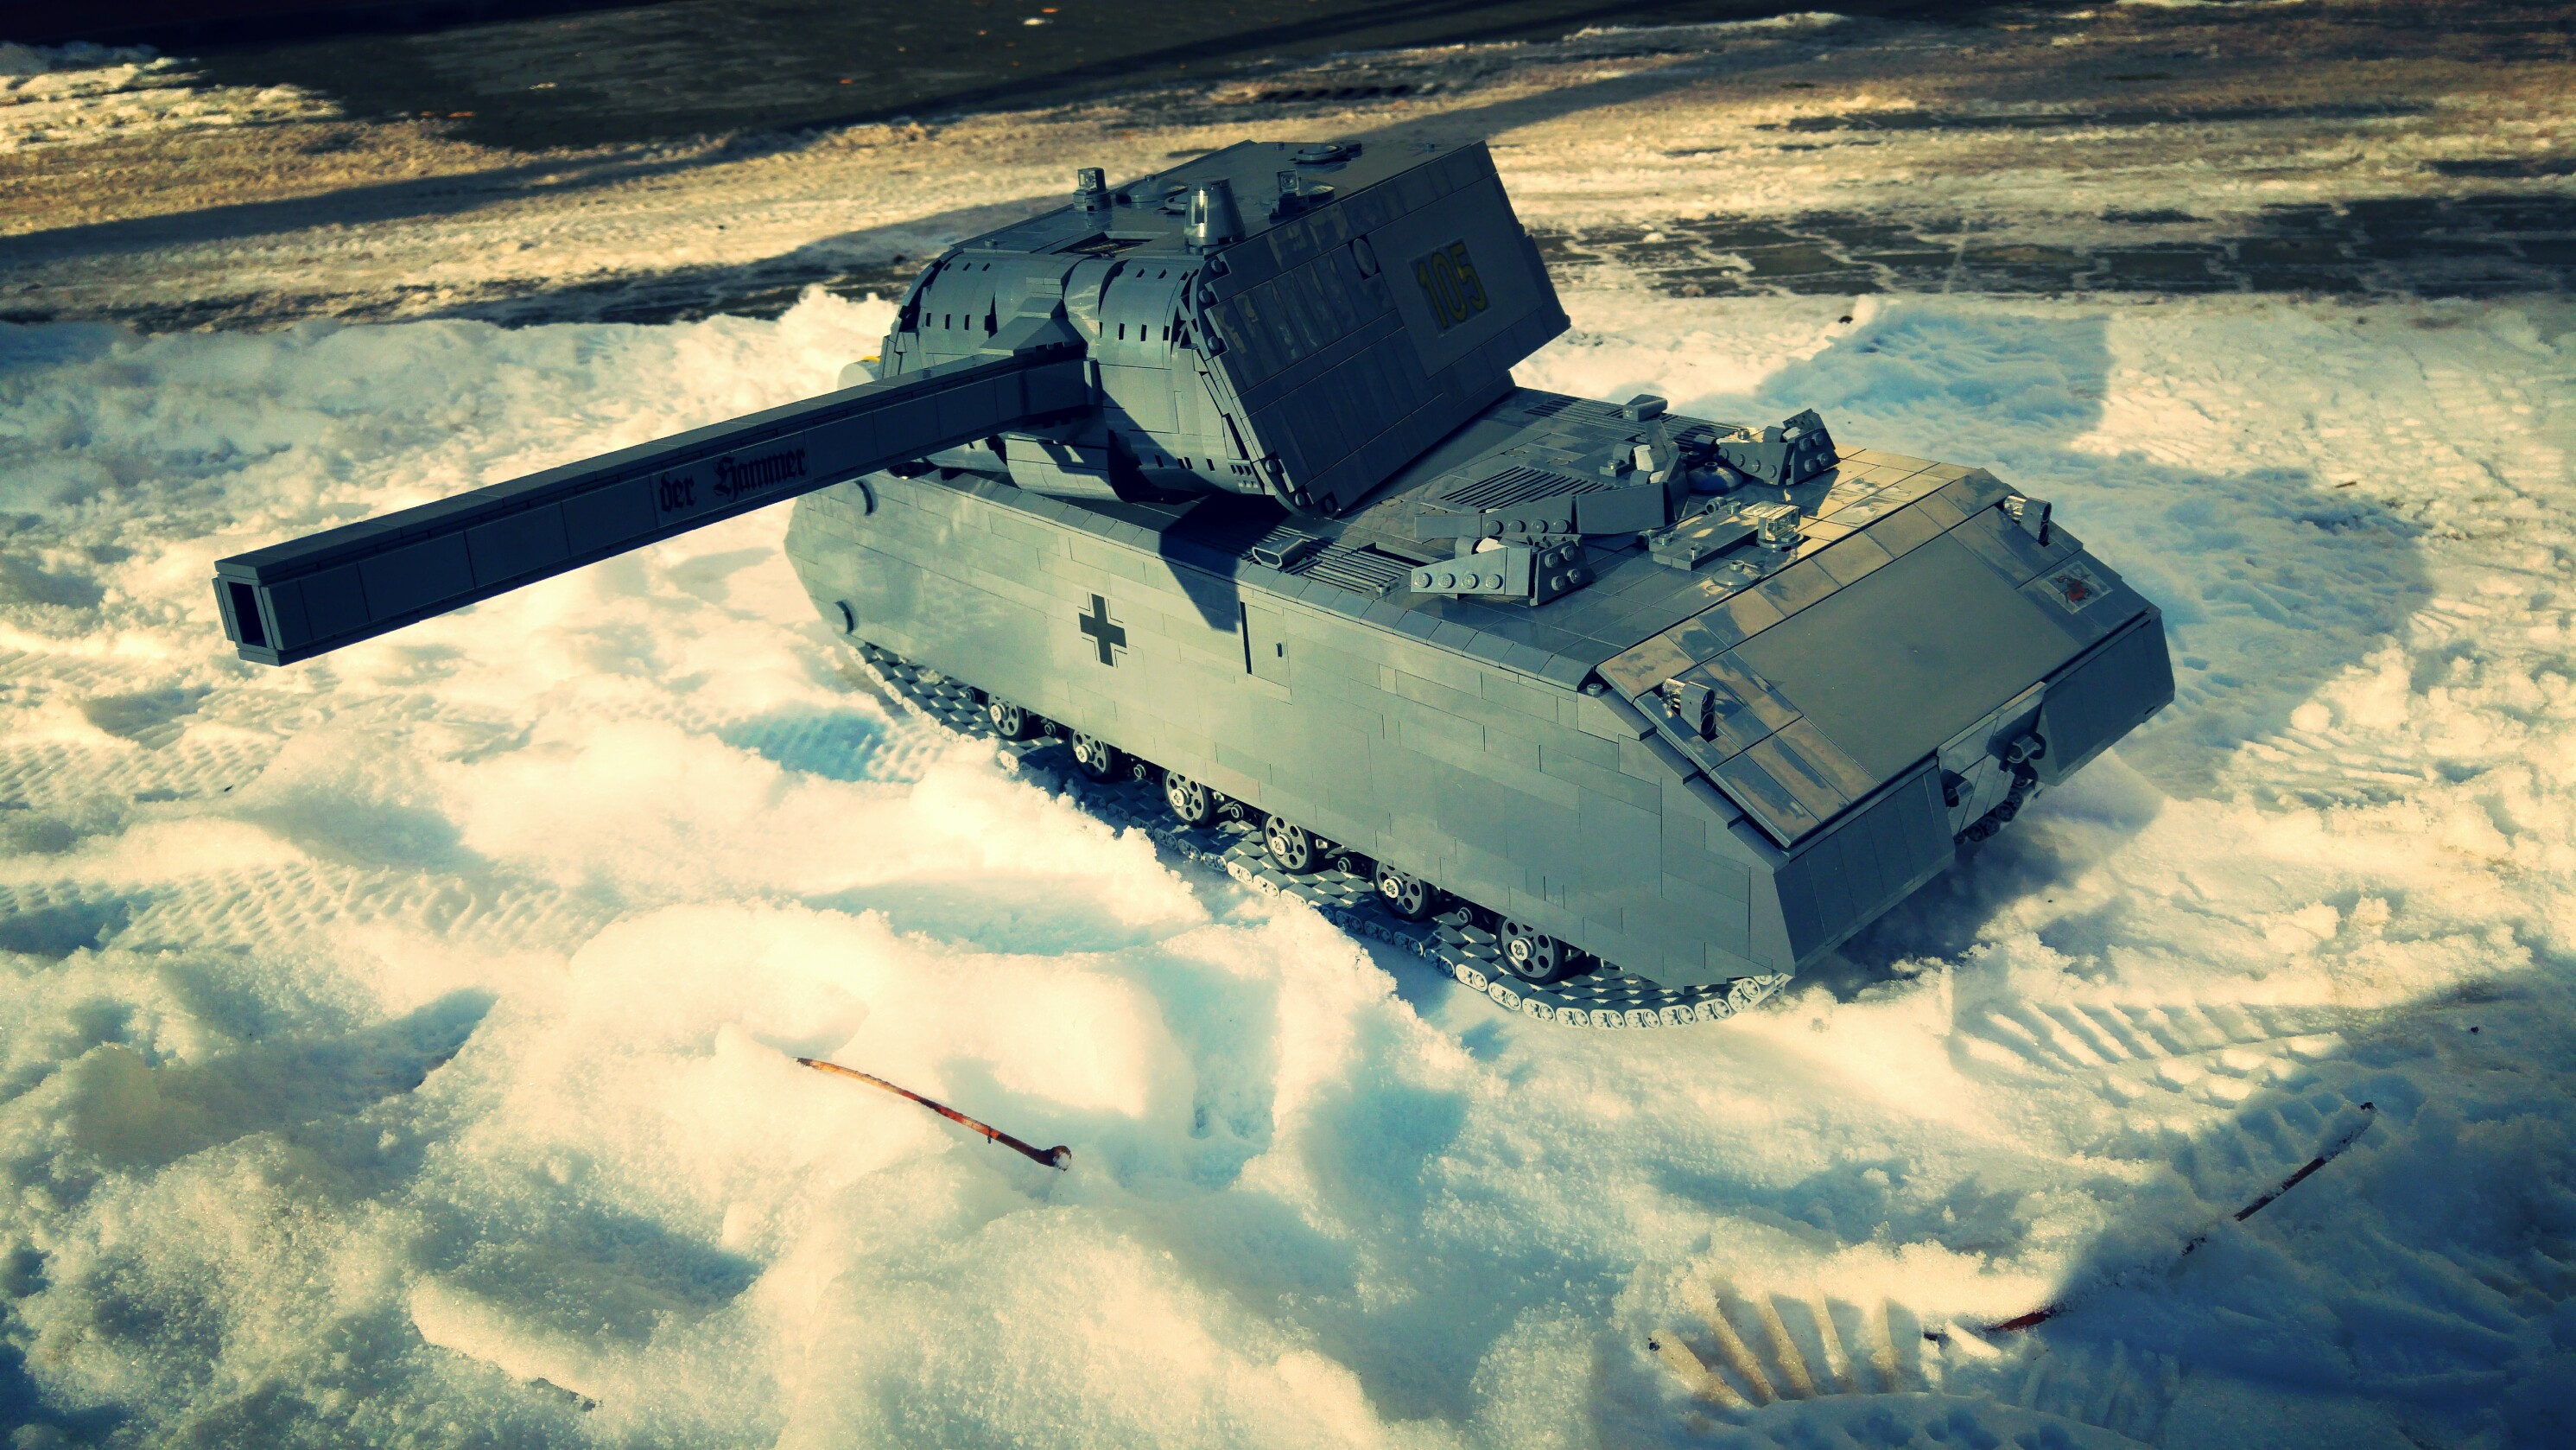
On the technical side, the model was using a completely re-built variant of the shooting mechanism from my T29 tank model, which was more compact, stiffer and had a different barrel. I have initially built it to shoot 3L beams, but the beams kept jamming when stacked above the shooting mechanism and I have eventually made the mechanism work with 3L axles put in a simple beam acting as a clip. Up to 5 axles could be inserted into a single clip, and the clip would be removed by hand once emptied. The new barrel was thinner and lighter than the older, and it had larger inner diameter. This worked well when shooting beams, but proved to be a problem with axles – the inner diameter was simply so large that the axles would come out of the barrel tumbling in the air, because the barrel didn’t keep them aligned. This, along with the small clip size and limited main gun’s elevation, prompted me to consider a completely different shooting mechanism in my future models.

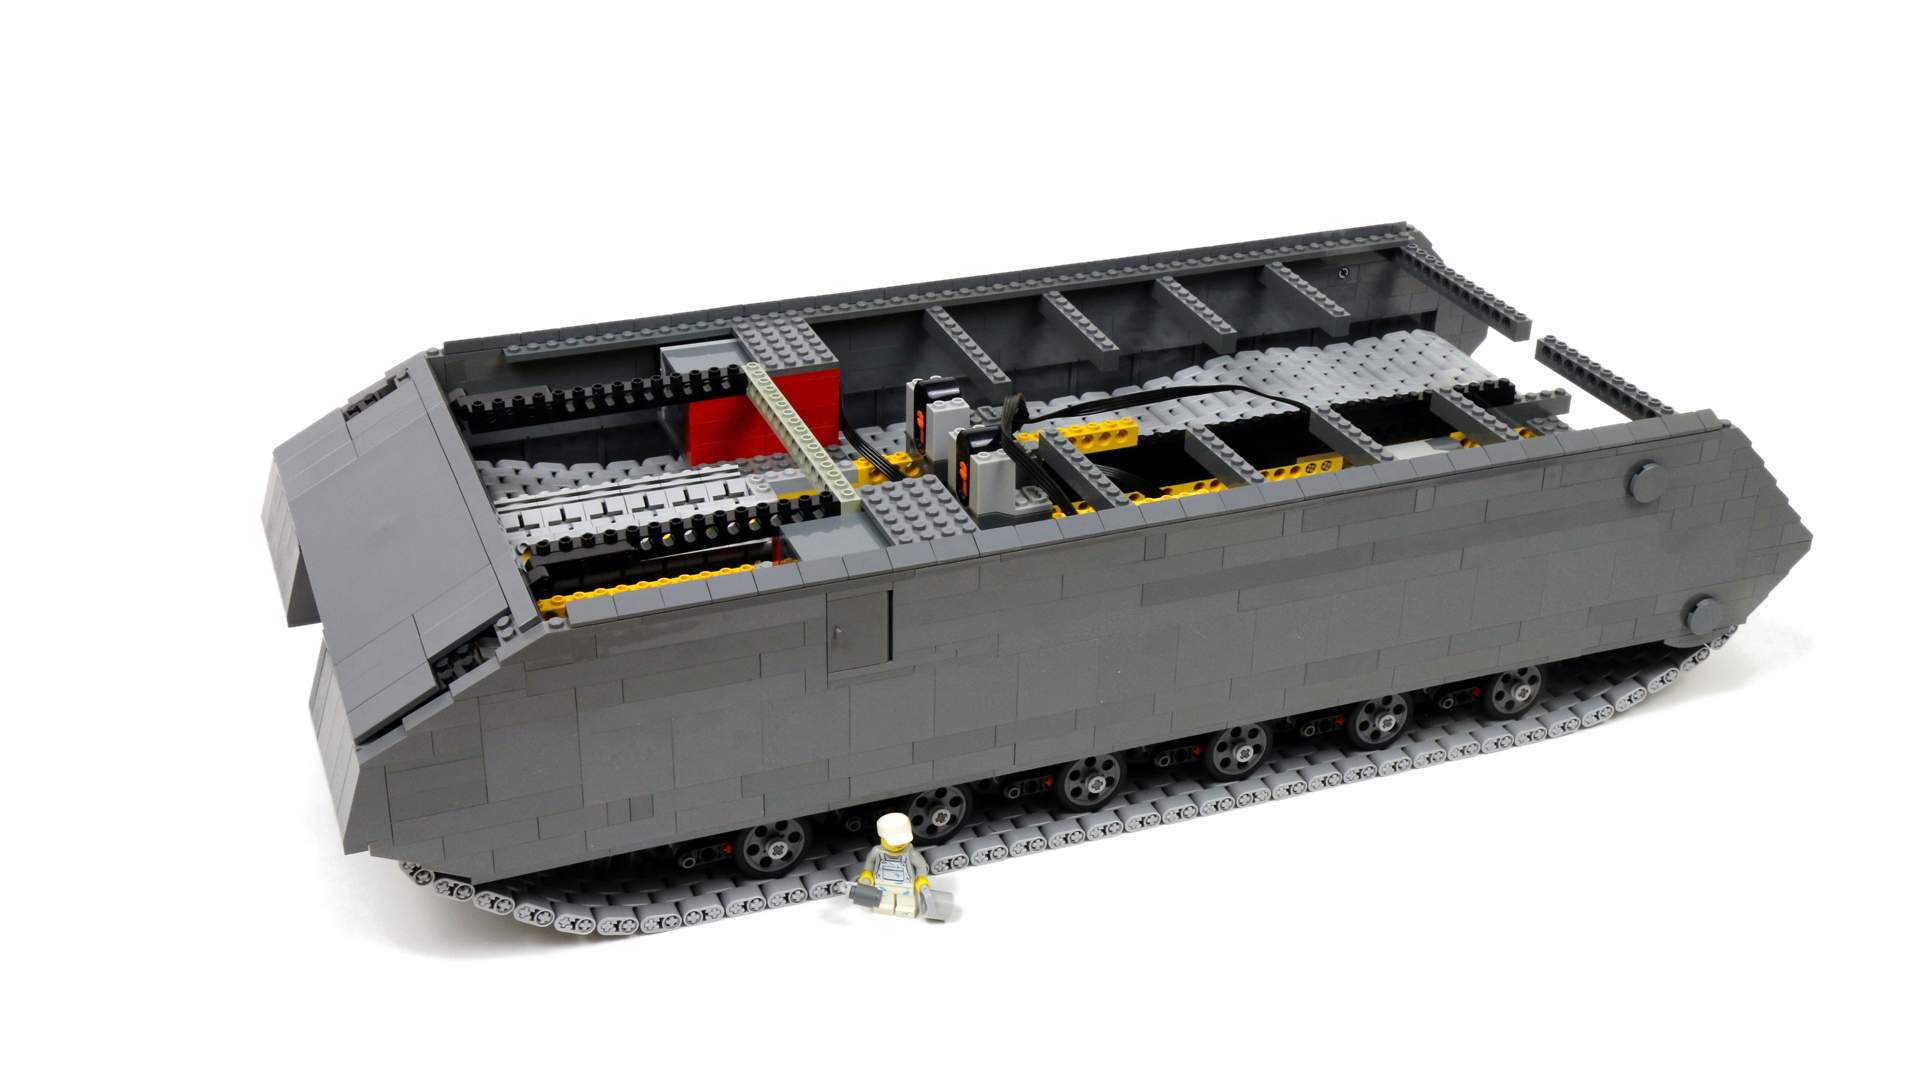
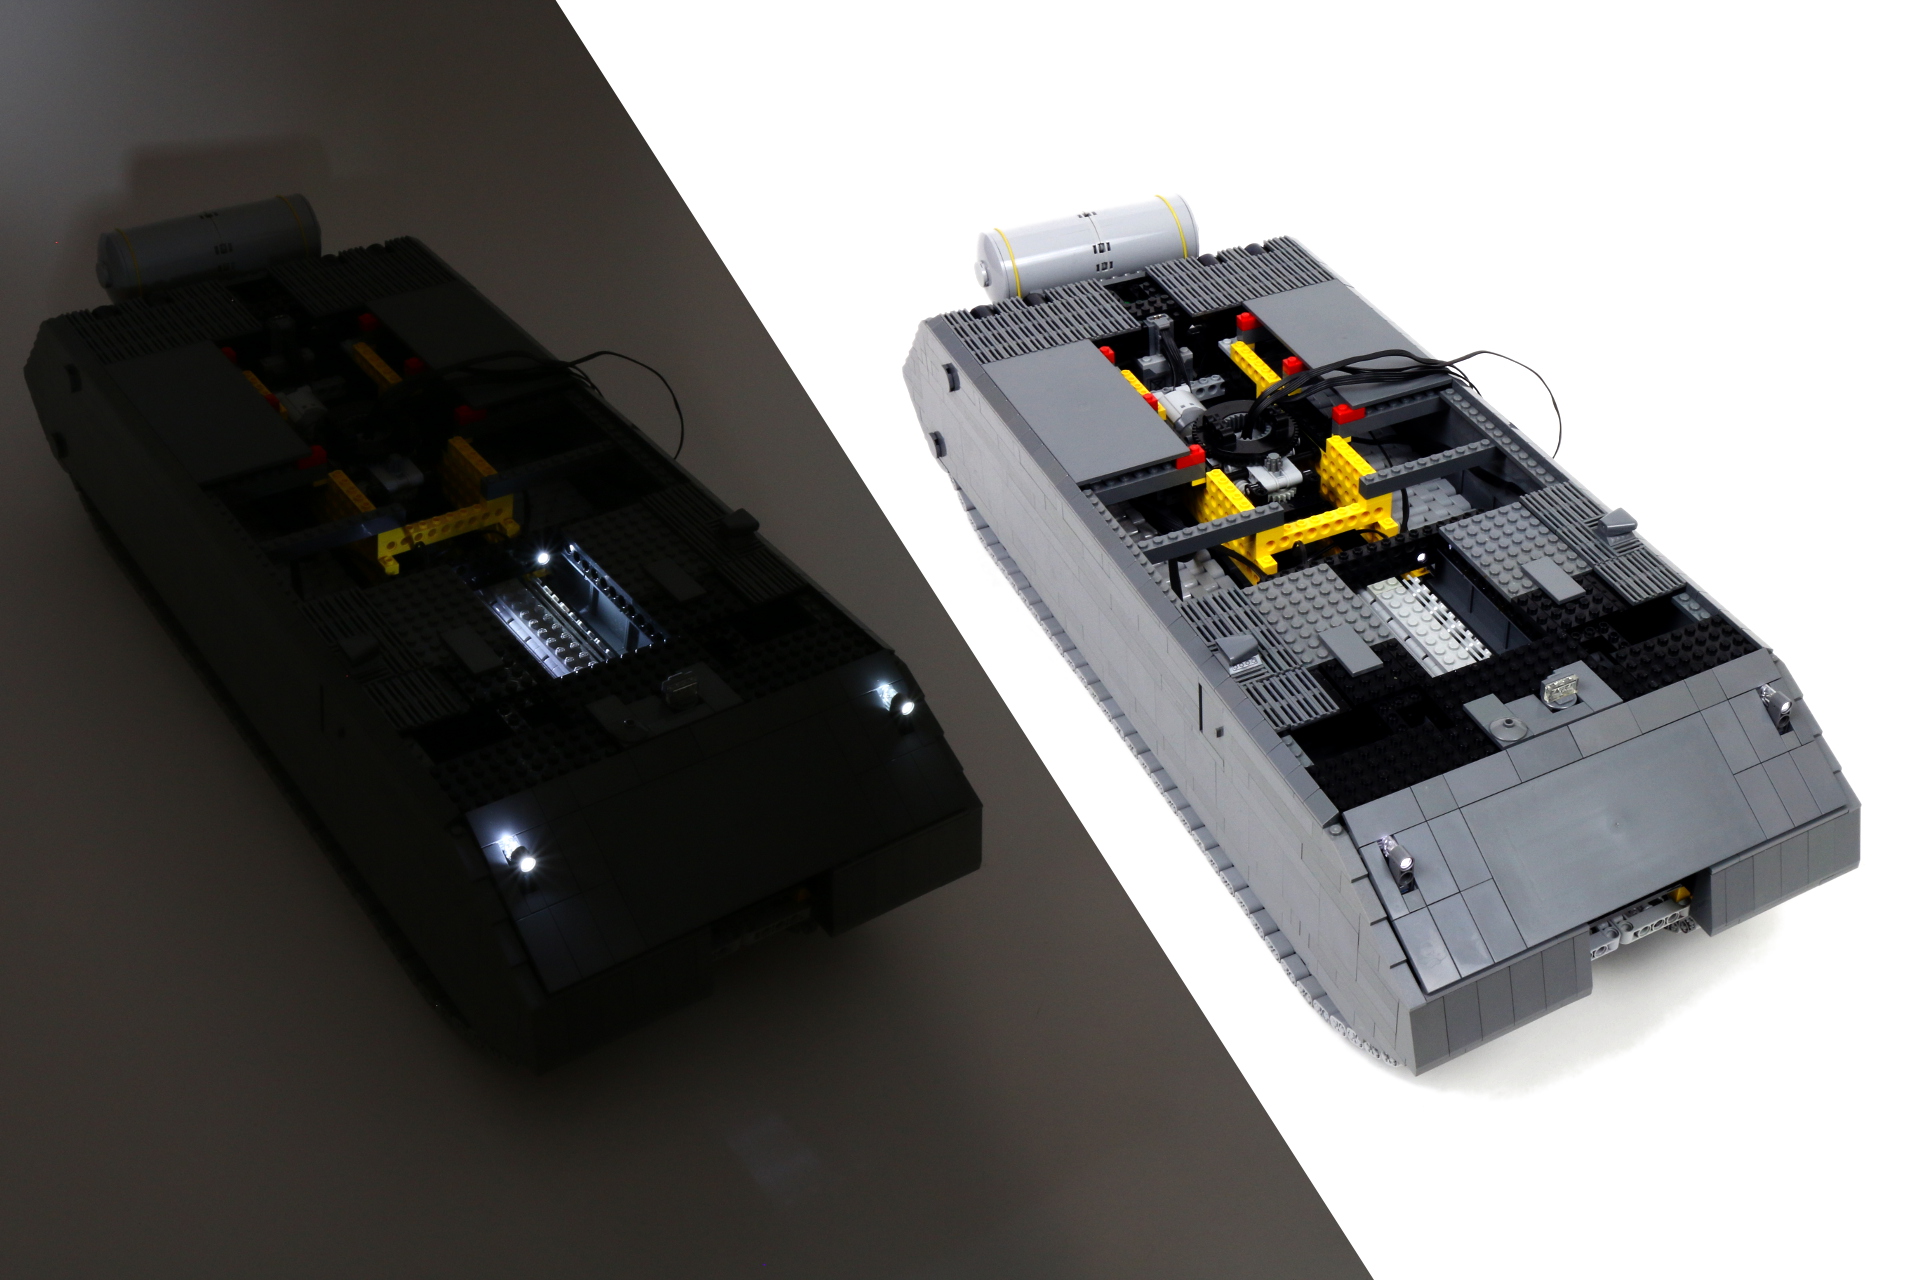
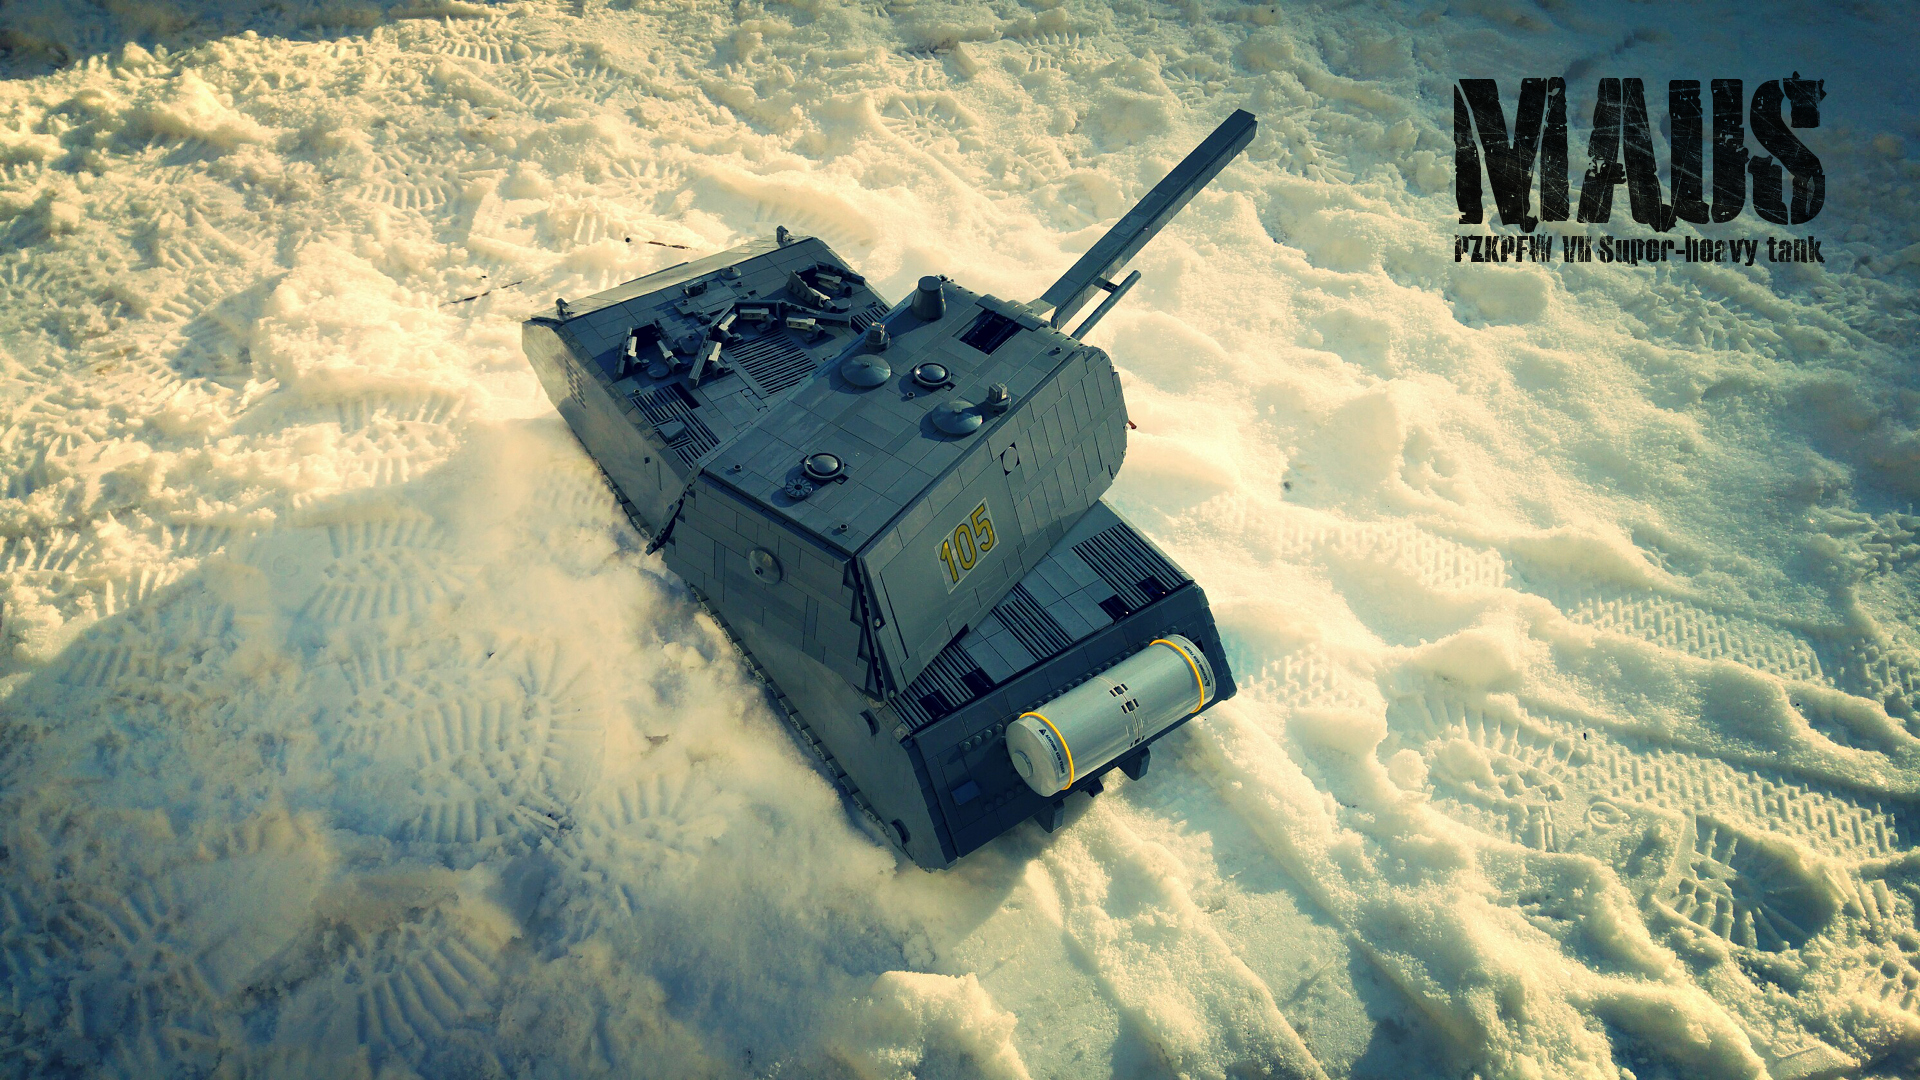
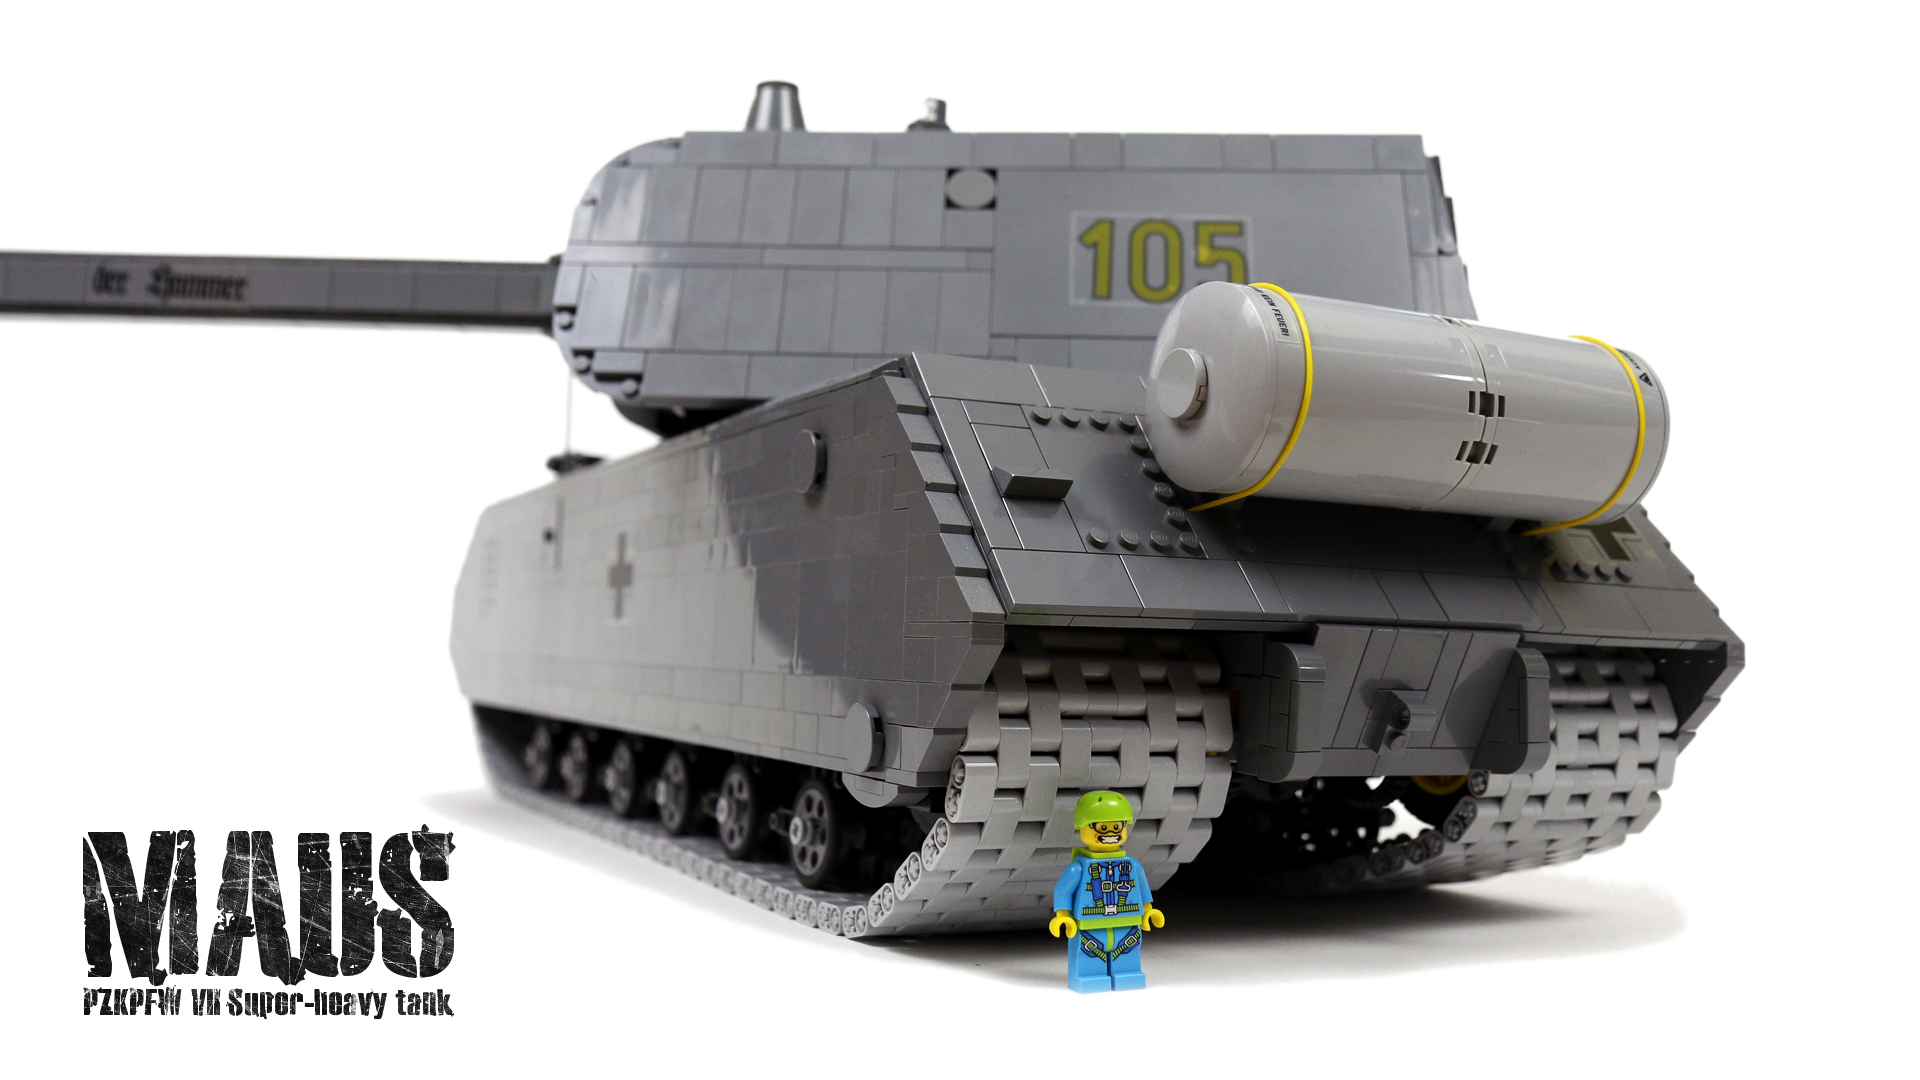
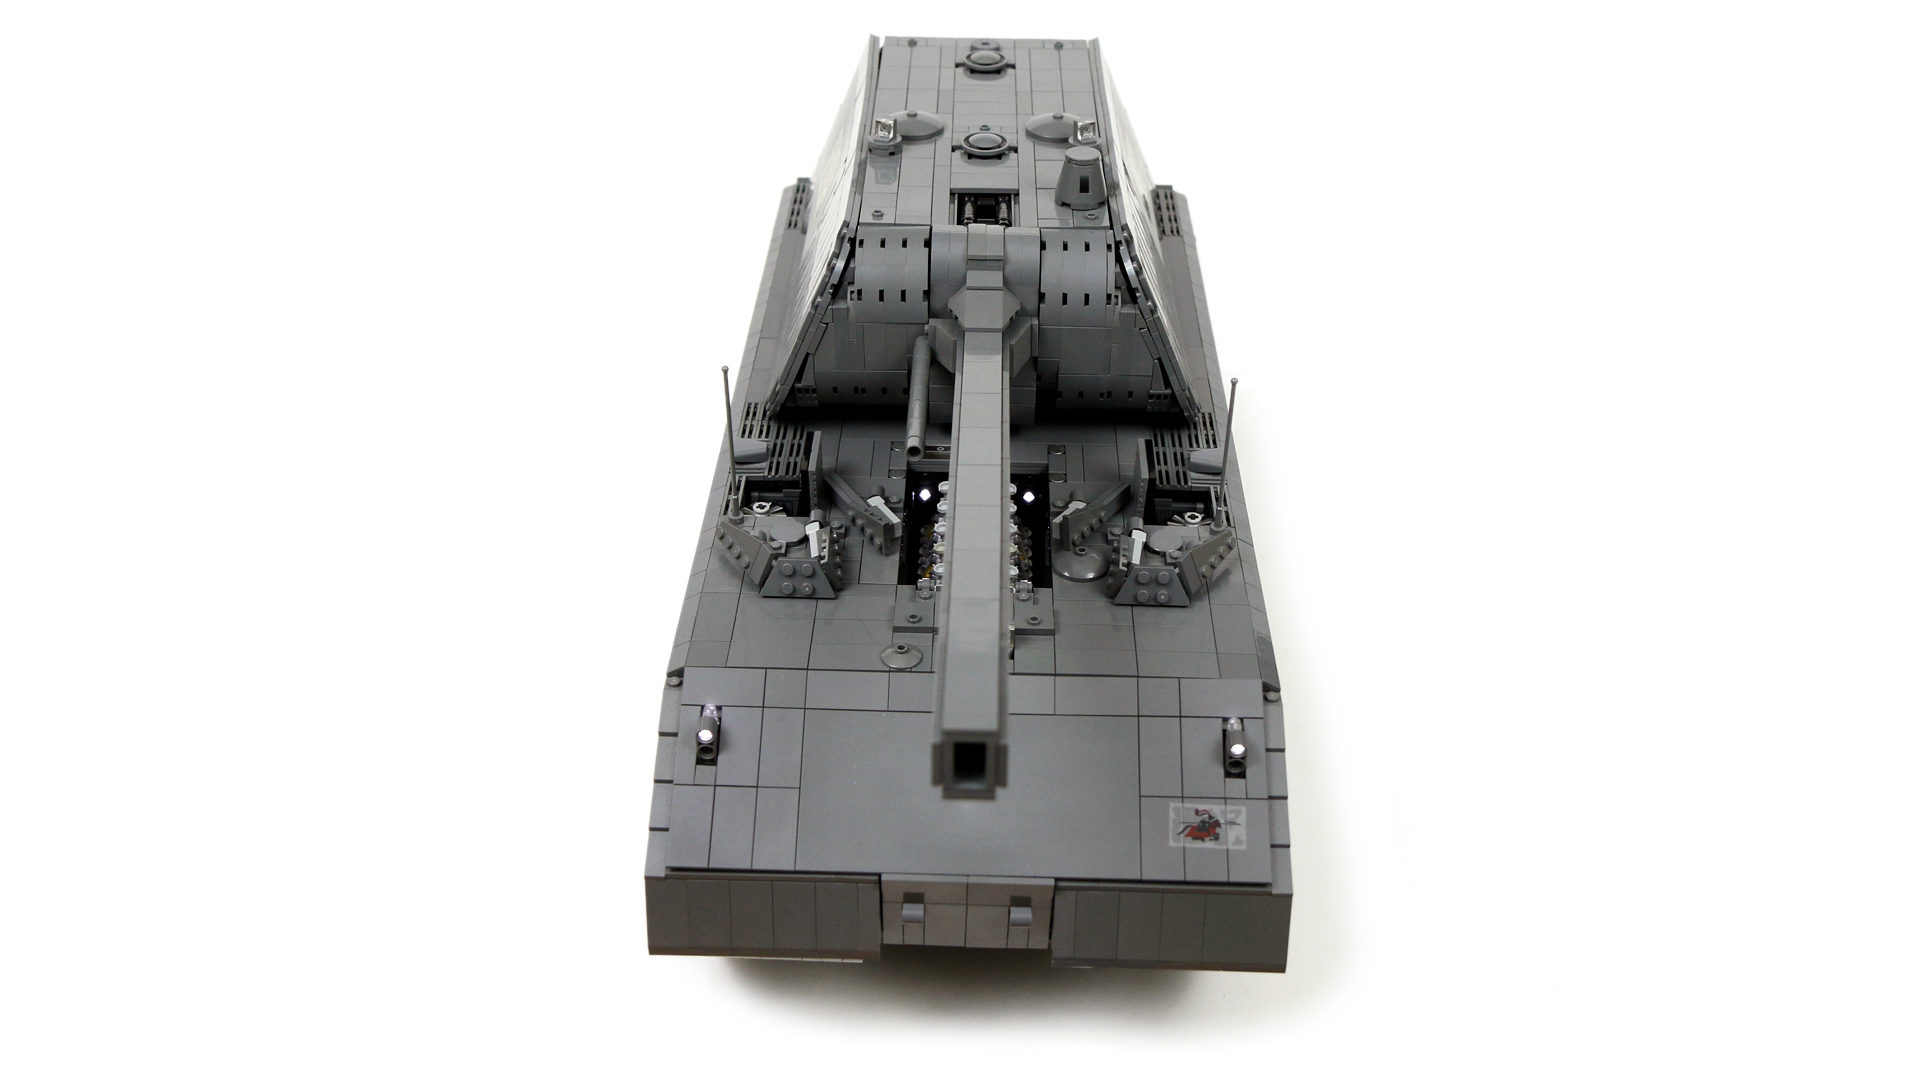
Other functions include a rotating turret and elevated main gun, as well as an V12 engine bay in the front deck, between two radiators with fans inside. The radiators could be opened up by hand and the radiators were driven by two 71427 motors, while third 71427 motor (chosen for its low noise level) was driving the V12 piston engine. All three 71427 motors were connected to a 9V switch under driver’s periscope, so that they could be turned on or off by turning the periscope slightly.
I estimate there was no less than 20% of the hull’s inner space left unused – I simply had no idea what to use it for, especially since the hull was almost entirely covered by the turret, which limited its possible functions. There was also some room left at turret’s back, and I had one free PF channel left to use in the turret. I have initially wanted to build a mechanism that would open two main hatches on turret’s top remotely, but it made little sense as the firing mechanism was right below, eliminating the possibility of adding some interior under the hatches. So in the end I have used a single Micromotor to make the main periscope on the turret rotate remotely.
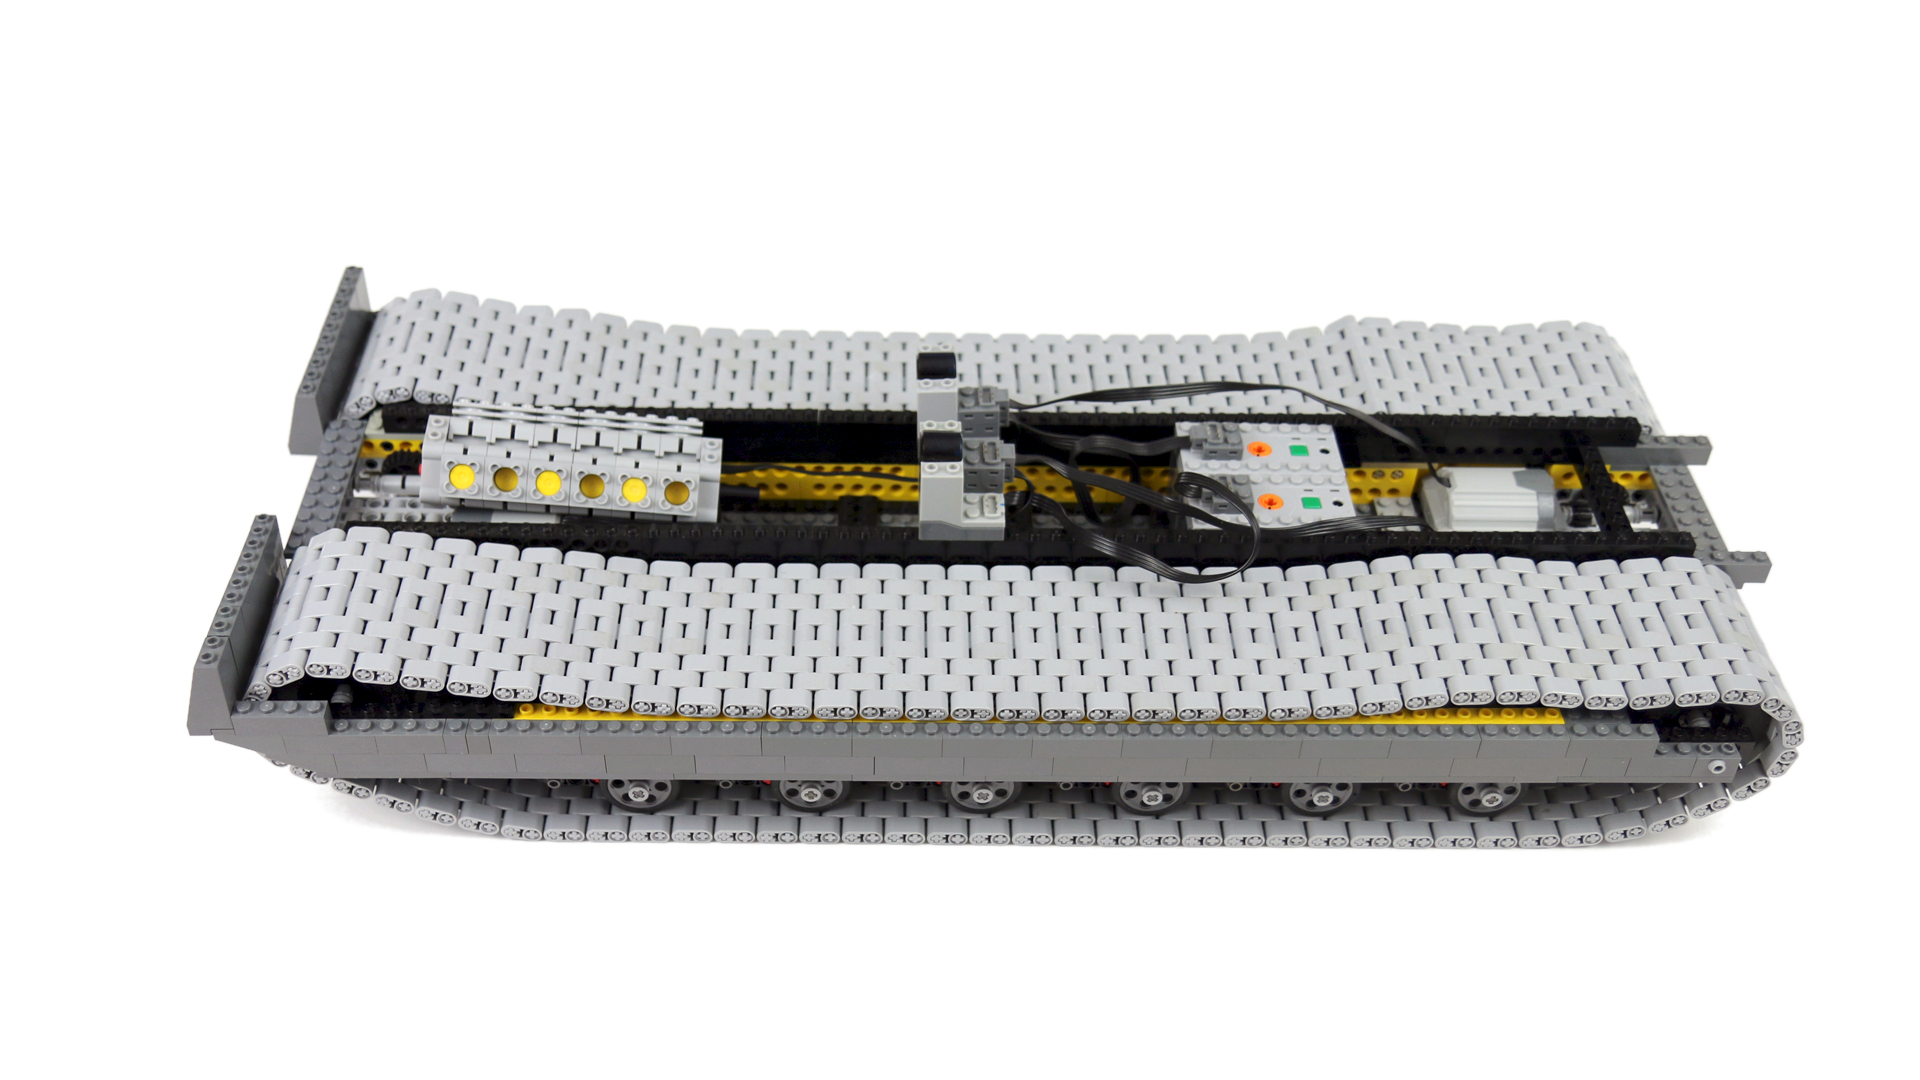
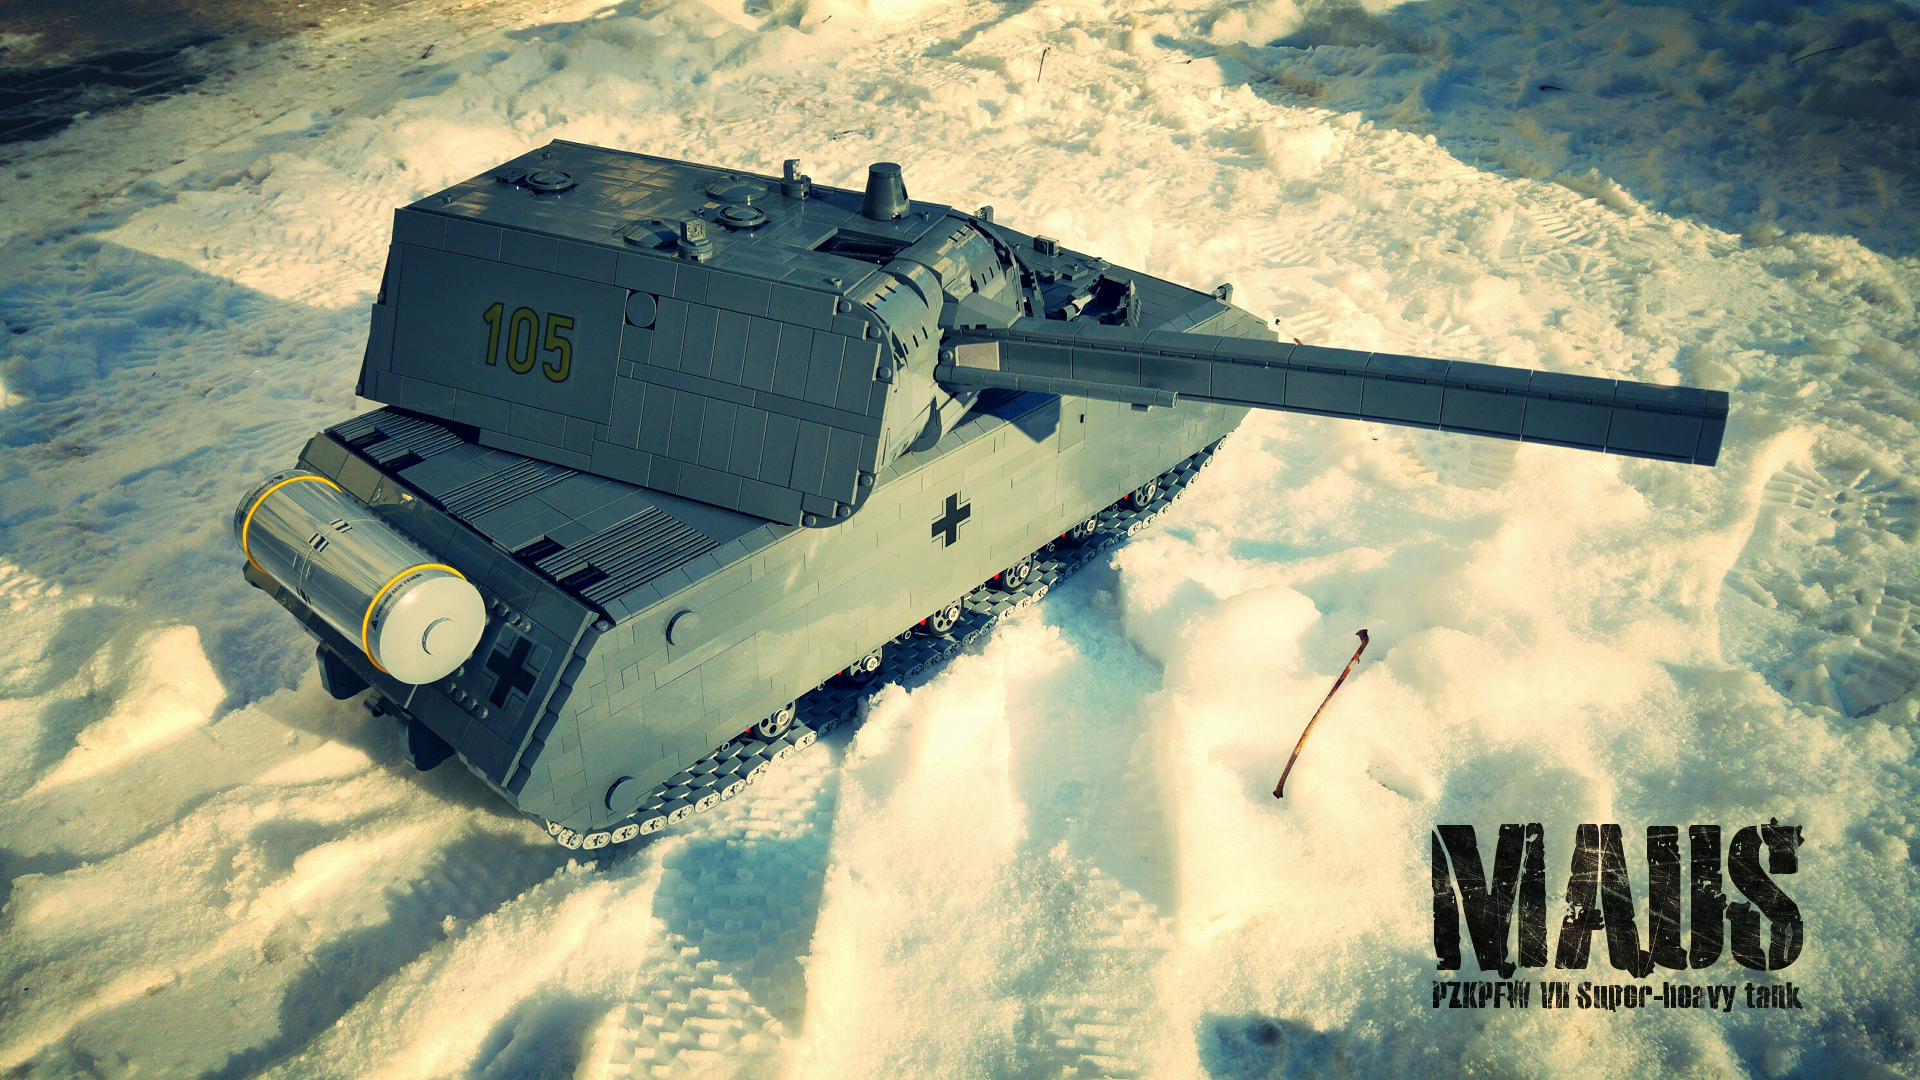
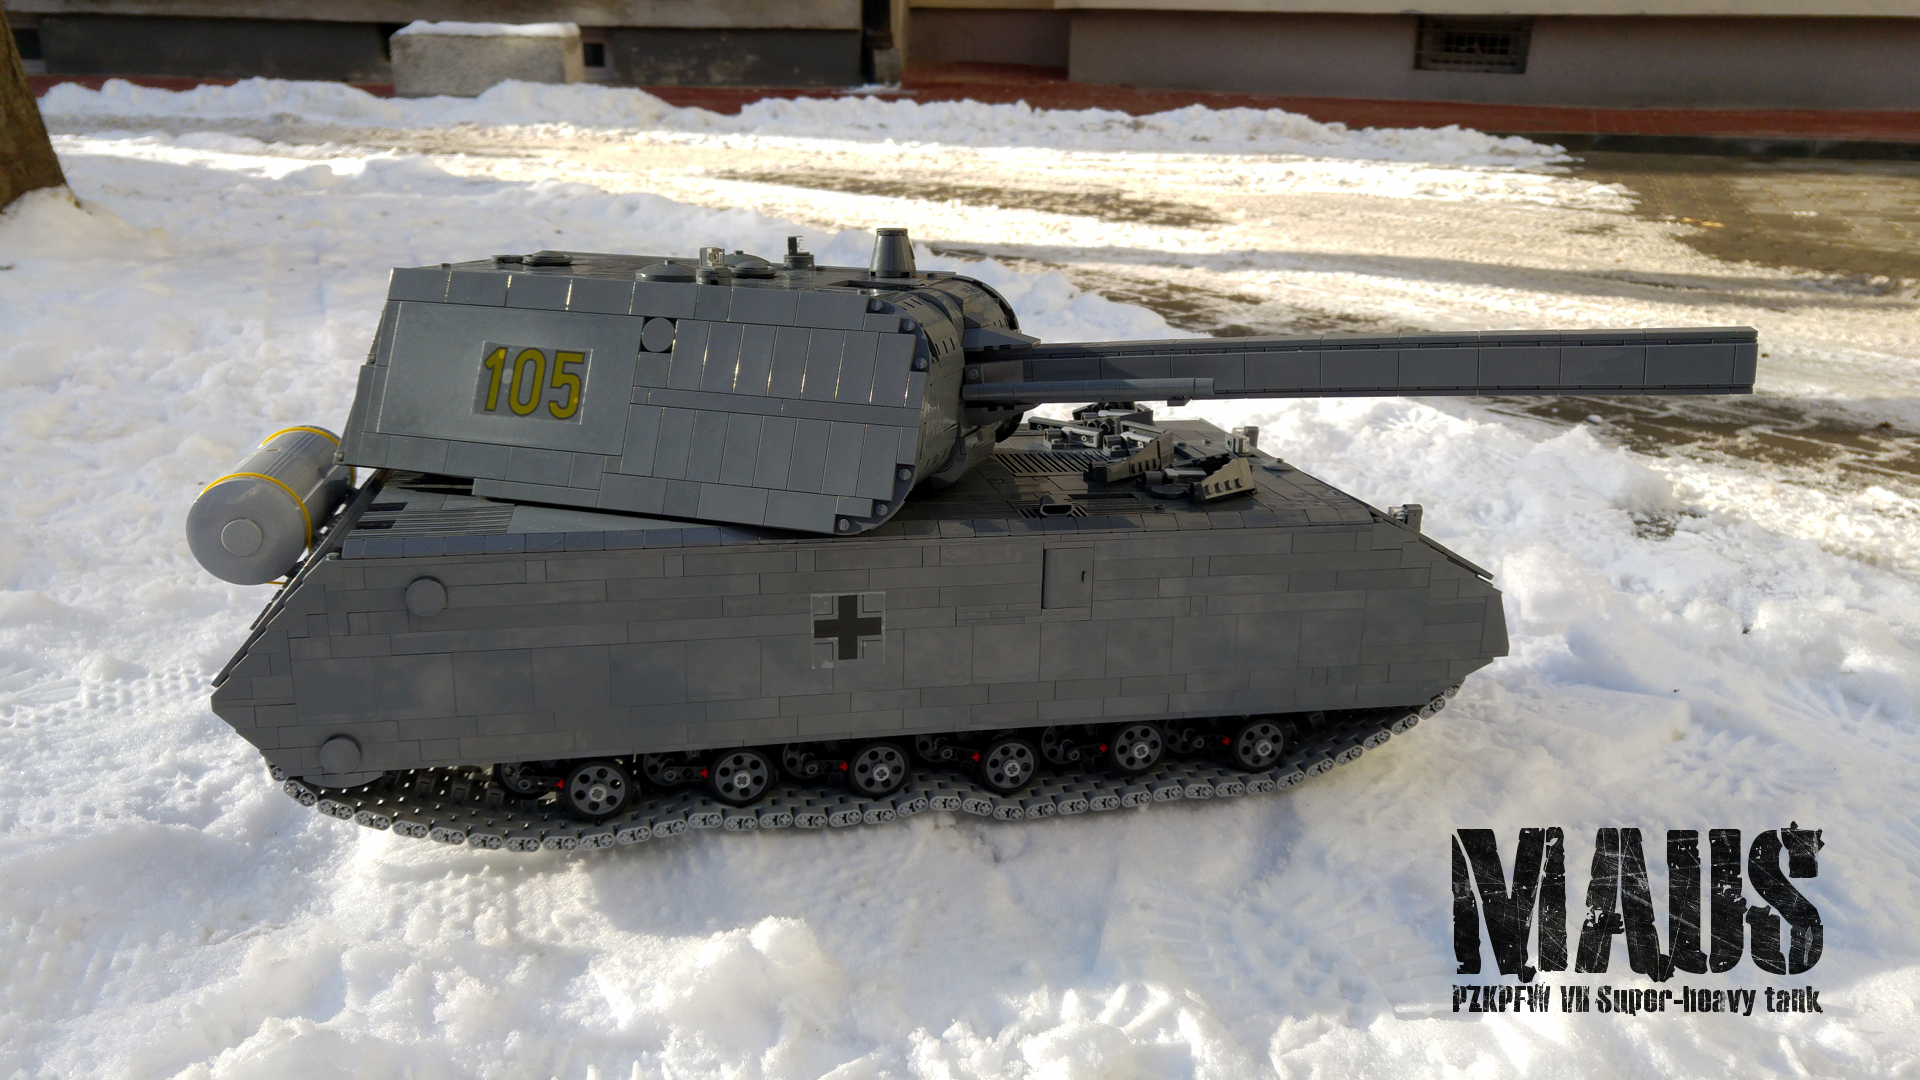
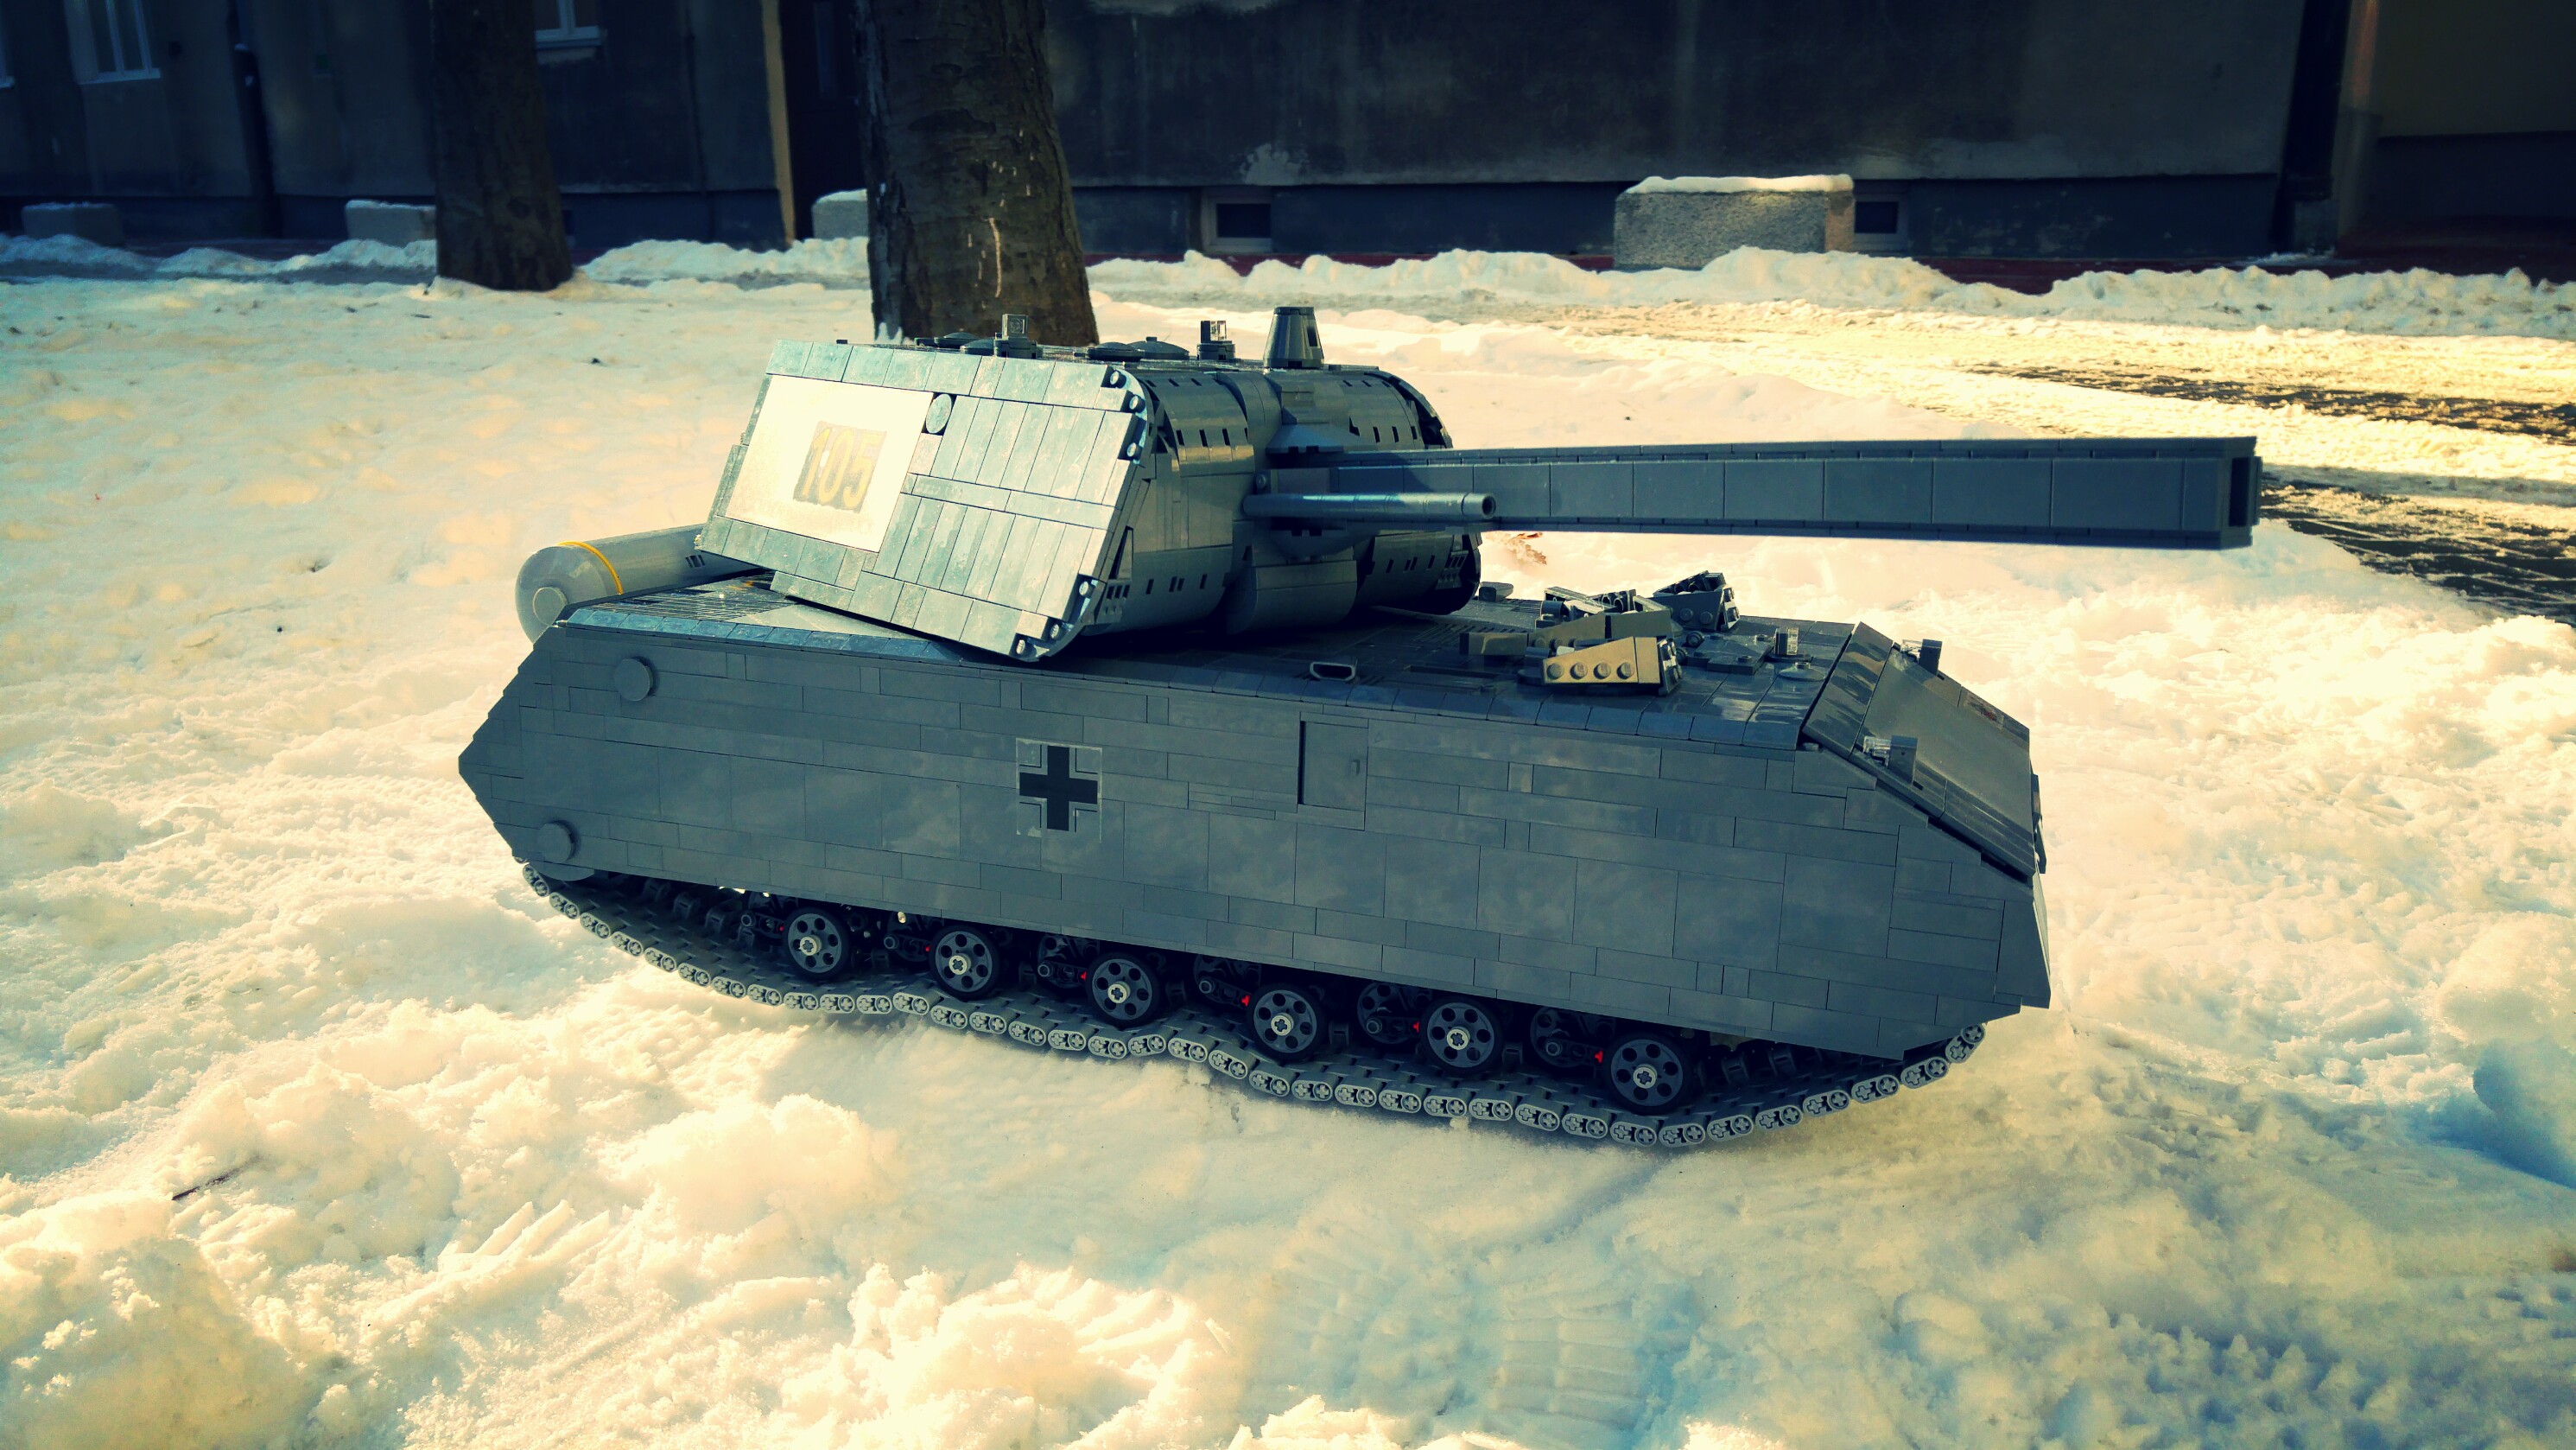
While the model was pretty simple for the most part, the real challenge was making it drive and powering it. It has ended up heavier than I’ve anticipated and I’m amused when I think that I have initially not geared down the PF XL motors at all. But as the model grew heavier, it proved necessary to gear them down, eventually to 3:1, which in theory produced just as much torque as 48 ungeared PF M motors. Three Lego 8878 batteries were used, partially because they are known to handle low temperatures well and I wanted to drive the tank on snow. Two of them were located in the sides, just above the tracks, each powering two PF XL motors driving the respective track. They could be accessed through small door in the side armor. I have also connected a pair of Lego LEDs to each of these two batteries – one LED would go into the headlight on the respective side, acting as external battery status indicator, and the other was installed in the back of the V12 engine bay, illuminating the engine. The third battery was powering everything else, including the 71427 motors, and it was located between the PF IR receivers at the very back of the hull, where it was hidden under a radiator’s grille and activated by pressing part of the grille.
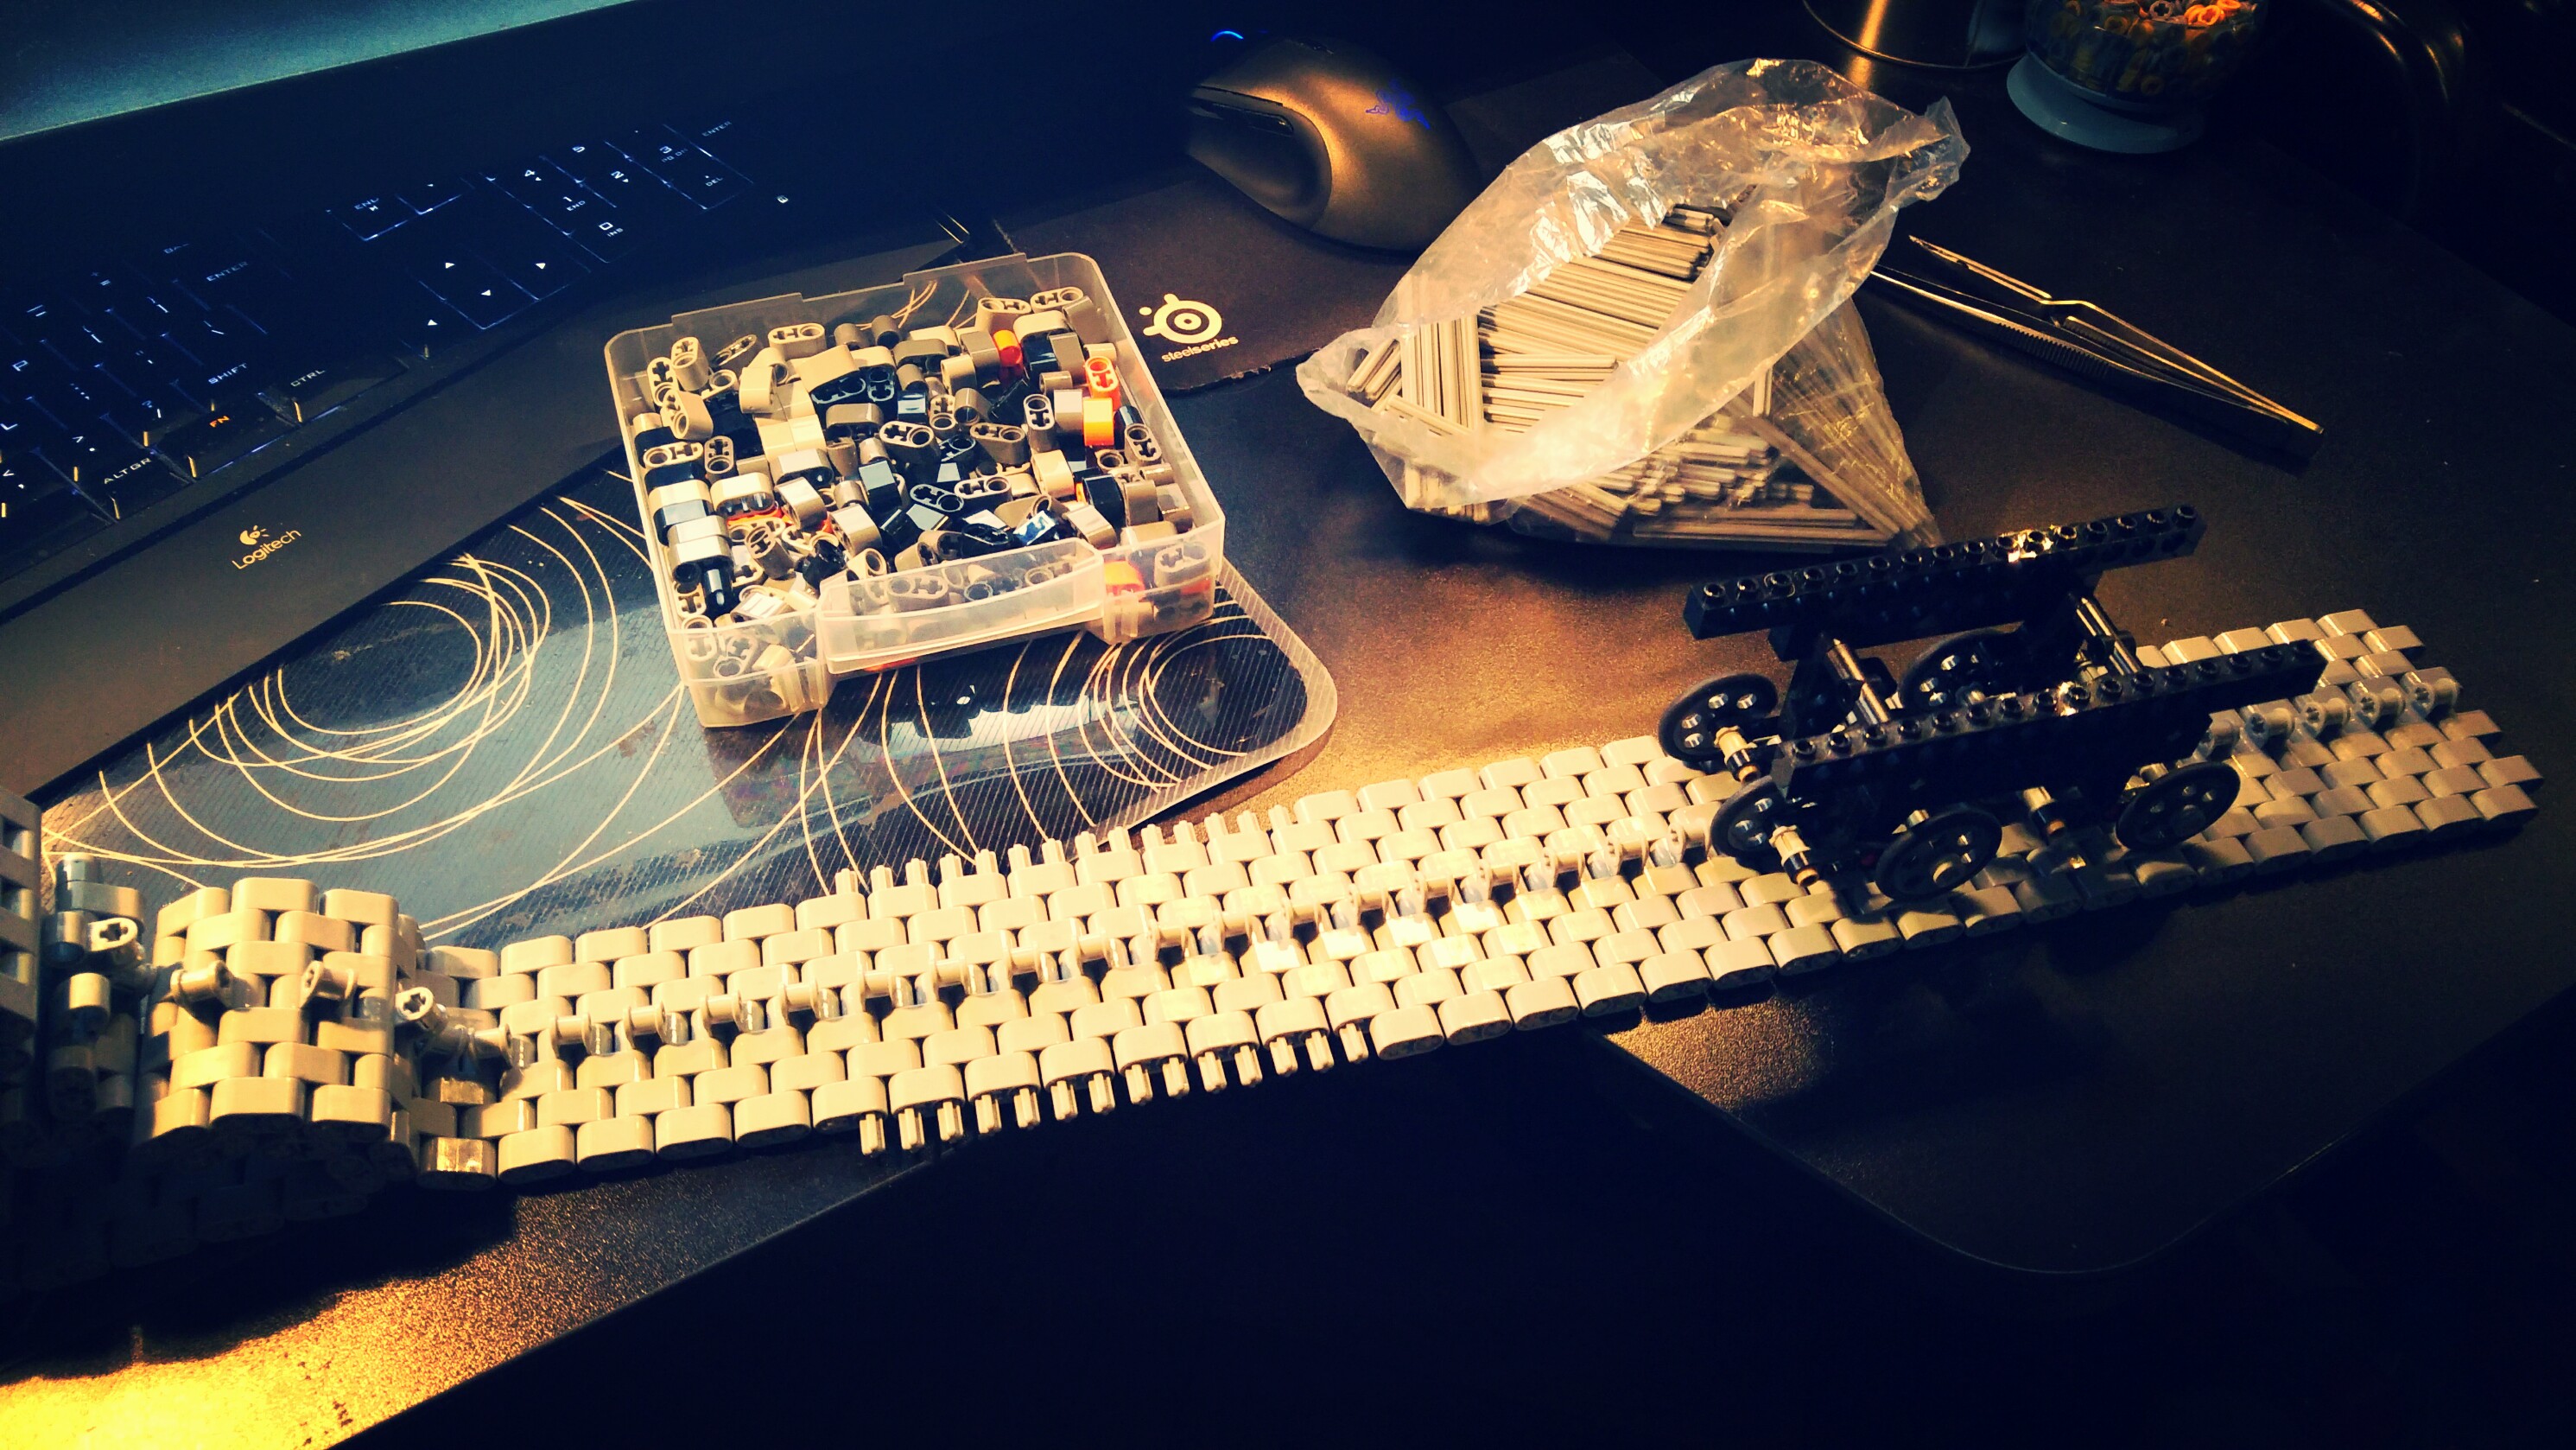
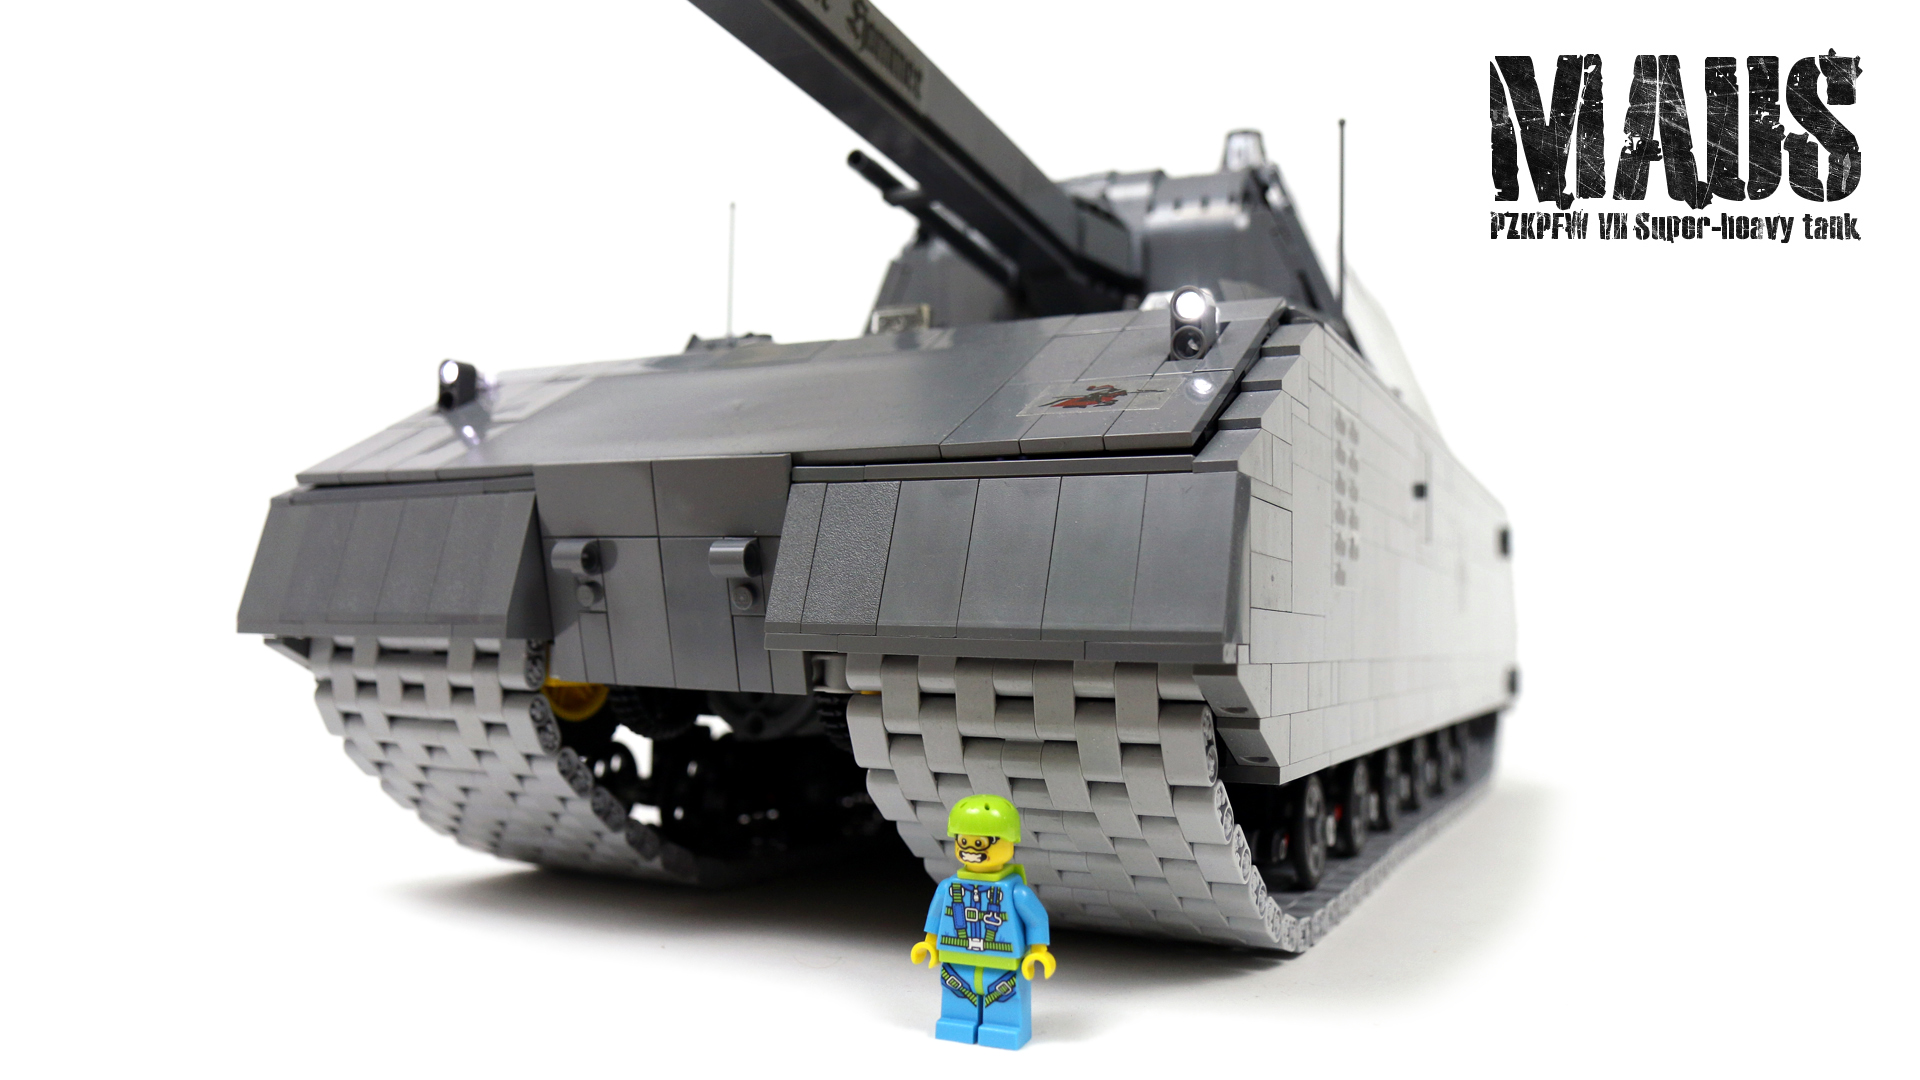
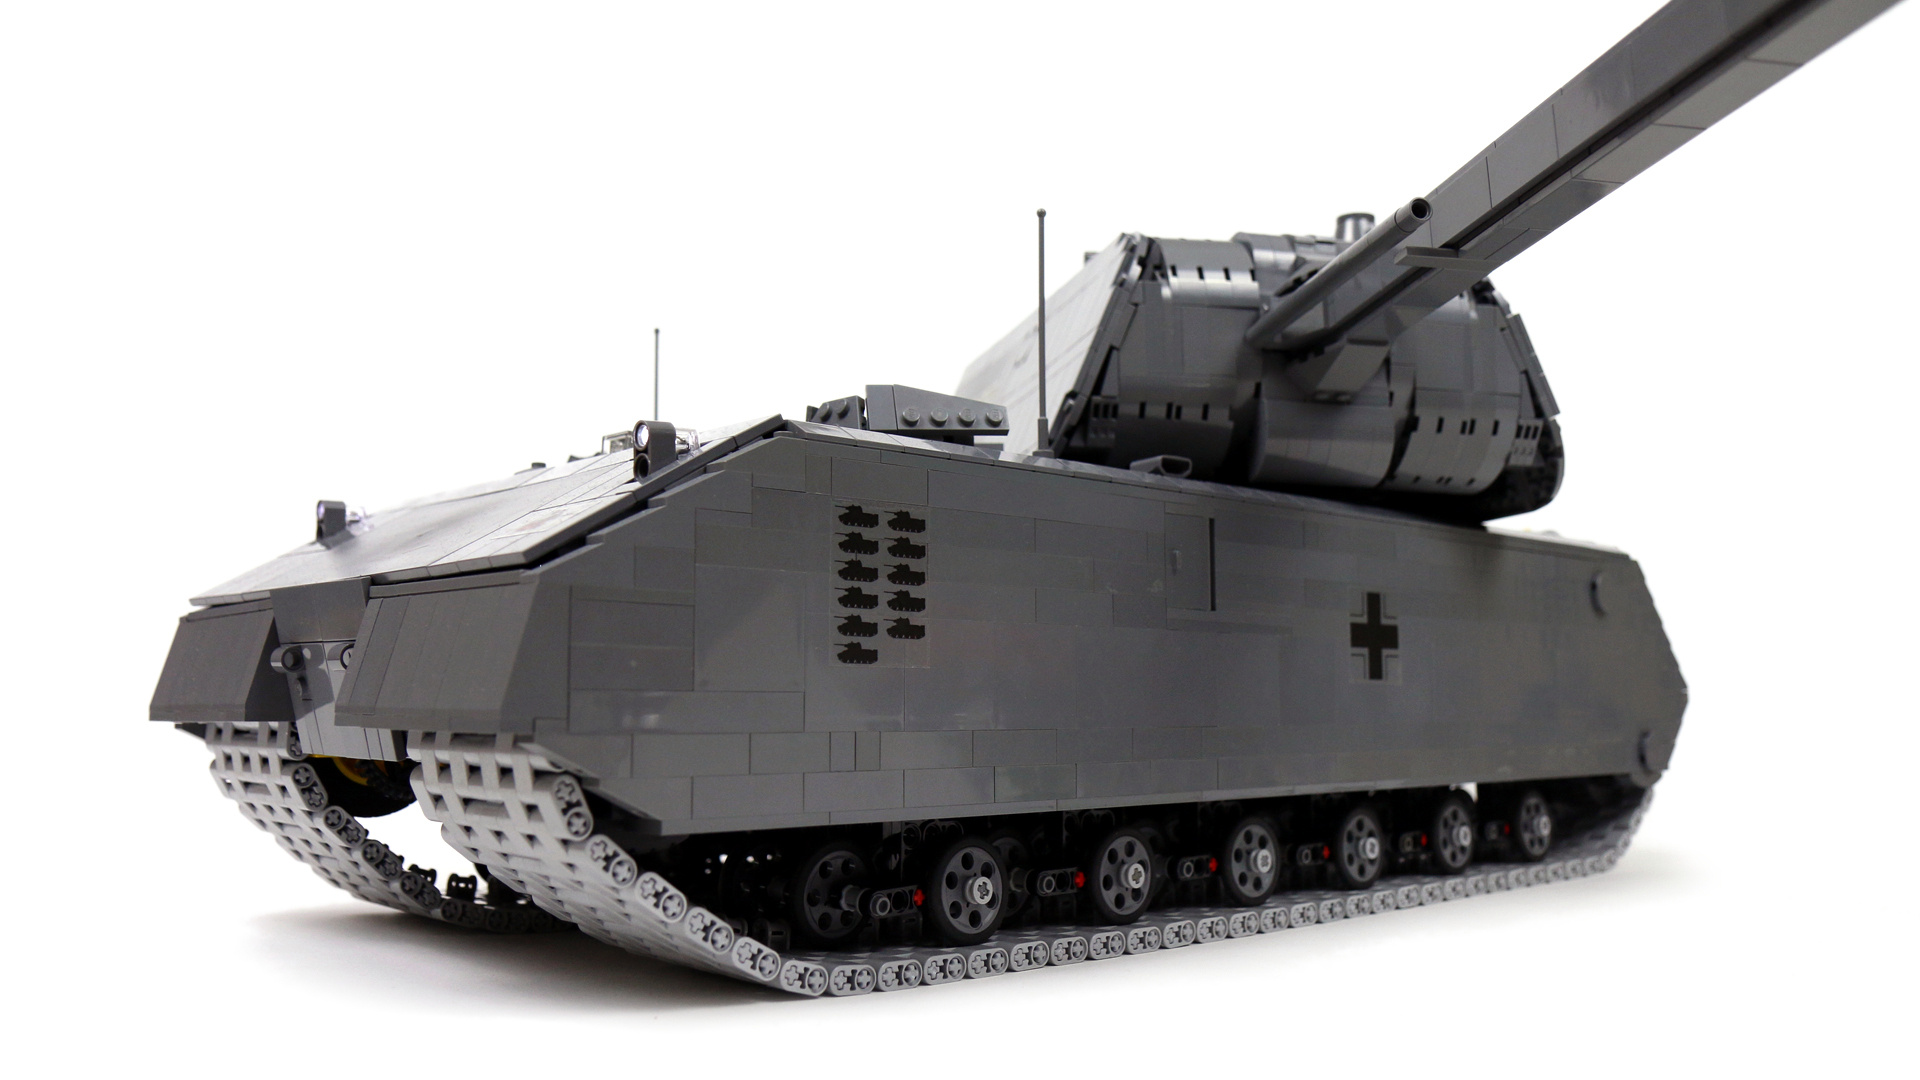
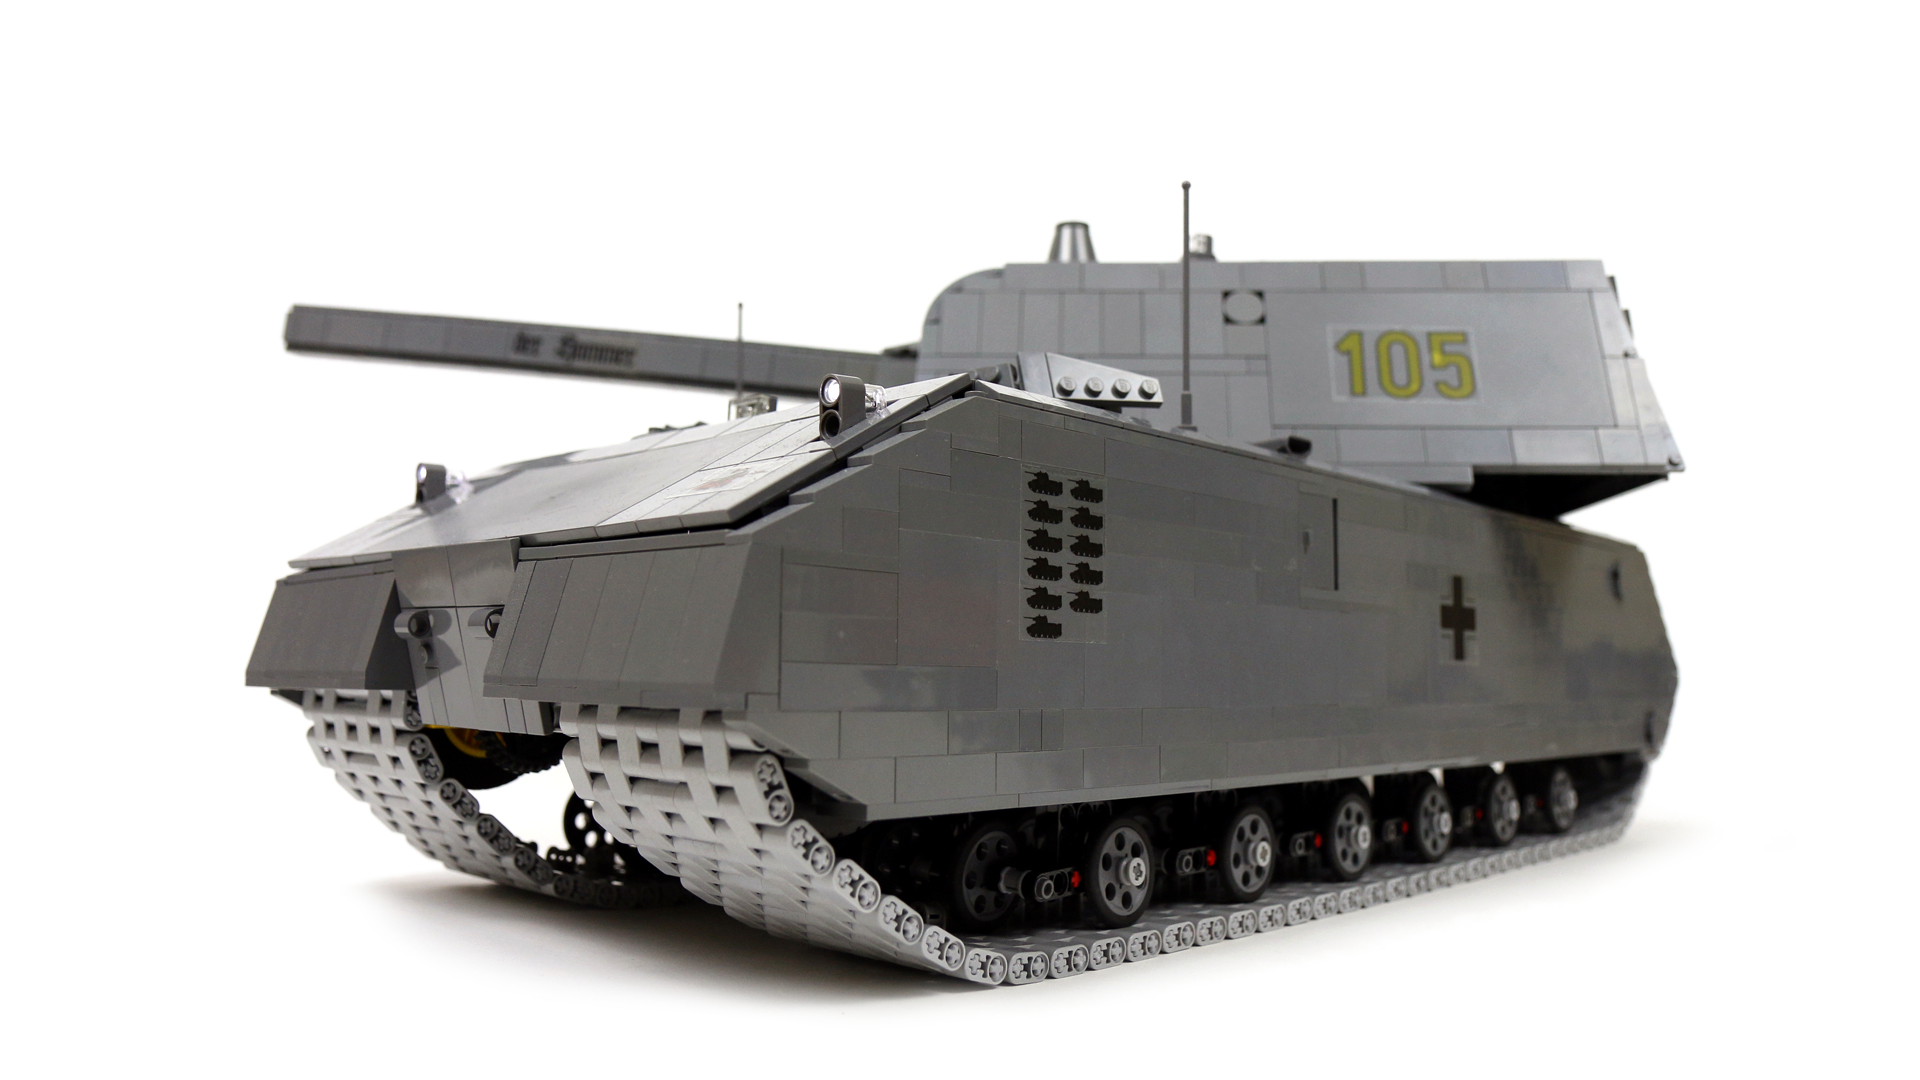
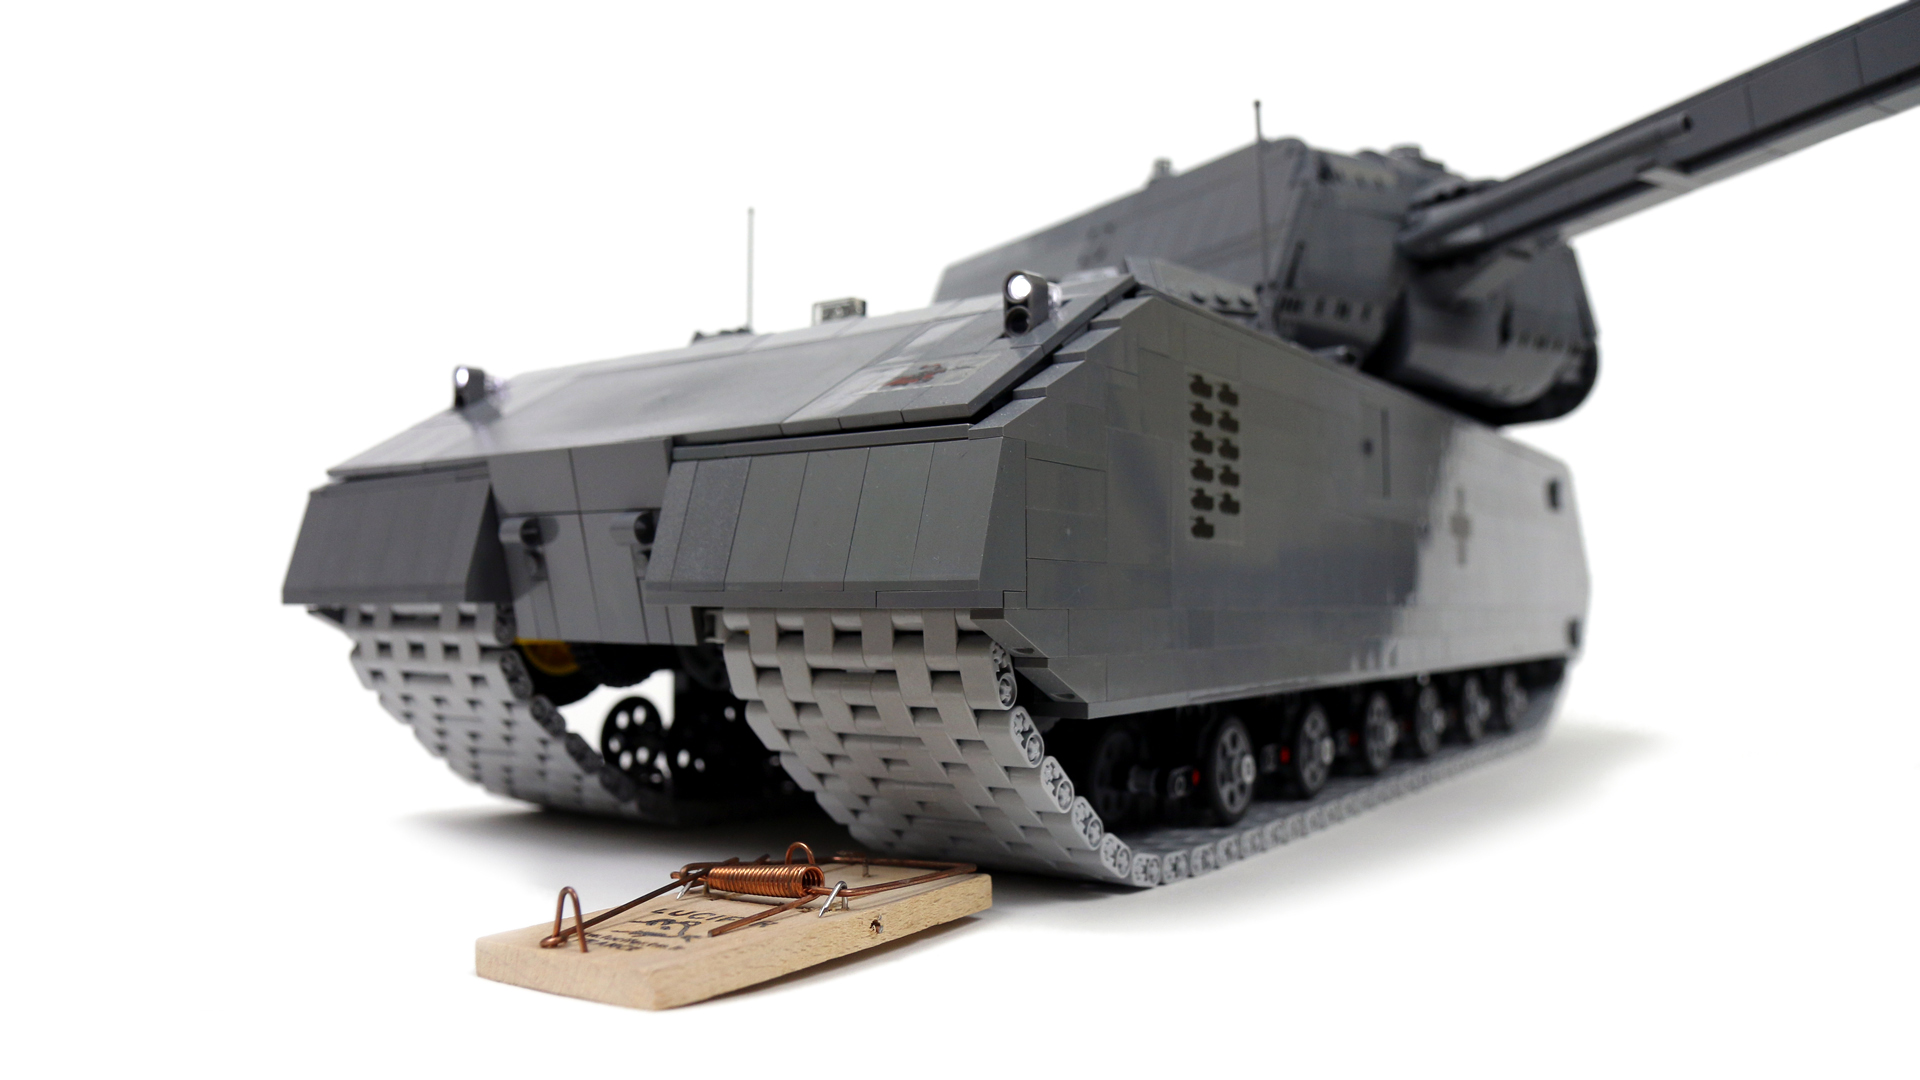
My “minimal size factor” for scaling this model was chassis wide enough to house two PF XL motors side by side (which eventually resulted in a model almost exactly at 15/1 scale). For all its massive size, the Maus’ chassis was actually very narrow, squeezed between two wide tracks enclosed in the hull. I needed it to be 10 studs wide, and this called for 9 studs wide tracks – almost twice as wide as the largest tracks Lego makes. I have therefore used custom tracks, just like in my Ripsaw XL model, but wider. The tracks were 148 studs long each, included 814 pieces each and their weight alone accounted for well over 1 kg. They had a single central teeth that would go between the road wheels, and they didn’t mesh with sprocket wheels – instead, they were driven by wheels with regular Lego tires, relying on traction between tire and the track. It has worked better than expected, the model had no traction problems and could even turn in place on a floor – but it had insufficient torque to turn on snow. When driving over snow, the tracks proved to have their pros and cons – being smooth on the outer side, they didn’t pick up any snow and there was no problem with snow accumulating on the tracks or being carried by them inside the hull, but on another hand they had not enough traction to go uphill. The model was doing well on flat surfaces or very small obstacles, and it drove downhill perfectly well, but the tracks would simply start sliding when trying to go uphill.
Probably the worst idea I’ve had with this model was using PF IR control system instead of SBricks. I had hoped that the gap under turret’s rear end would allow the IR receivers to remain well exposed, but it didn’t and I’ve experienced repeated problems with range of the PF remote, both indoors and outdoors. Using SBricks would be a much better solution here and I’ve only given it up because I wanted to make a nice customized PF remote and I was expecting it to work better than touchscreen when wearing gloves outdoors.
In the end, the model proved an interesting challenge, and it was the heaviest single-part vehicle I’ve ever built up to date. I was impressed by its performance, and by how its thin, fragile road wheels could support its massive weight and allow it to negotiate some obstacles. It looked nice and it allowed me to learn some valuable lessons about engineering behind large-scale, heavy models. I hope these will pay off in the future.


Thank you Sariel. Yes the picture is perfect and explains everything I wanted. Good luck with future projects.
Mike
@Mike Jeffery
Thanks. I believe this pic should help: https://s16.postimg.org/mqjbzyql1/12484576_10154466181893696_1594547198330218778_o.jpg
Personally, I liked the T29’s barrel better. Its smaller inner diameter improved stability of the projectiles.
Hi Sariel, I have 3 grandsons who are mad on Lego and building tanks in particular. I have your ‘Unofficial’ Technic guide which is invaluable when helping the boys with their creations. I have built the T29 firing mechanism, but would like to understand more about the gun barrel construction on the Maus, which I prefer to the T29 barrel. I wonder if you could give me some idea of what Lego elements you used to construct such a smooth looking barrel that also enables missiles to be fired through it. I am not asking for instructions, just some idea of the principles involved. Many thanks, you are an inspiration to at least 3 generations in my family who thrive on creativity.
that was quick 😛
@Addison Heath AUSLUG
Yes, I play WoT like twice a year. I work for my money. SBrick is cool, but it doesn’t make building a tank any easier.
Me again.
Still no luck on the lego tank.
Just wondering, would you suggest S-brick over the normal lego power functions?
Also, how do you have all the money to buy all the lego. #SoPoor 😛
STILL wondering if you play World of Tanks. (Your such a tank fanatic i wouldn’t be surprised :D)
@Addison Heath AUSLUG
Thanks. I only have experience with Mindstorms NXT, not Ev3. It’s all here: http://sariel.pl/category/mindstorms/
@Sariel
Thanks for the feedback. i was just wondering if you had any experience with mindstorms.
just wanted to say i think your a fantastic lego contributor and youtuber and hope to see you create more lego tanks in the future (Wish i could build them!)
Addison
p.s still wondering if you play World Of Tanks!
@Addison Heath AUSLUG
Sorry, I don’t see how I can help, especially since I don’t have the ev3 set.
Hey sariel, for my local lego convention (Brickvention)i am thinking of building a lego tank. i dont not have enough motors for any of the designs i can find on YouTube and the only thing that would be available for me would bee the EV3 mindstorms set. i have been doing doing some tests for structure and shape and have found it is to bulky. can you suggest any tips/ tricks so help my problem?
Thanks
(P.S do you play wot, just something ive wanted to know :P)
@Cheesy
No.
Hey man is their any instructions to build this awesome tank
@Sariel
if only I had time to build it… anyways thx
@BJ
Sorry to disappoint your son but even if I was willing to sell it – which I’m not – there’s nothing to sell. I took it apart long ago.
I see… unfortunately I had not time to watch the video thought my son really wants it hence asked if you would consider selling… just name the price mate
@BJ
There are no instructions and perhaps there’s a reason why it says “not for sale” in the video.
Hello mate,
this is awesome! Can you share the building instructions or else would you consider selling this tank as is?? If so, how much?
Thx
BJ
@Sariel
Woops (:
“The third battery was powering everything else, including the 71427 motors, and it was located between the PF IR receivers at the very back of the hull.”
hmm you used a lot of motors 😛
@DroidekaOne
The problem is, the snow is almost gone here now, and what’s left is old, hard, ice-like snow.
Could you make a snowplow in the spirit of the season?
I know it’s simple, but in simplicity, there is room for creativity.
@Boston Abrams
Ahem: http://sariel.pl/2015/08/t29-shooting-mechanism/
I even posted this link in this very description right here.
Awesome model ,this is one model you shouldn’t take apart.You may keep it besides the batman tumbler if you like:-) . Anyway i strongly suggest the next model you should begin is Arocs 42043 B model please please please build it I am dying to see it. And i am not going to build my Arocs B model till you give a positive vote about it.
Thank You
I hate to be another person asking for building instructions but I really would like to see how you made the firing system becaue I am trying to build a shooting device!!
Thanks in advace