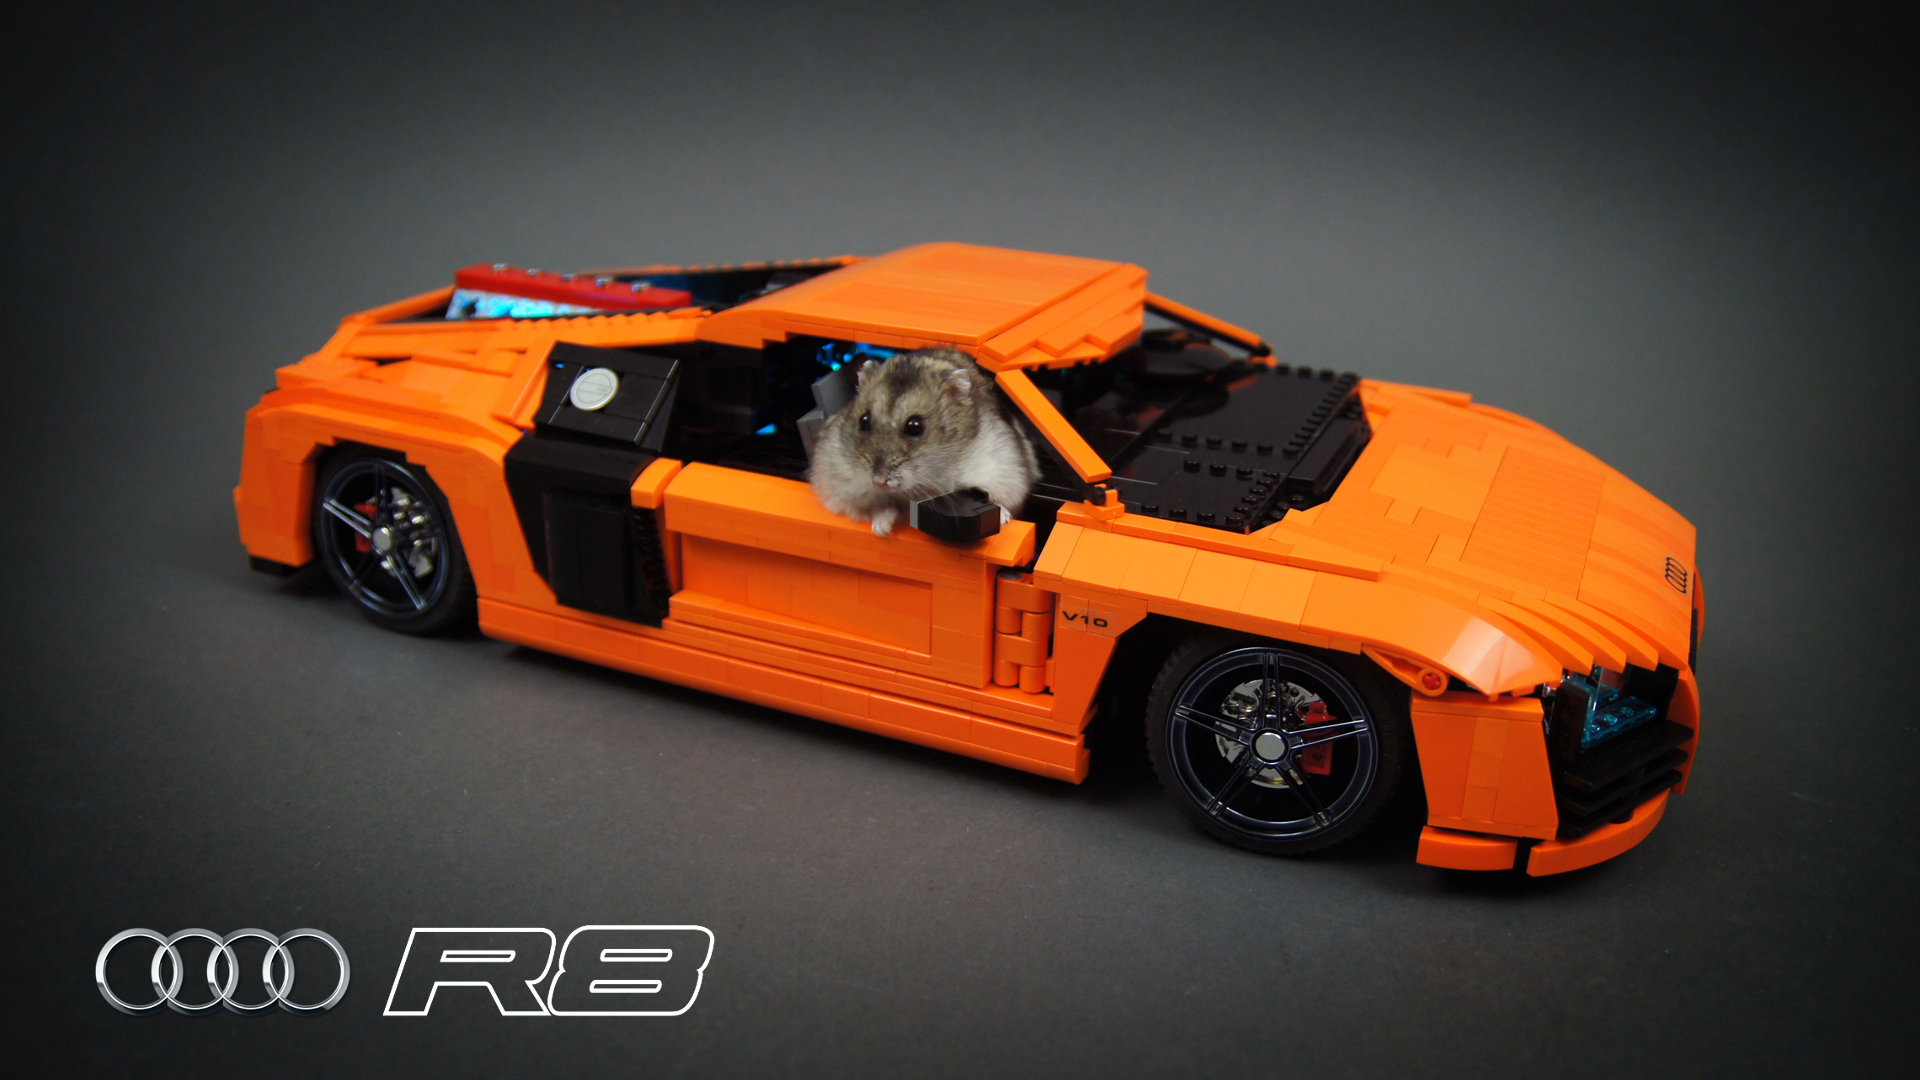
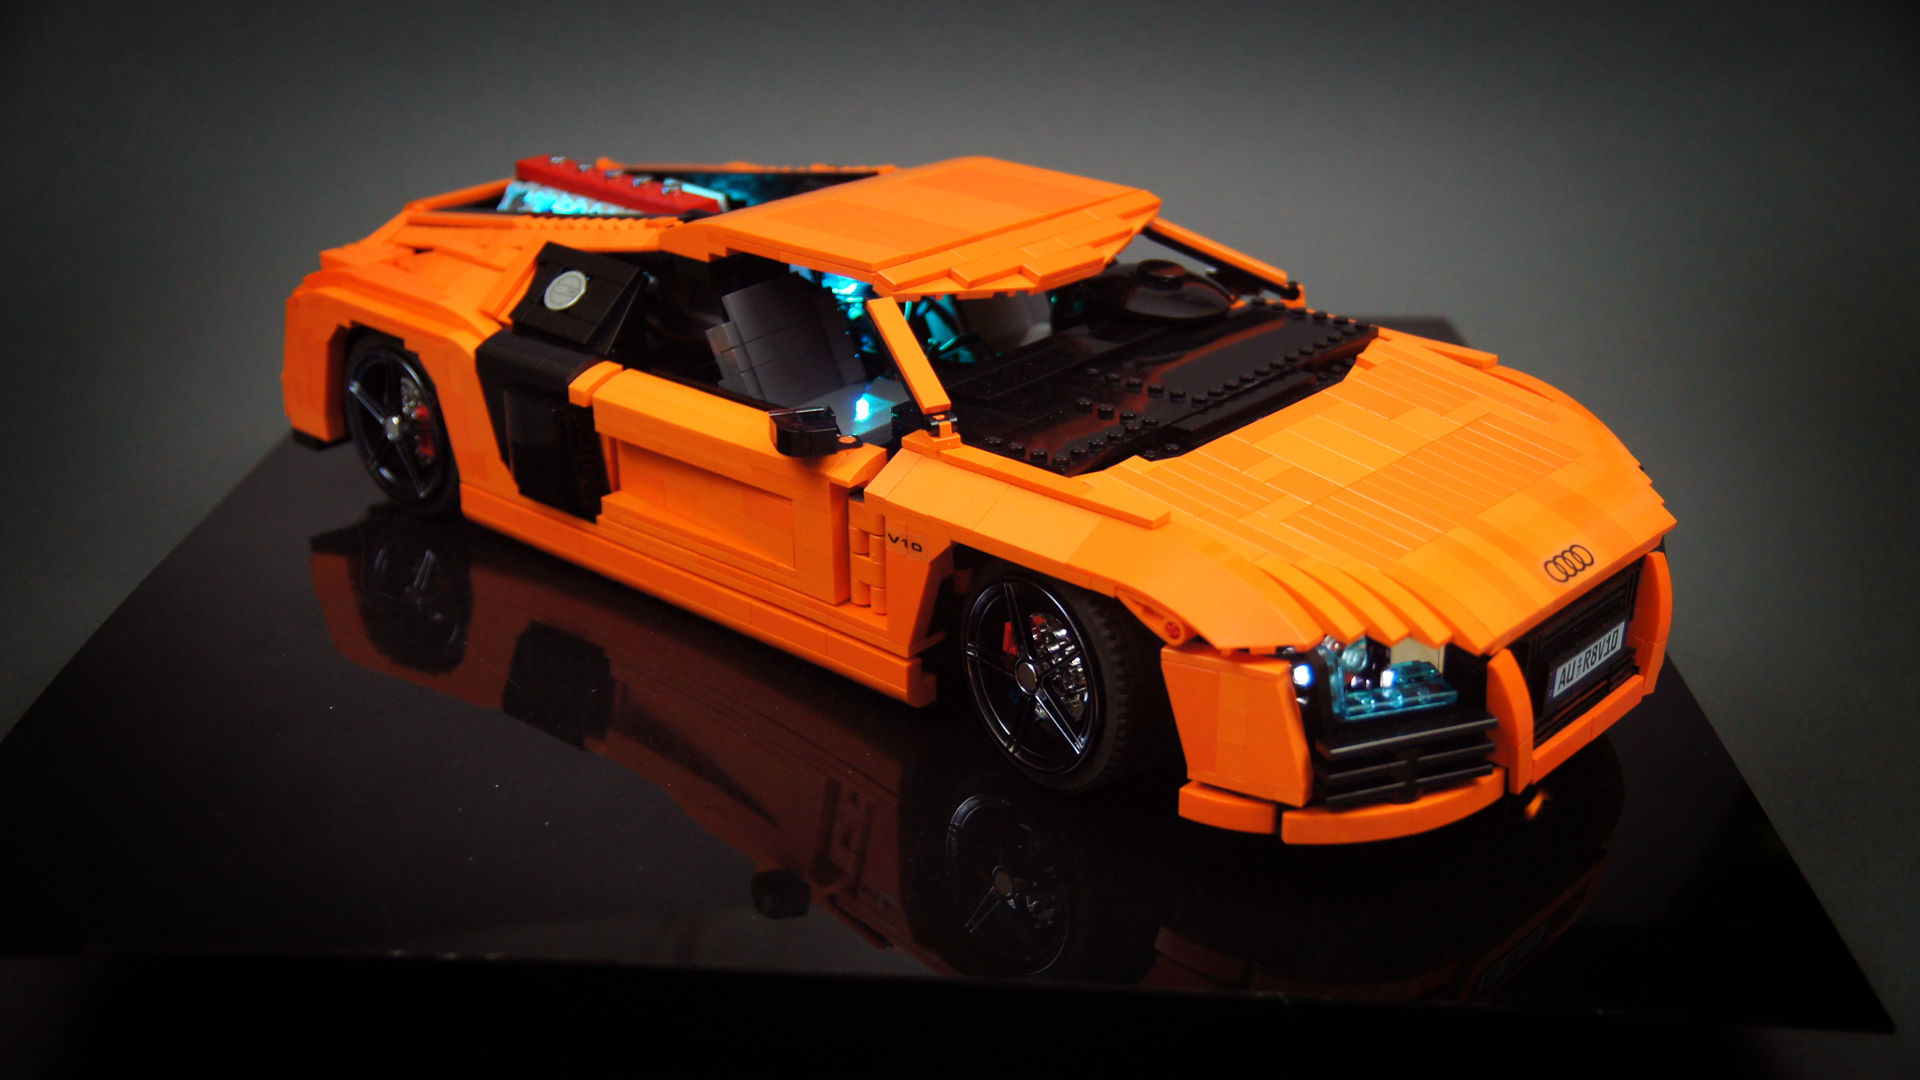
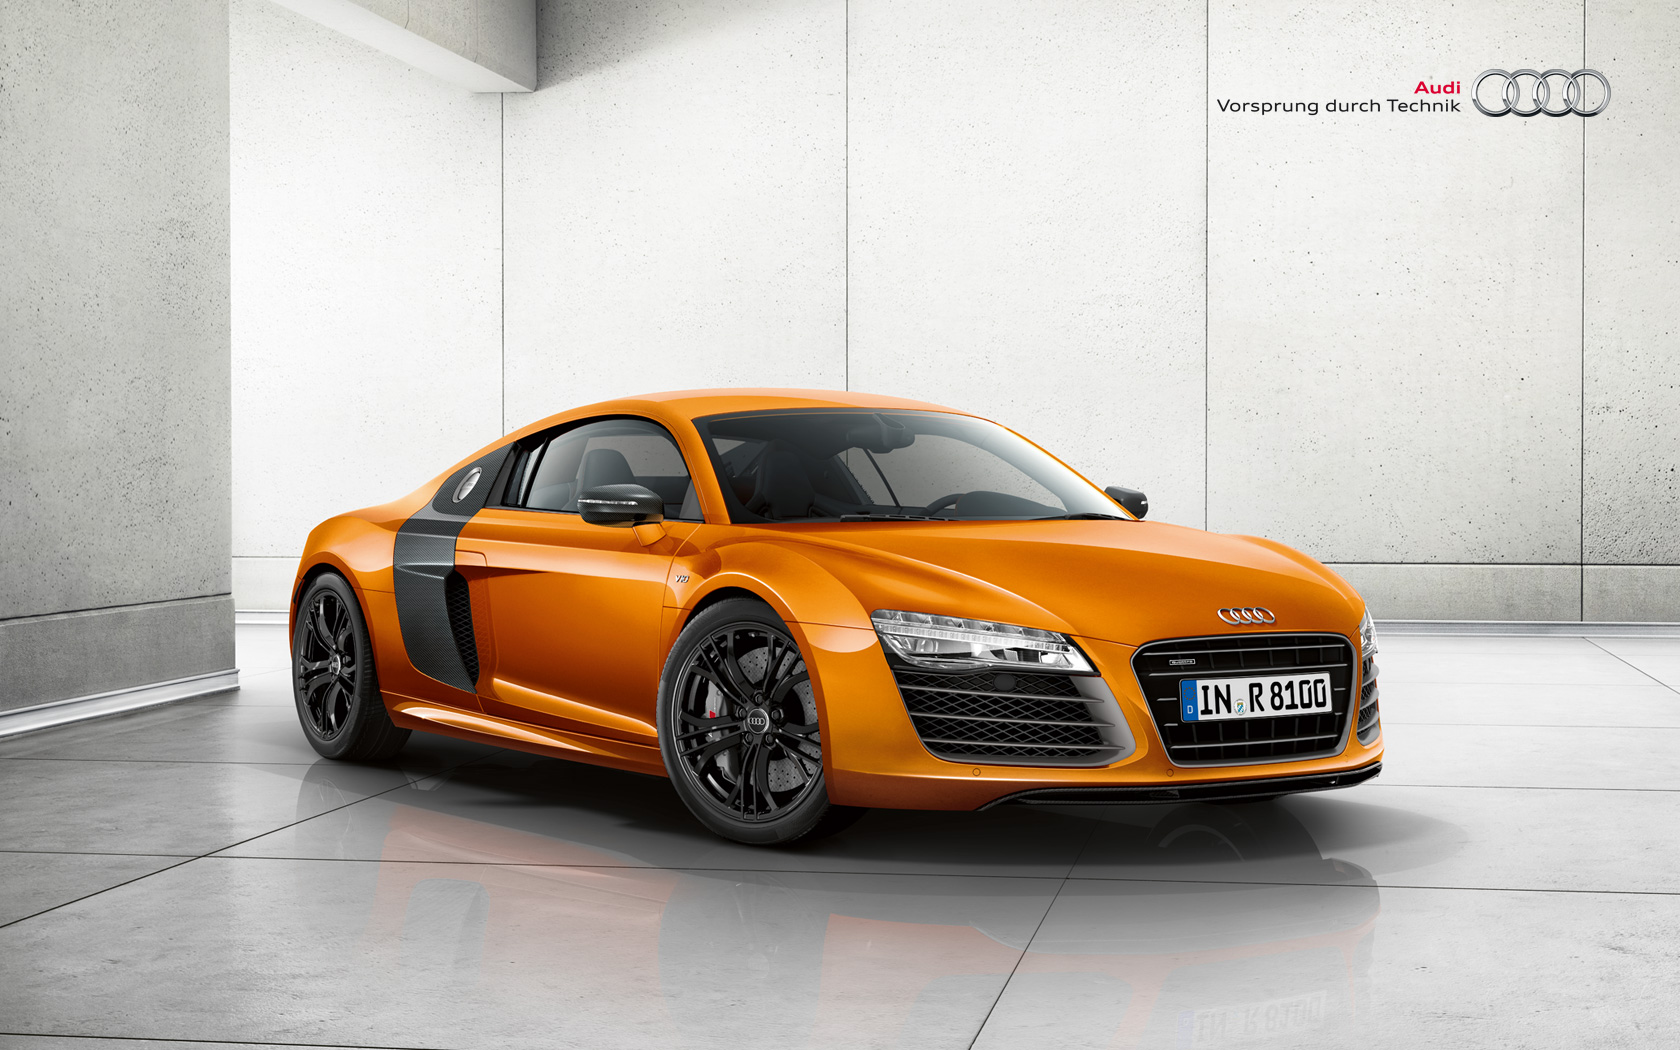
Audi R8 V10

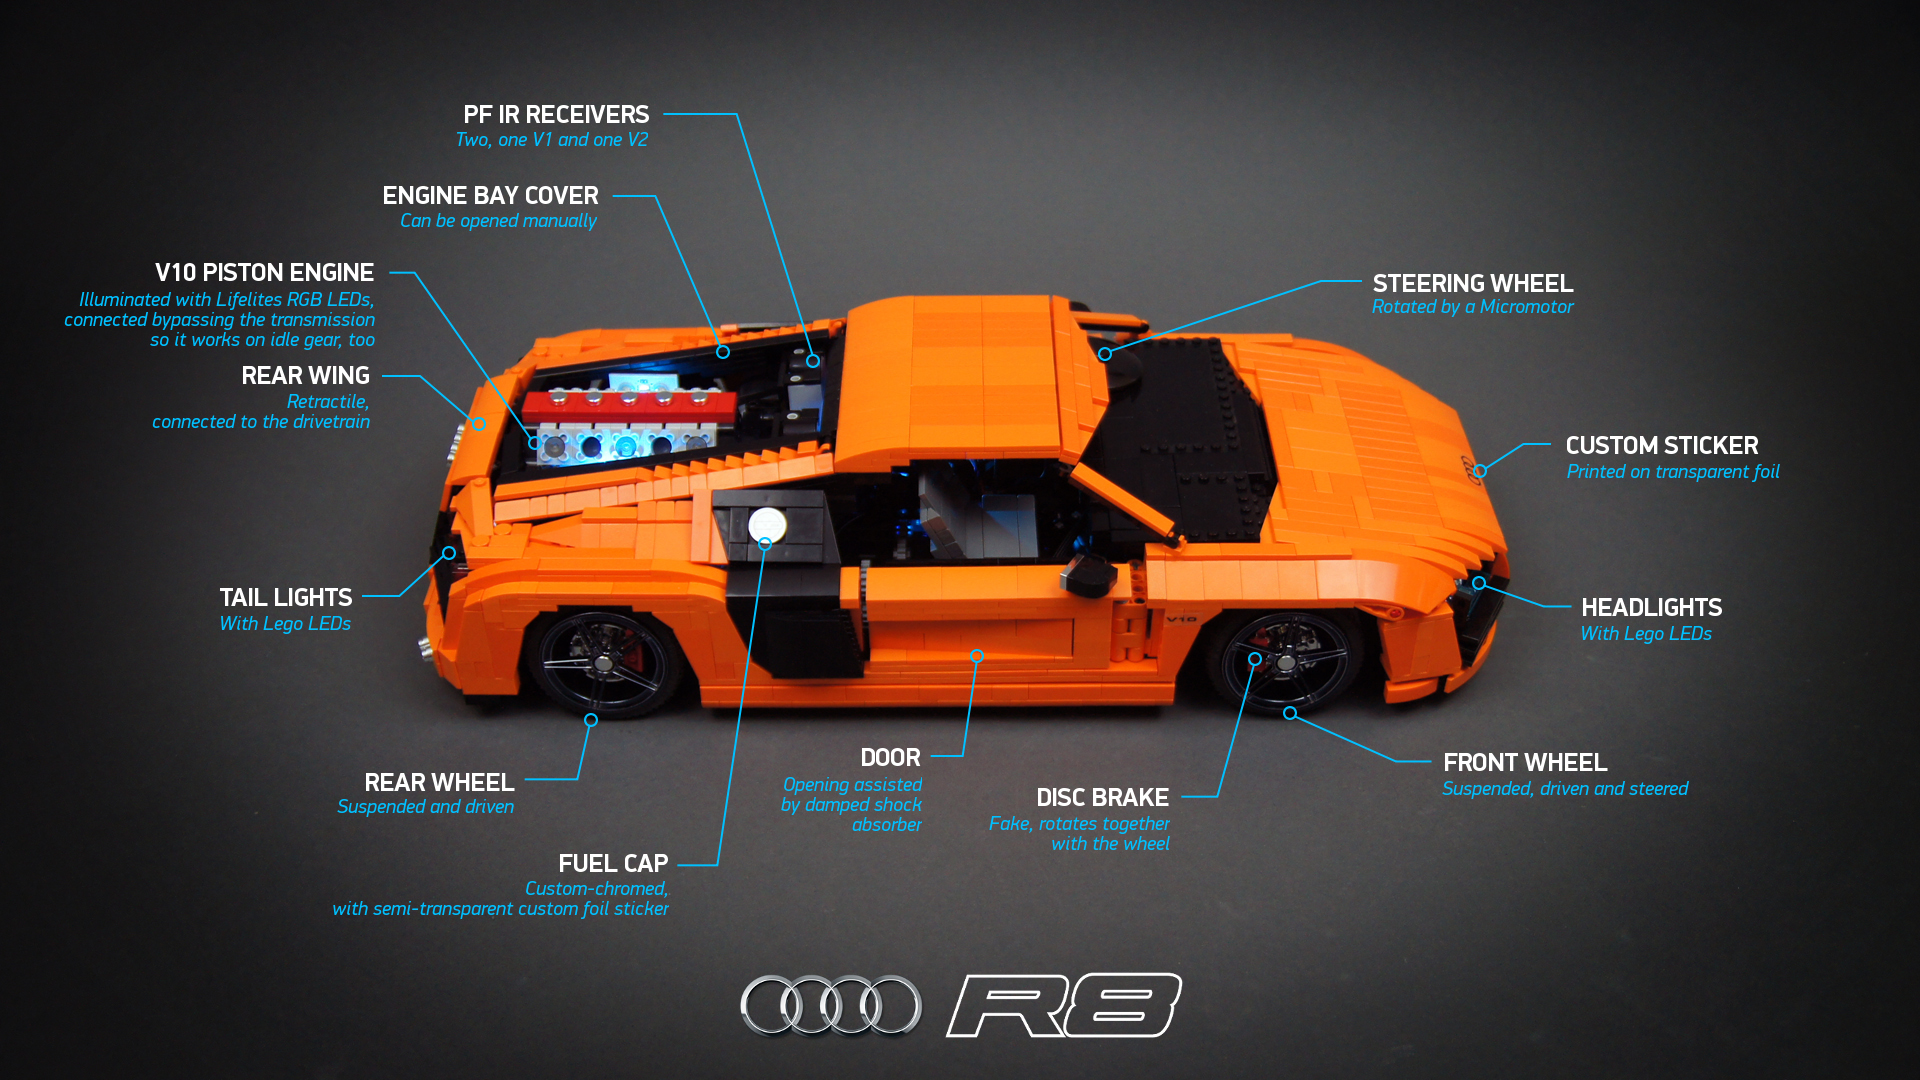
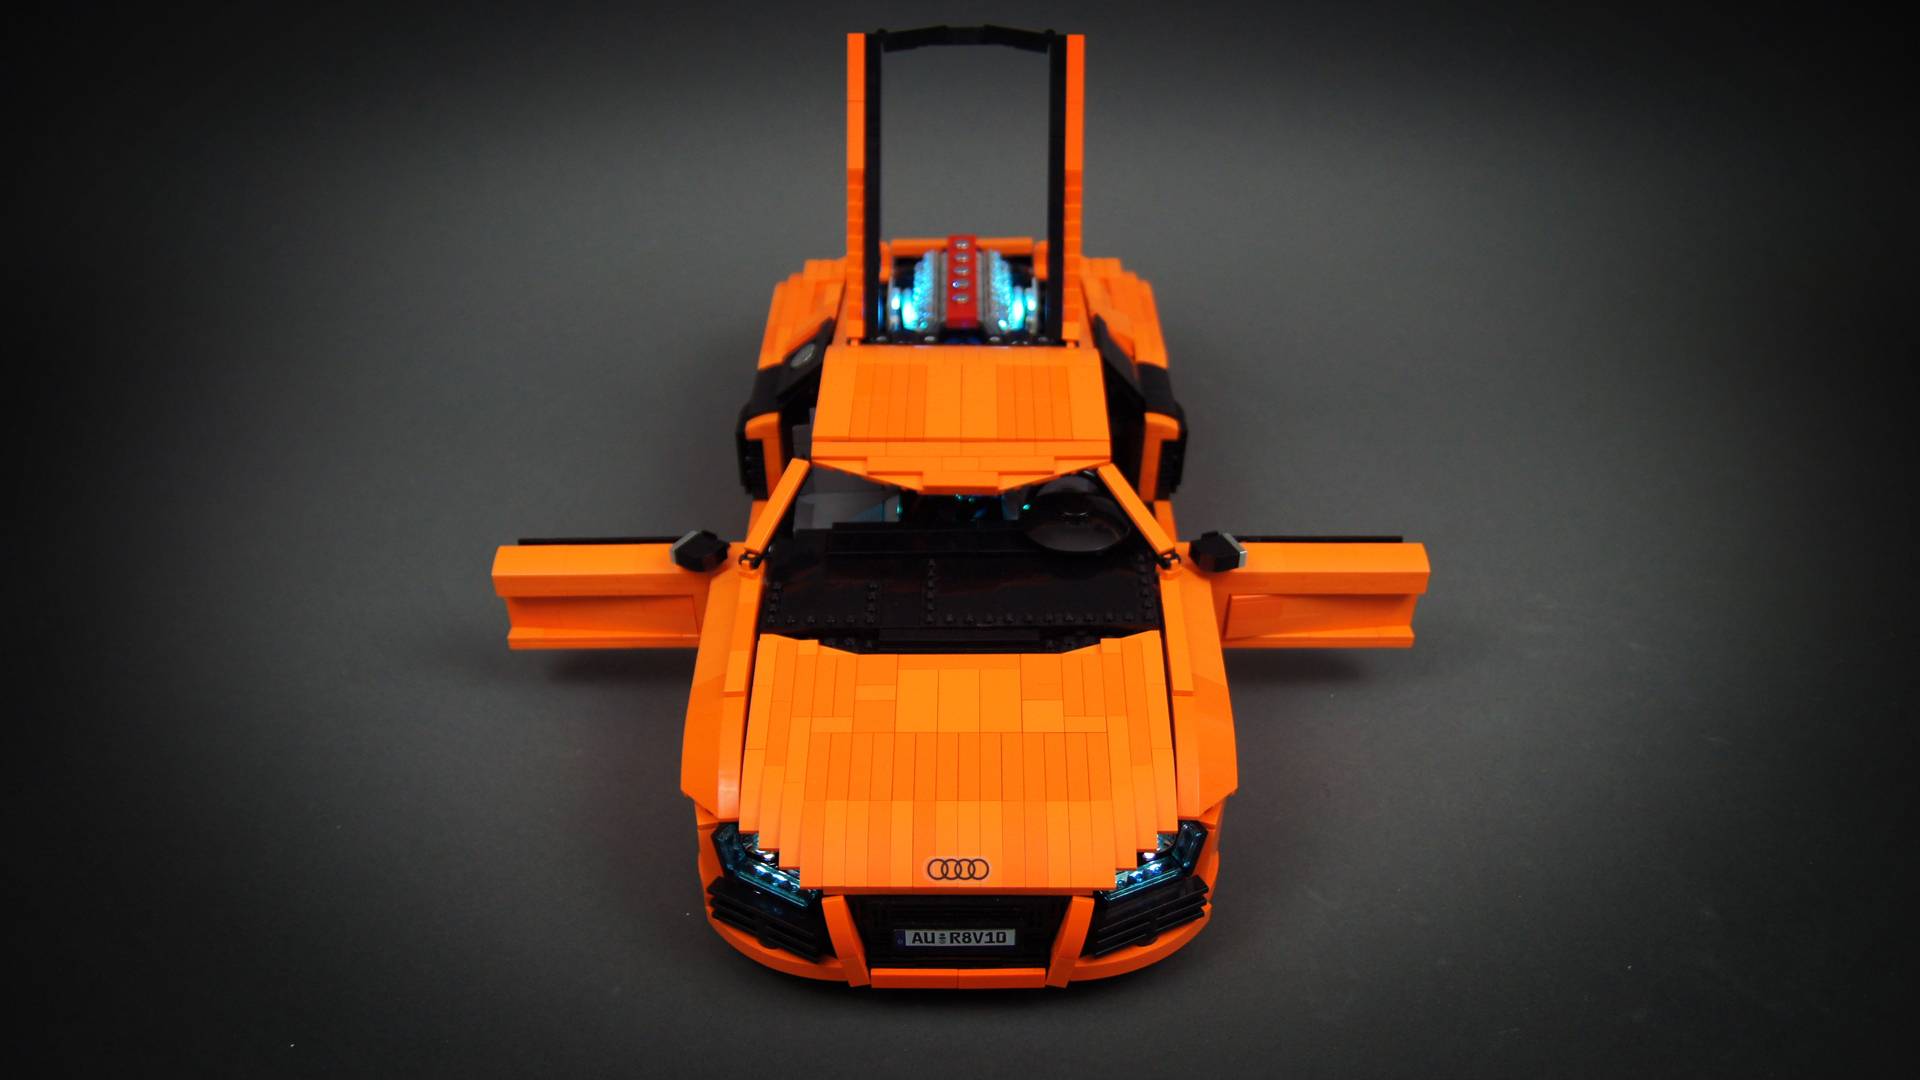
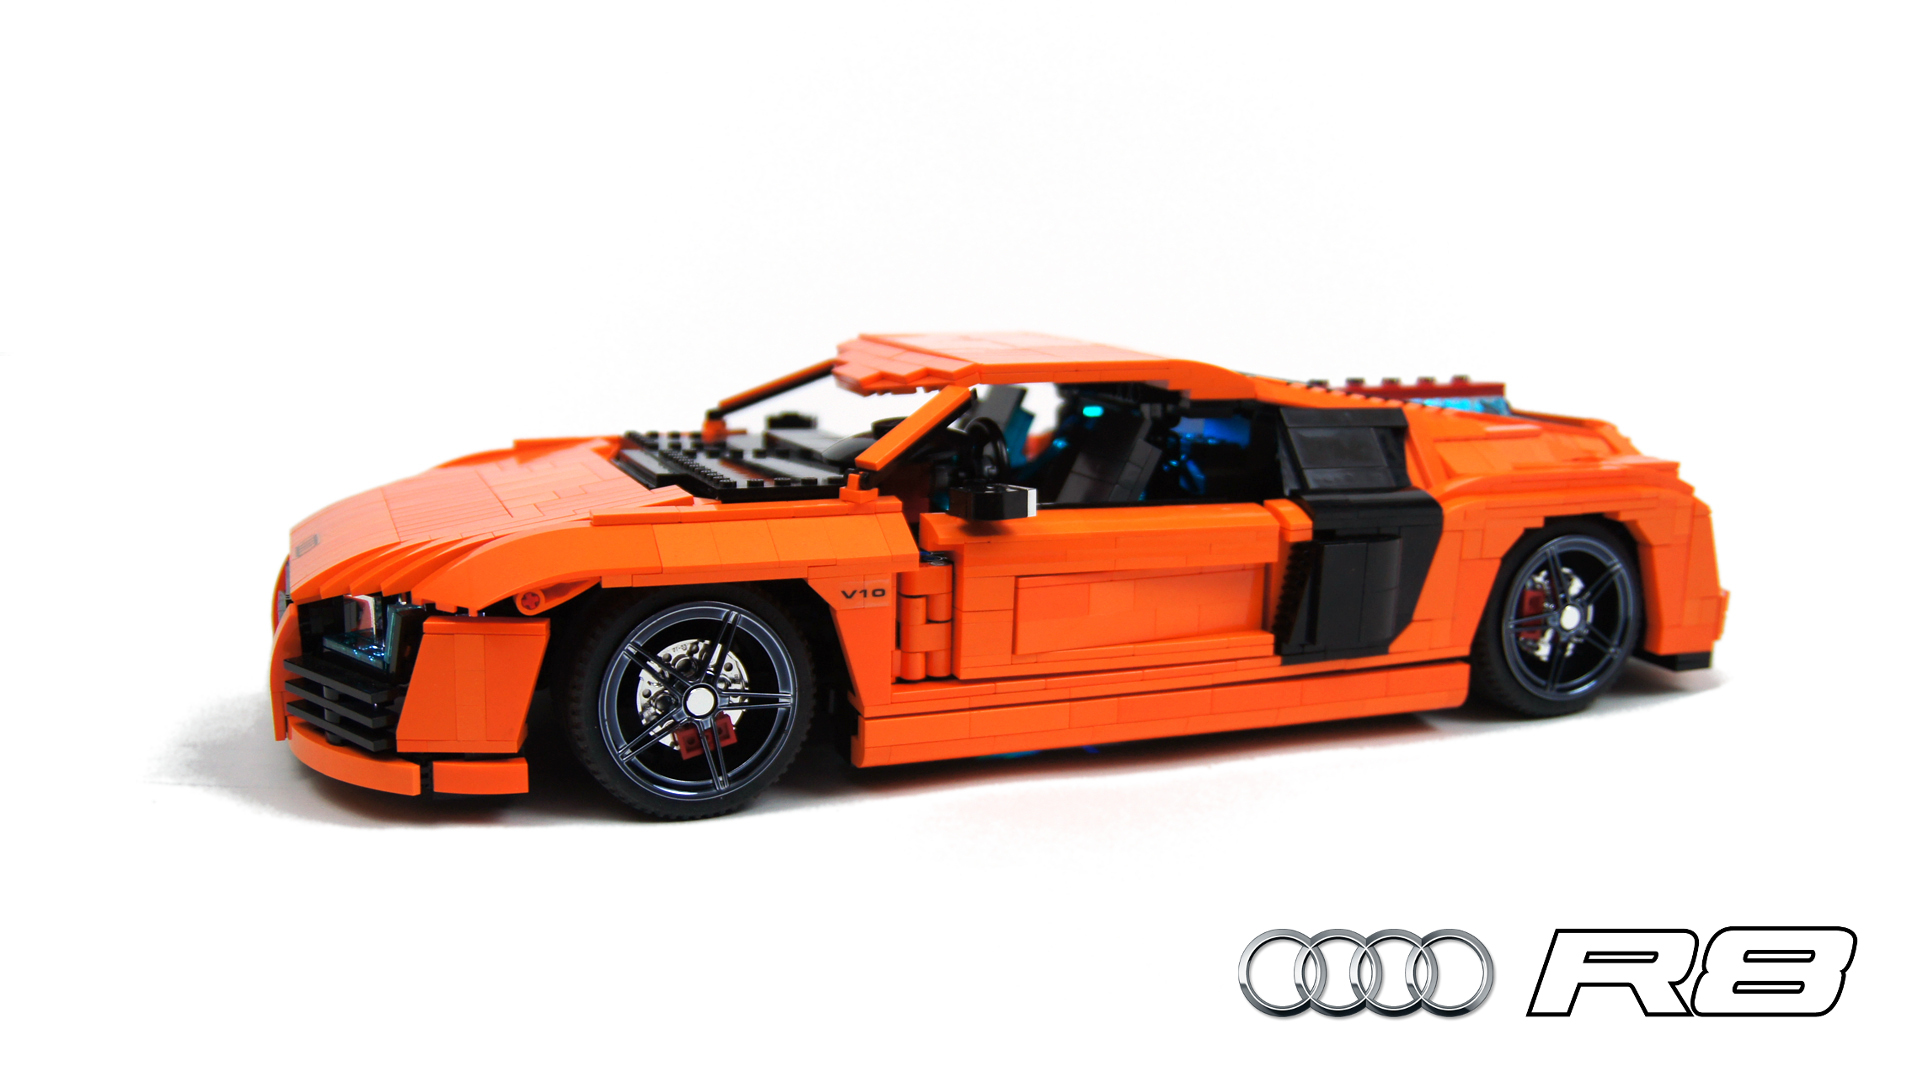
Model of the Audi supercar. Features full suspension, AWD drive, remote-controlled 4-speed gearbox, V10 piston engine, doors assisted by pneumatic shock absorbers, manually opened engine cover, rotating steering wheel, retractile rear wing, lights and custom stickers.
Datasheet:
Completion date: 07/03/2015
Power: electric (8878 battery)
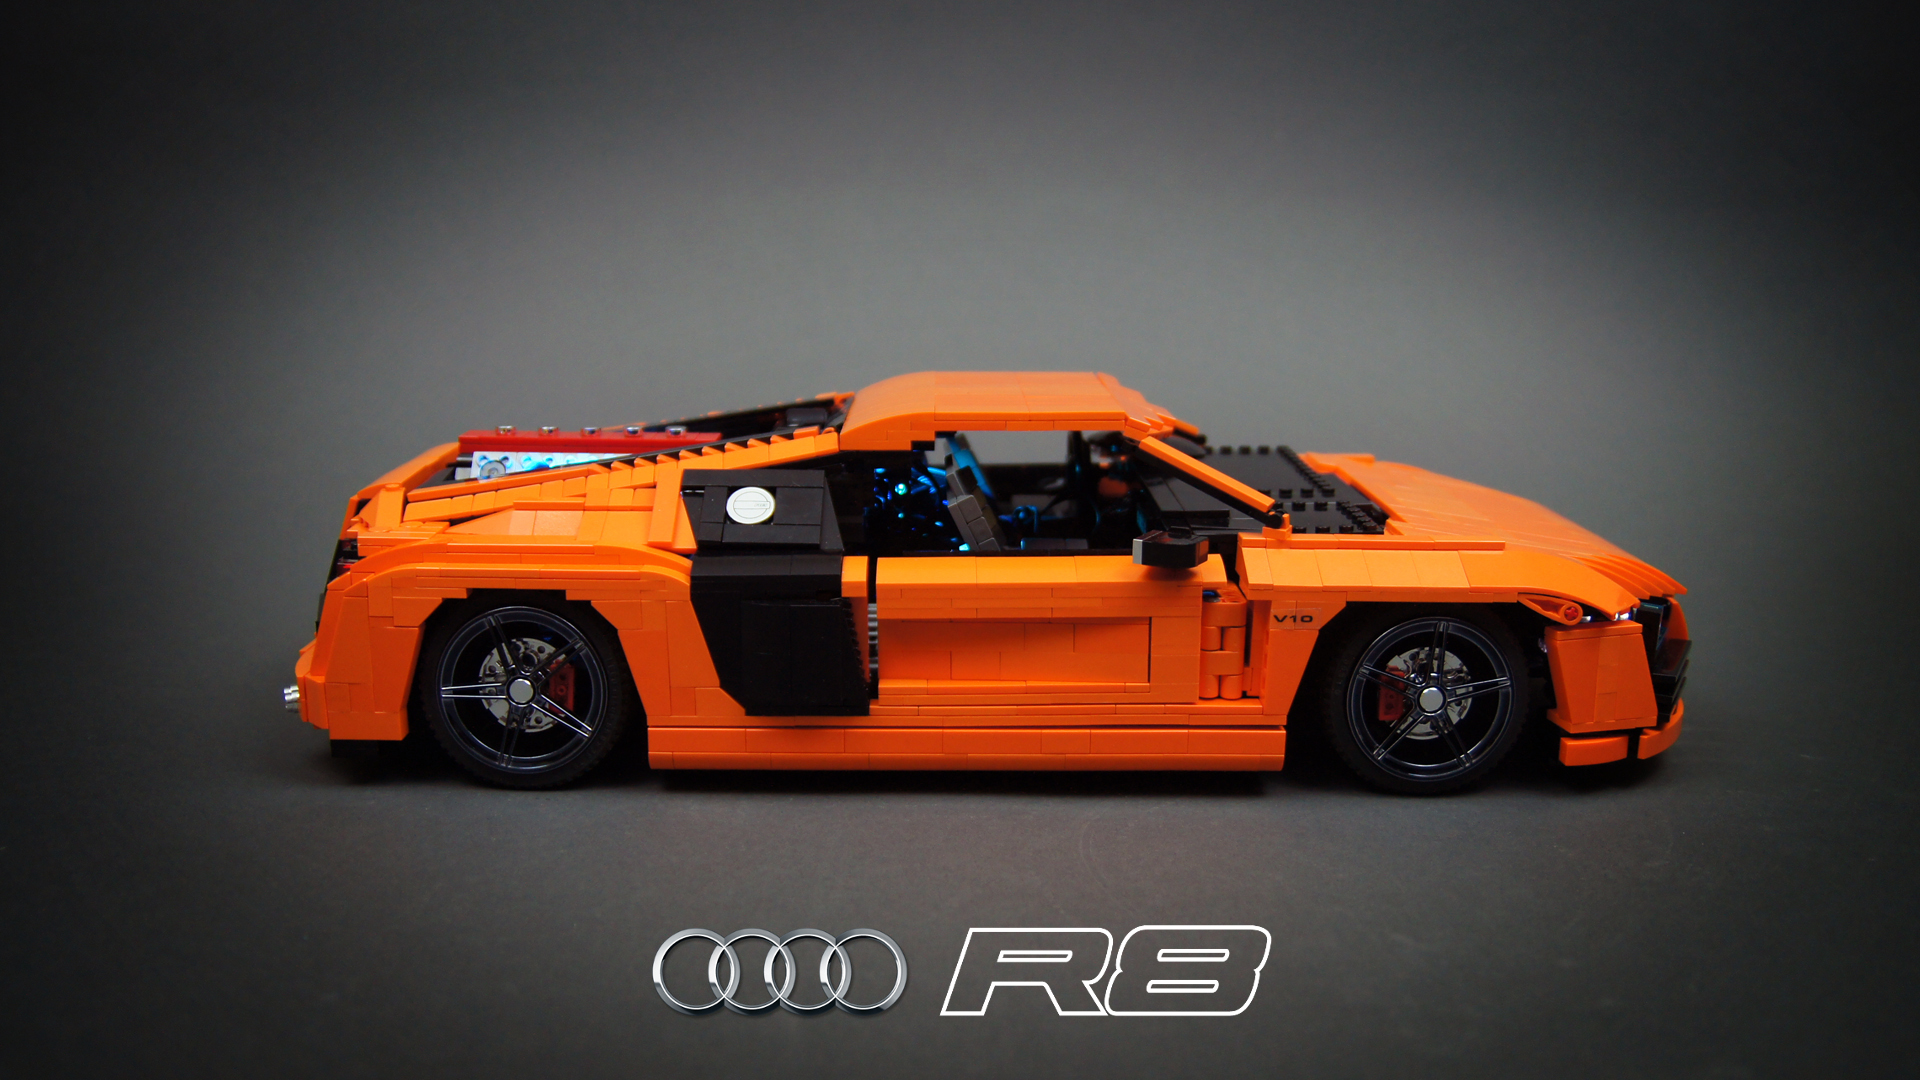
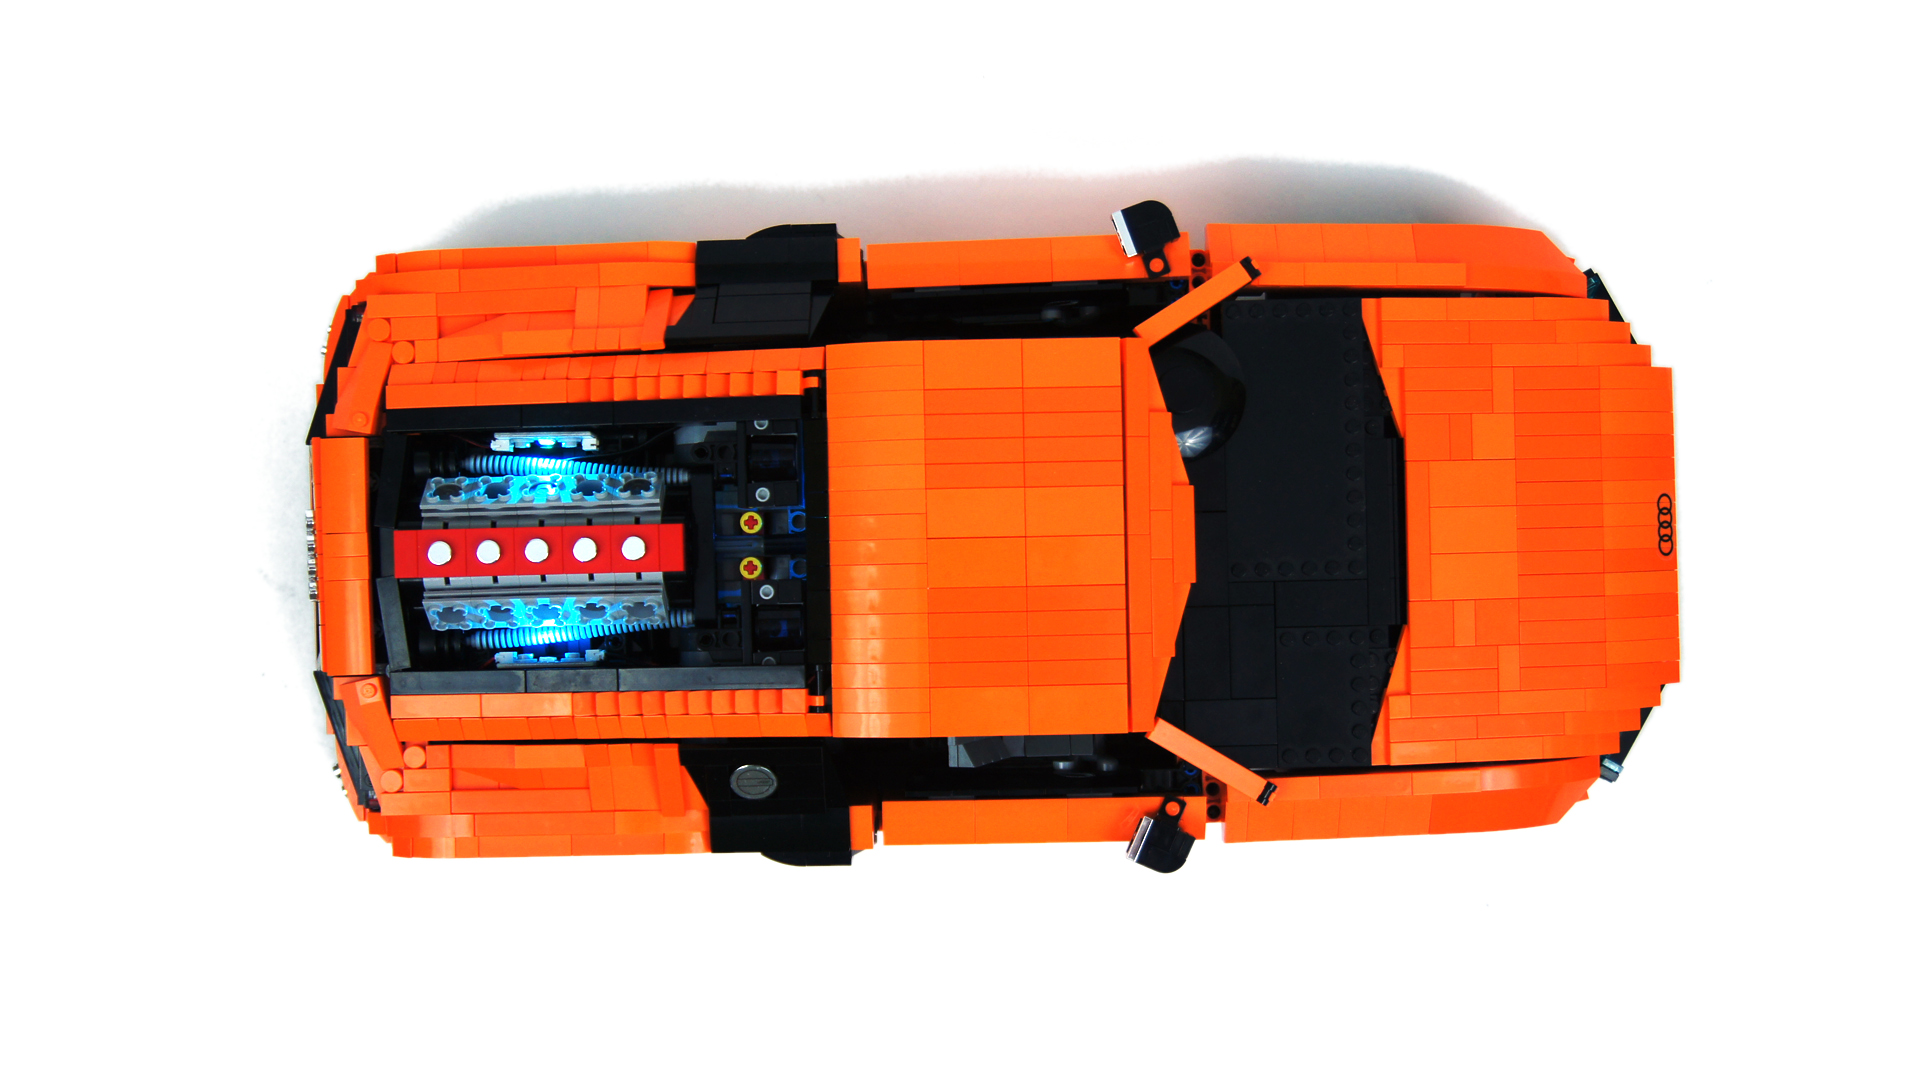
Dimensions: length 61 studs / width 28 studs / height 16 studs
Weight: 2.488 kg
Suspension: full independent
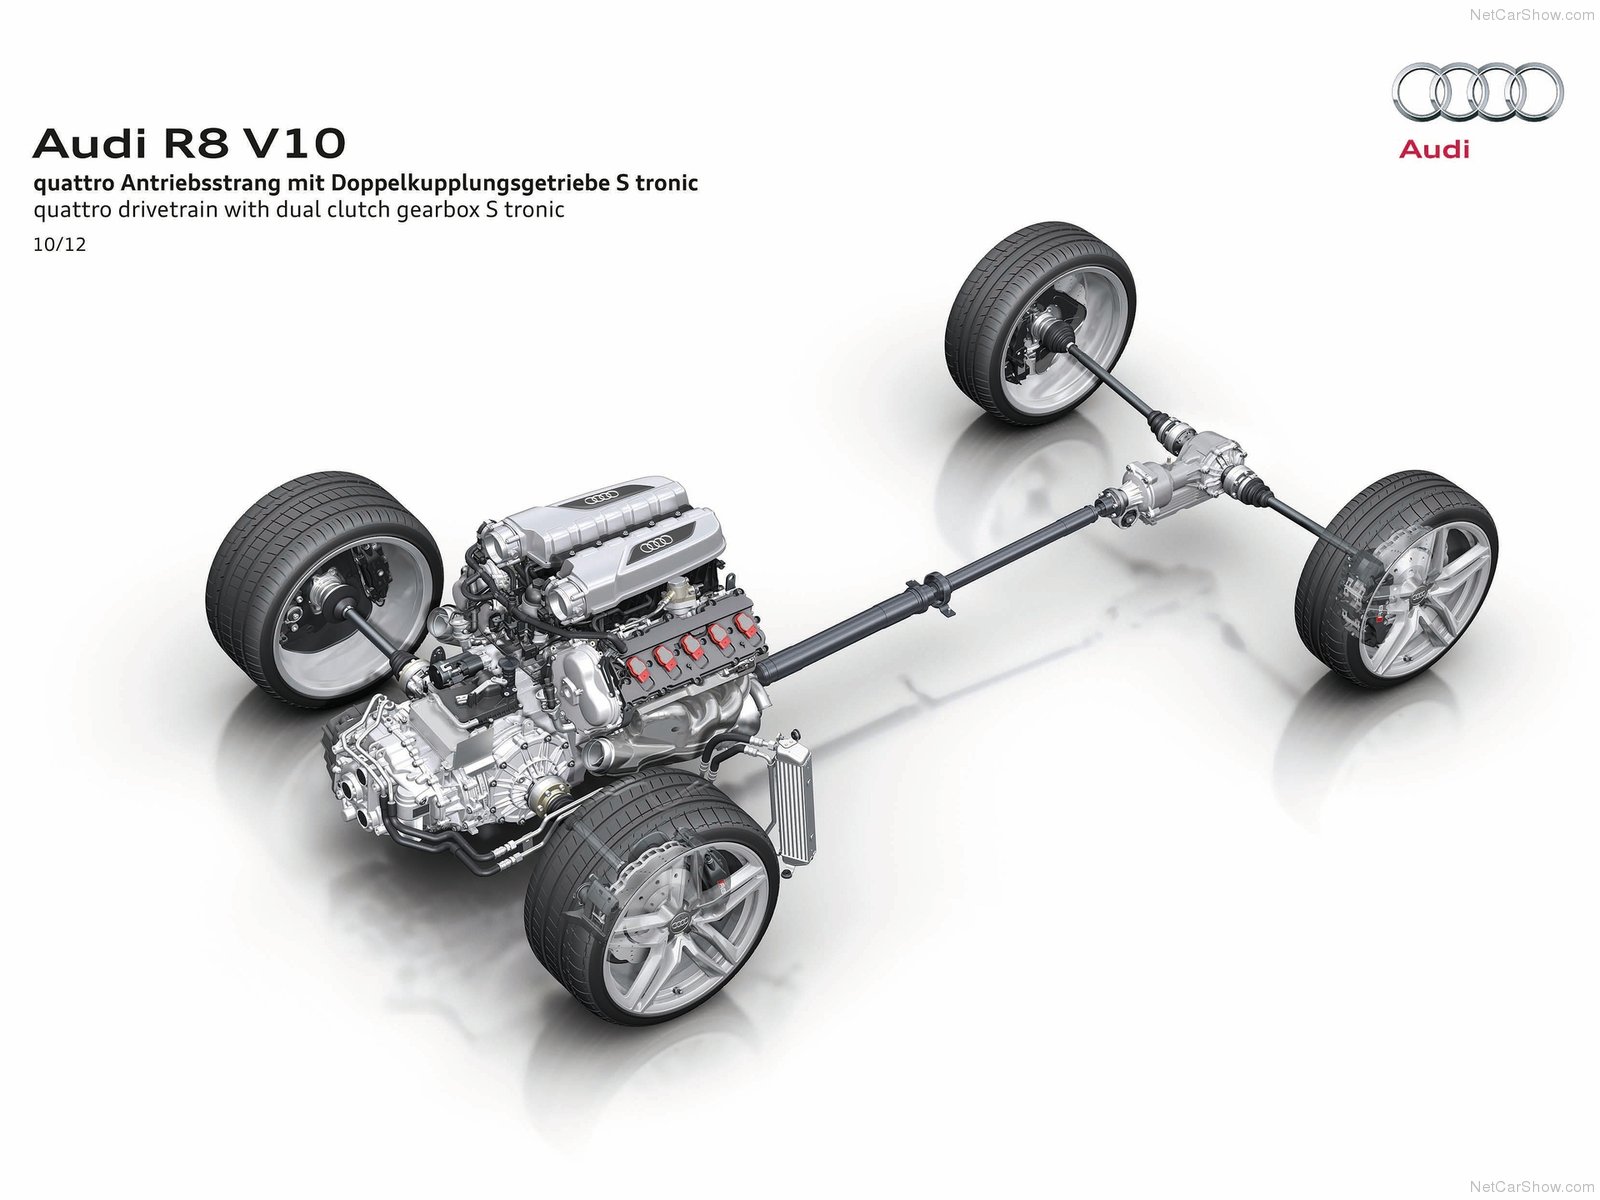
Propulsion: AWD, 2 x PF XL motor via a remote-controlled 4-speed gearbox
Motors: 2 x PF L motor, 2 x PF Servo motor, 1 x PF M motor, 1 x Micromotor
A decade ago Audi was mostly known for its low-key limos popular among middle-aged businessmen and nobody would put words “Audi” and “supercar” together in one sentence. But that was before Audi team took platform from Lamborghini Gallardo and used it to build a car that not only outperformed, but also outsold it. The initial Audi R8 cost half as much as Gallardo, sold twice as often and was one of the most distinctive supercars of its generation. It went to become immensely popular both among generic fans and automotive experts. It has gotten one of the highest marks ever given in the Top Gear, where it was hailed as a “supercar without drawbacks of a supercar” and as a worthy rival to the legendary Porsche 911. It is popular opinion that the R8 not only drives better than original Gallardo, but is also much more spacious, more comfortable, less compromising and simply better suited for everyday use. Personally, I can’t appreciate enough the outstanding work of Audi stylists who took a car shaped very much like Bugatti Veyron and made it look perfect, while the Veyron looks kind of swollen and generally ugly.
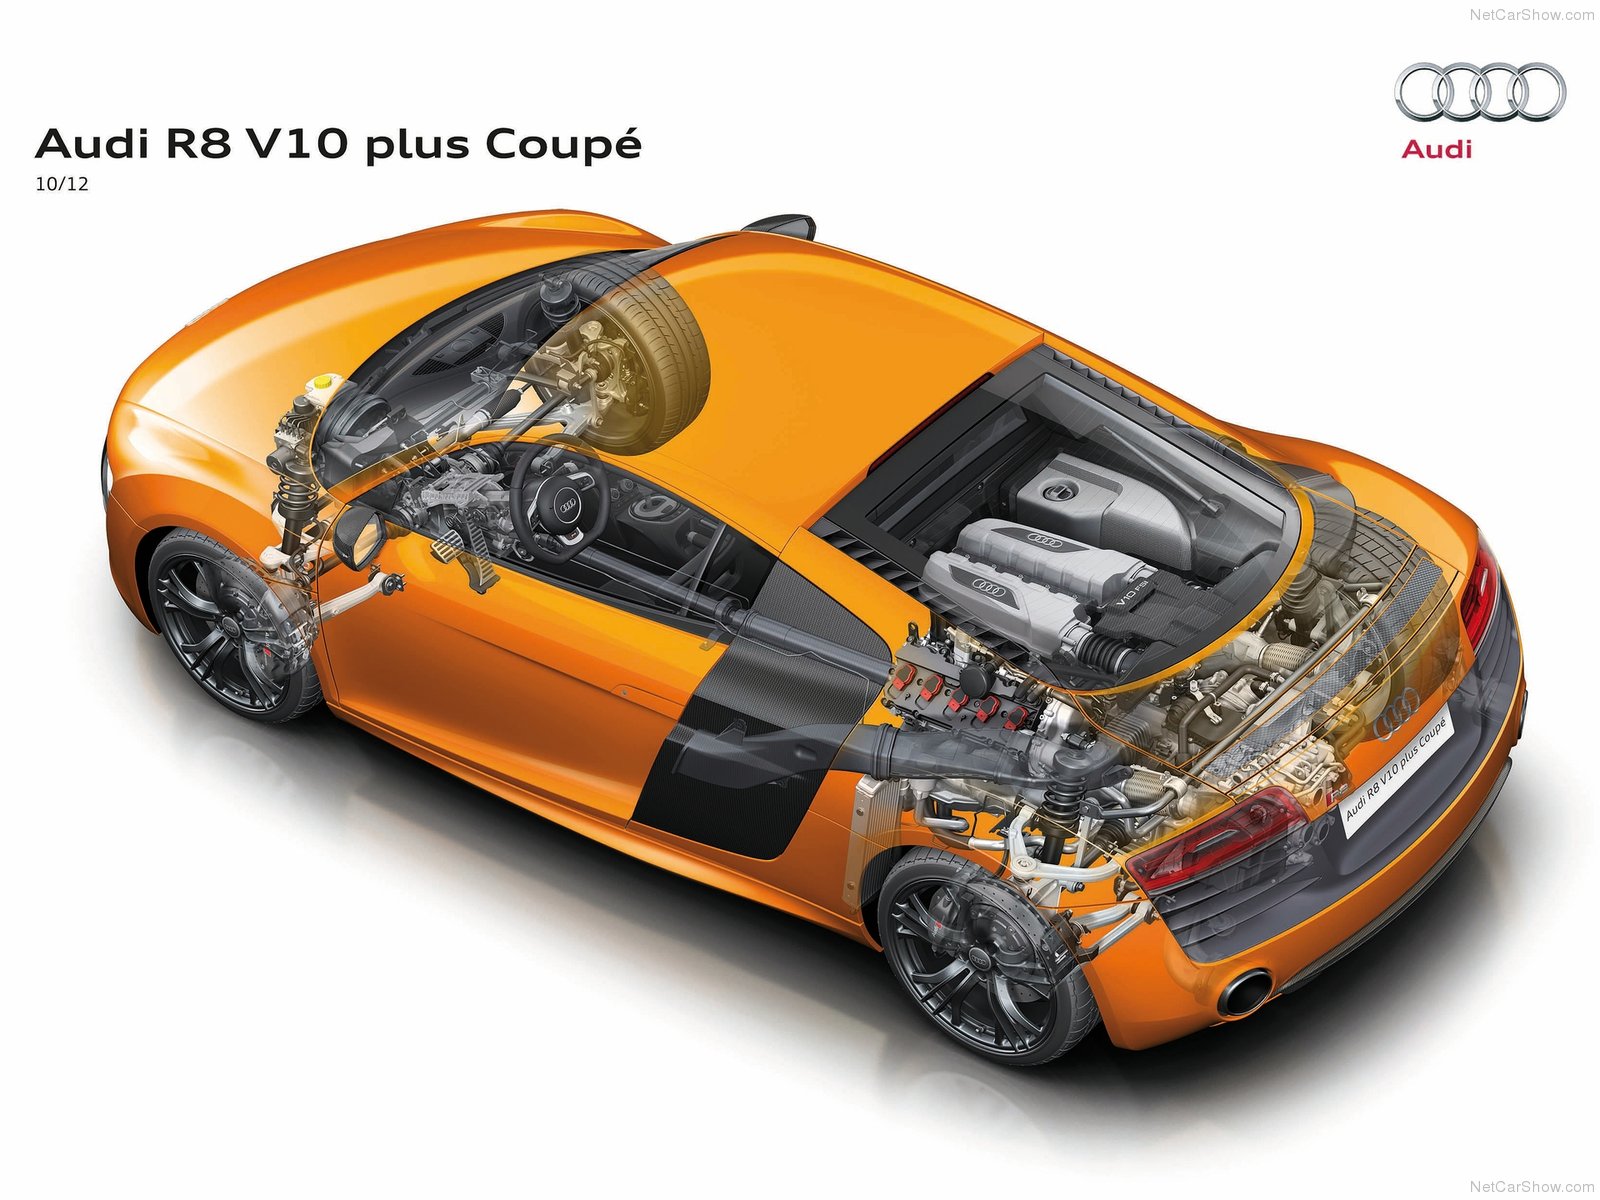
Being a very successful car, the R8 has quickly seen new versions. The original V8 was followed by V10, using engine coming from Gallardo, which in turn was taken from earlier Audi models (welcome to the world where Germans make all the cars). There was also a V12 concept that didn’t see mass production, an inevitable soft-top Spyder with equally inevitable GT and LMS variants, and in the meantime R8 has gone through a facelifting and eventually saw a brand new generation, just a few weeks ago. At this point I have to confess that personally I find the original R8 spectacular and every following change was for the worse, up to the point where the new generation R8 looks like Lamborghini Huracan crashed into it and somebody attempted to put something whole out of the debris. On the bright side, at least it’s not such a tragic mistake as the new Ford GT is.
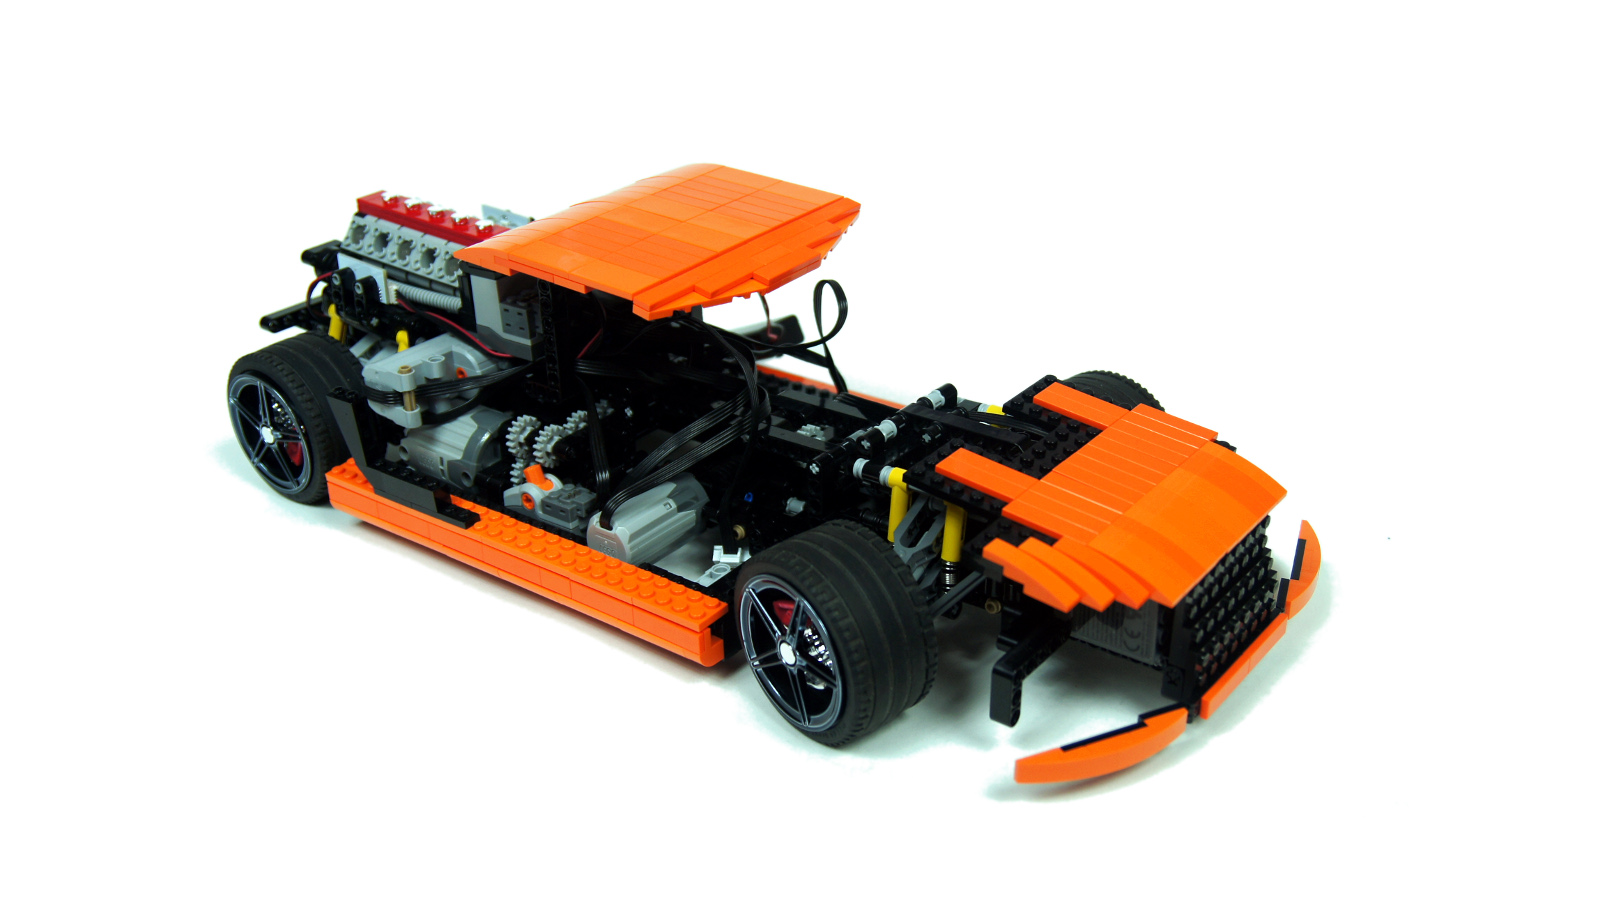
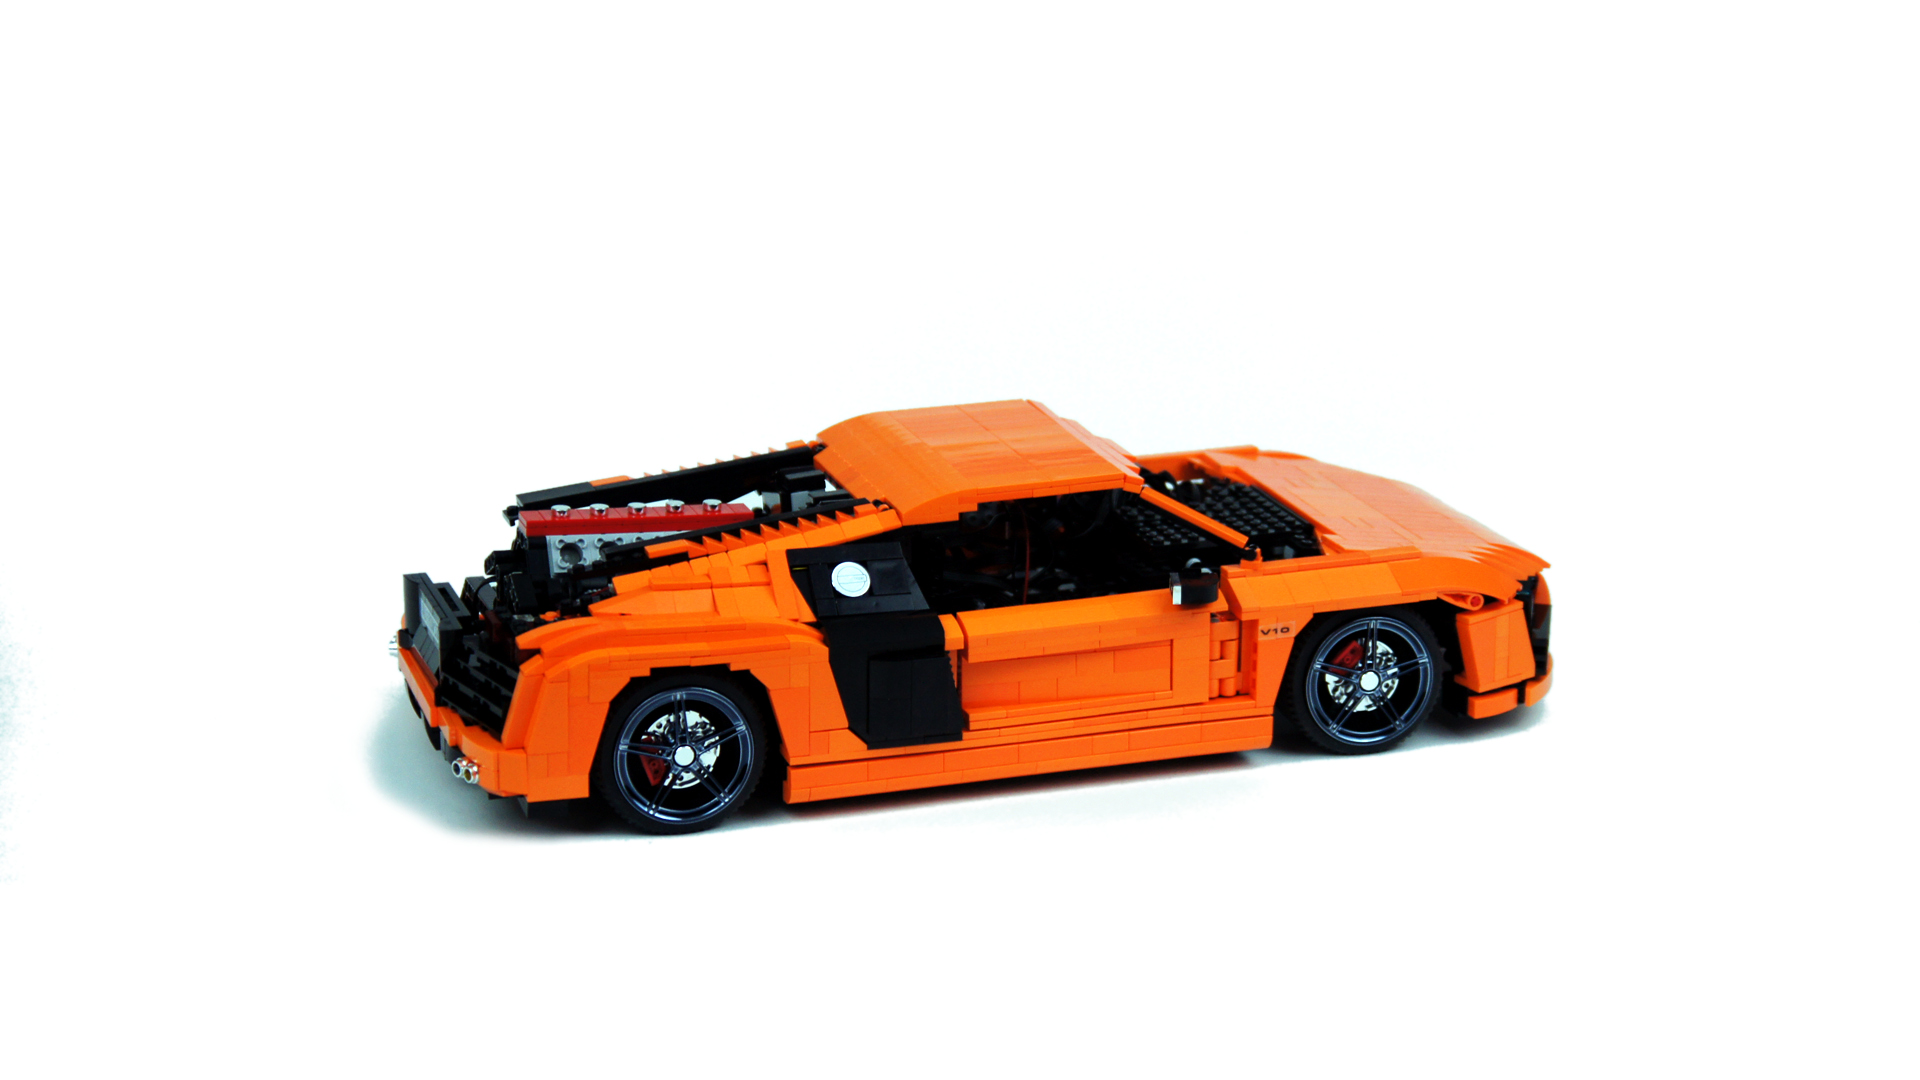
Being a fan of the R8 and orange Lego pieces, I got a crazy idea to mix the two. Since there were precious few Technic panels in orange, and the R8’s body shapes are quite complex anyway, I decided to make a supercar with a studfull body. It was an insane plan, it was an entire year in the making, and I seriously never want to repeat the experience again.
The model was essentially a technical improvement over my previous supercar, Ferrari Enzo, equipped with a heavy and aesthetically challenging studfull body. To make things harder, the orange pieces are fairly rare and I spent entire year with Bricklink’s Color Guide in front of my face just to make sure I’m using pieces that exist and can be bought (one doesn’t automatically mean the other). And then Lego is unable to maintain one consistent hue of orange.
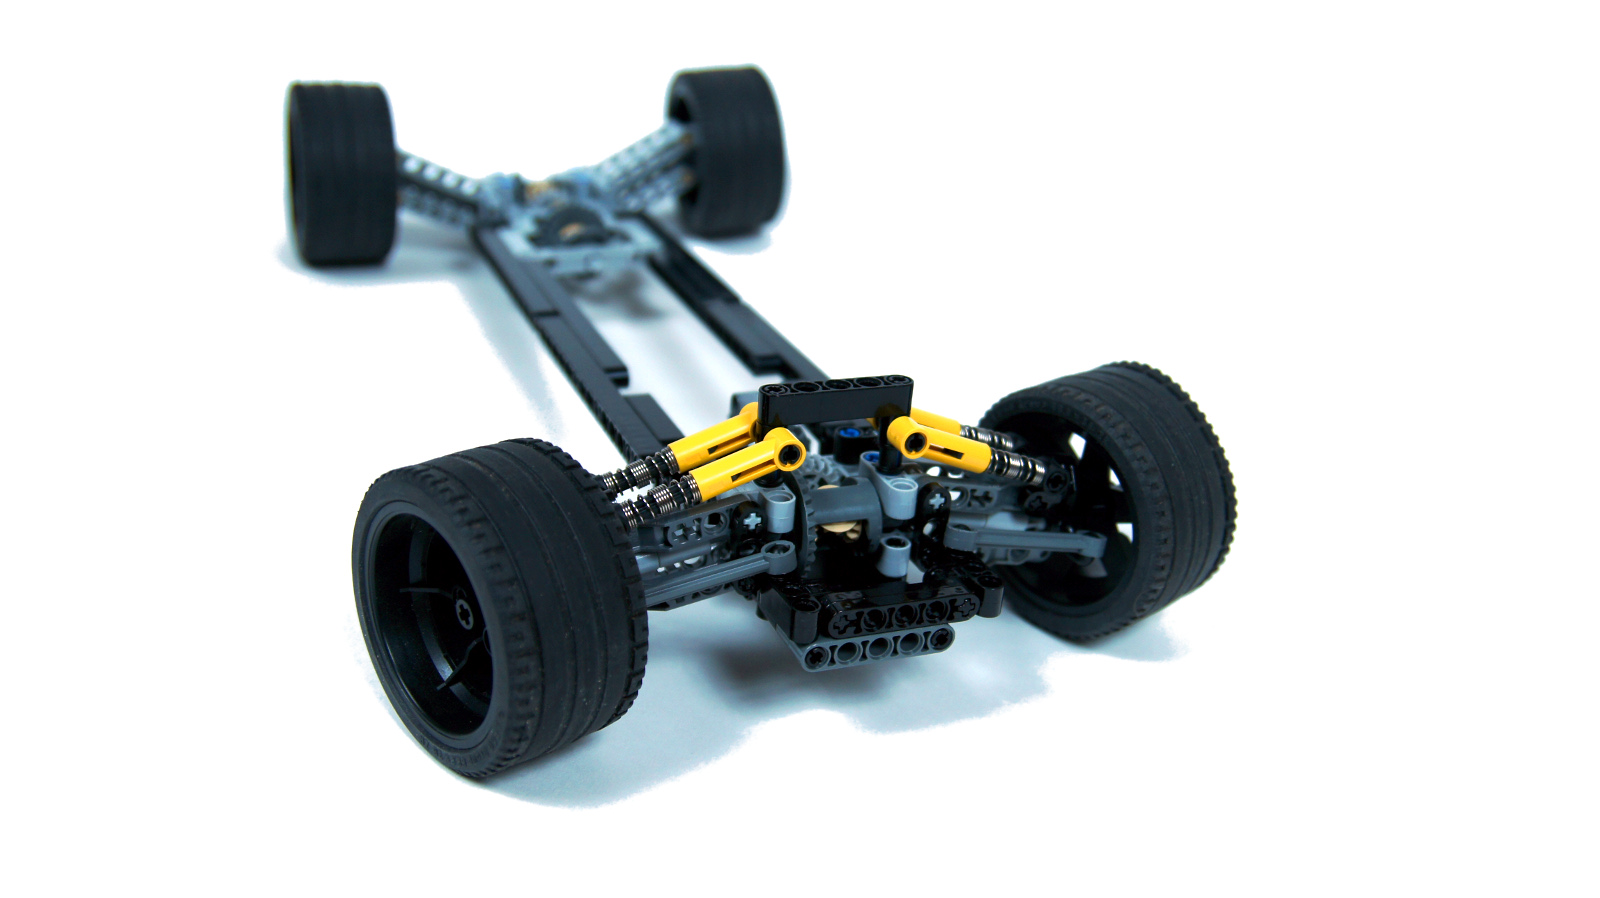
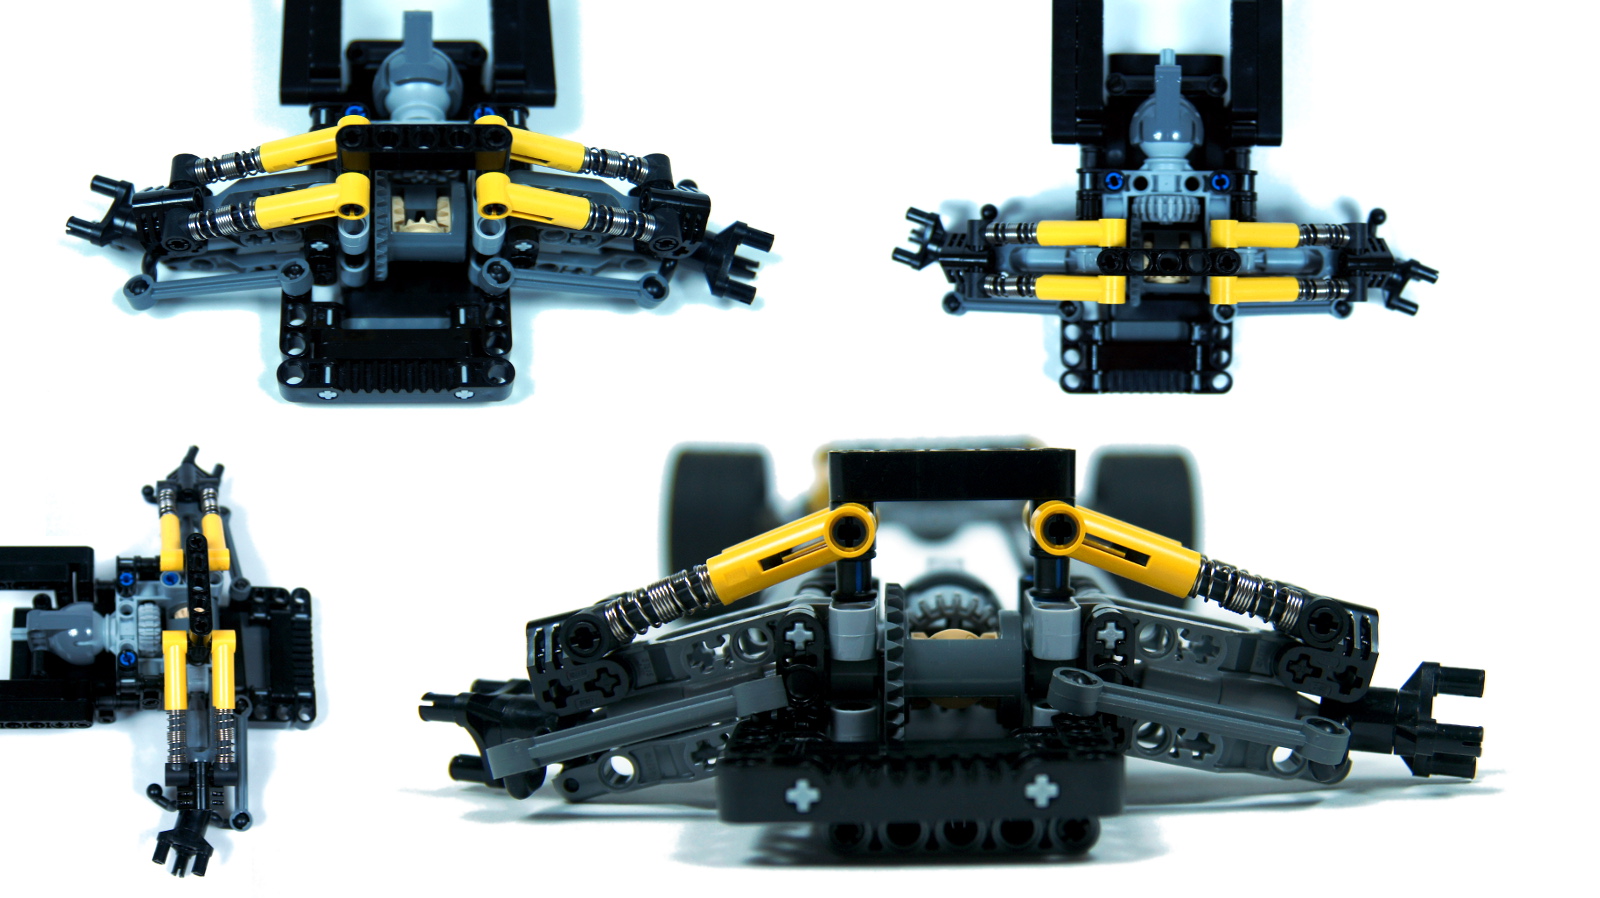
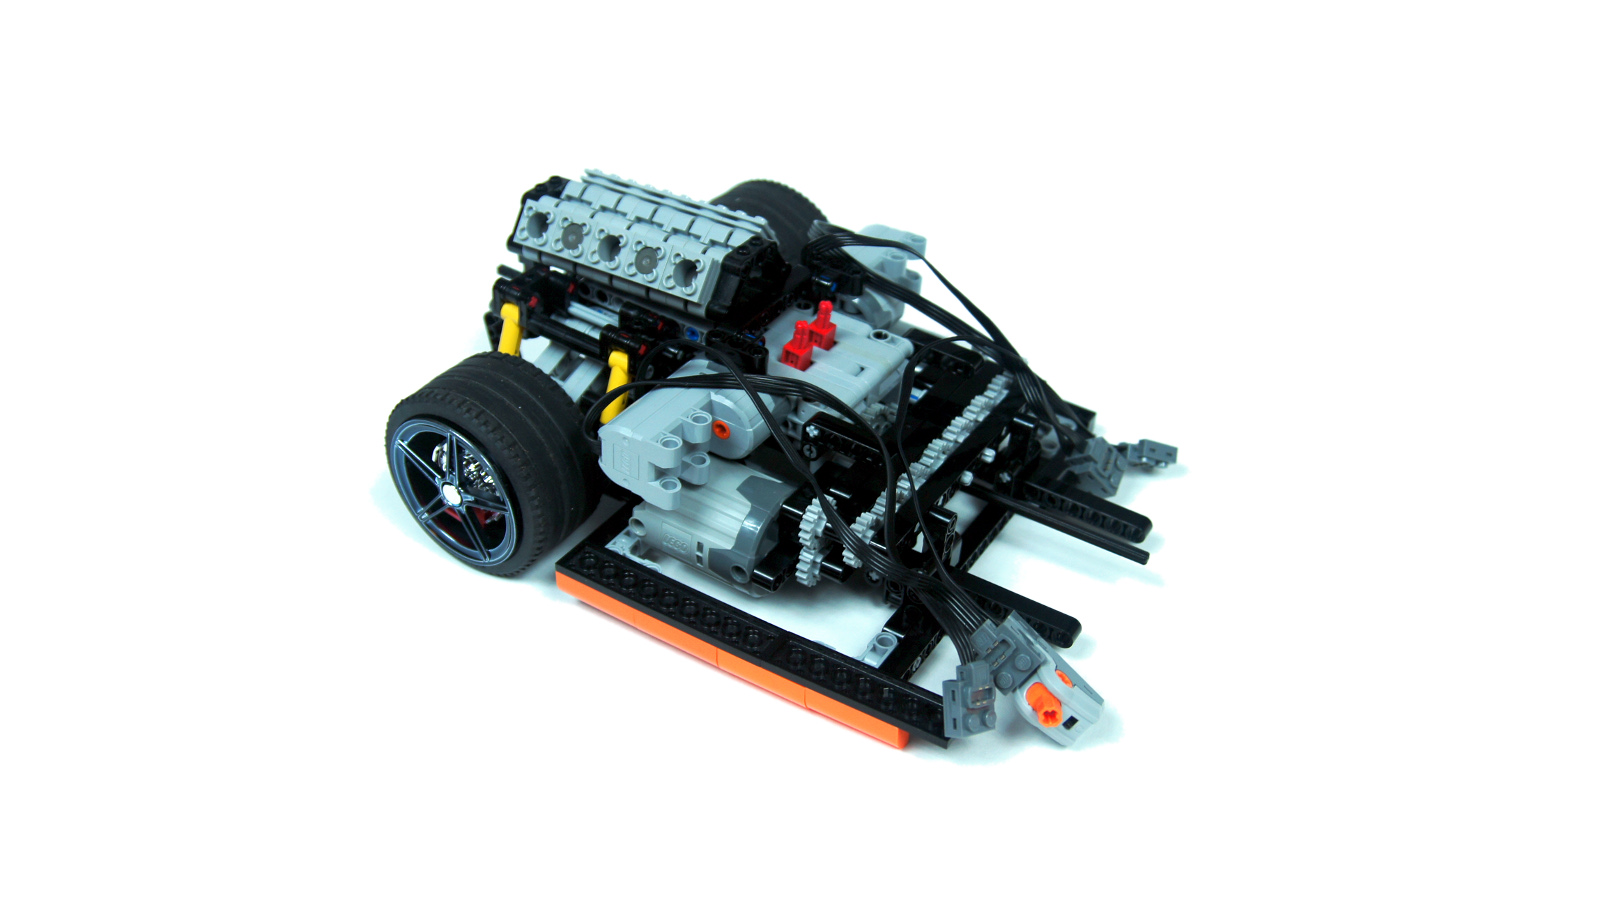
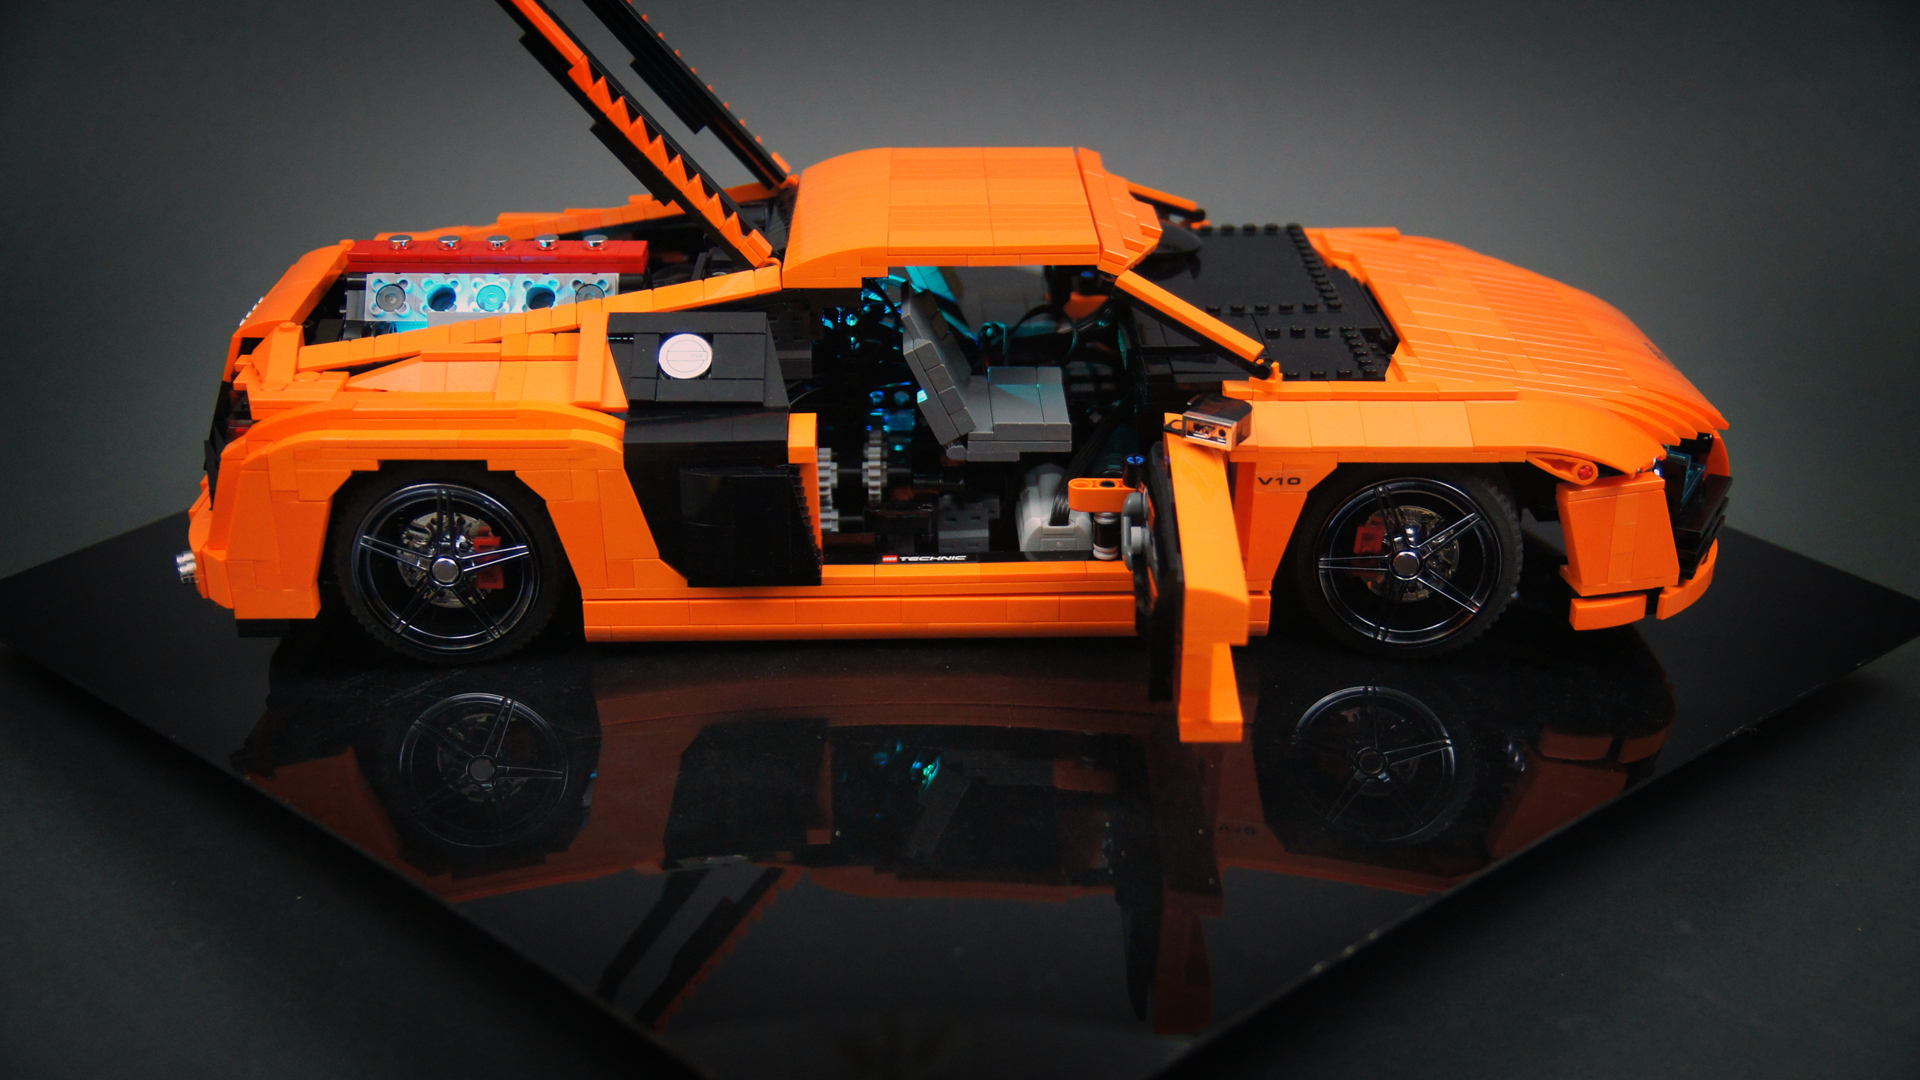
The chassis was built around a singular powerpack made of a gearbox and four motors. Two PF XL motors were located on the sides, with a gearbox almost identical to the one from my Enzo in between, and on top of them were two PF Servos allowing to control the gearbox remotely. The entire unit was relatively compact and so wide as to fill almost entire body crosswise, but short enough to be located between the rear axle and seats in the cabin. The seats were, in fact, a little further forward than they should have been to allow transmission between the PF XL motors and the gearbox. There was no central differential because the car wasn’t tall enough to house it and the gearbox at the same time. But there was a differential in each axle, as well as independent suspension on all wheels which was very hard, with limiters to shorten its travel. Both axles were suspended and driven, and the front one was steered, too.
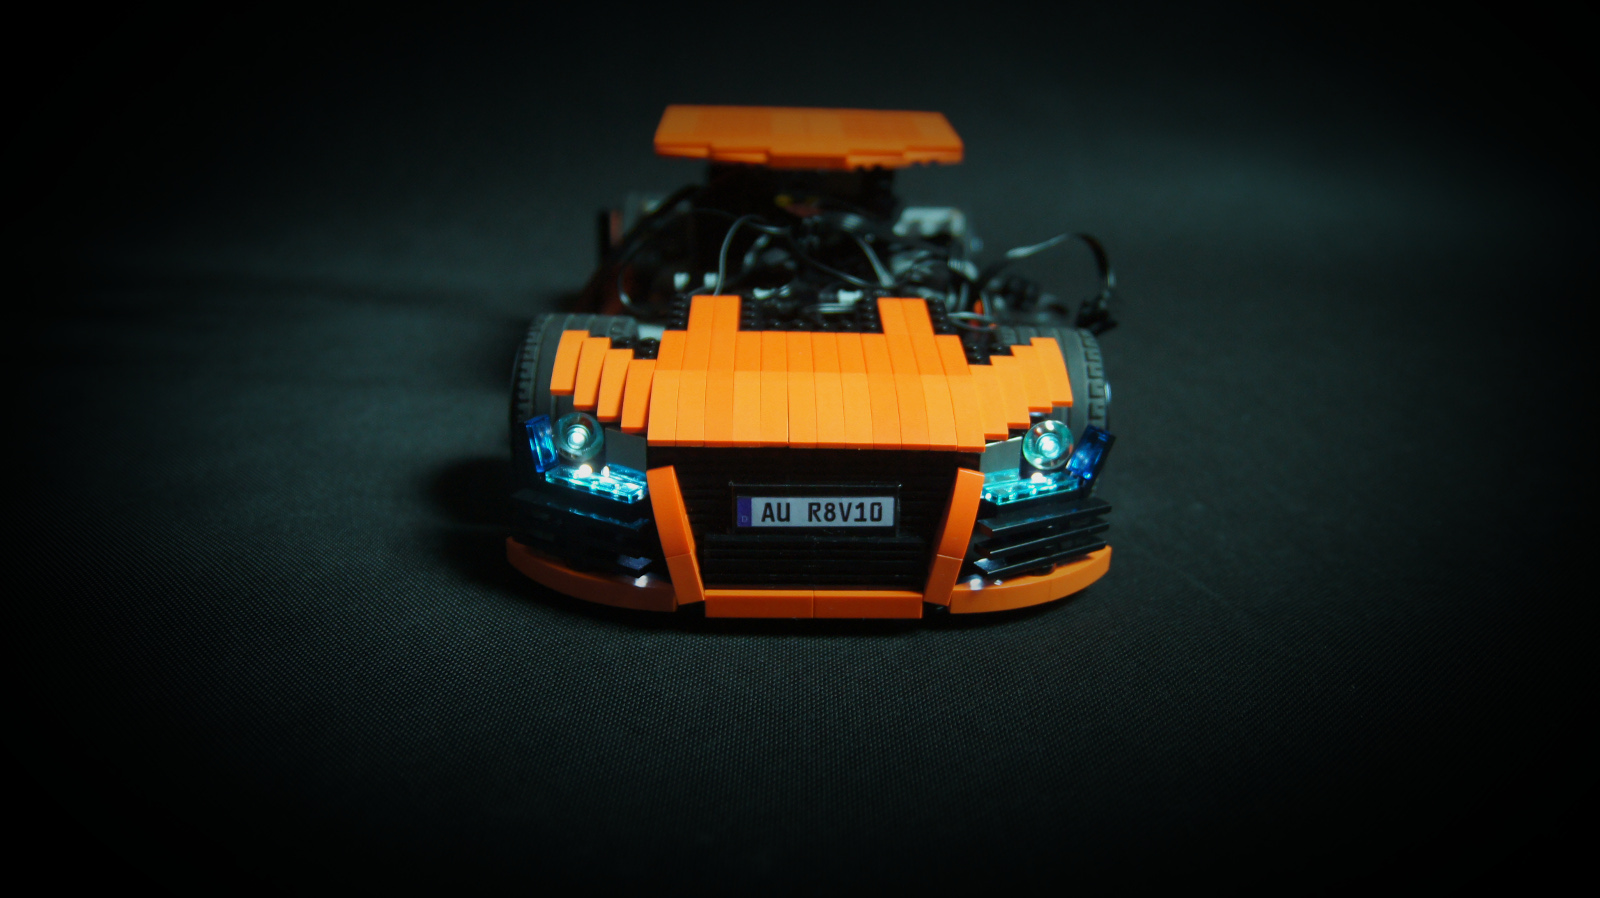
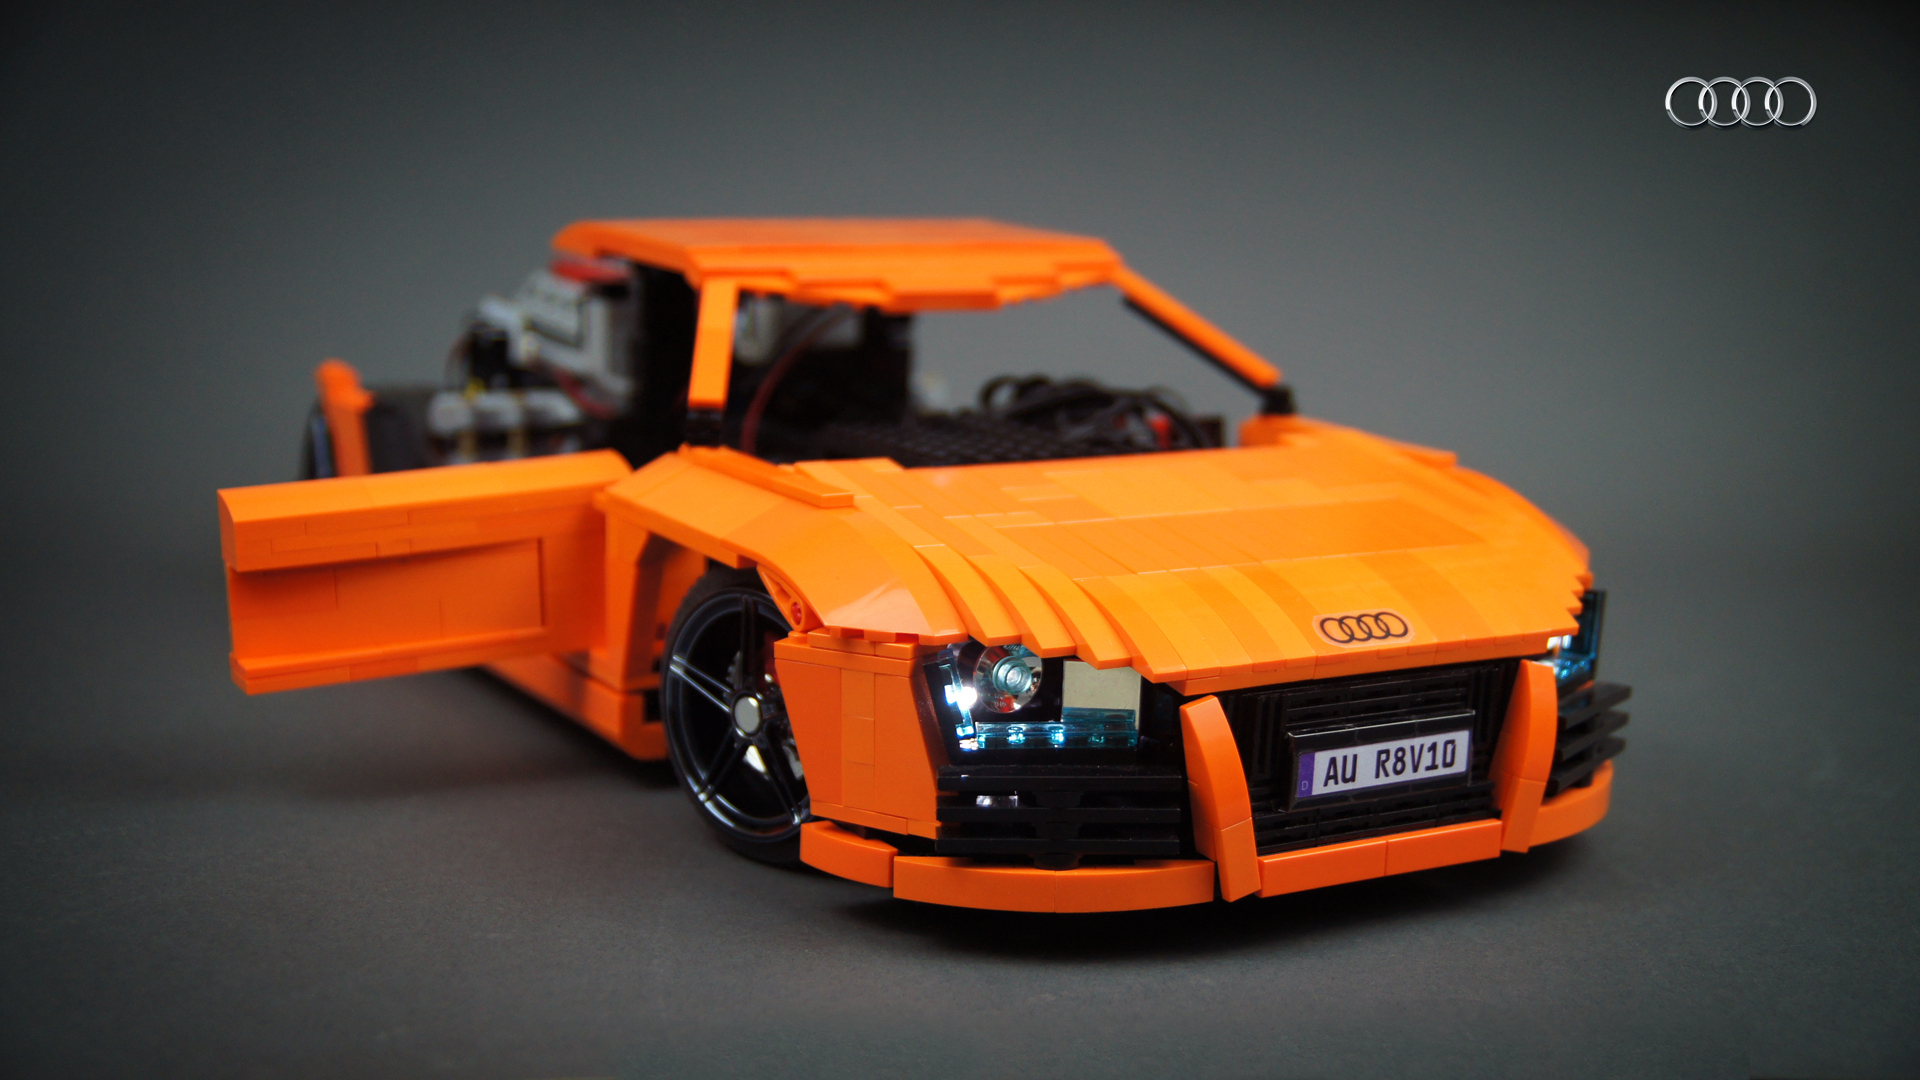
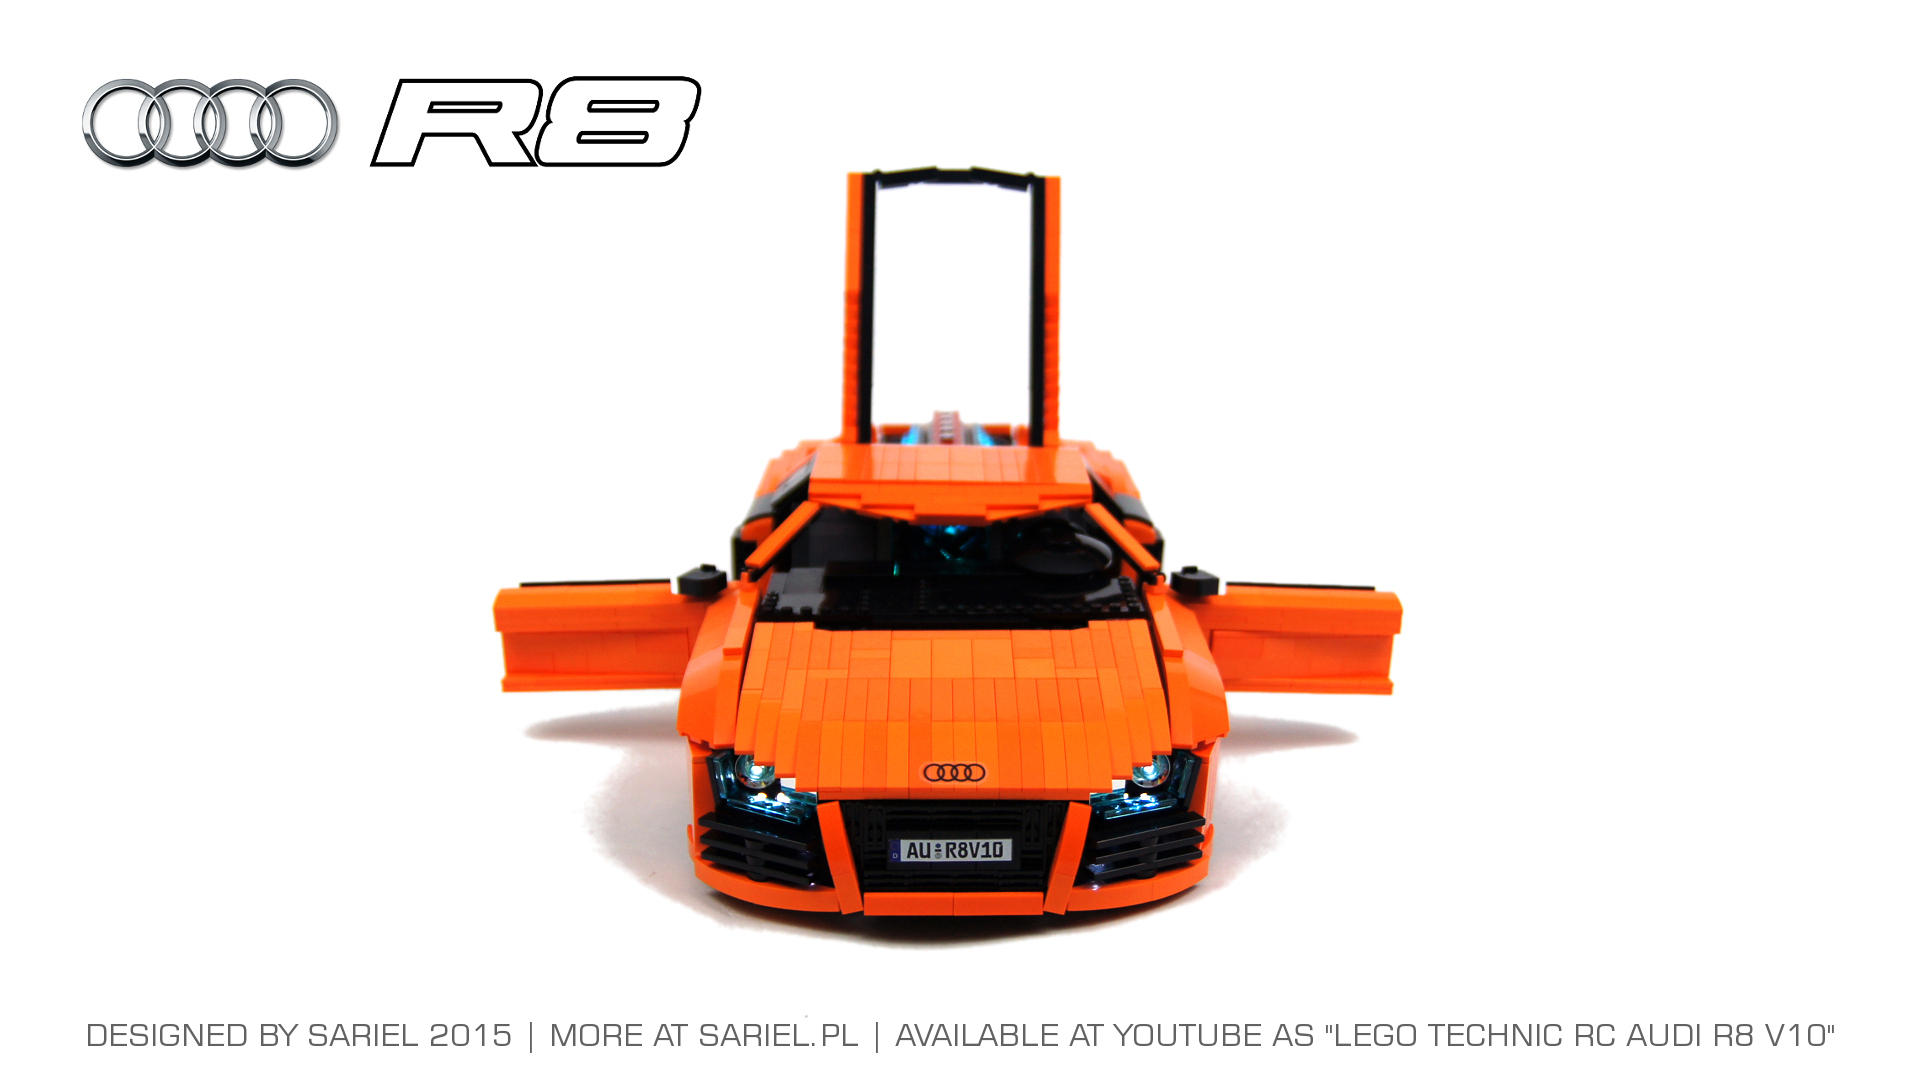
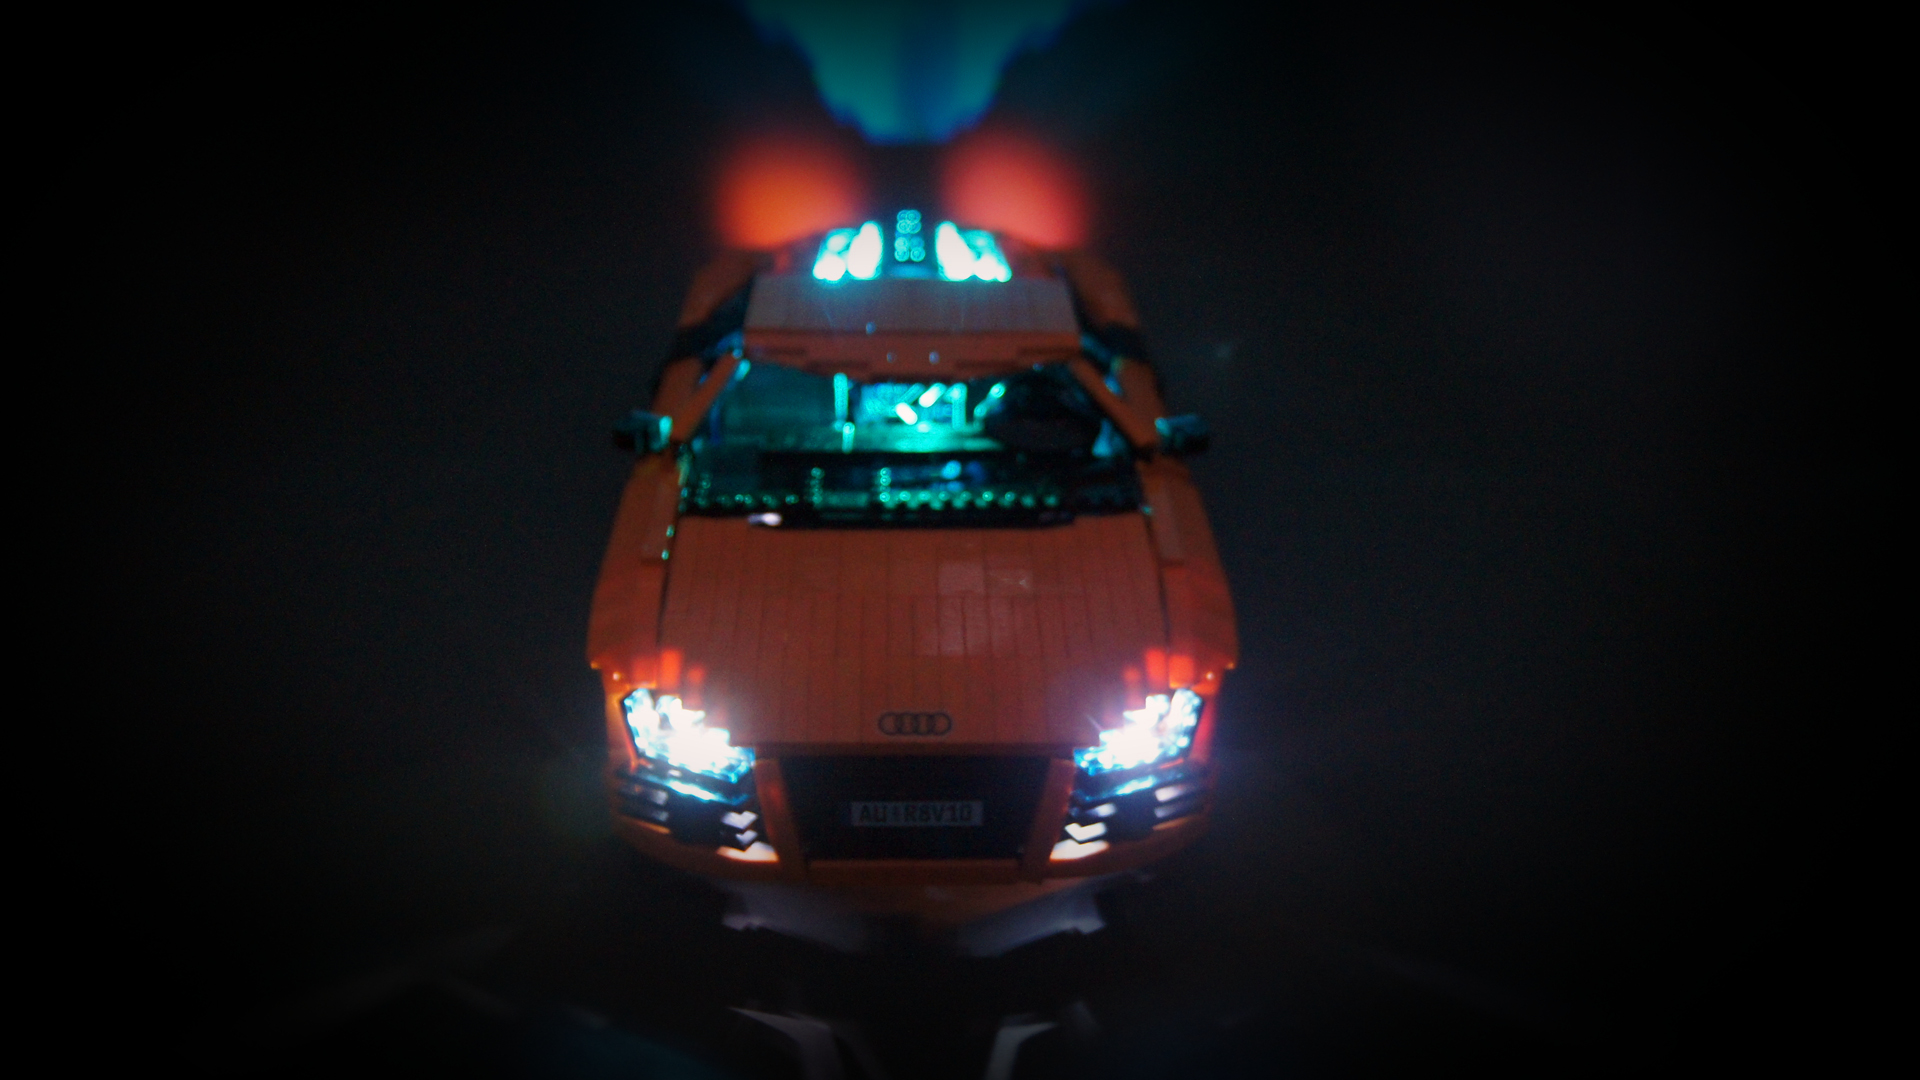
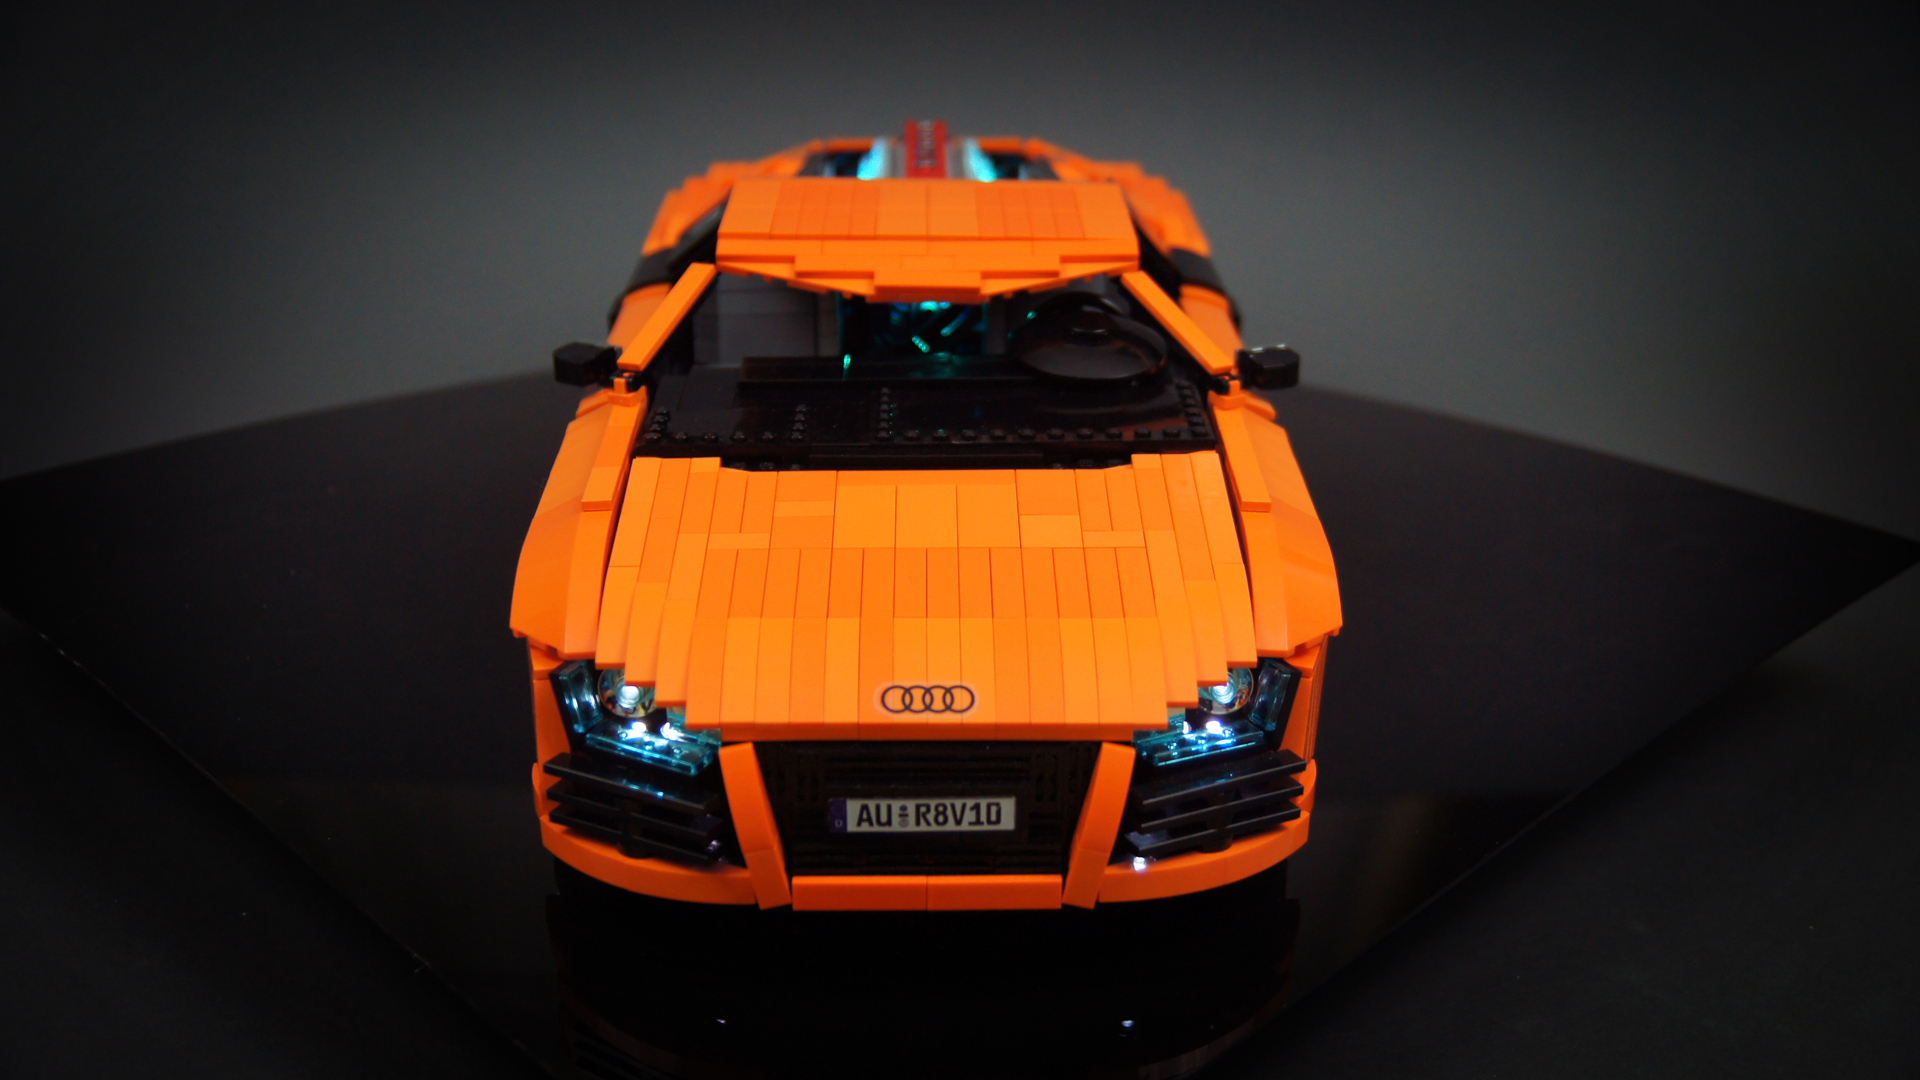
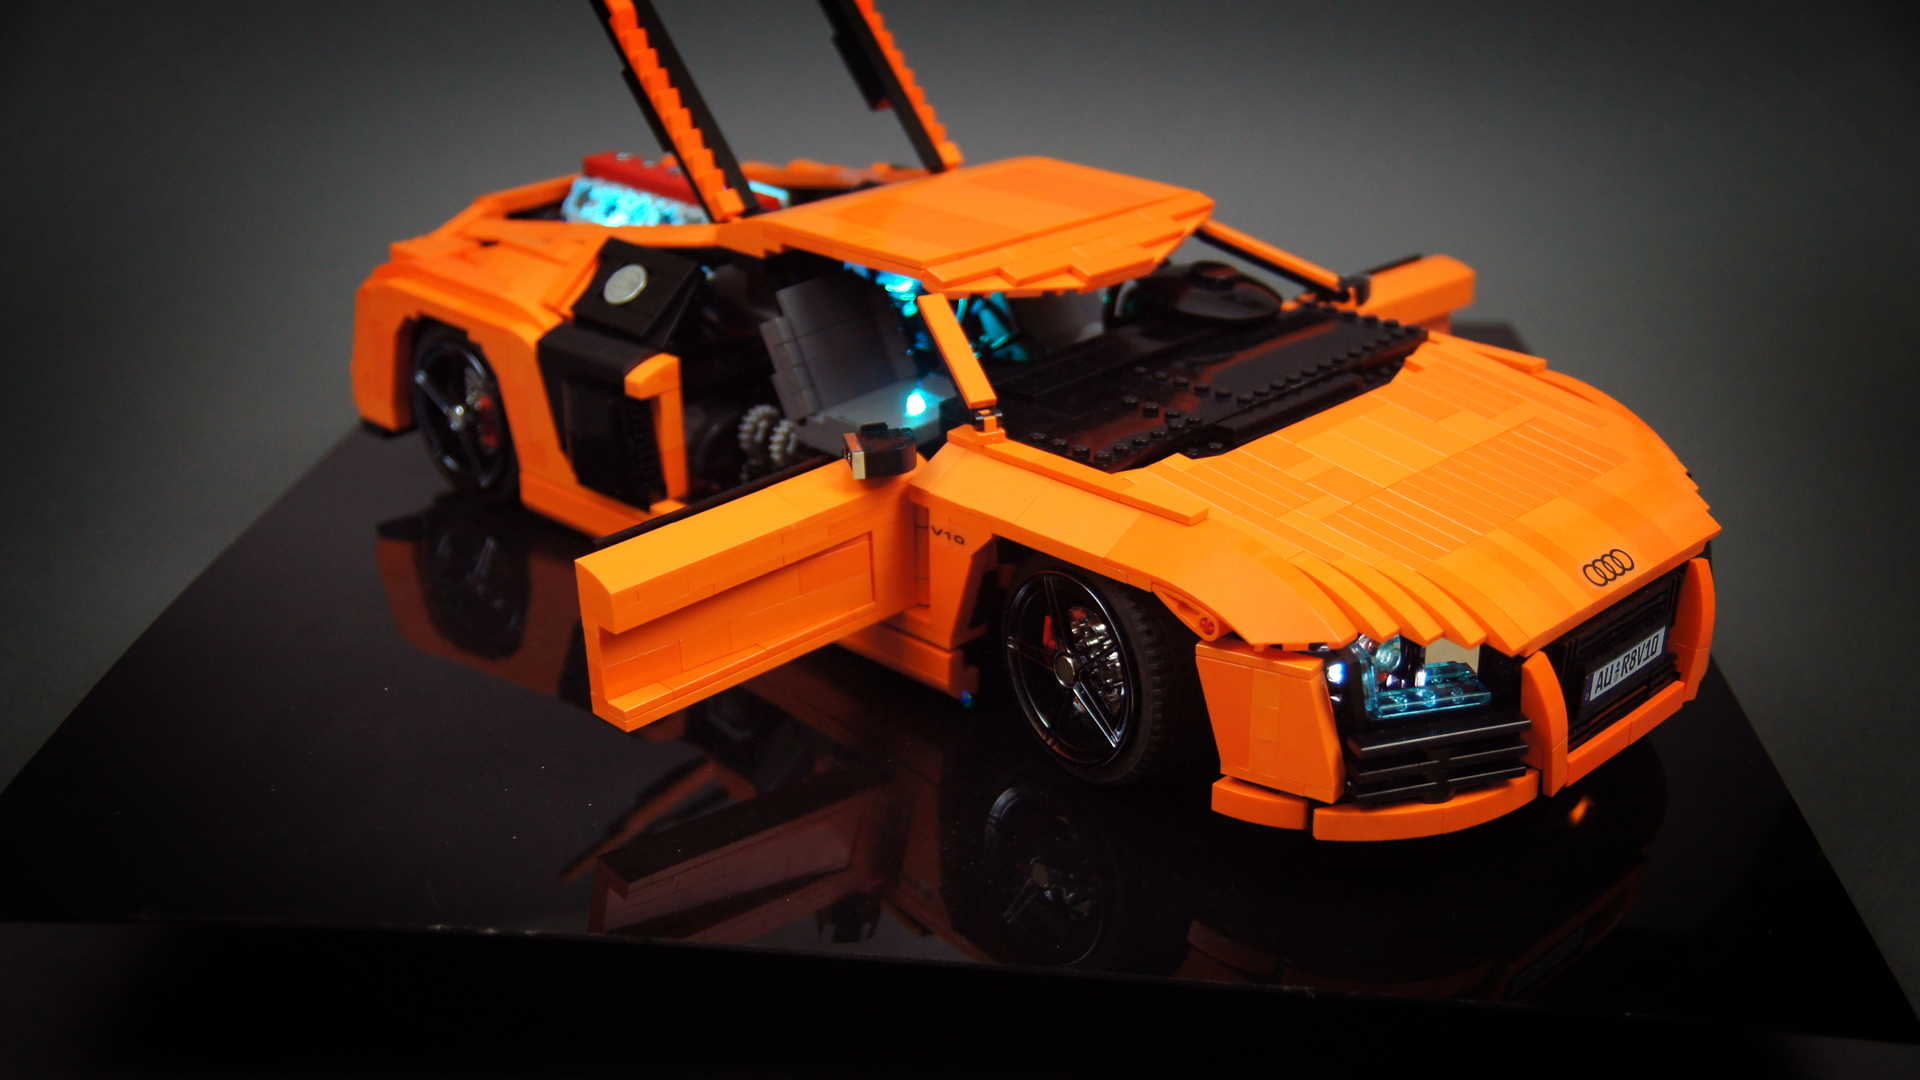
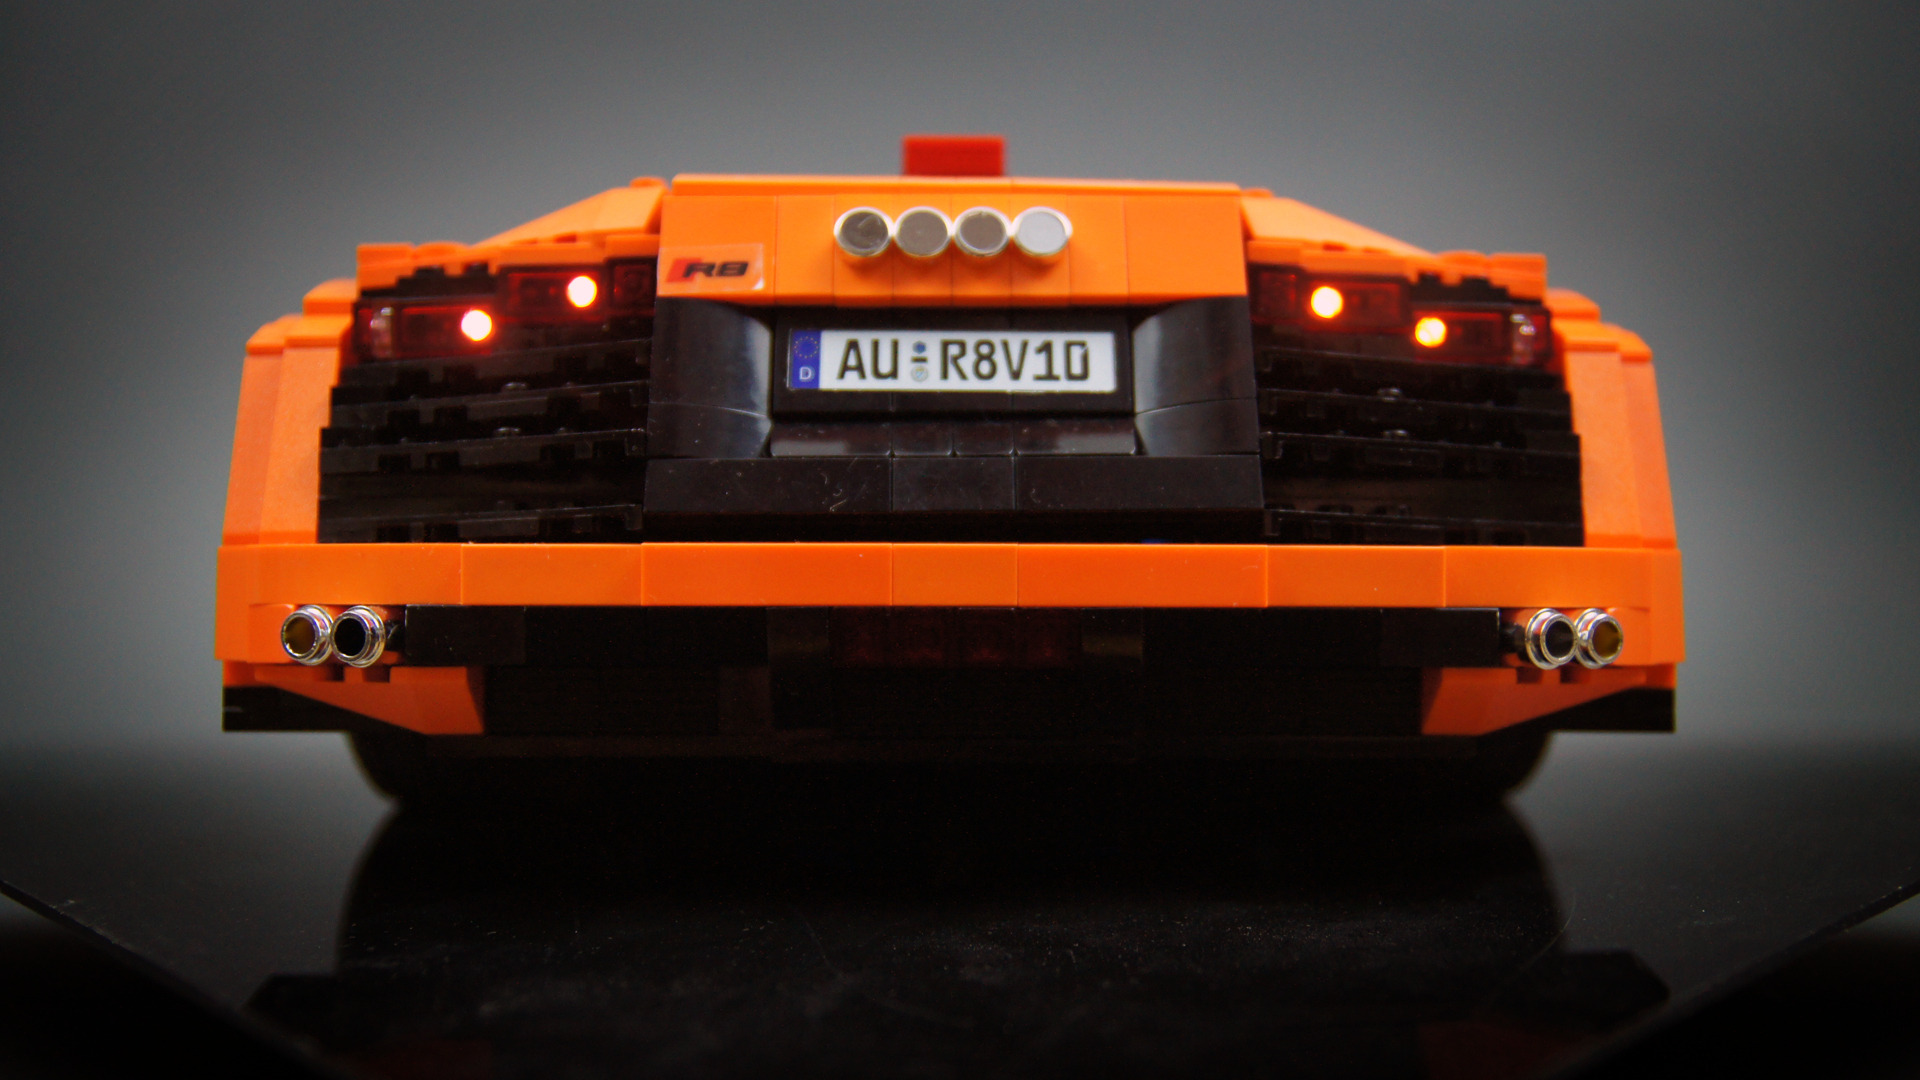
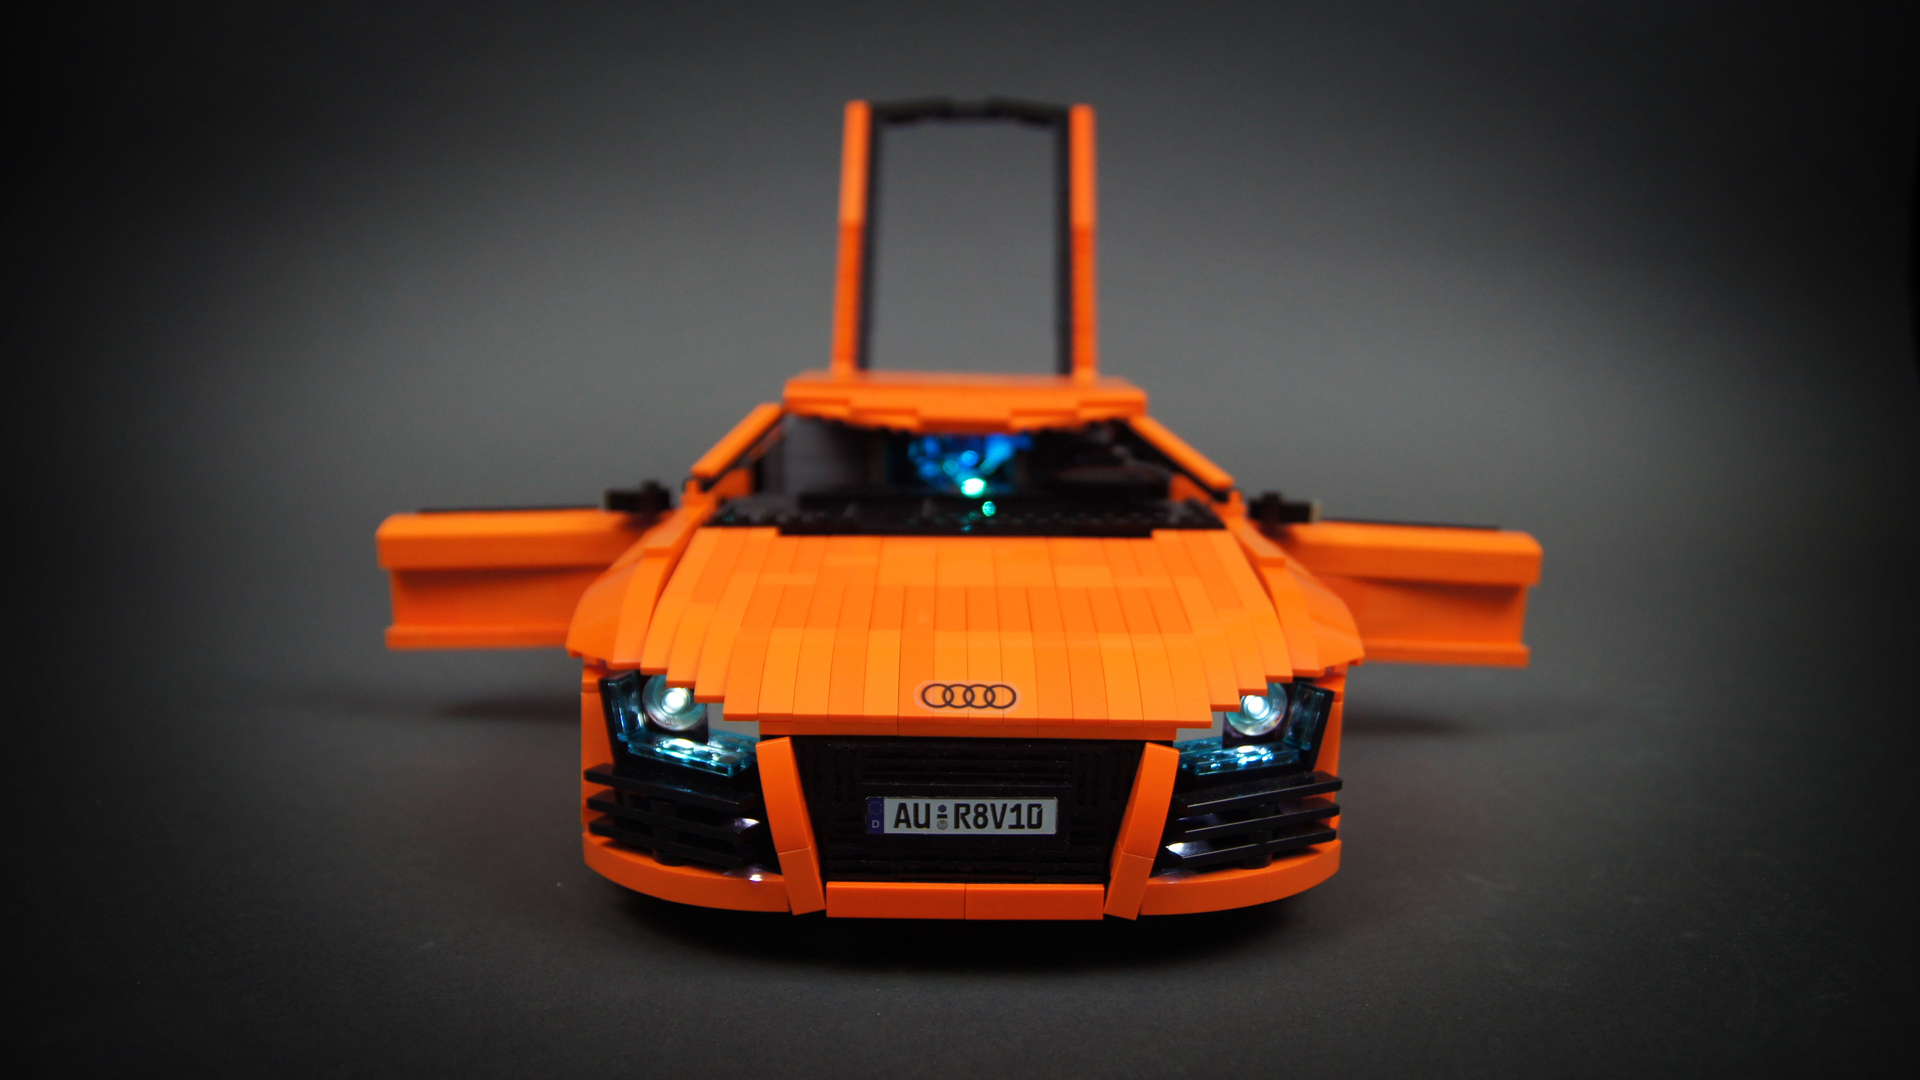
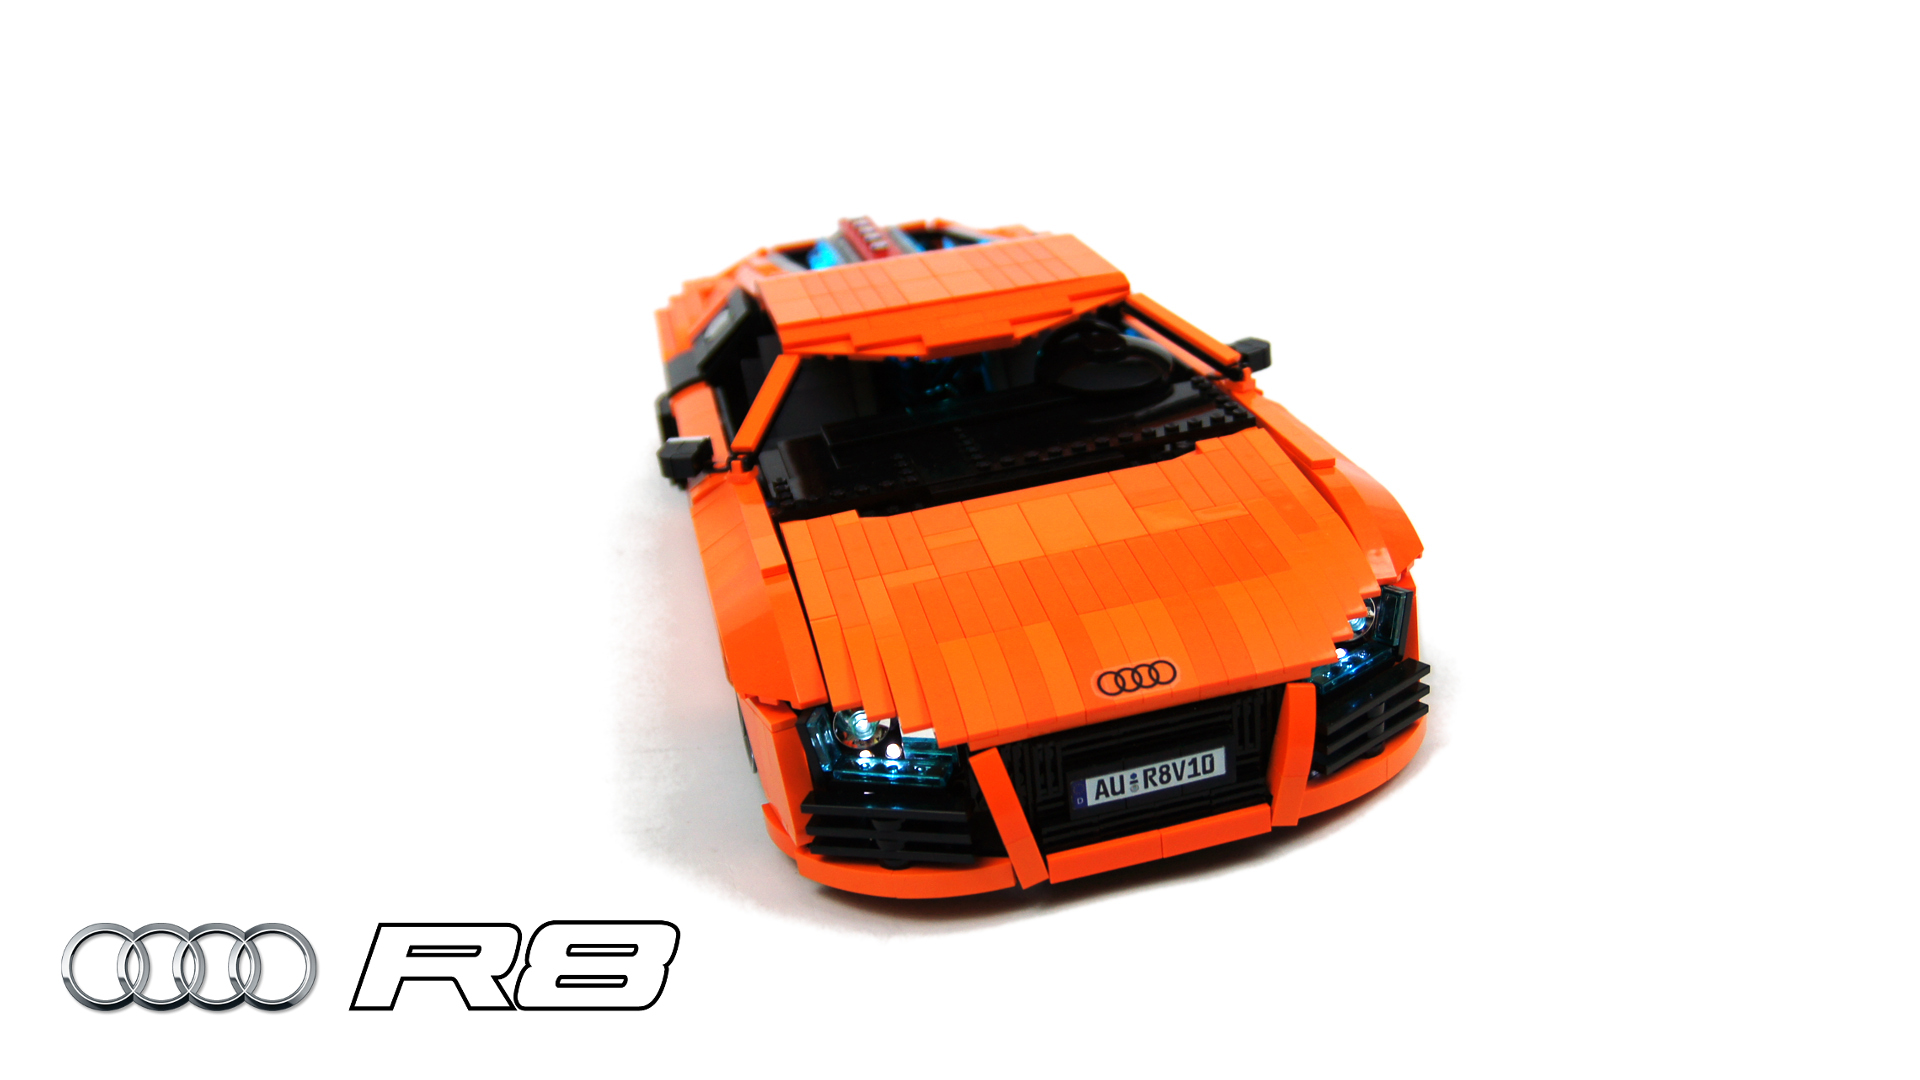
Probably the most challenging part of the model was its front end. There was little space elsewhere, so I installed the model’s battery exactly in its nose, right between the front grille and front axle. This meant putting several meters of wires there, including 5 pairs of Lego LEDs in the headlights. If you want a simple recipe to start hating yourself, try to make an axle that is suspended, steered and driven at the same time, then put a ton of wires around it, and then try to make it all fit under a very low hood. I believe I spent no less than month to cram everything in there without making the hood taller. In the end, the entire front end was like a combination of about eight separate modules that would stay together only if connected in a very specific order.
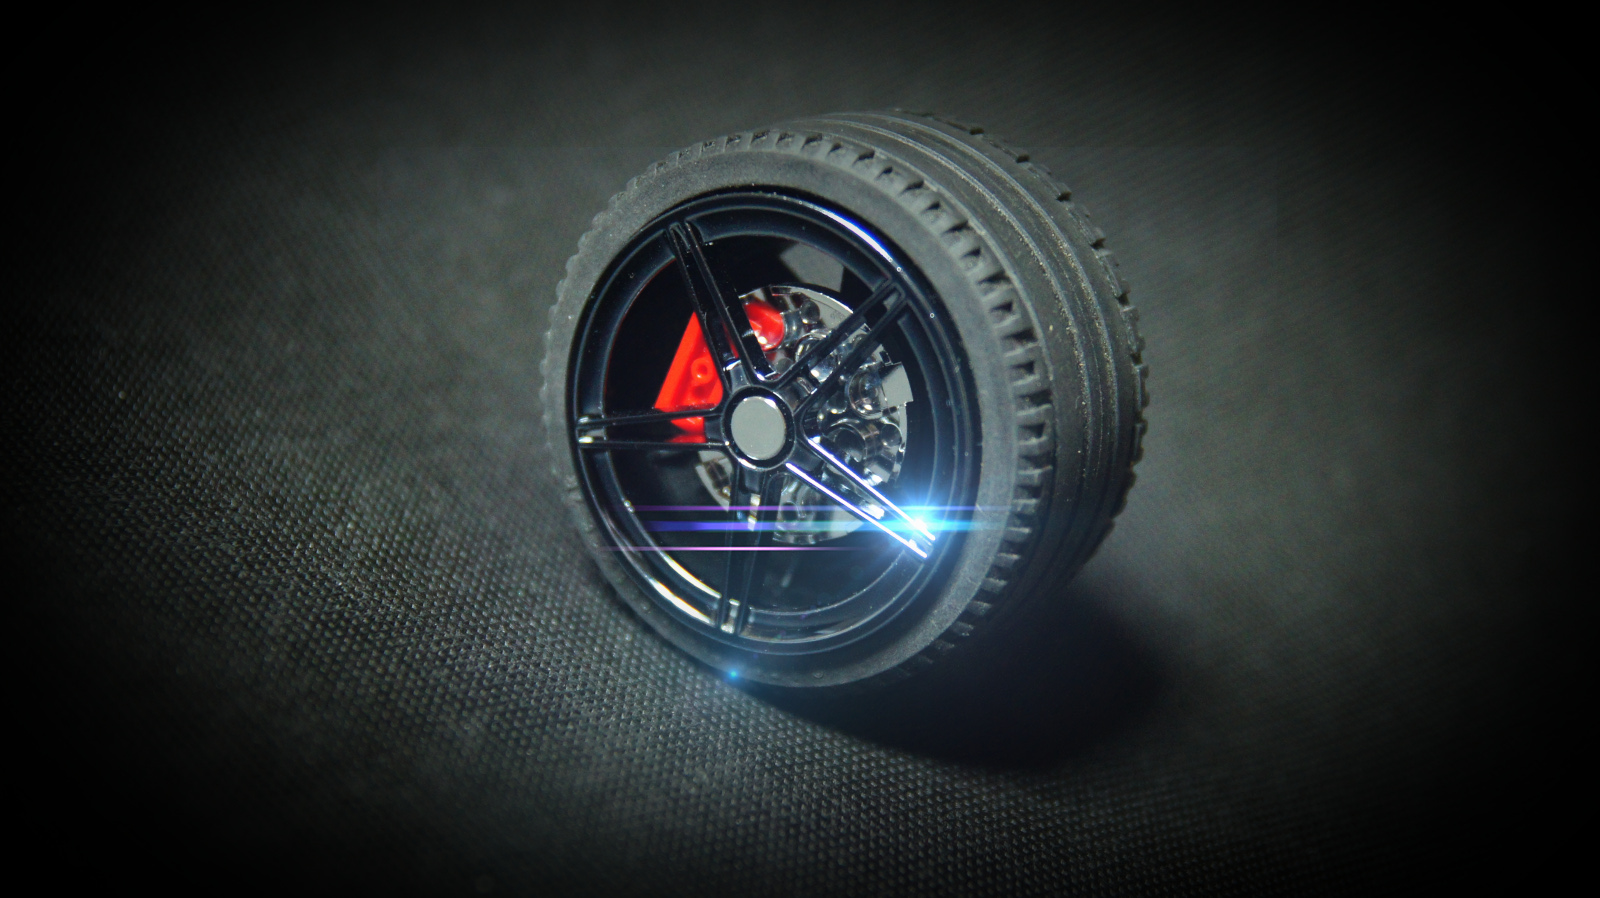
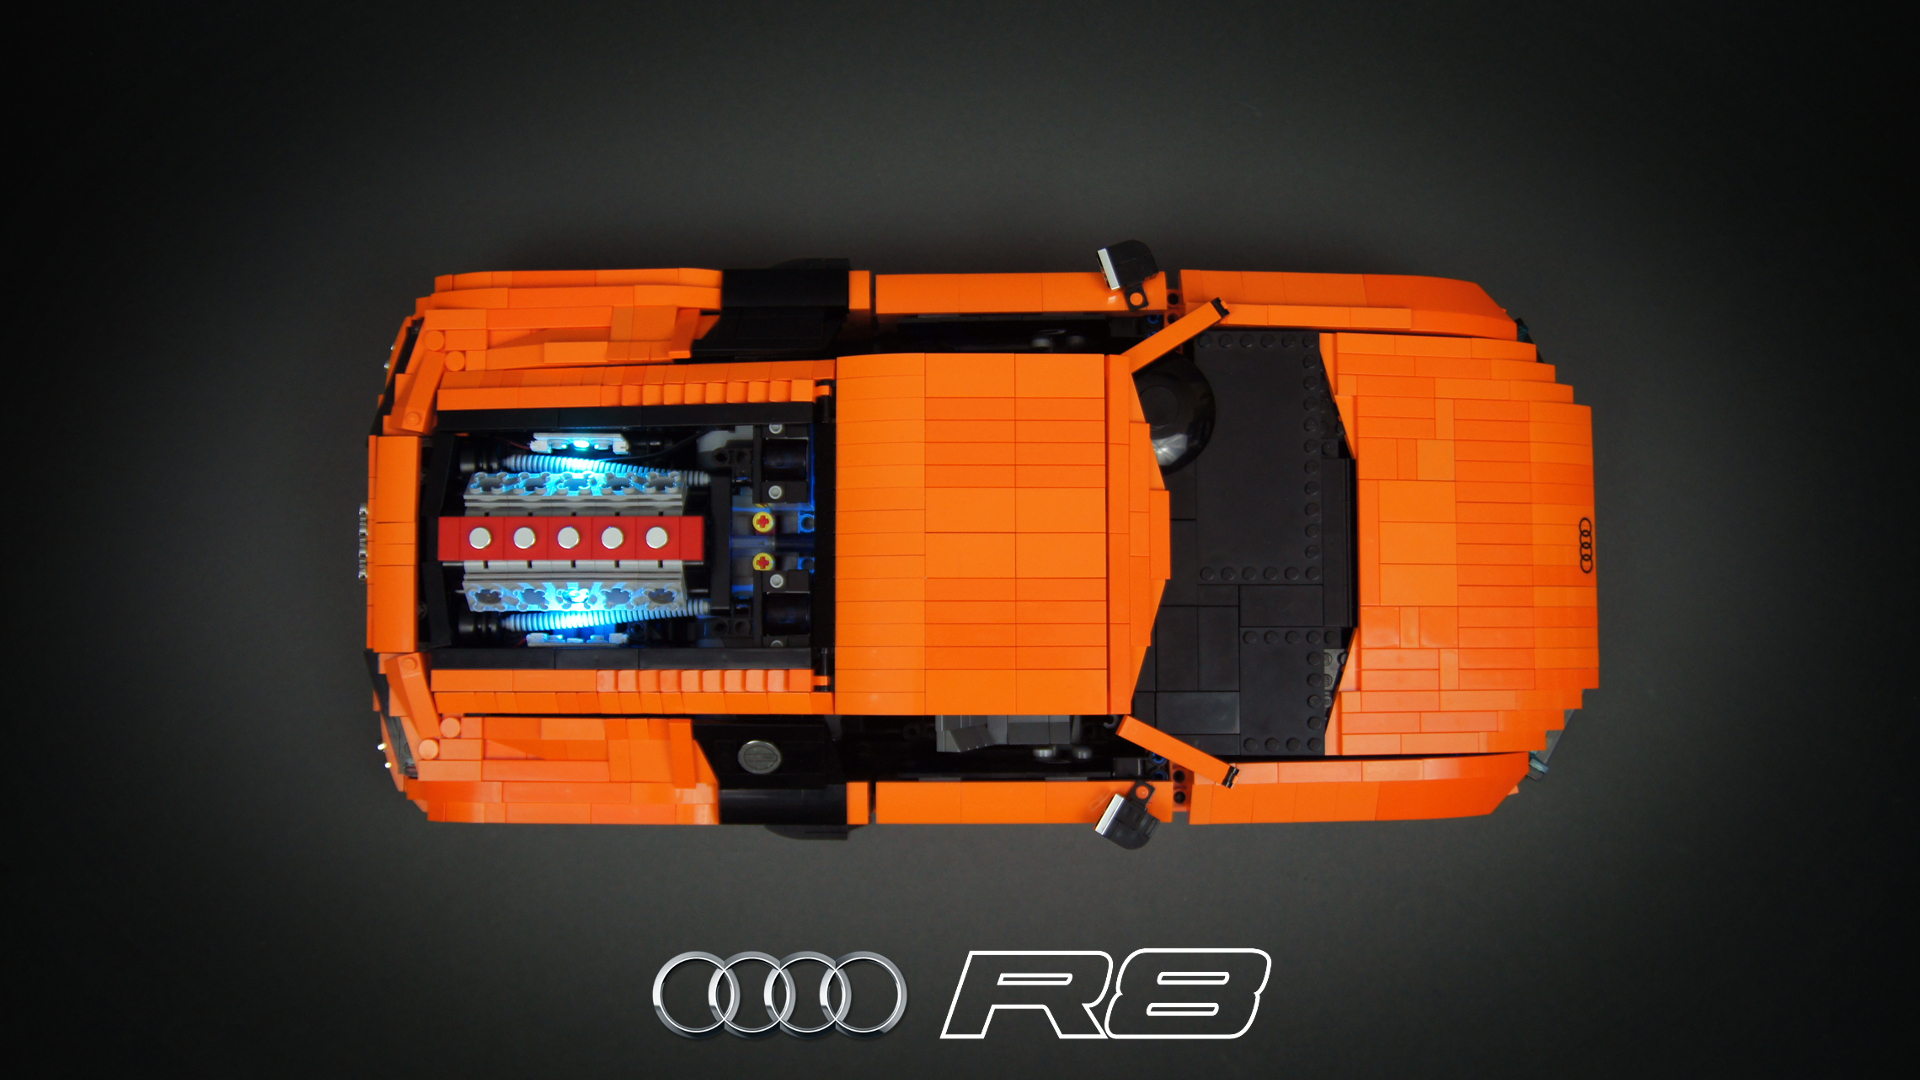
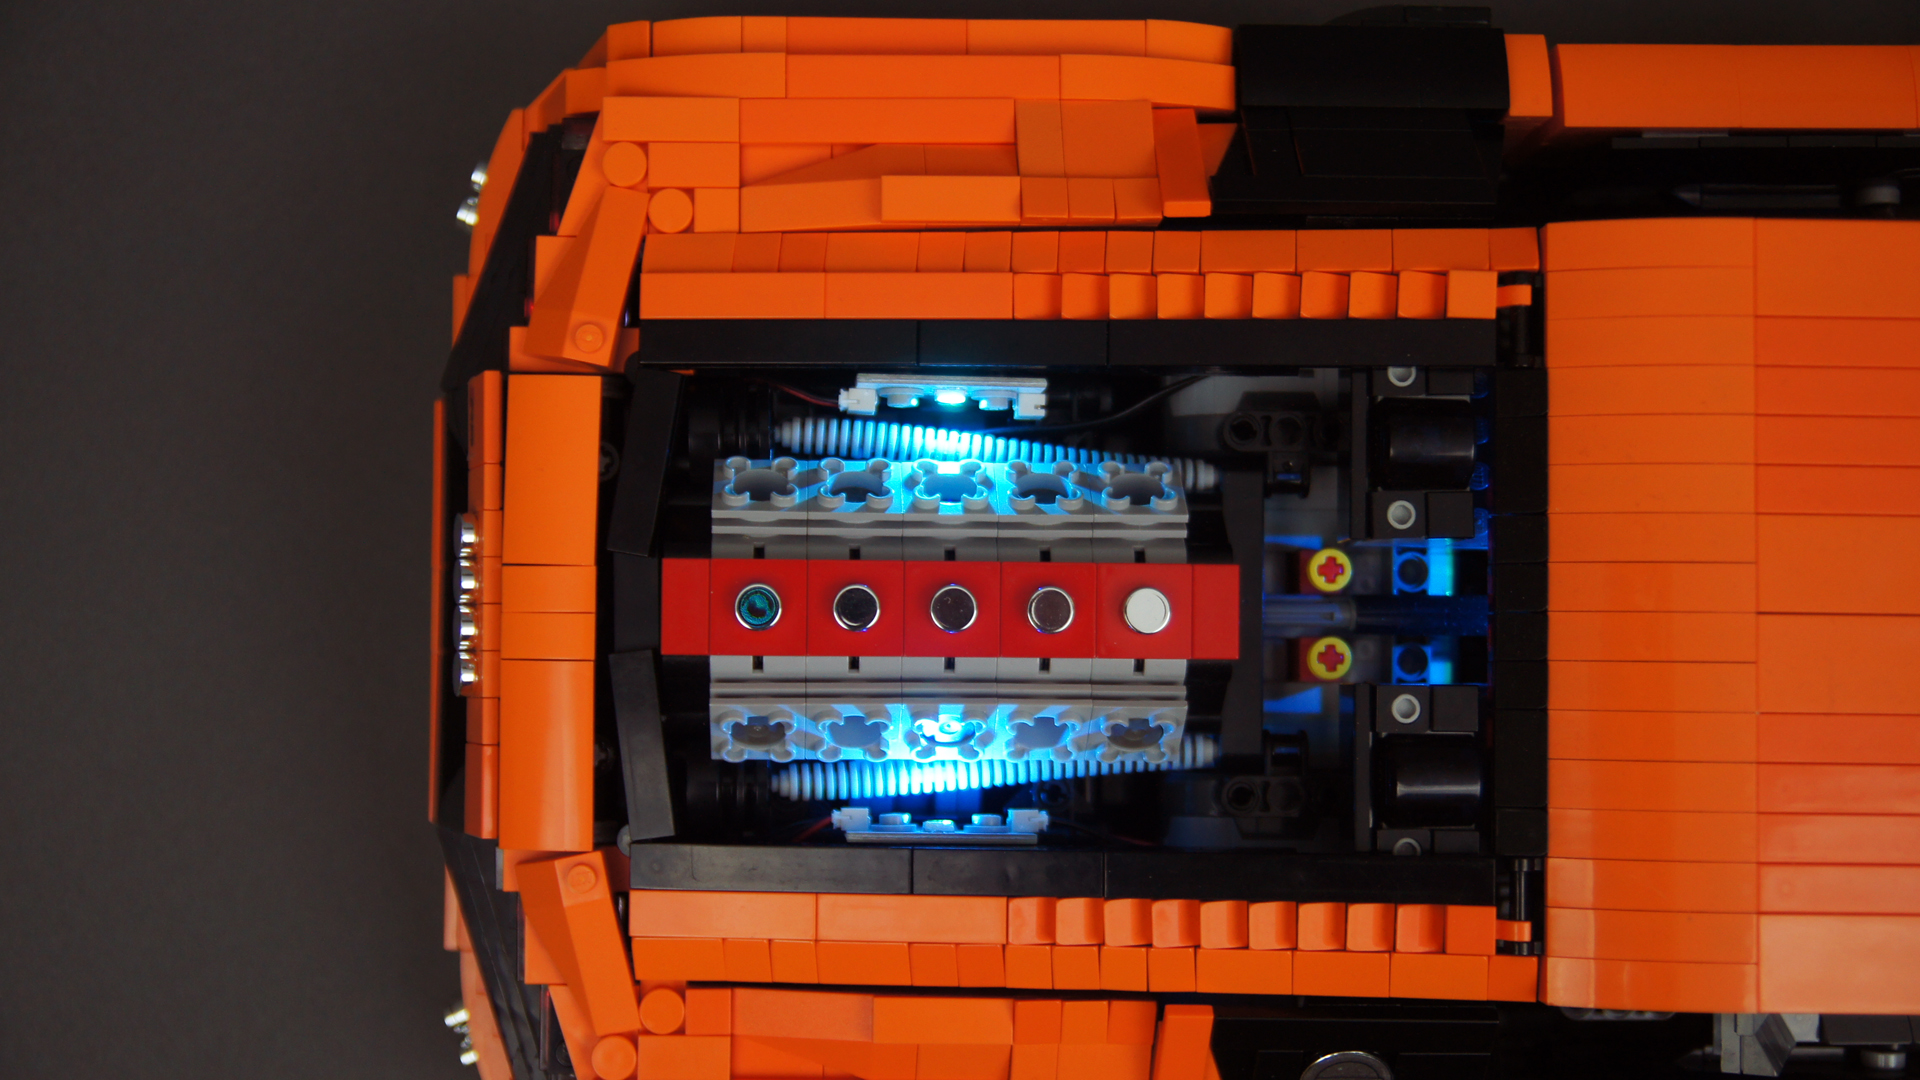
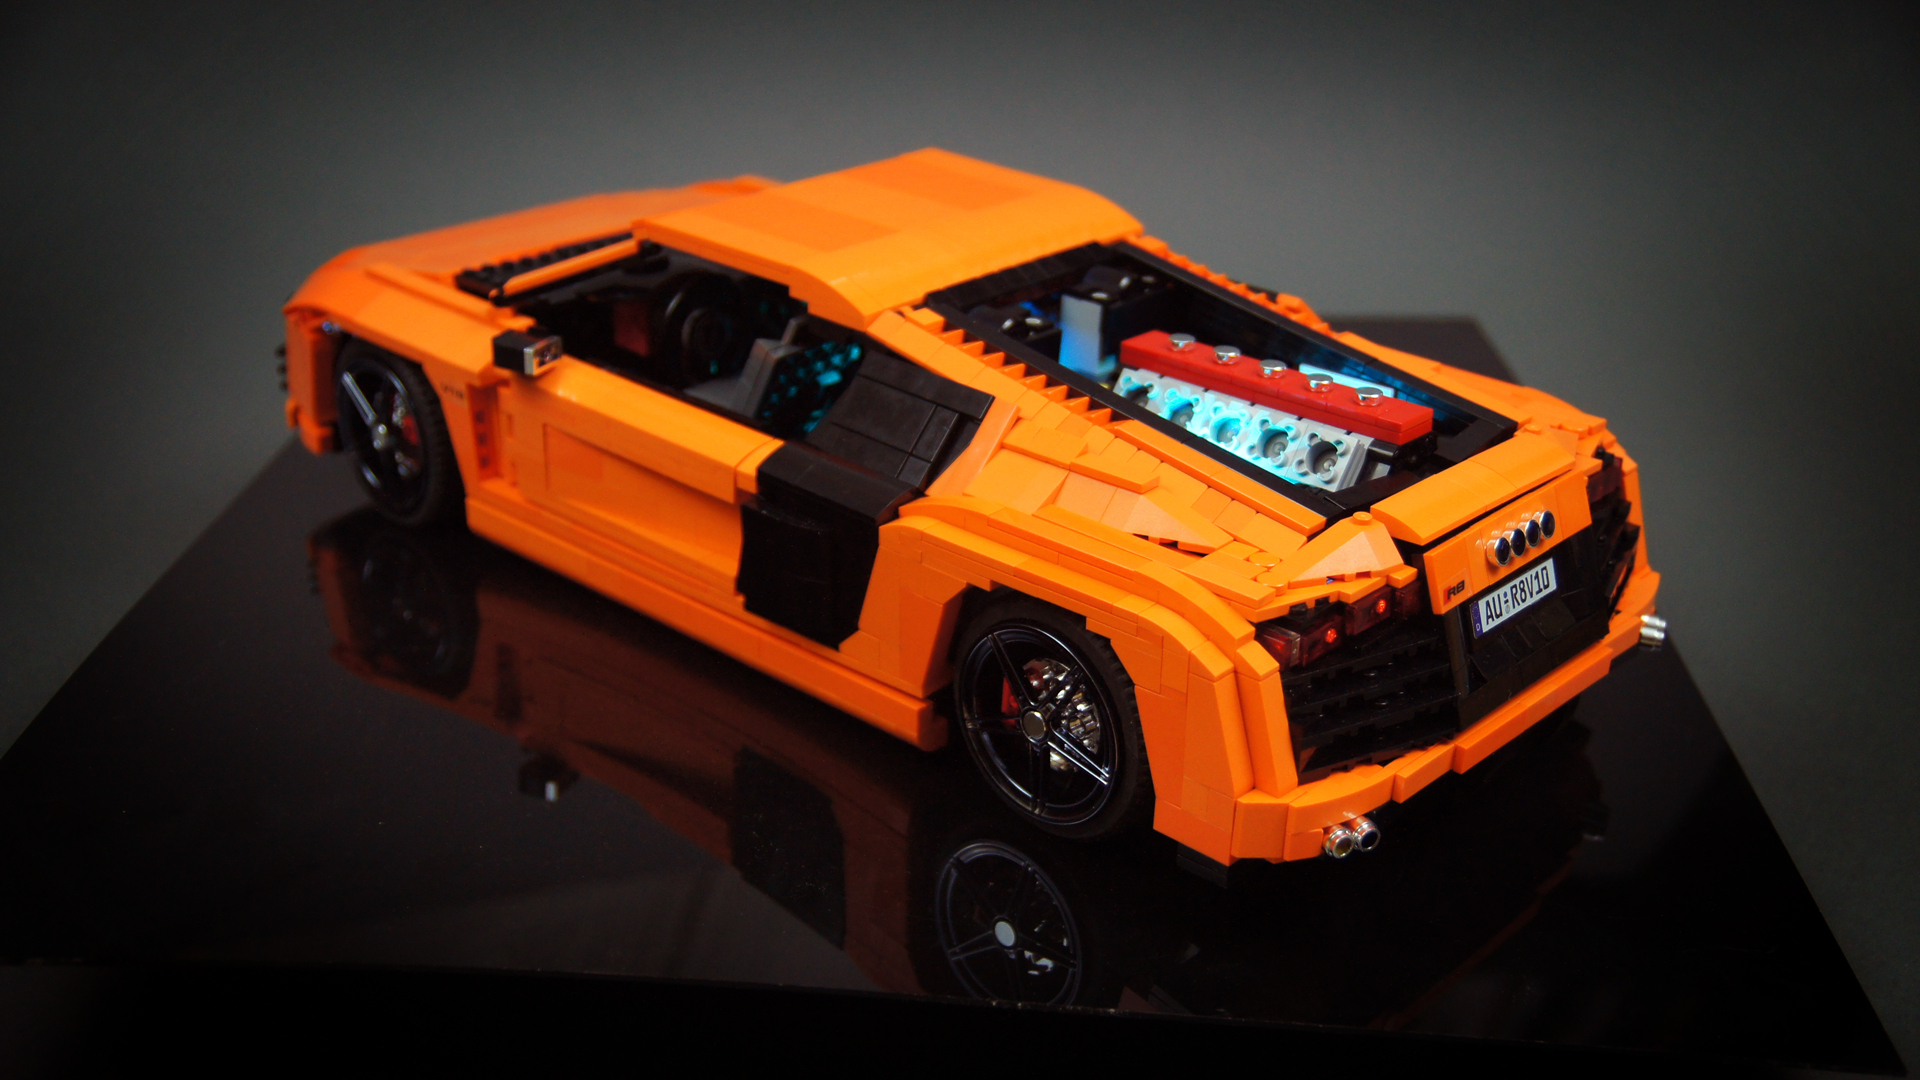
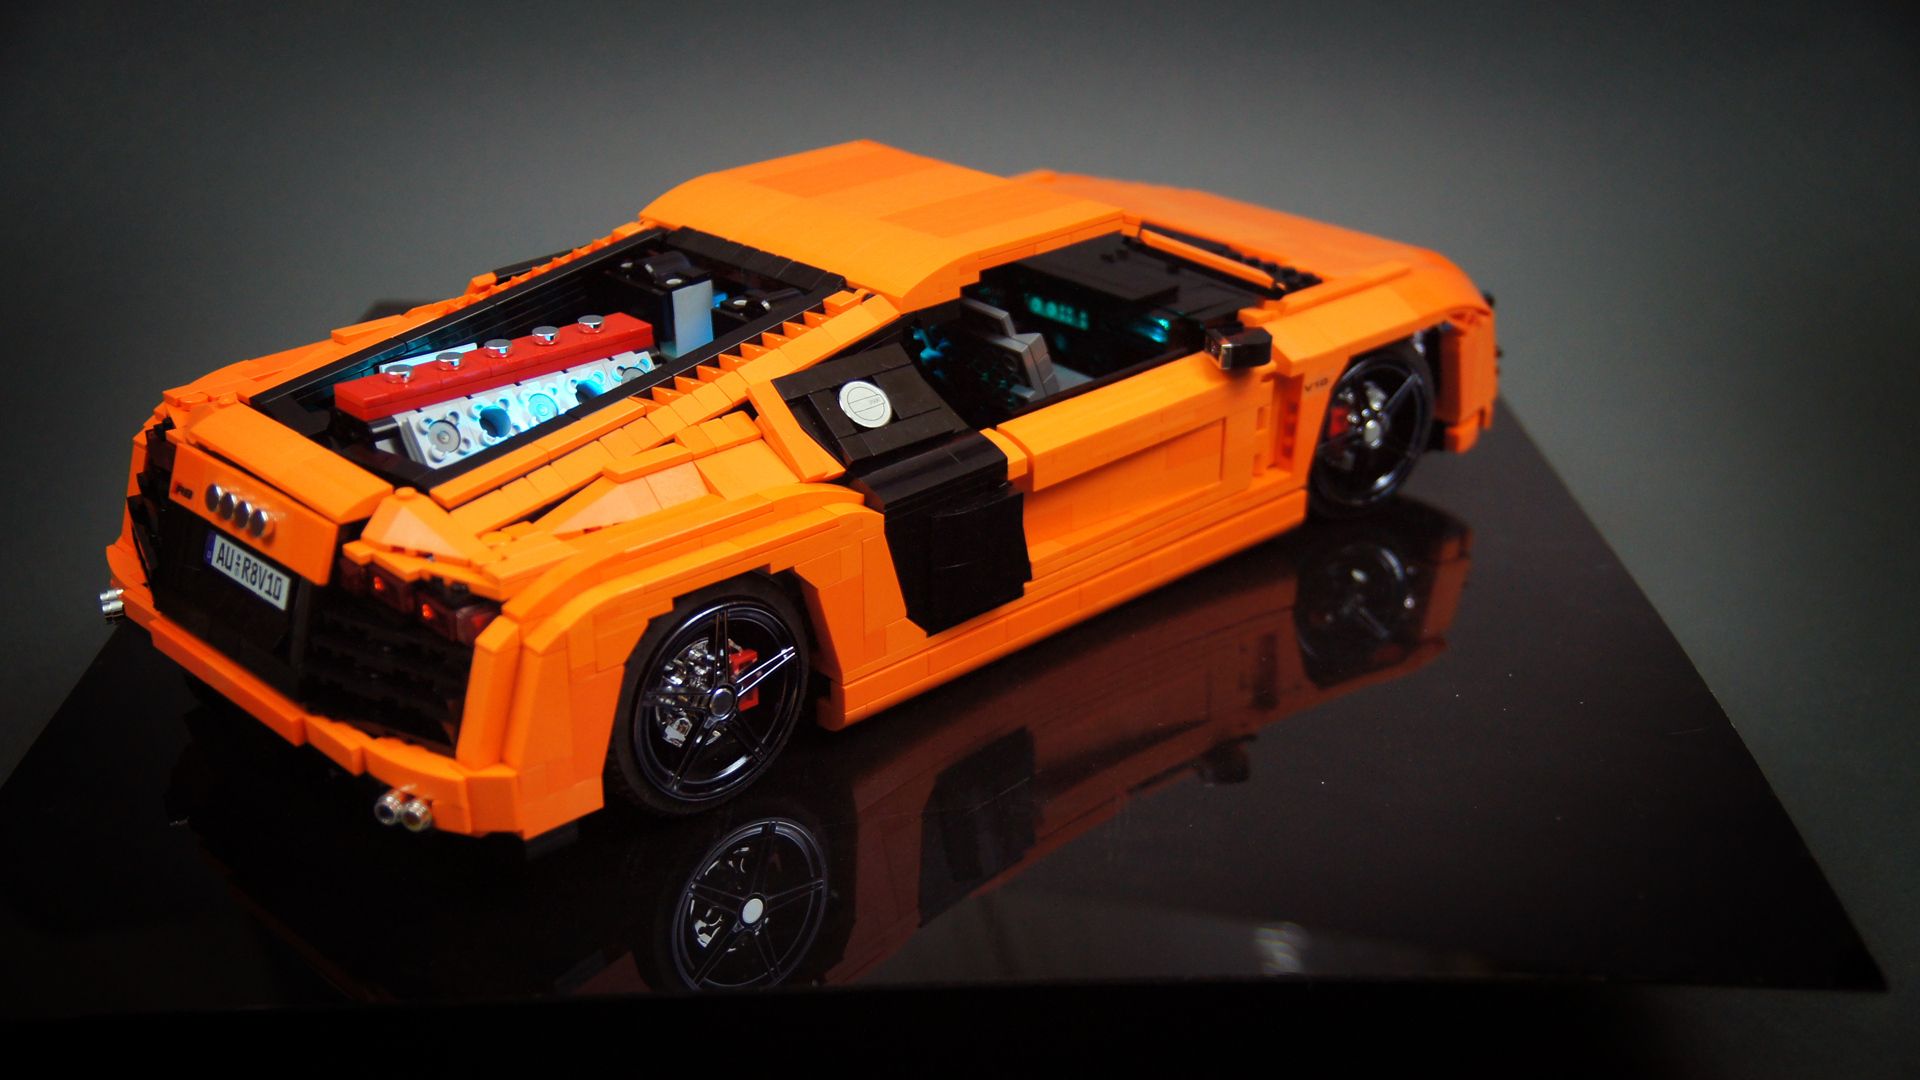
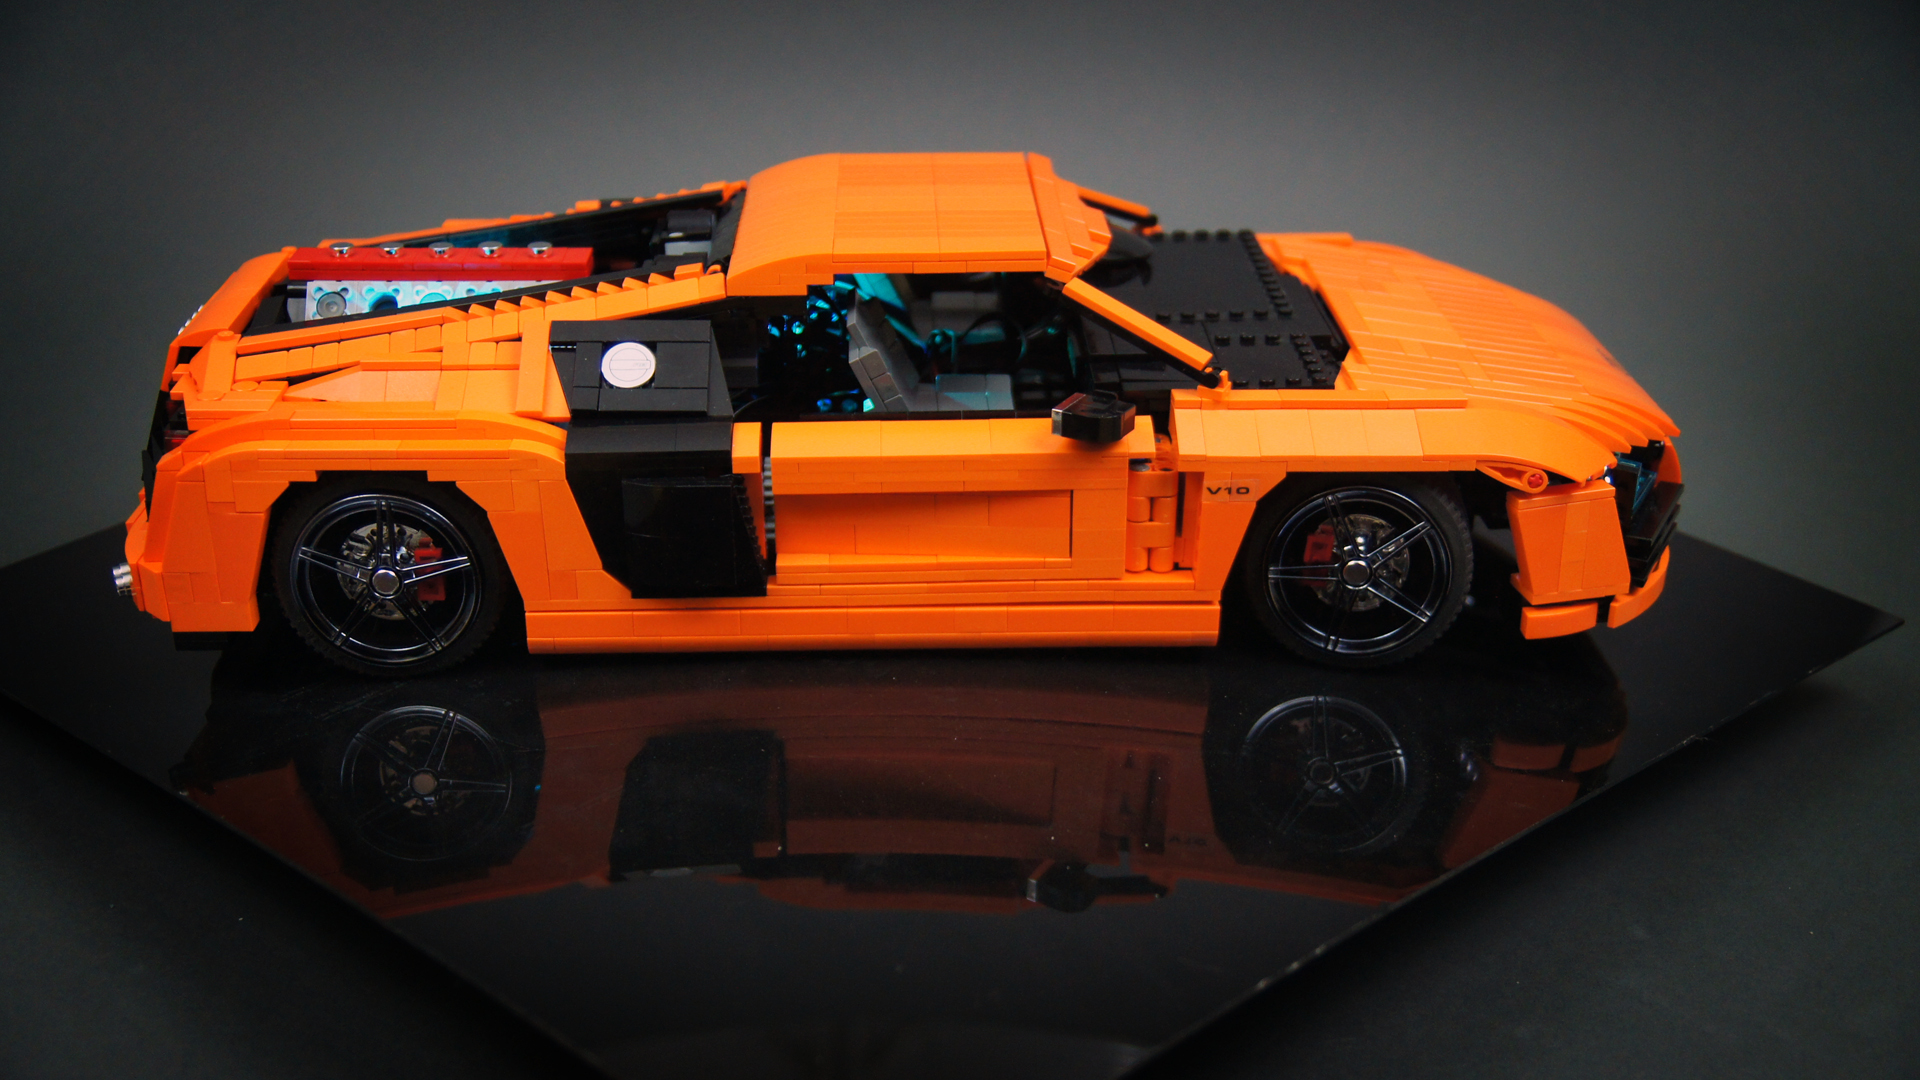
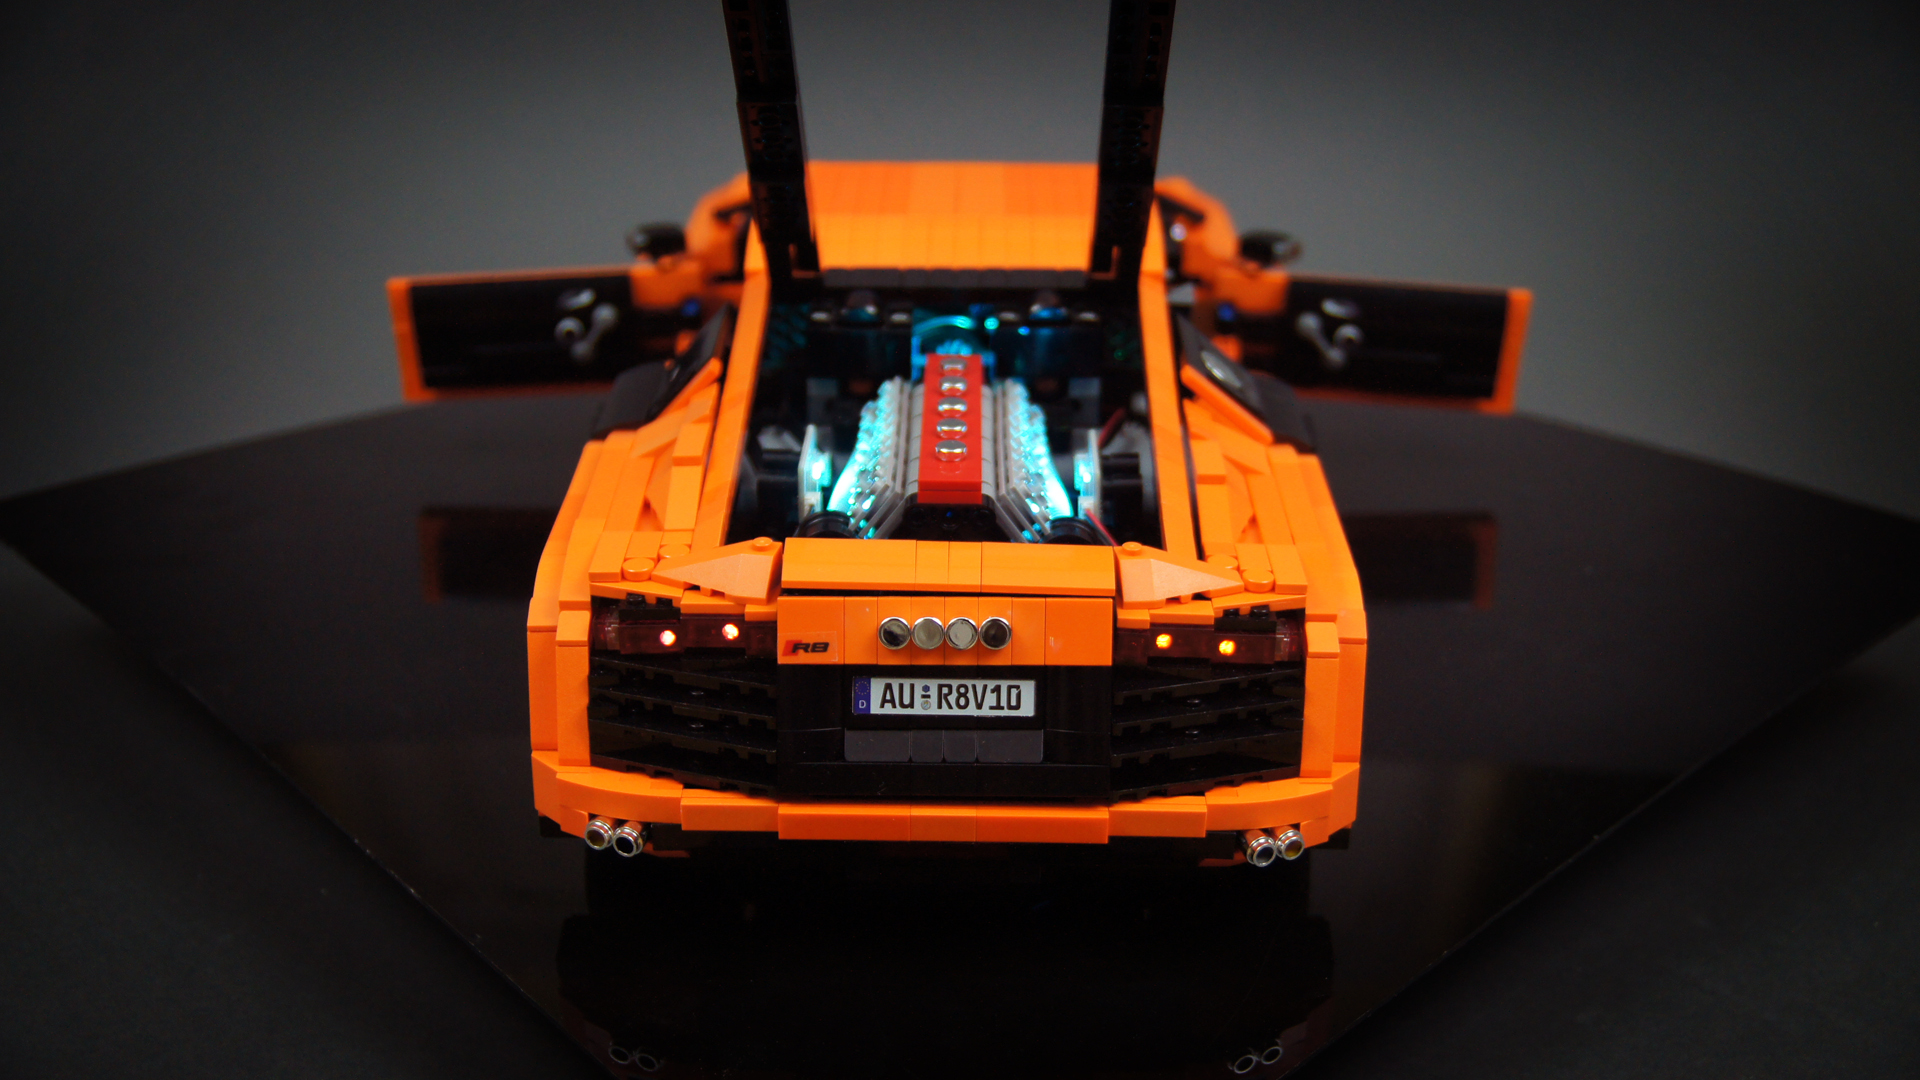
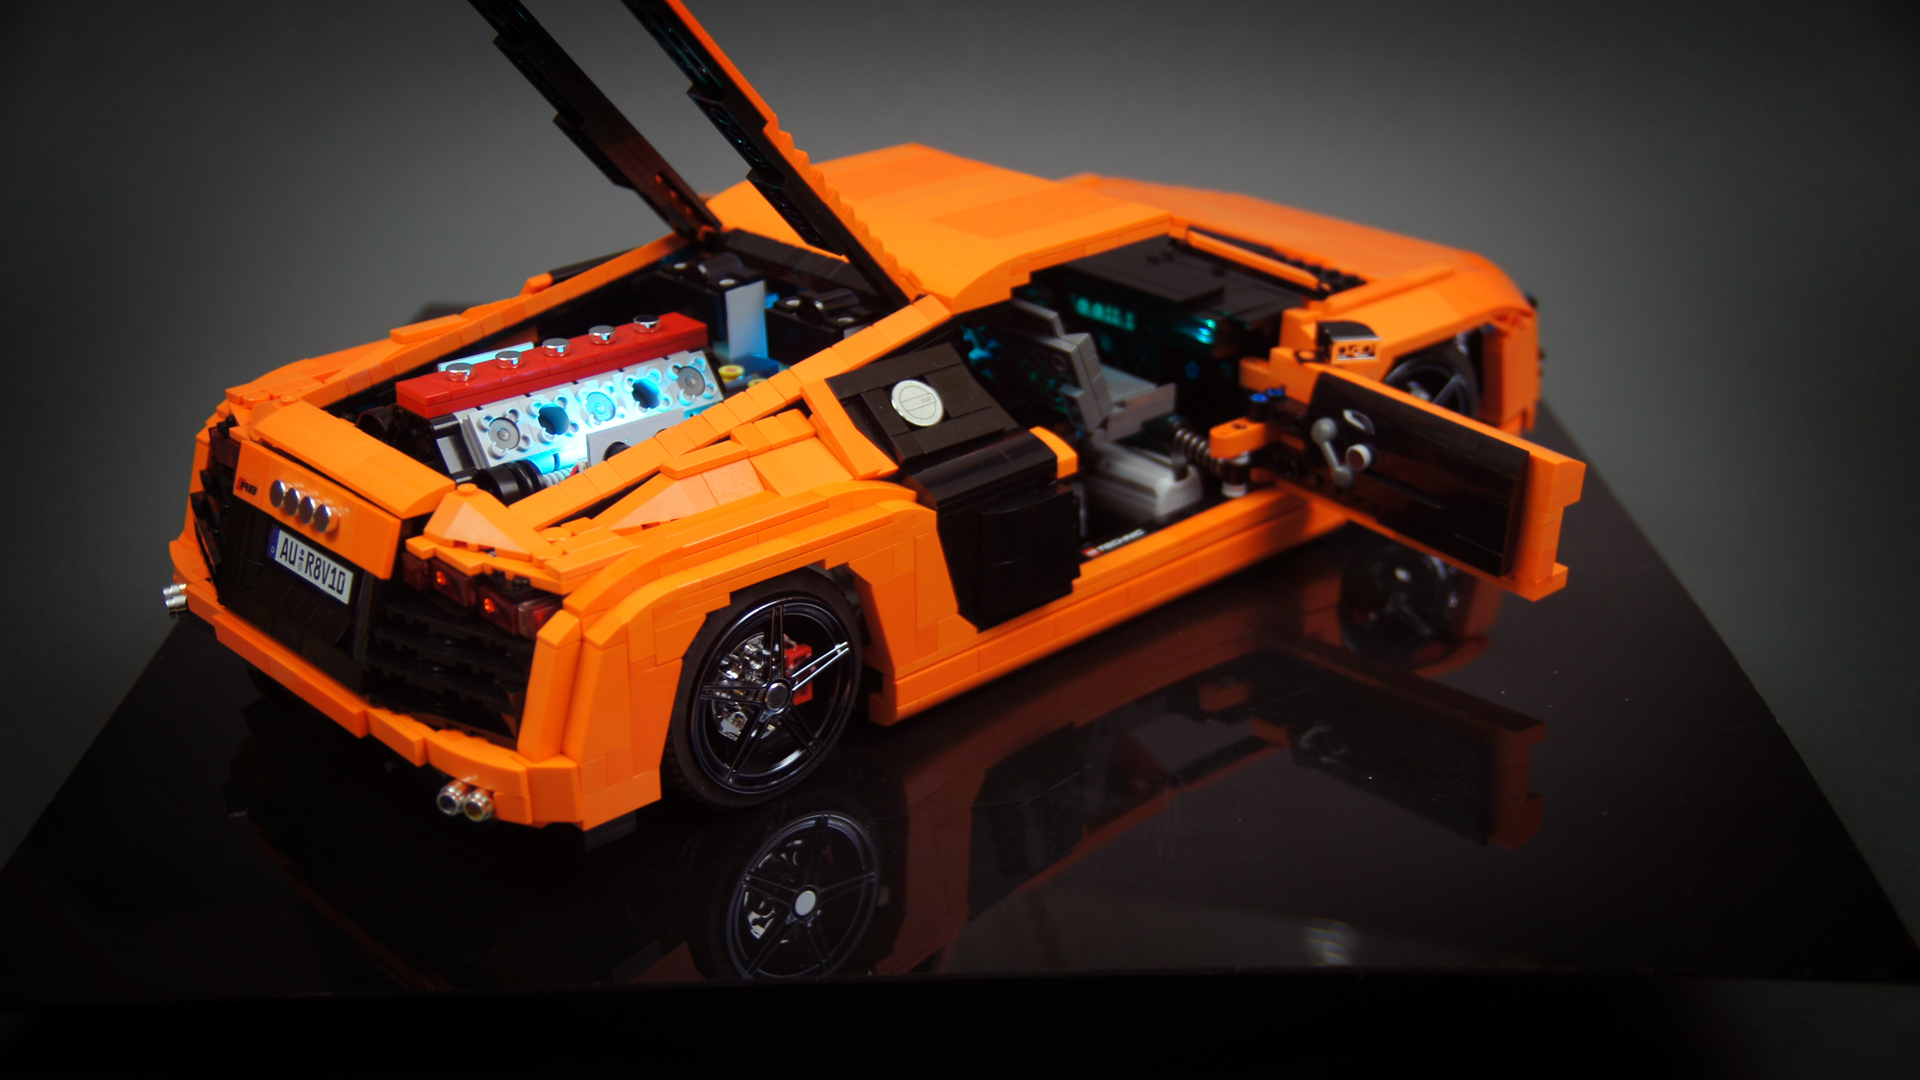
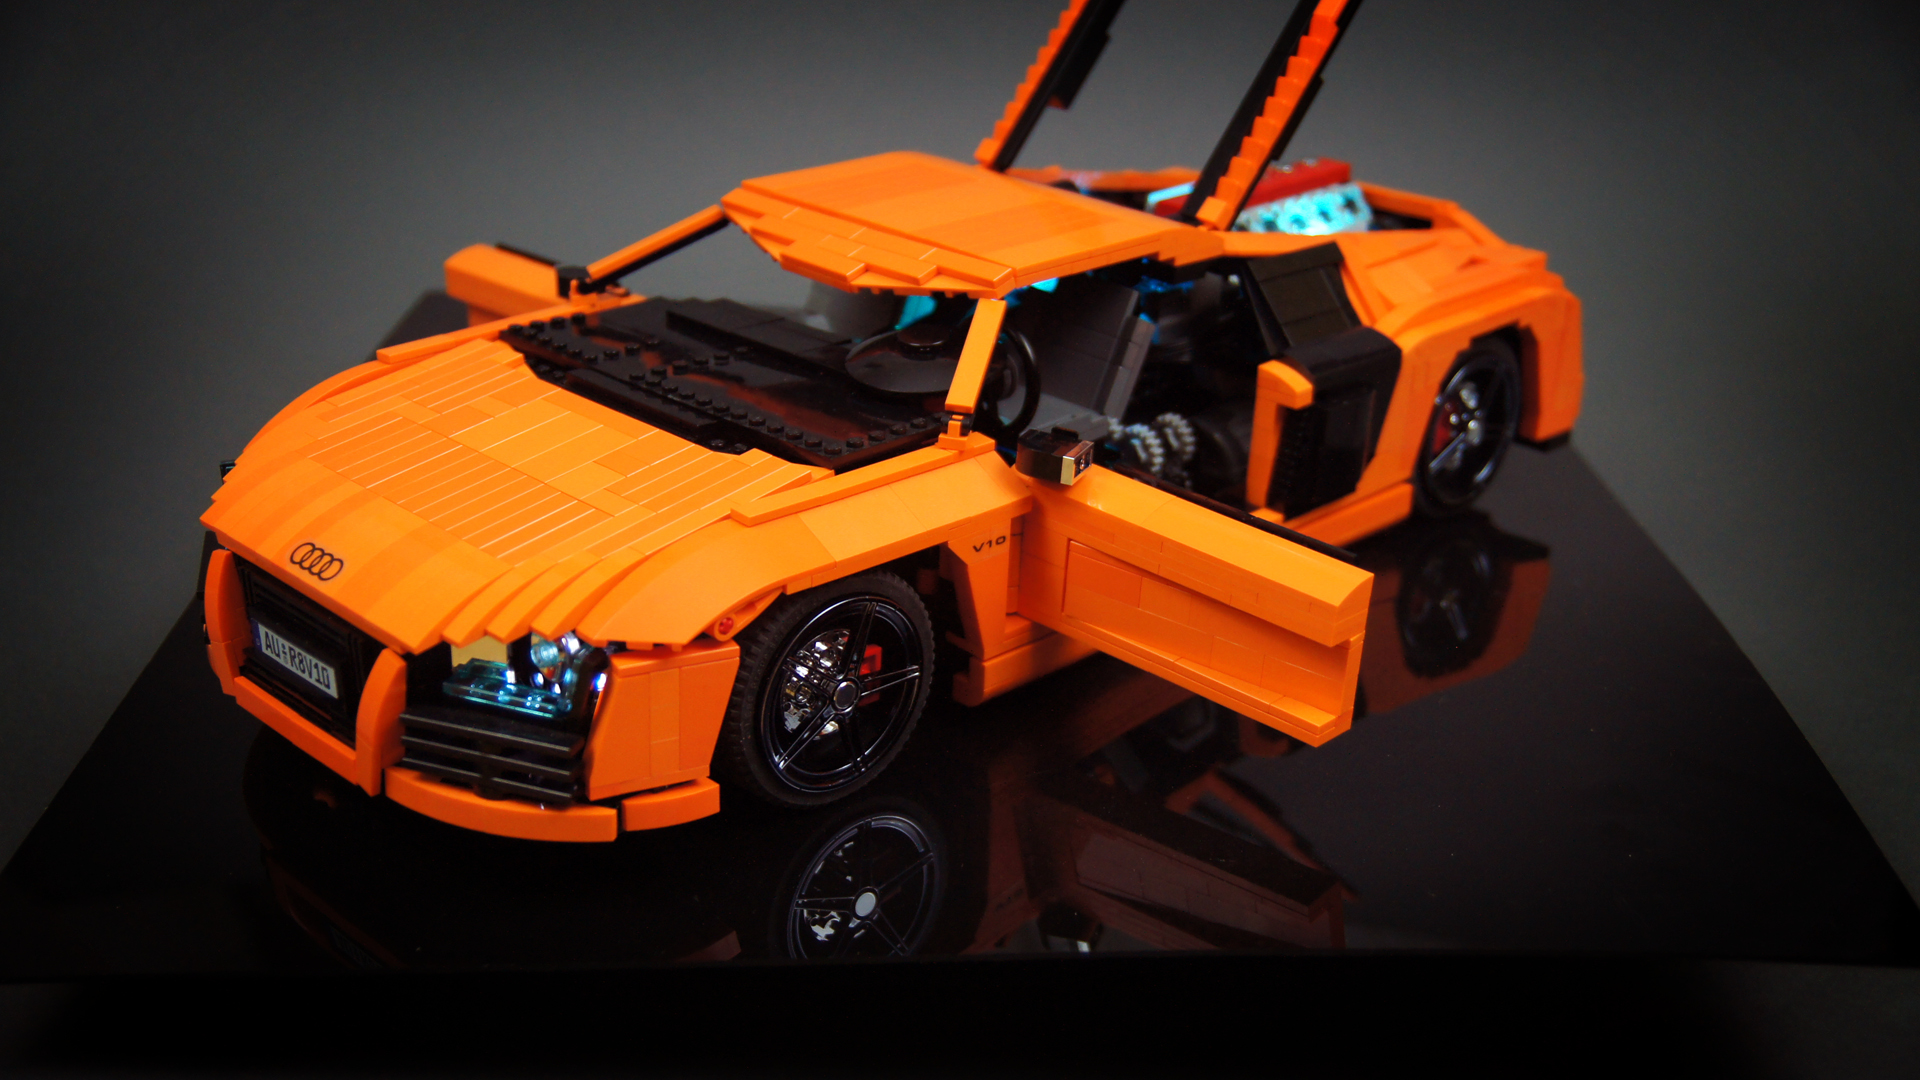
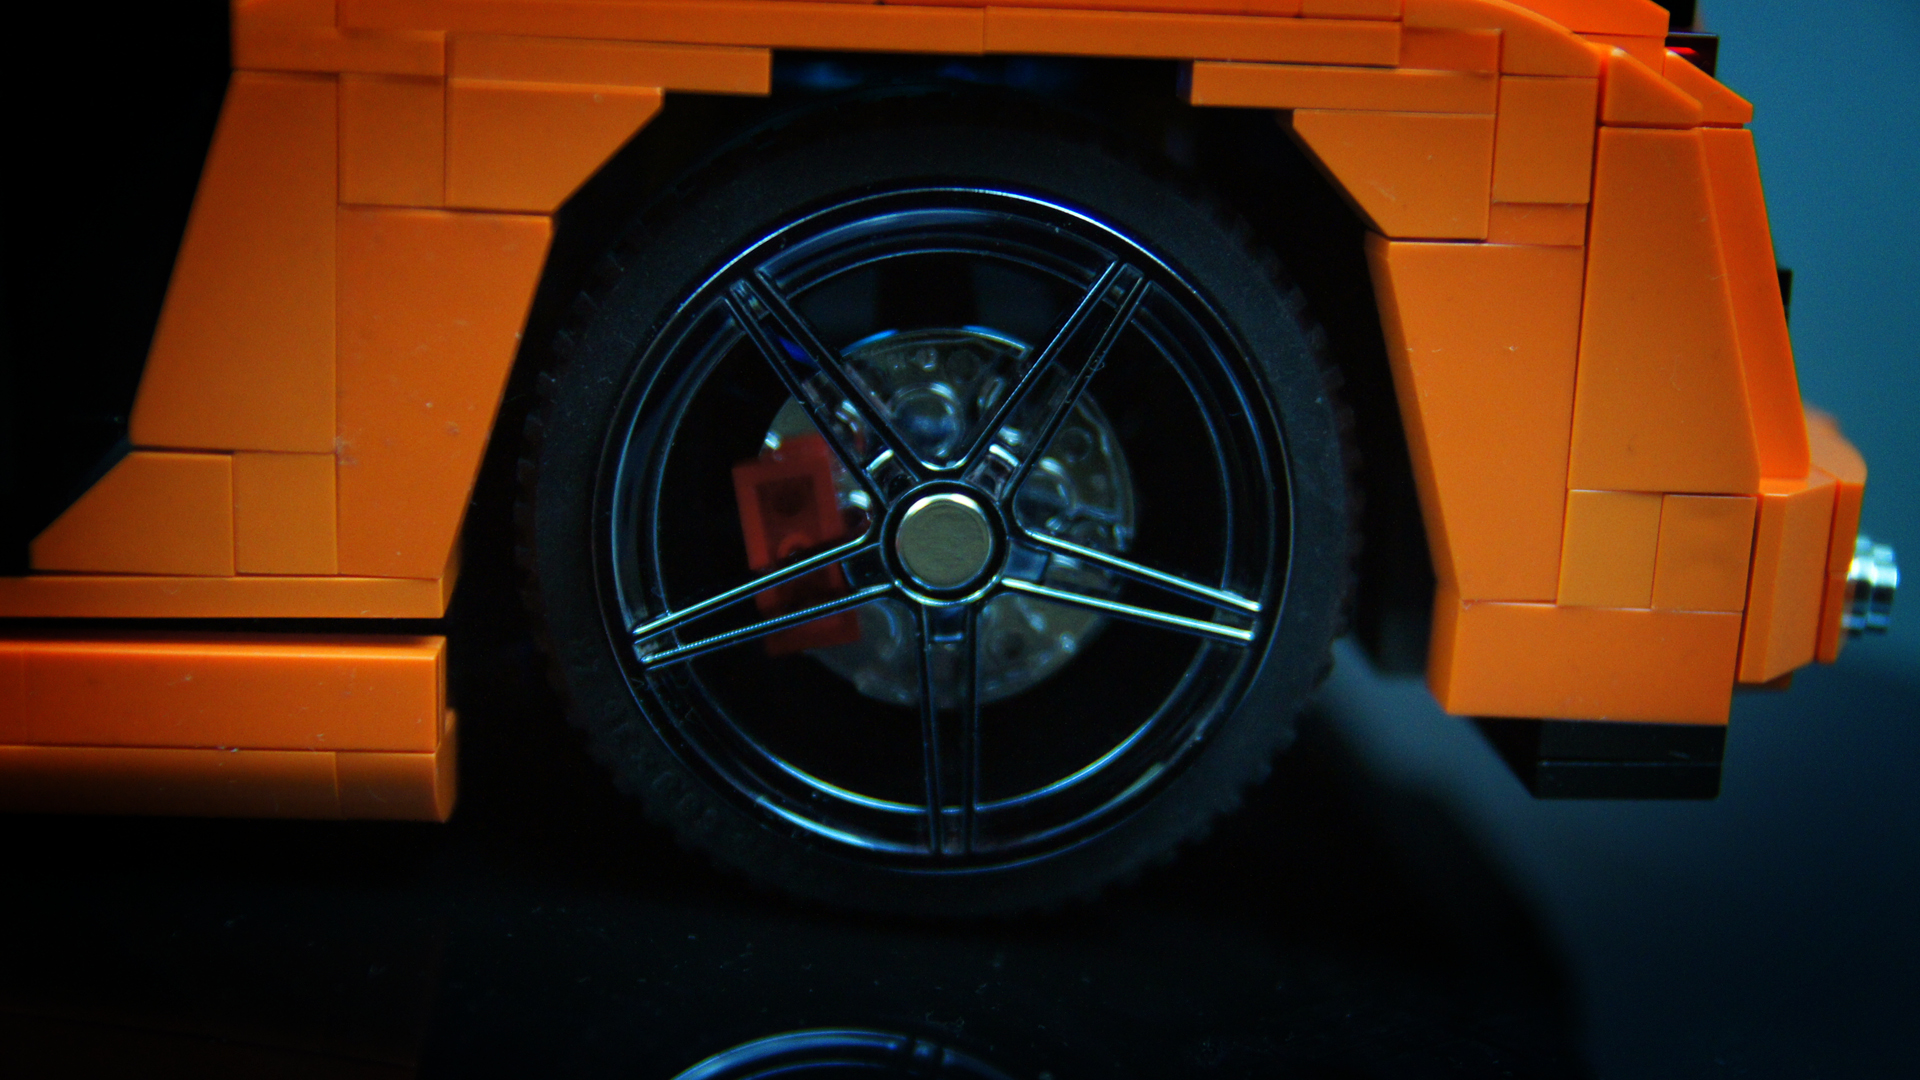
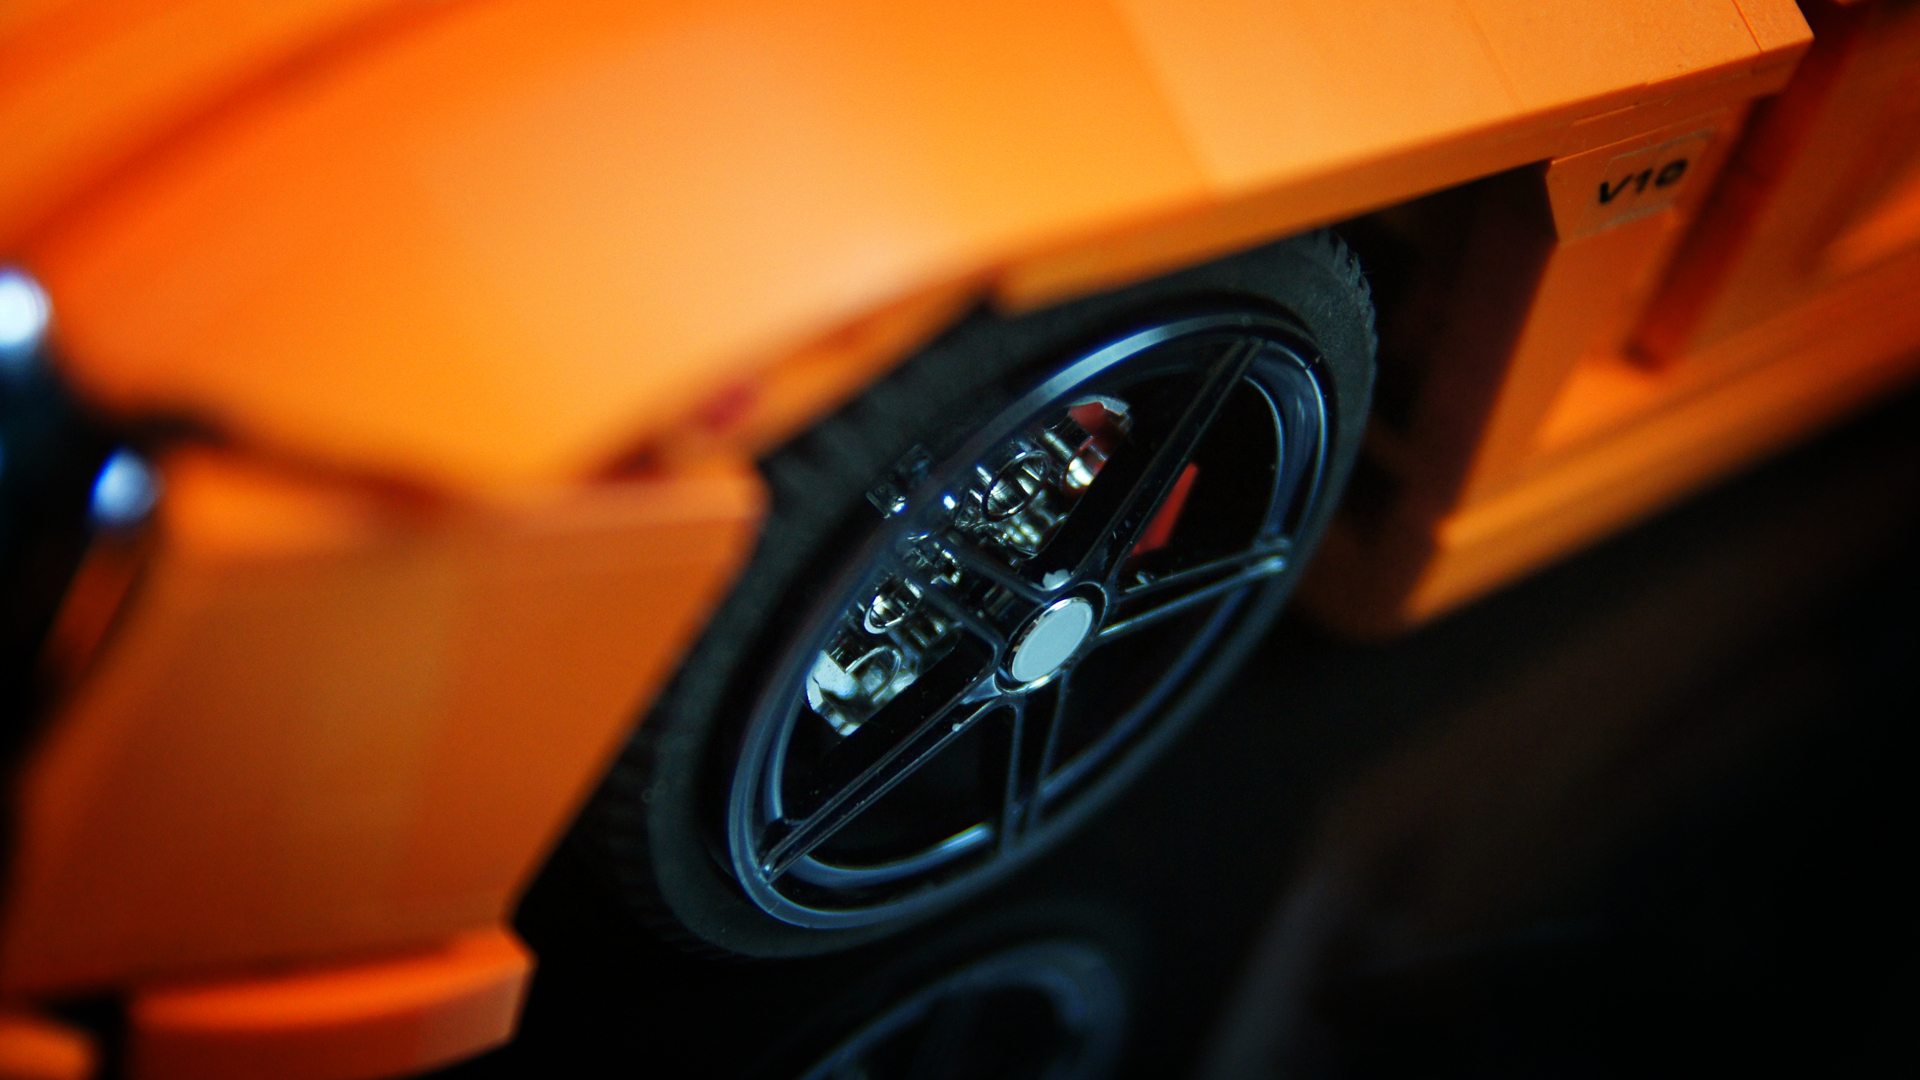
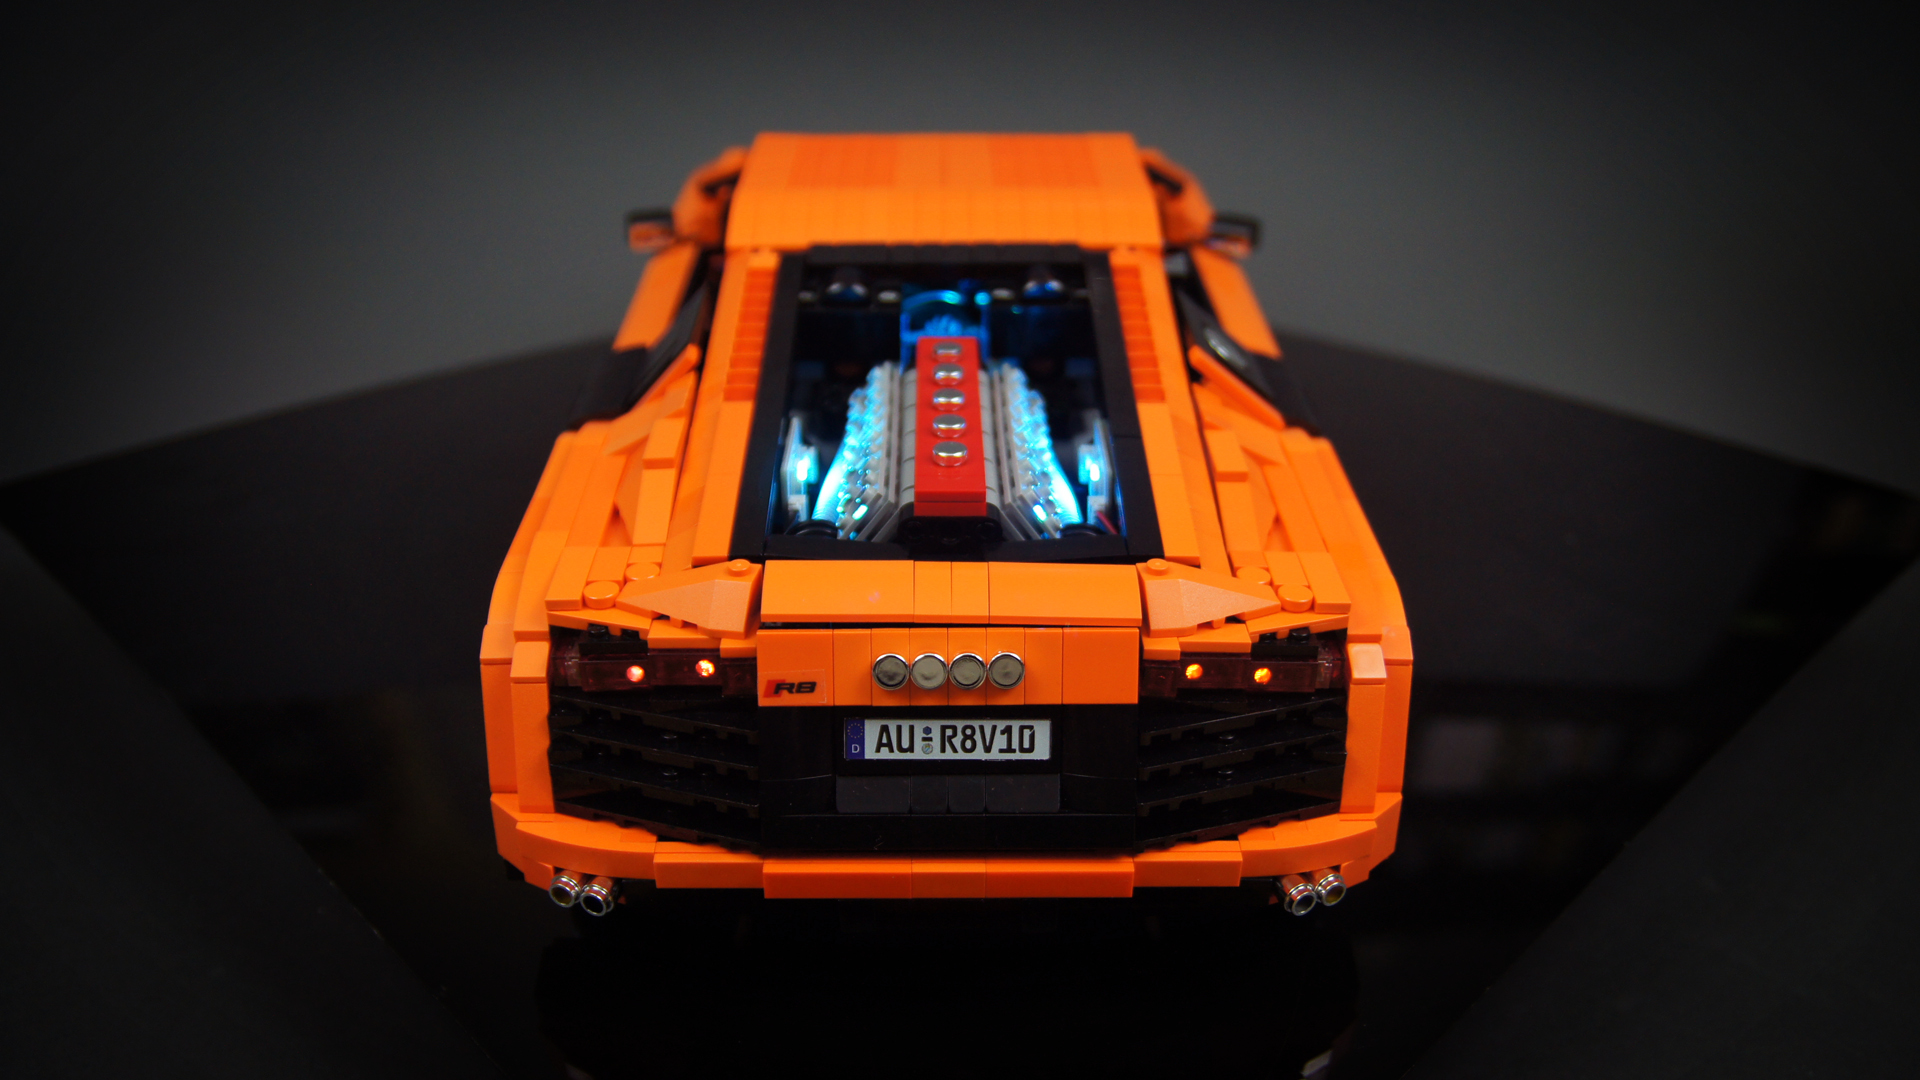
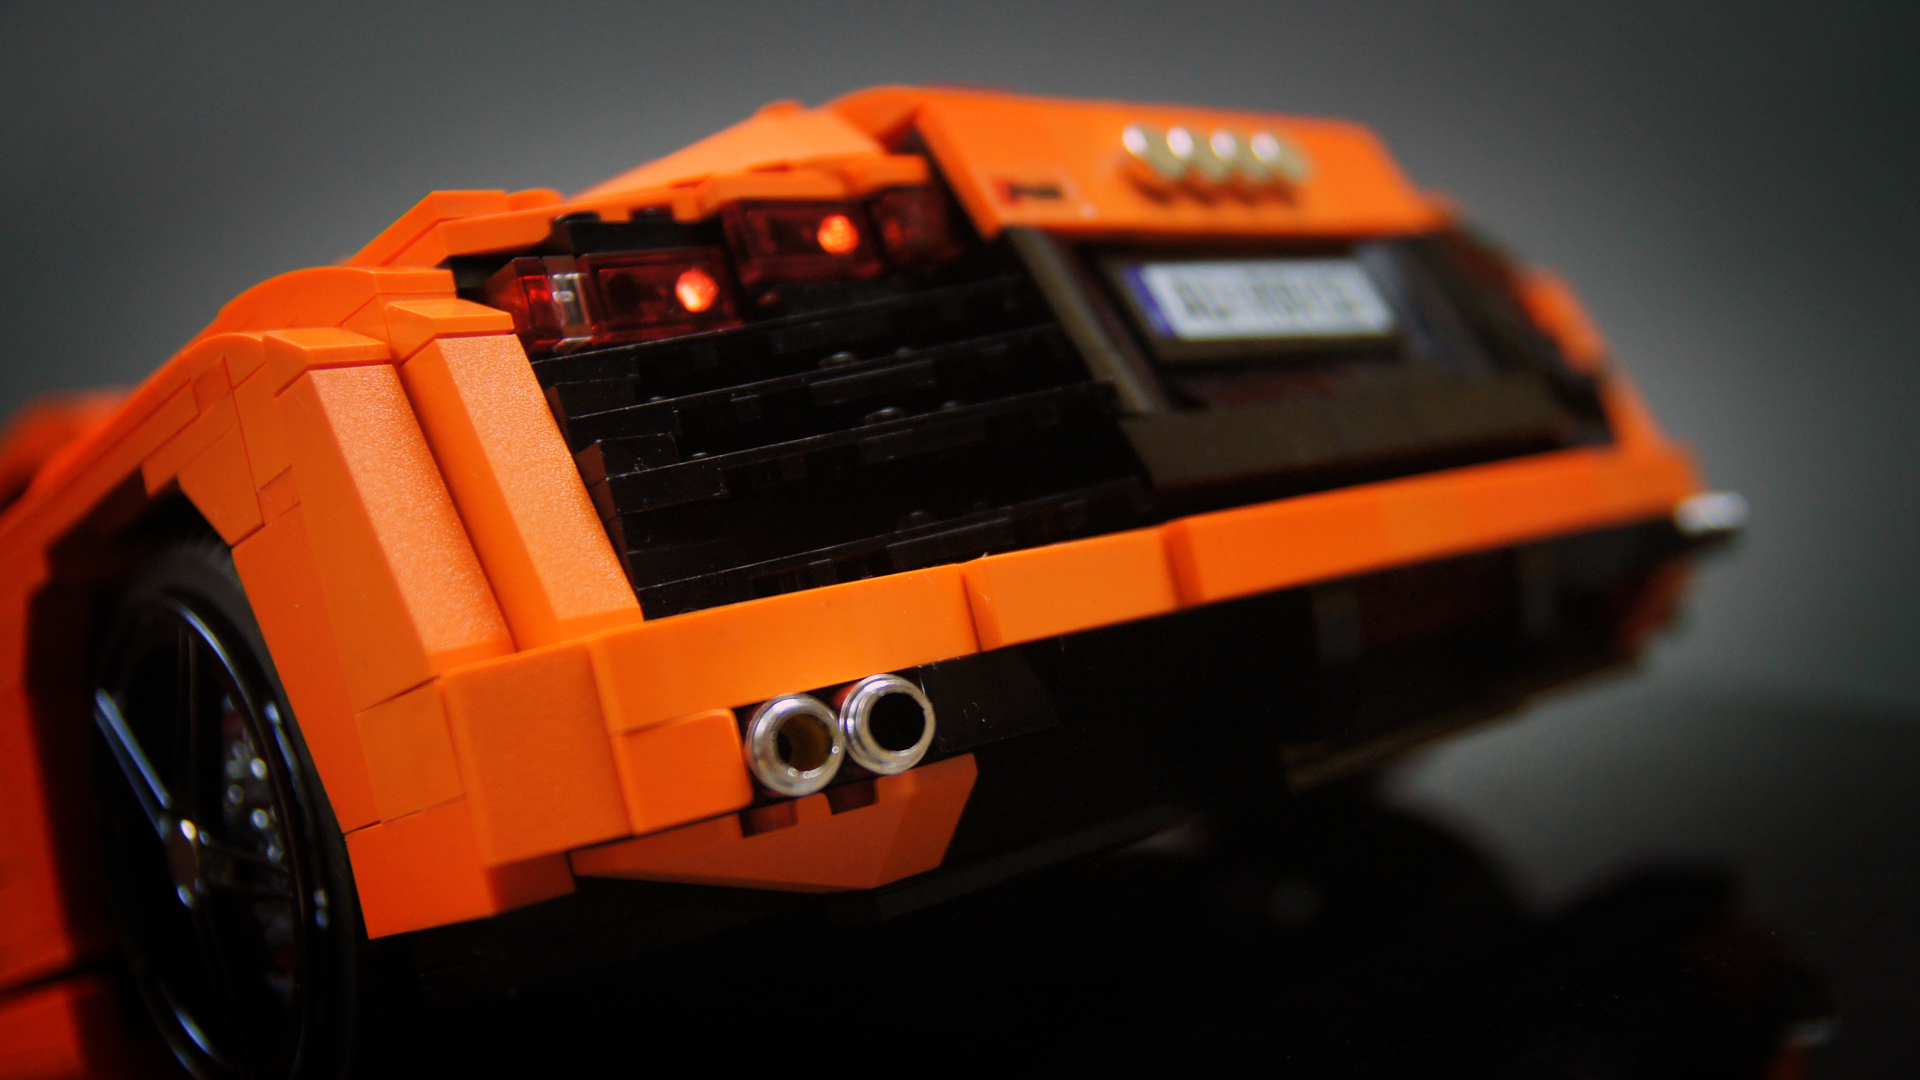
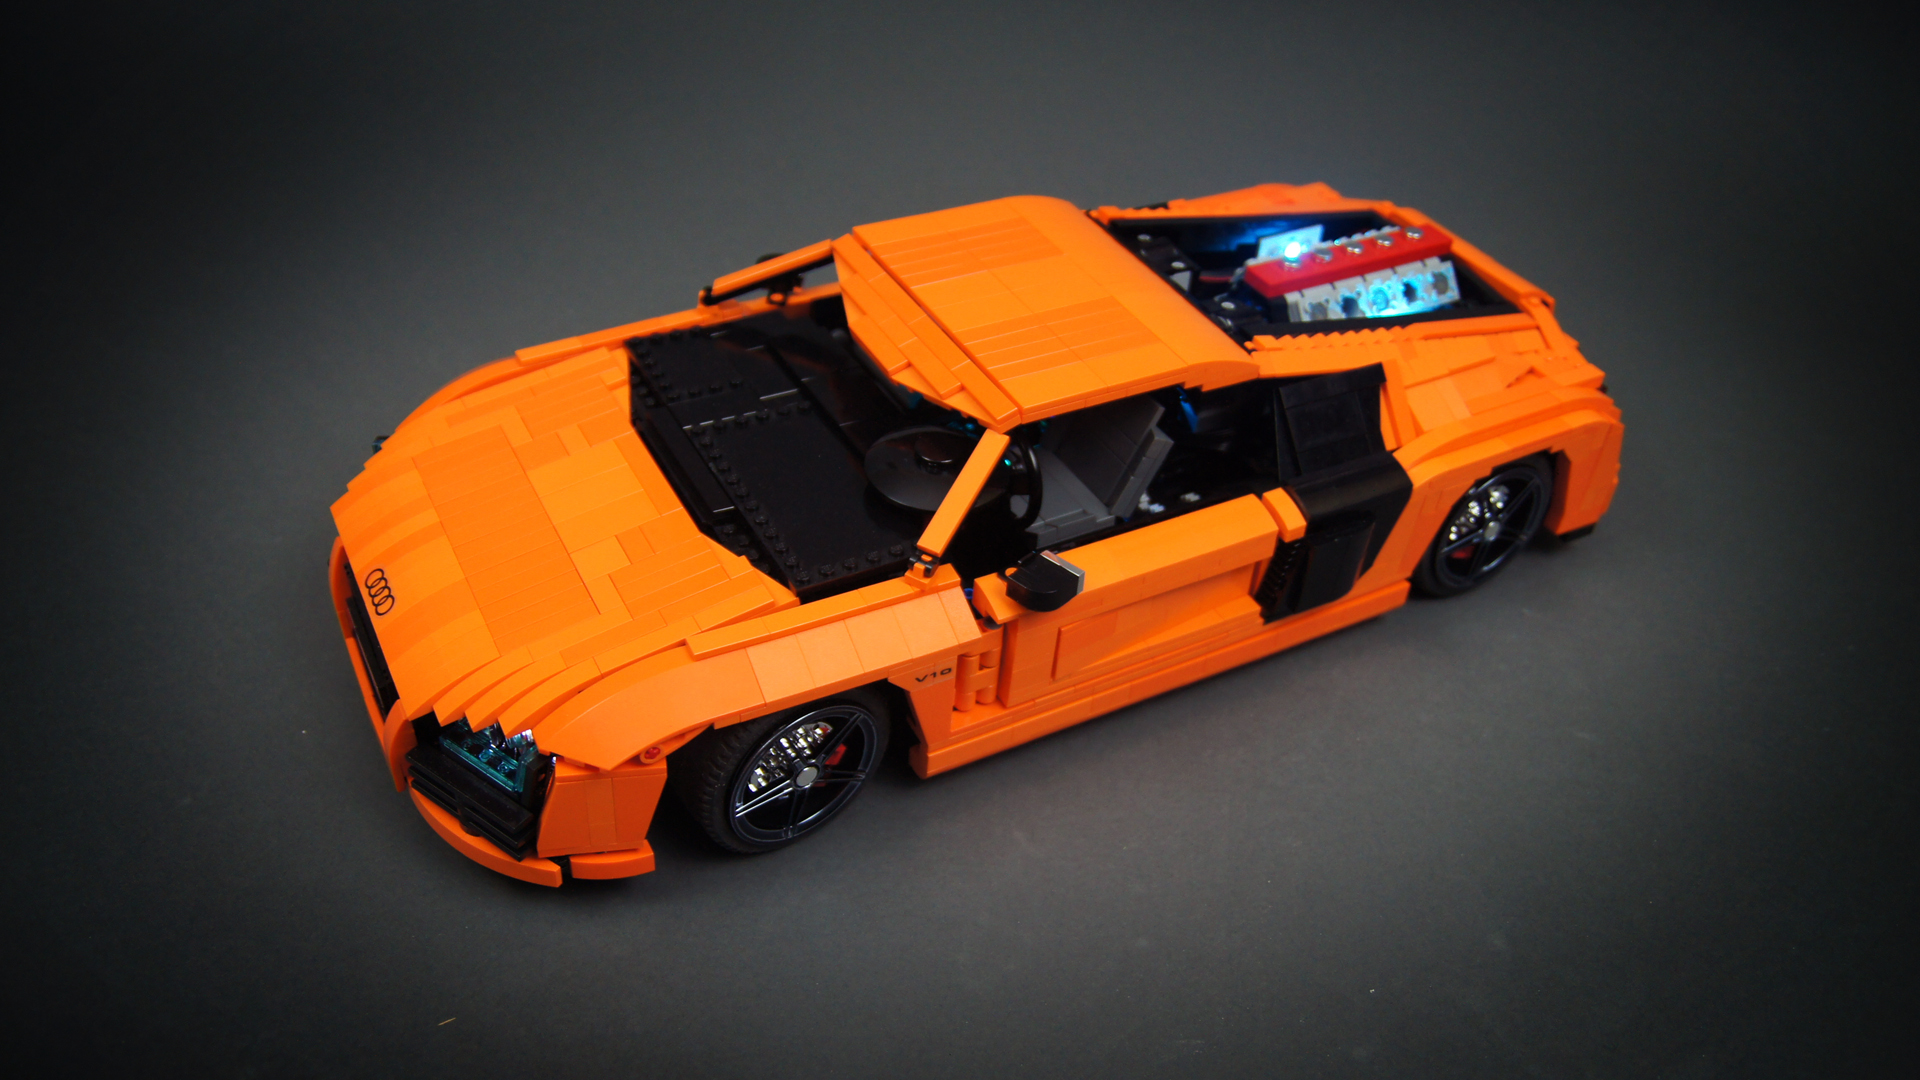
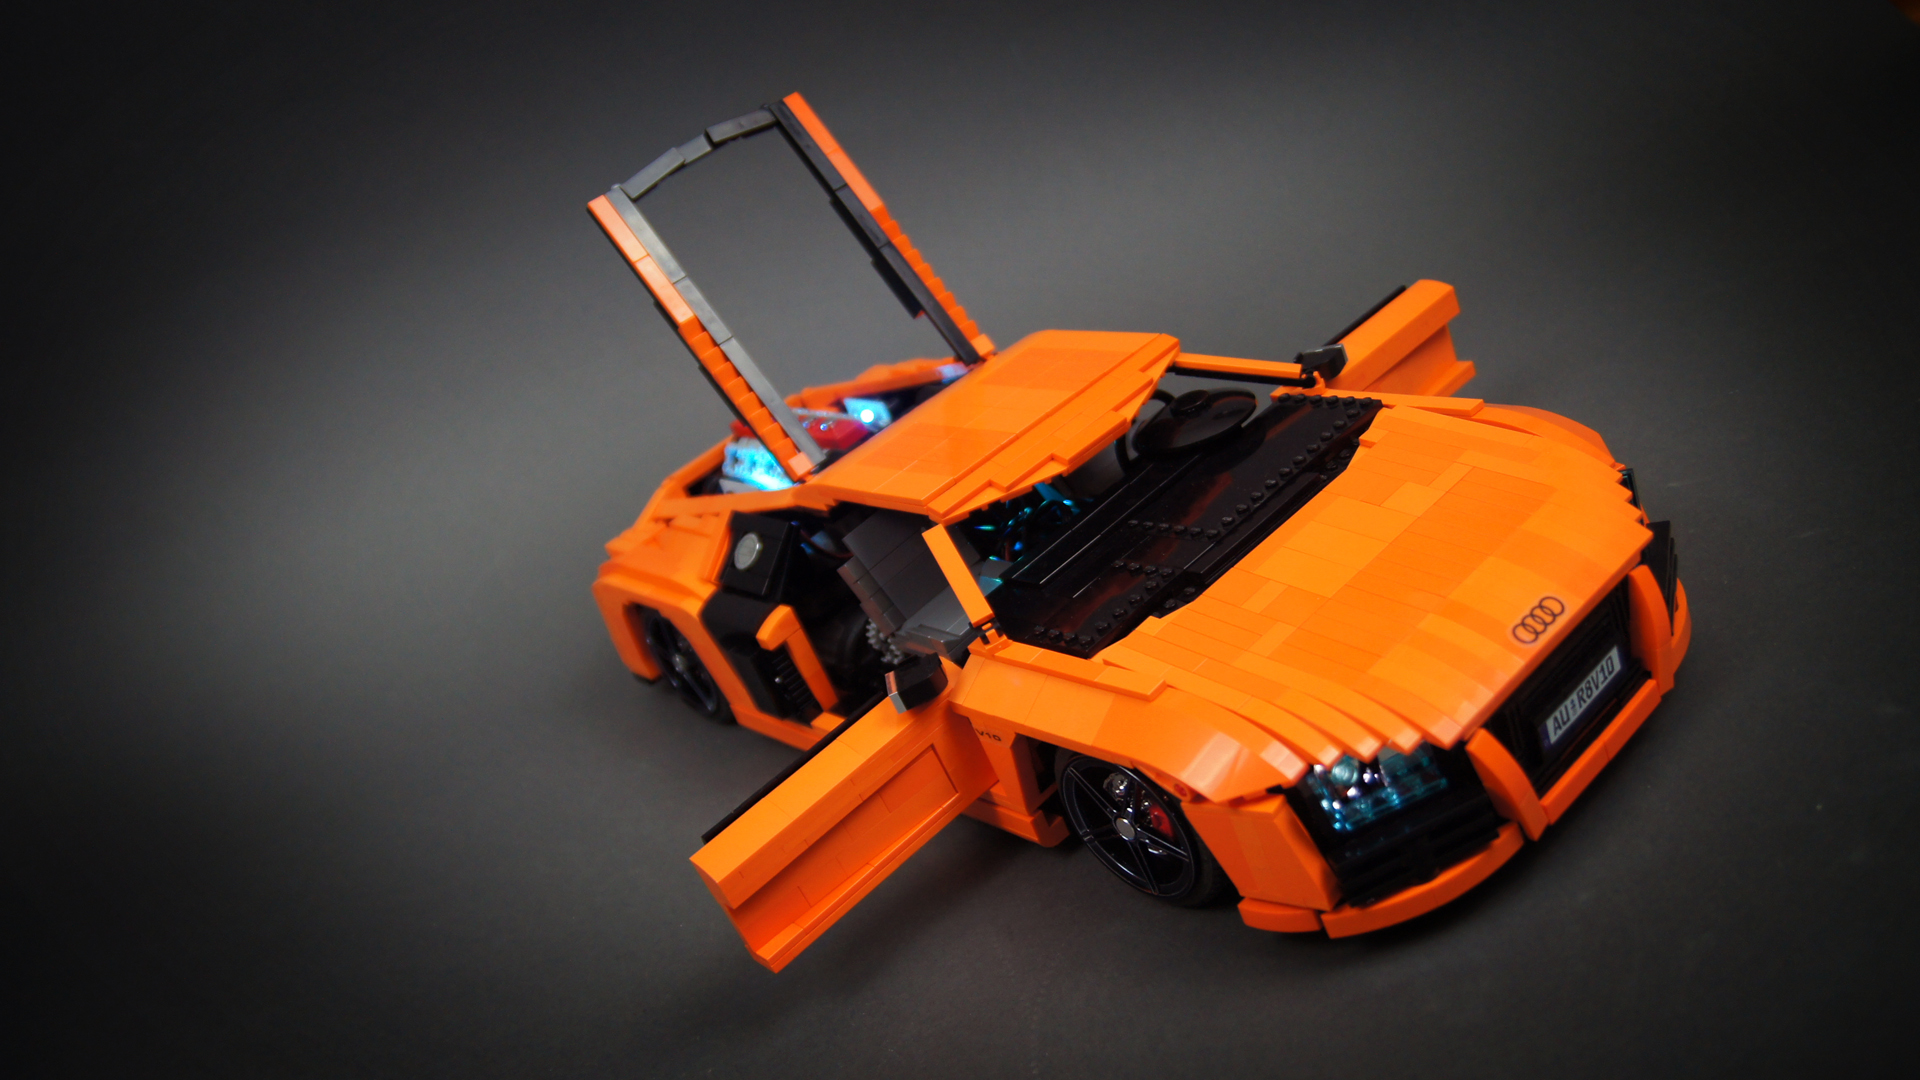
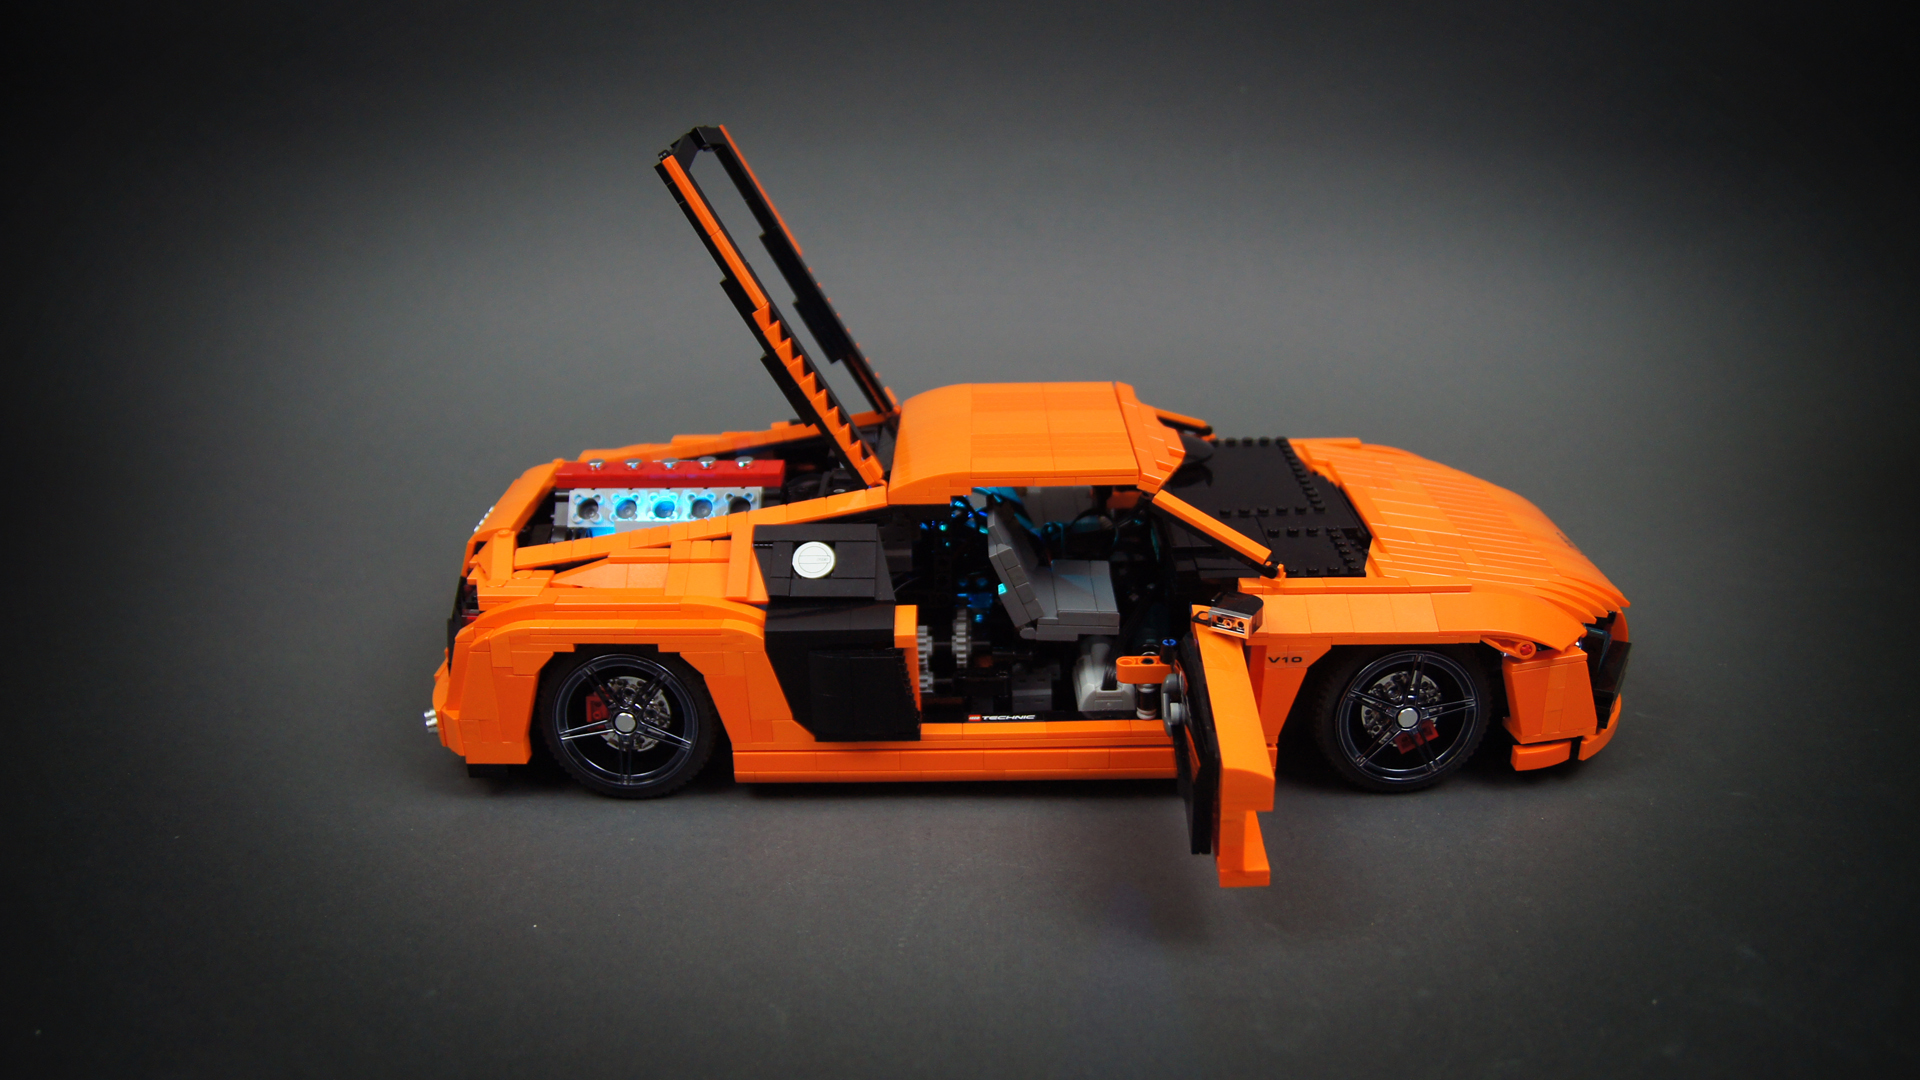
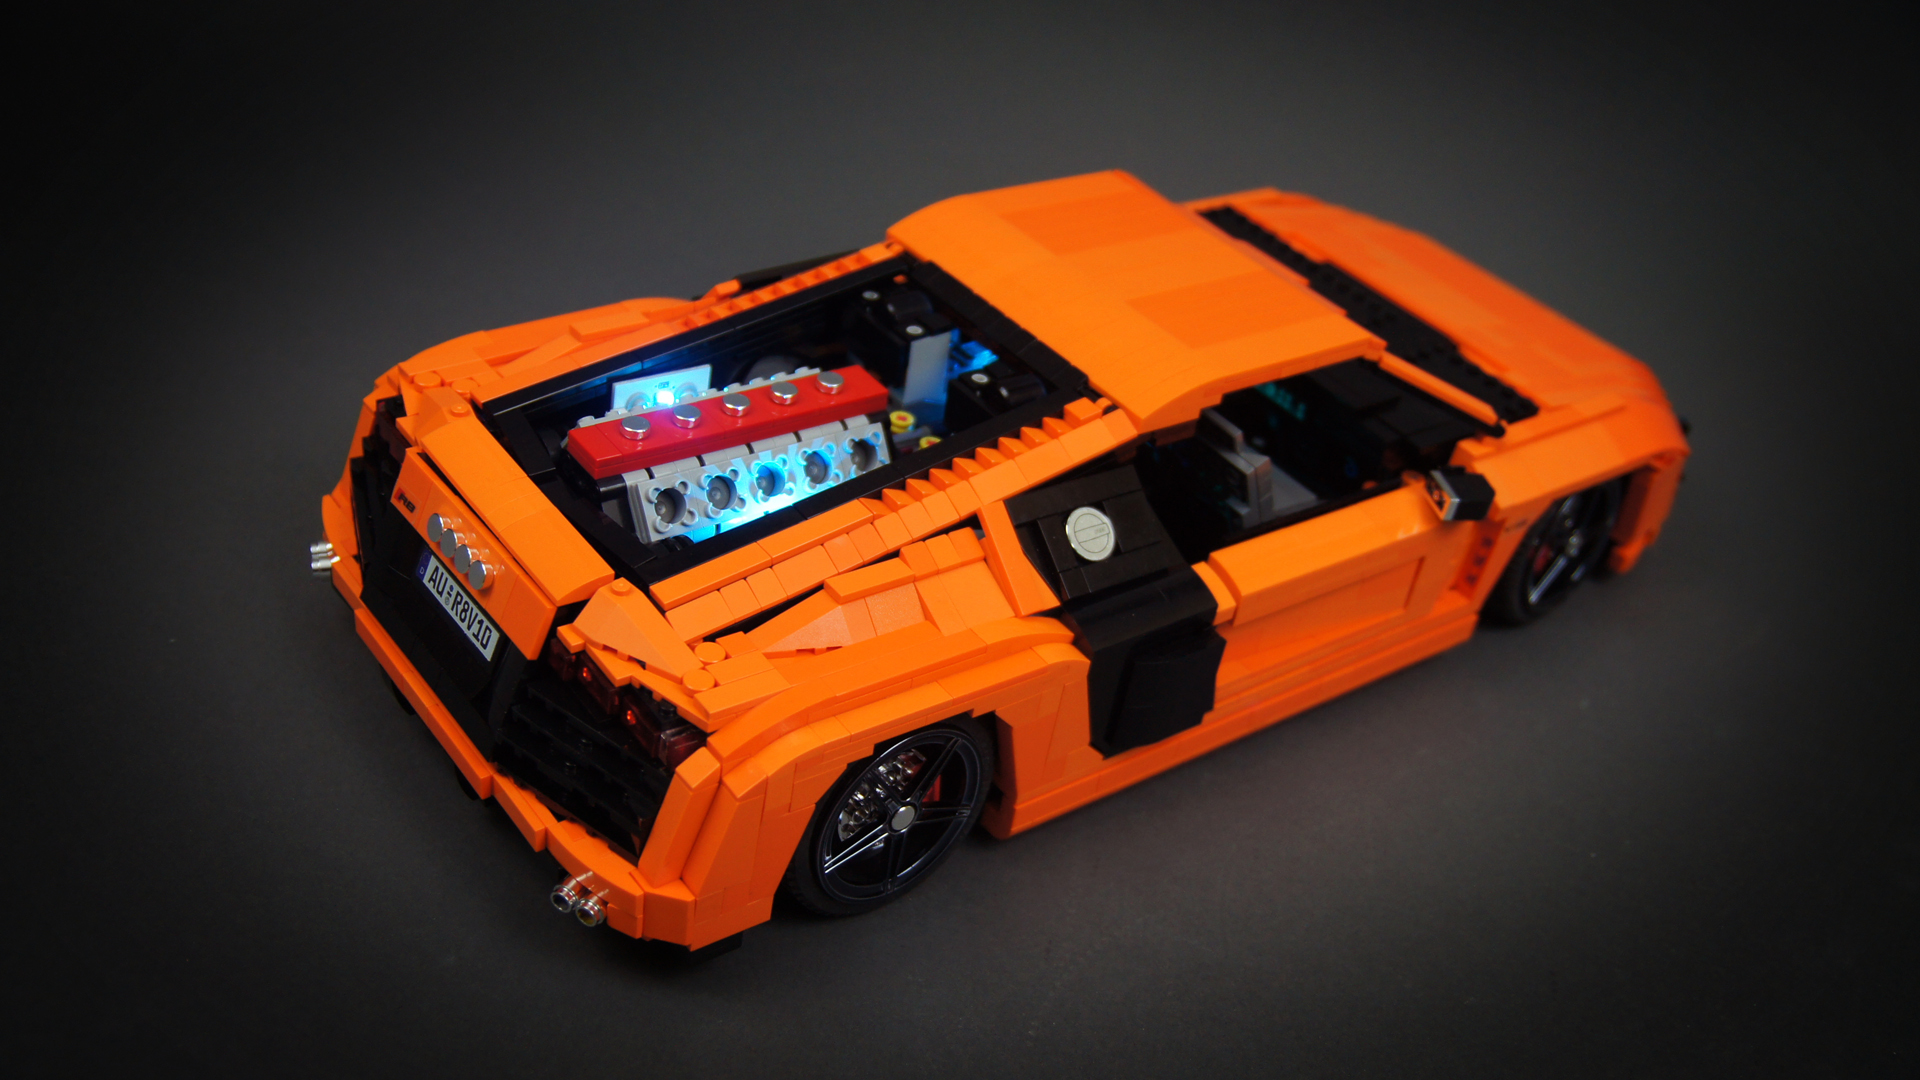
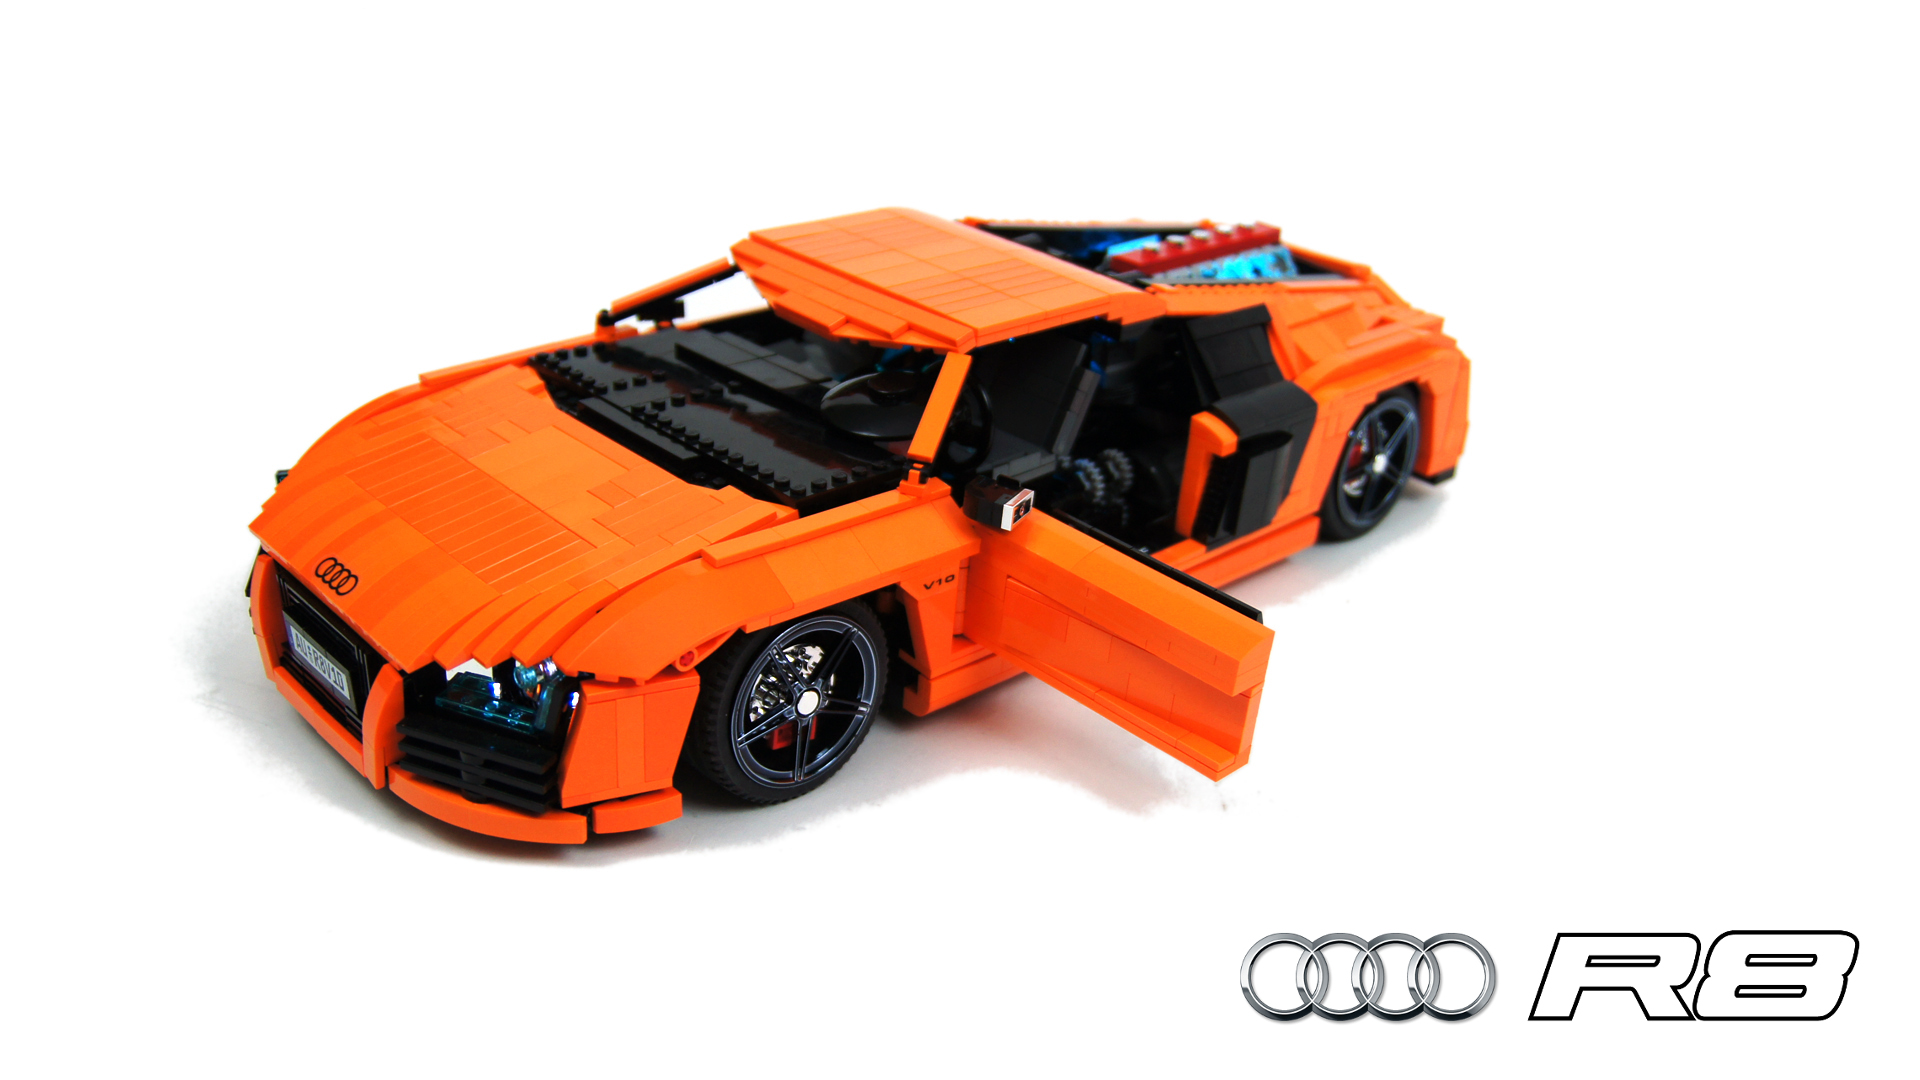
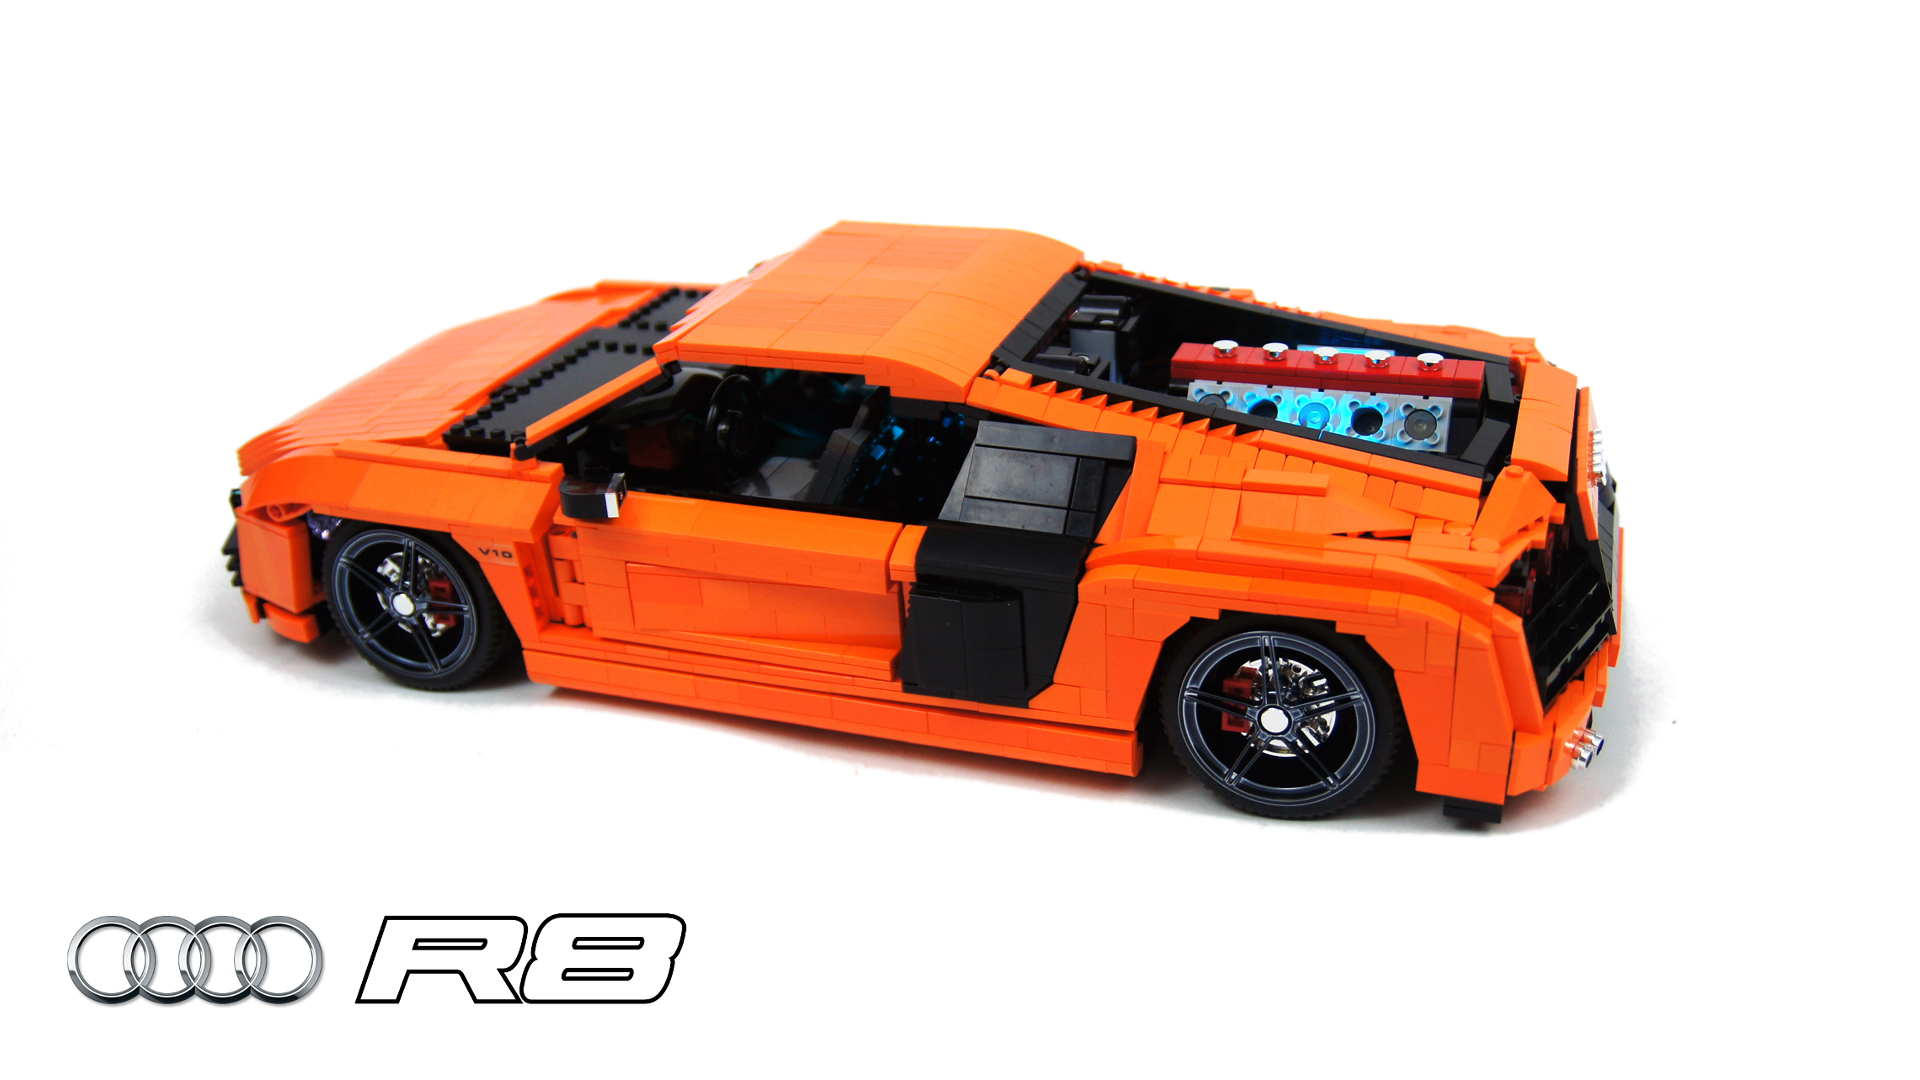
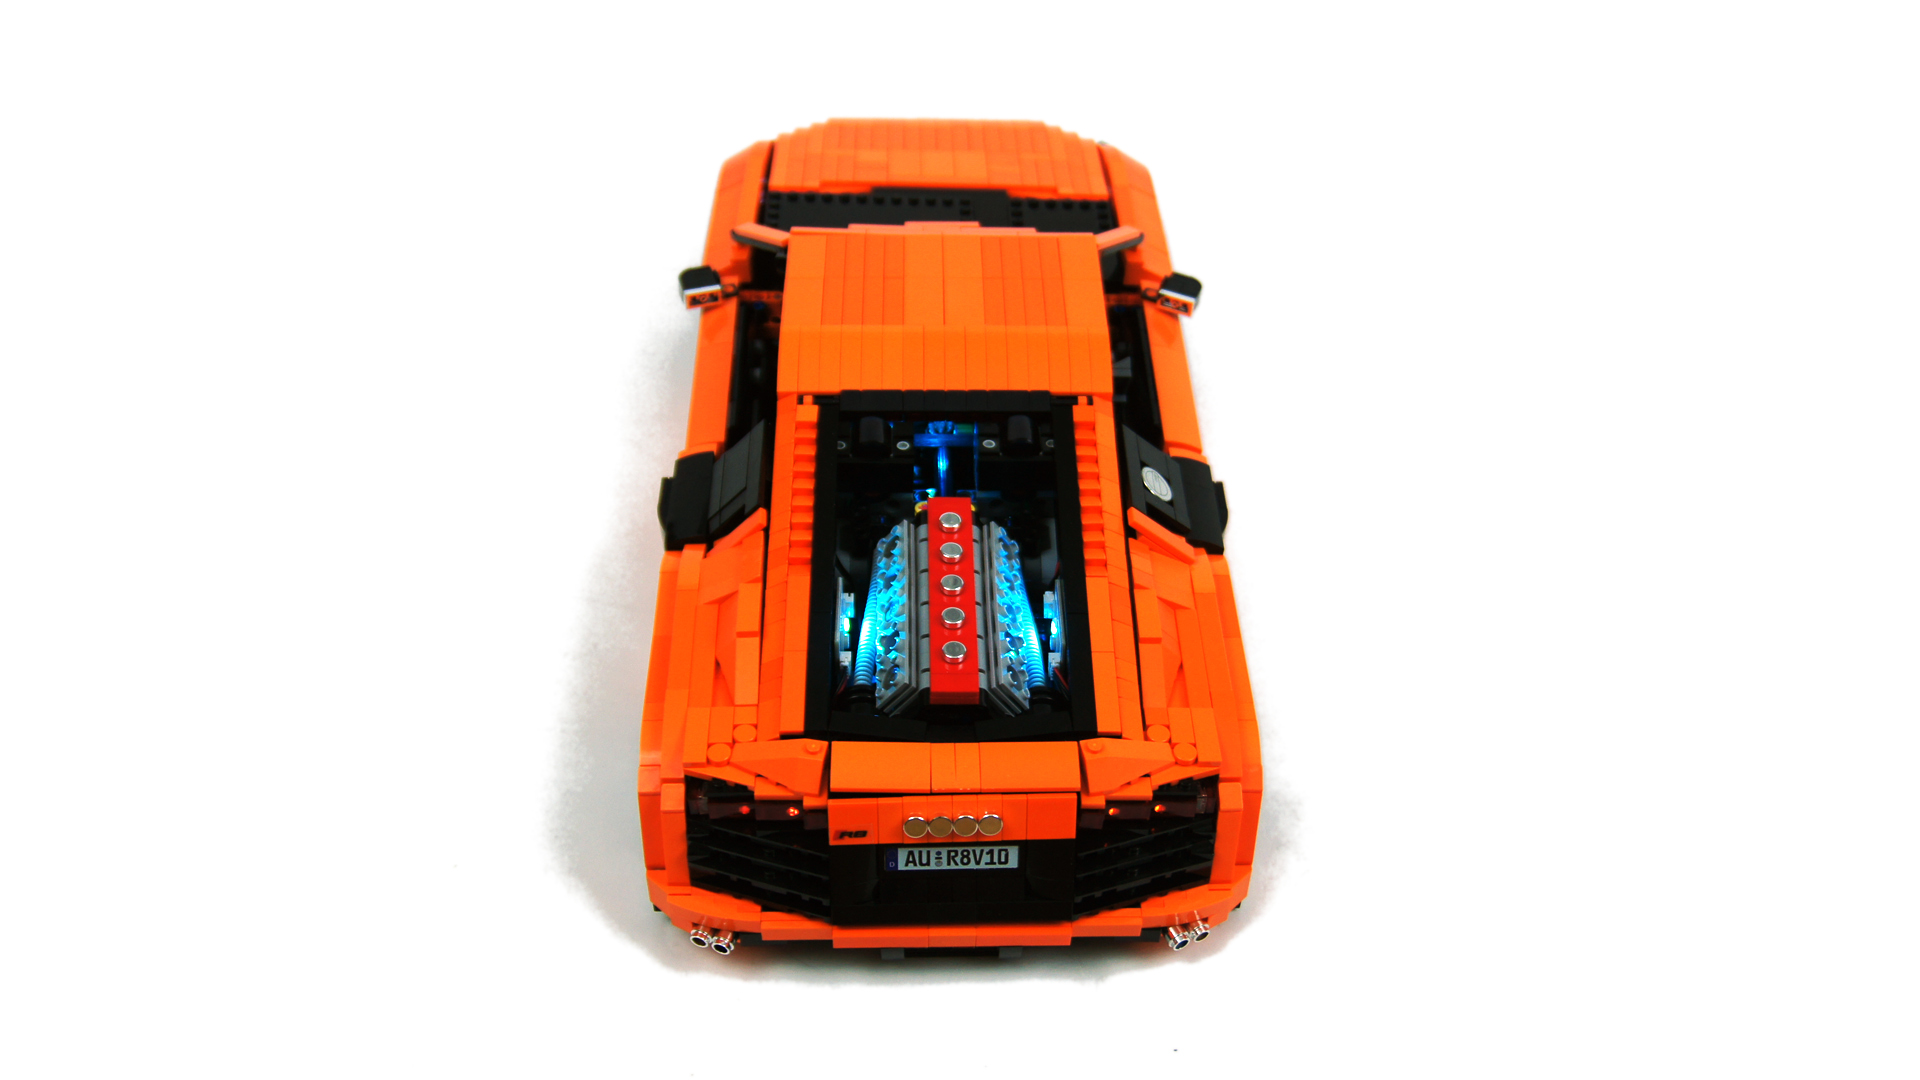
With so many elements squeezed tight in the front, I had no way of connecting steering system to the steering wheel, so I went with the simple solution of using a Micromotor to rotate it. The V10 engine was connected to the propulsion system in a complicated way, bypassing the gearbox so that it would run at constant speed at any gear, and kept running in idle gear, too. The rear wing was connected in pretty much the same way but from the bottom of the chassis, which allowed to use propulsion motors to control it when the gearbox was set on neutral. There were also fake disc brakes inside the wheels that rotated together with them because there was nothing I could connect them to in order to stop rotation, and there were doors that were assisted by damped shock absorbers. This required massive reinforcement of the cabin’s sides and it didn’t look like much on the video, but it felt very cool to use – the door would essentially snap shut or snap open slowly with only minimal manual input. For me it was a source of some contentment because I owned a pair of these shock absorbers for about 5 years and it was my first real opportunity to put them to use. The engine bay cover could be opened by hand, skeletal as it was.
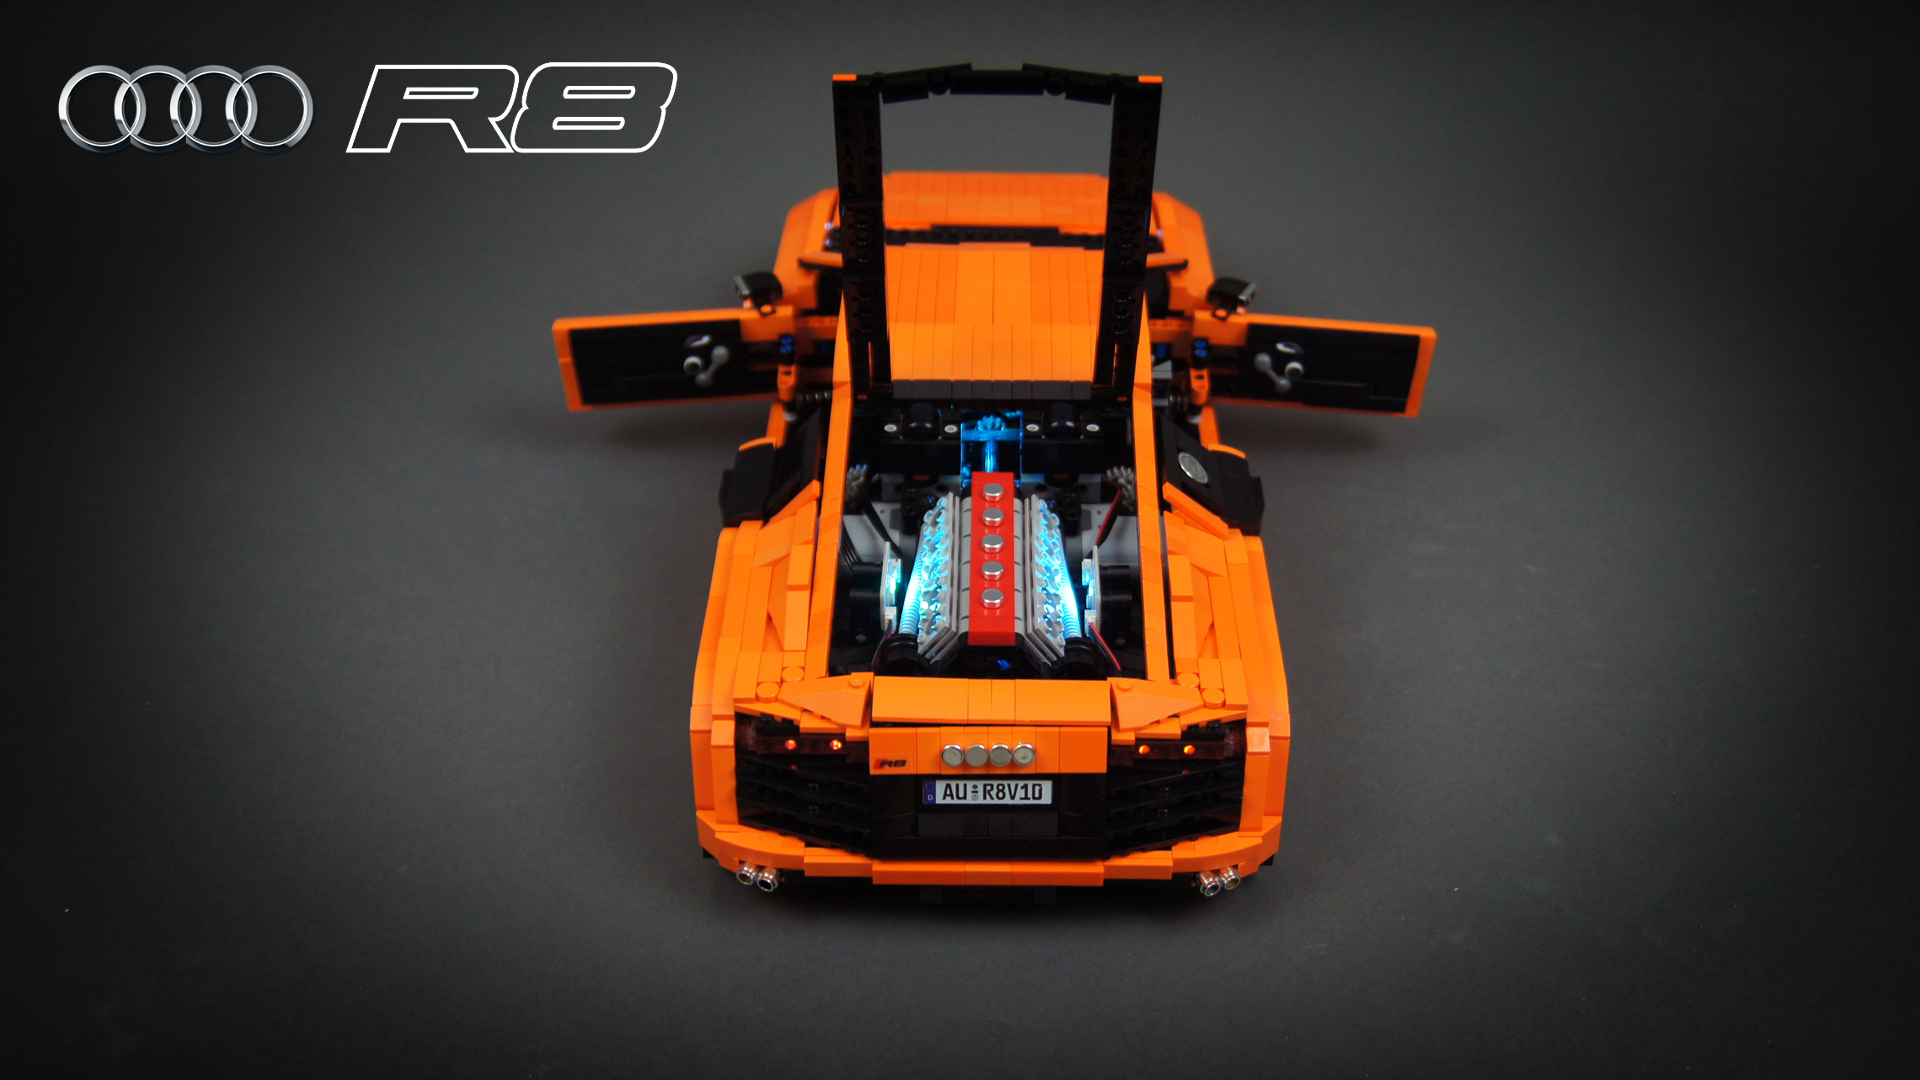
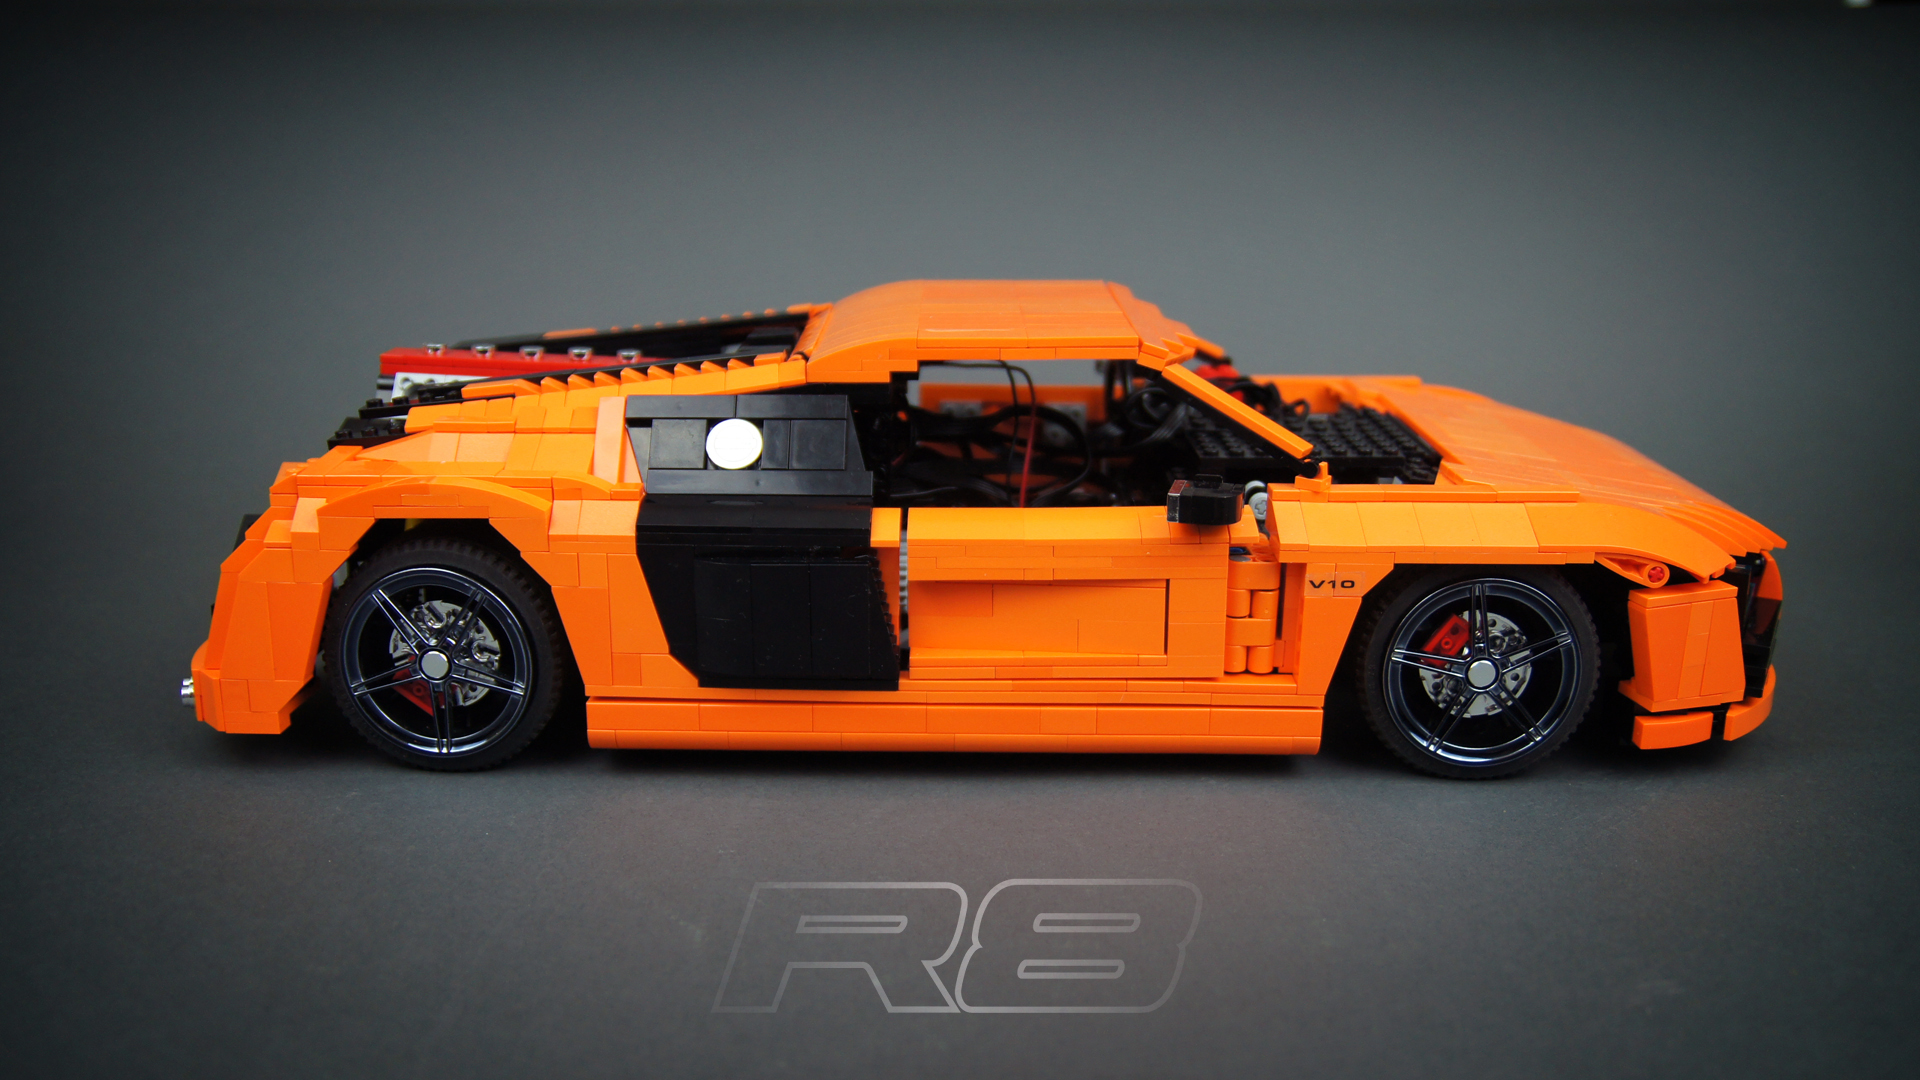
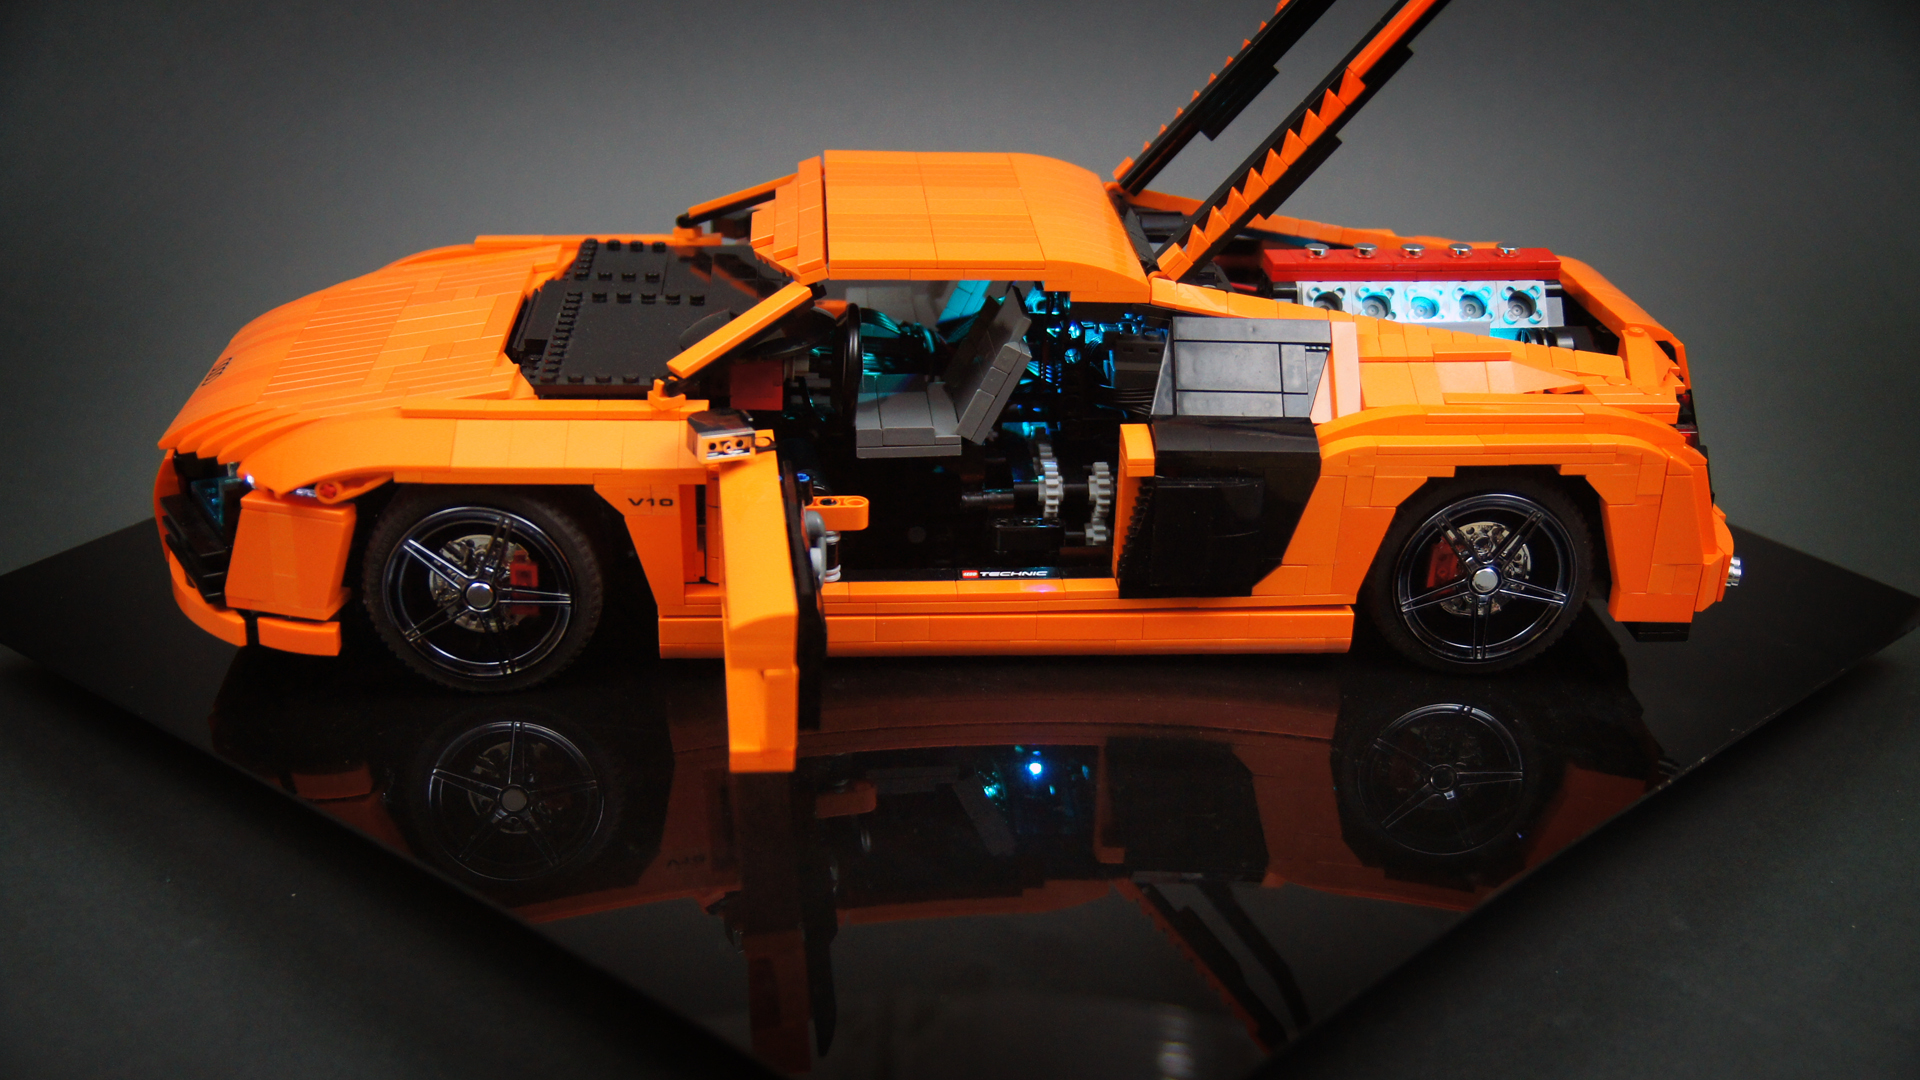
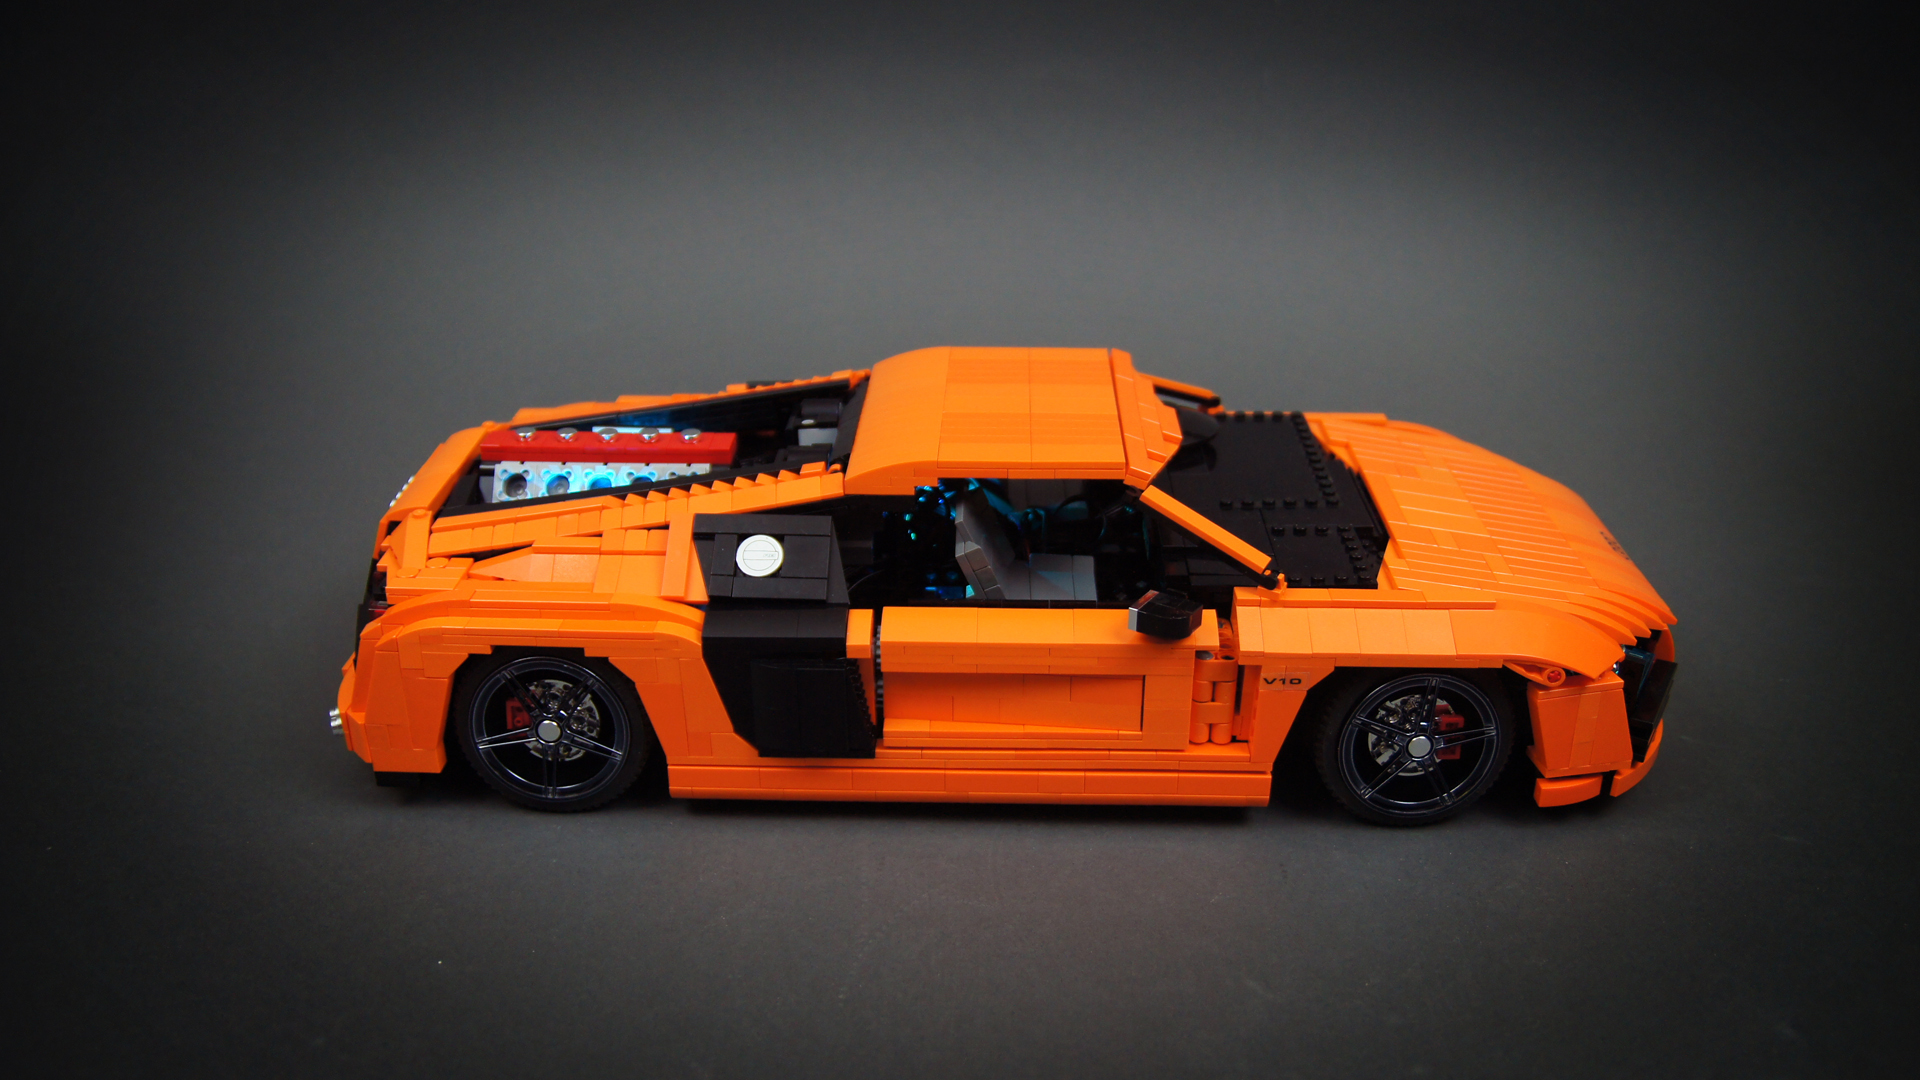
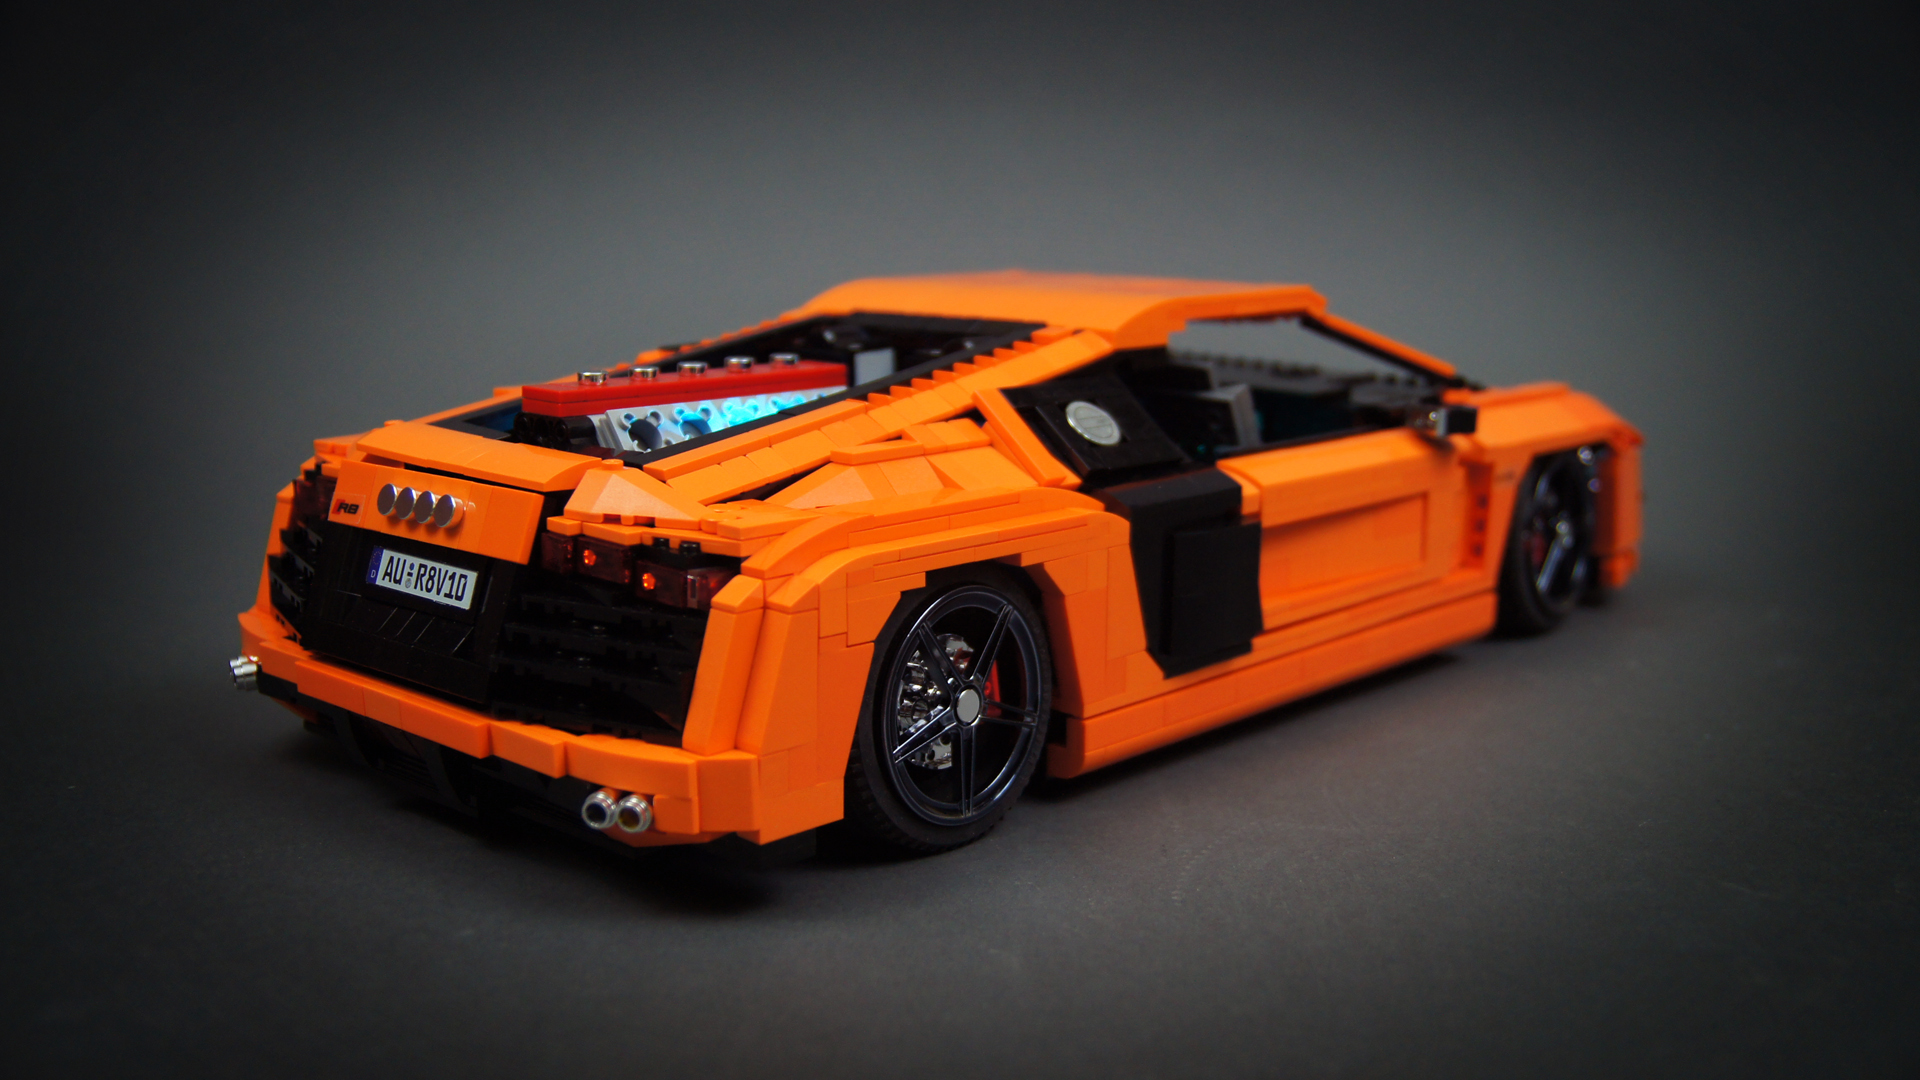
As for the look of the body, it had a number of shortcomings and not all of them resulting from limited palette of the orange pieces (which, I think had most impact on wheel arches). Most importantly, I was told countless times that the model needs V10, not V8, so I stretched the engine bay to accommodate for it. Because of the rear suspension and the gearbox the engine simply couldn’t be any lower or further forward, so it ended up spoiling the look of the model’s rear end – in fact, because of it the model could appear too long, even though the wheelbase and total body length were perfectly in accordance with the blueprints. The long engine also meant that I had just 1 stud of space between it and body’s rear end to use for the rear wing mechanism, which is why the mechanism was quite simple and the wing itself was very fragile. Still, it was quite different from the mechanism in my Ferrari Enzo.
No less important was the width: with studless chassis and studfull body and wheel hubs that did not allow half-studs spacing between them and the wheels, my options were: make each wheel half stud too narrow, make each wheel half stud too wide or make the entire body odd number of studs wide. The last solution would make the entire body complex, fragile and probably ugly, so I went with the first option, hoping that wheel covers would help a bit and that at least this would allow for relatively tight front fenders. In the end, it seemed like the right choice, but you could still see that the wheels should be just a little bit wider.
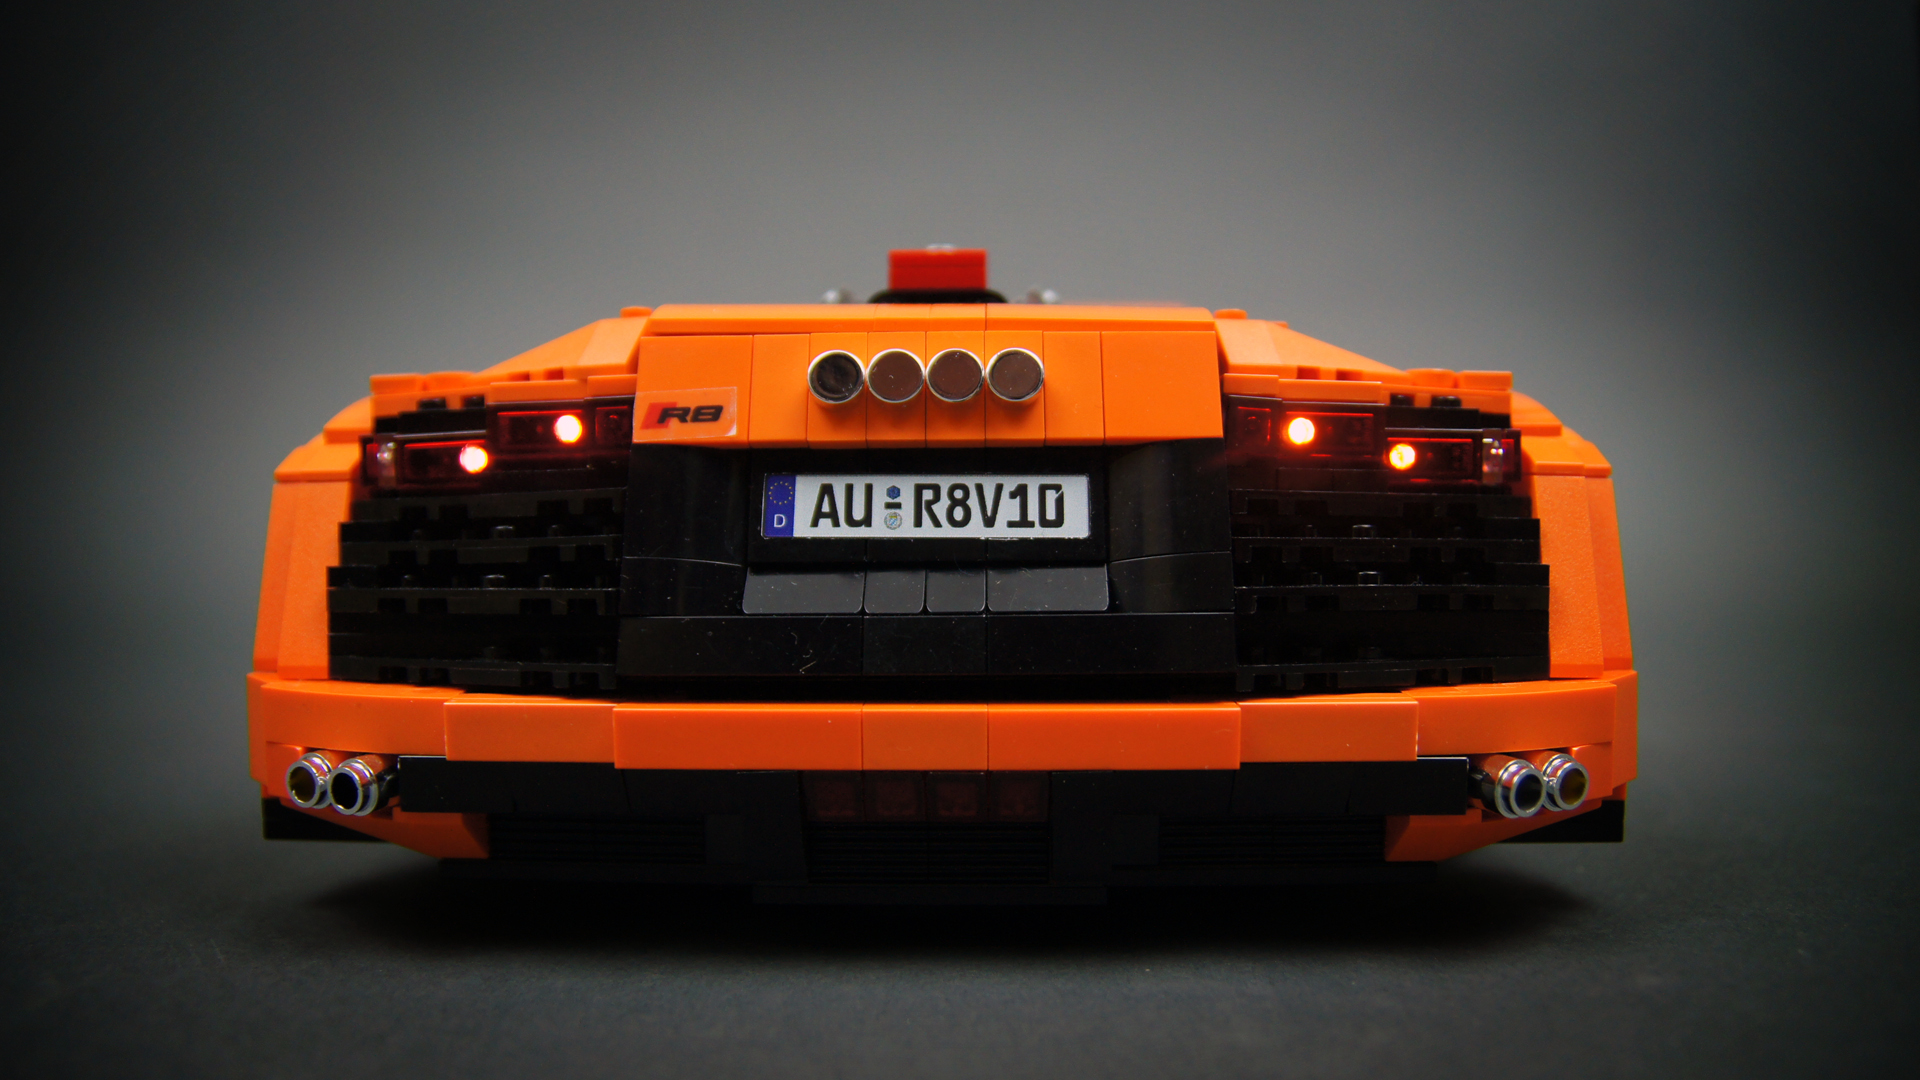
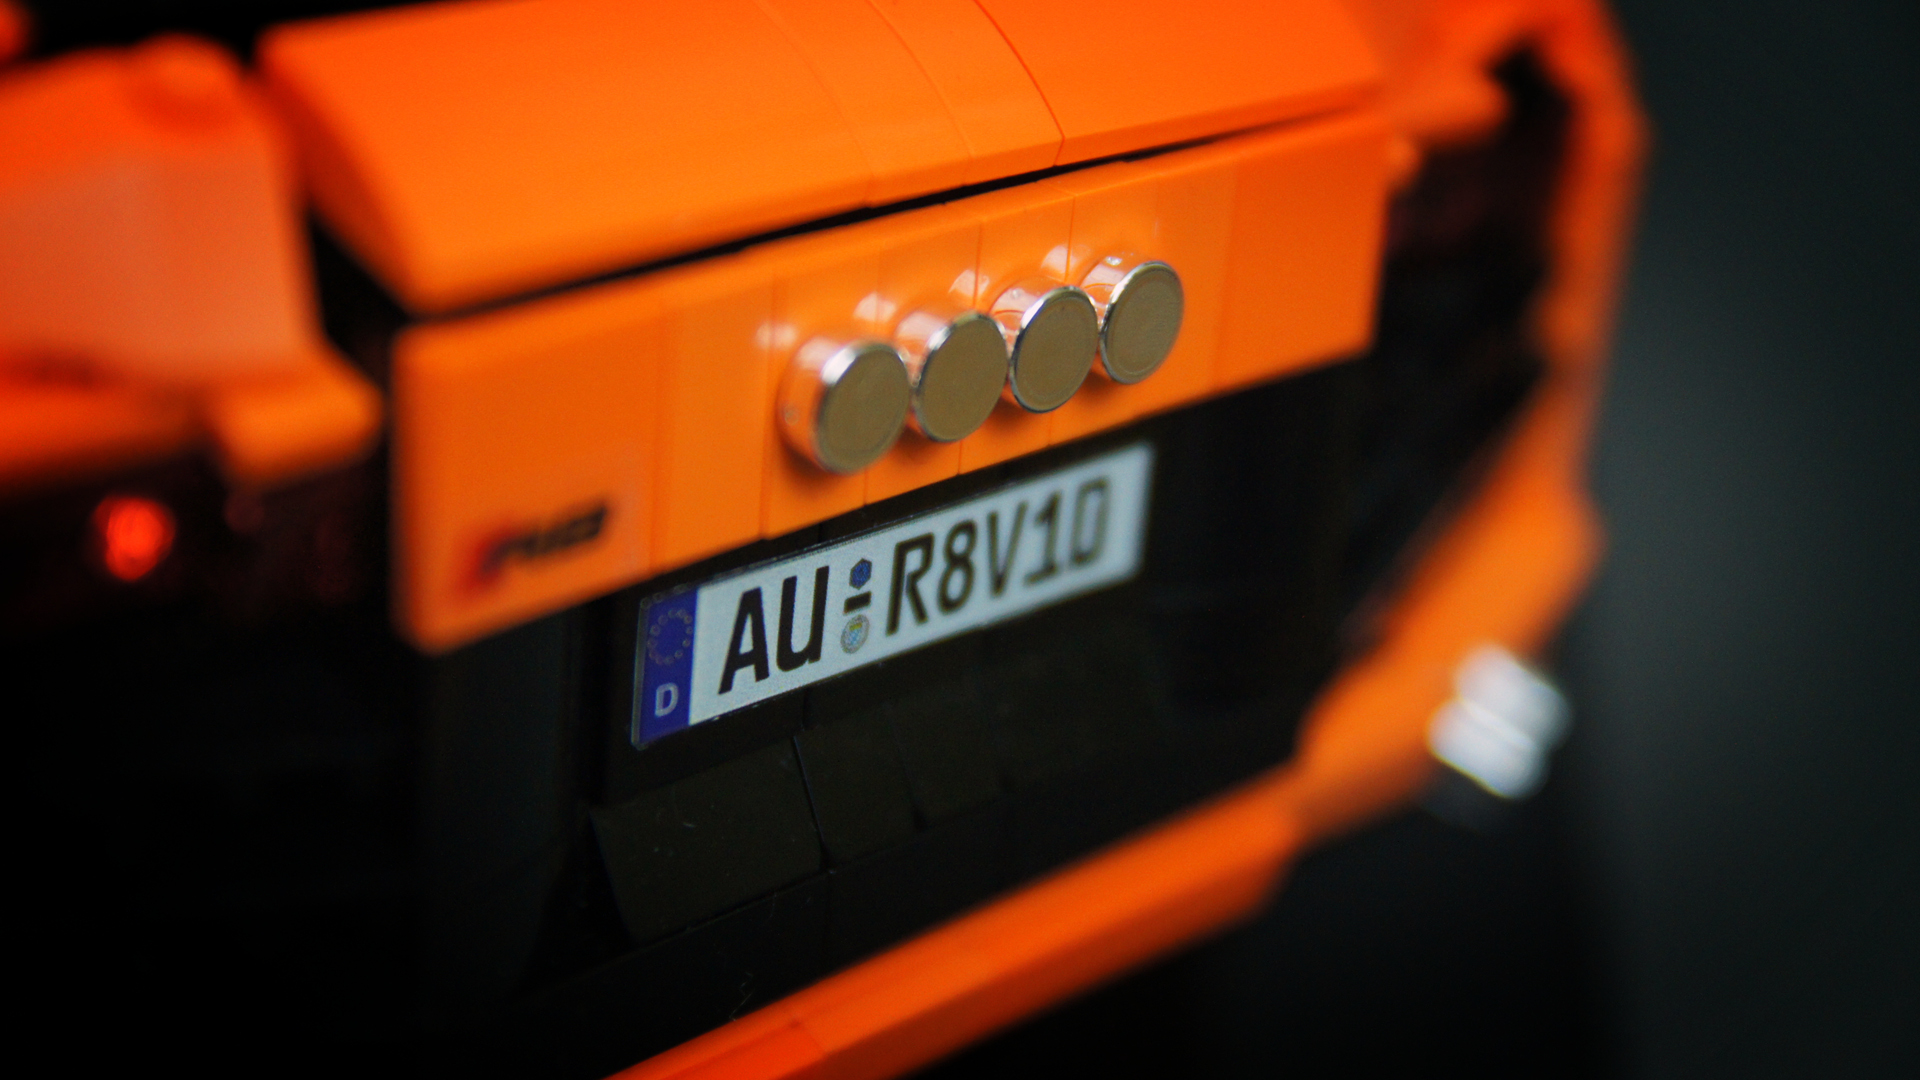
Finally, the V10 was in wrong place and sticking out of the rear window, for reasons mentioned above. I was also deeply unhappy with tail lights, but I simply couldn’t find any Lego pieces that would allow to recreate their shapes better. Also, because there were no hinge plates nor hinge bricks available in orange, I had to mount the doors on studless hinges integrated into the chassis, which didn’t look well but gave me the chance to make them strong enough to allow using the damped shock absorbers. Still, making the doors work took me easily a week.
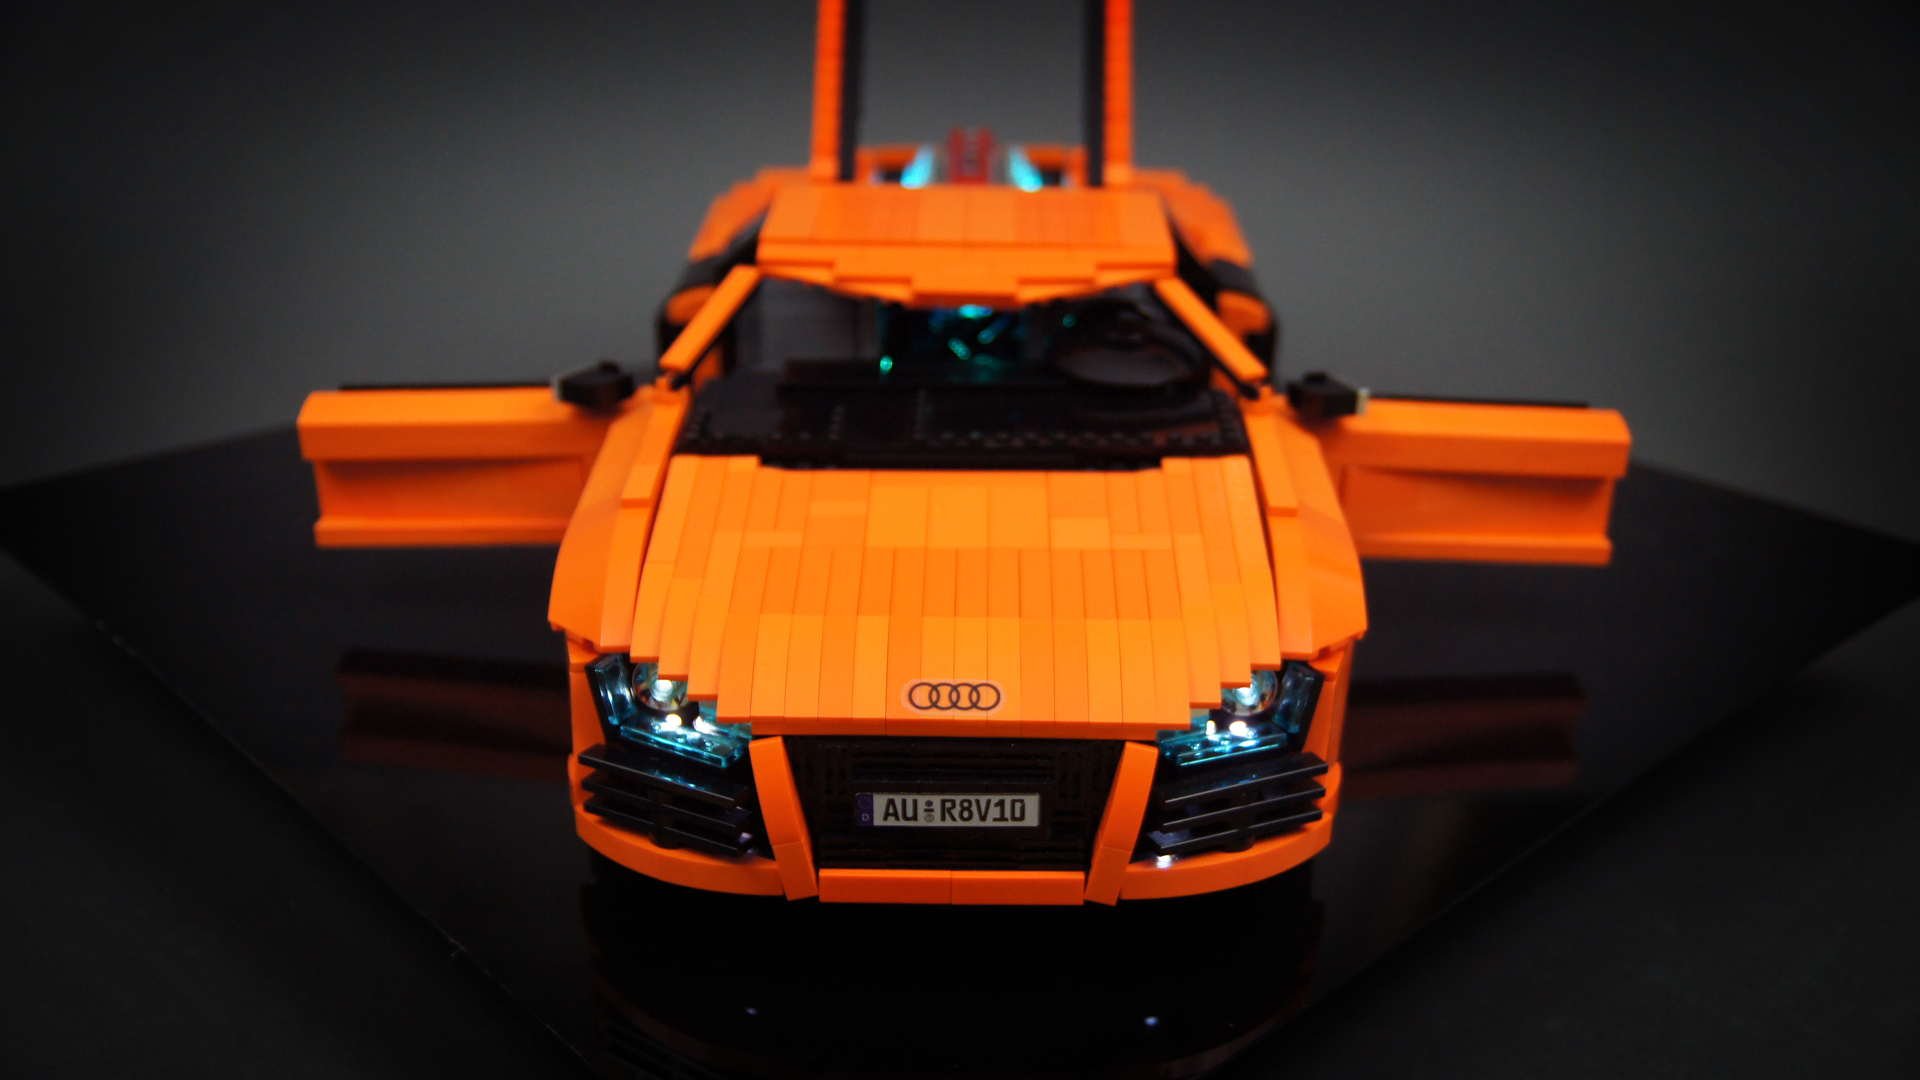
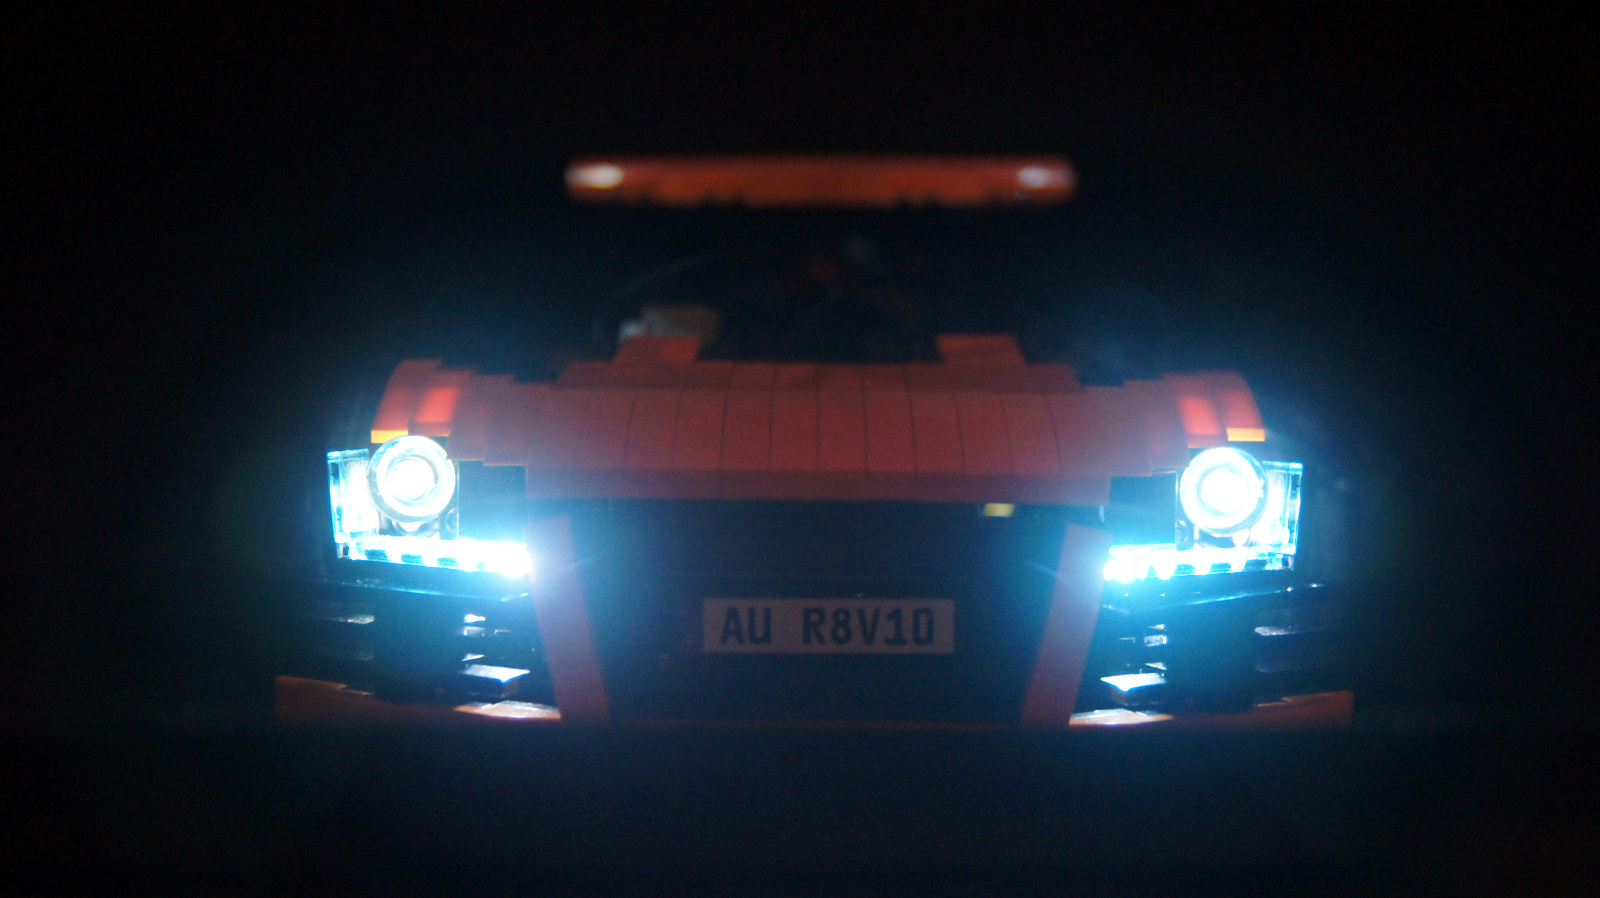
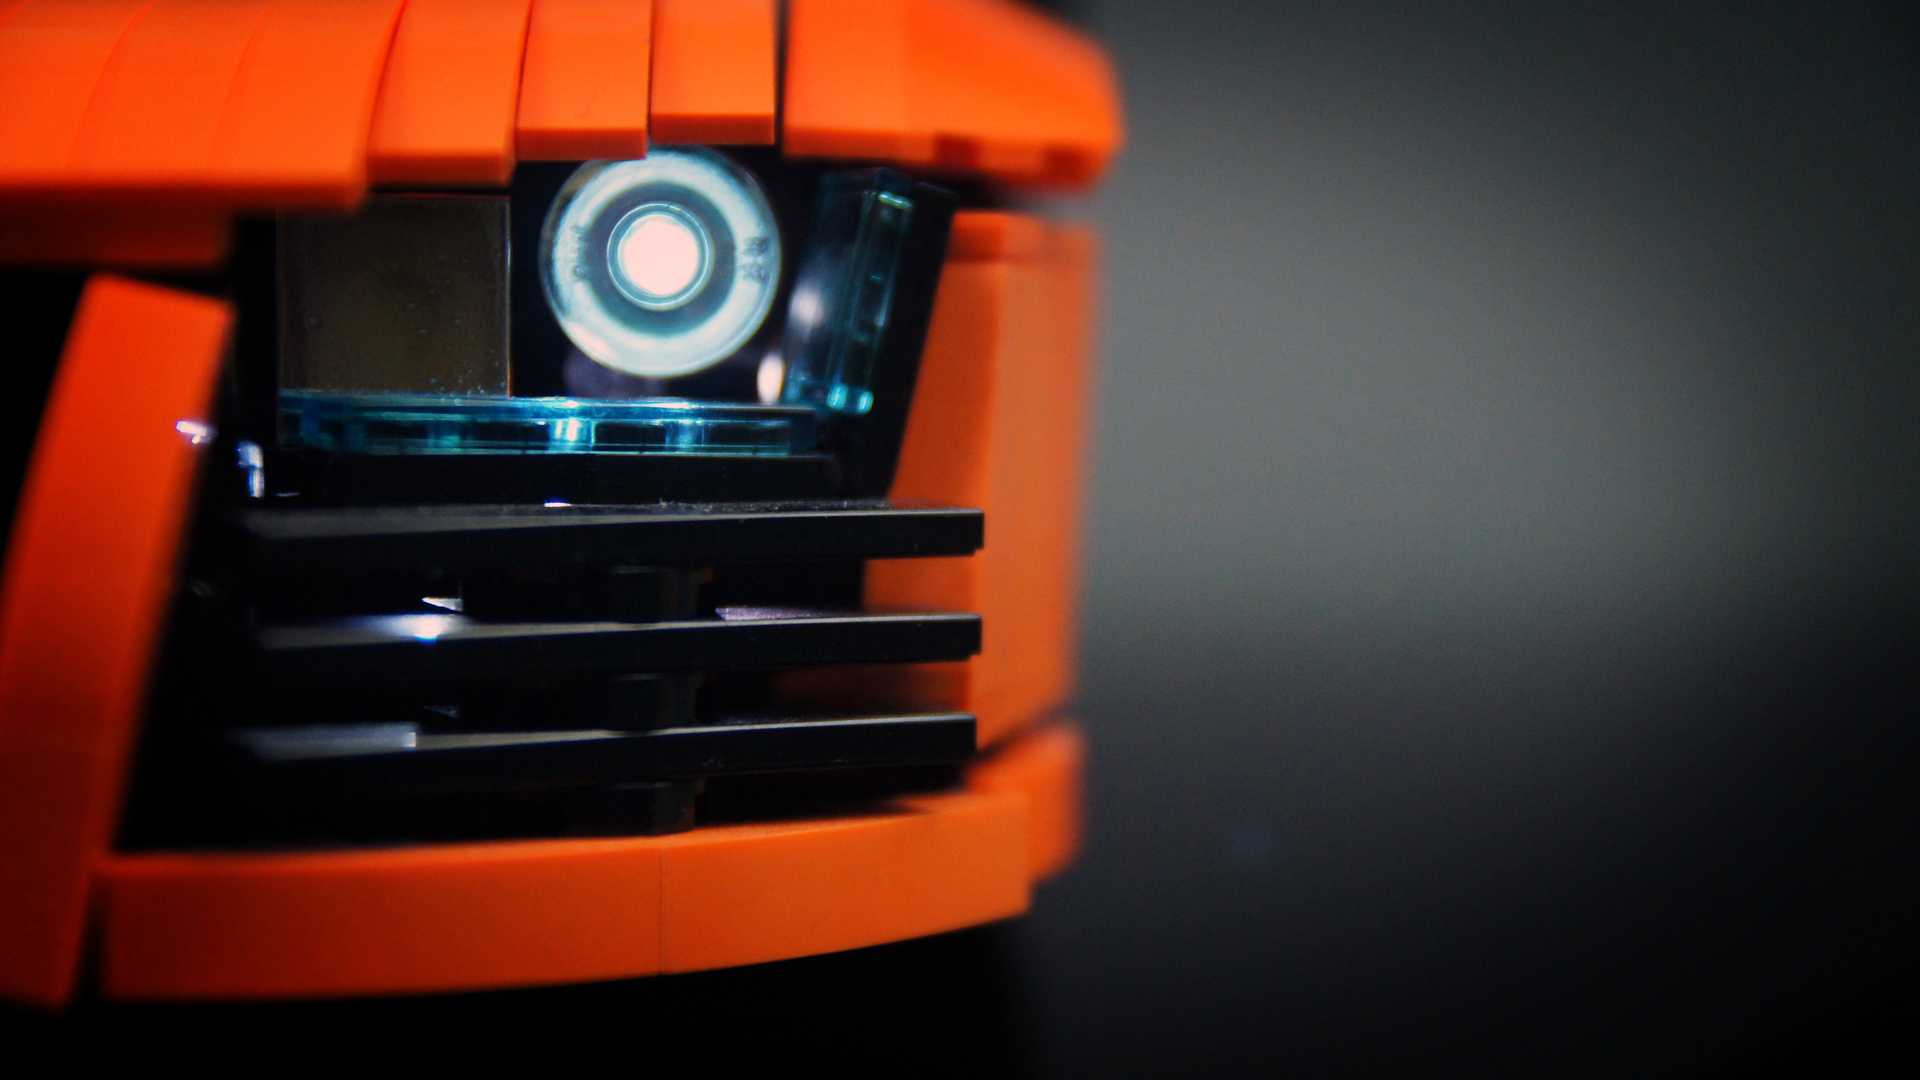
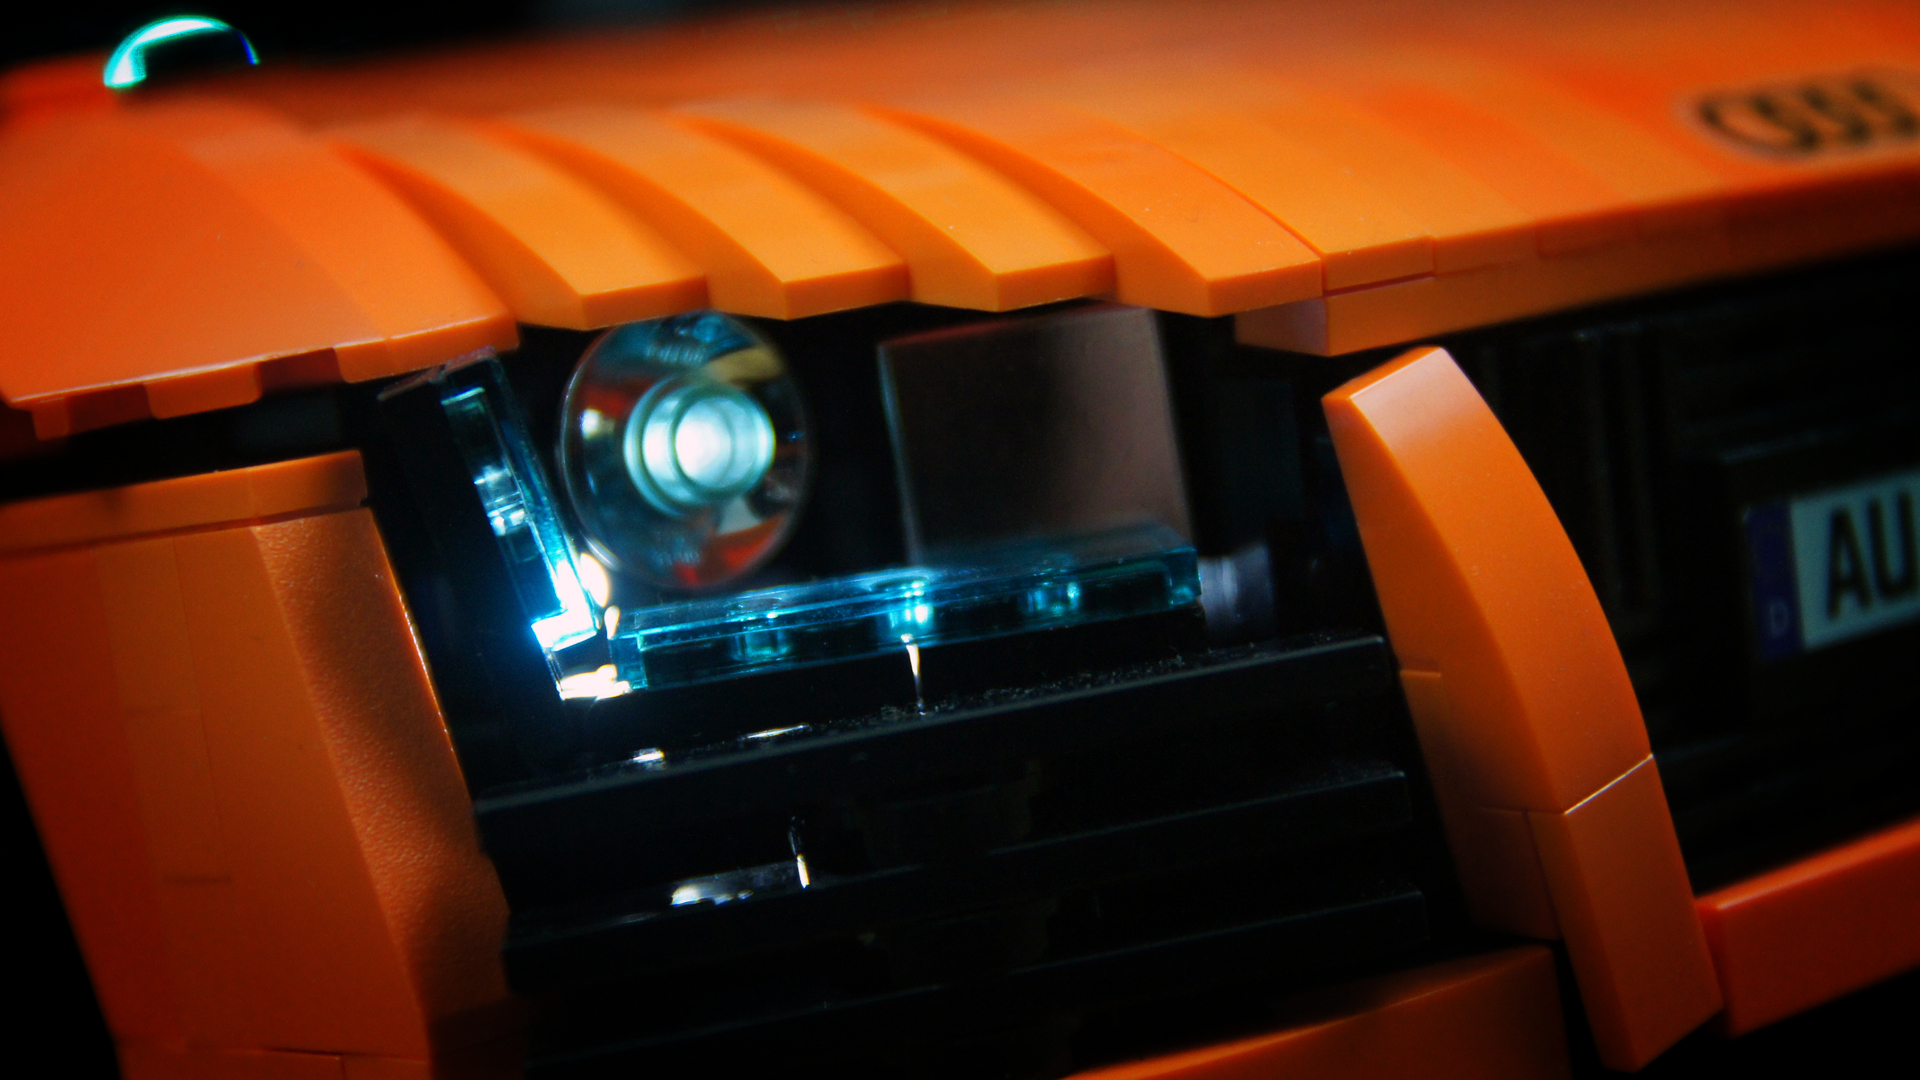
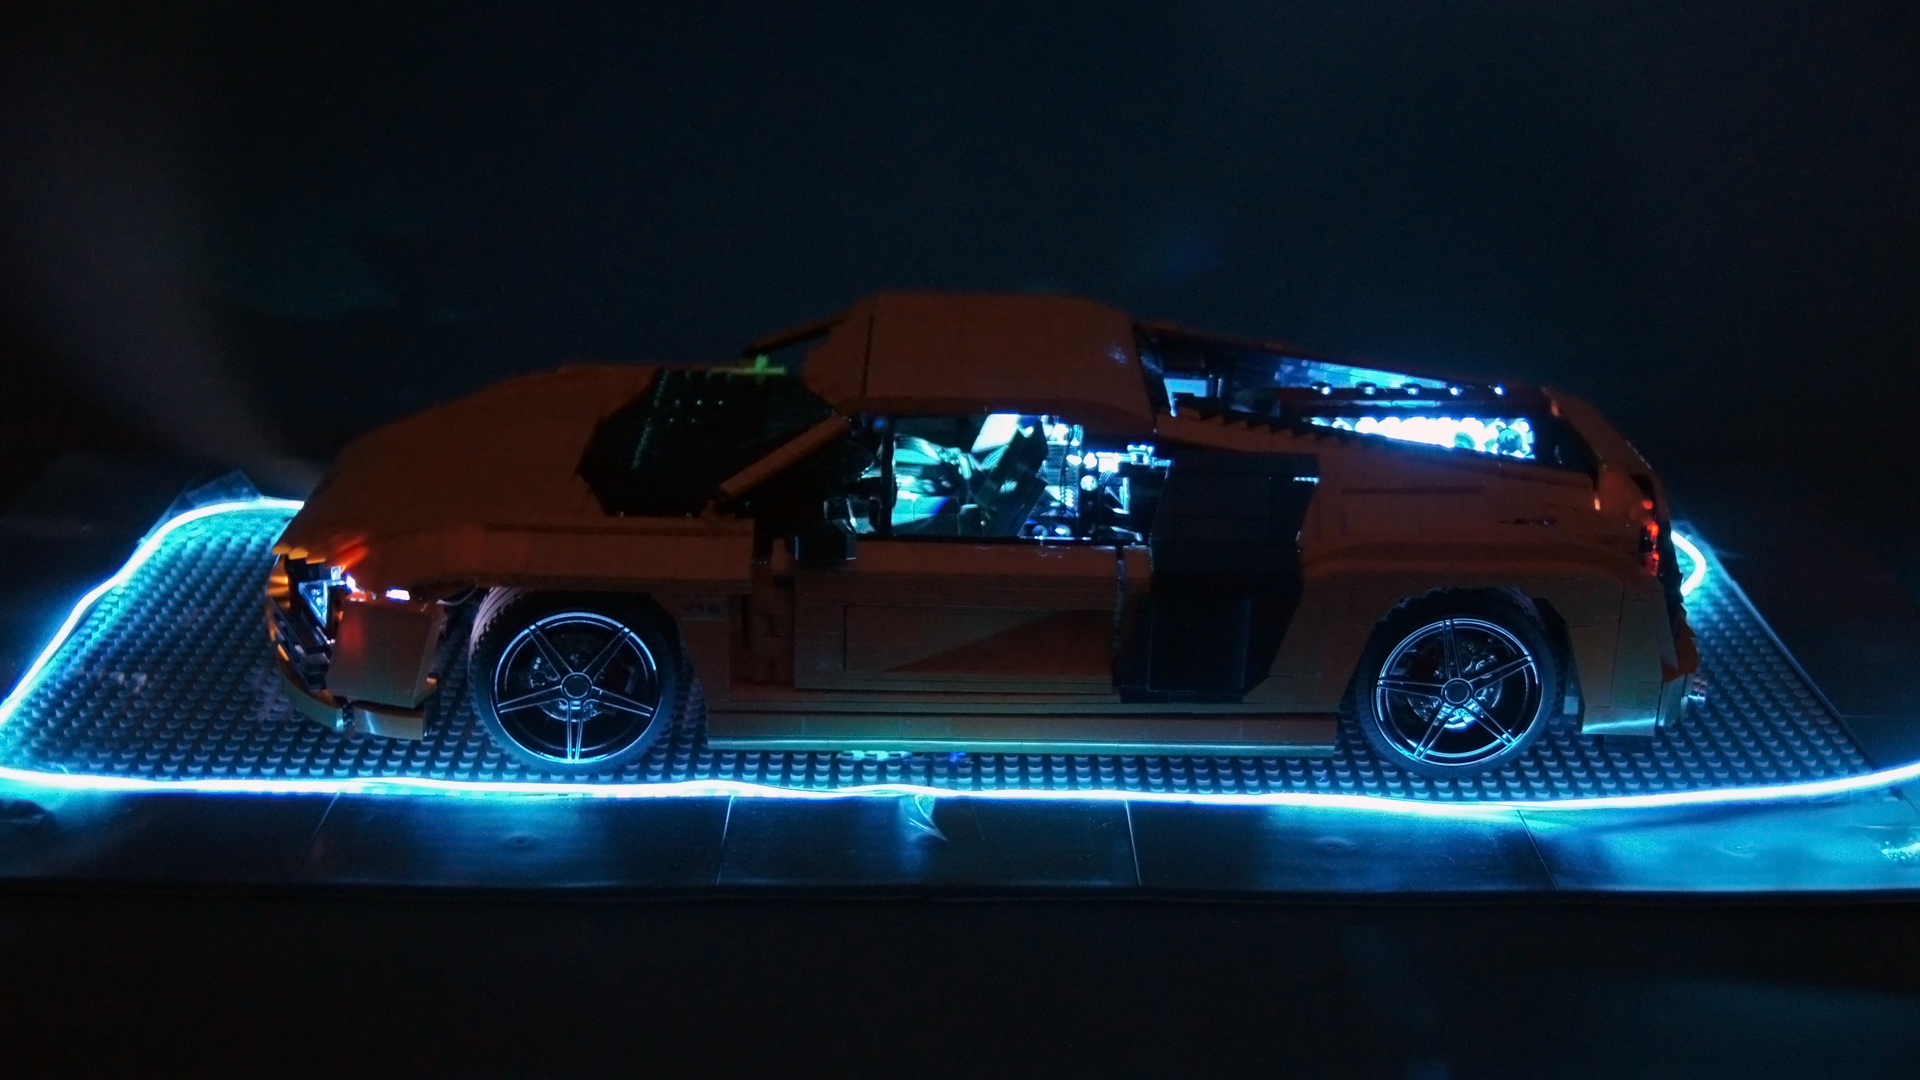
Since the very beginning, I considered the lighting of this model crucial for the final aesthetic effect. To this end, the headlights were a complex combination of LEGO LEDs and other pieces. There was a total of 5 LEDs in each headlight: one sitting inside a round chrome reflector, illuminating a trans-blue 1×1 round plate which created a ring-like reflection when viewed head-on, and four mounted at various spacings and angles, illuminating trans-light blue tiles. The tiles had tiny pegs inside them, so by placing LEDs behind them, I was trying to make them shine in a way resembling LED strips from the original R8. I was happy with the result.
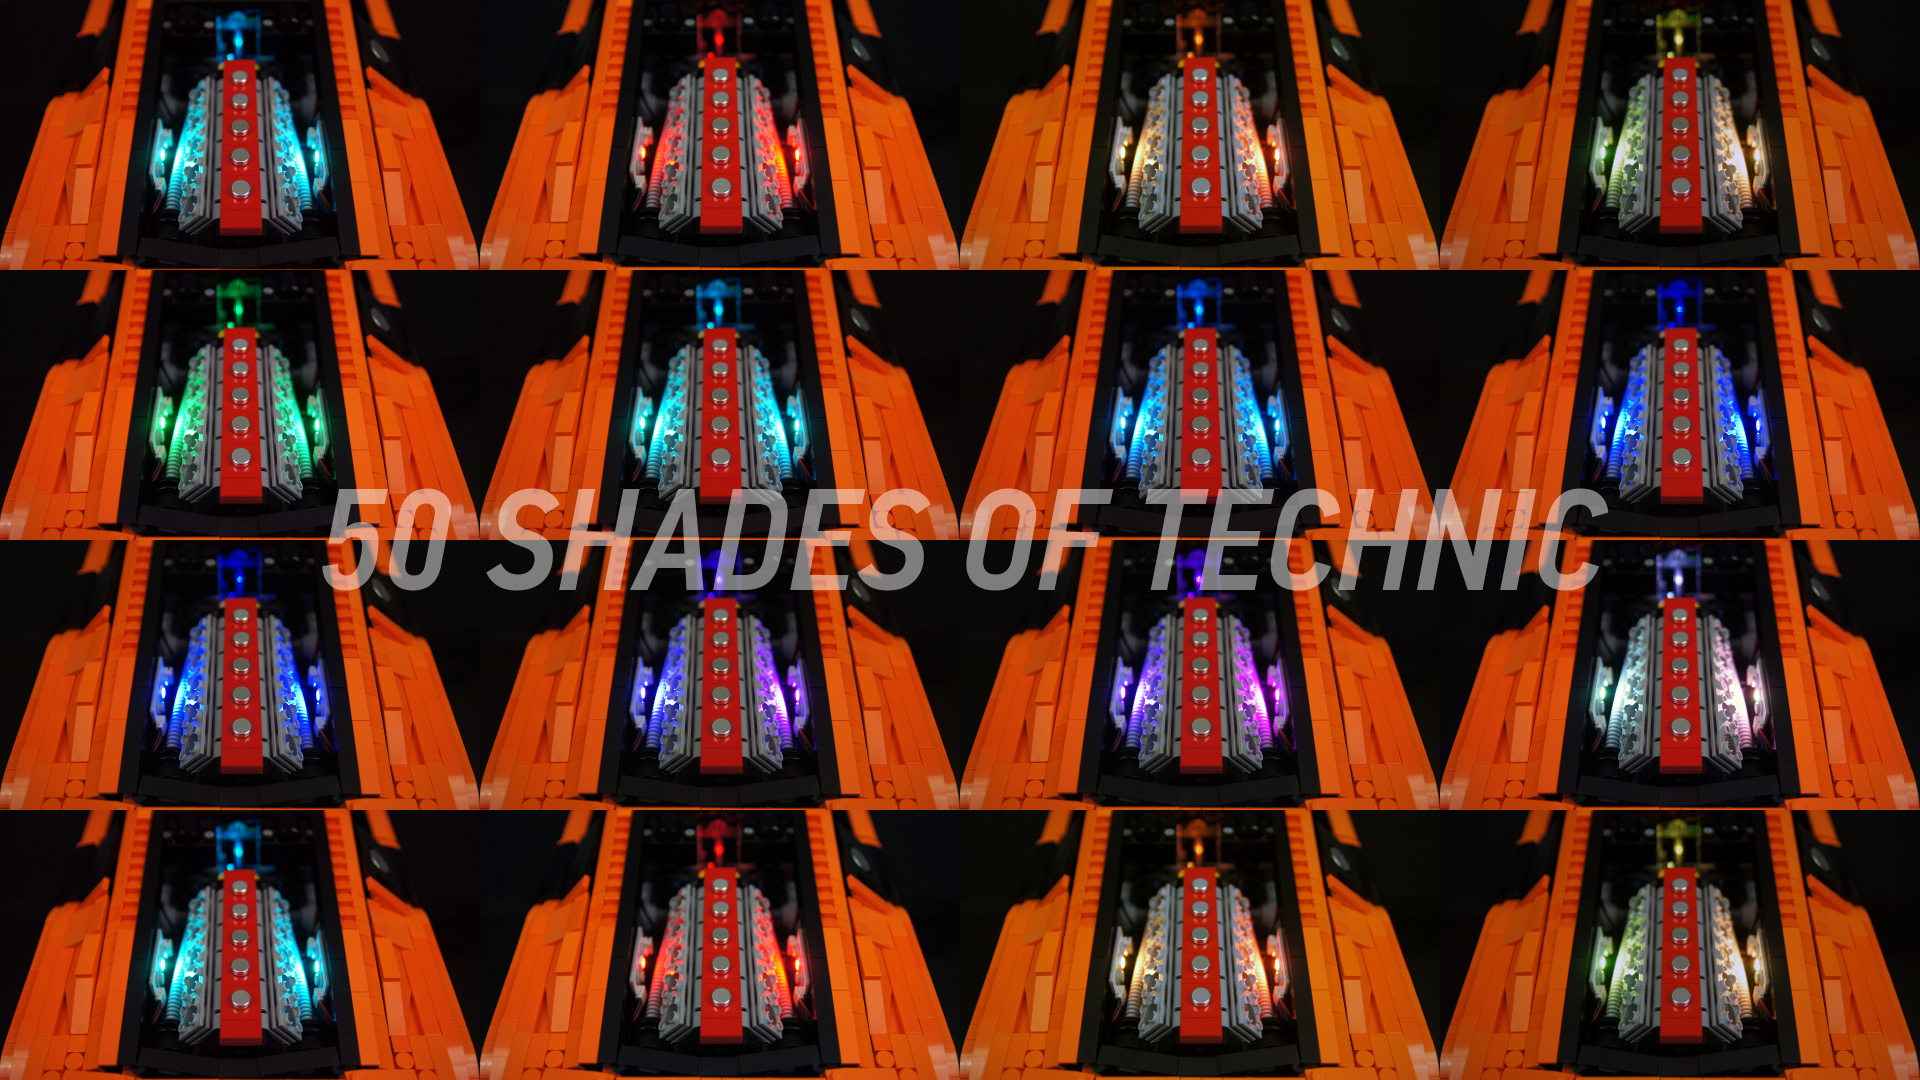
Finally, I have used RGB LEDs by Lifelites: two on engine’s sides and one on cabin’s ceiling, between the seats. The Lifelites LEDs were powered from their own small battery box located behind the seats, and could be controlled remotely using IR remote, with the IR receiver being located in the ceiling LED, very close to the two LEGO PF IR receivers. I quite liked the effect, which was impossible to achieve with Lego LEDs not only because of their lack of various colors, but also because of their focused beams of light. It could be possible to use old Lego 9V incandescent light bulbs for similar effect, but they would most likely be much darker and their color would be permanent, depending on what cover was put over them.
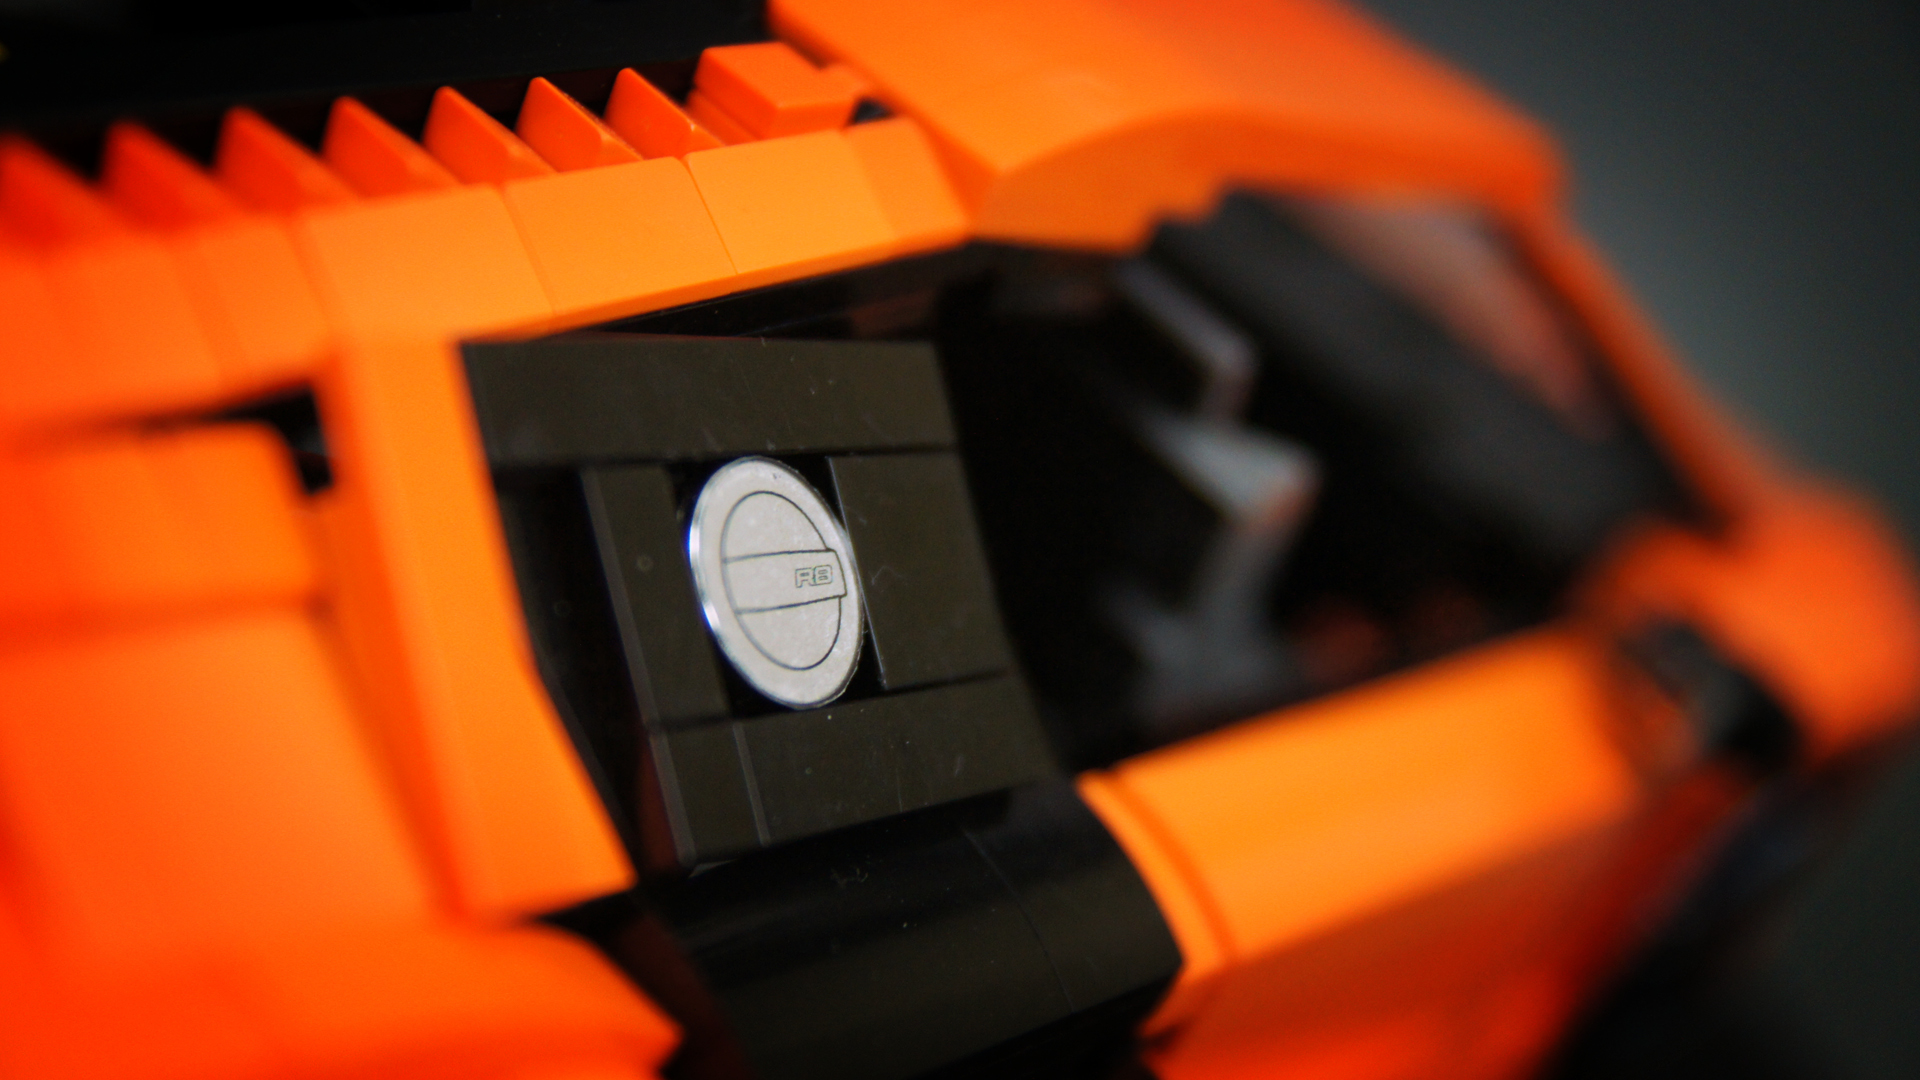
The model was completed using some original Lego pieces that were custom-chromed by Chrome Block City, including wheel covers that were covered in black chrome, and using my own custom stickers that were printed on transparent and white foil, depending on whether I wanted see-through effect or not. For example the Audi rings on the nose were printed on transparent foil while both license plates were printed on white one.
All in all, the model proved to be very demanding in terms of both work and budget. It wasn’t so challenging technically as it was aesthetically. I spent weeks shaping some parts of the body again and again, and some connections between pieces inside this model can be only described as “unholy”, but luckily no glue was used and no pieces were cut. The model clearly had its share of flaws, but it was something new to me and it put a number of interesting solutions to use. Personally, I was very pleased with its photos. It was this model that finally let me see that all the effort and investments I was putting in my photos over the years, including getting Tamron lens and paper backdrops in several colors and installing diffusing umbrellas on my lamps has paid off – I was able to take photos that I would never dream of making several years earlier.


@Alex145
Thanks, but making MLCad file of something that complex is actually several times more-consuming than building it.
Ah shame…
if one day you make a nice car like her, I’d love you to give me the MLCad file (or LDD I do not know) as your buildings are really beautiful!
@Alex145
Thanks, but I can’t give you something I don’t have.
I find your beautiful creations and was wondering if you could give me the instructions of the Audi R8 V10?
Or give me the MLCad file?
Wait a minute. If you buy around 100 new parts in a month then in 30 years… just a joke.
@Bento
I’ll pass, thanks. Not a fan of Porsche.
As perfect as it can be done with the limited selection of orange bricks, I guess.
How about re-using the orange parts in a classic 1970’s Porsche 911?
Welcome to the world where germans make all the cars – and americans all the IT 😉
Just another level of building. There are only a handful of persons on the whole planet who could do so. You can be really proud.
Just perfect
AMAZING, but not sure about the wheel arches
OMG ITS HERE AMAZING!!! WOOHOO WOW. INCREDIBLE..