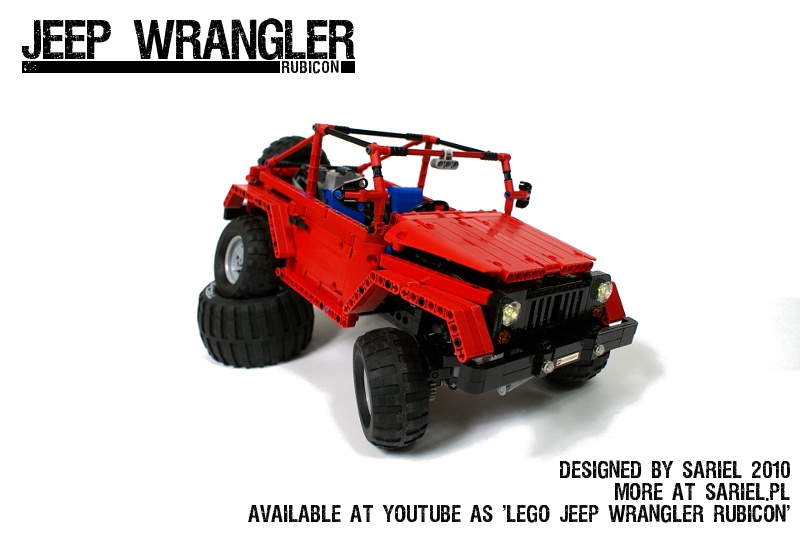
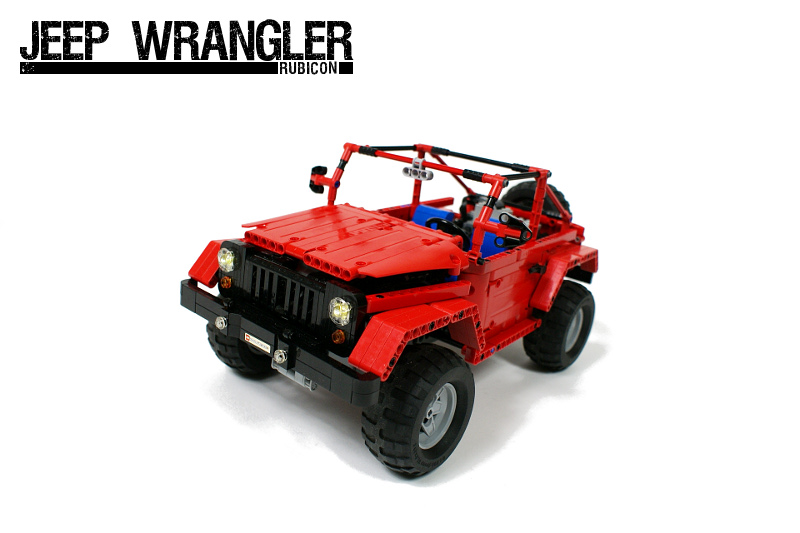
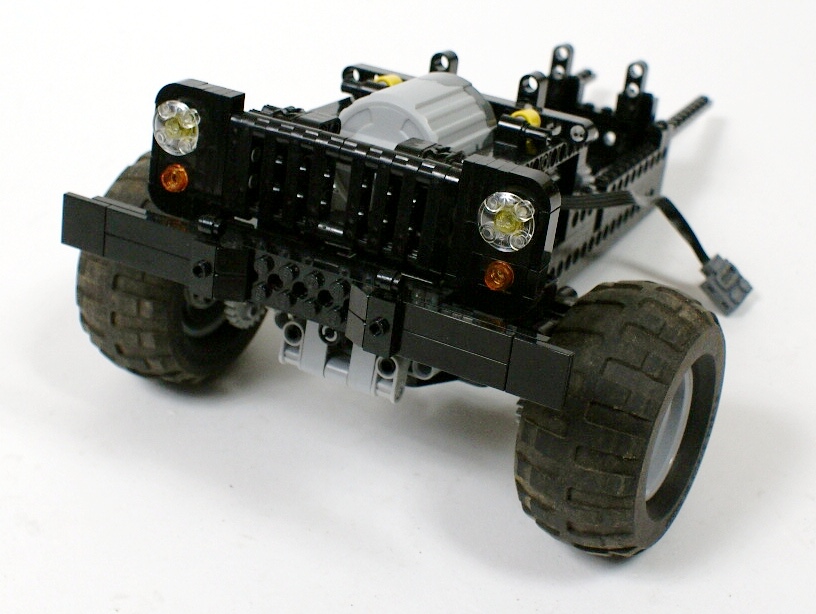
Jeep Wrangler Rubicon

My second 2010 Truck Trial vehicle, and the first vehicle designed for this competition other than a truck. Features 4×4 drive, pendular suspension, lights, modular body design and an openable bonnet. Update: a complete set of instructions added.
Datasheet:
Completion date: 18/04/2010
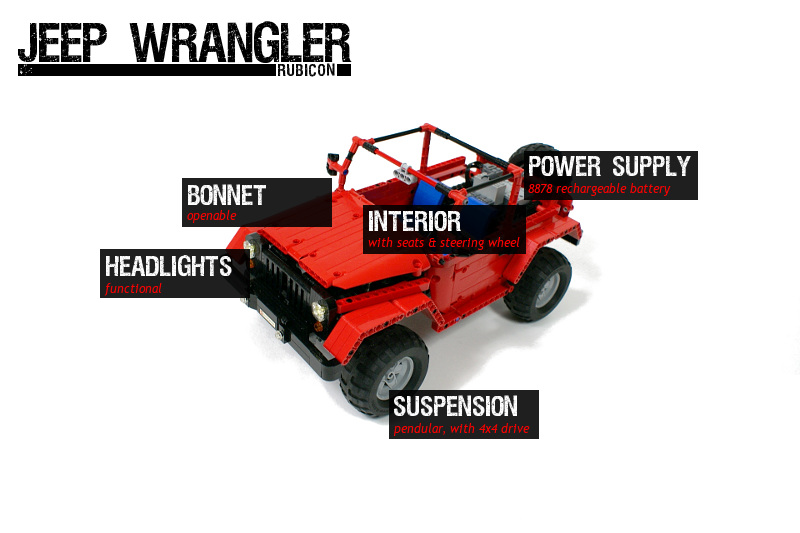
Power: electric (Power Functions)
Dimensions: length 47 studs / width 24 studs / height 23 studs
Weight: 1.224 kg
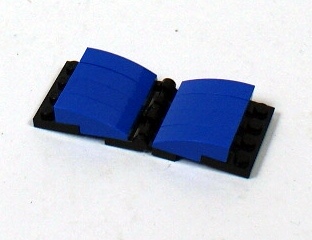
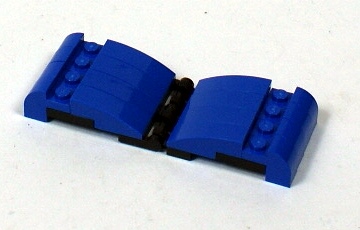
Suspension: pendular, stabilized with 2 shock absorbers per axle
Motors: 1 x PF Medium, 1 x PF XL
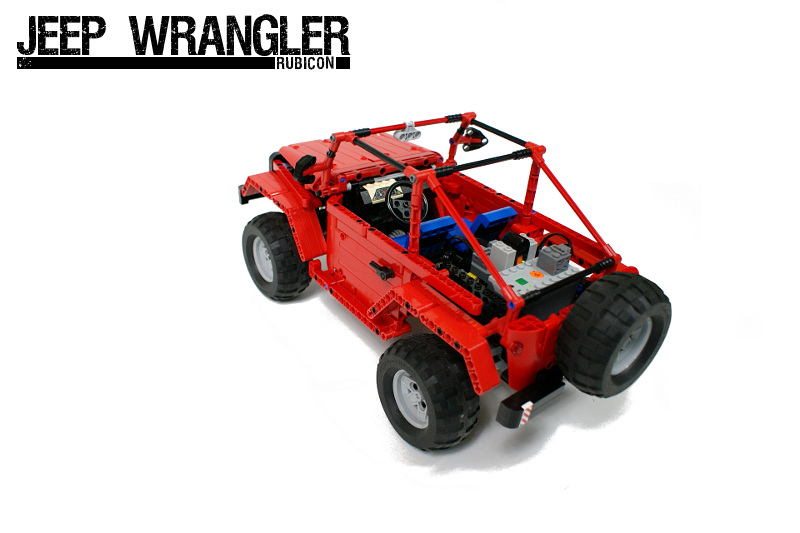
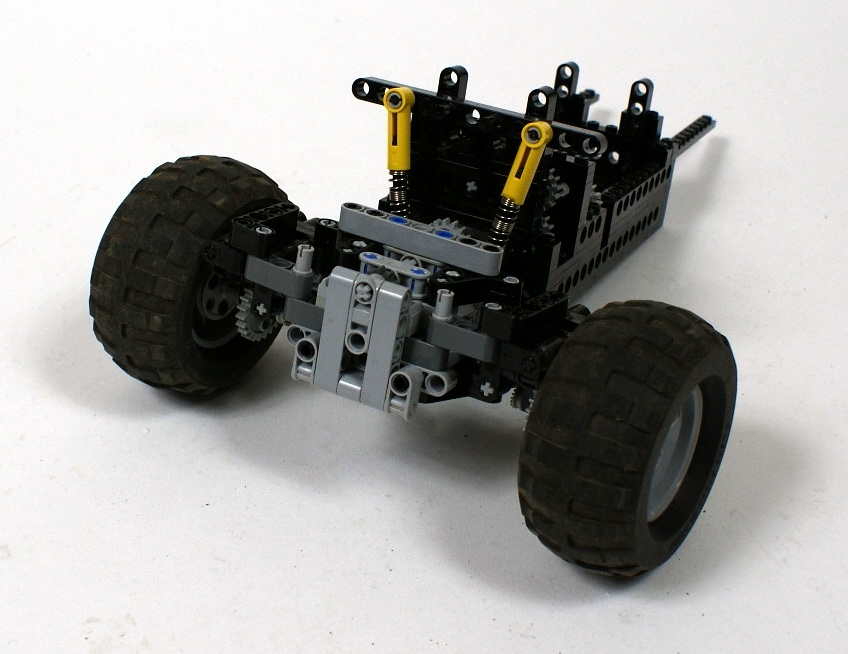
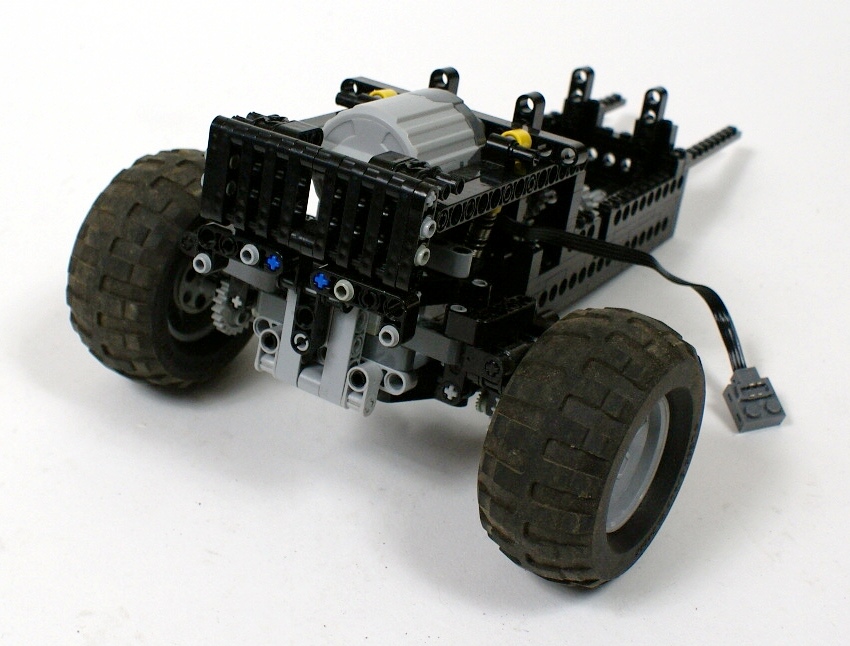
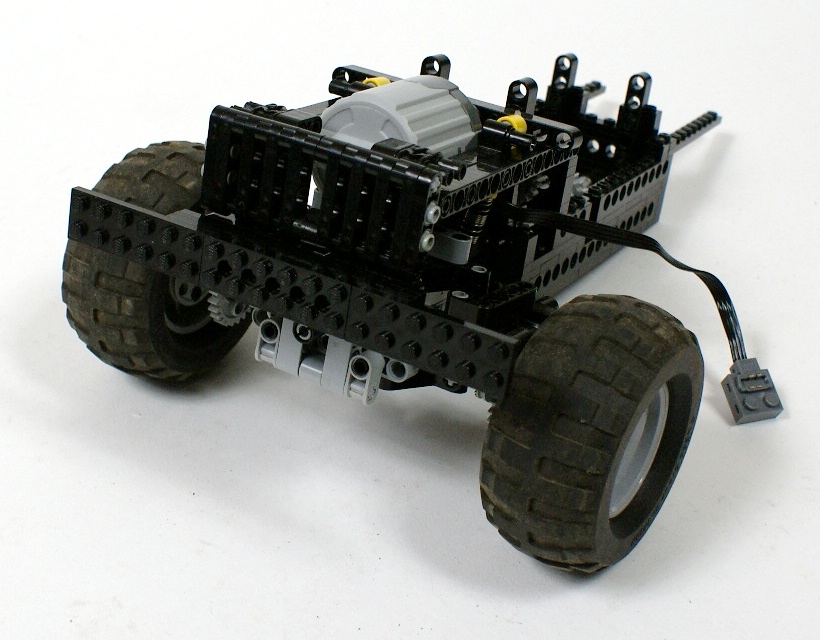
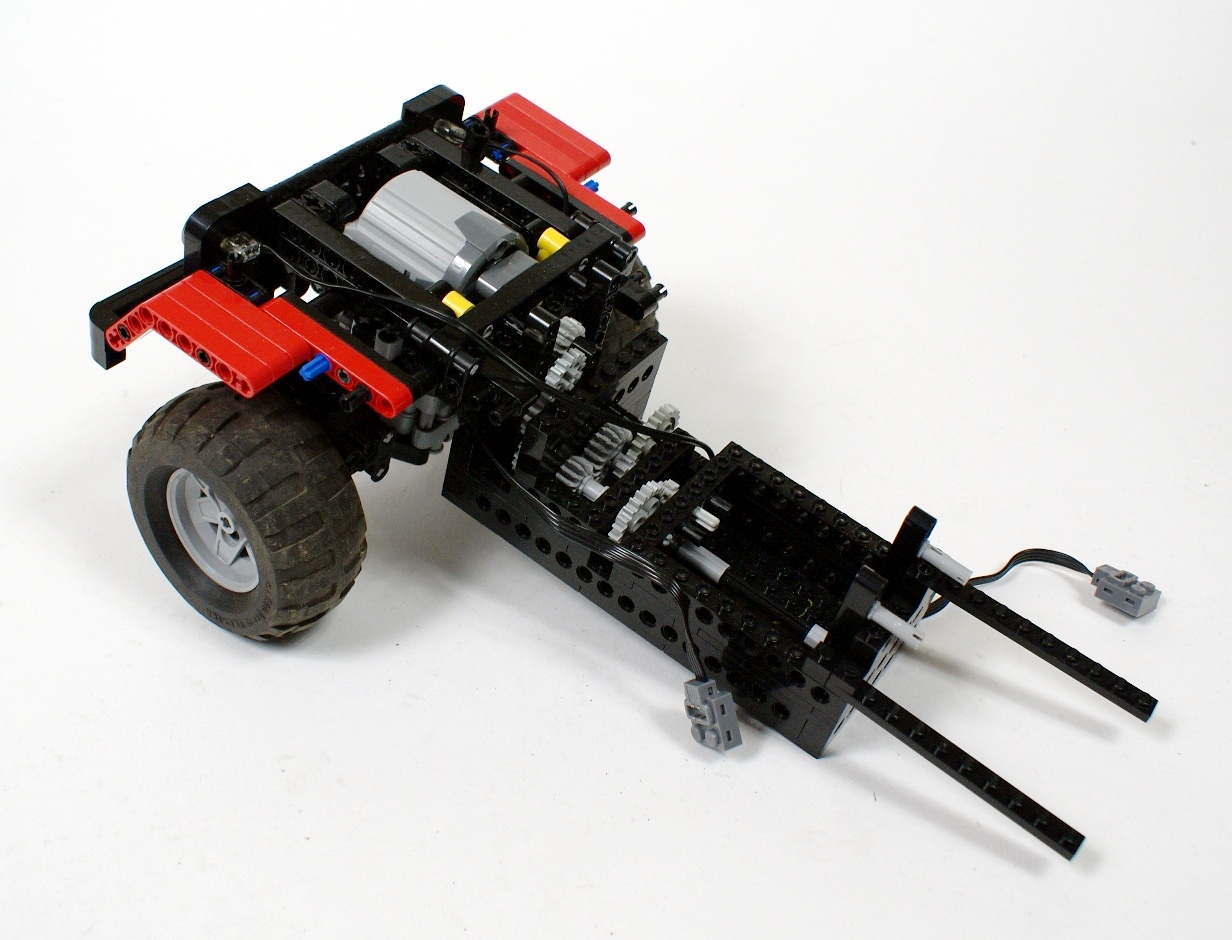
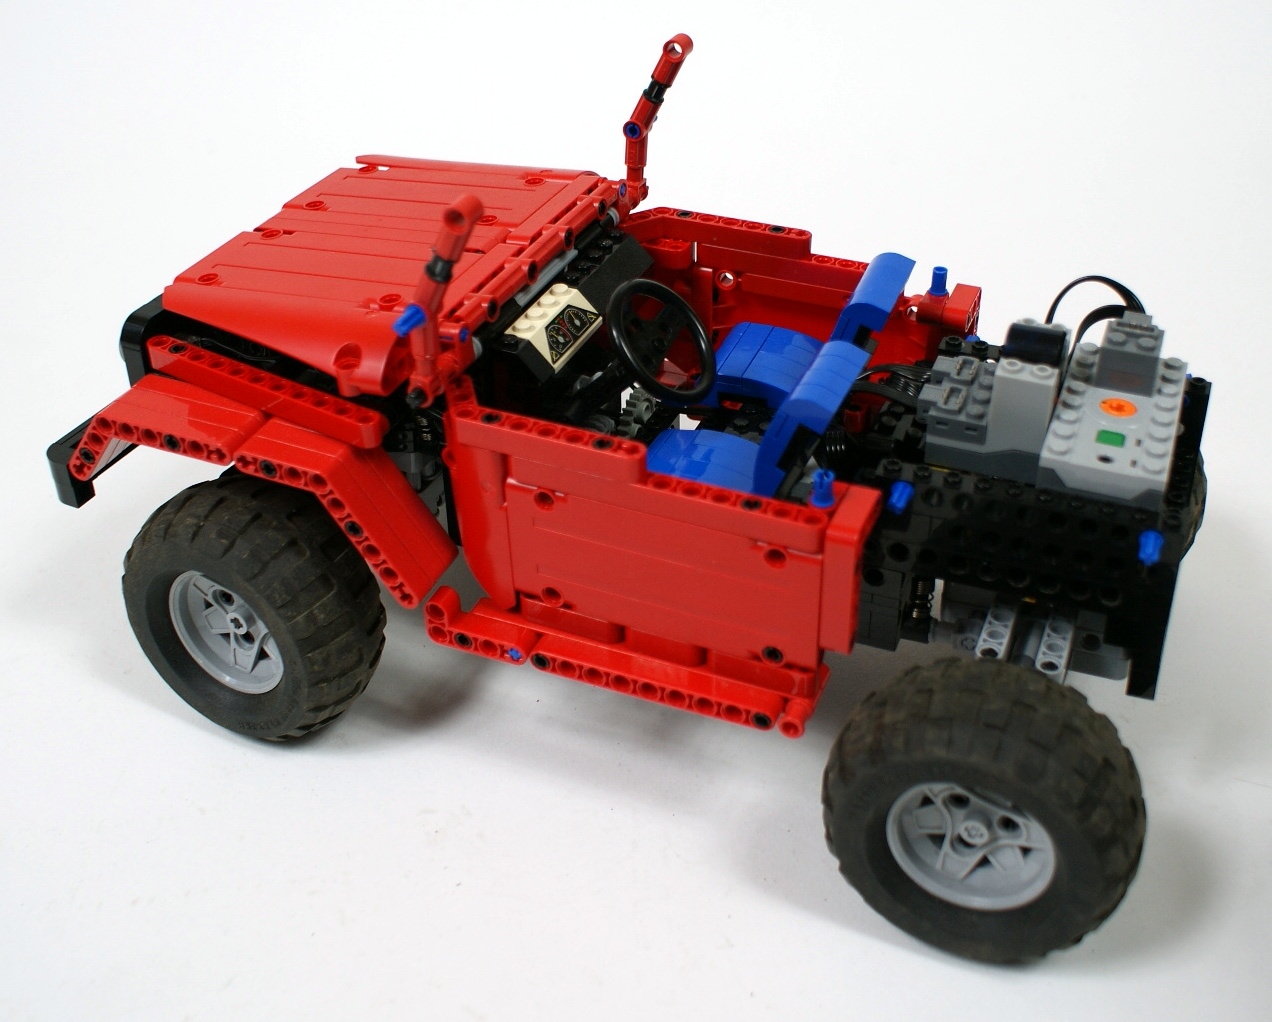
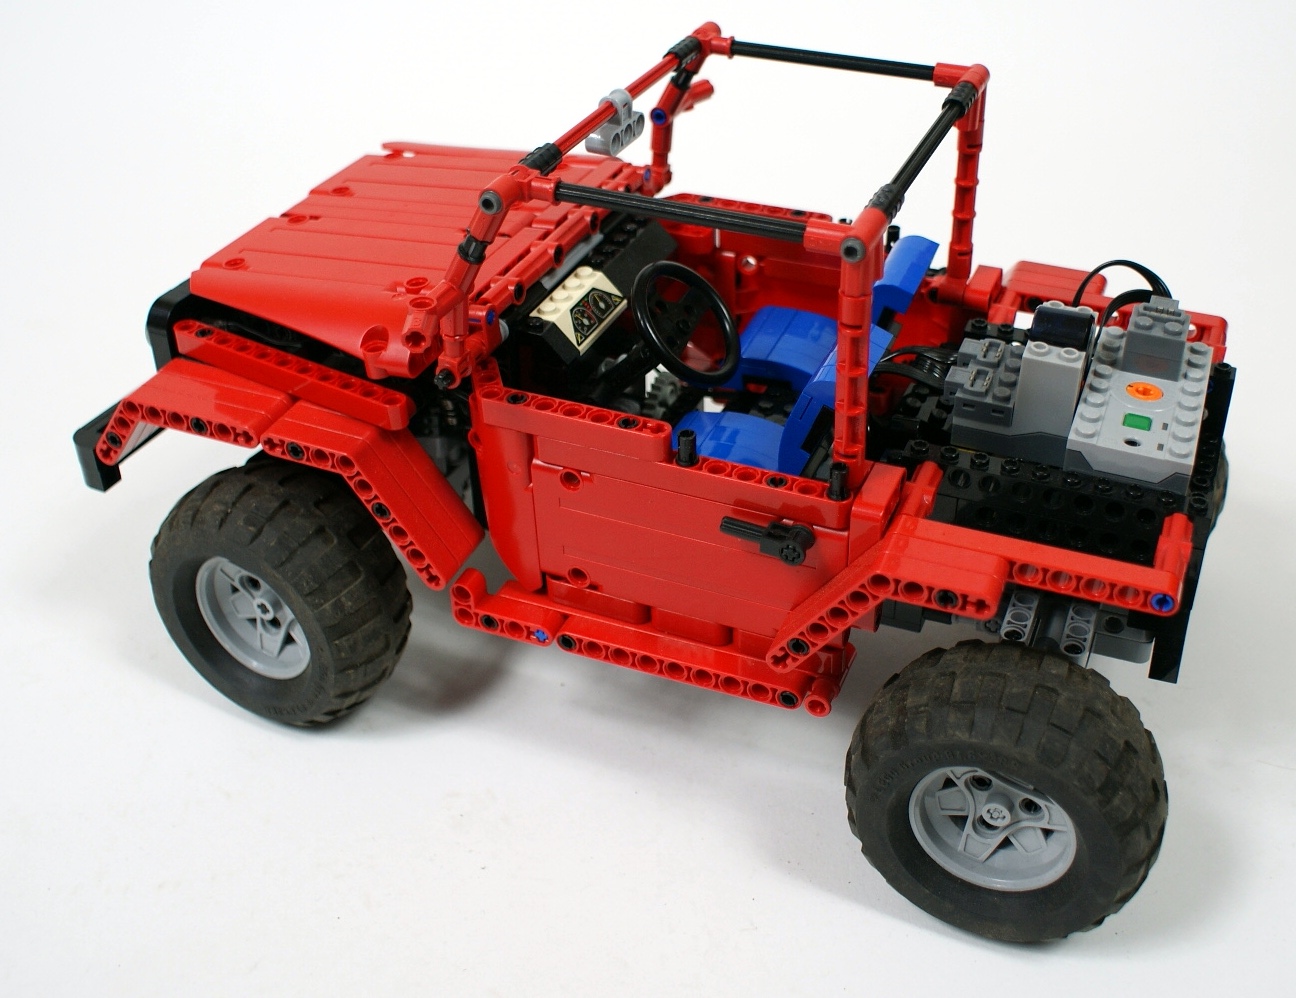
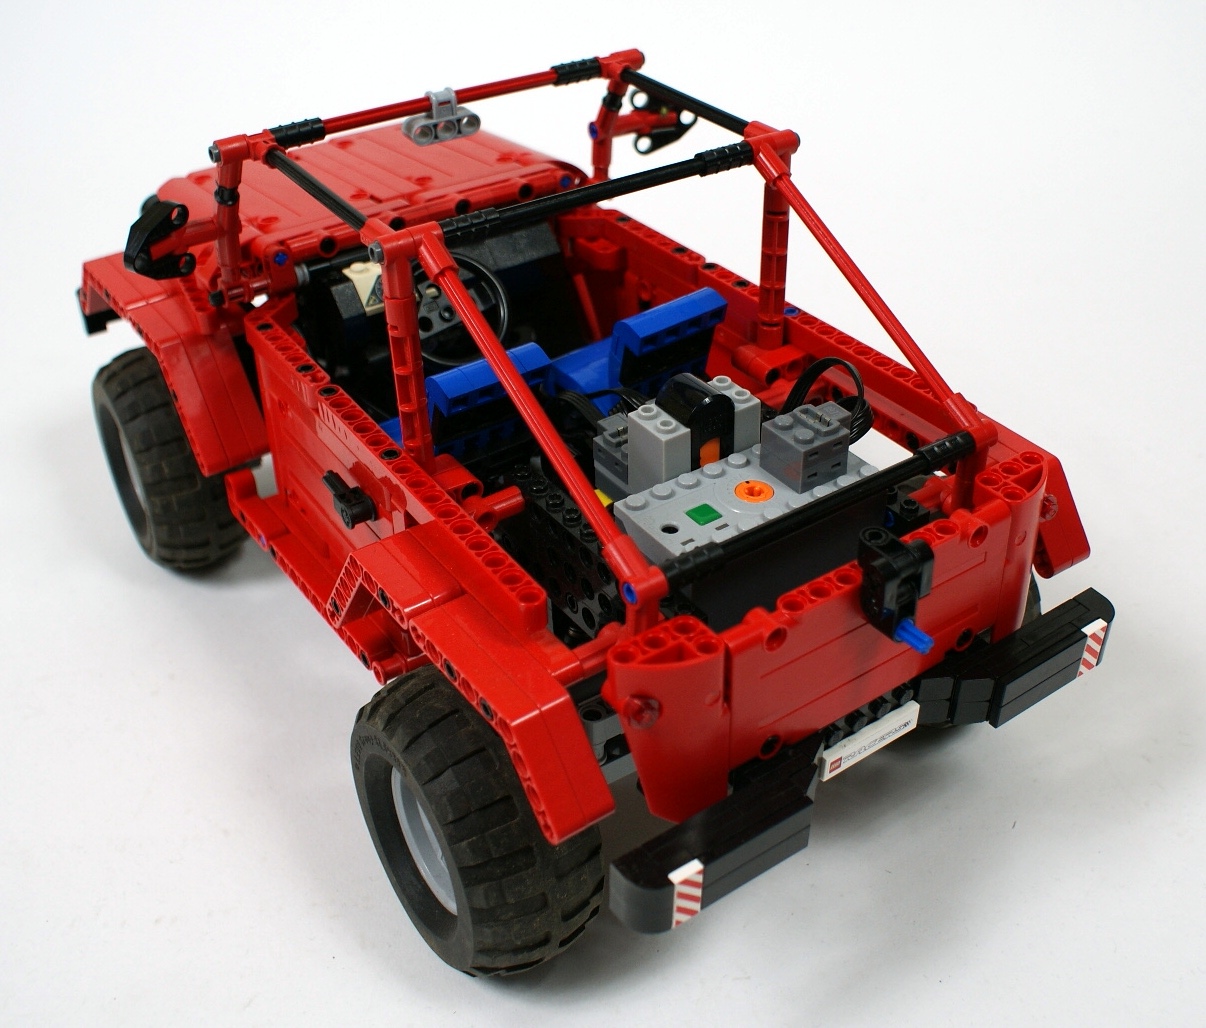
After the disappointing failure of my Tatra T815 truck, I was left with less than two weeks time until the next race. Re-using Tatra was out of the question, so my only option was to build some simple and small 4×4 vehicle. Since our current rules allow this type of vehicle into competition, I decided to model the iconic Jeep Wrangler in the acclaimed Rubicon version. It was built in roughly 4 days.
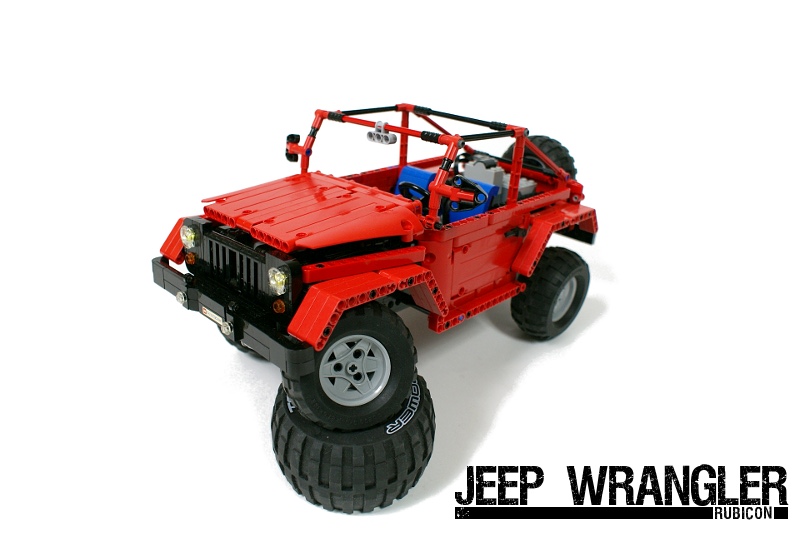
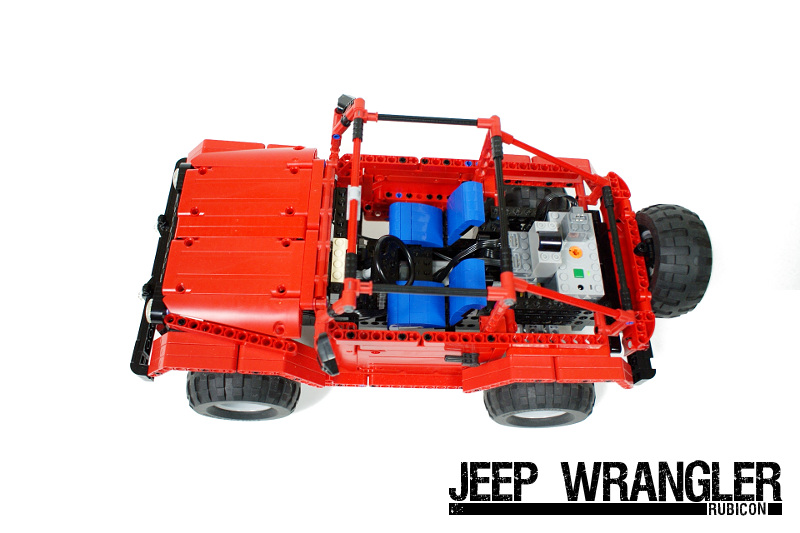
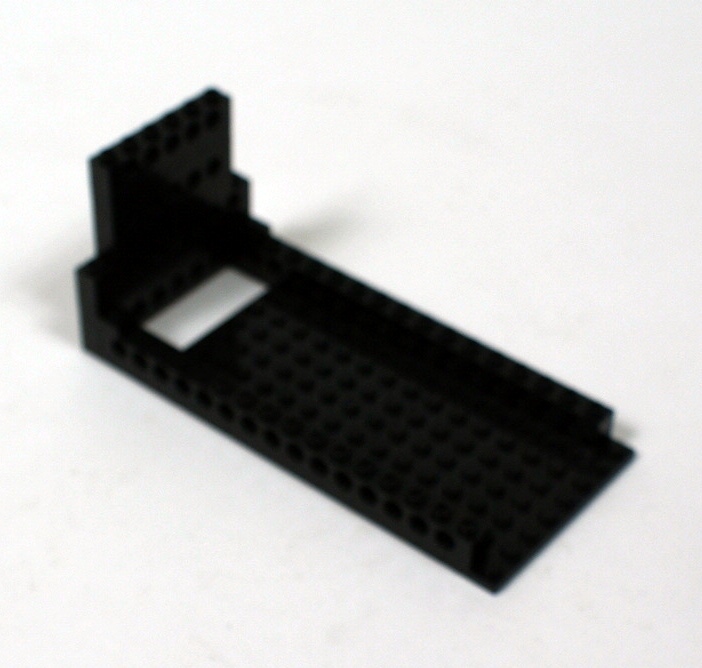
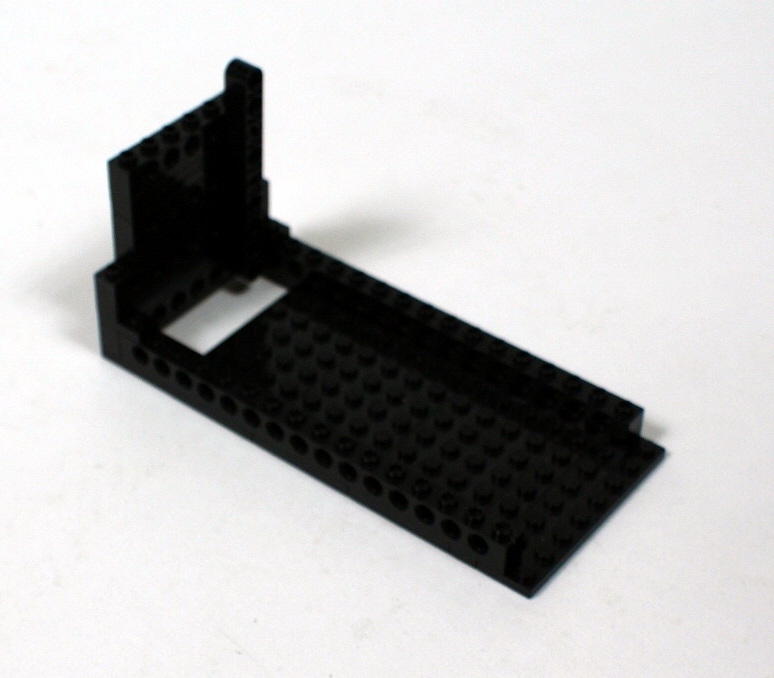
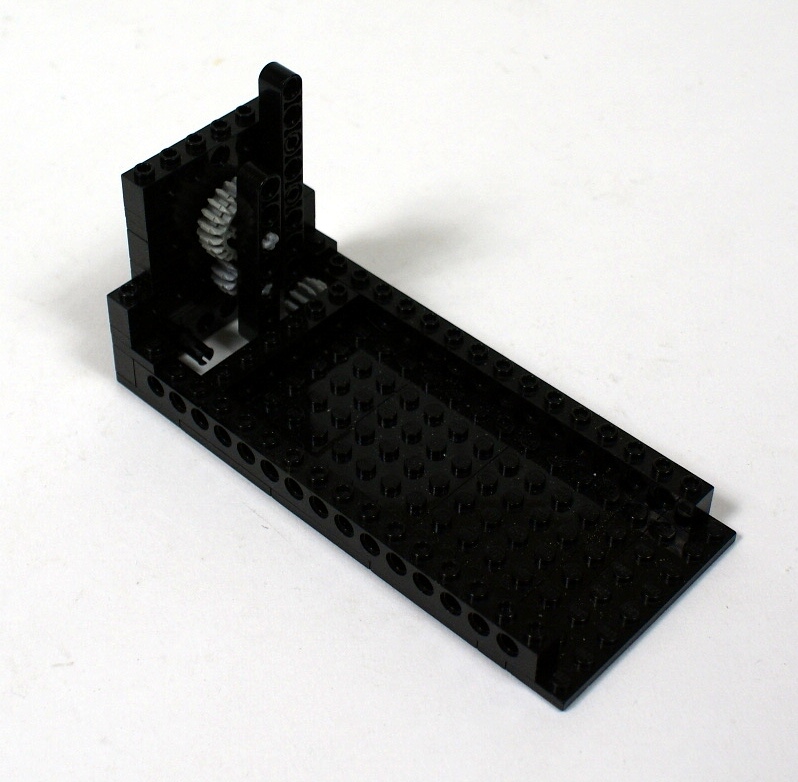
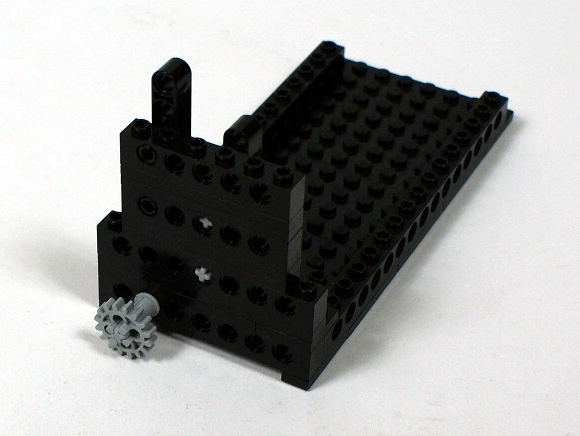
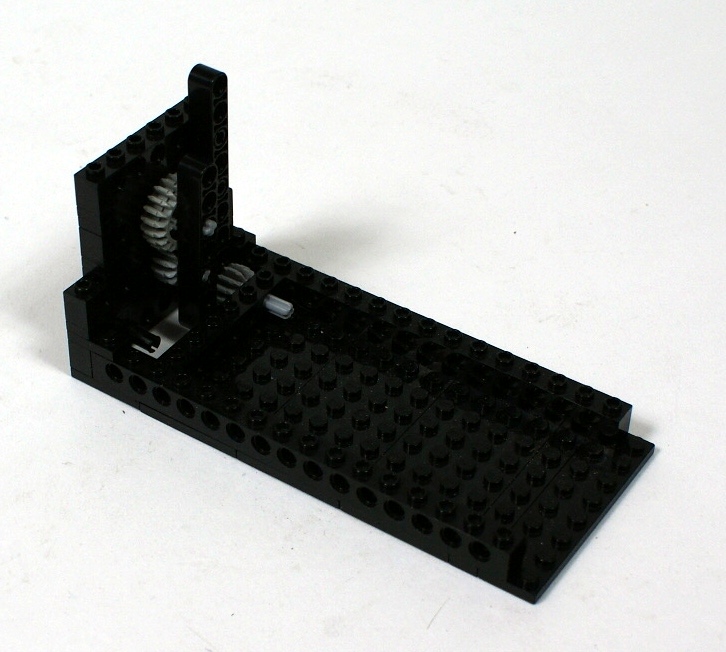
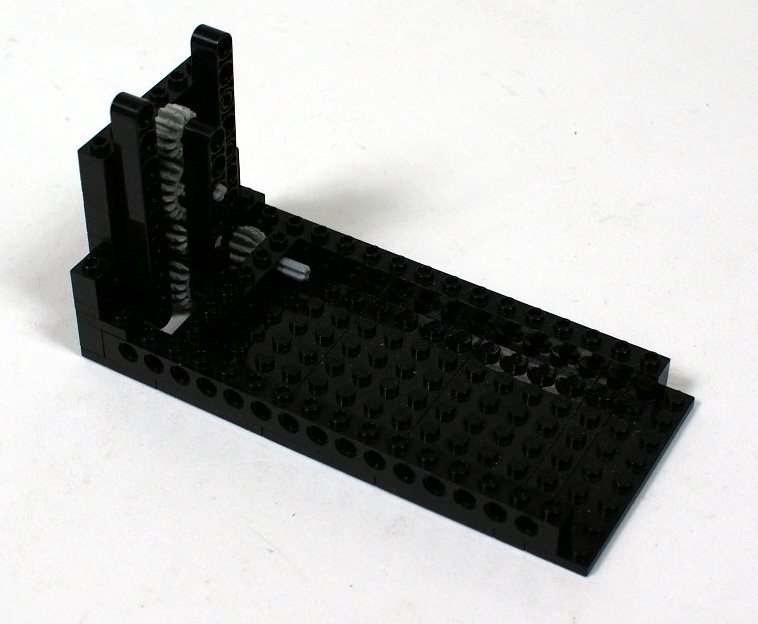
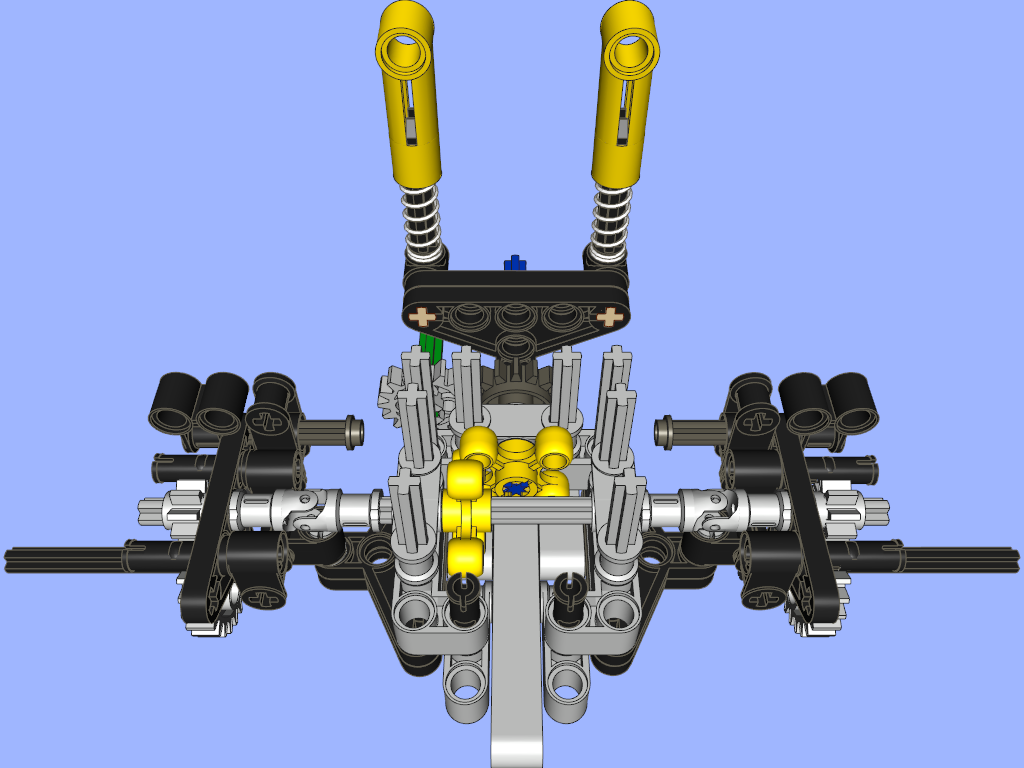
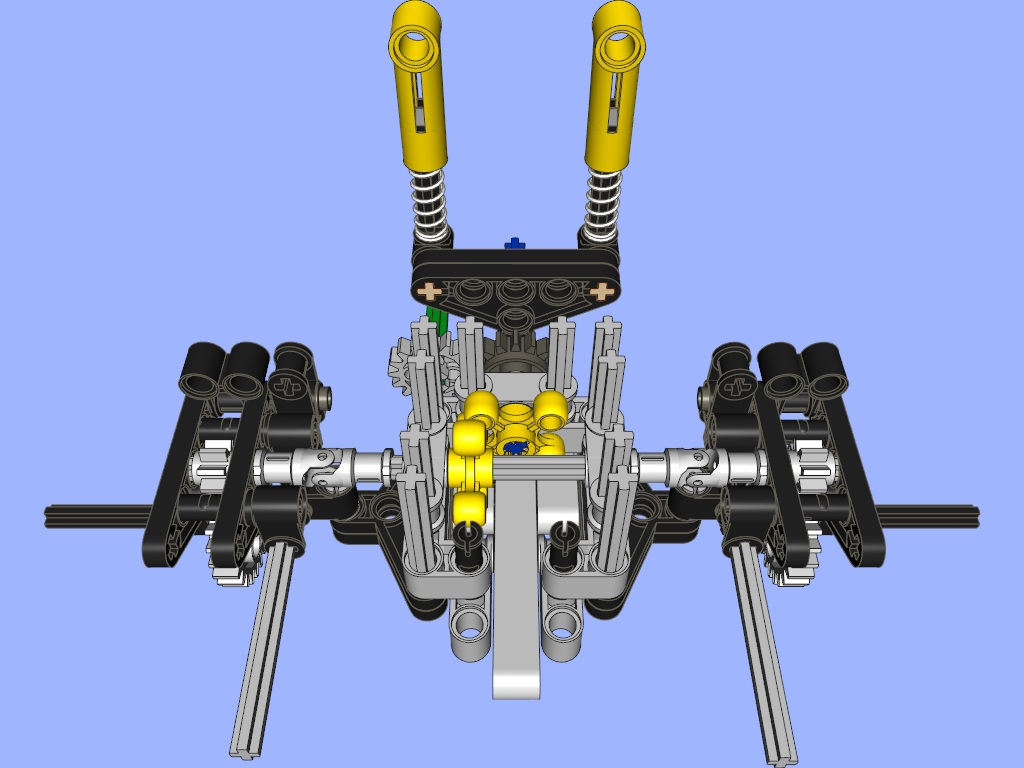
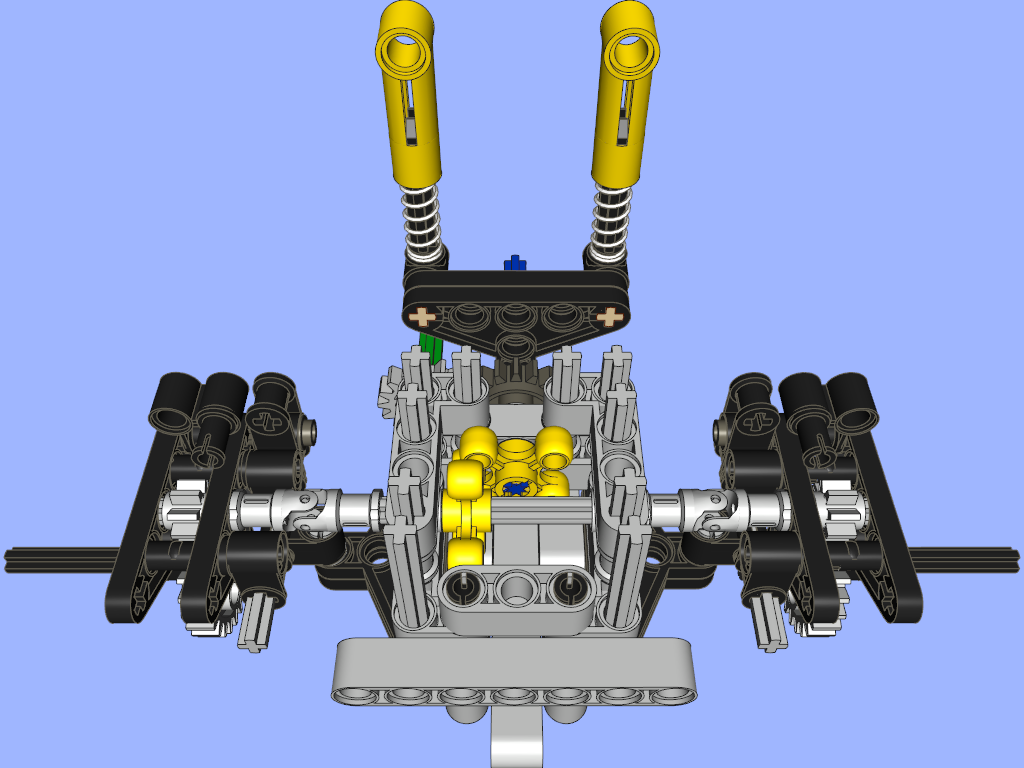
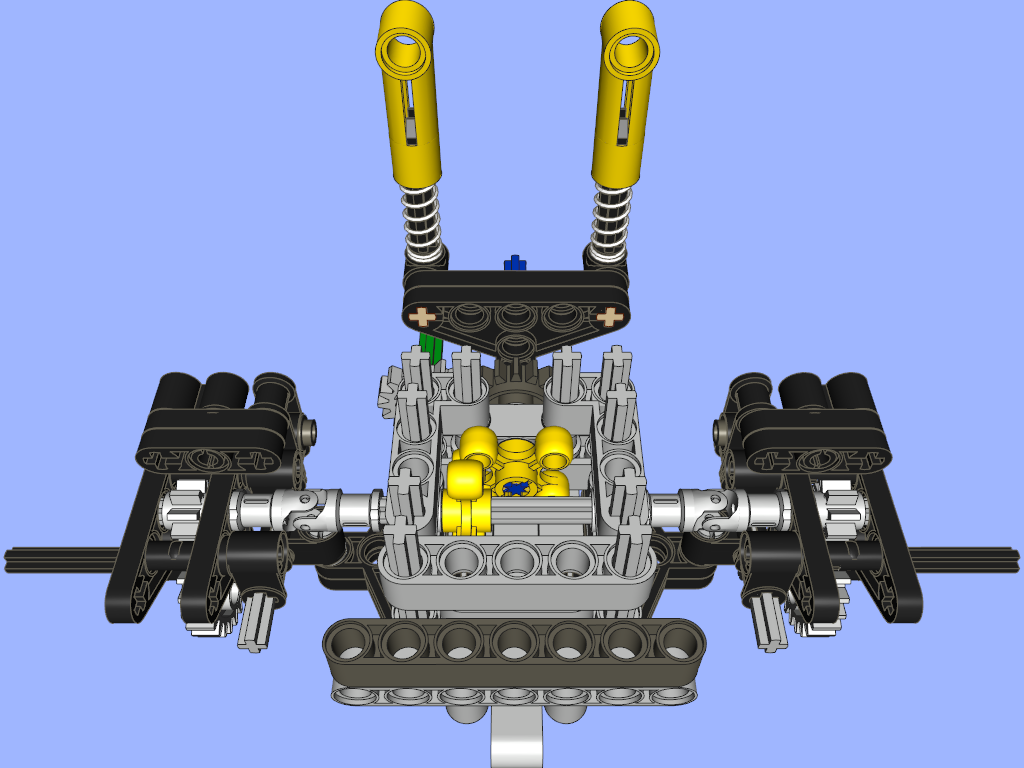
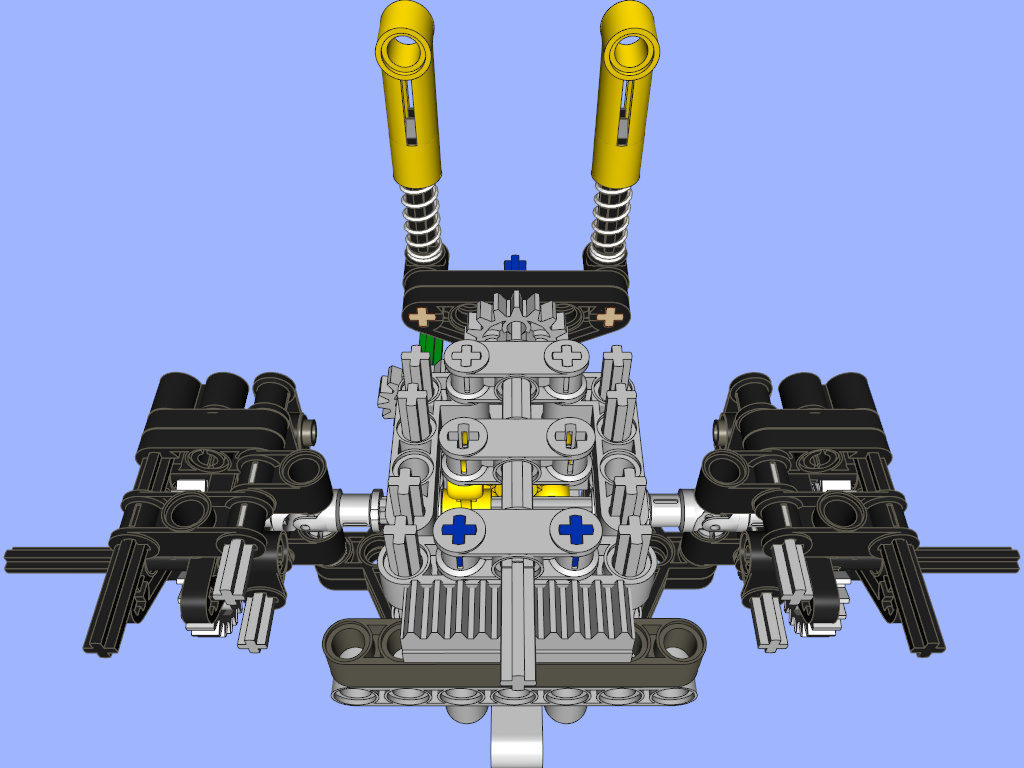
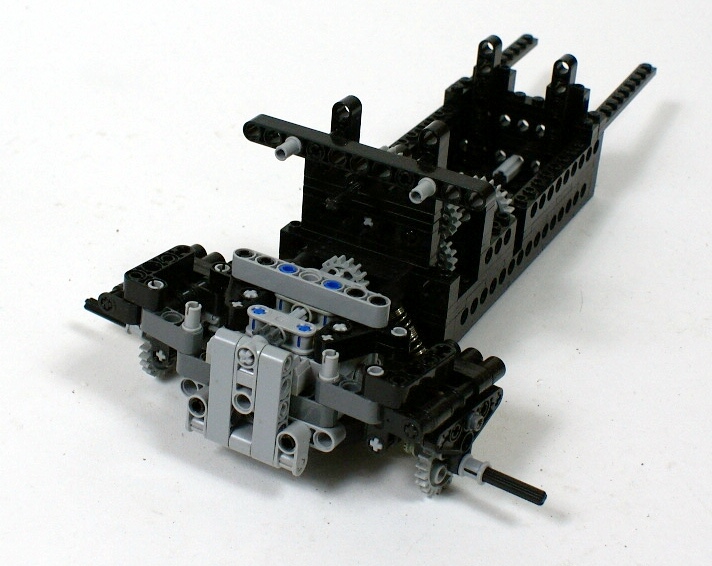
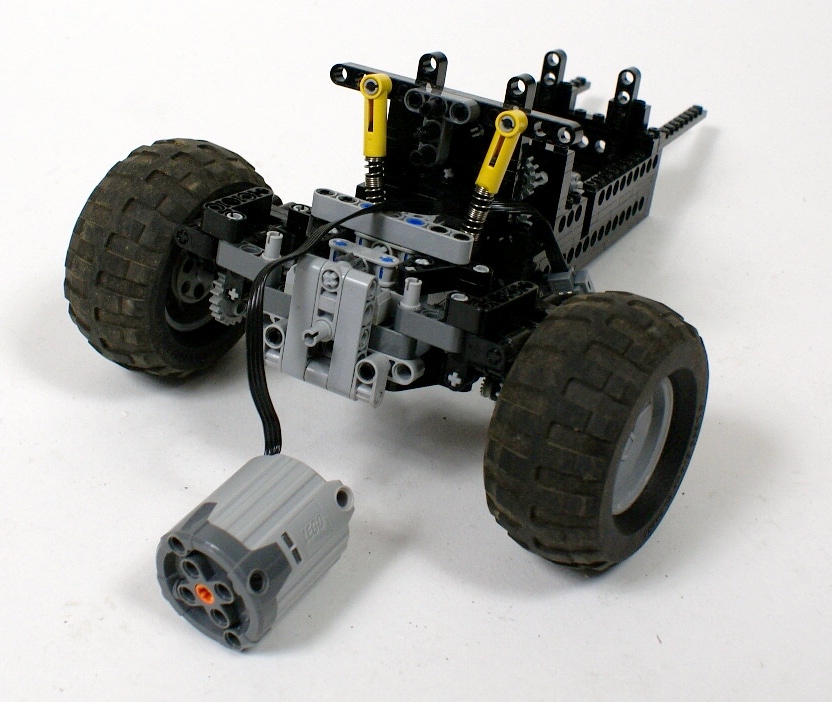
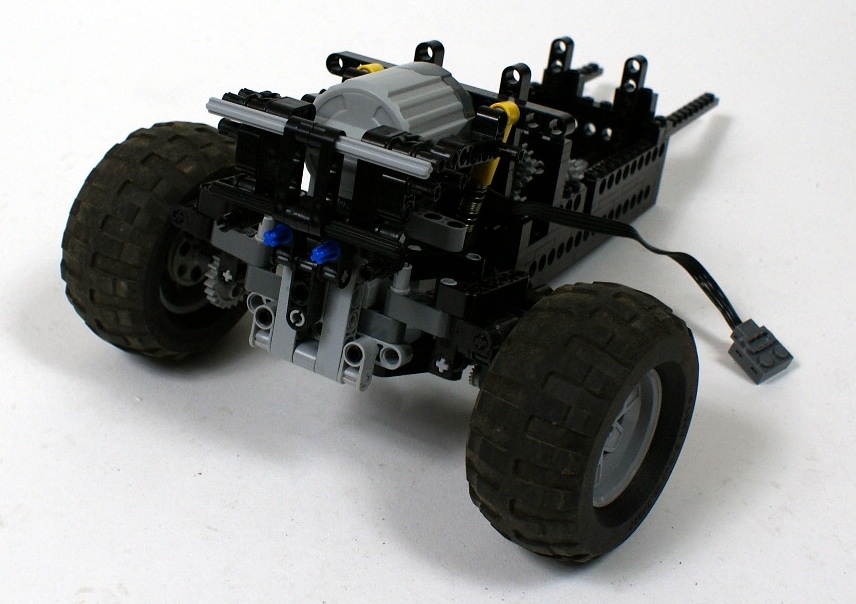
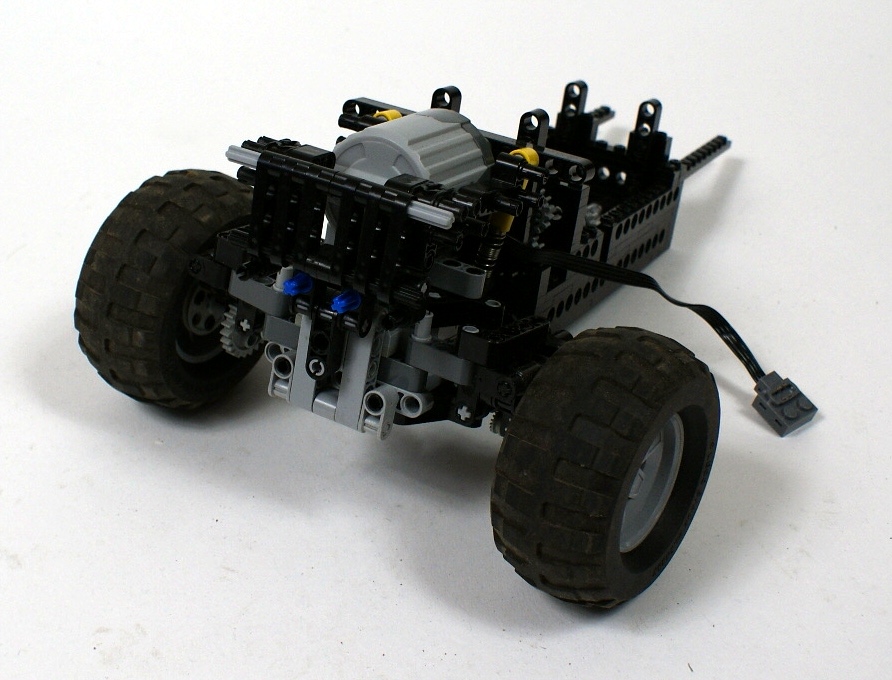
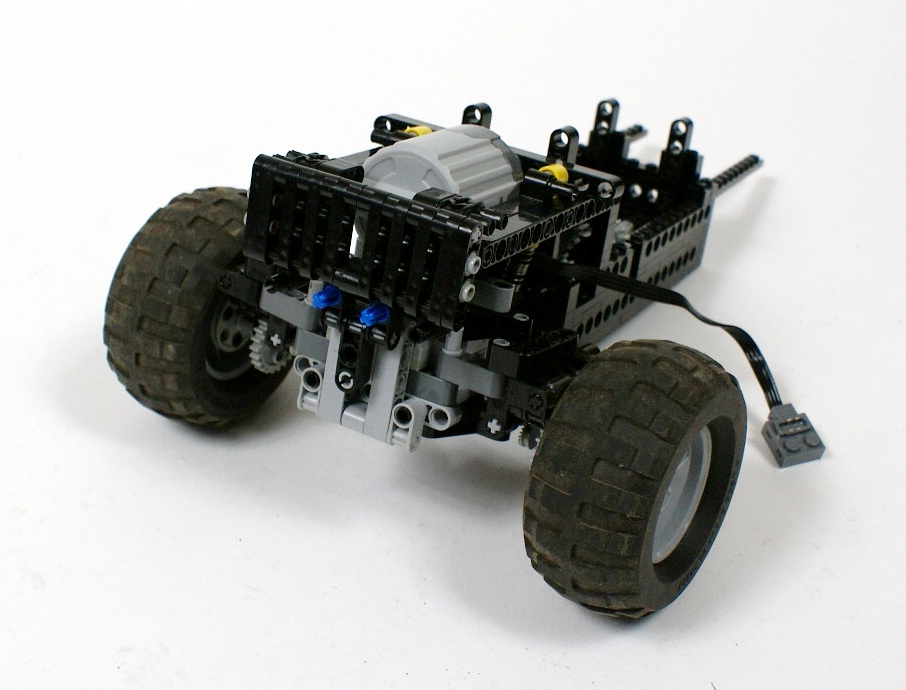
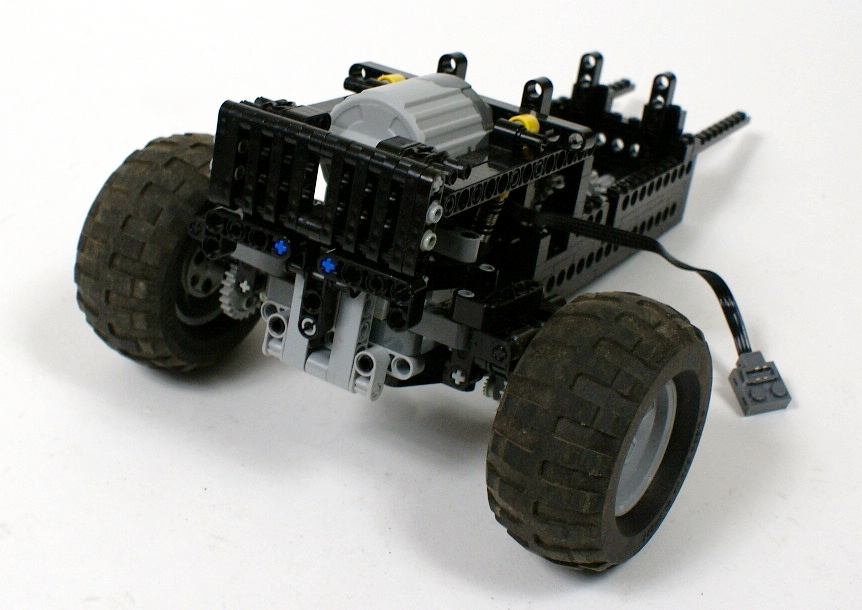
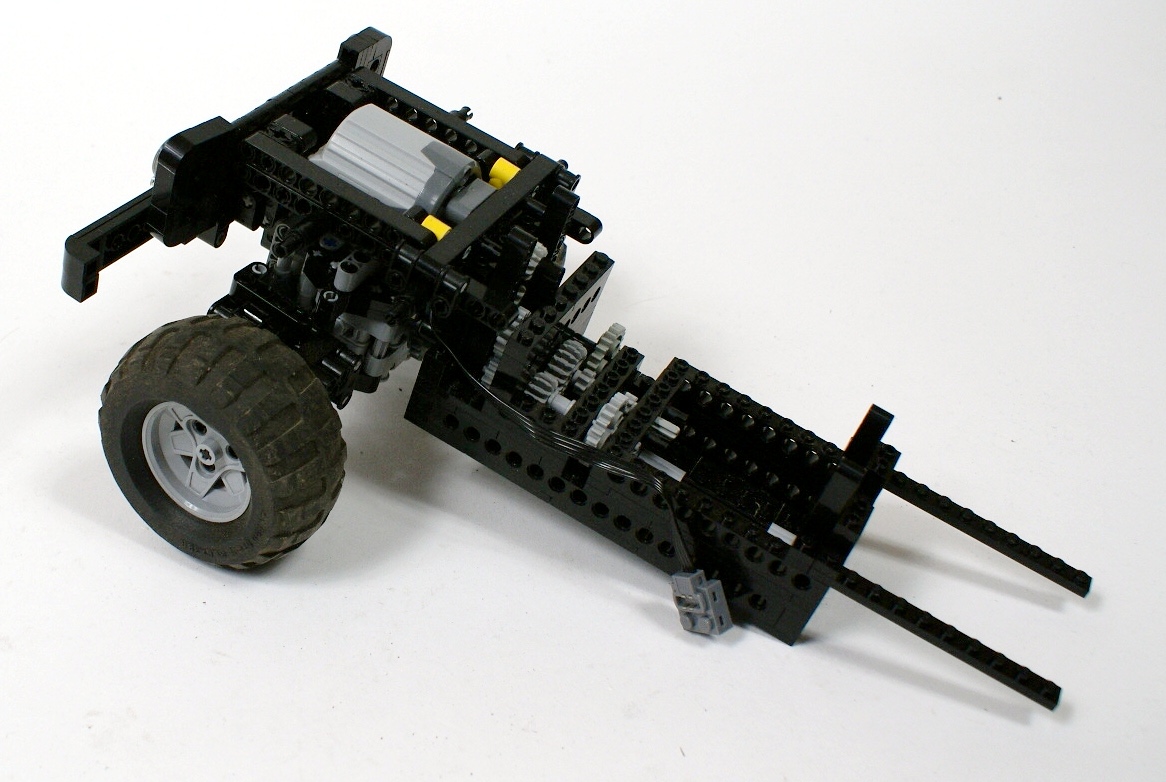
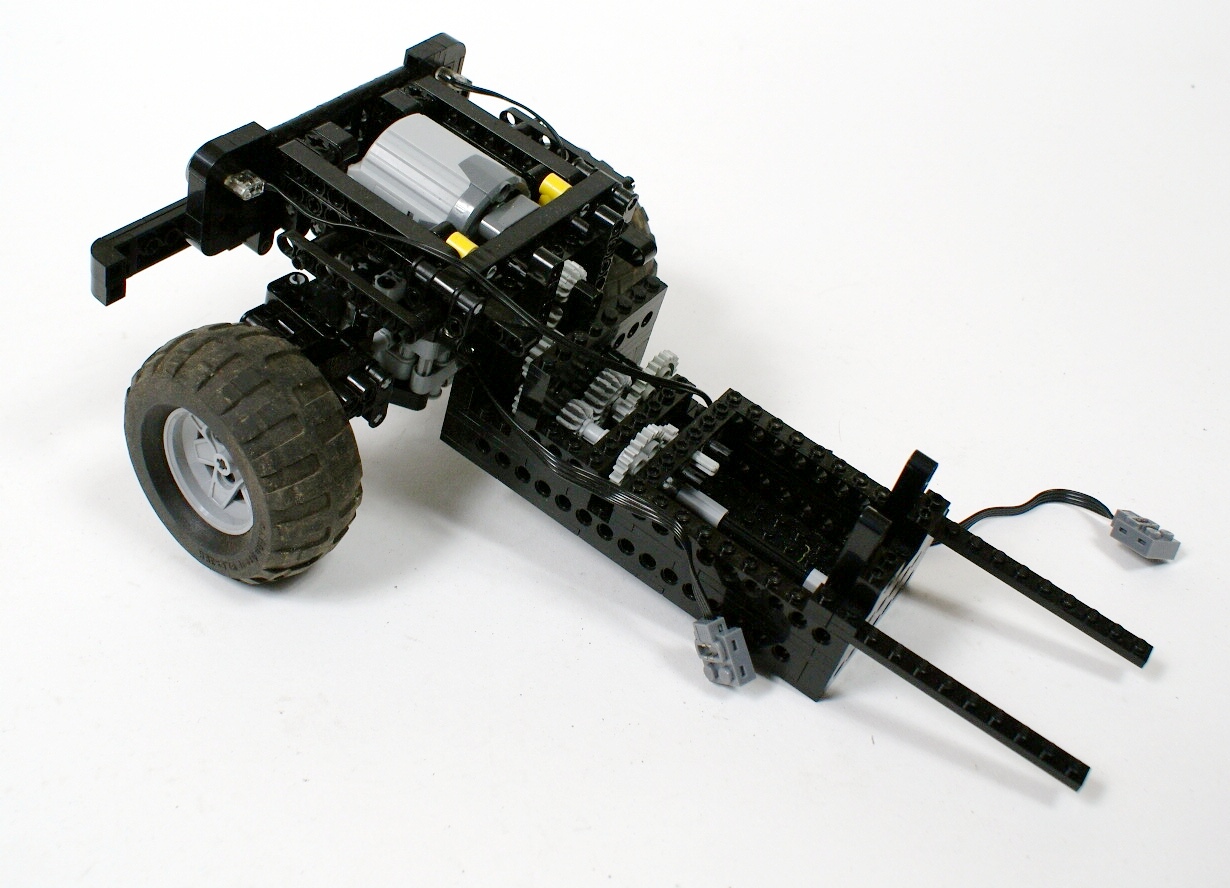
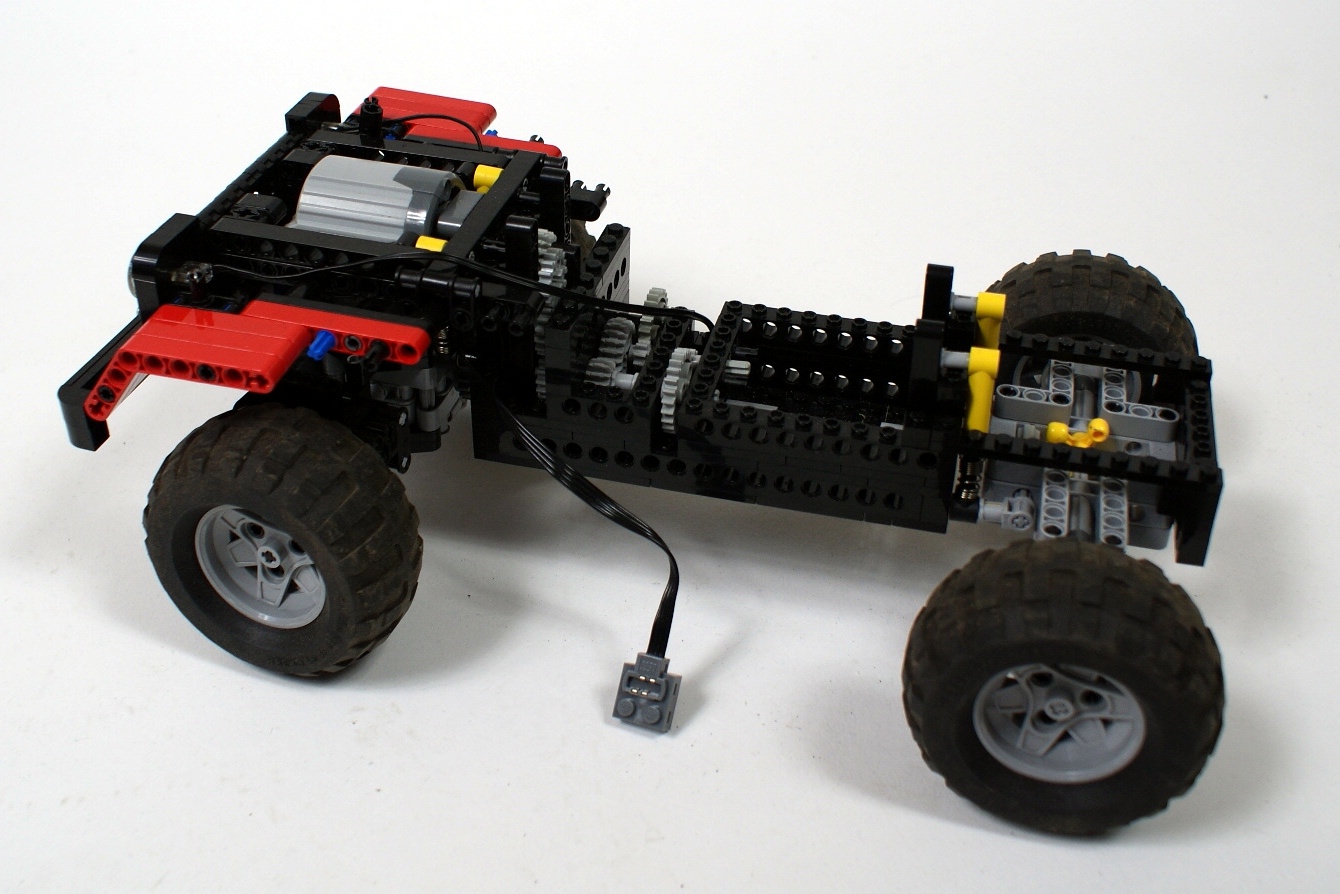
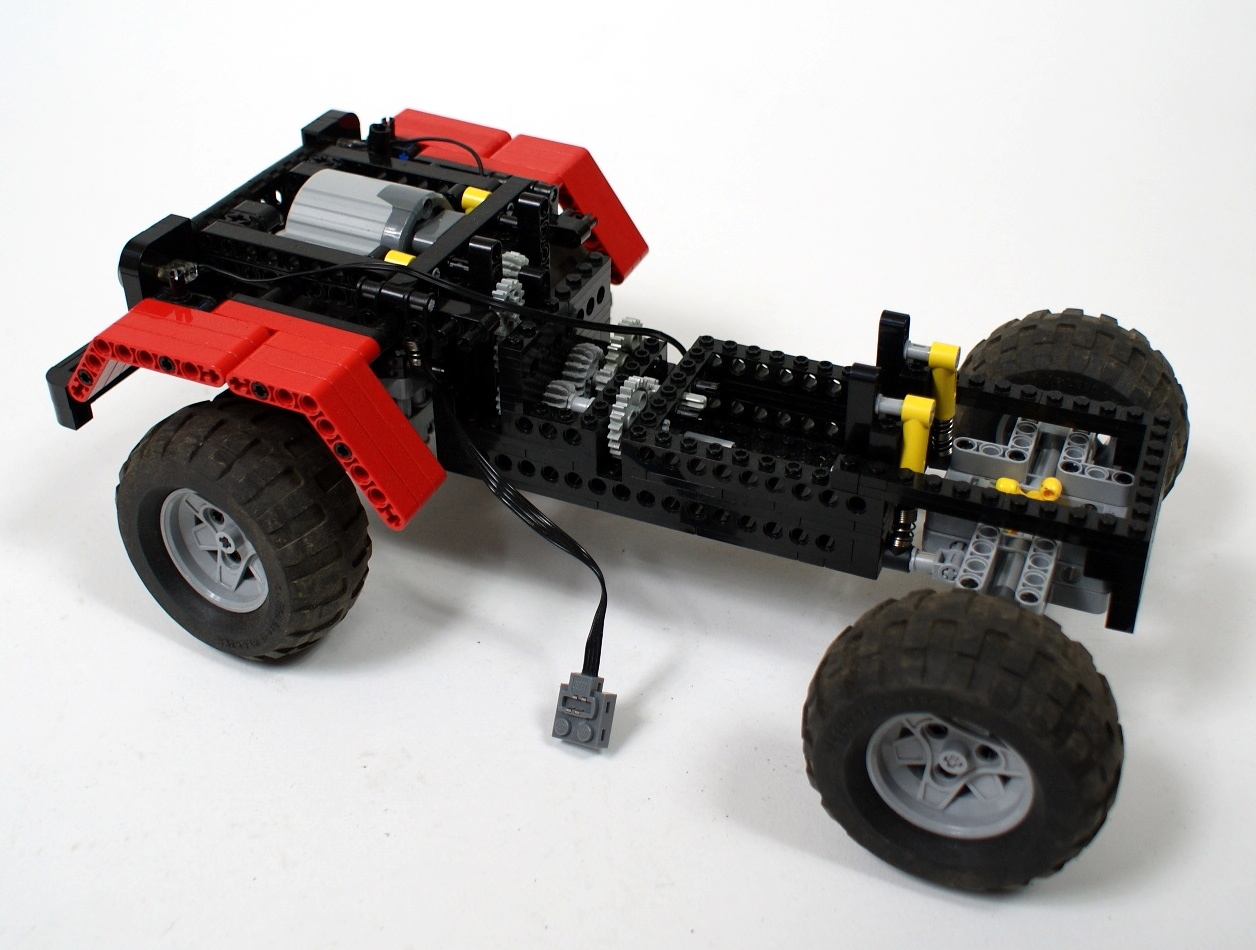
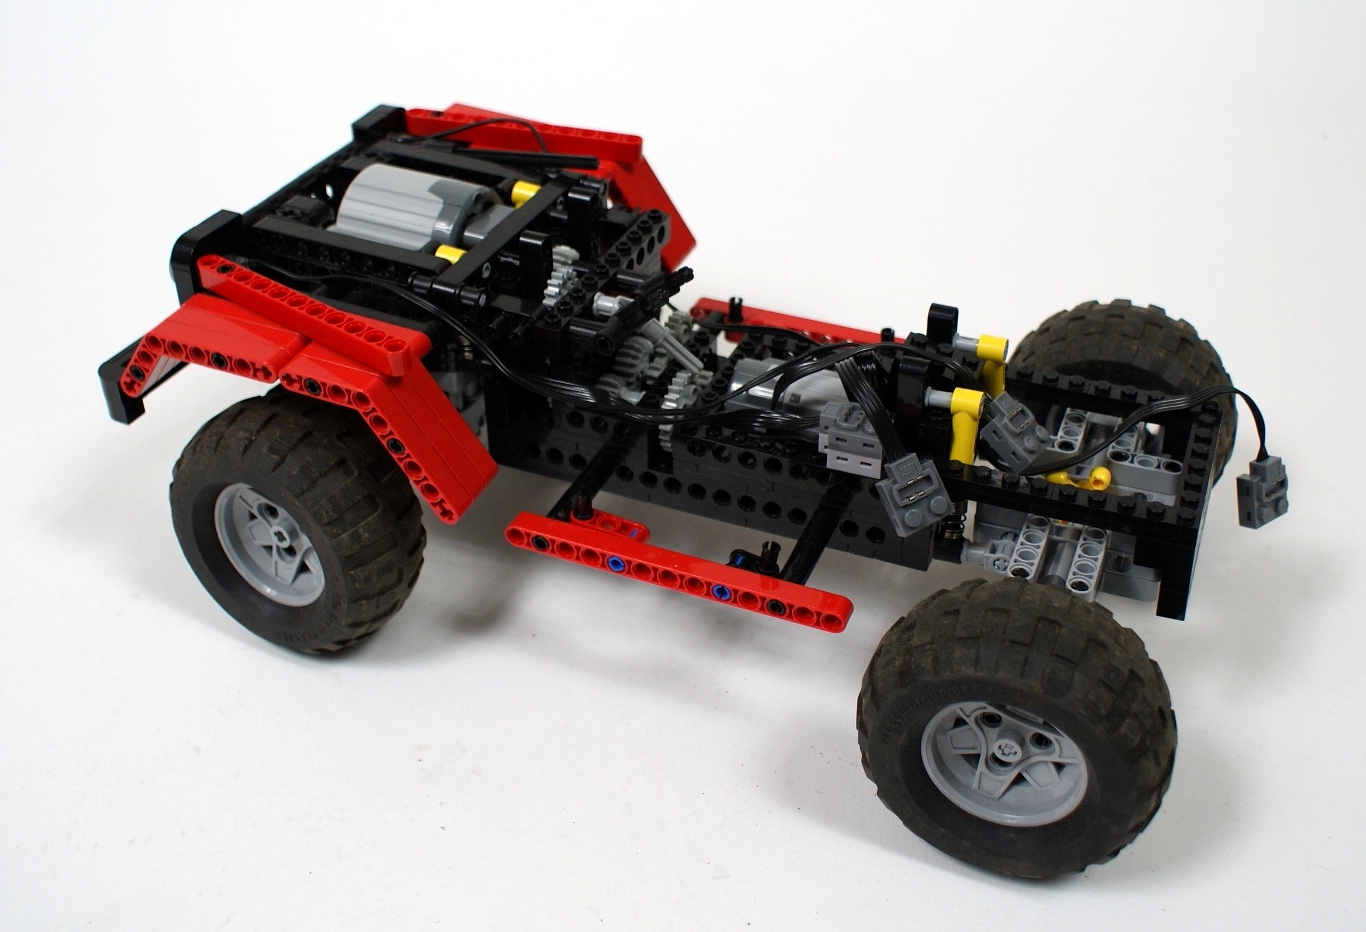
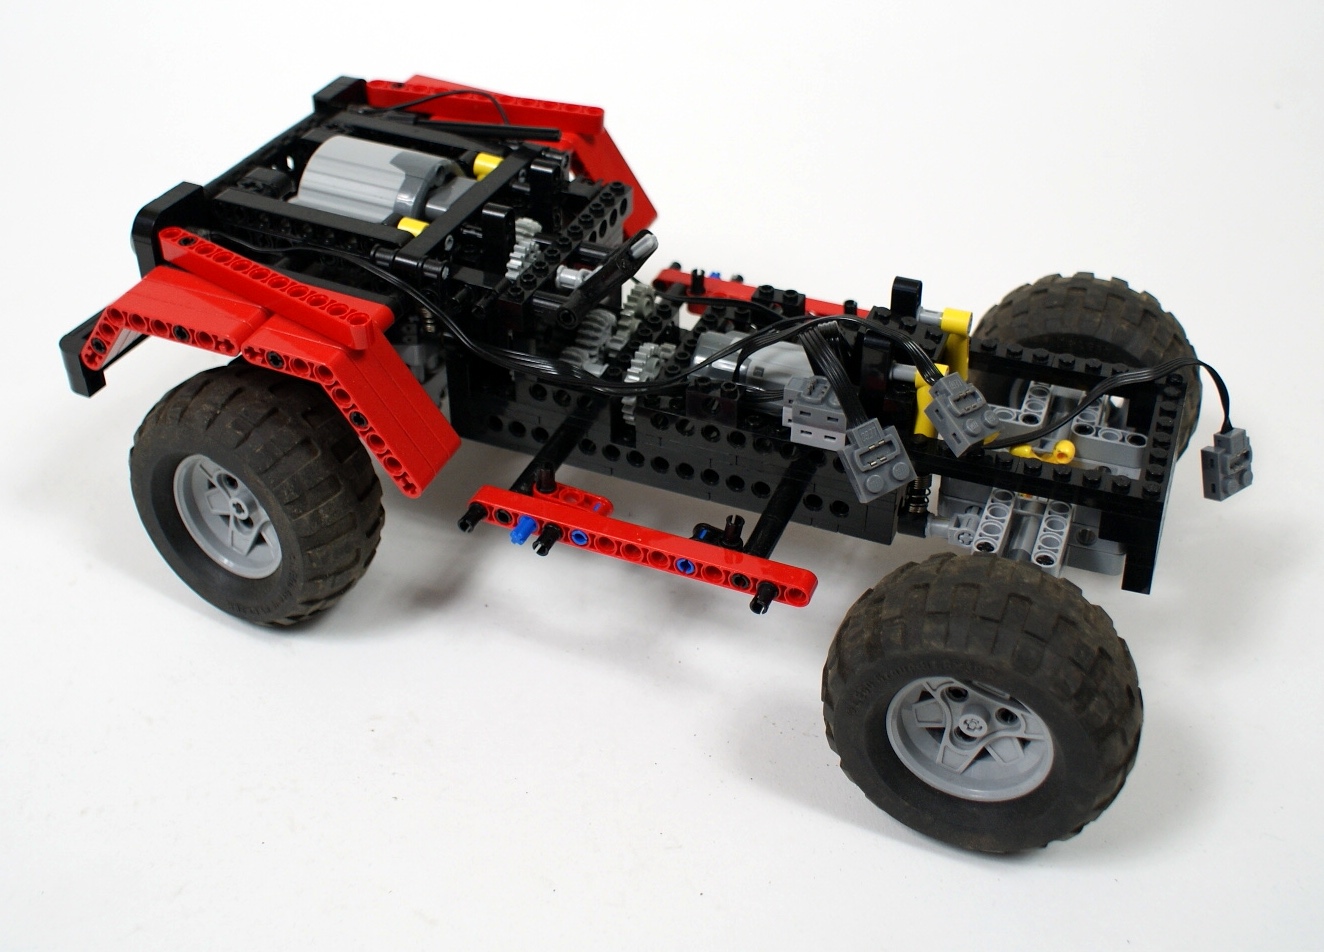
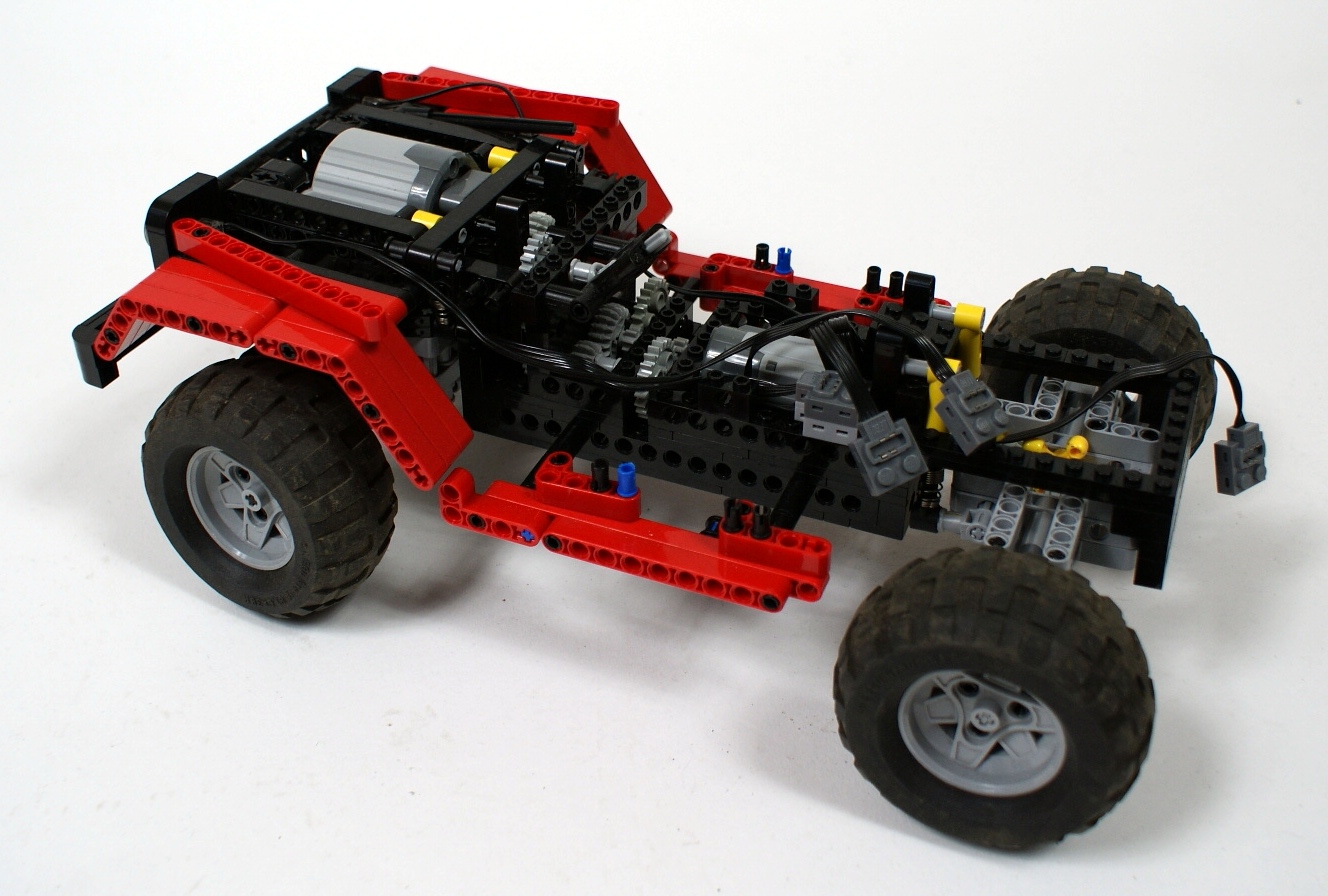
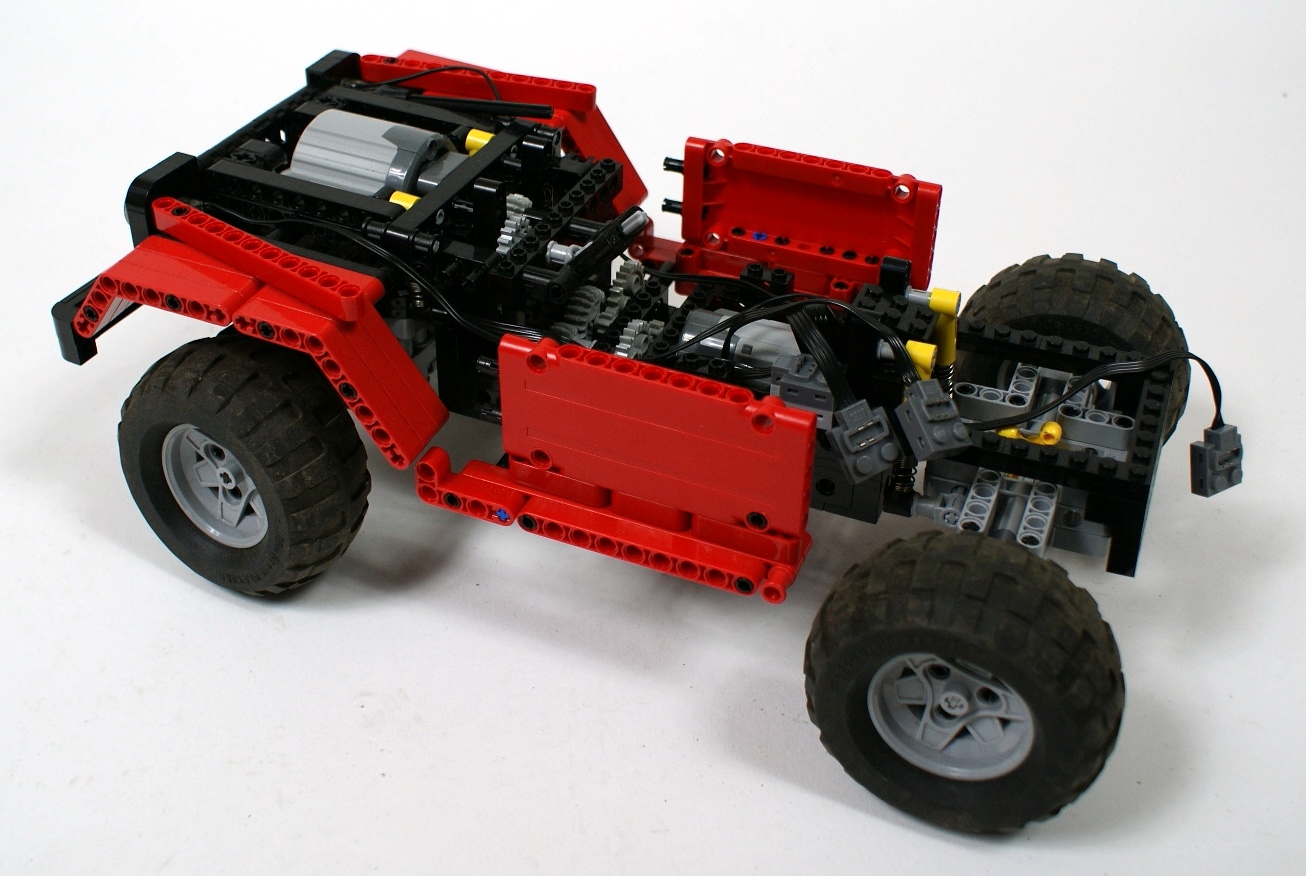
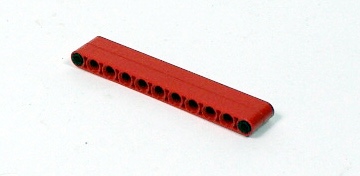
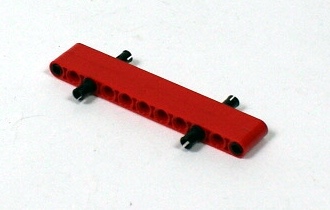
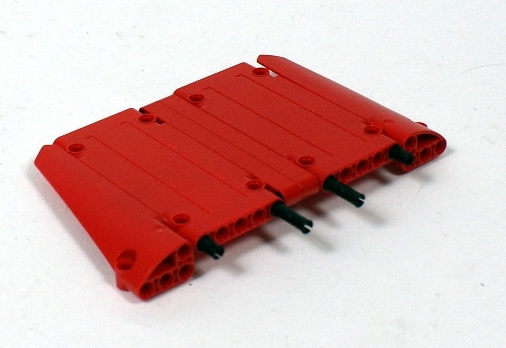
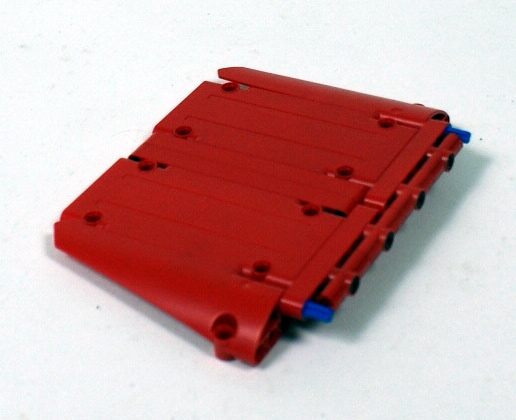
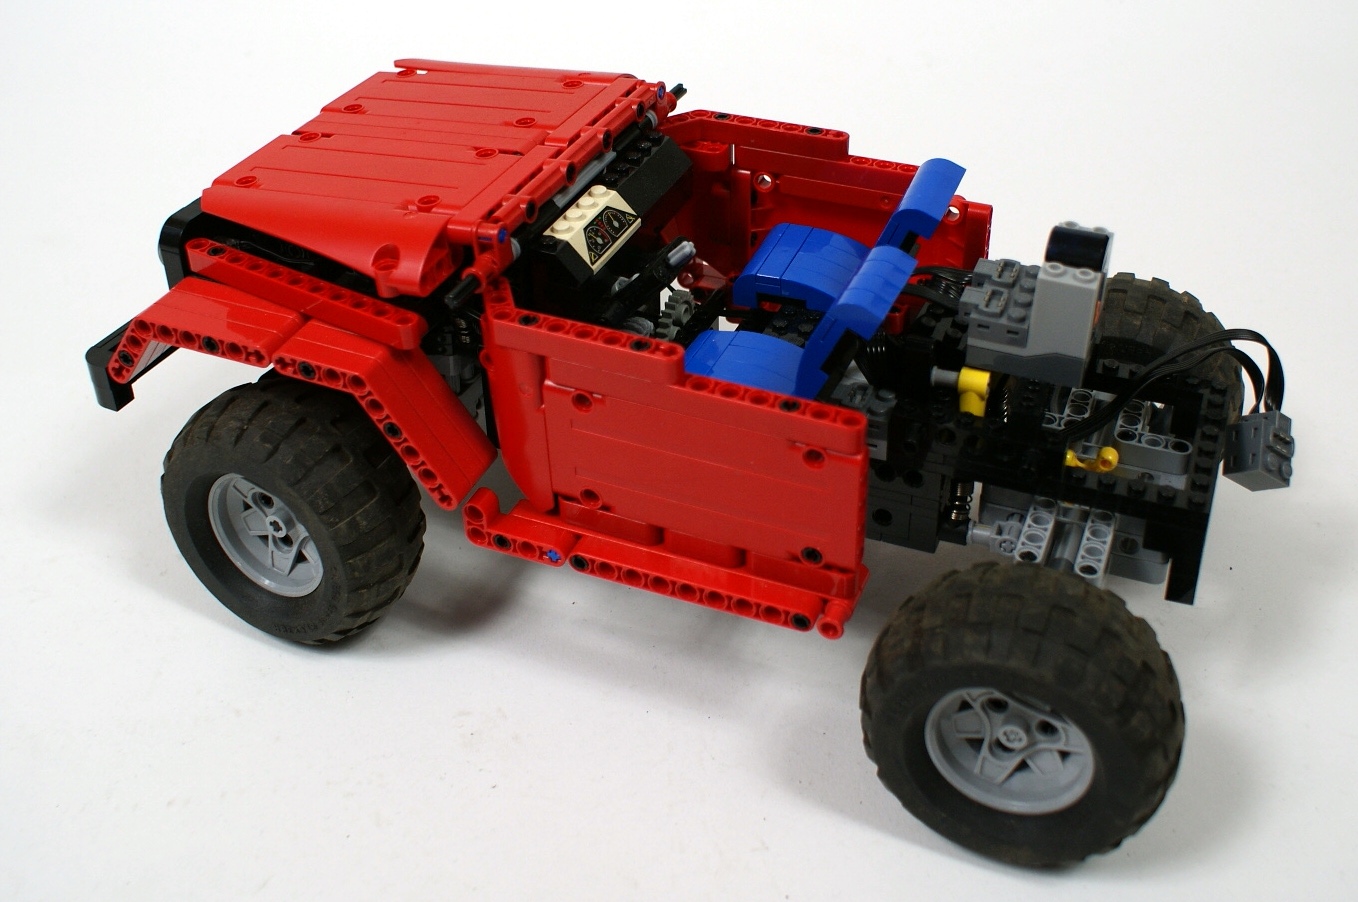
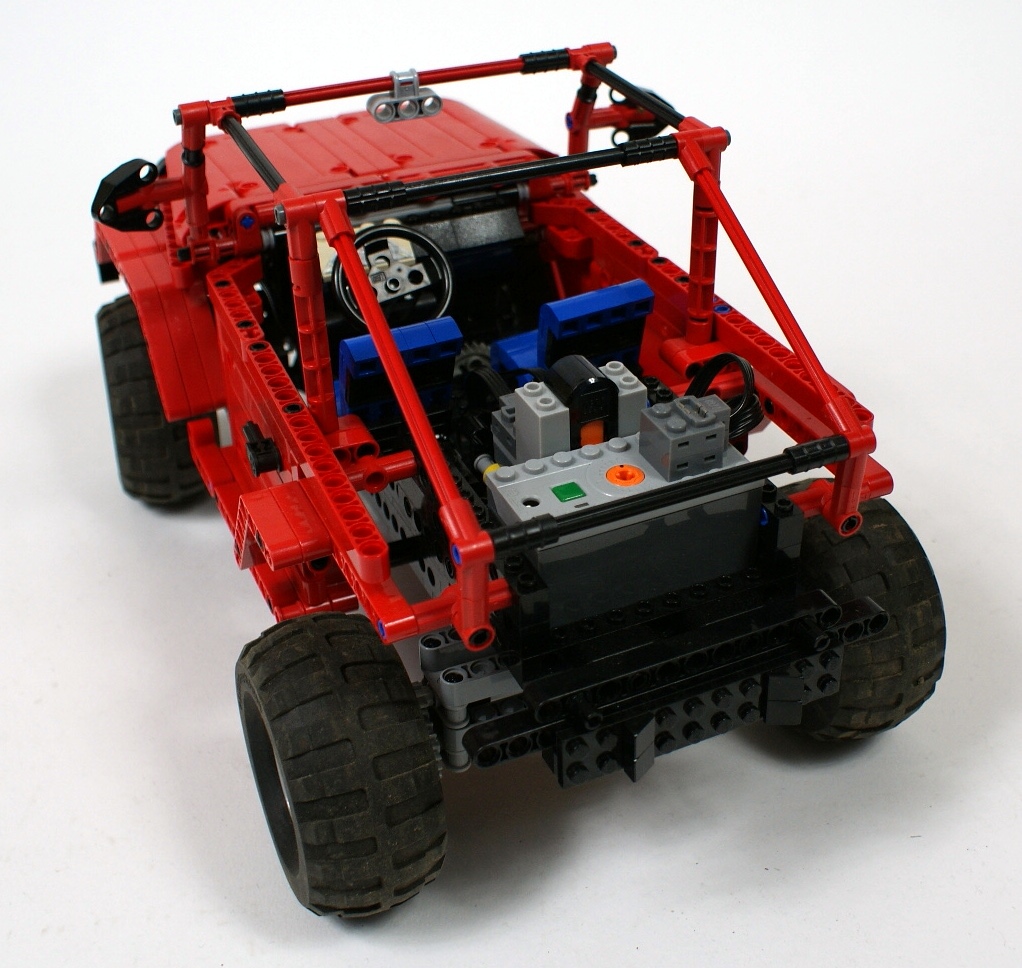
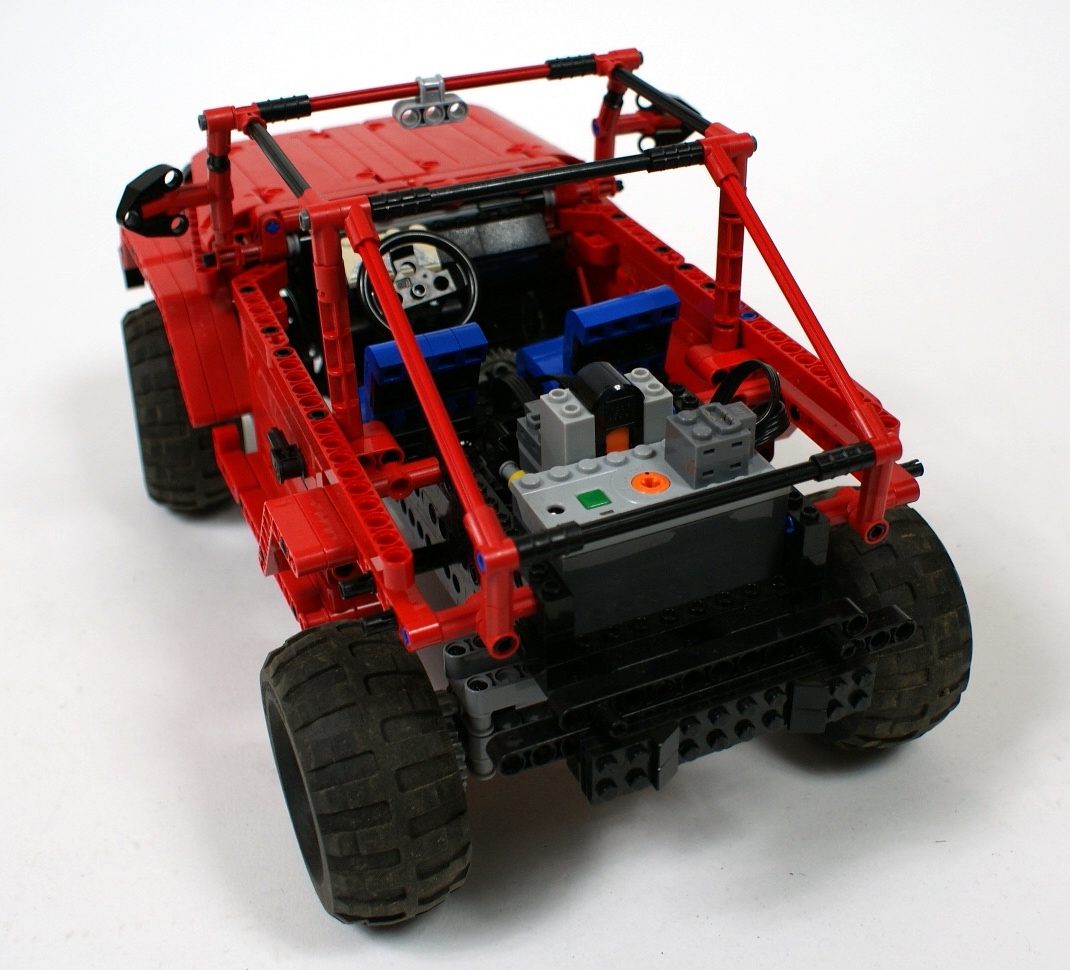
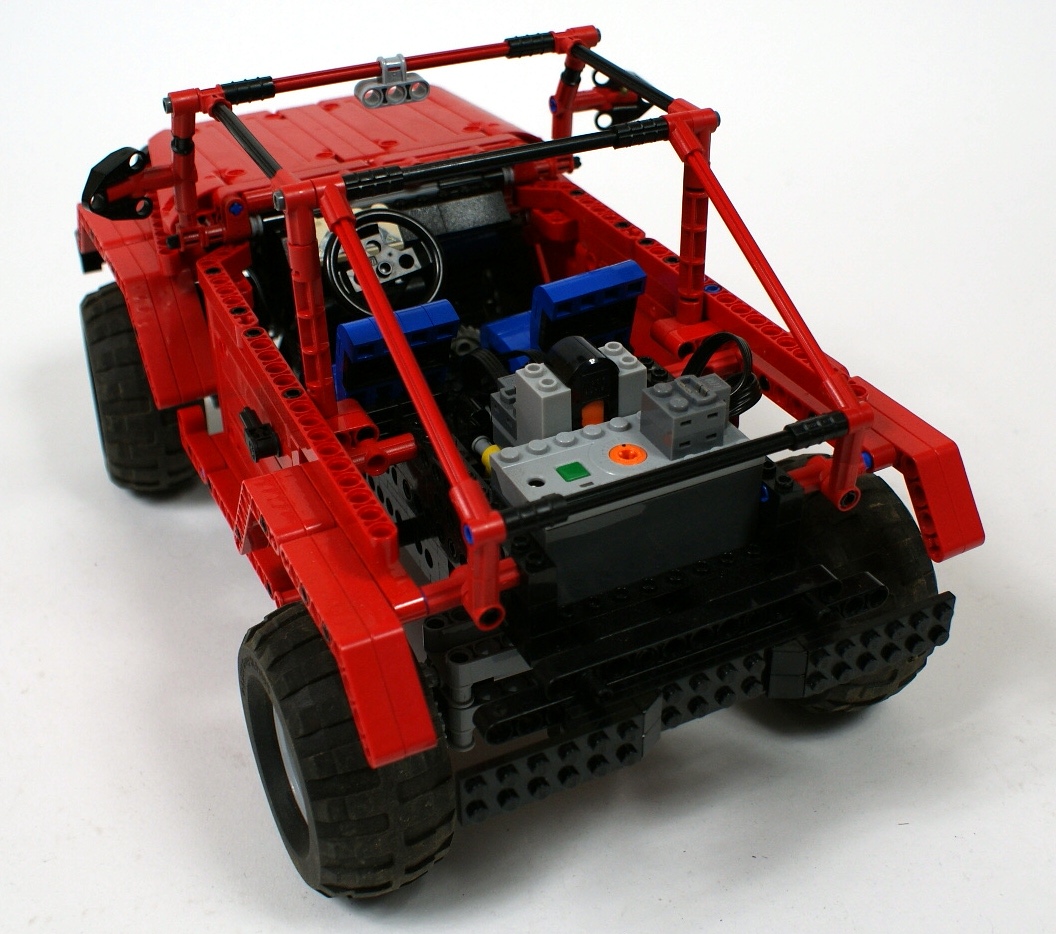
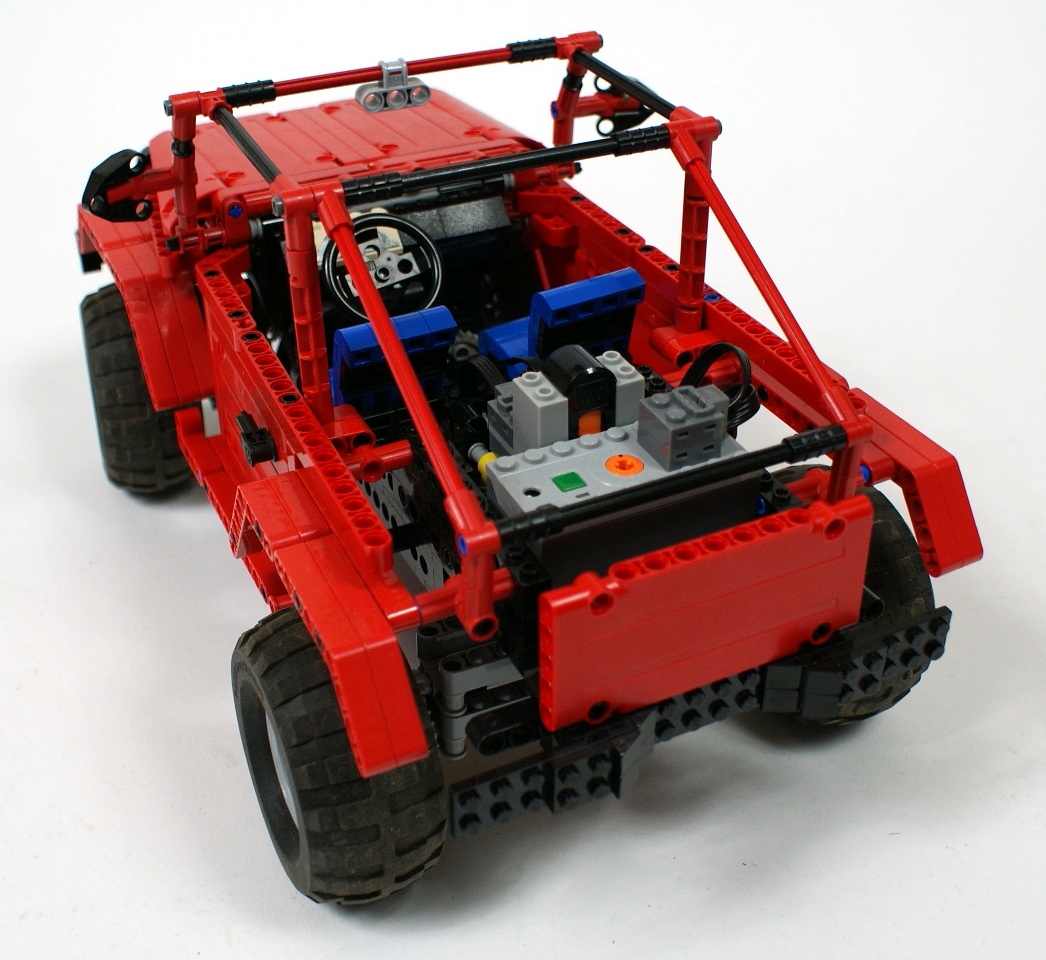
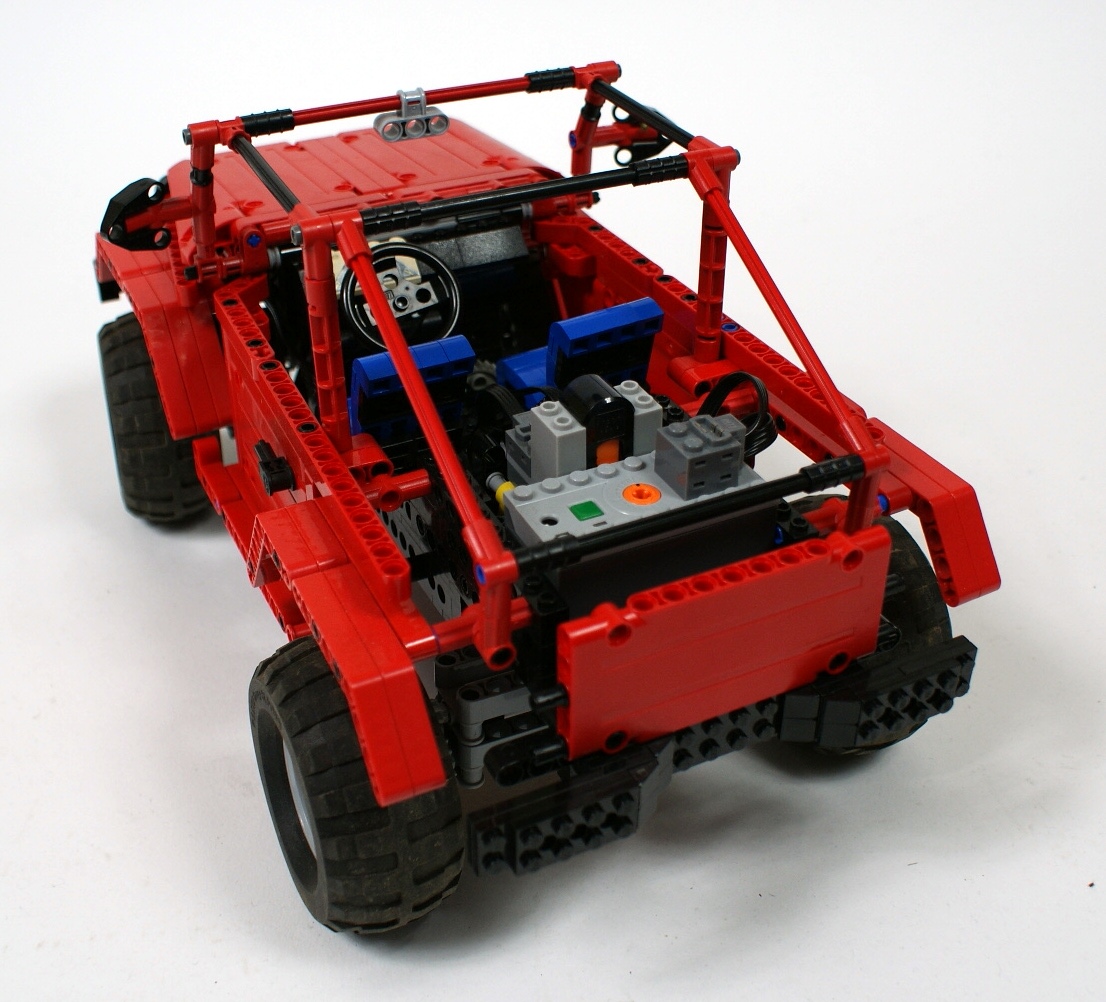
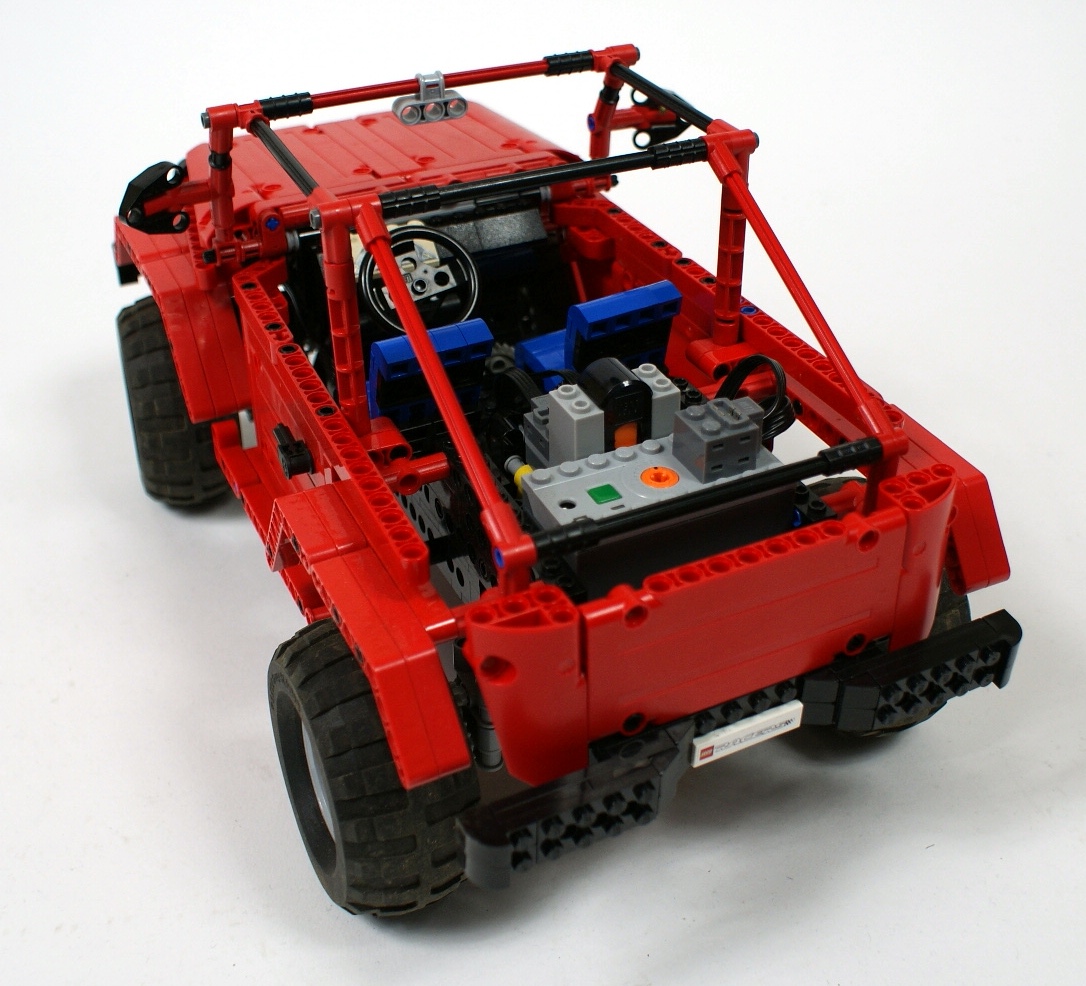
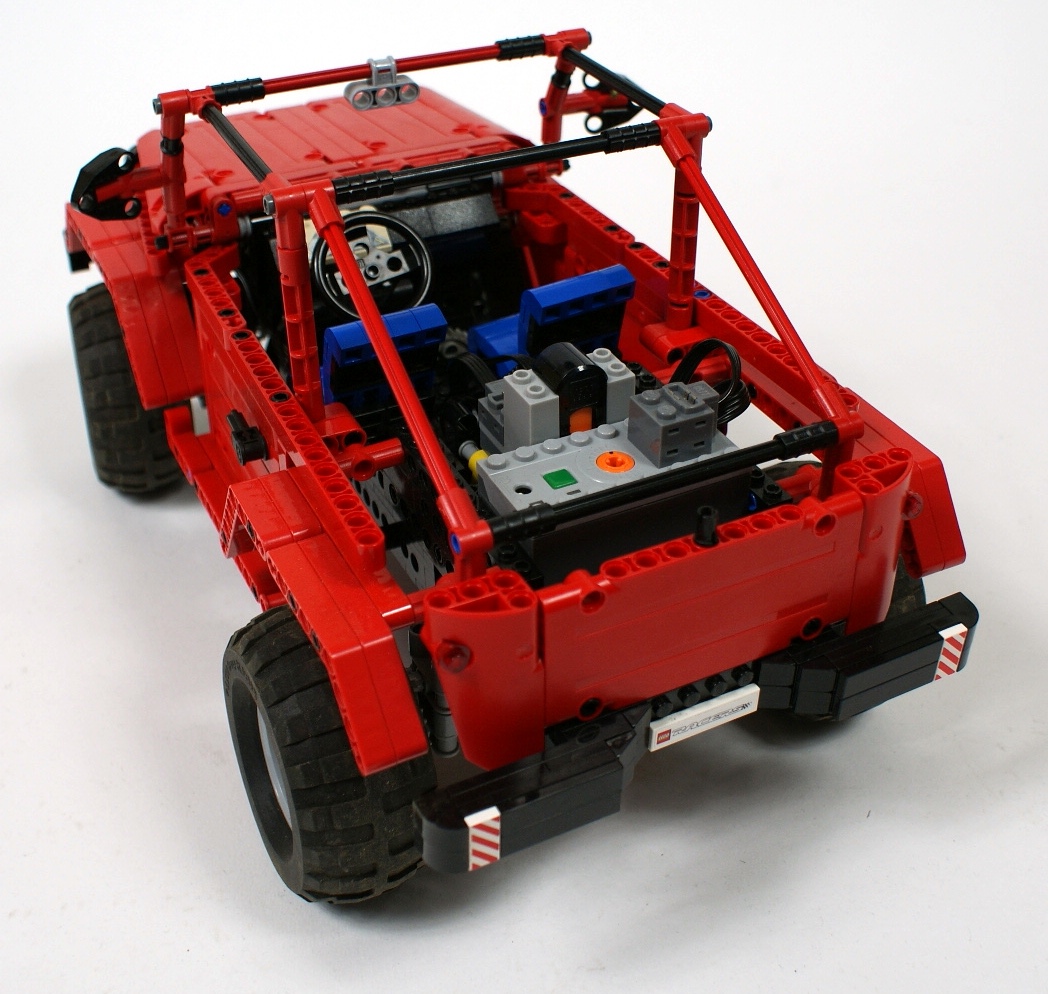
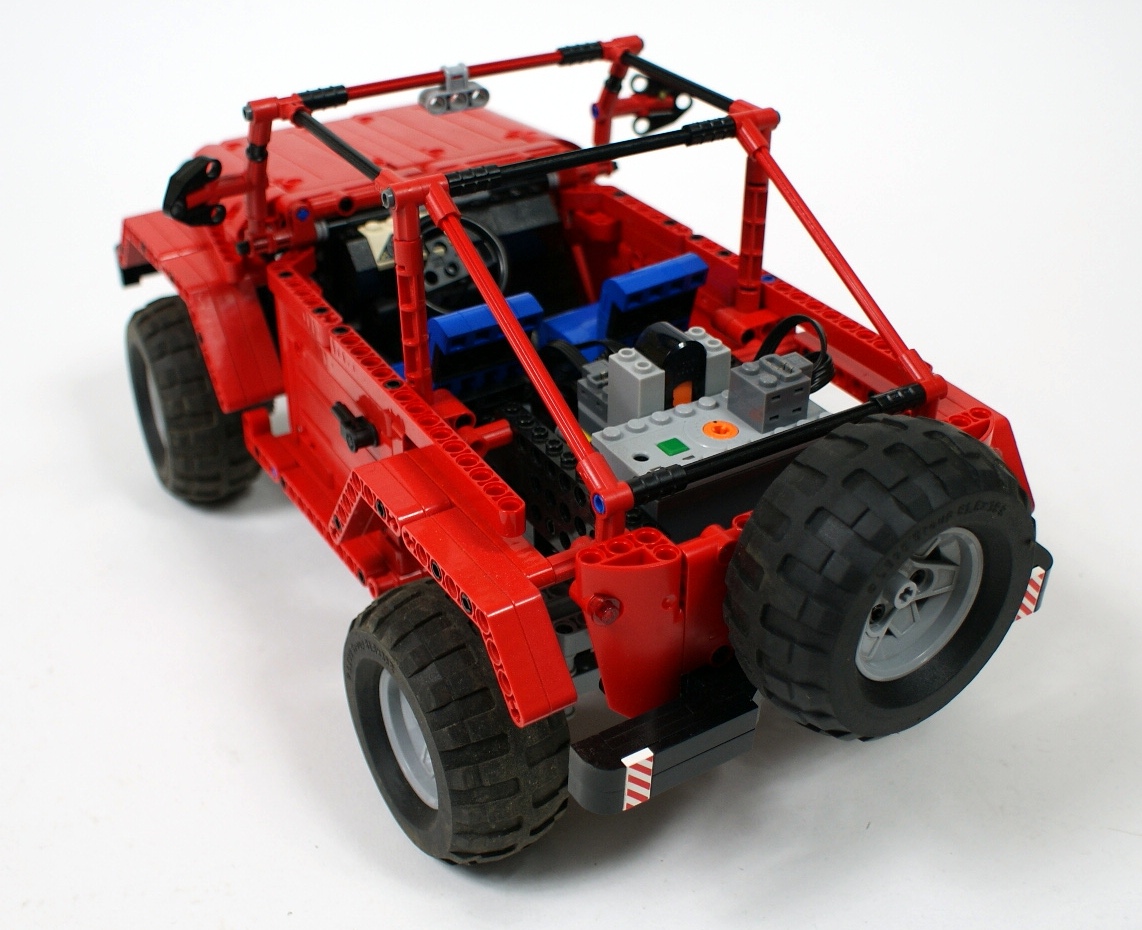
The basic rule of this construction was to keep everything as simple as possible and to reduce the weight to minimum. This is why the body was built with the new Technic panels, which provide the best combination of stiffness and lightness. Both front and rear axle are built entirely with liftarms, but the frame that connects them is built with Technic bricks. The reason to use bricks was that I wanted to build a roofless version of the Jeep in order to obtain low center of gravity, and since the sides of the cabin are made of single panels, the whole model had to be kept together by the cabin’s floor. Therefore there are bricks in the floor, that provide excellent stiffness and robustness while keeping the floor thin.
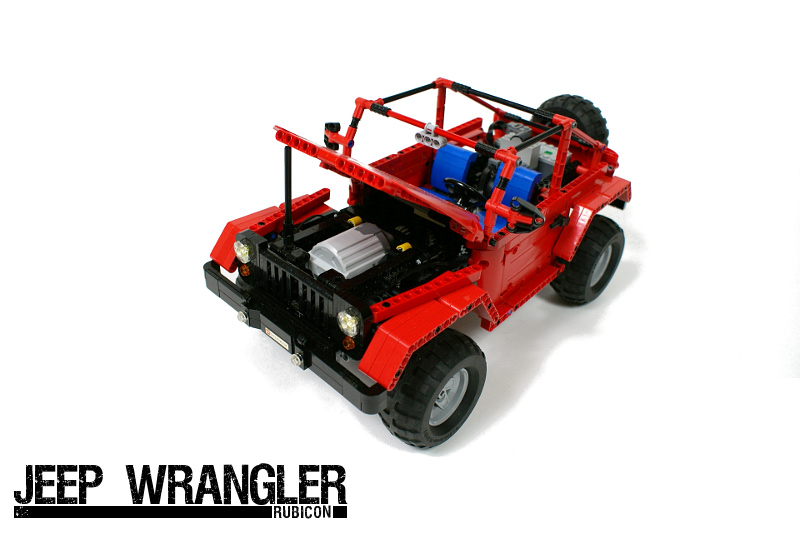
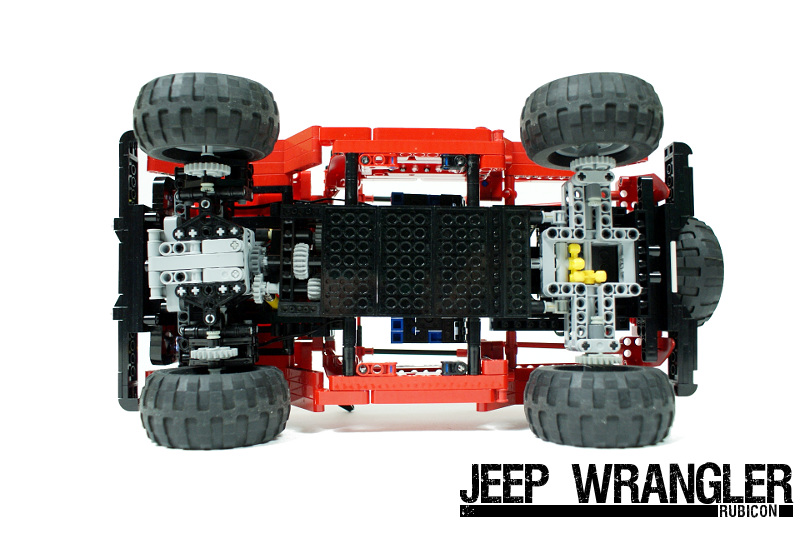
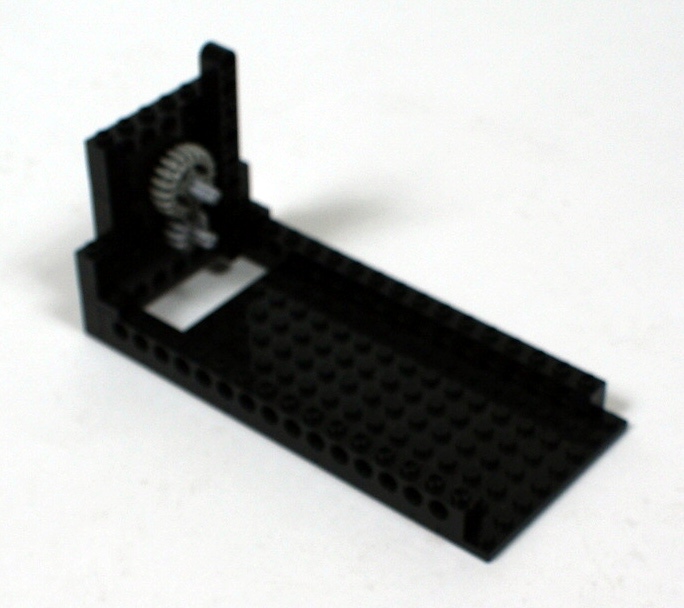
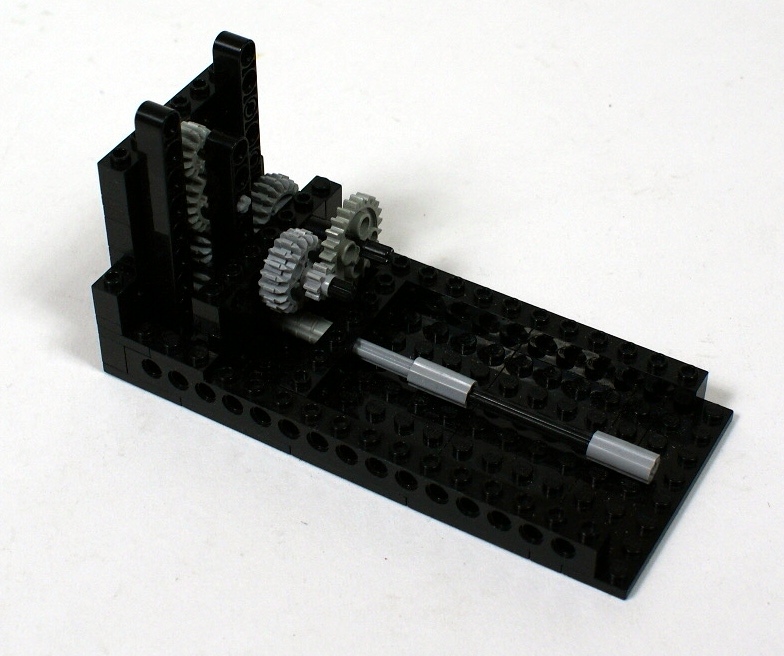
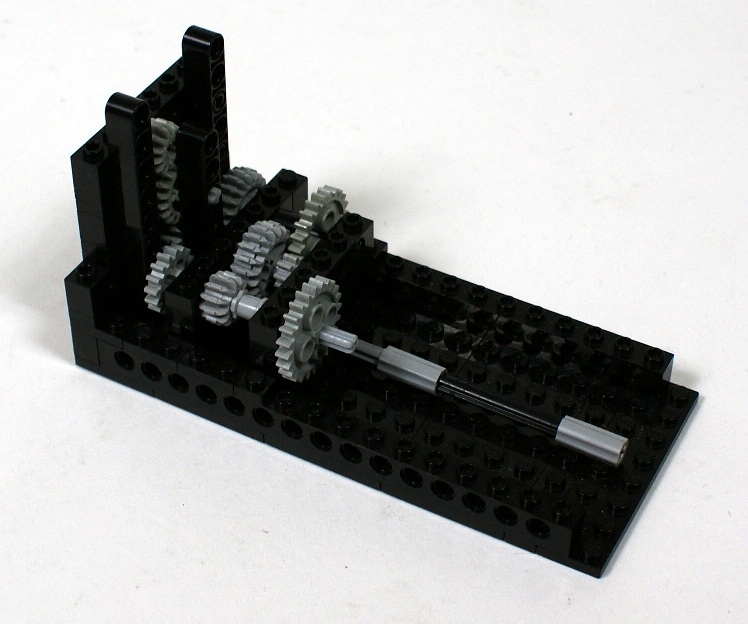
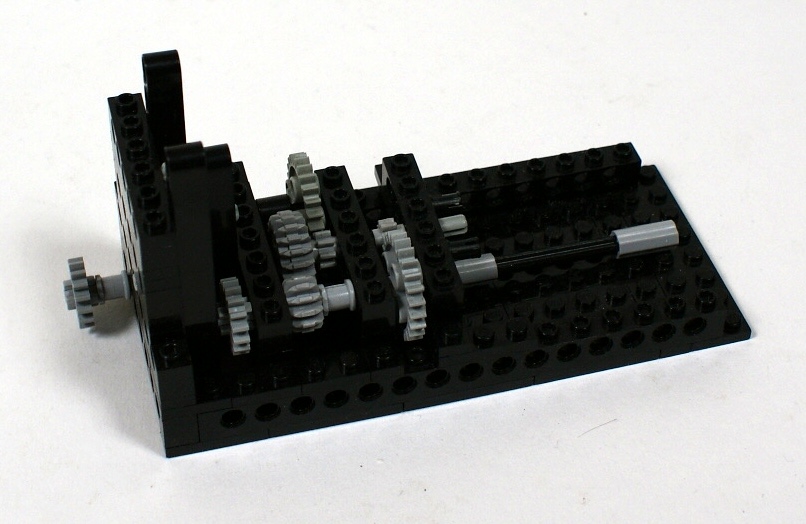
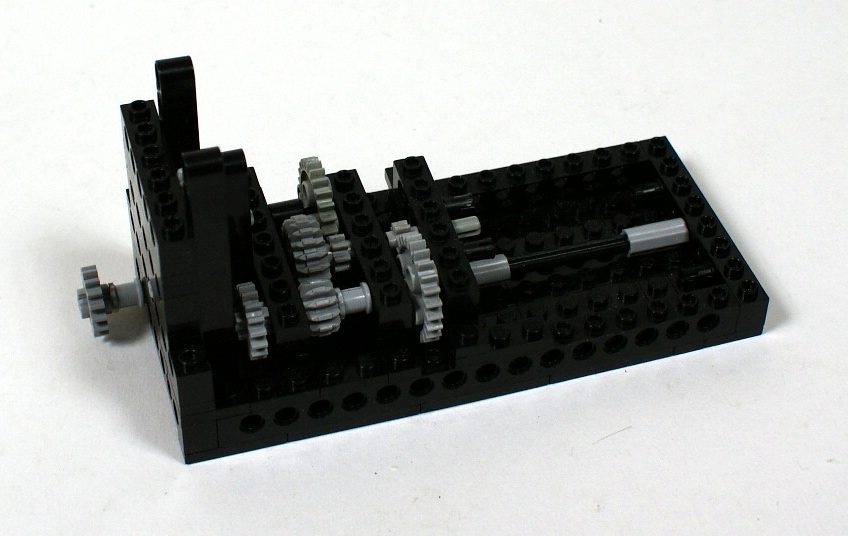
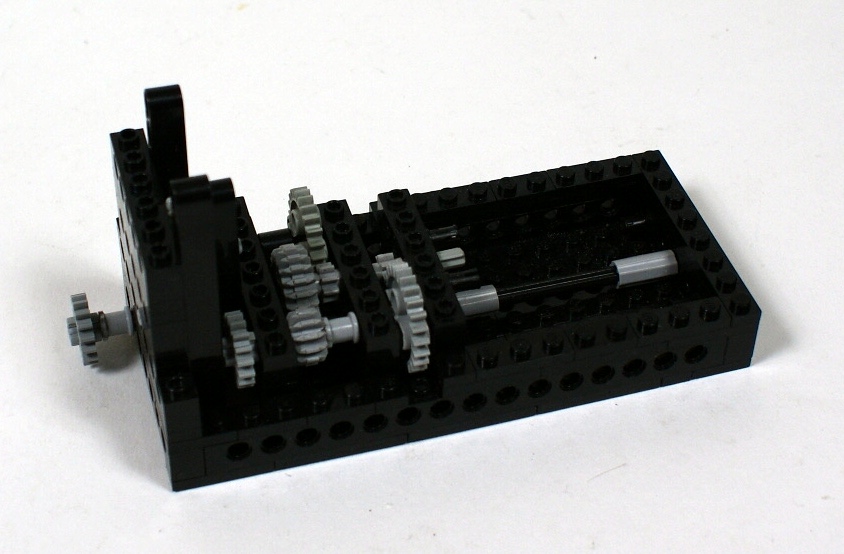
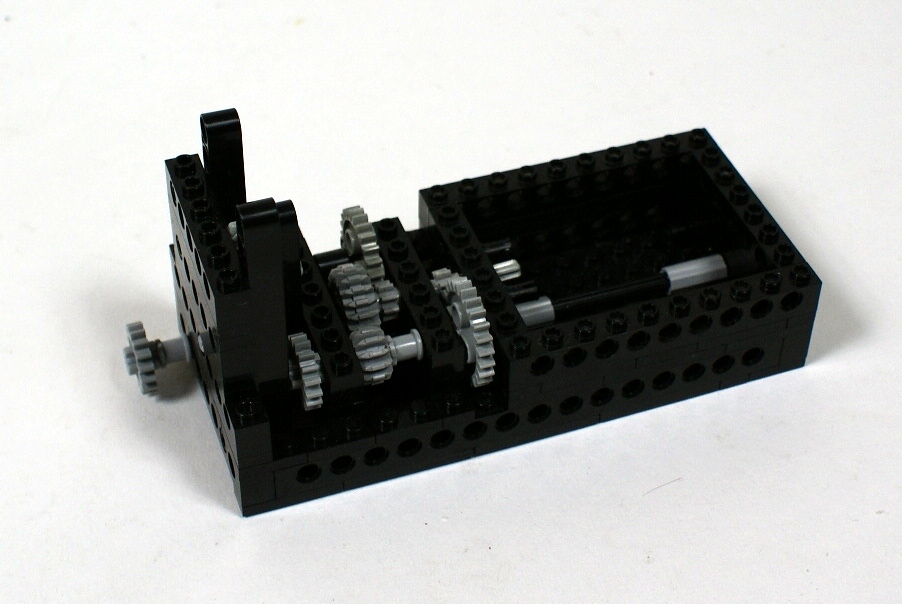
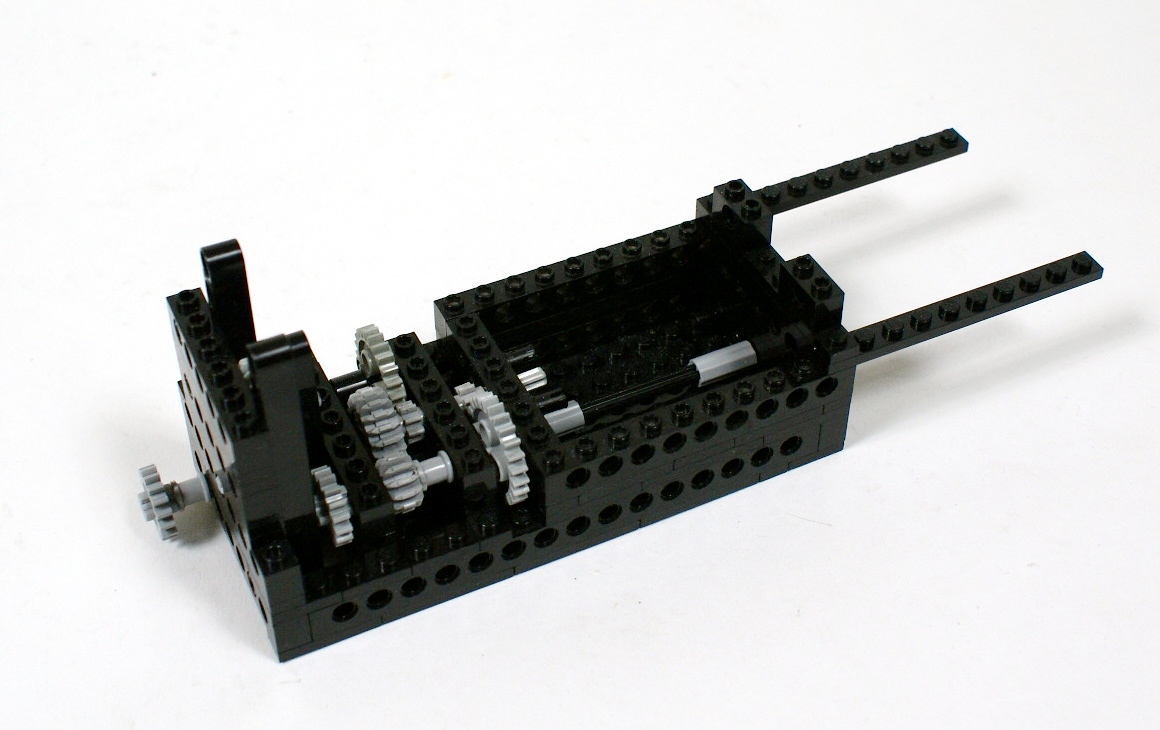
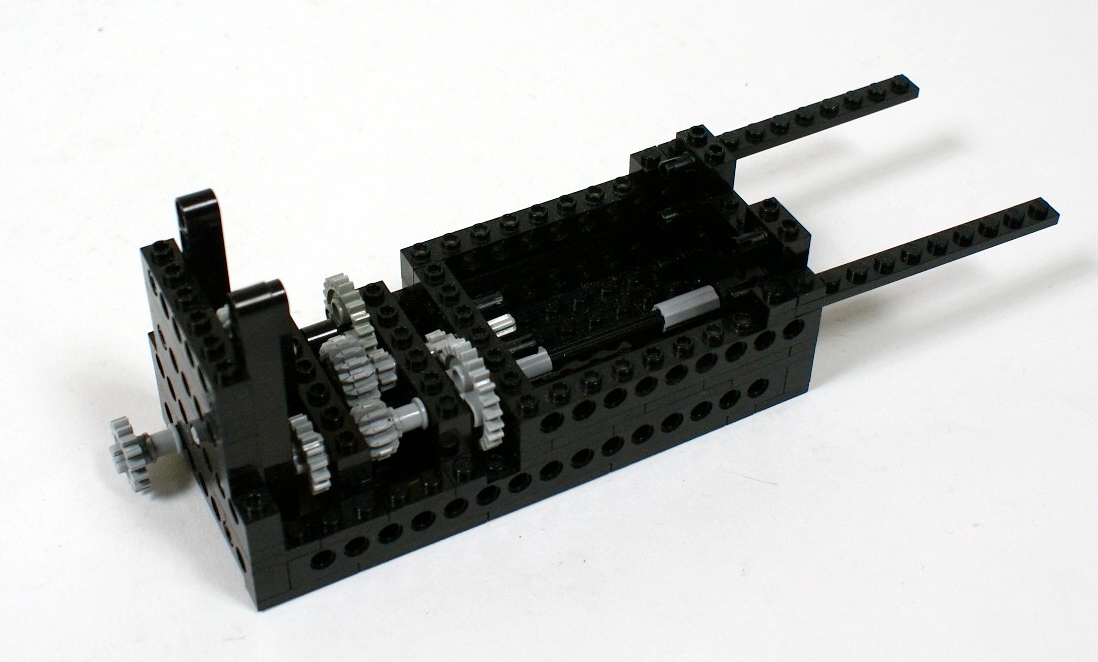
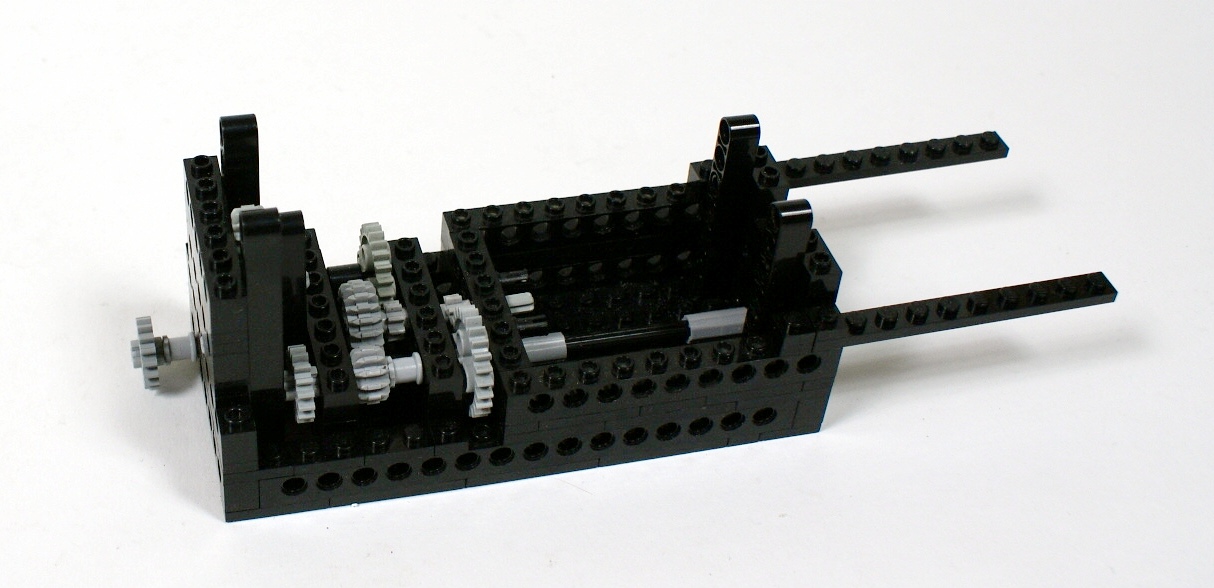
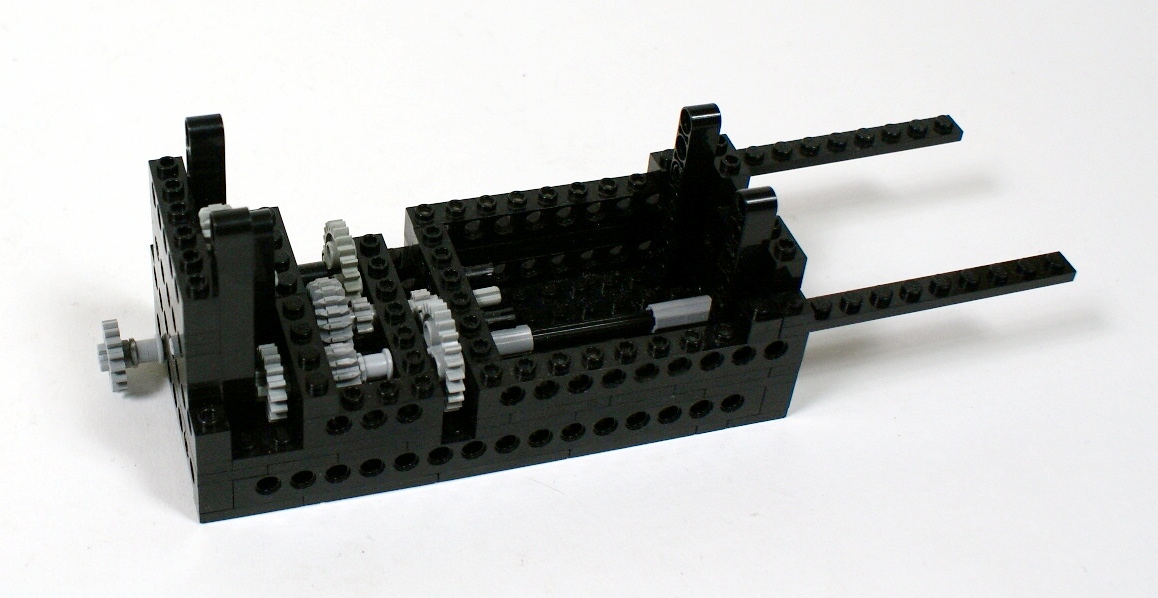
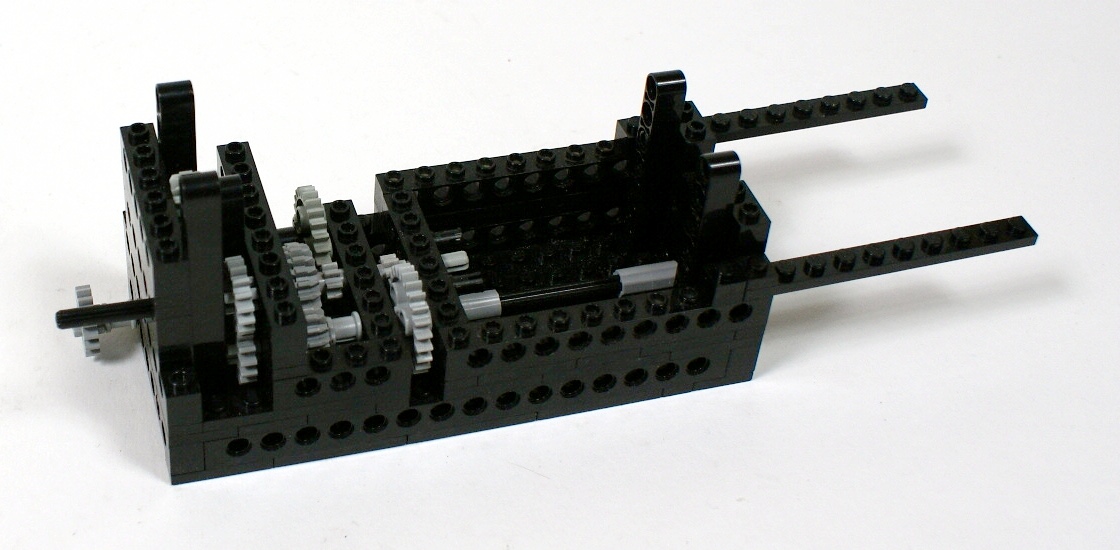
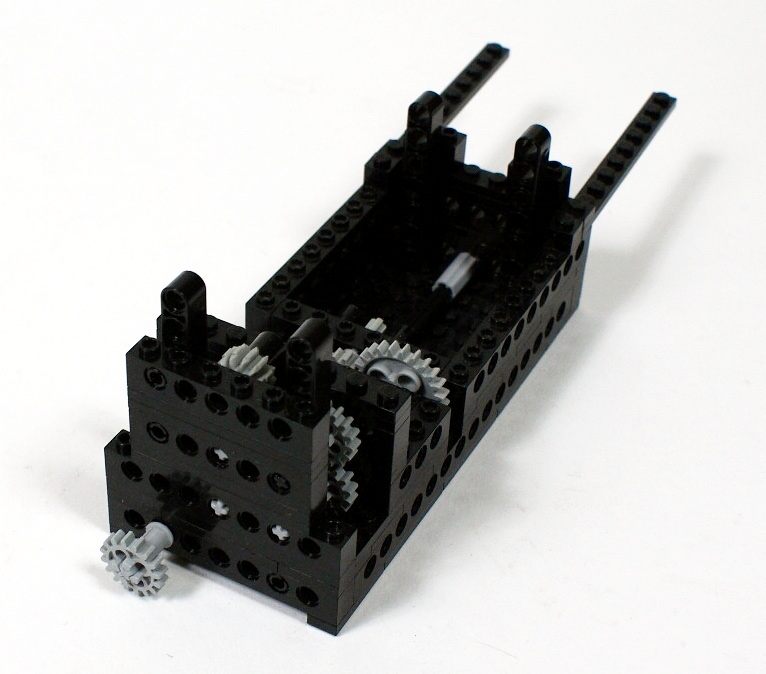
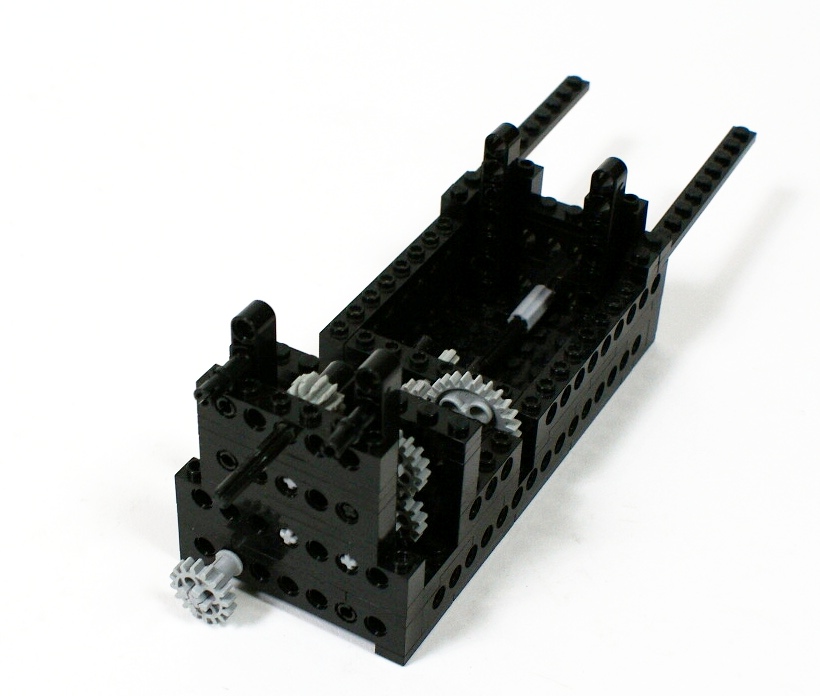
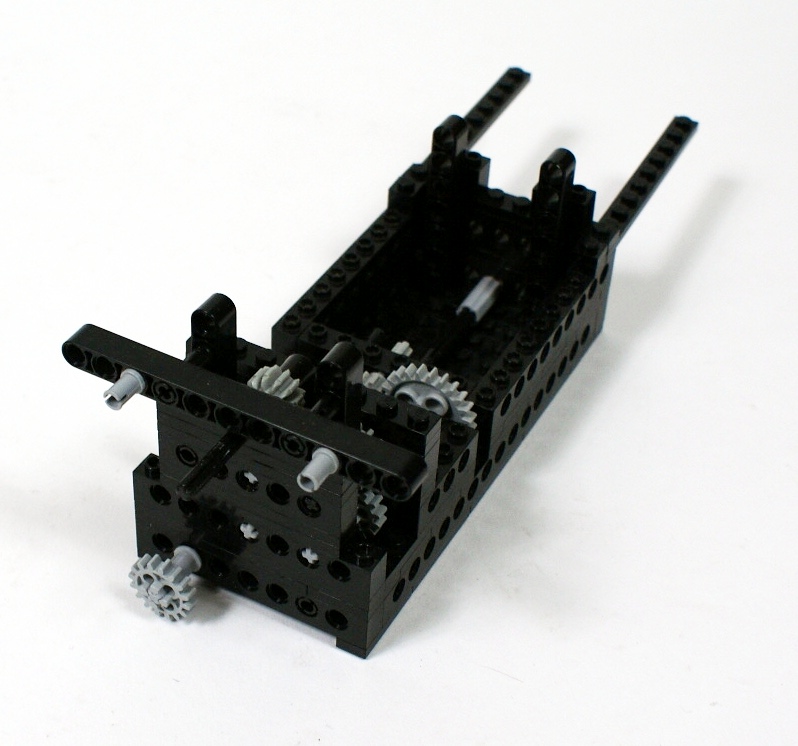
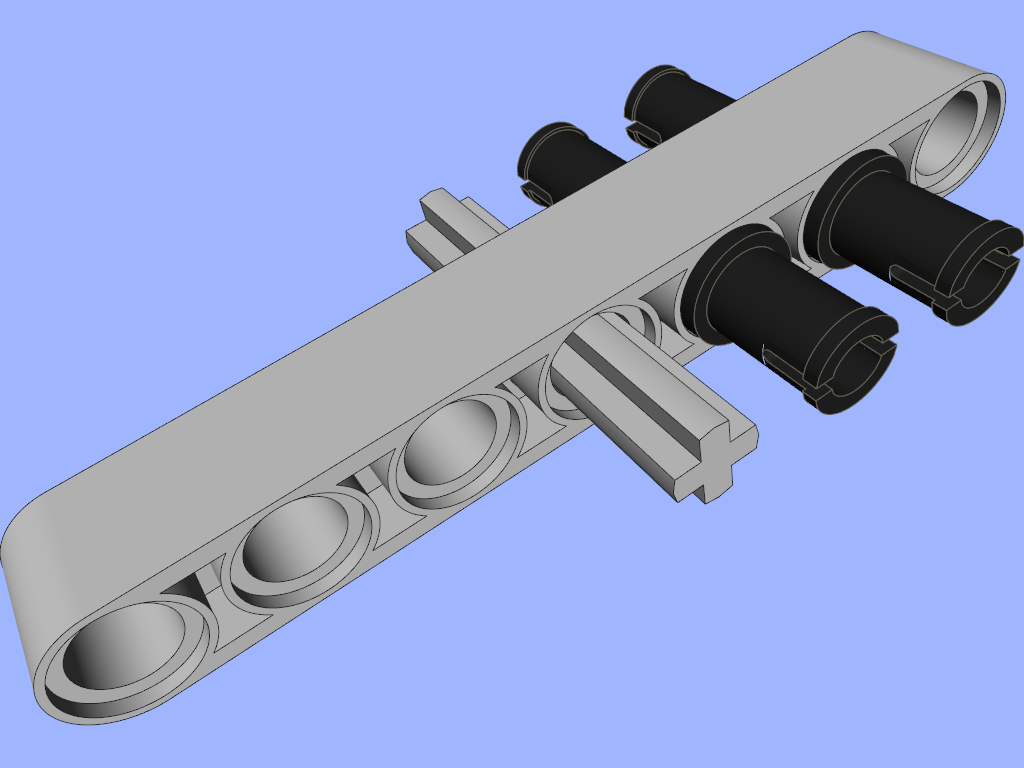
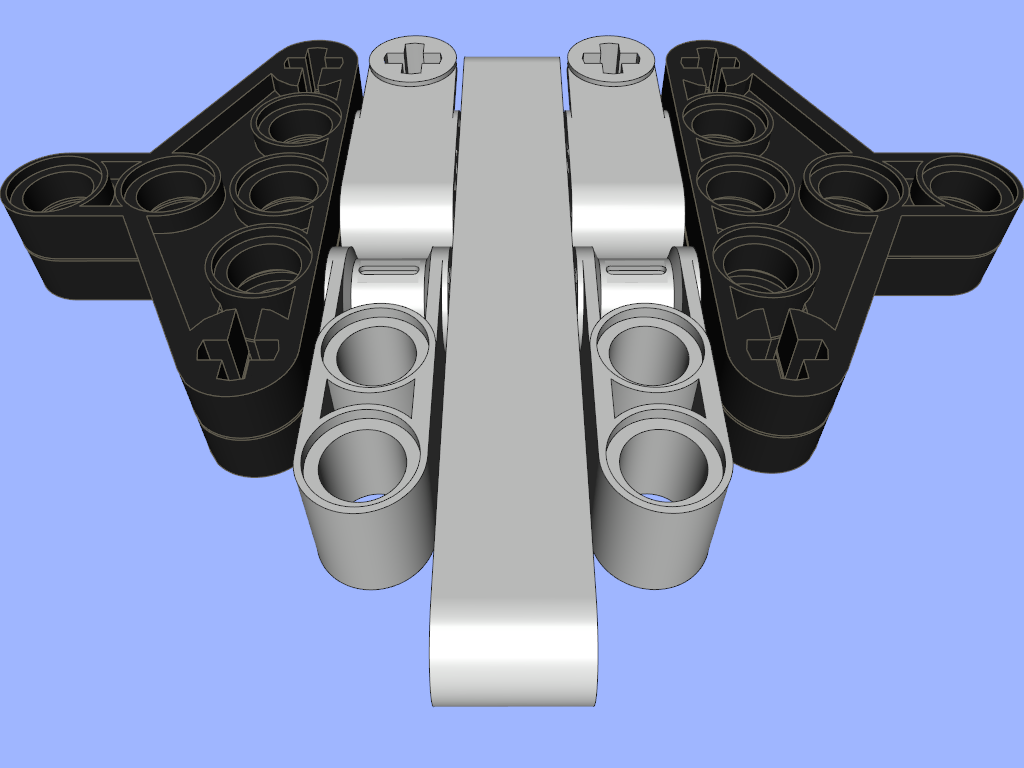
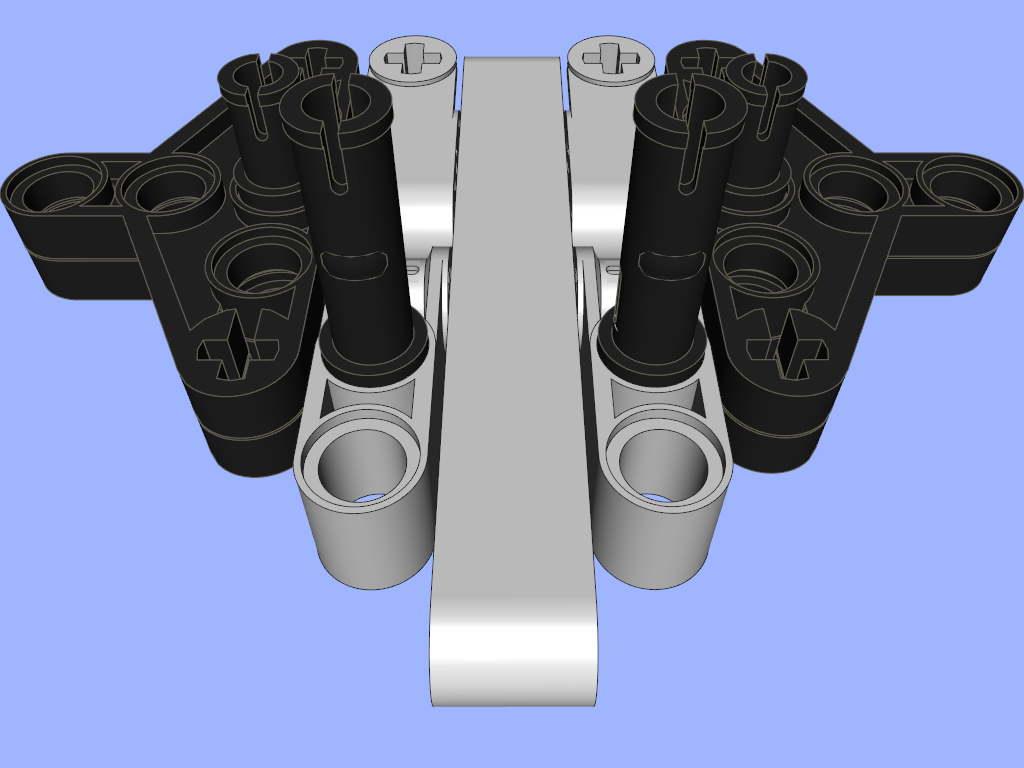
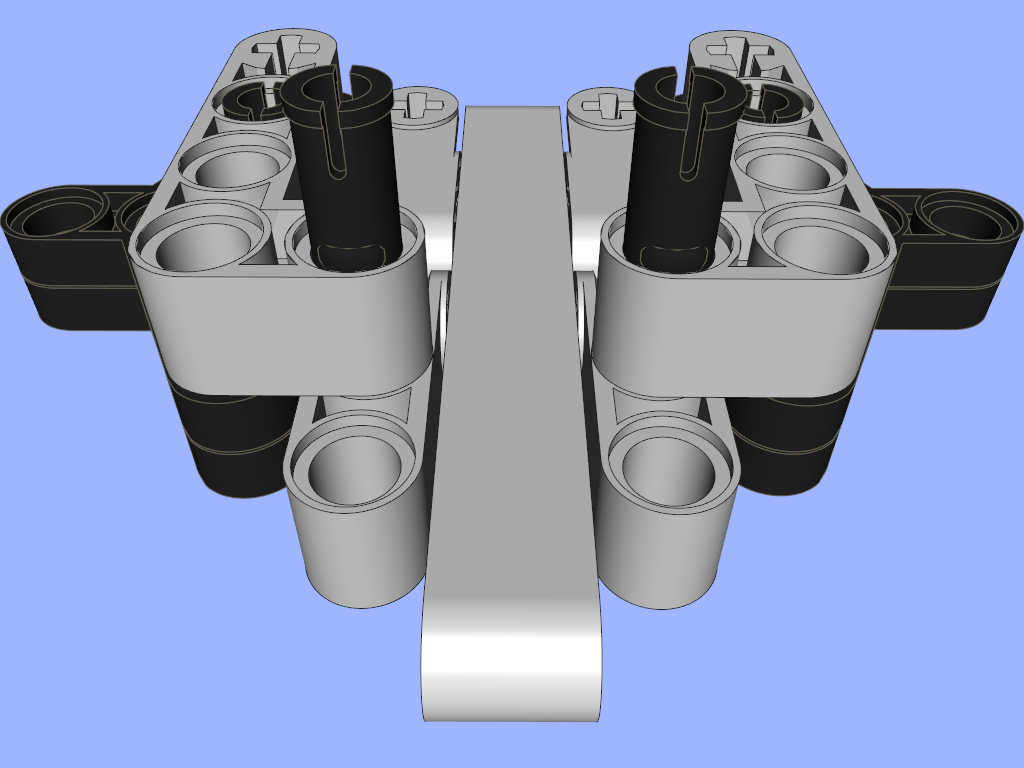
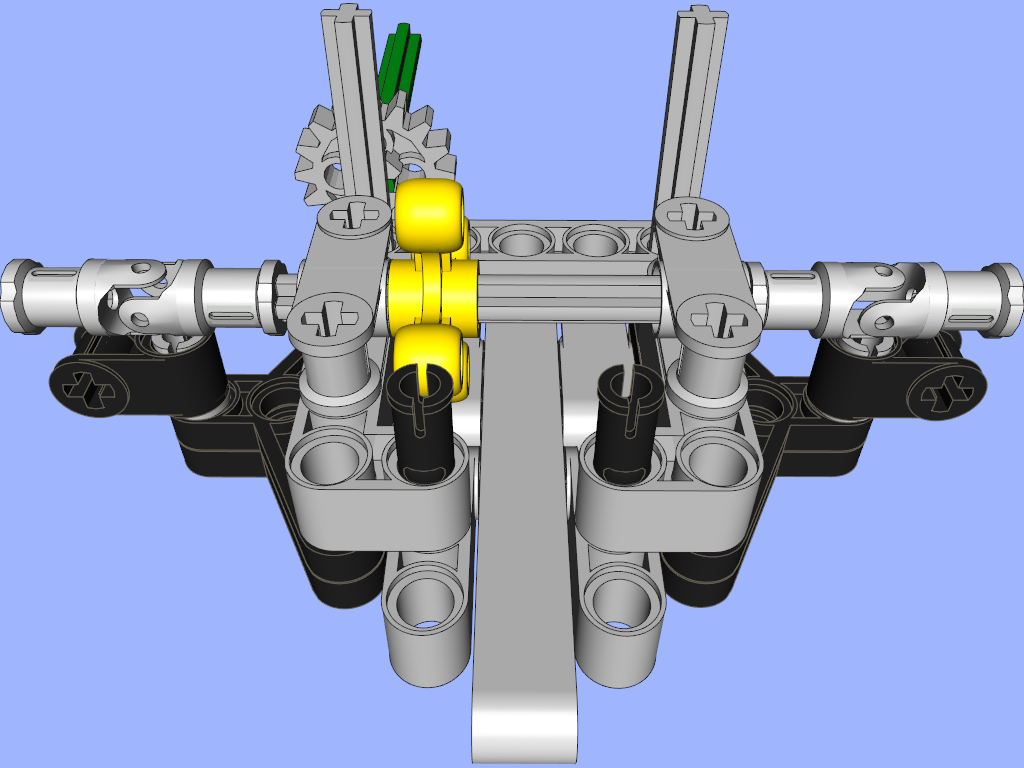
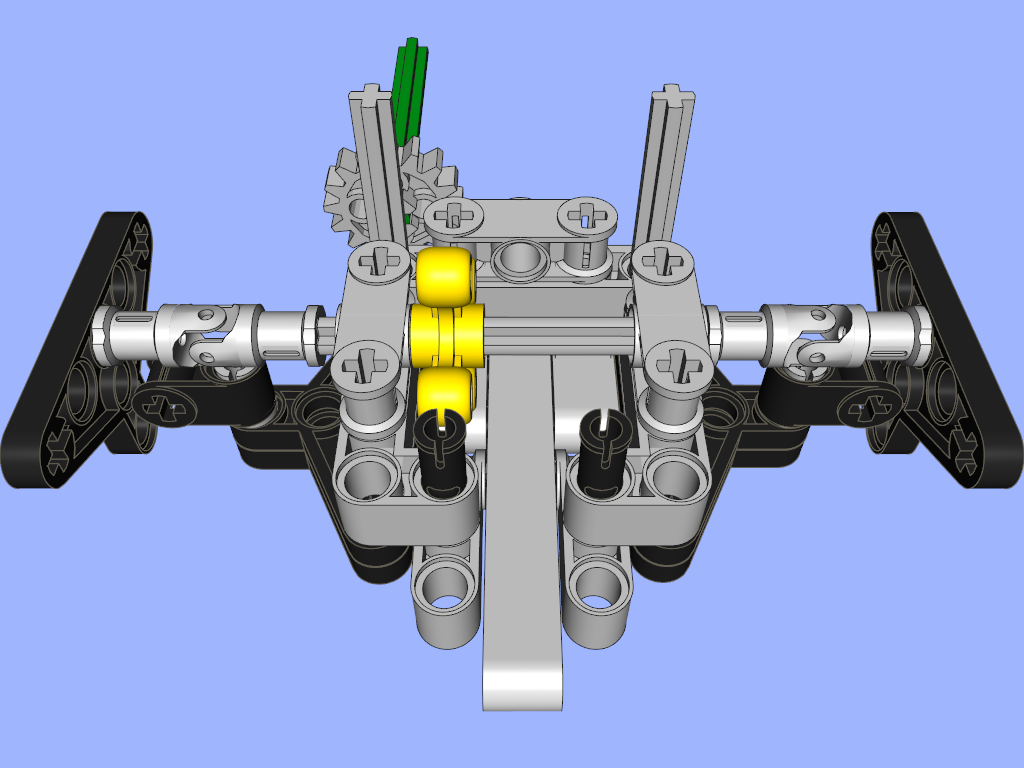
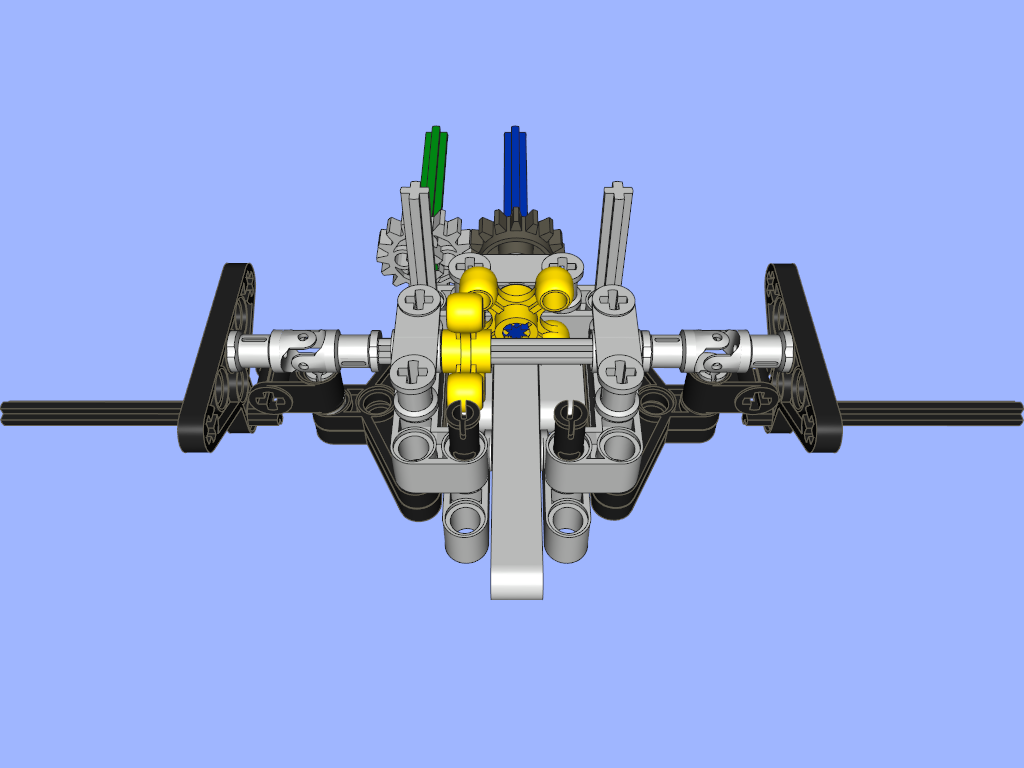
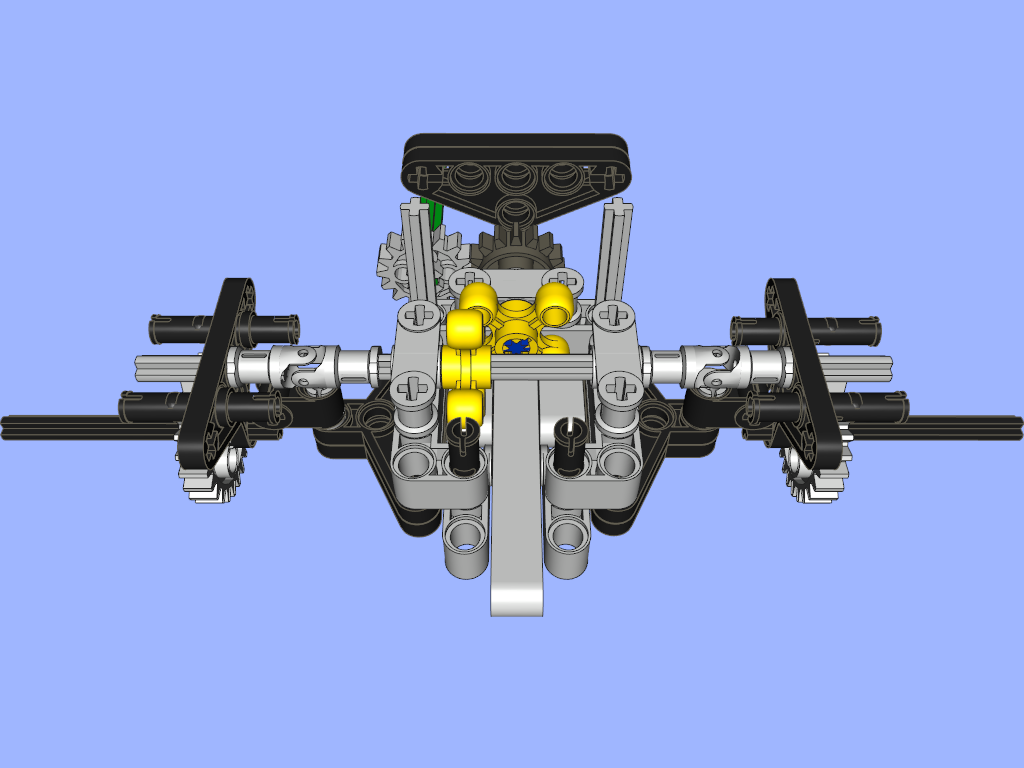
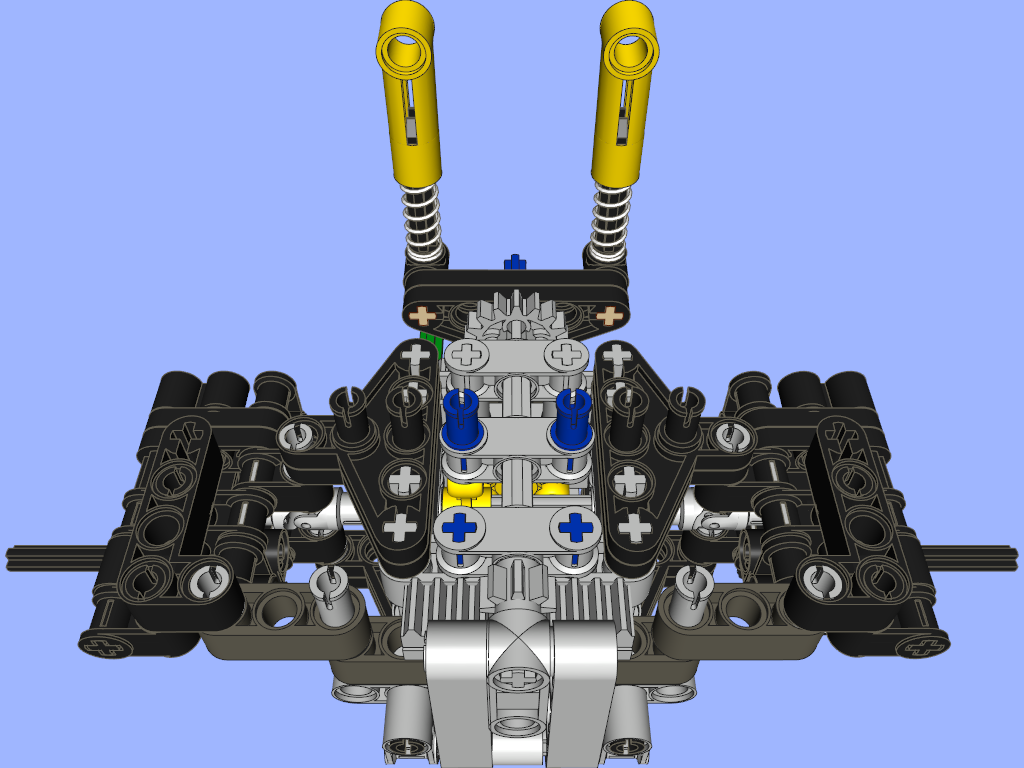
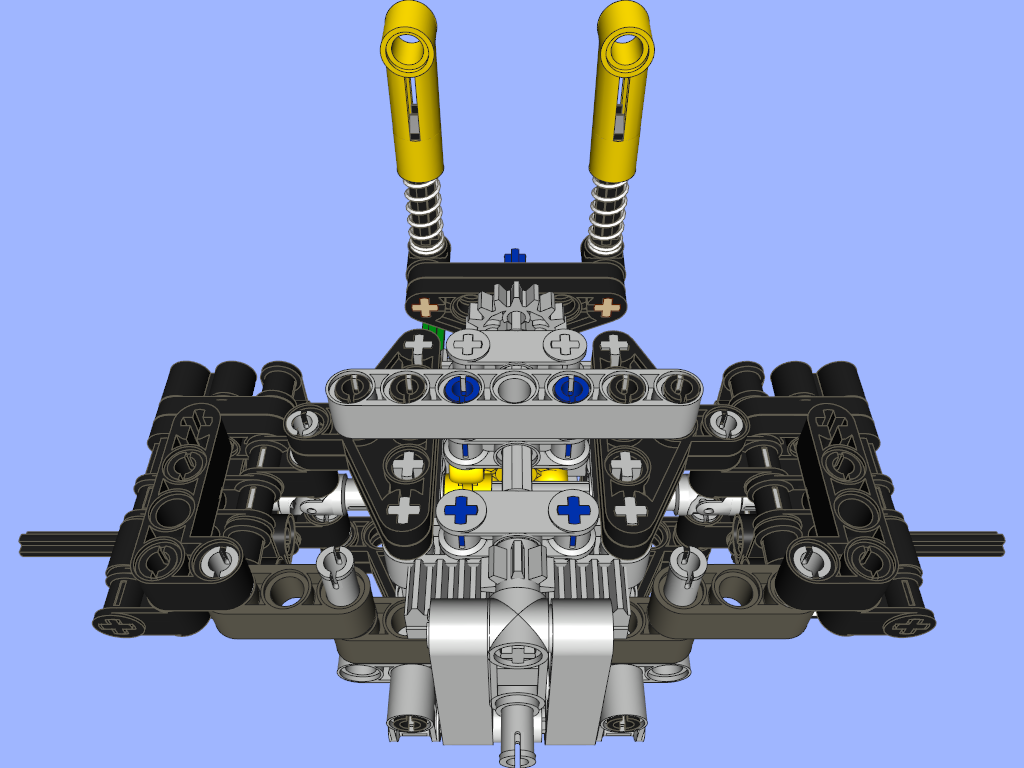
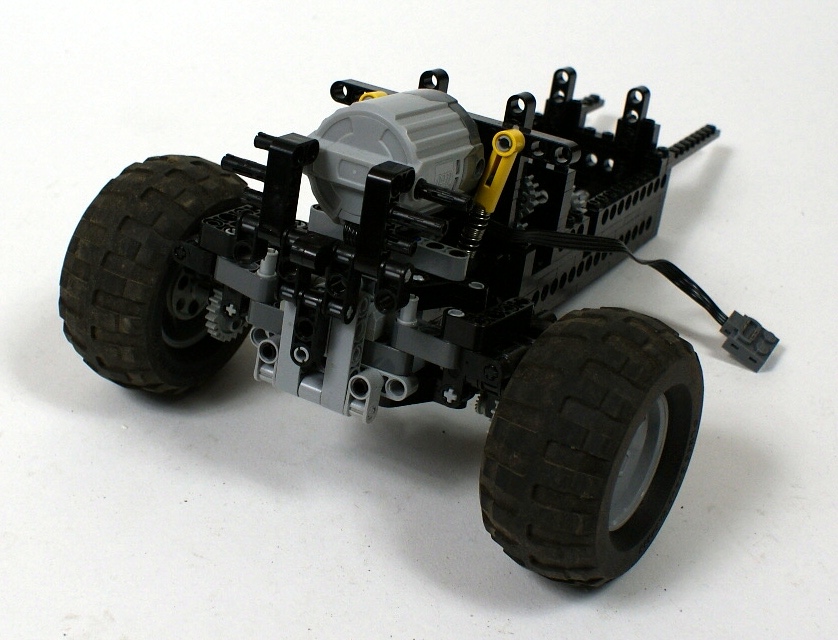
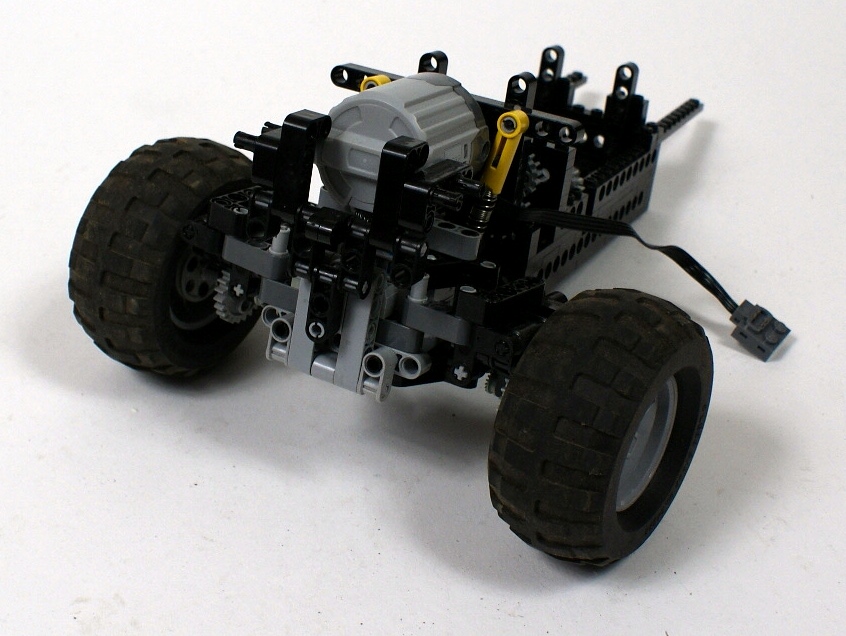
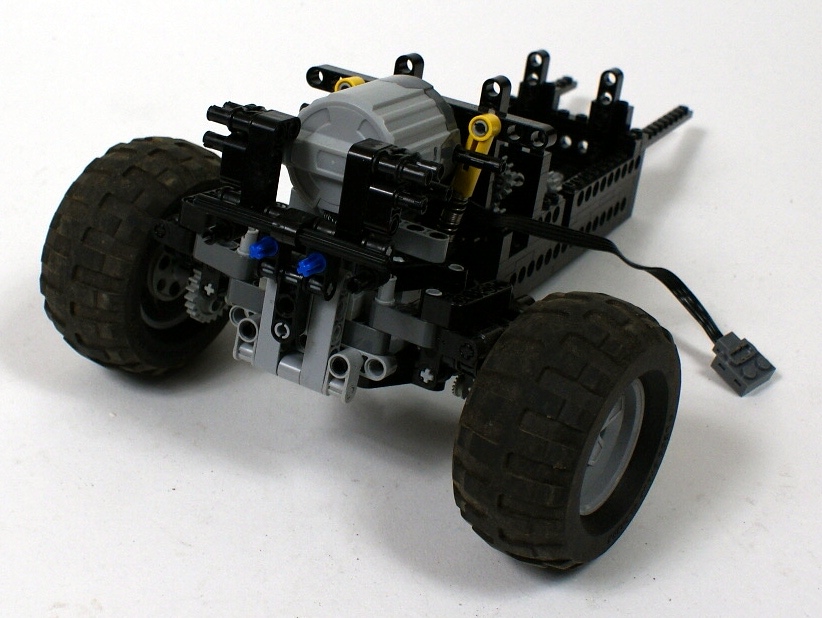
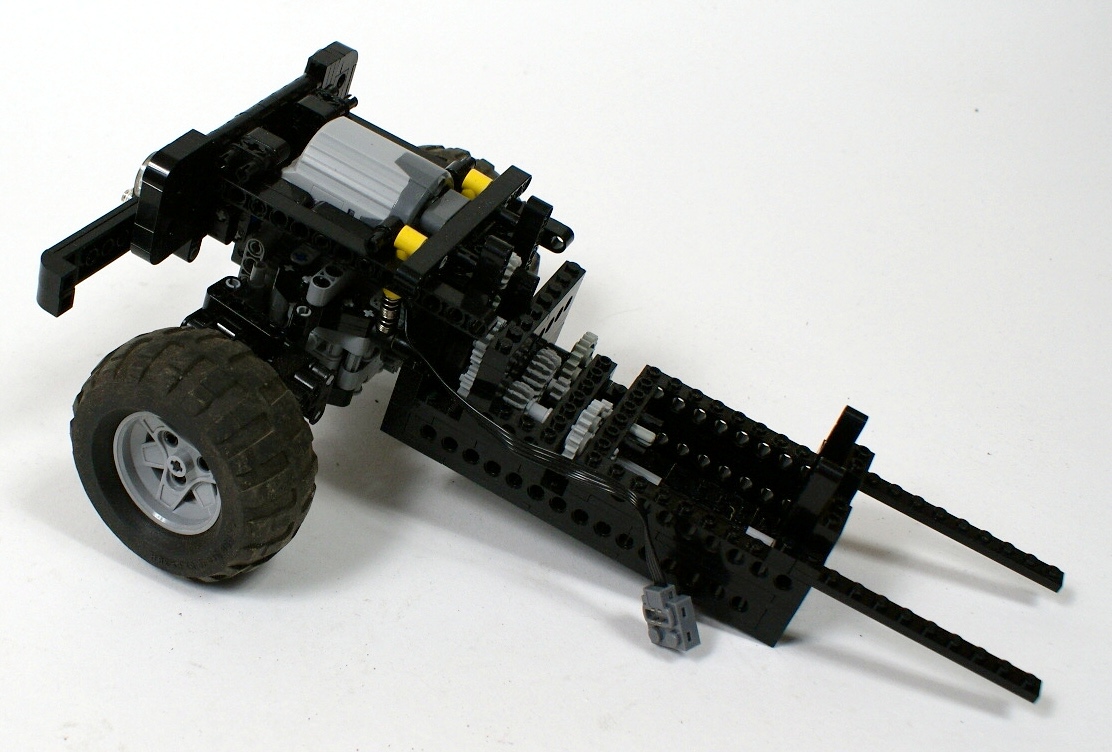
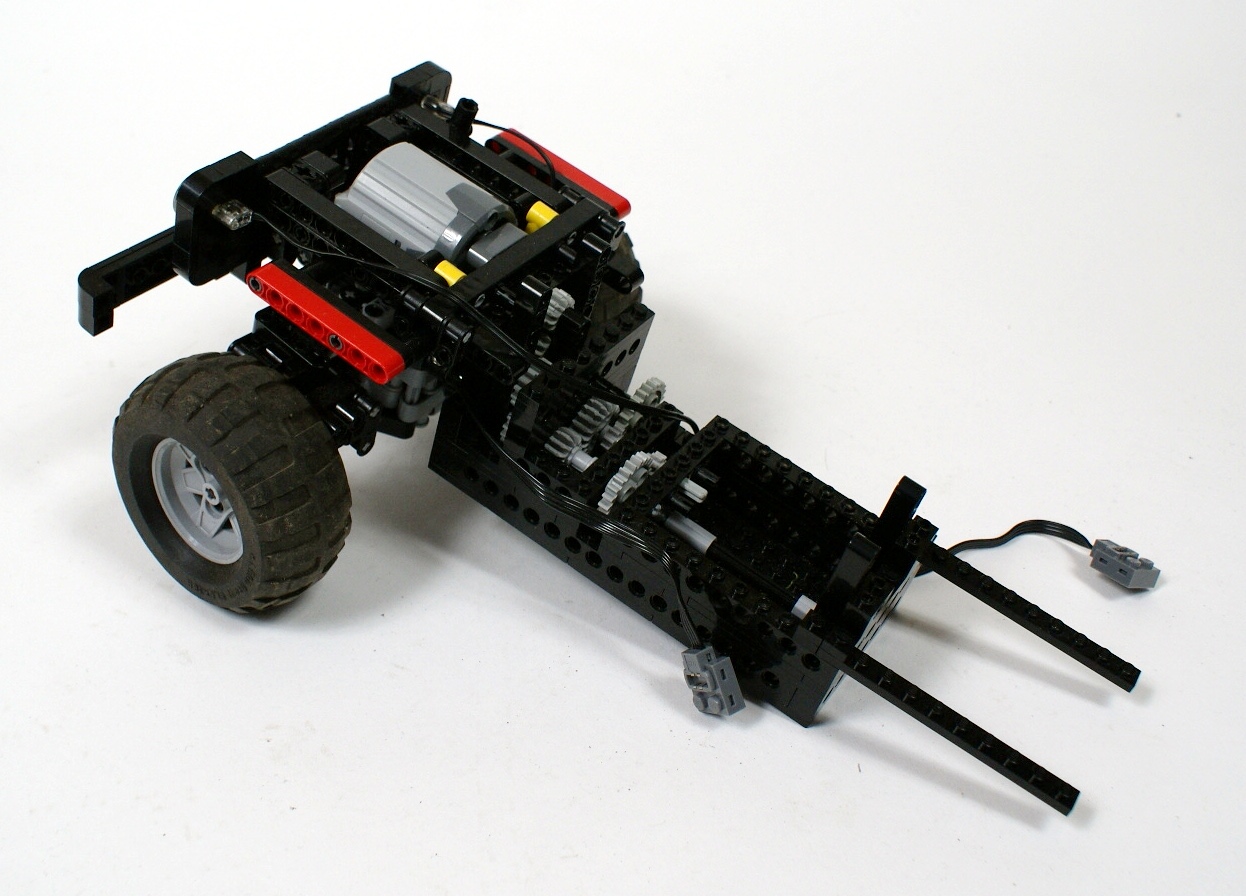
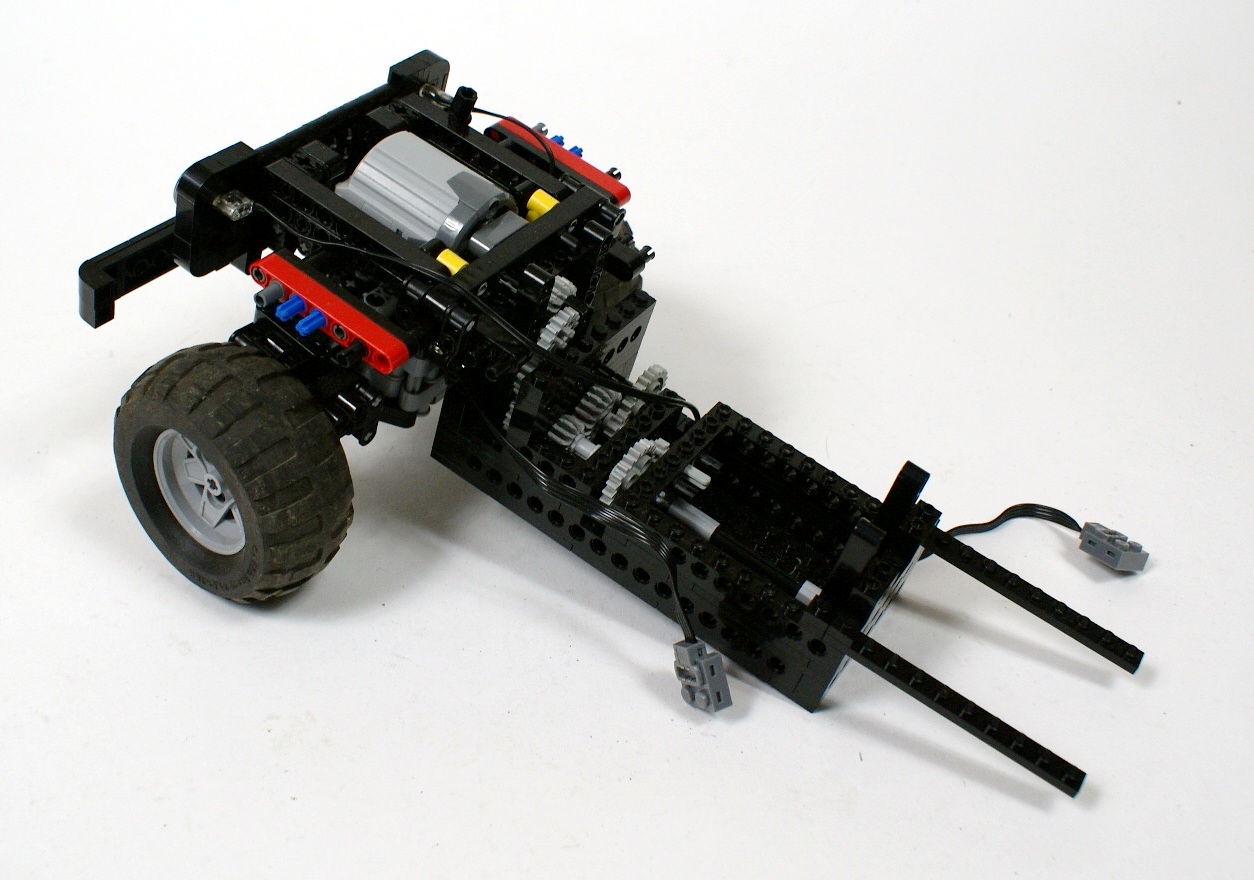
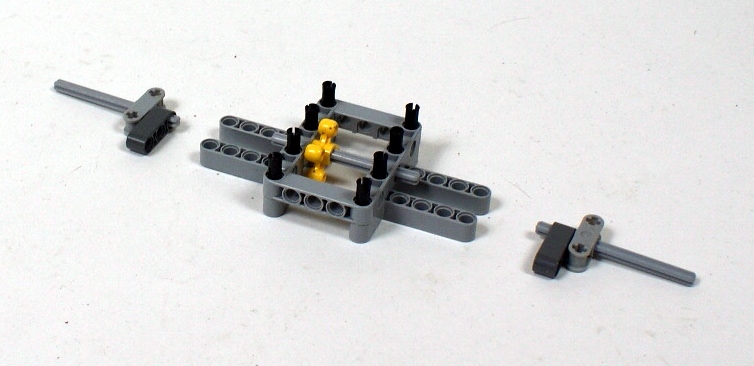
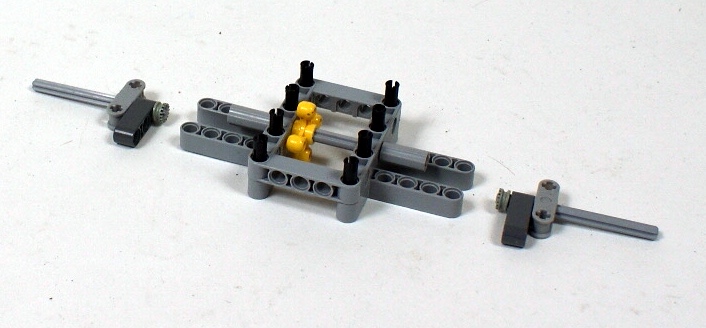
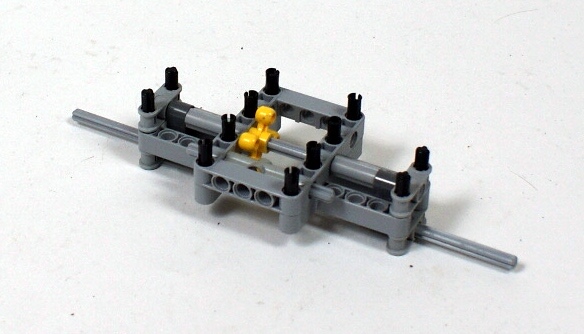
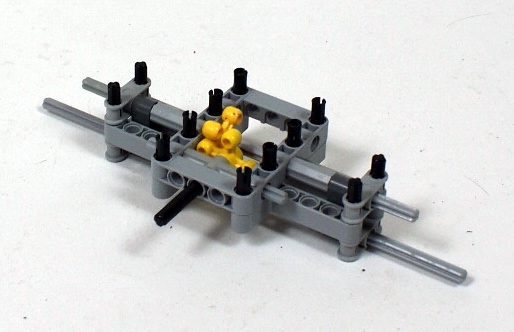
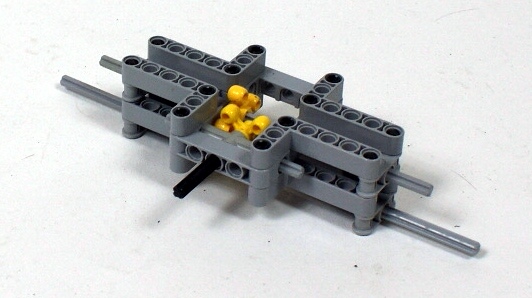
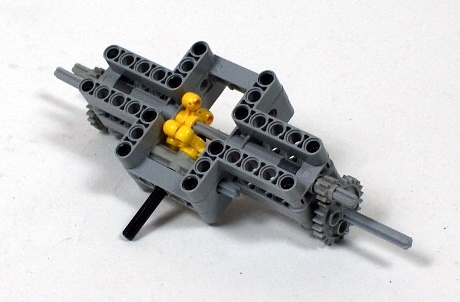
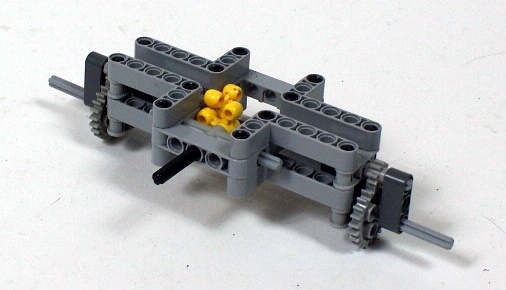
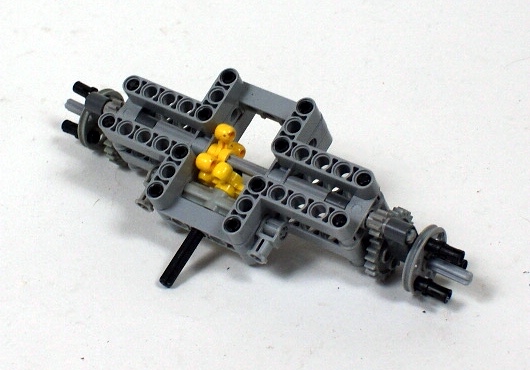
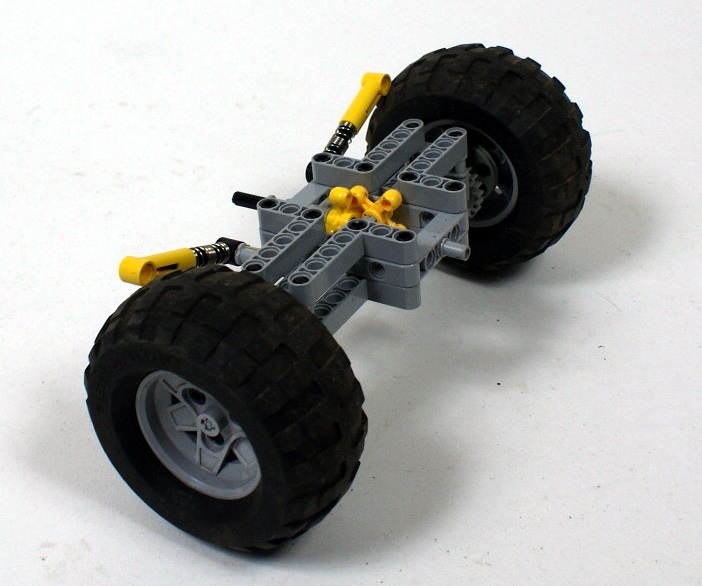
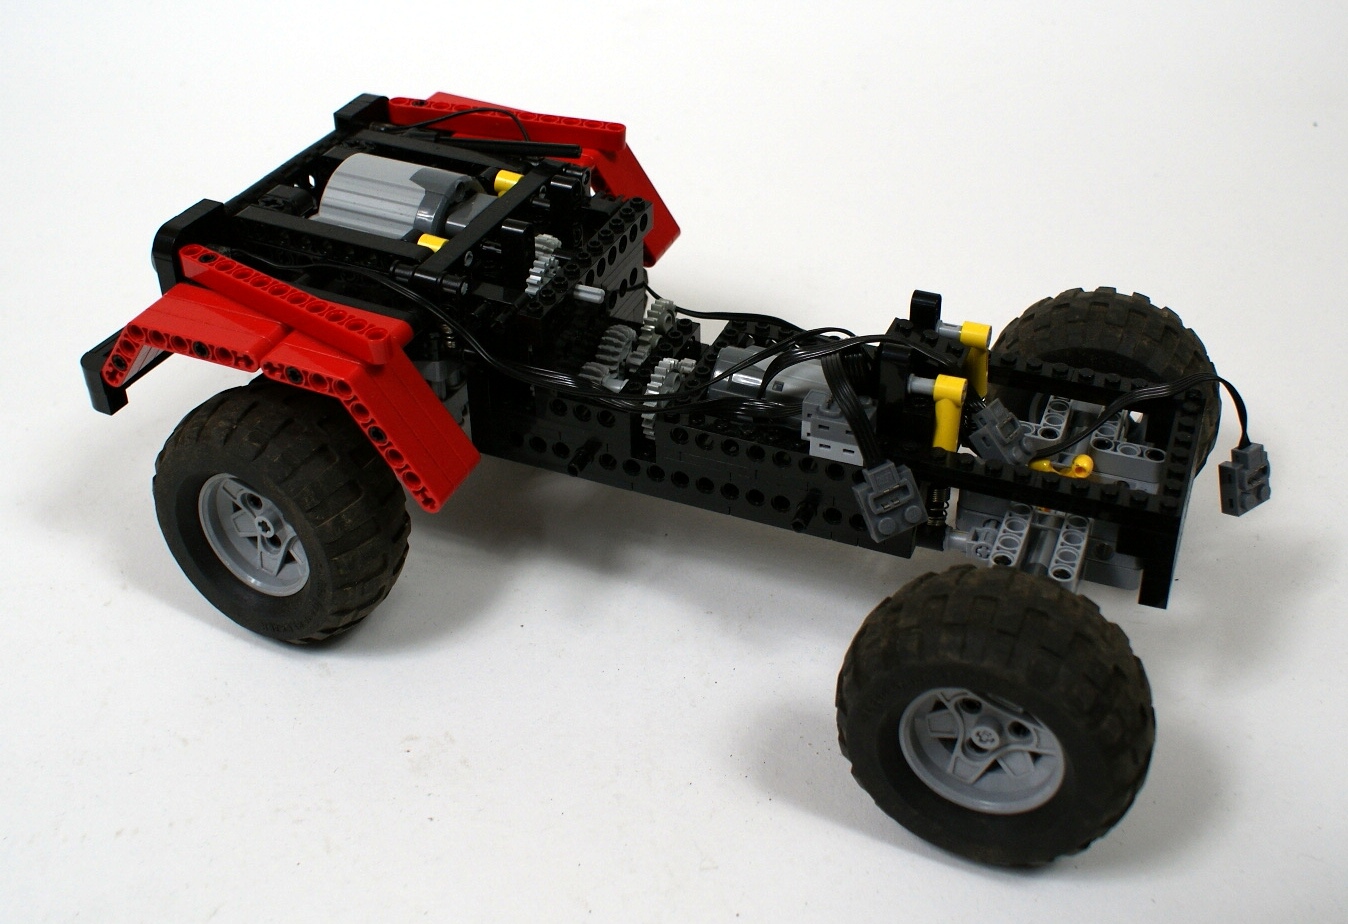
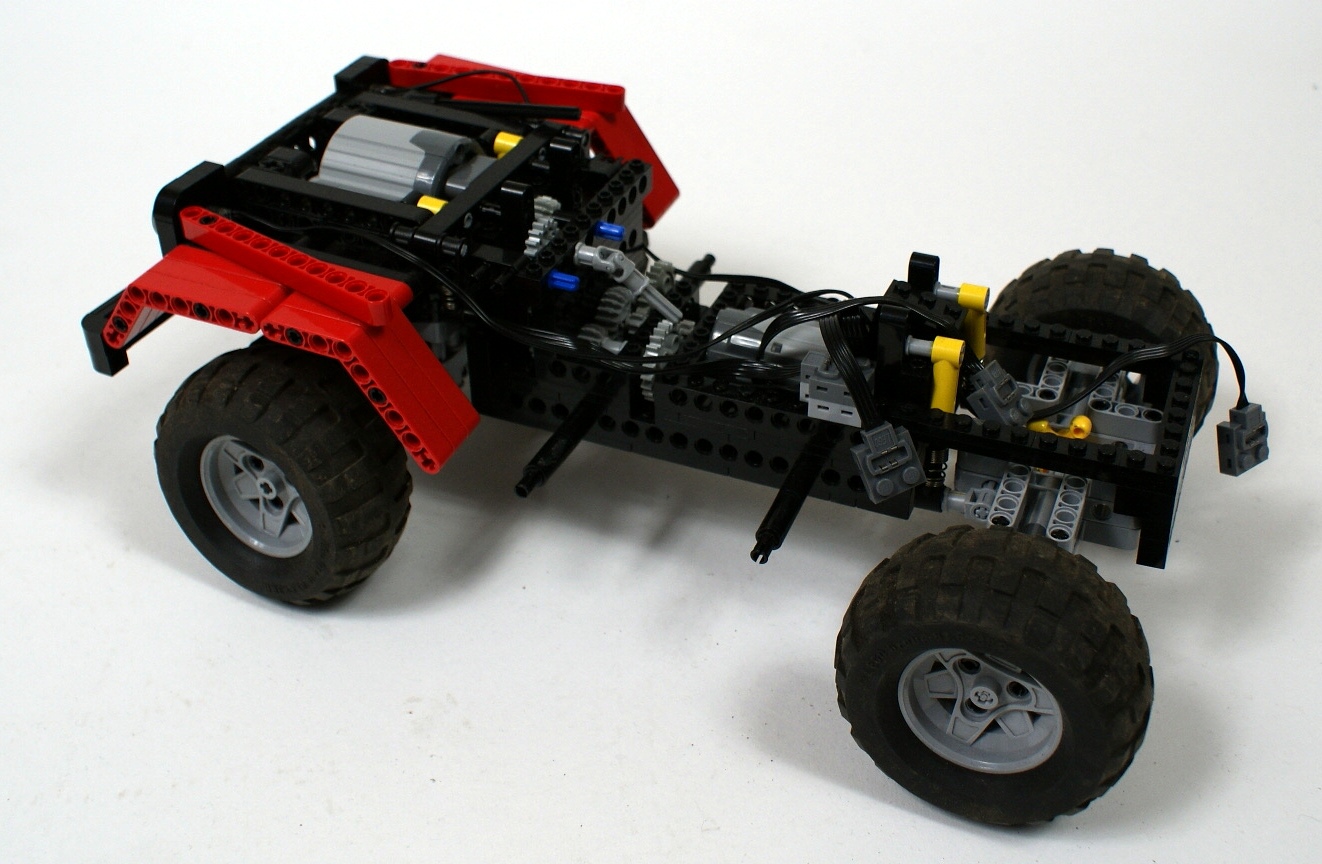
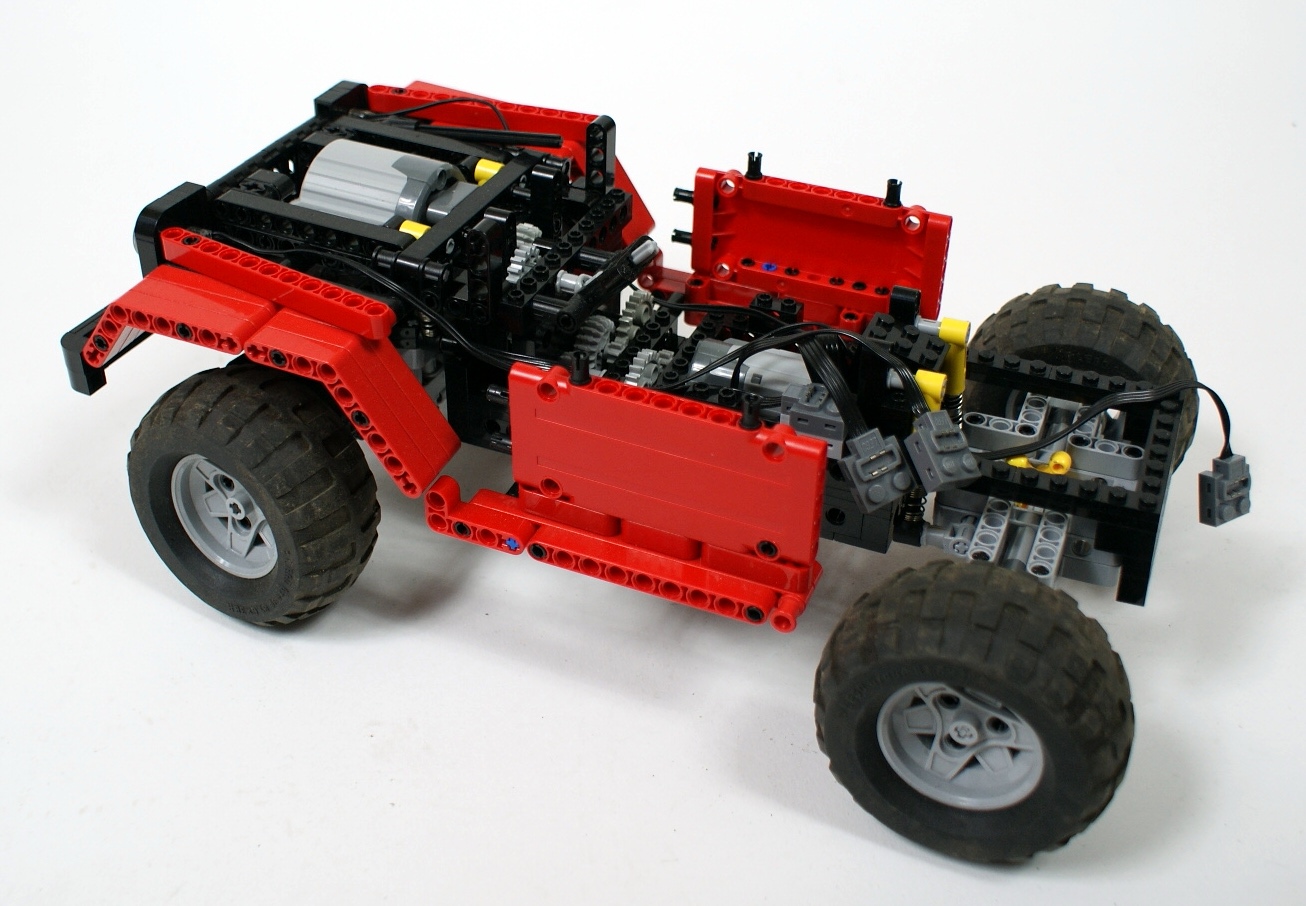
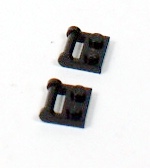
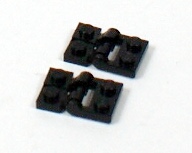
The chassis, which weights just 0.75 kg, consists basically of the studfull frame connected with studless axles. Since there is very little space in front of the front axle, both drive and steering had to be transferred to the front axle from behind. This was achieved by placing a 16-teeth gear with a clutch on the driveshaft – this gear works as an idler gear between two other gears, thus transferring the steering independently to the drive. Front axle is compact but massive, strong enough to handle much heavier vehicle, and it’s bottom is entirely covered with liftarms to prevent it from getting stuck on an obstacle. It should be noted that both axles use knob wheels instead of differentials, and both are portal axles with an integrated 3:1 gear reduction. Each axle is stabilized by a pair of short shock absorbers located between the axle and the frame for maximum structural integrity. In order to minimize the effect of central driveshaft’s torque tilting the body, which occurs when only pendular axles are used, the axles are stabilized with the hardest shock absorbers available. The rear axle is built around the 7×5 liftarm frame and is not covered from below.

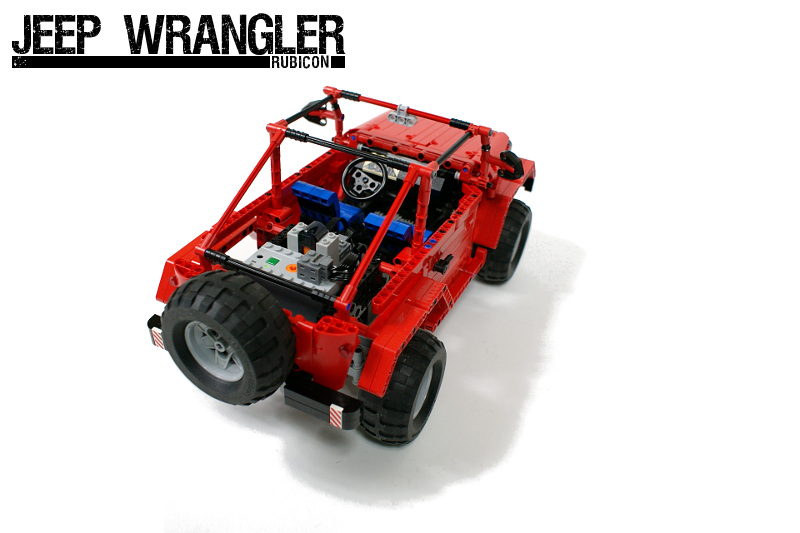
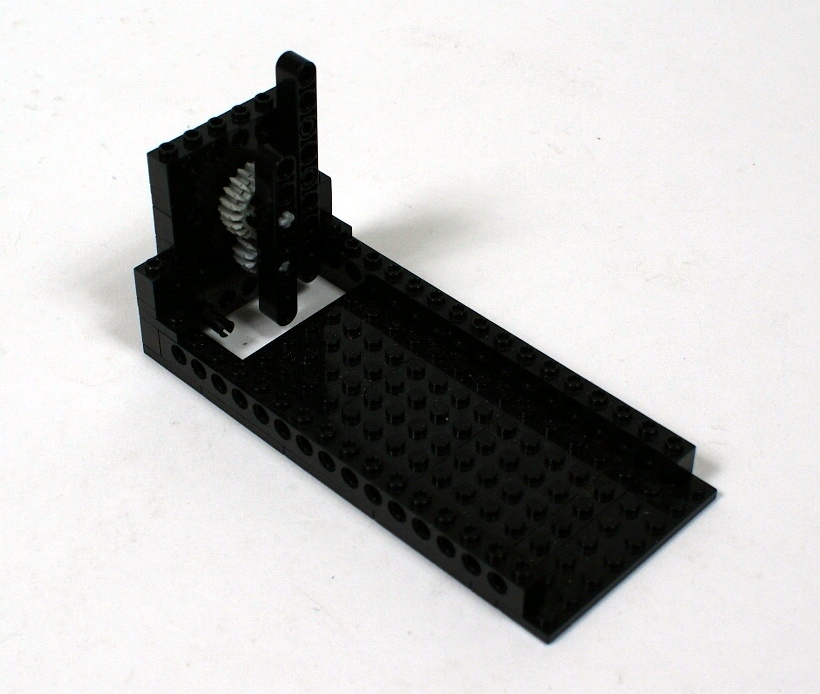
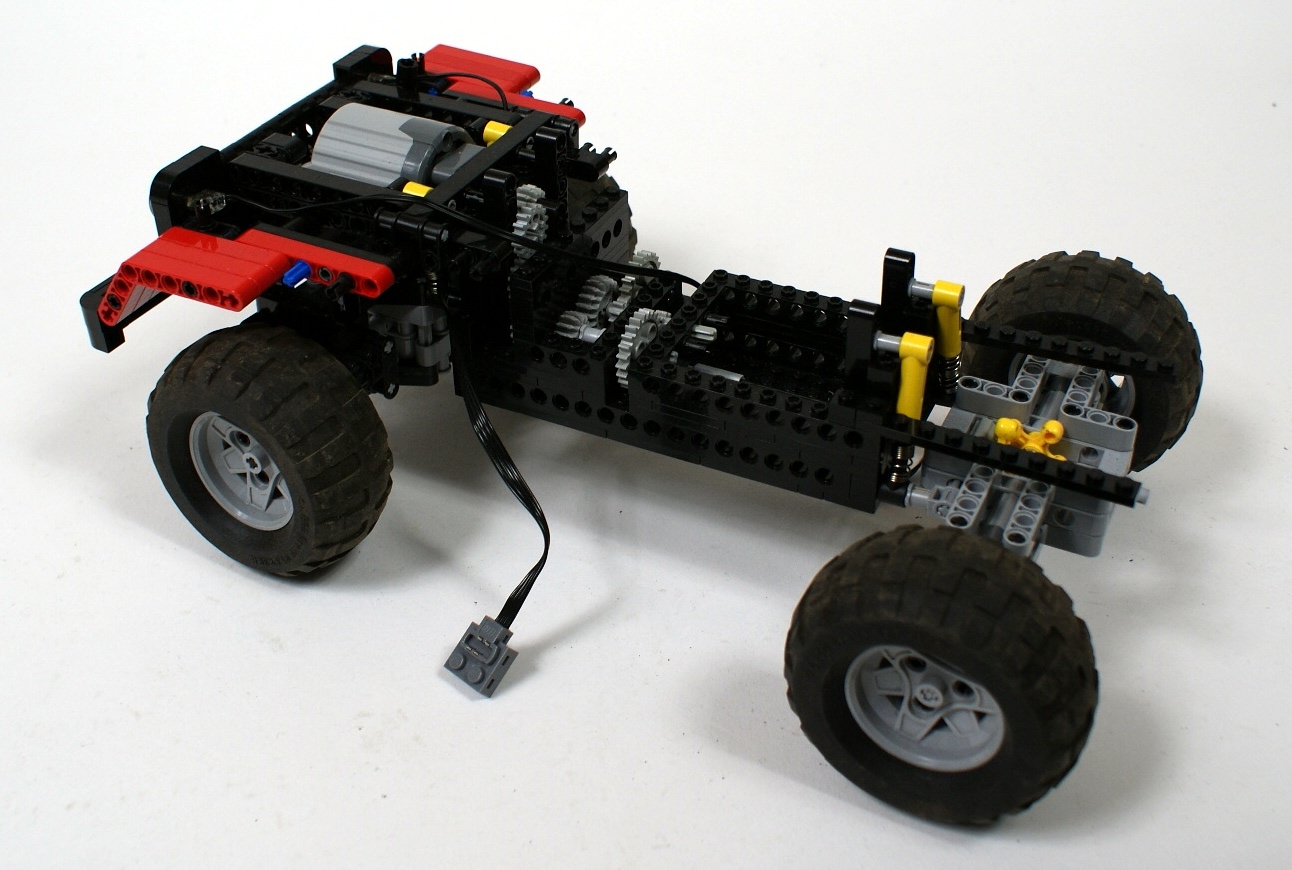
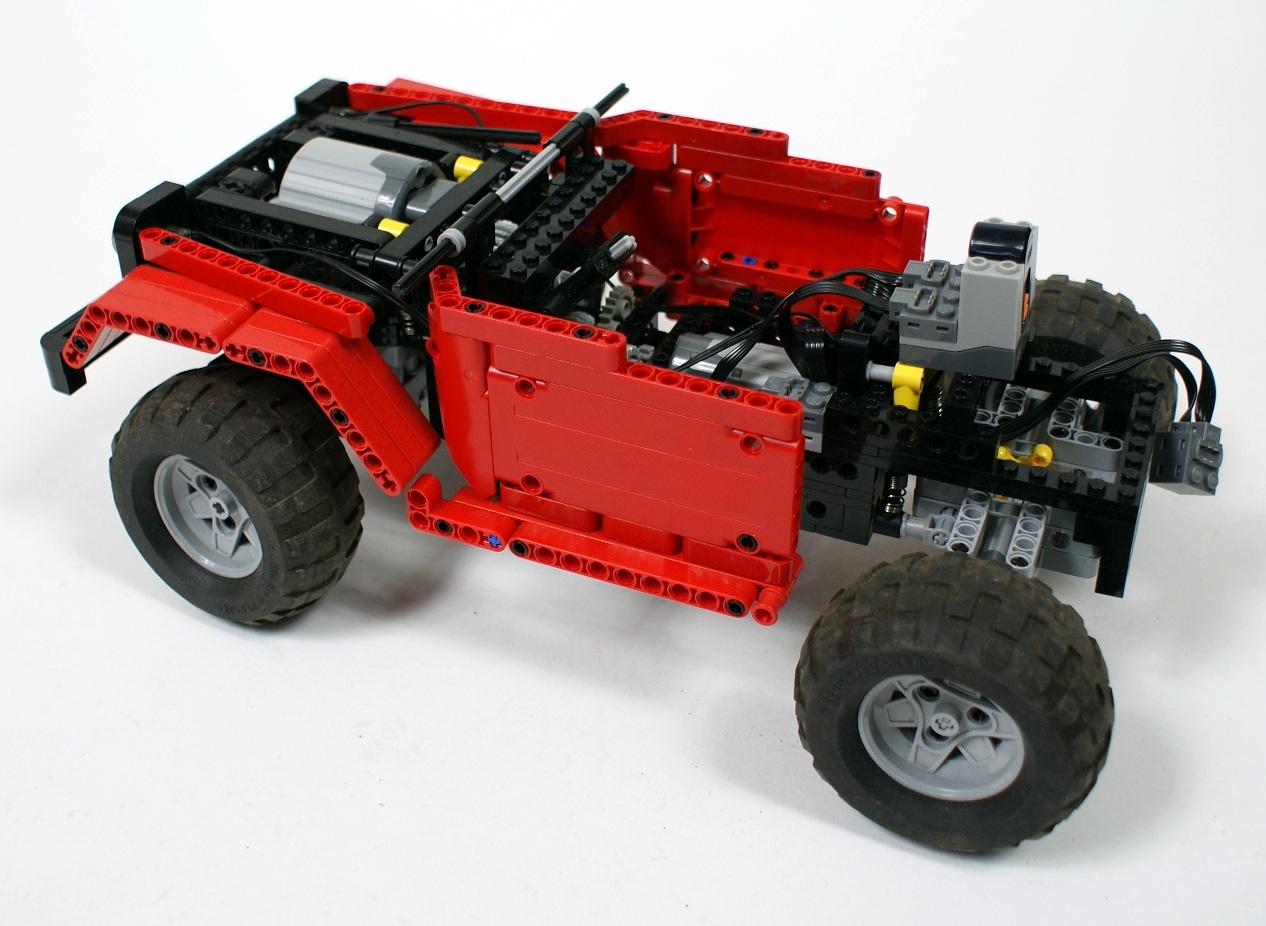
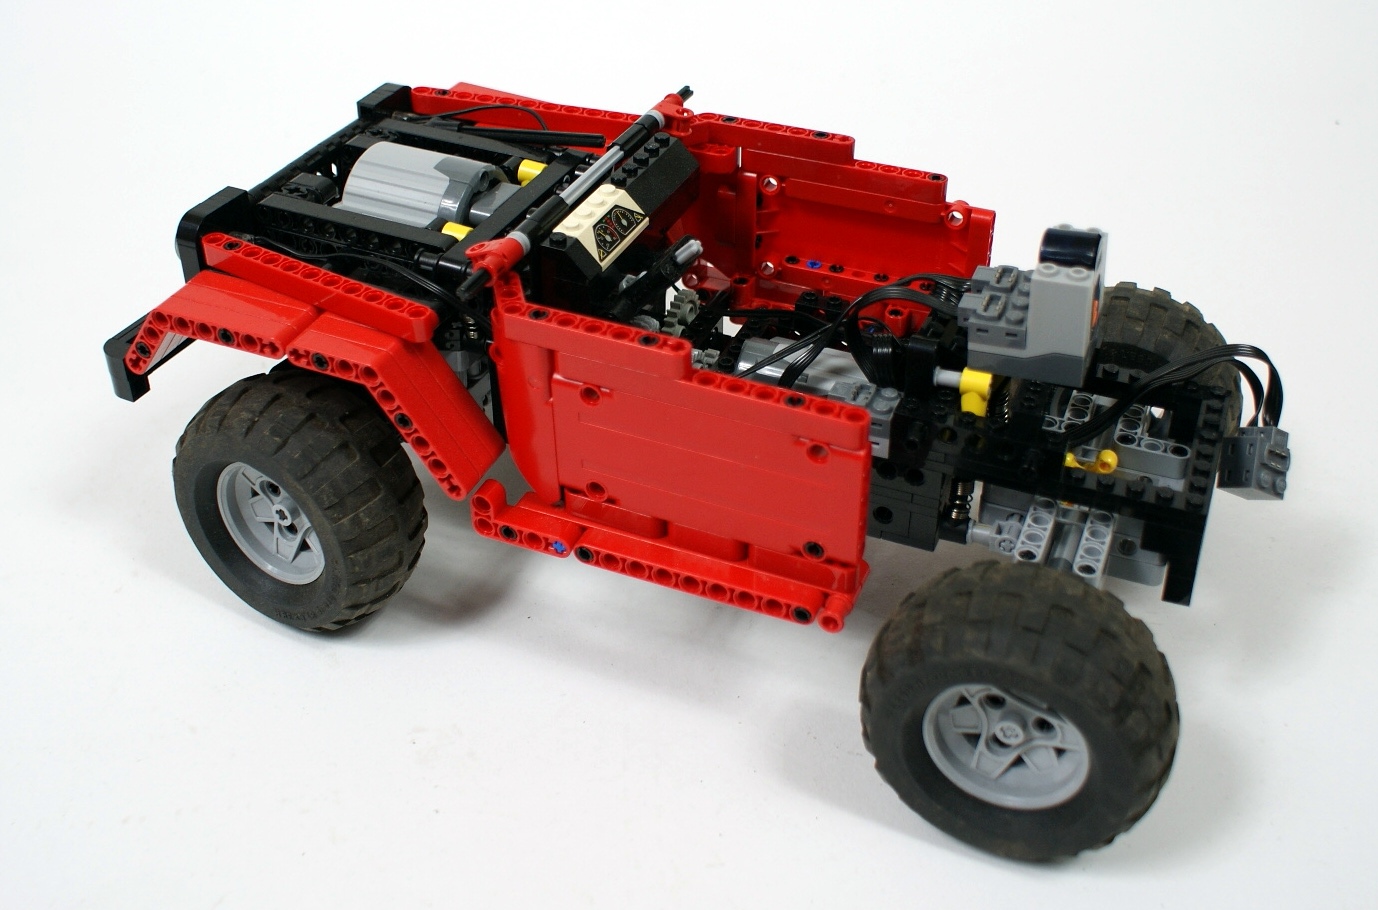
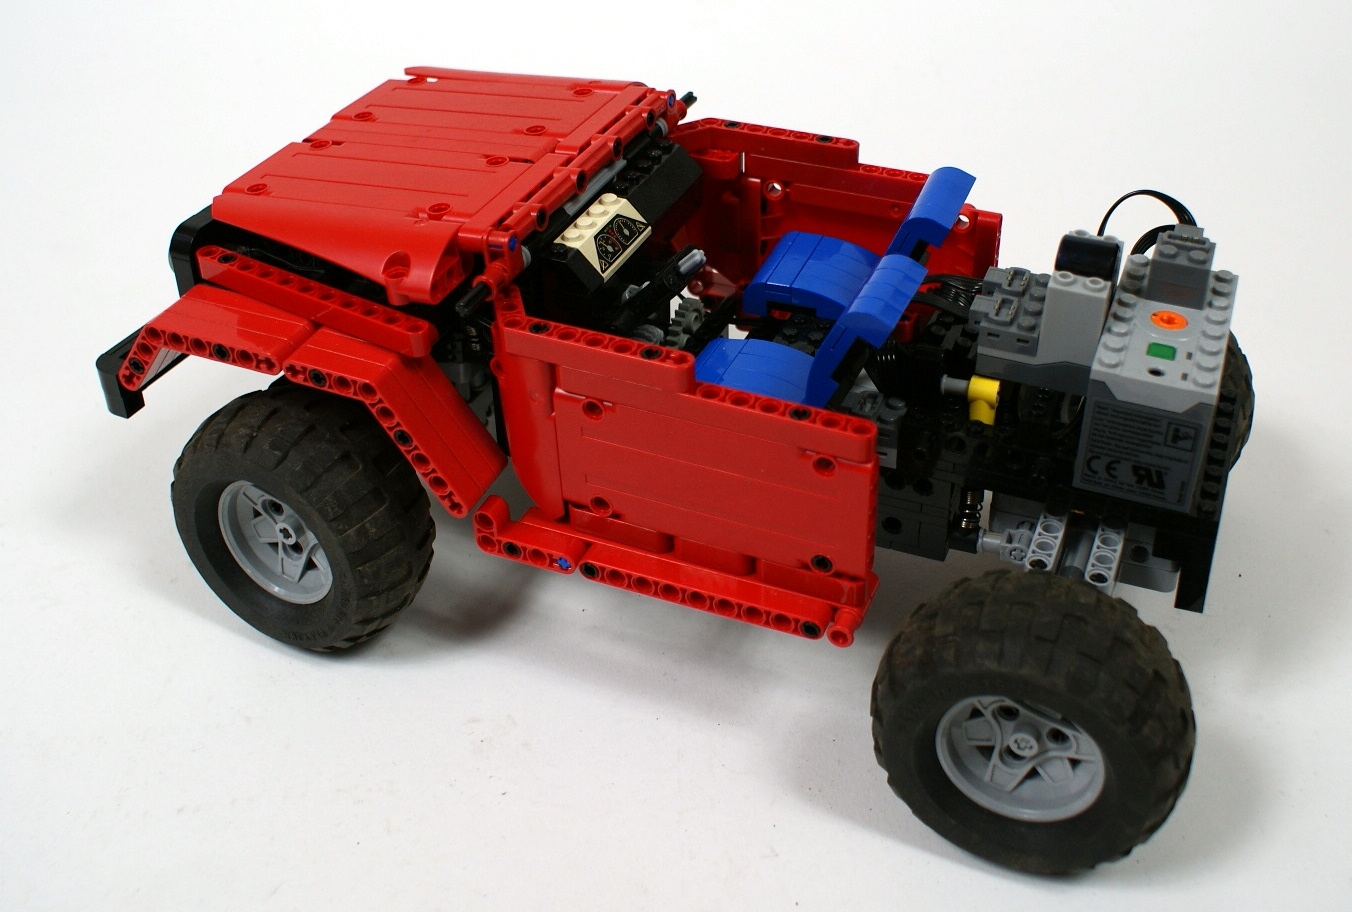
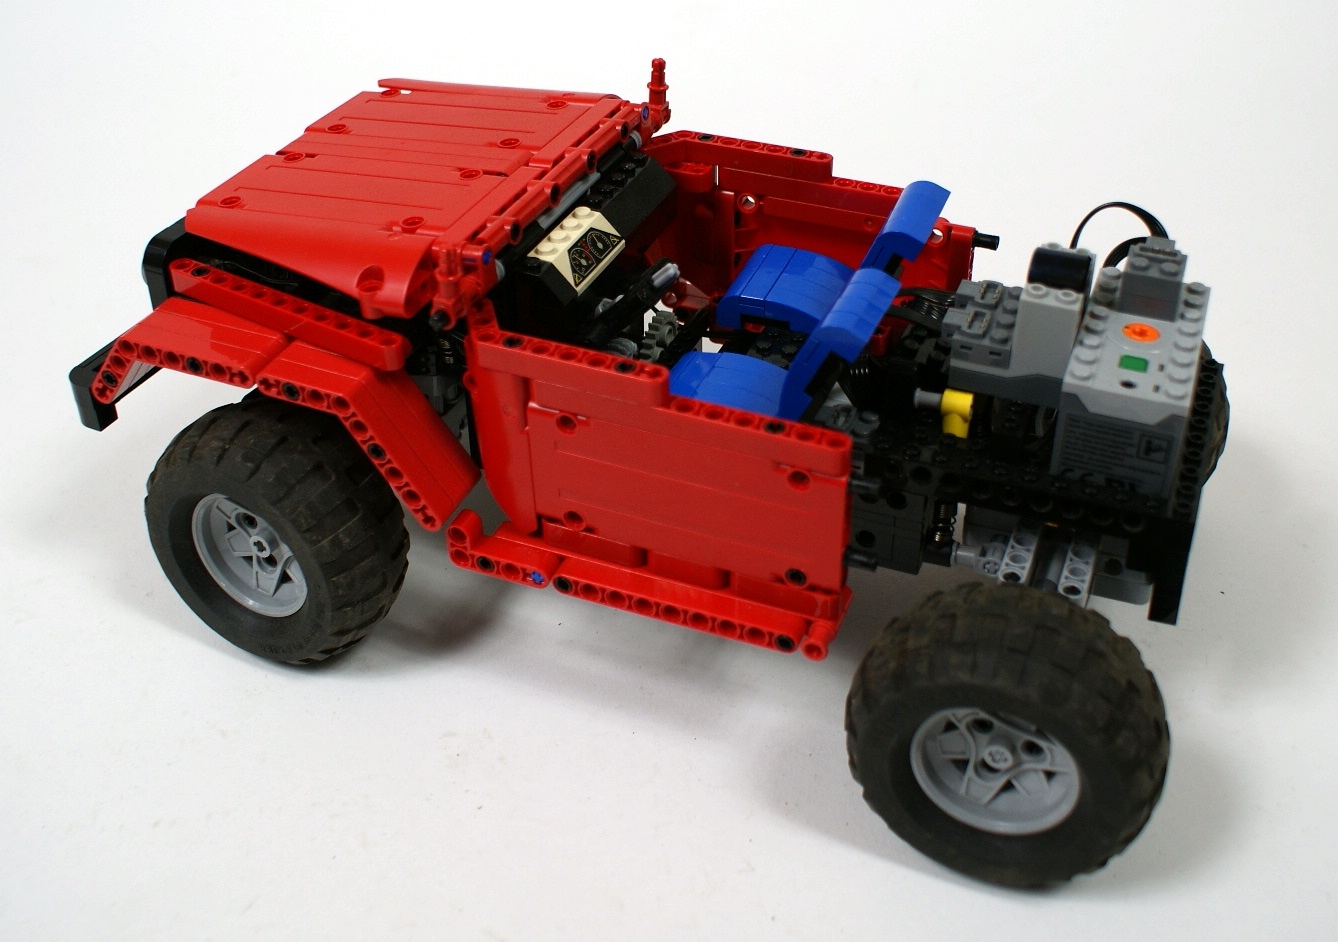
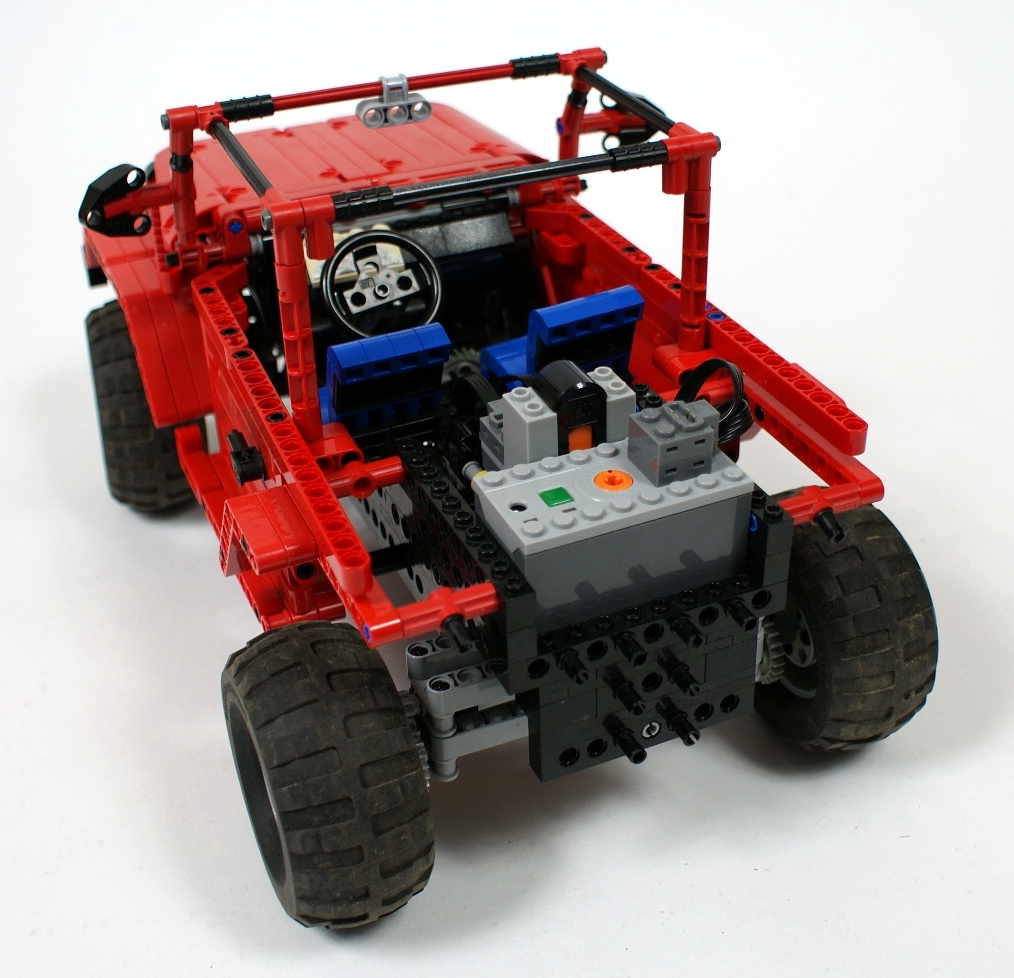
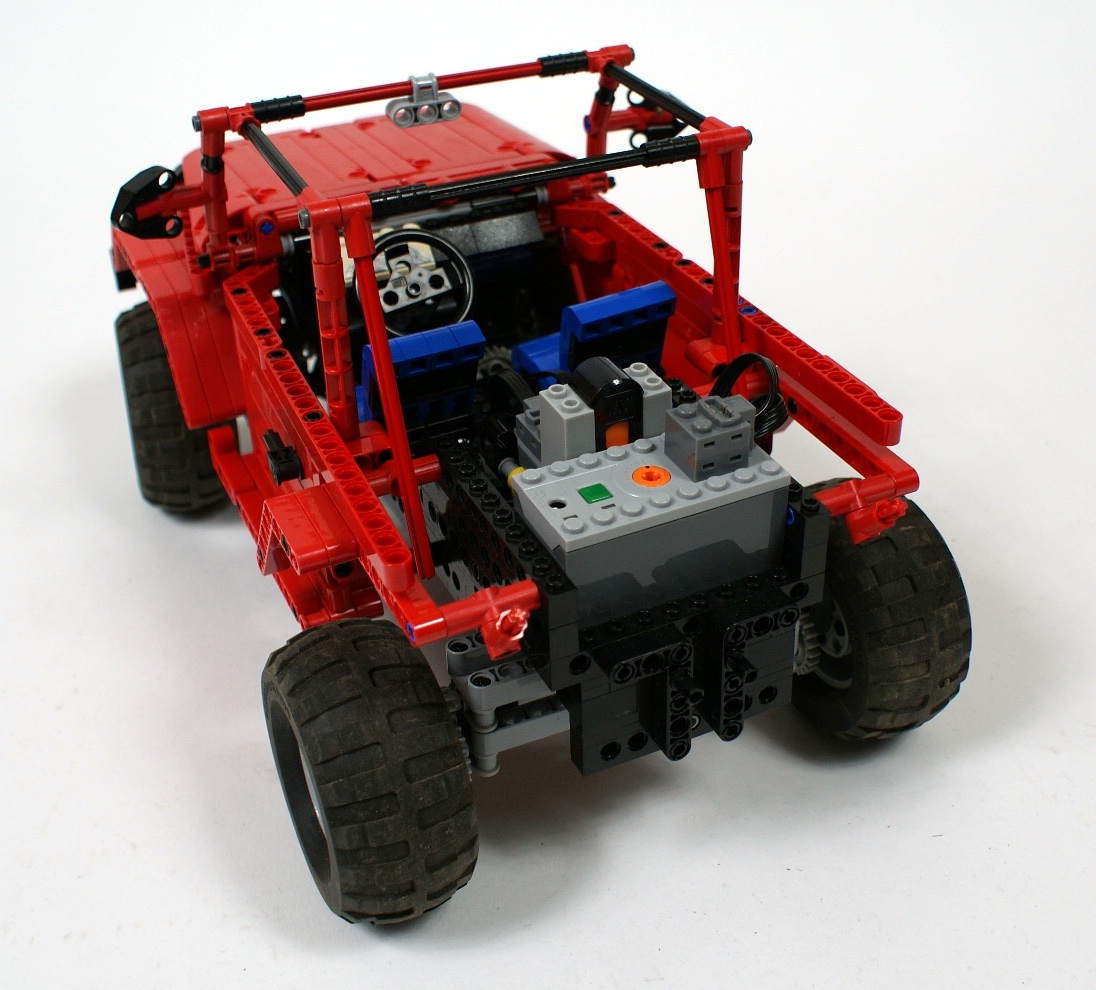
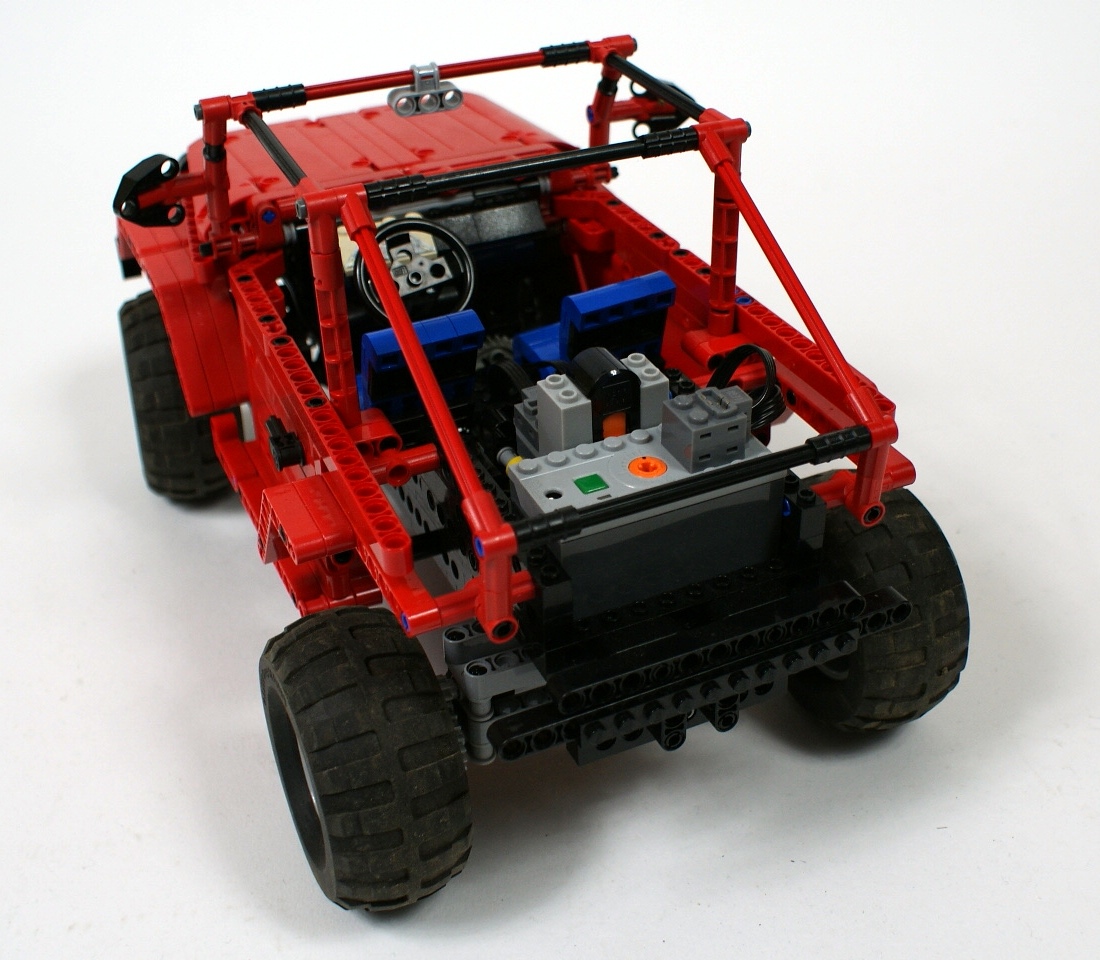
The model is driven by a single PF XL motor with a total 5:1 gear reduction, and the motor’s location is strictly related to our current rules. Our rules state that every model has to be equipped with a piston engine whose set-up and location are consistent with the original engine. This rule, however, can be omitted if the drive motor is located exactly where the original engine is. This is Jeep’s case – the PF XL motor occupies exactly the same place that is taken by the original engine in a real Jeep, hence there is no need for the piston engine and the model can be simpler and lighter. You can see the top ends of the front axle’s shock absorbers next to the motor. It should be noted that the PF XL motor actually touches the front axle, but because it’s located in the center of the chassis and because it has a round shape, the axle can still oscillate under it. Such a trick was necessary to fit the XL motor under the bonnet.
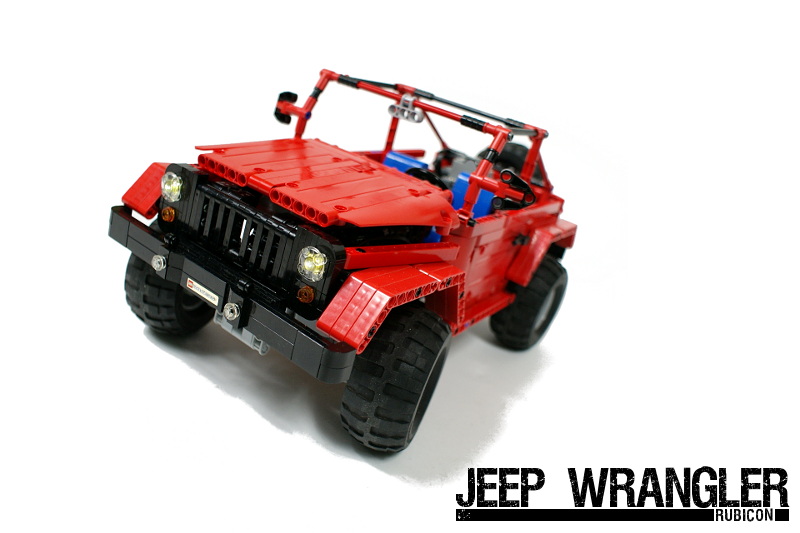
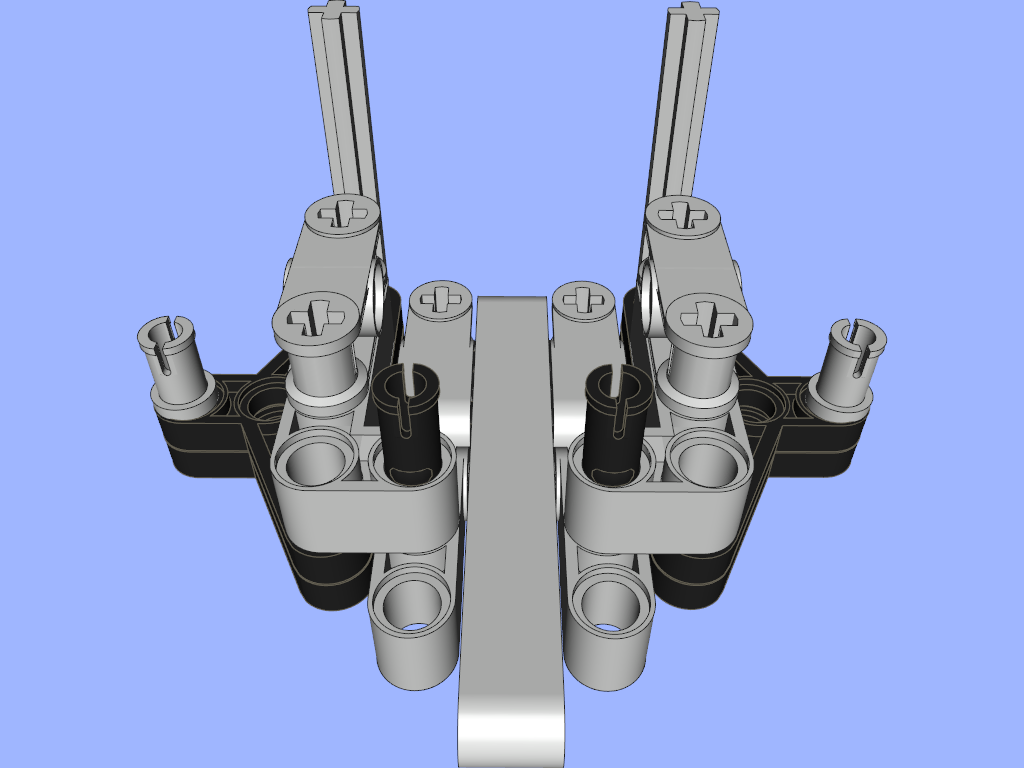
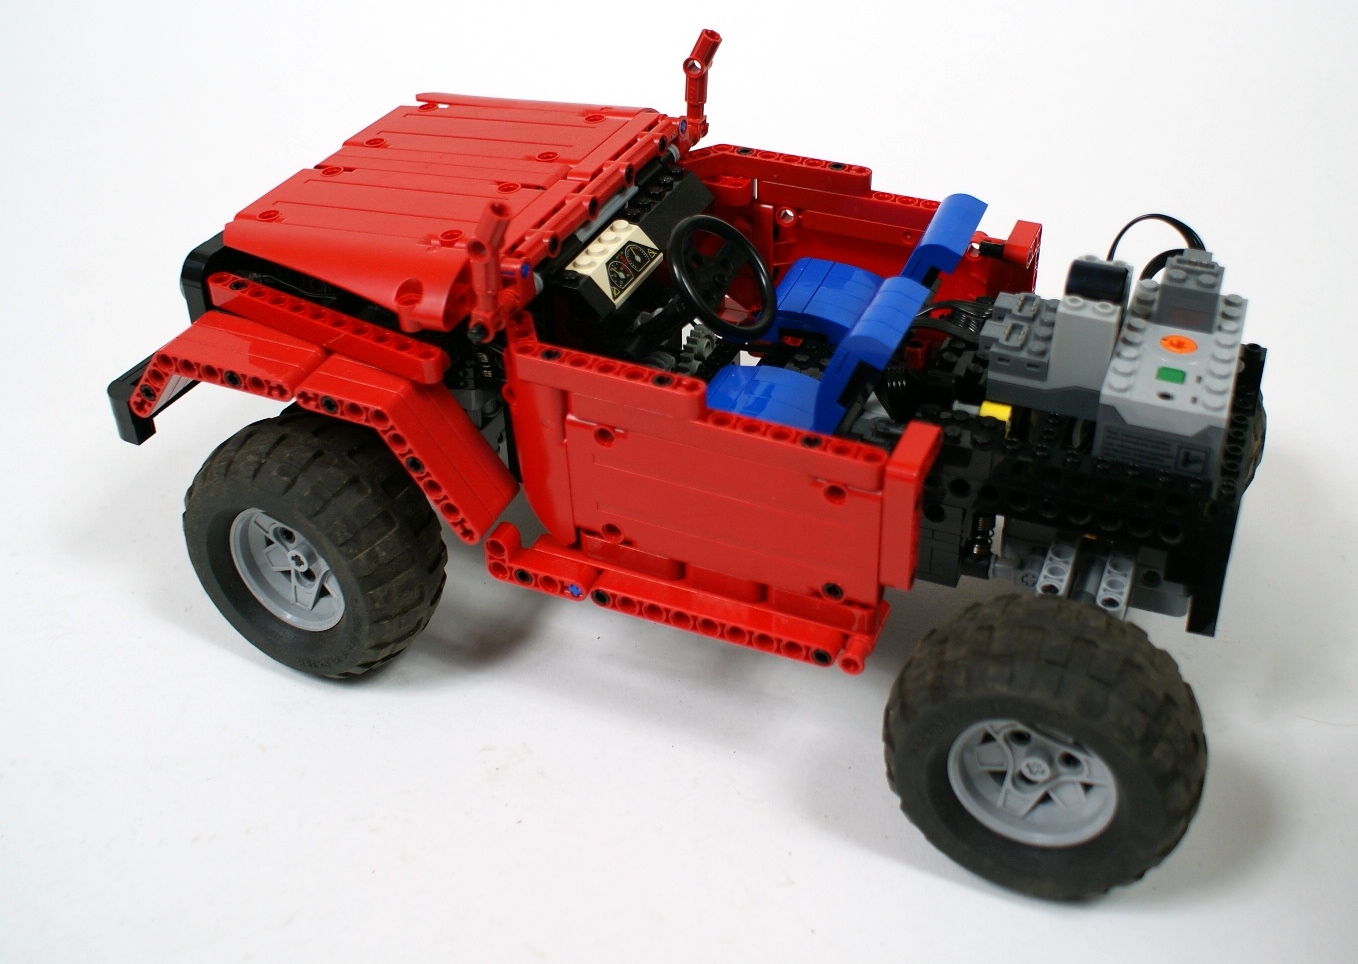
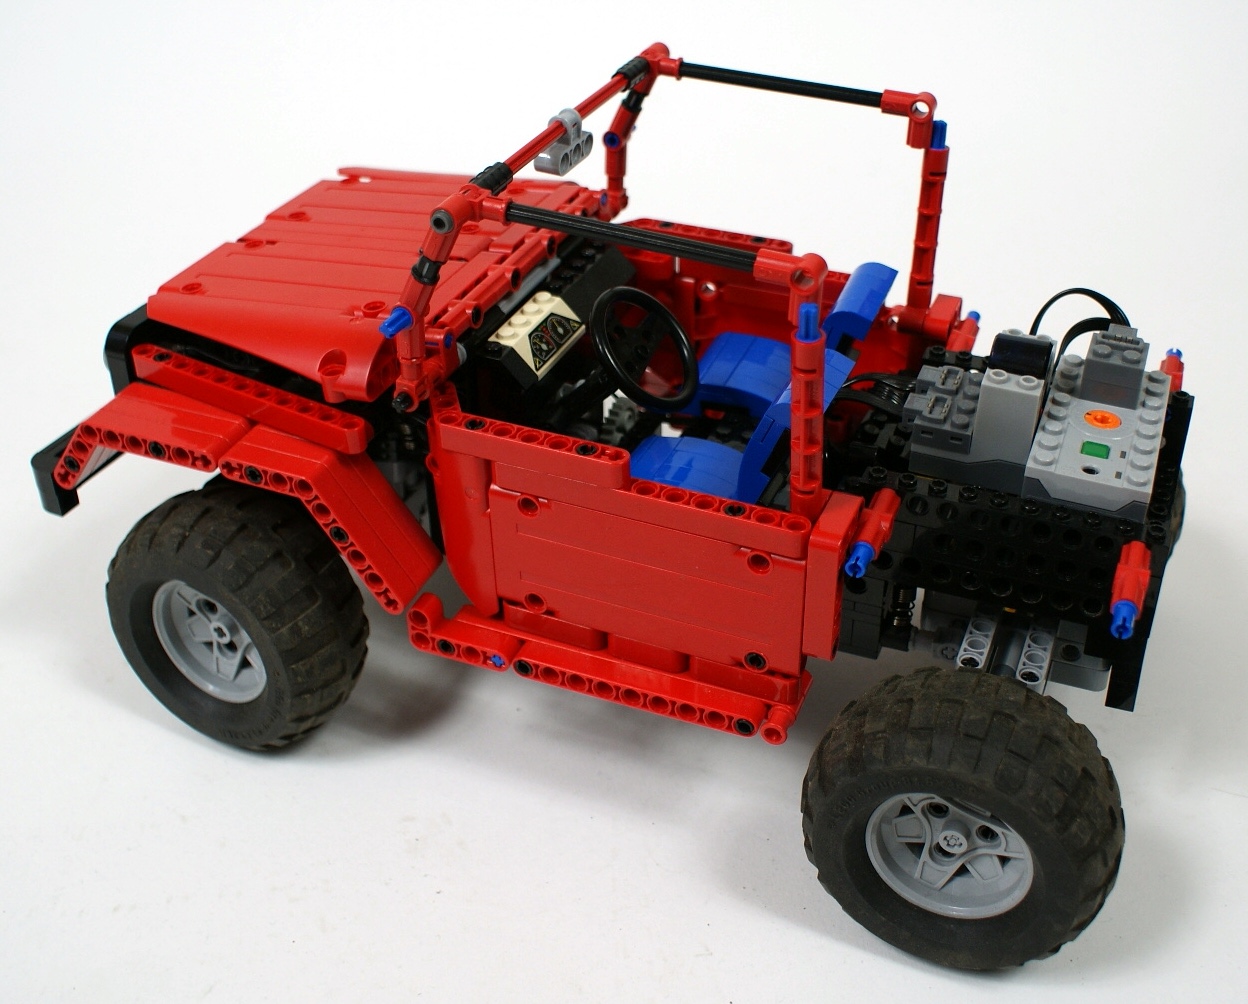
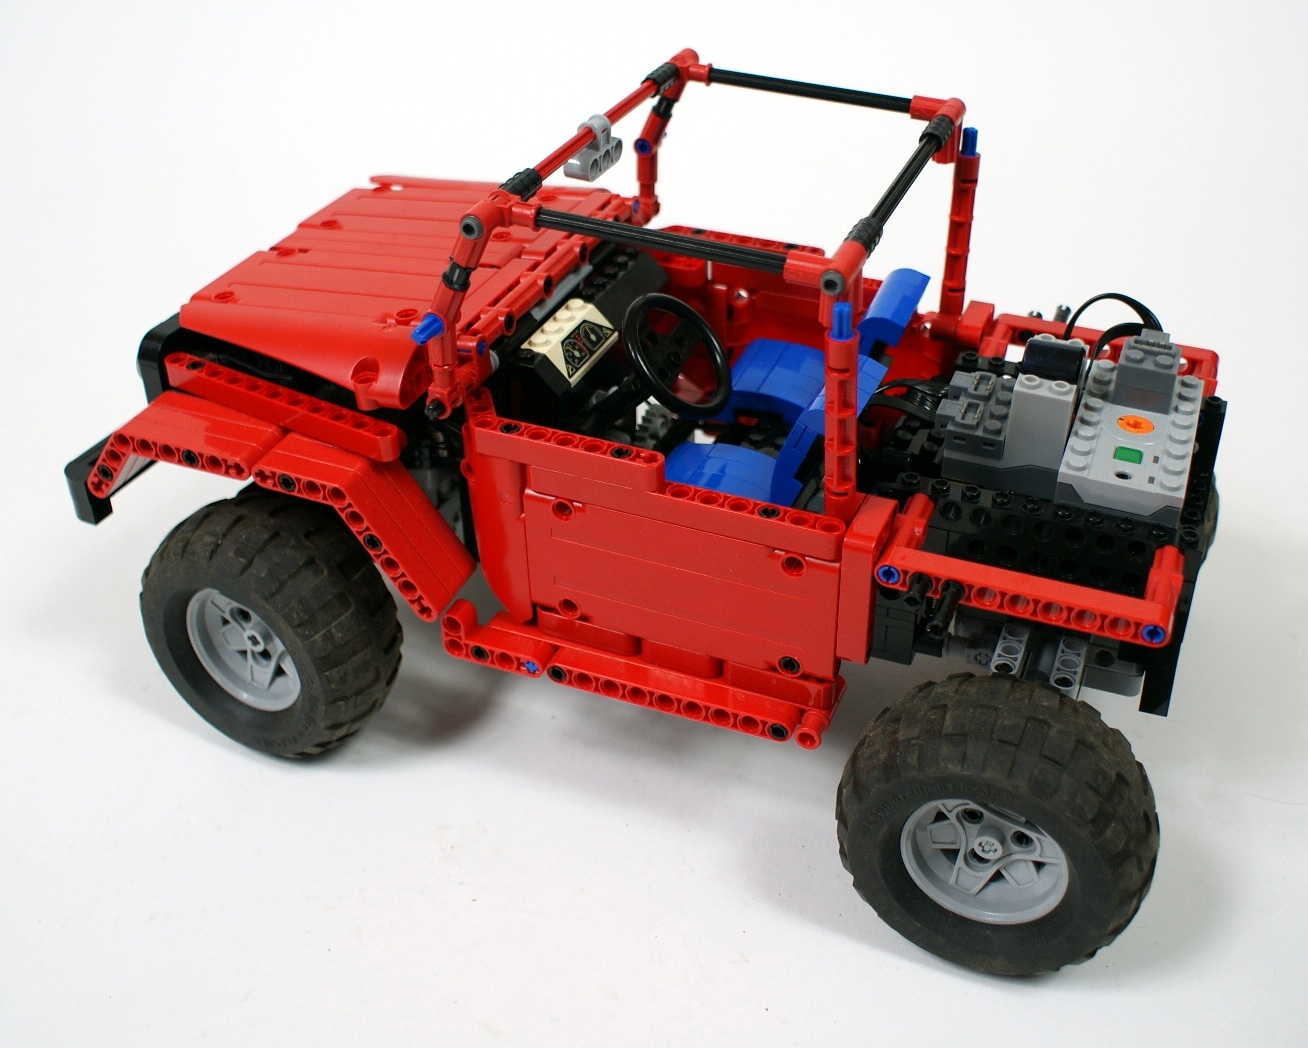
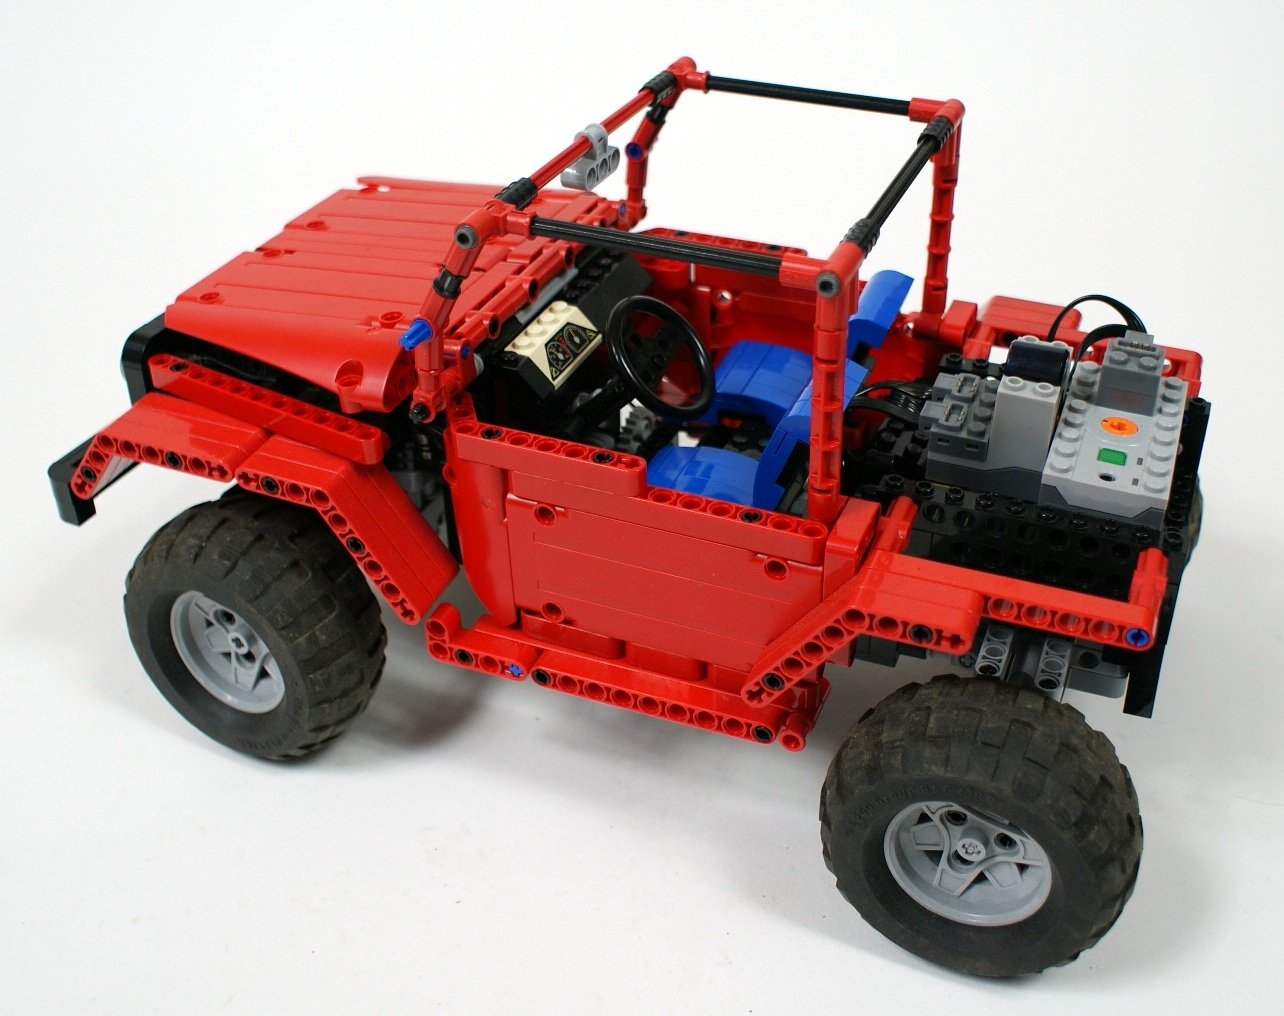
The steering is controlled by a PF Medium motor with a 9:1 gear reduction. The motor is located between the seats in the cabin, and the steering wheel is connected to it. The cabin has a safety cage built on top of it, which is strong enough to survive a turnover without any damage. Finally, there is the 8878 rechargeable battery box and the IR receiver located over the rear axle, as a counterweight against the PF XL over the front axle.
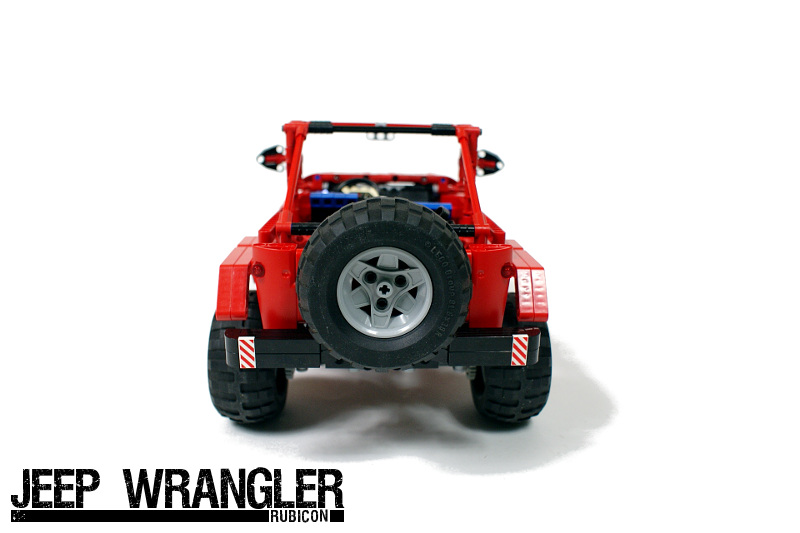
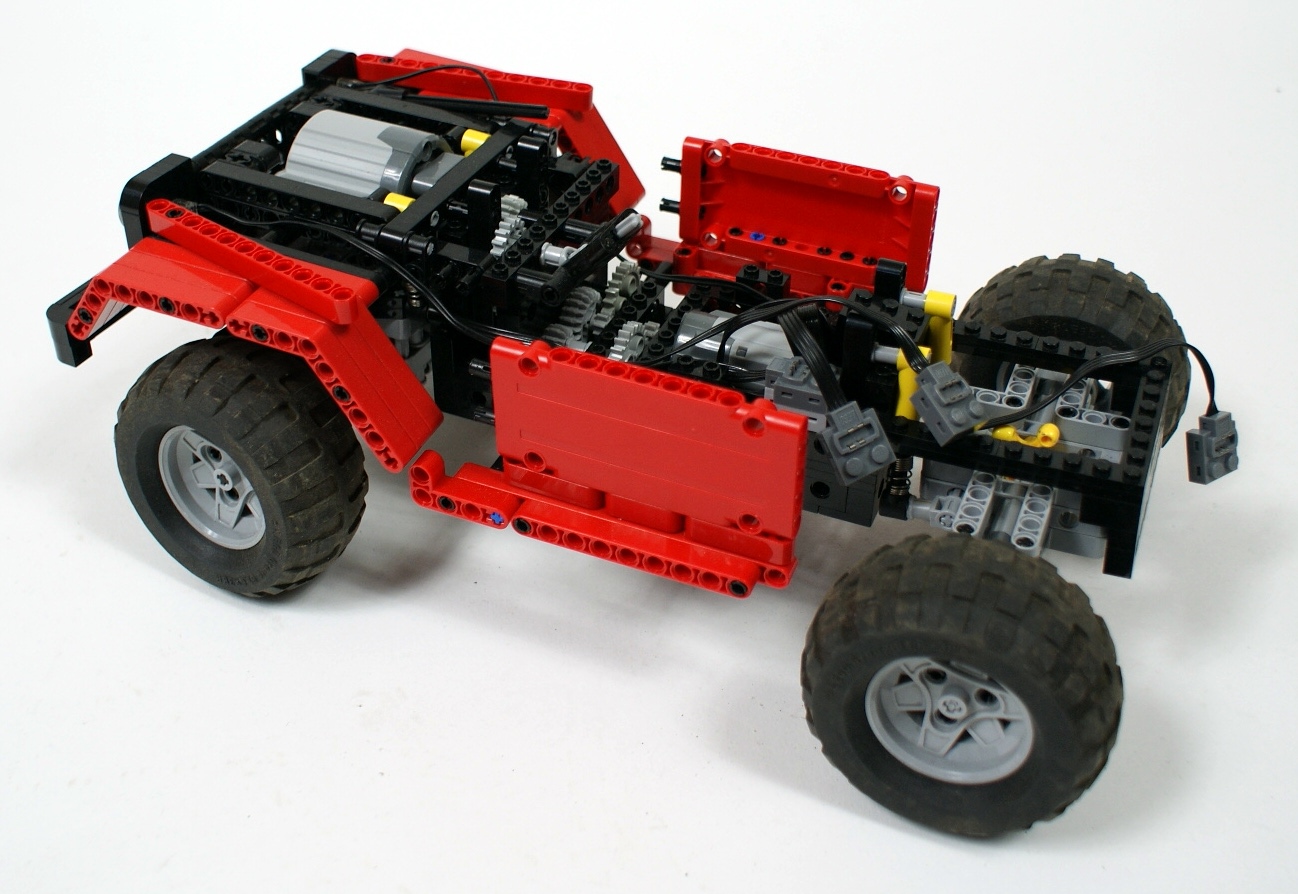
One special feature of the bodywork is a droppable modules design. The obstacles used in our races are often larger than the ones the real vehicles are designed for, so the usual practice to handle this difference is to increase the model’s ground clearance. I wanted to avoid it, however, to keep the Jeep’s center of gravity as low as possible. It meant that some parts of the body are very likely to touch the ground e.g. when the approach angle proves to be insufficient. Therefore I designed a number of body elements as independent modules that would fall off when stressed, on assumption that it’s better to drop something than let it get the whole vehicle stuck. The list of droppable elements includes front and rear bumper, rear spare wheel and front mudguards. The sides of the cabin are somewhat elastic too. This design is also helpful when the front wheels’ steering lock makes them collide into some parts of the body.
The model turned out to be pretty stable, with a well performing suspension and an excellent amount of torque available. It was my goal to prefer the torque over speed, since I did not want the model to get stalled under any circumstances while its speed didn’t seem crucial. This is second model of a Jeep used in our races, and it’s much different from its predecessor, the Jeep Willys built by Atr. Among other things it is heavier, larger and slower. Observing the two models compete against each other and comparing their performance will be certainly a great experience.
The main disadvantage of this model is its size. The standard scale used for vehicles in our races is 1/13. I was in hurry while building the Jeep, so I picked up the wheels I found most suitable and scaled the whole model accordingly to their size. Eventually it turned out to be in 9/1 scale which is much different from the required one, and will probably result in letting this model race outside the official ranking (in a so-called ‘open class’). Still, building and testing this model was a valuable experience, and driving it in a race will be so too. It was also acclaimed by other builders and race contestants for its look, its authenticity and its performance. If it turns out to be successful in the race (meaning that it suffers no fatal malfunction and doesn’t end up last), I will prepare and publish a complete step-by-step instruction for it, as well as schemes of front and rear axle along with their individual instructions.
Update: since the Jeep performed well at the race, the instructions are under the photos.
Photos:


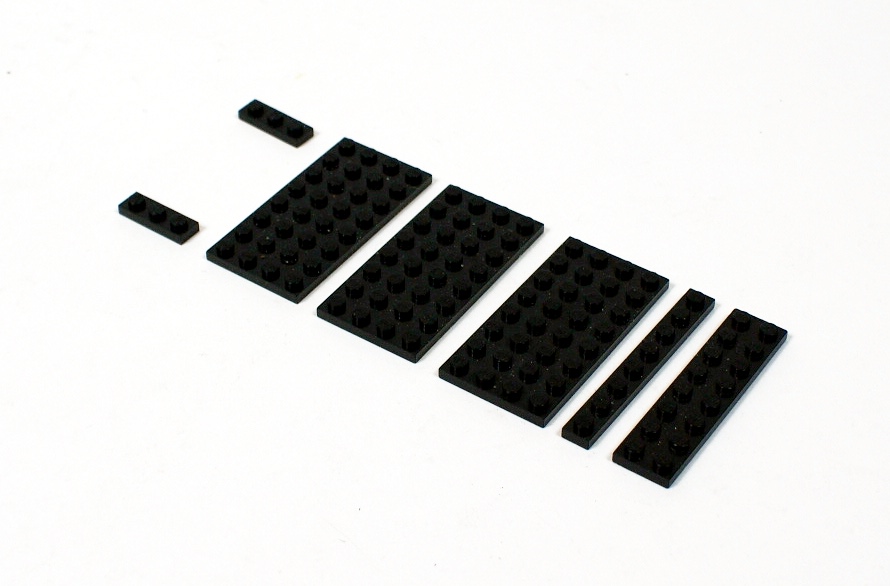
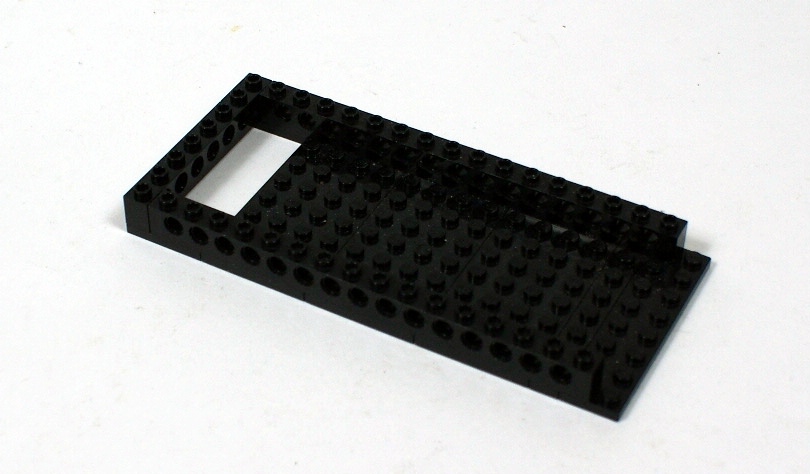
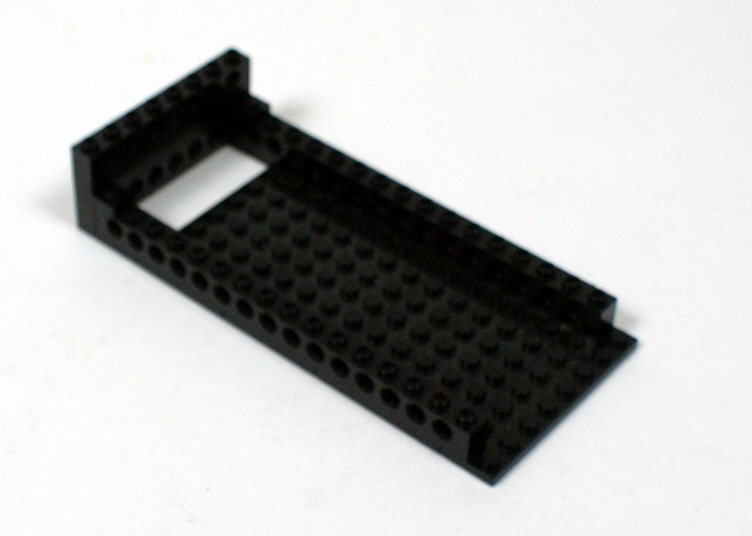
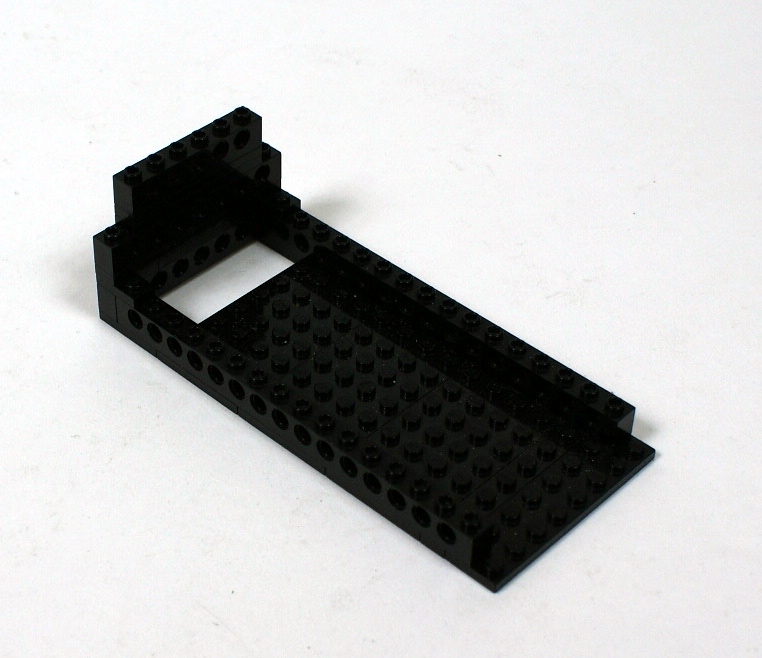
Full instruction with parts list:


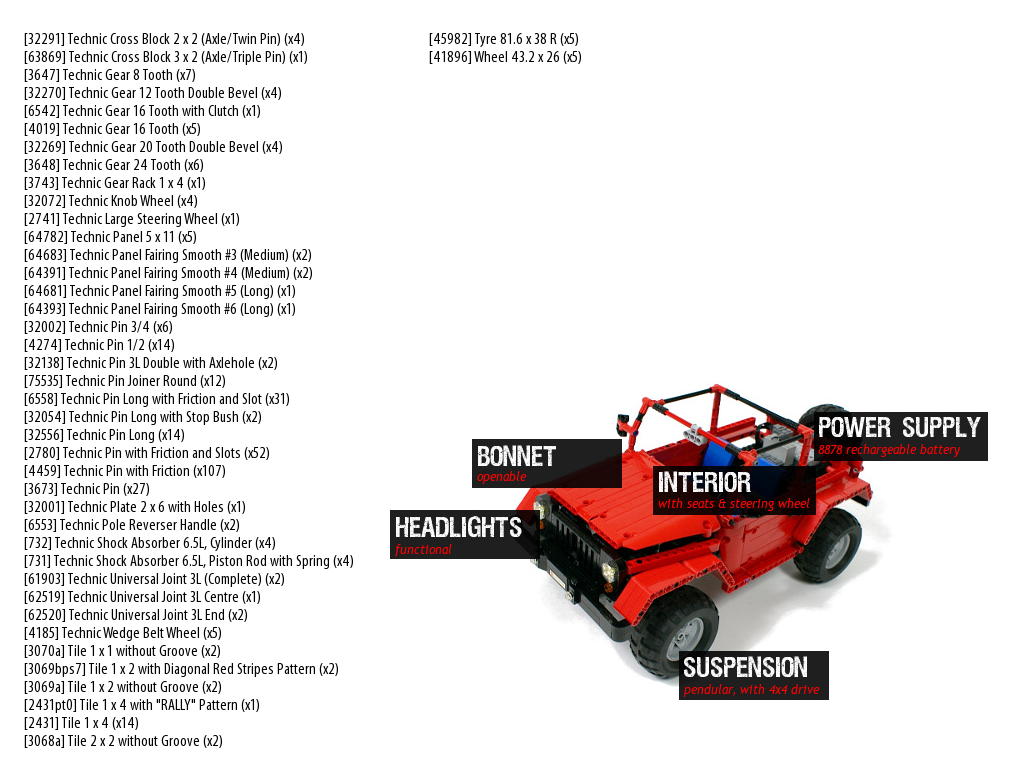

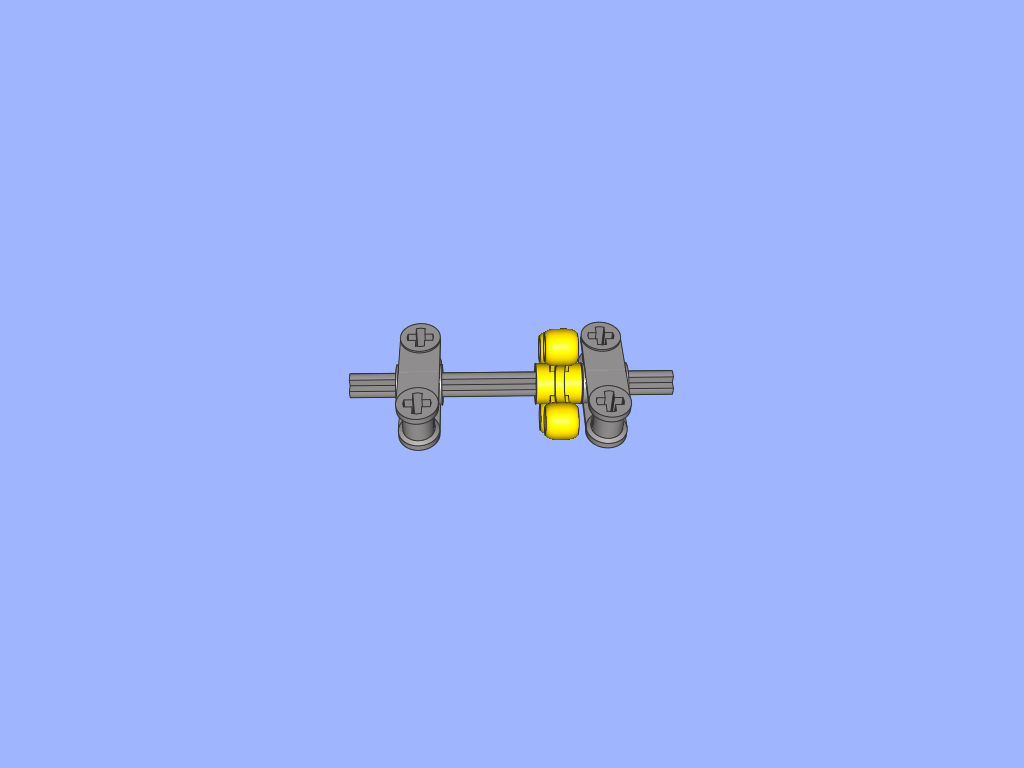
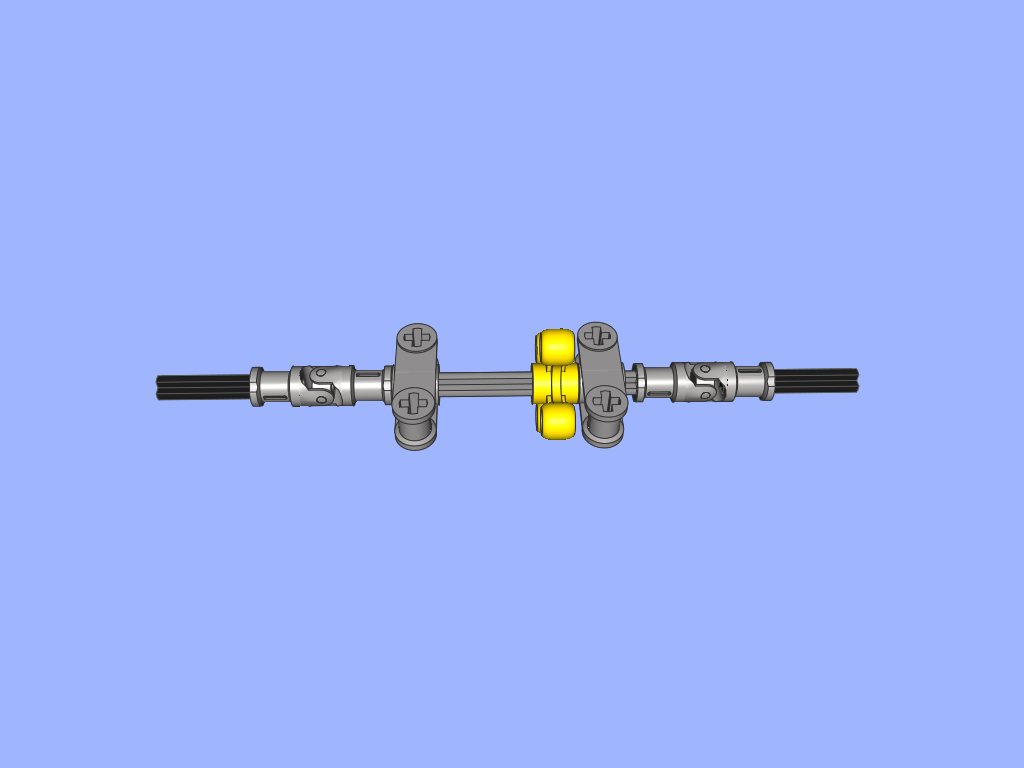

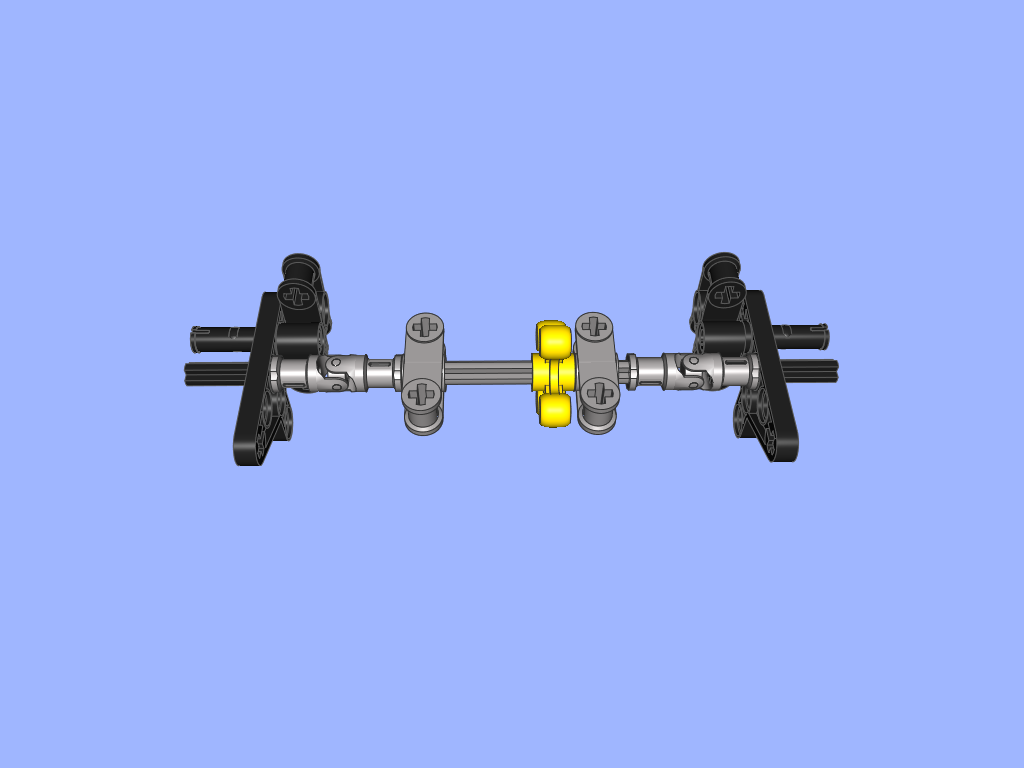

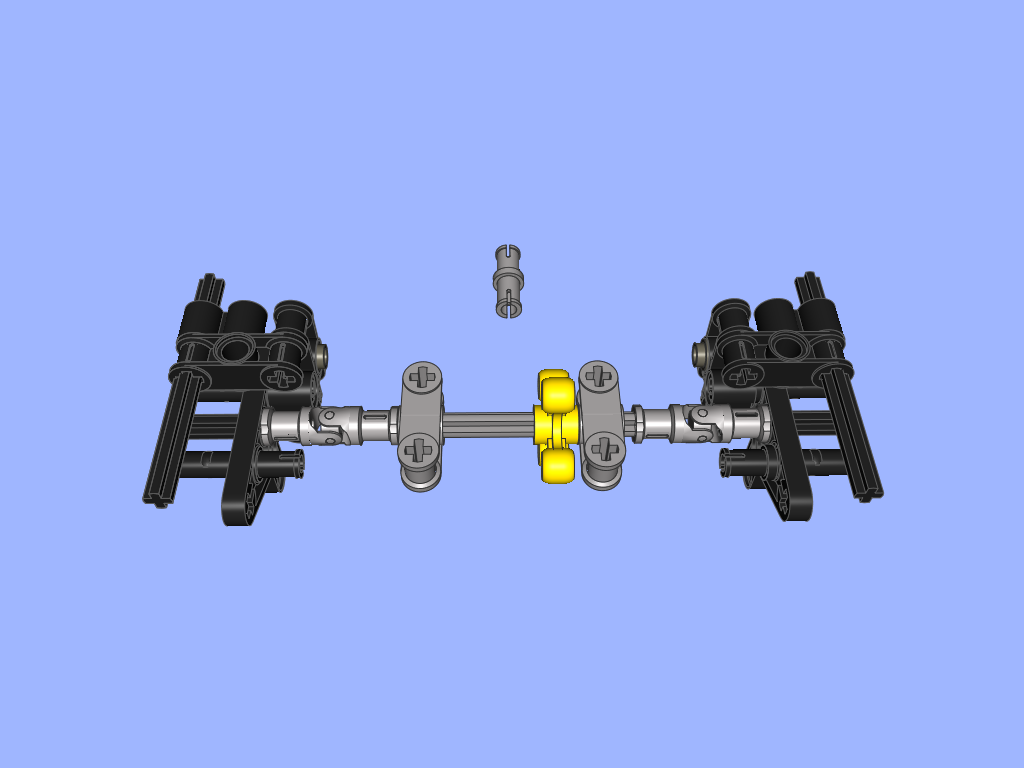
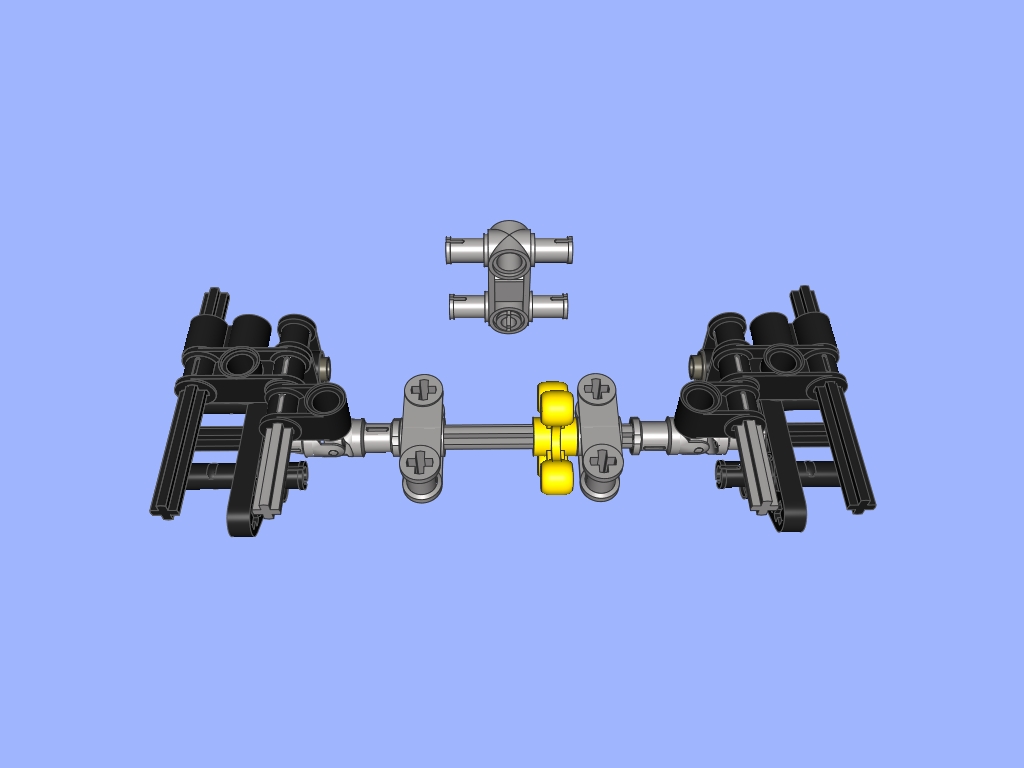
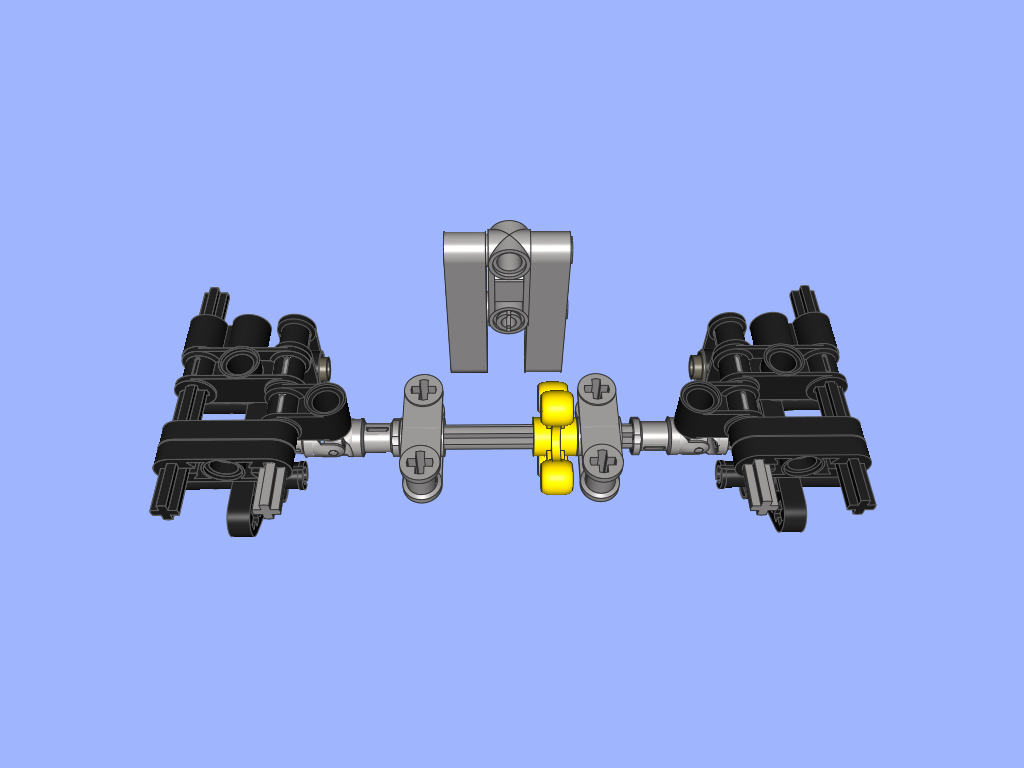

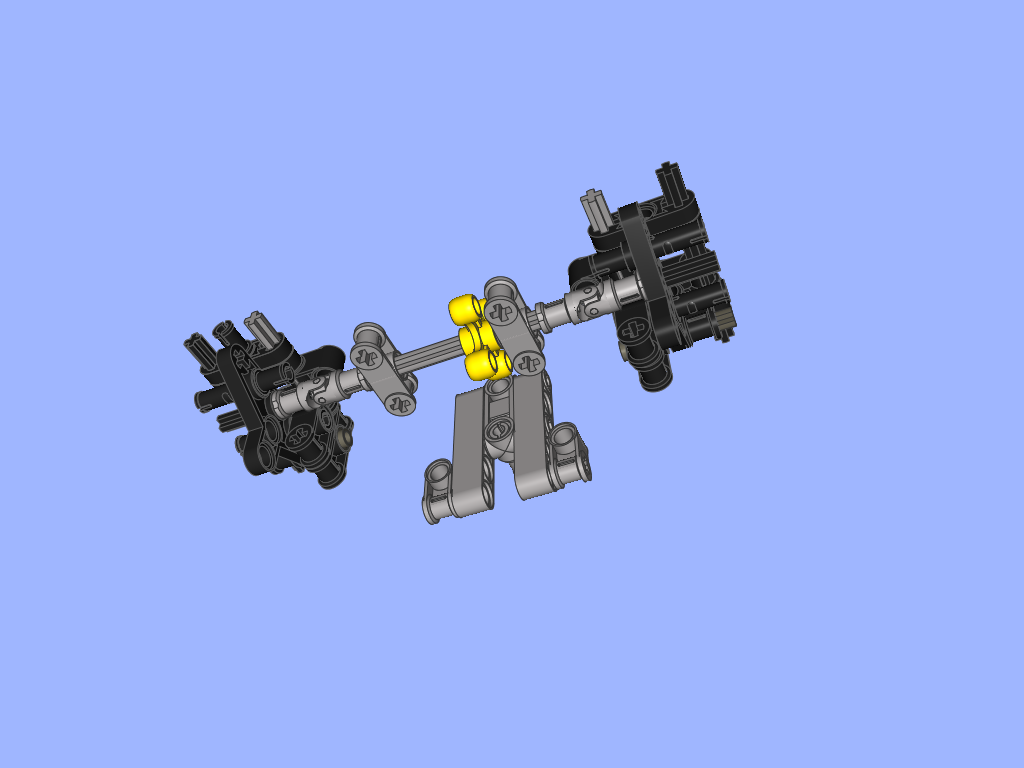

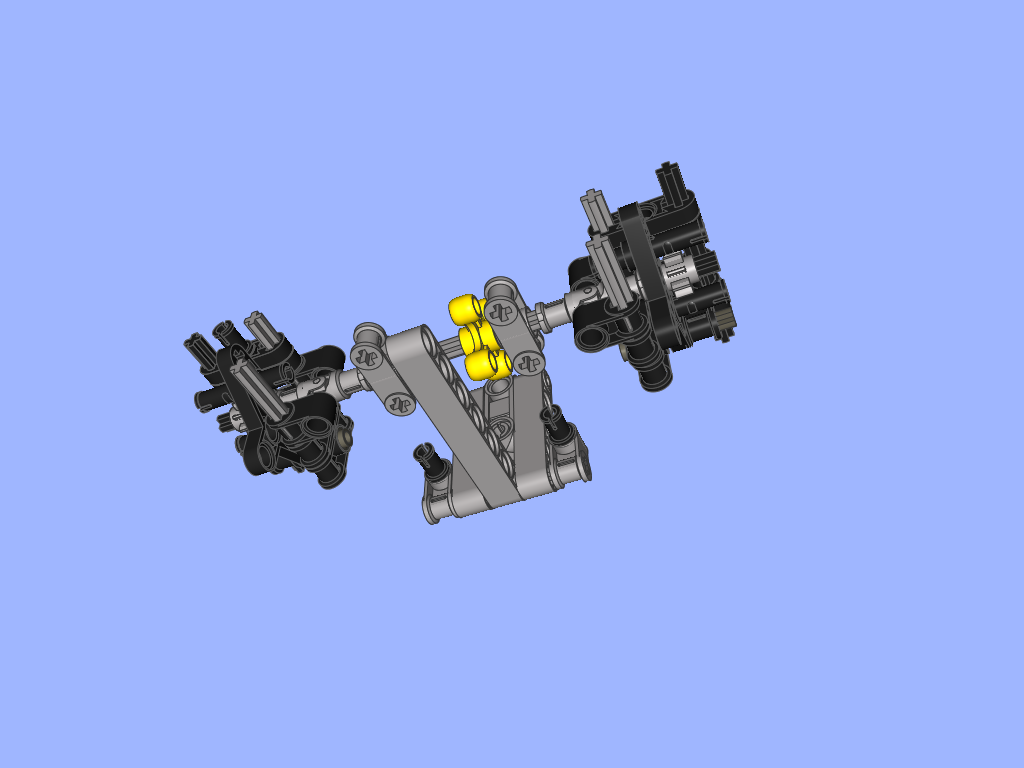

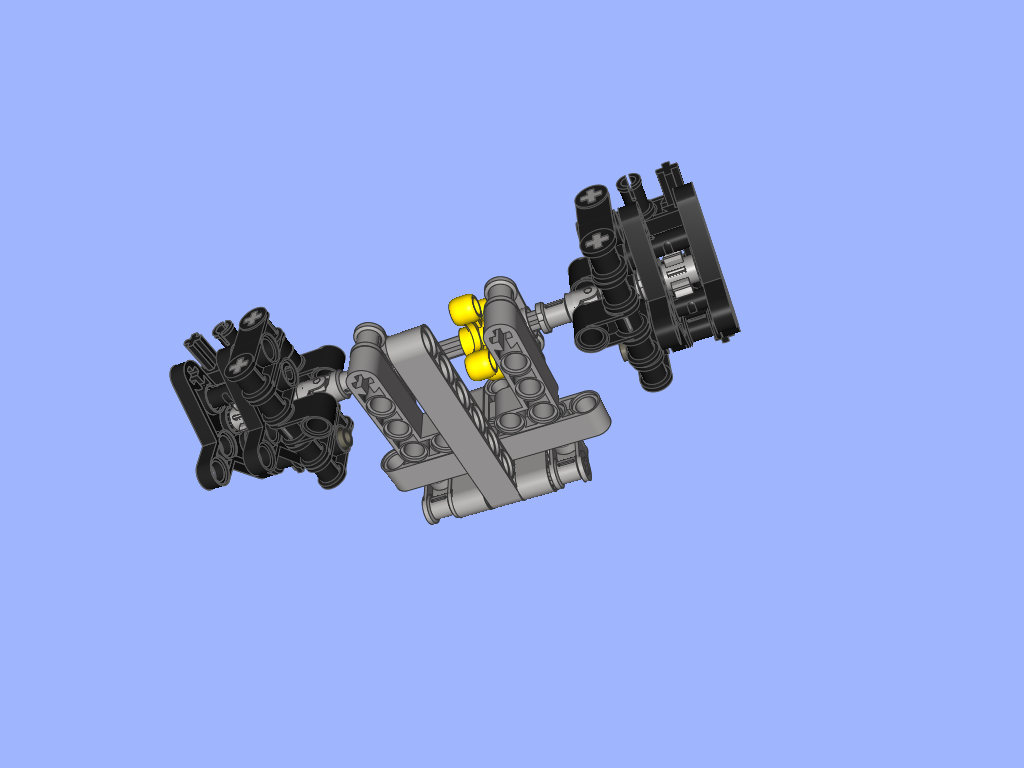
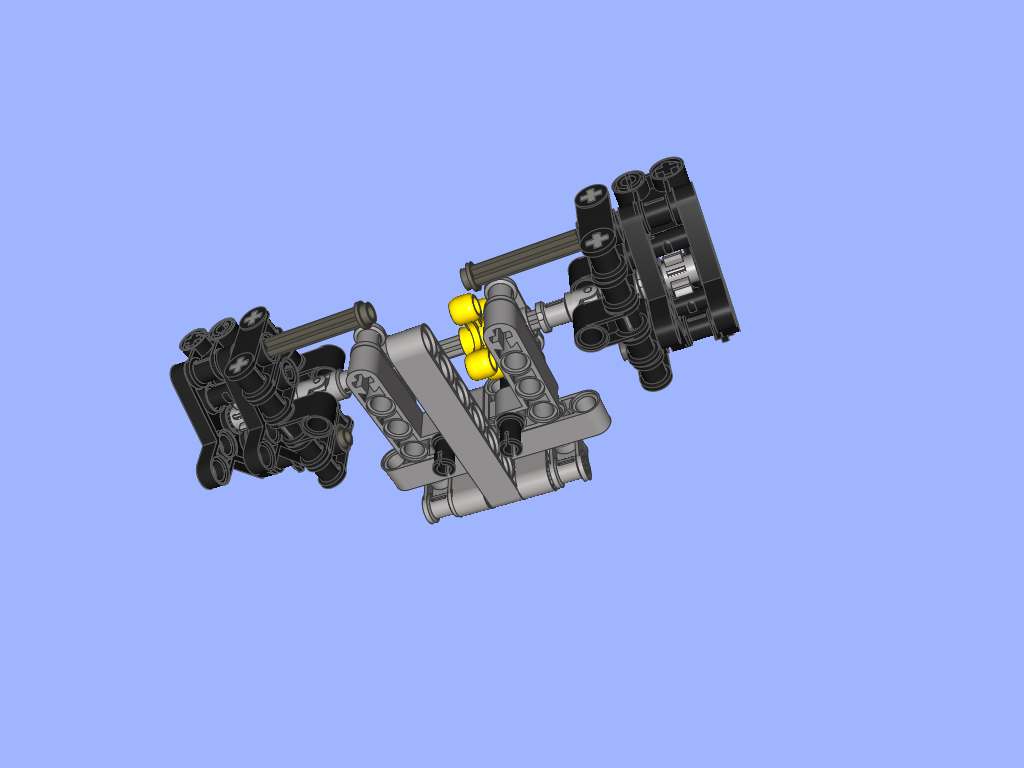
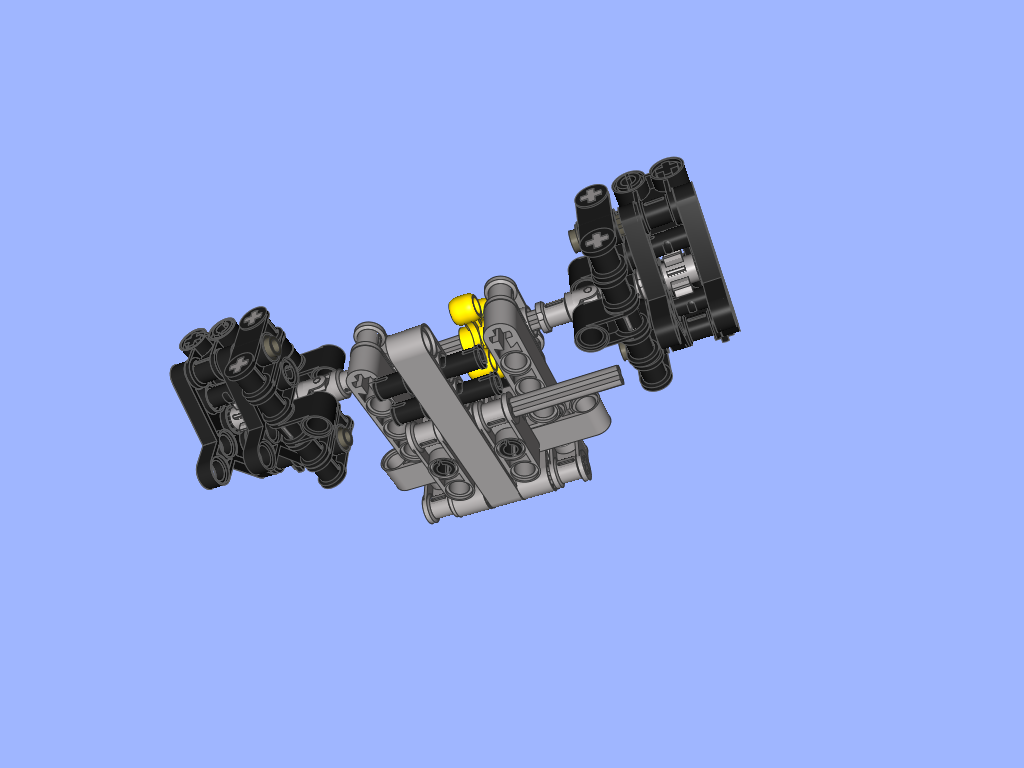
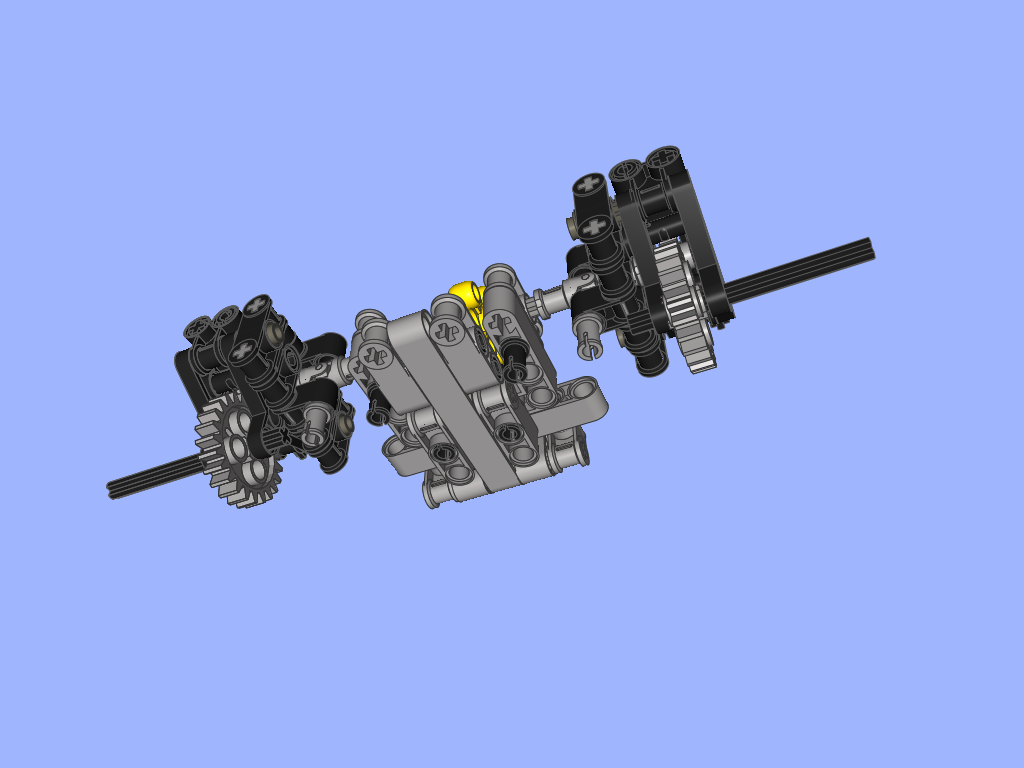
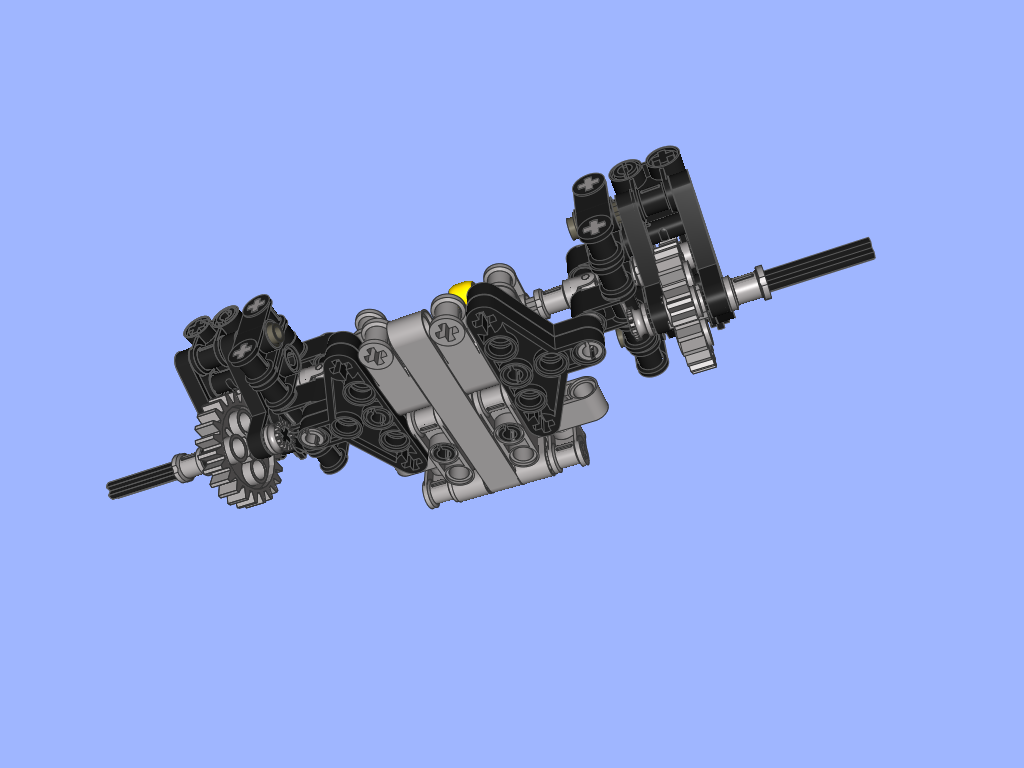
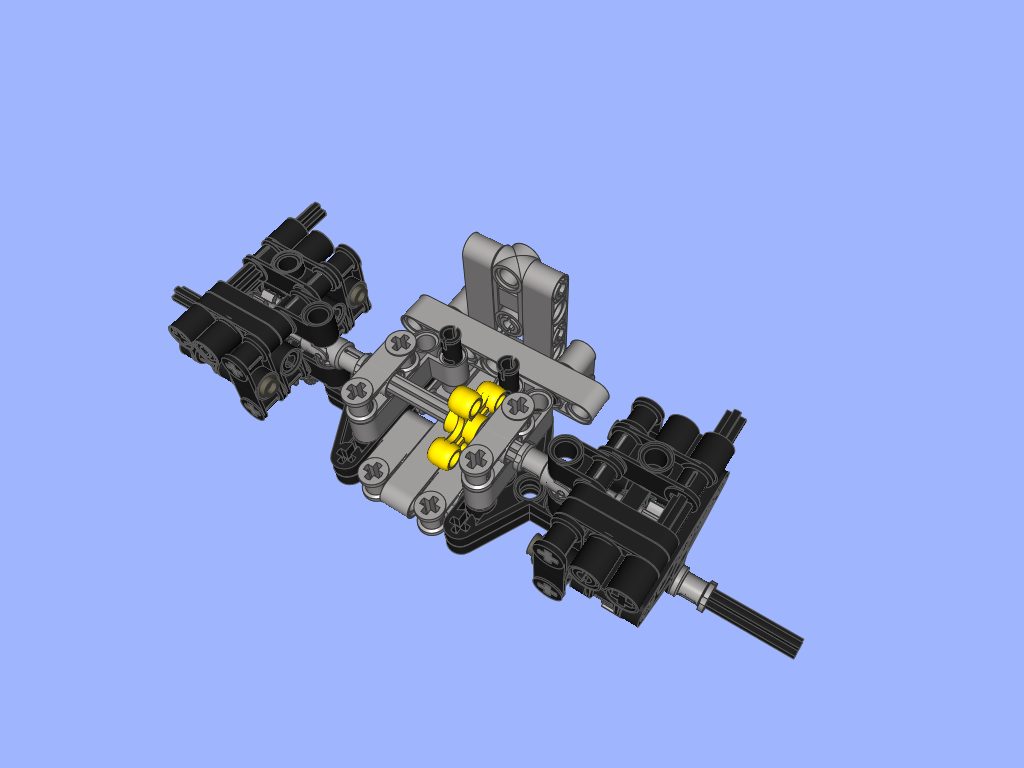
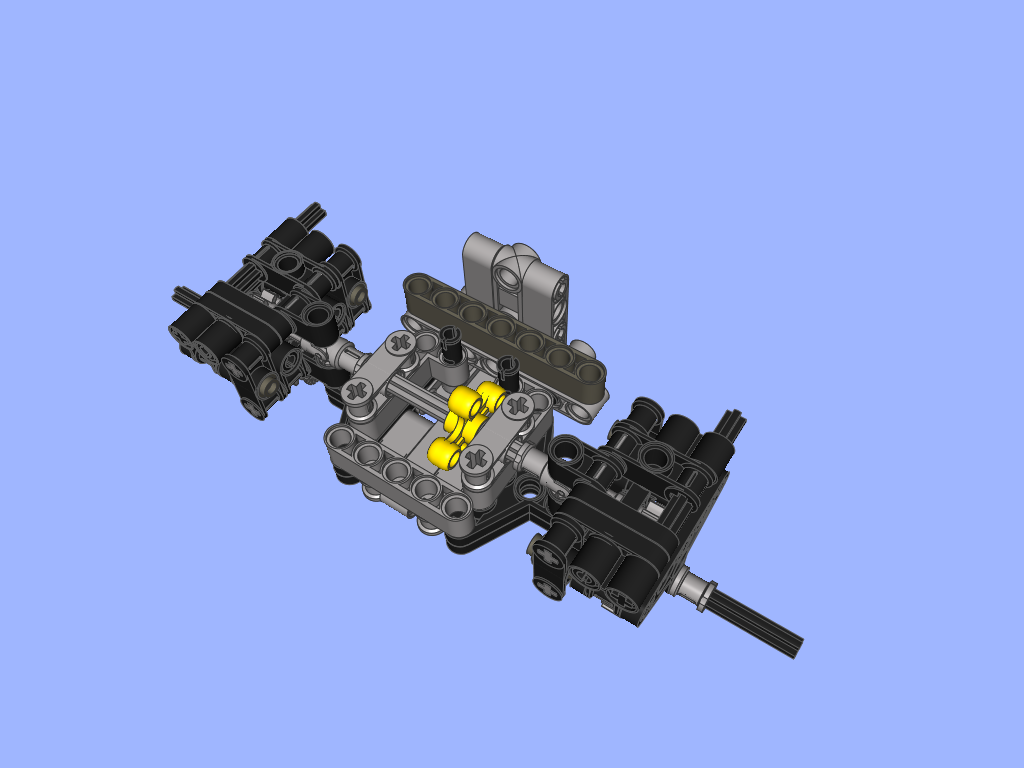

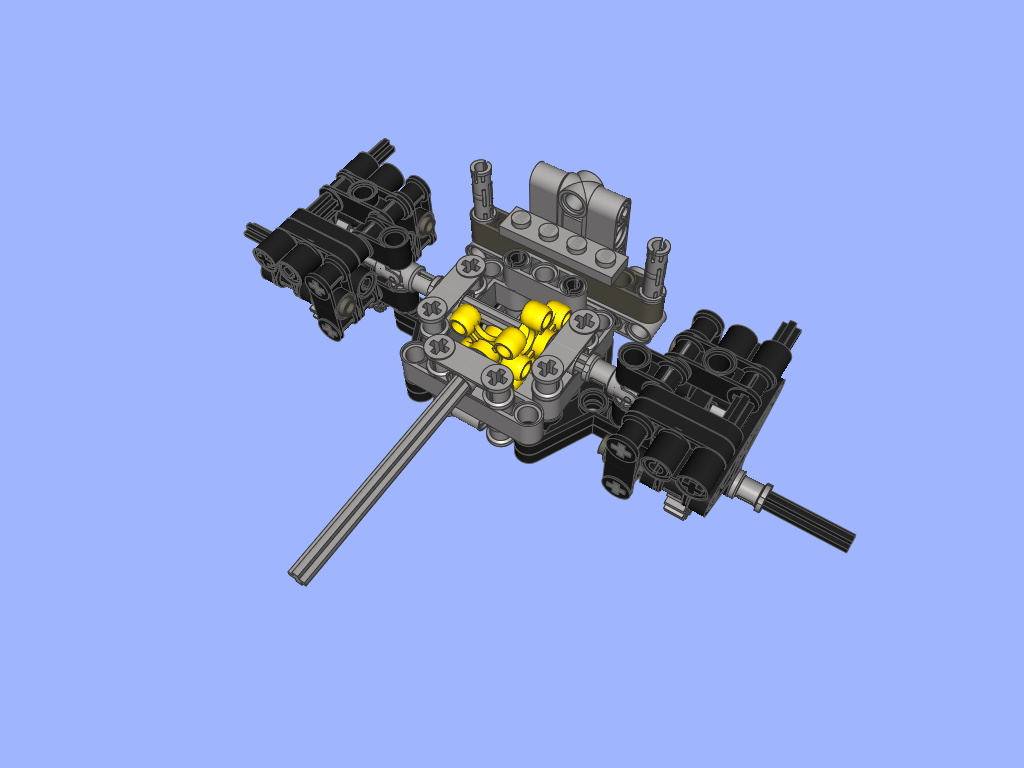

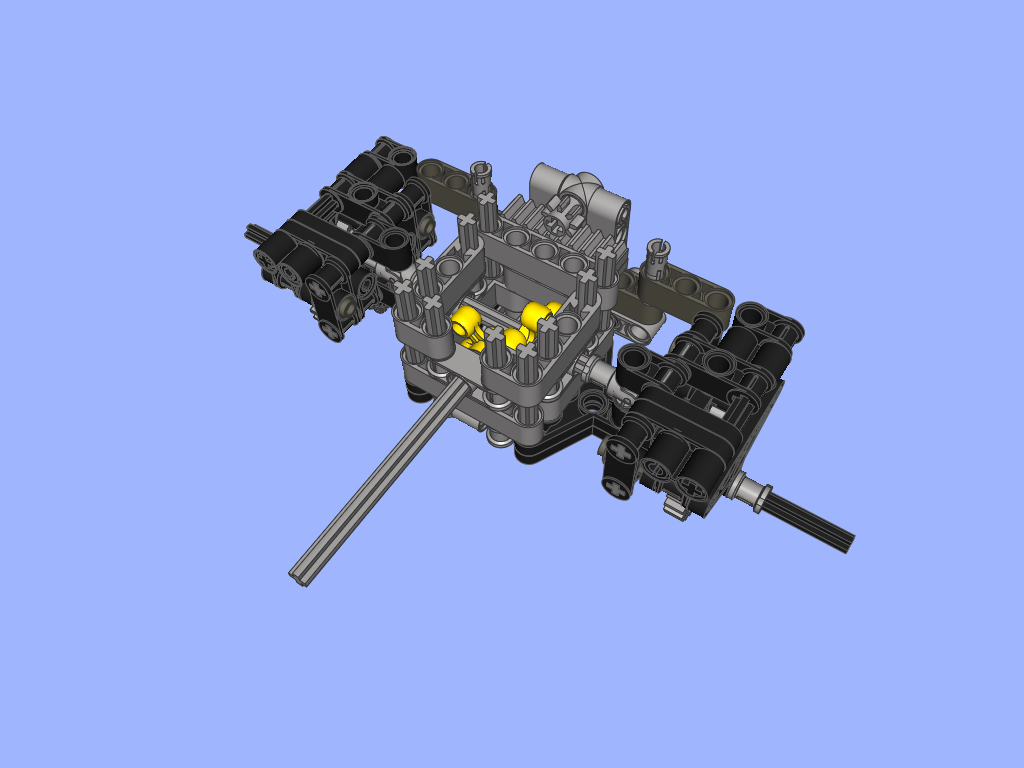

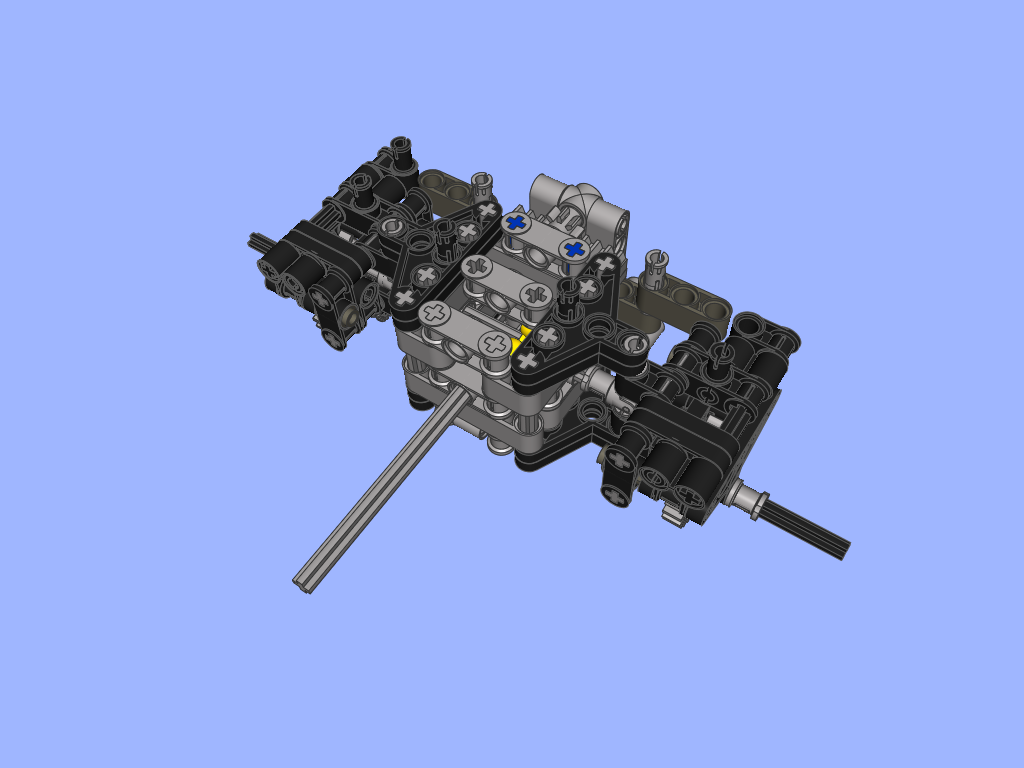

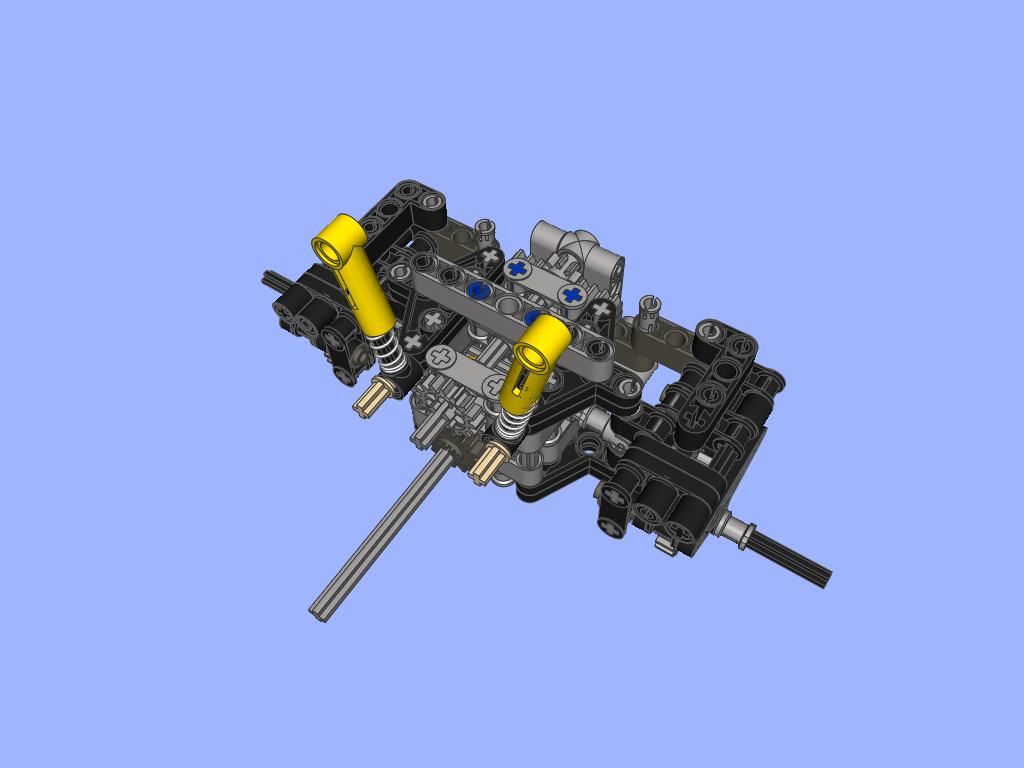

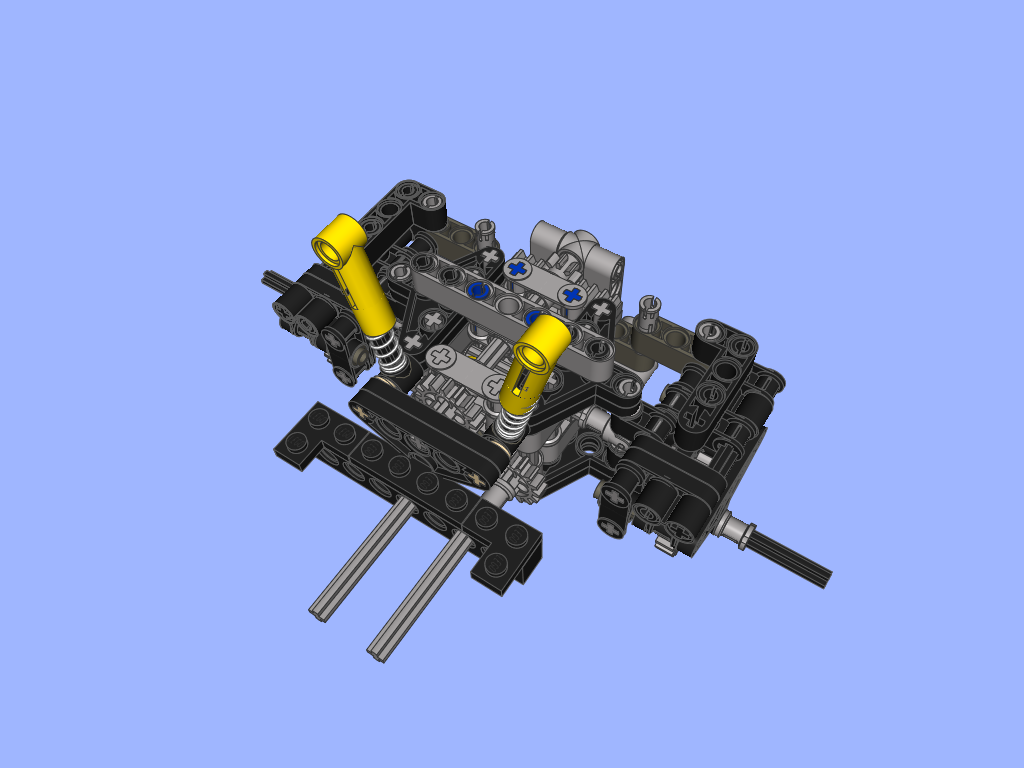
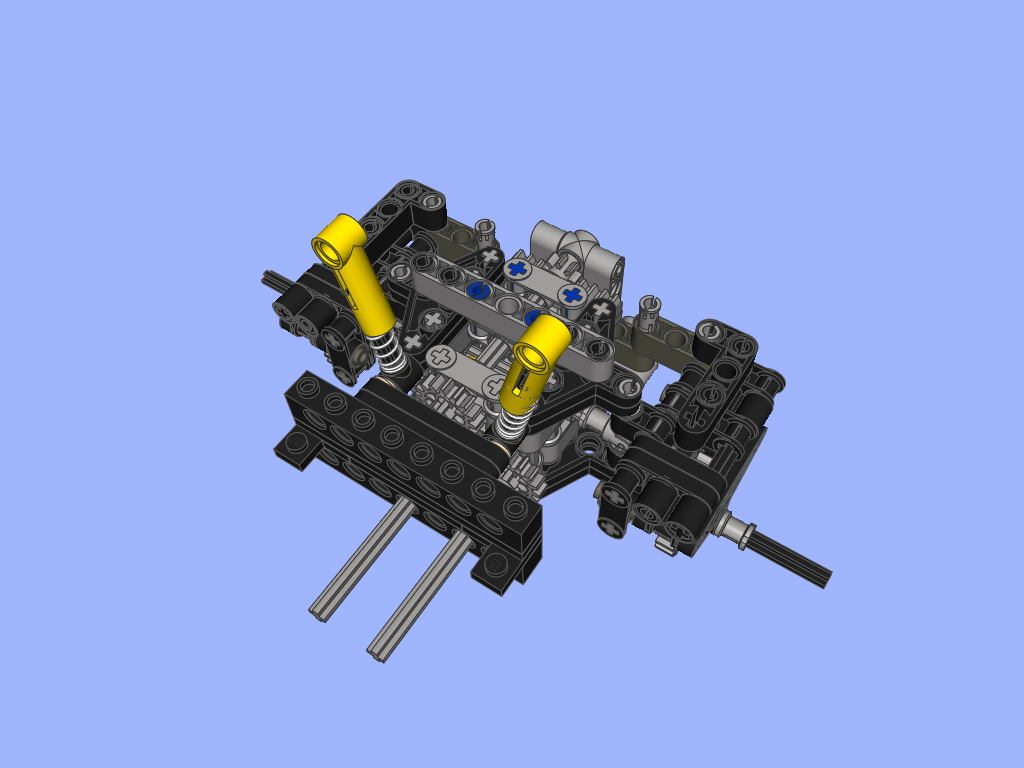

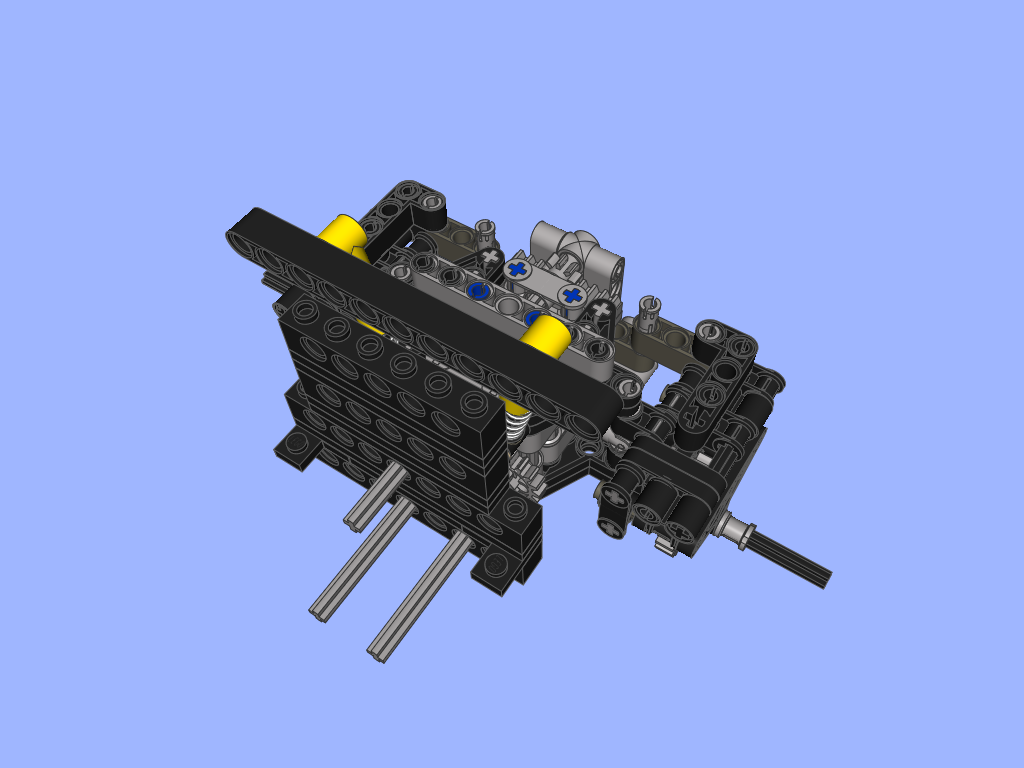
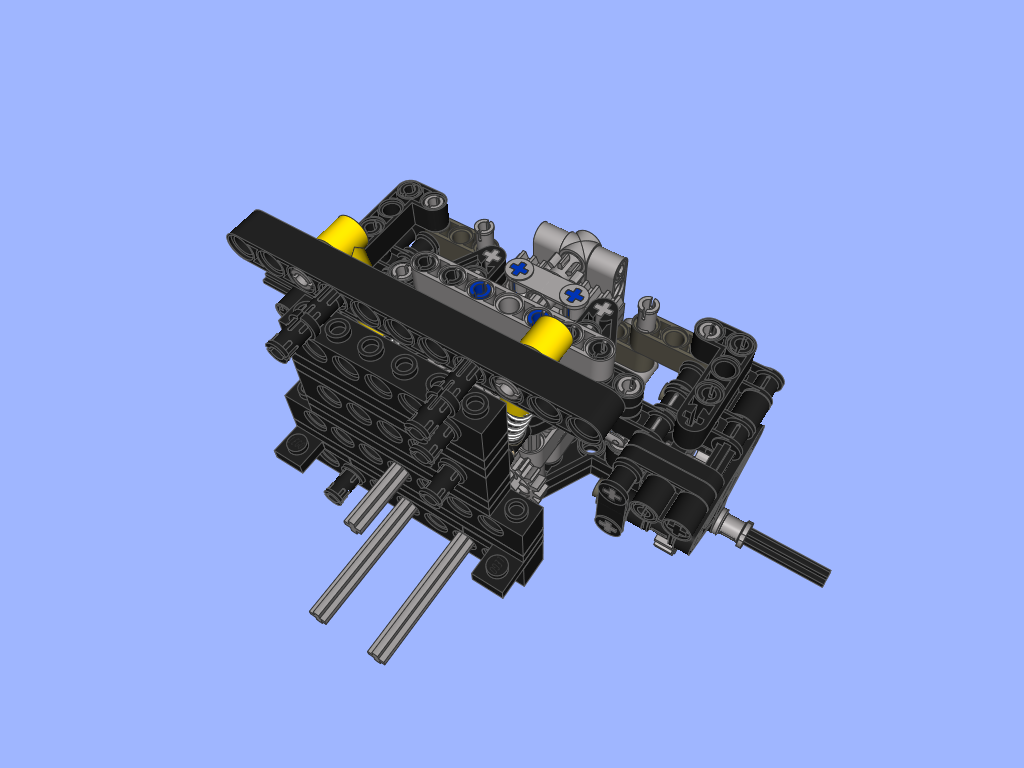
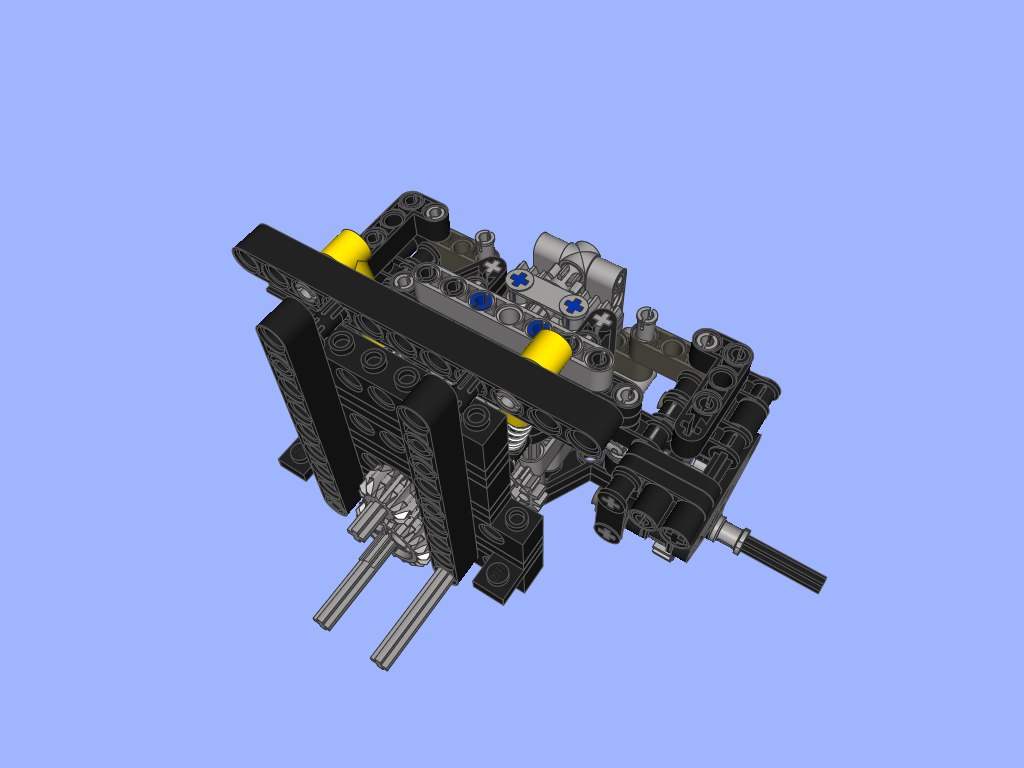


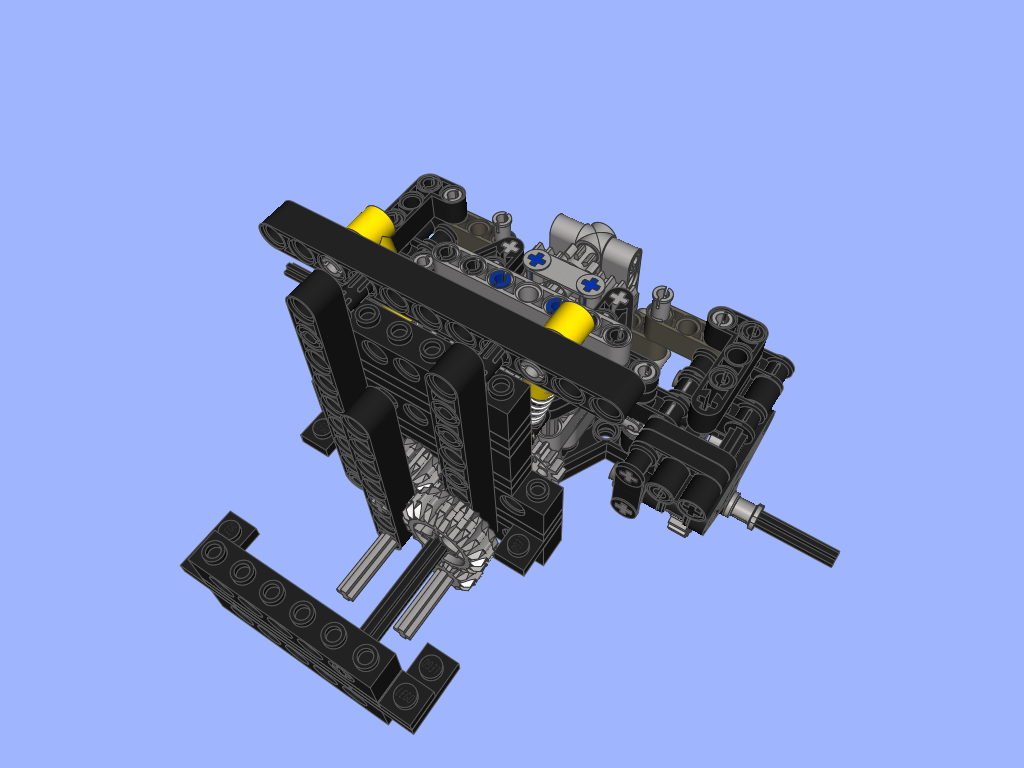
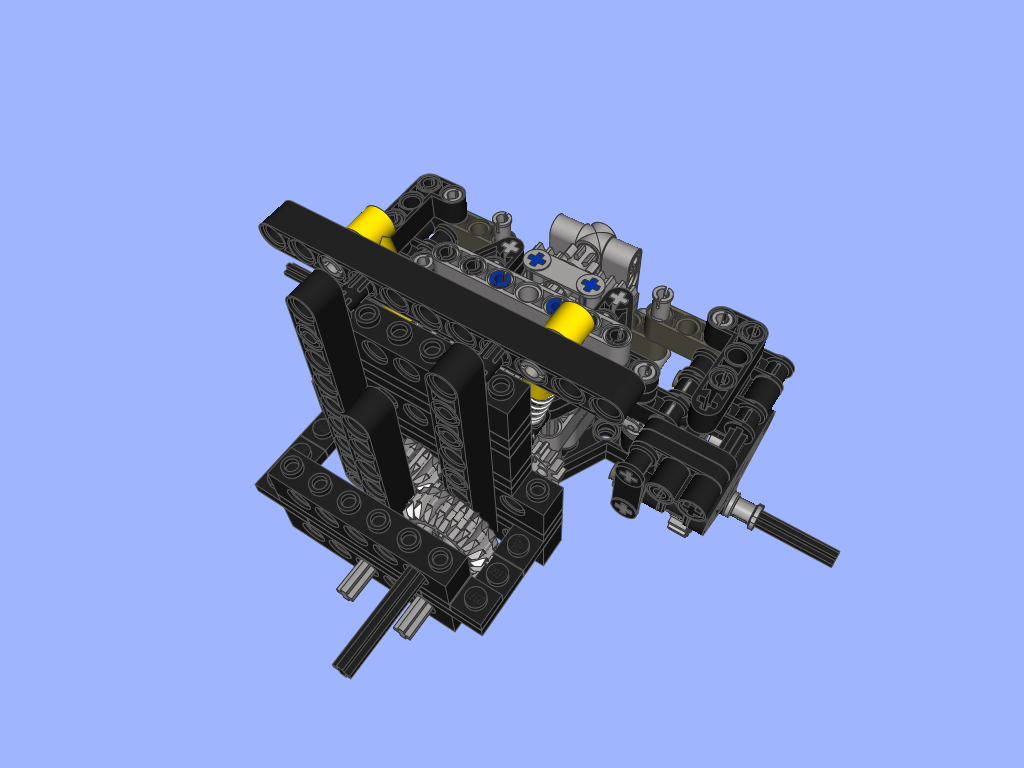
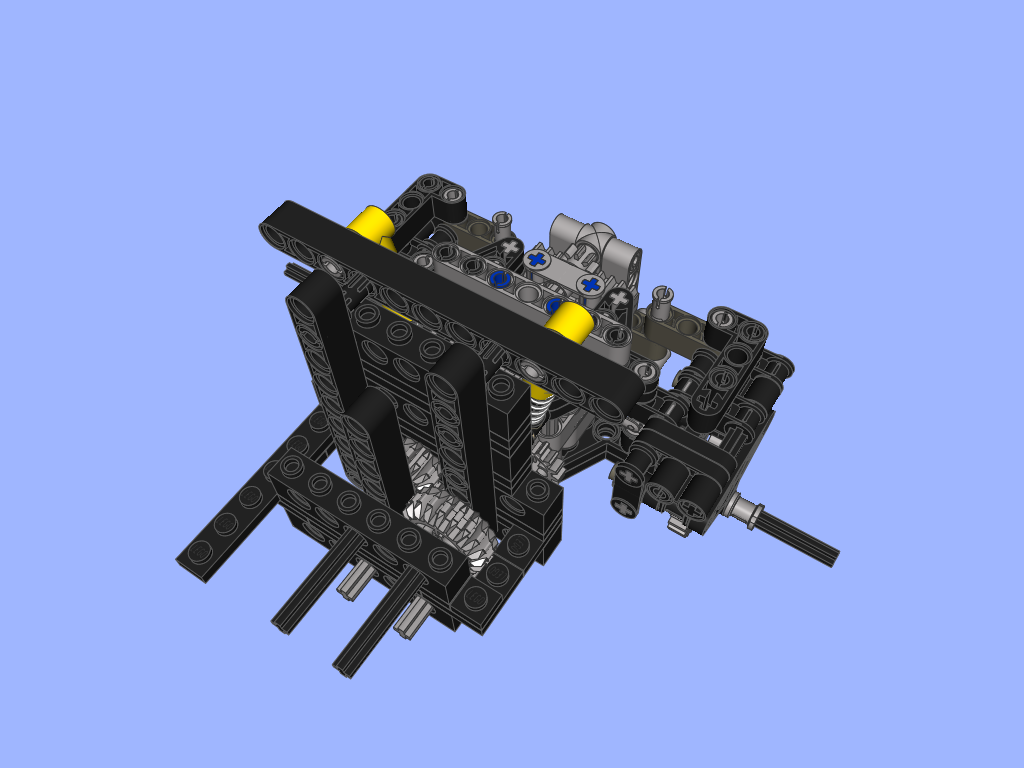
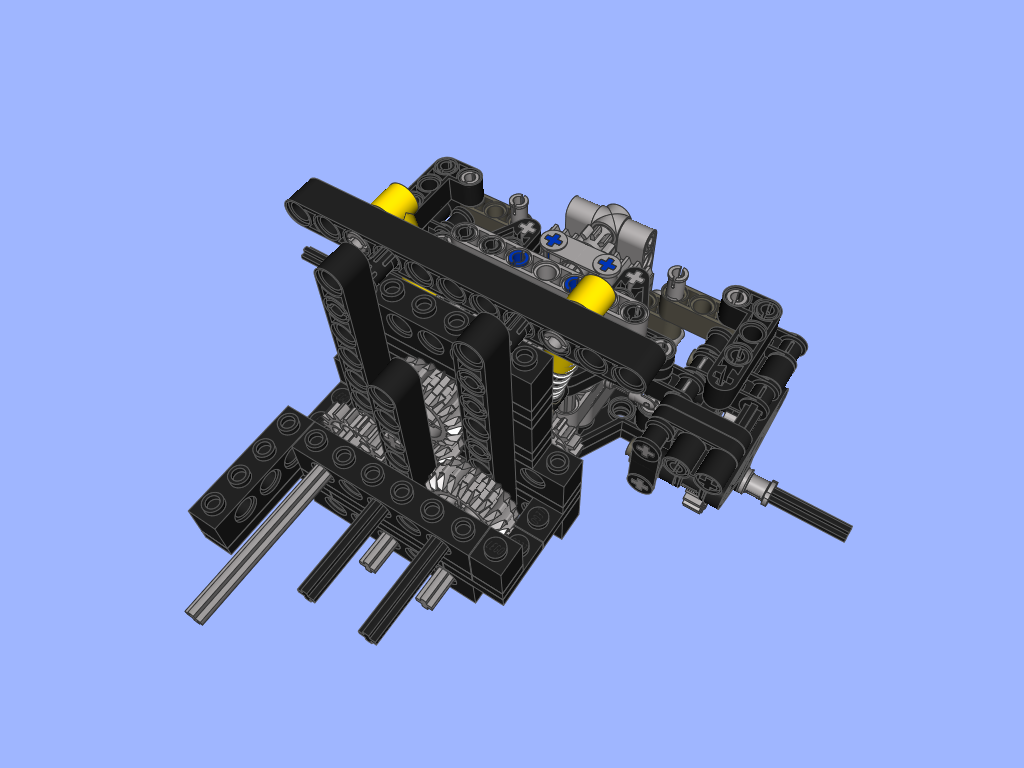
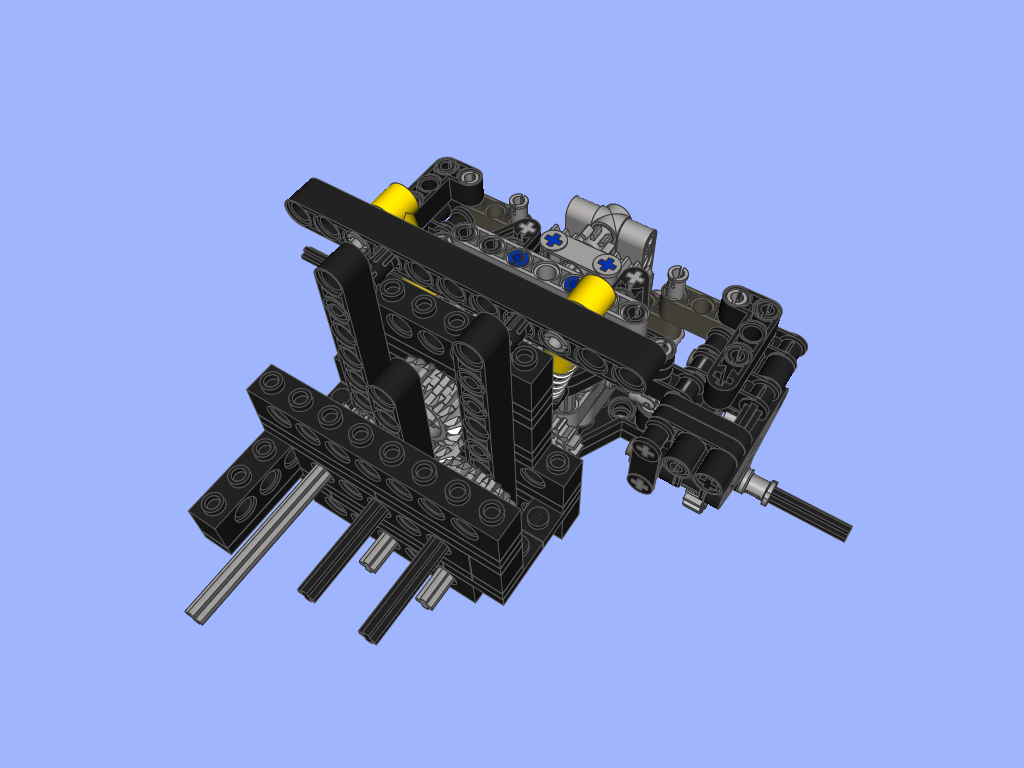

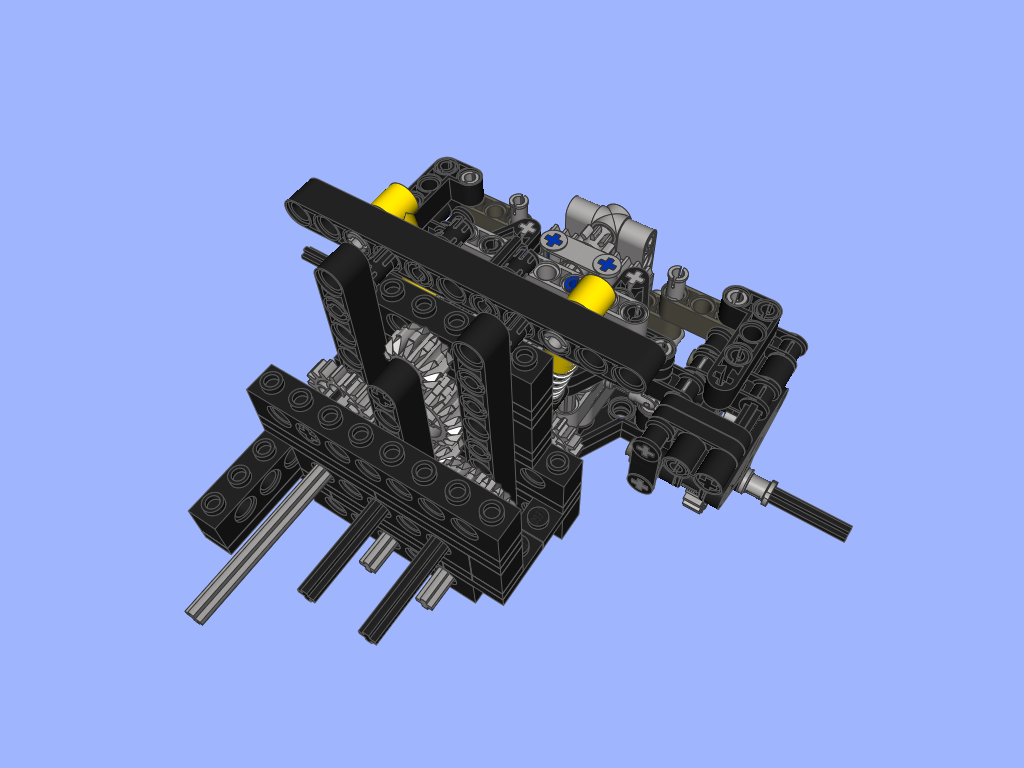
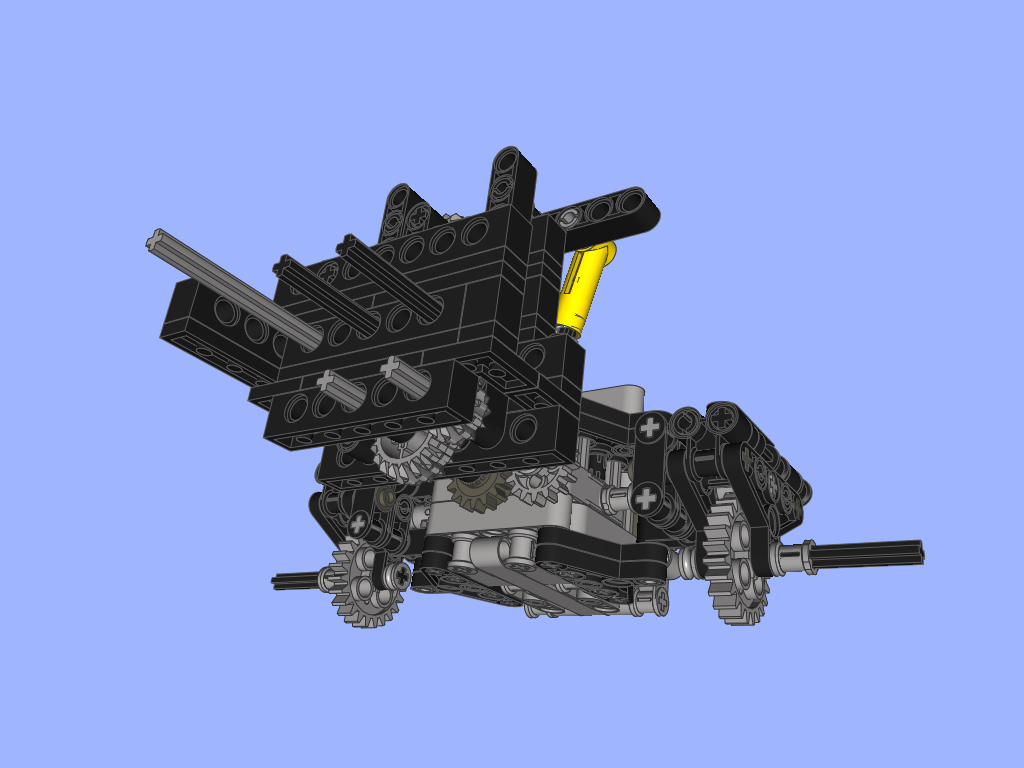
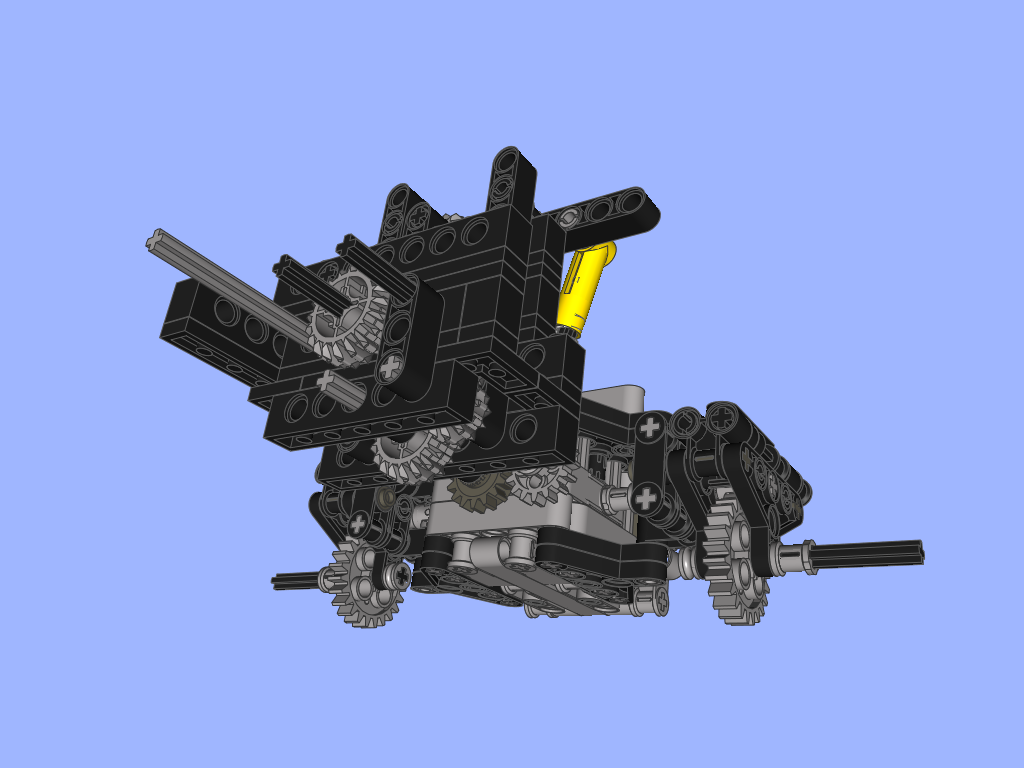
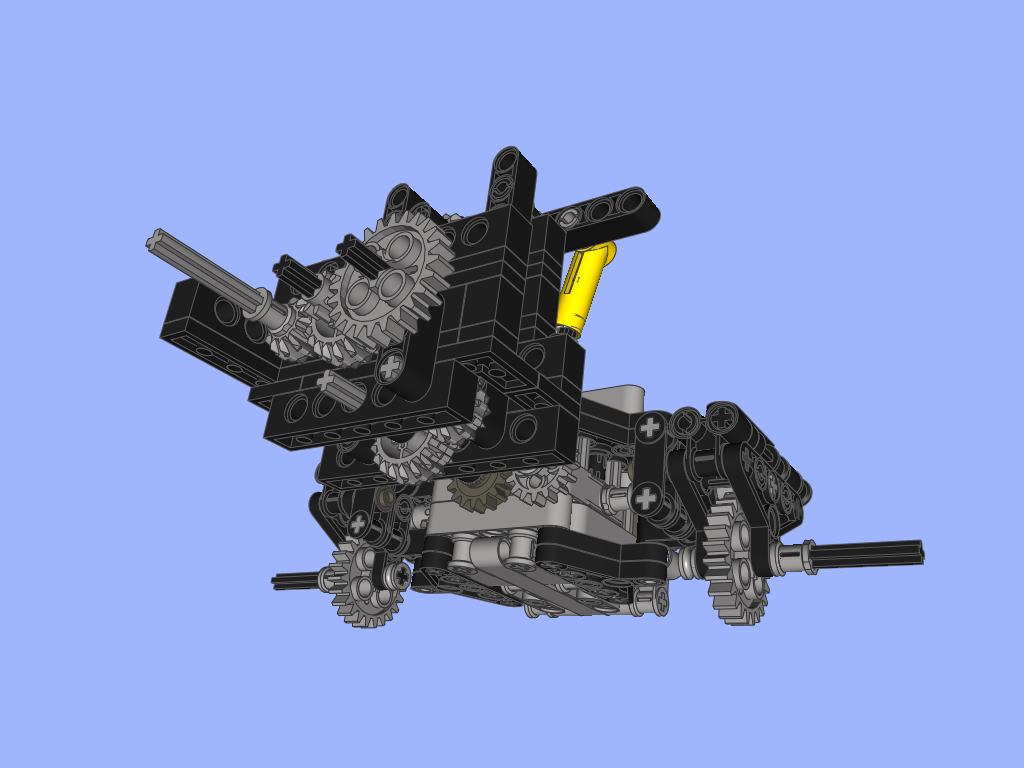
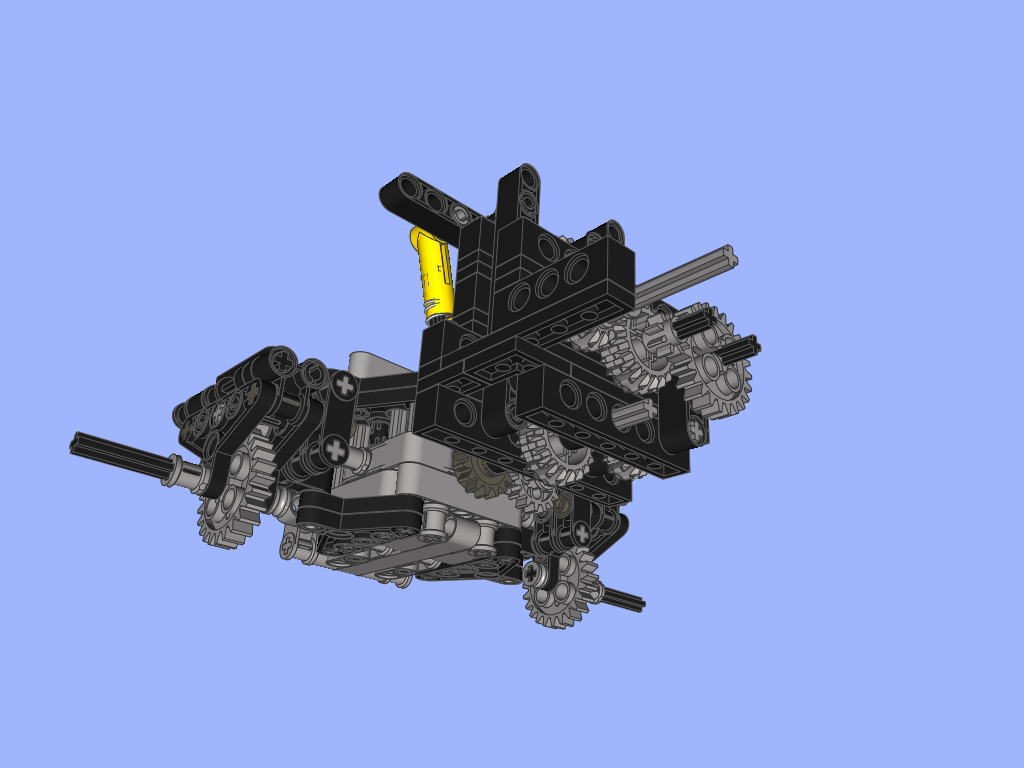
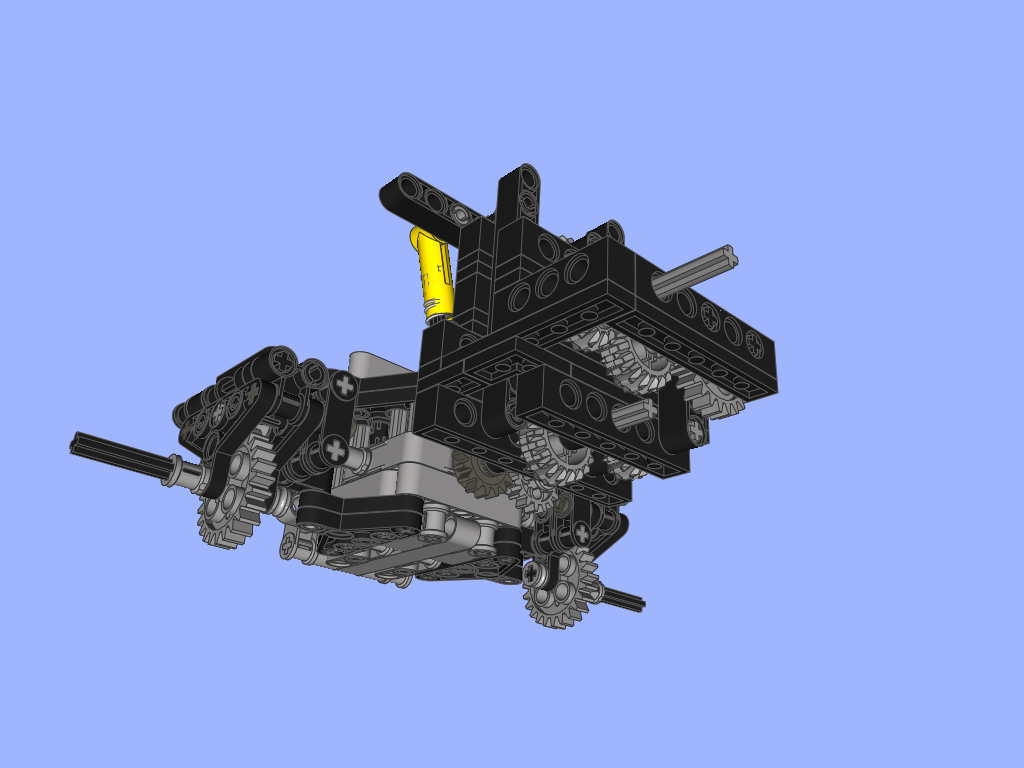
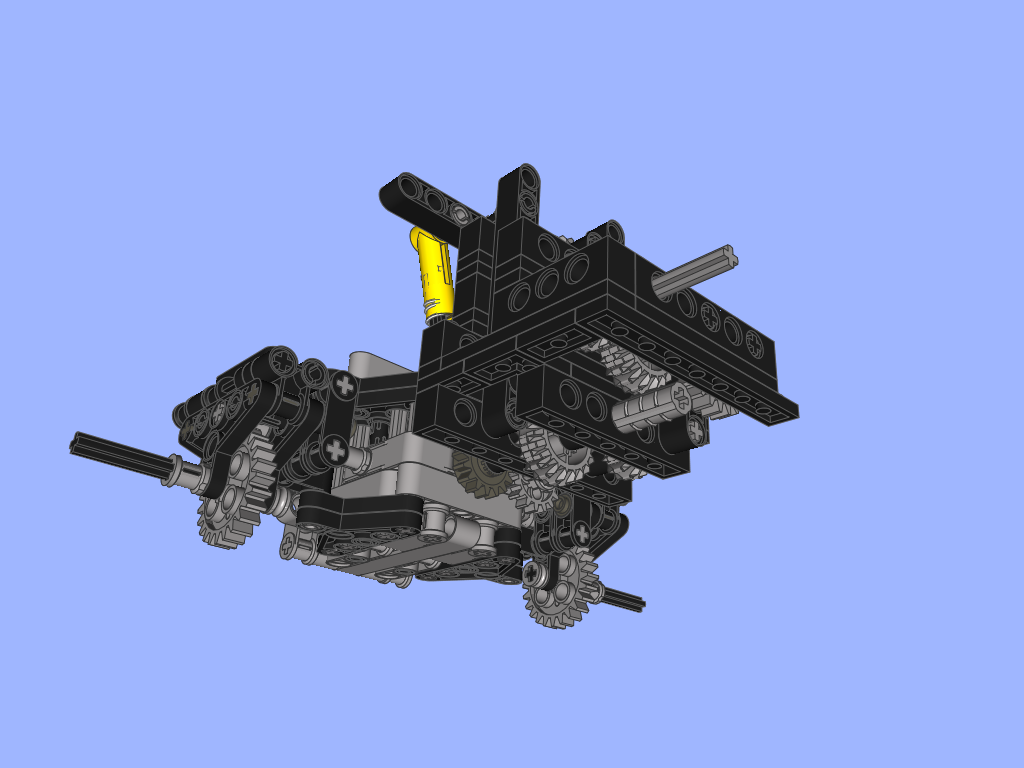
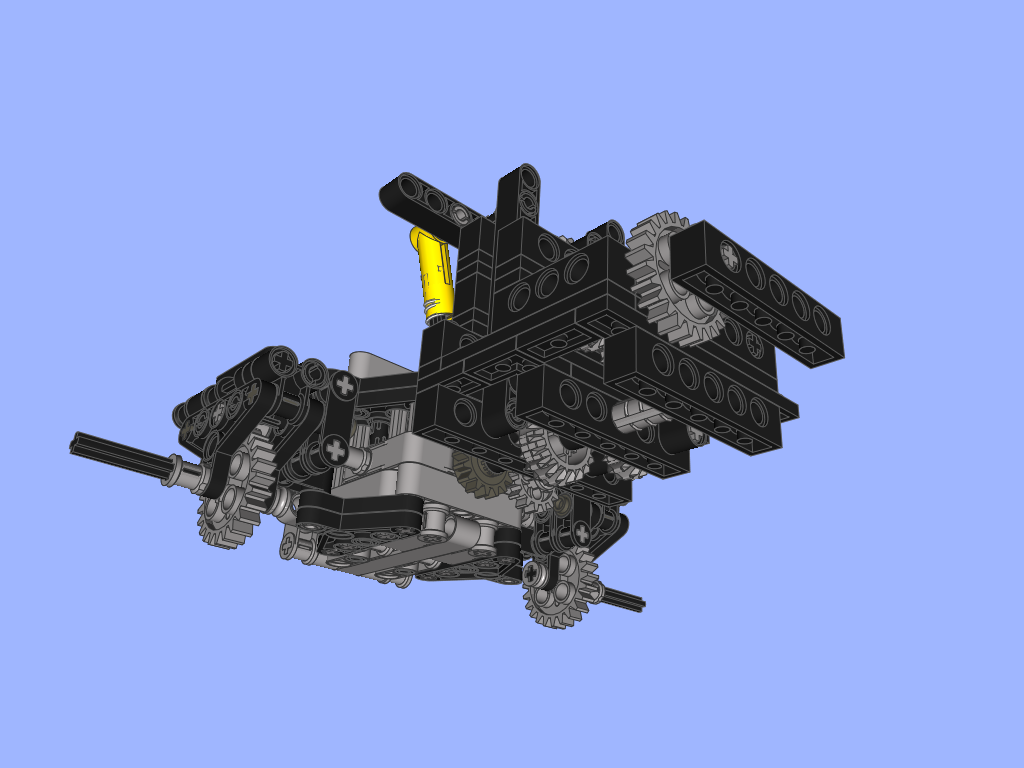
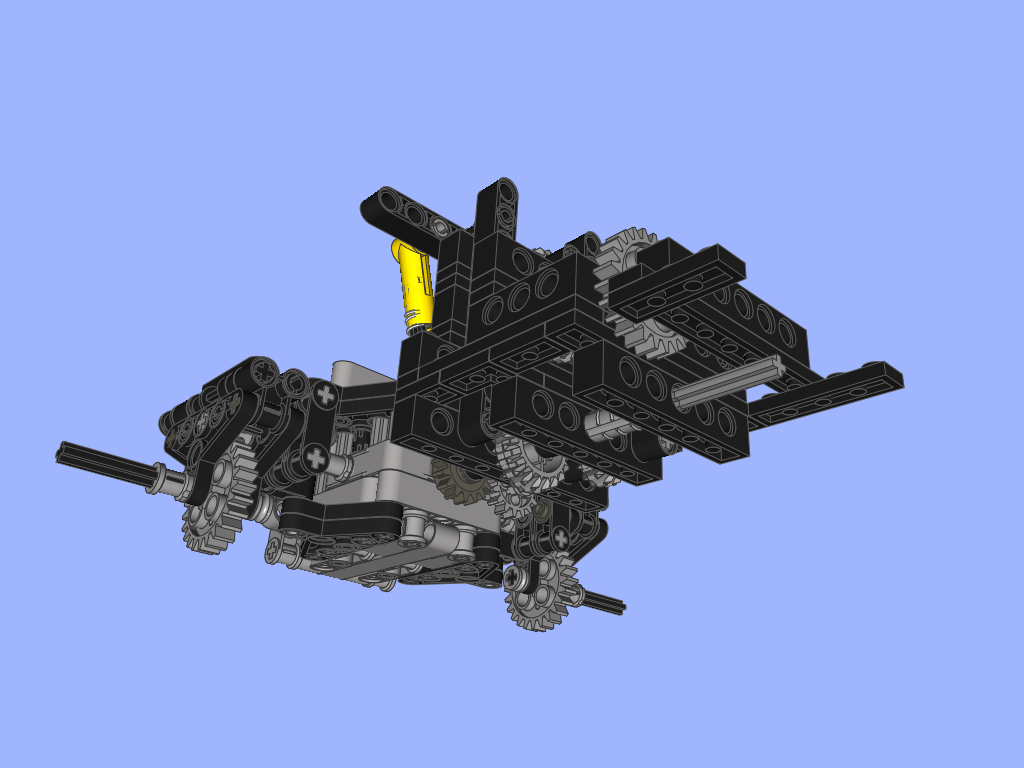
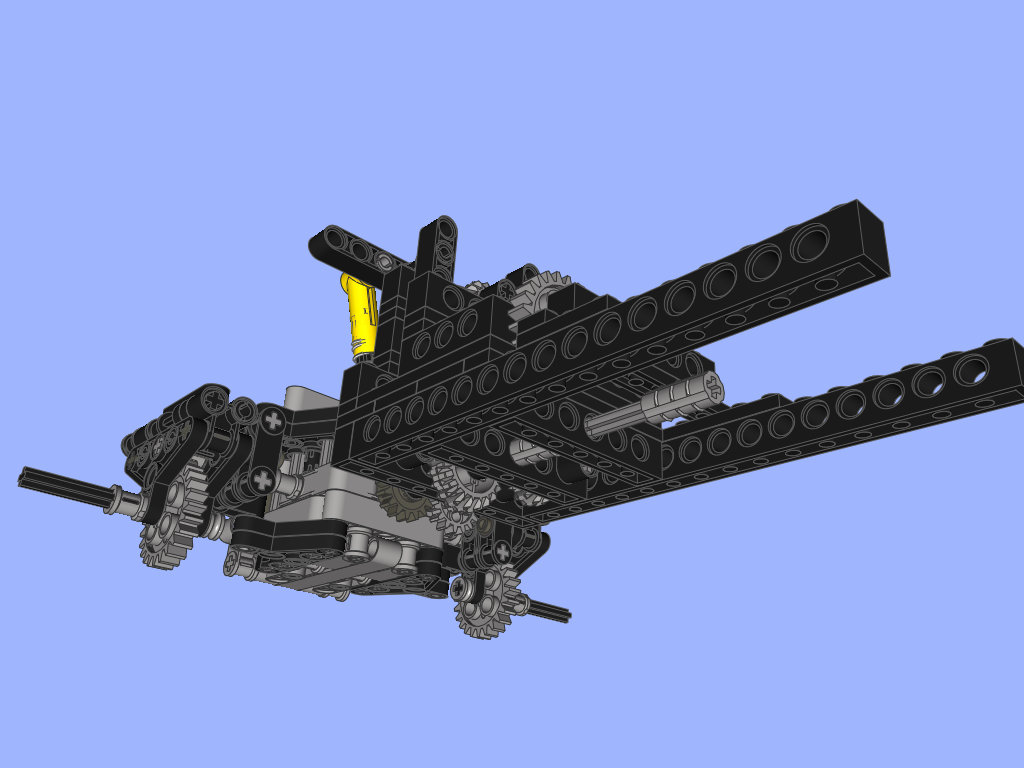
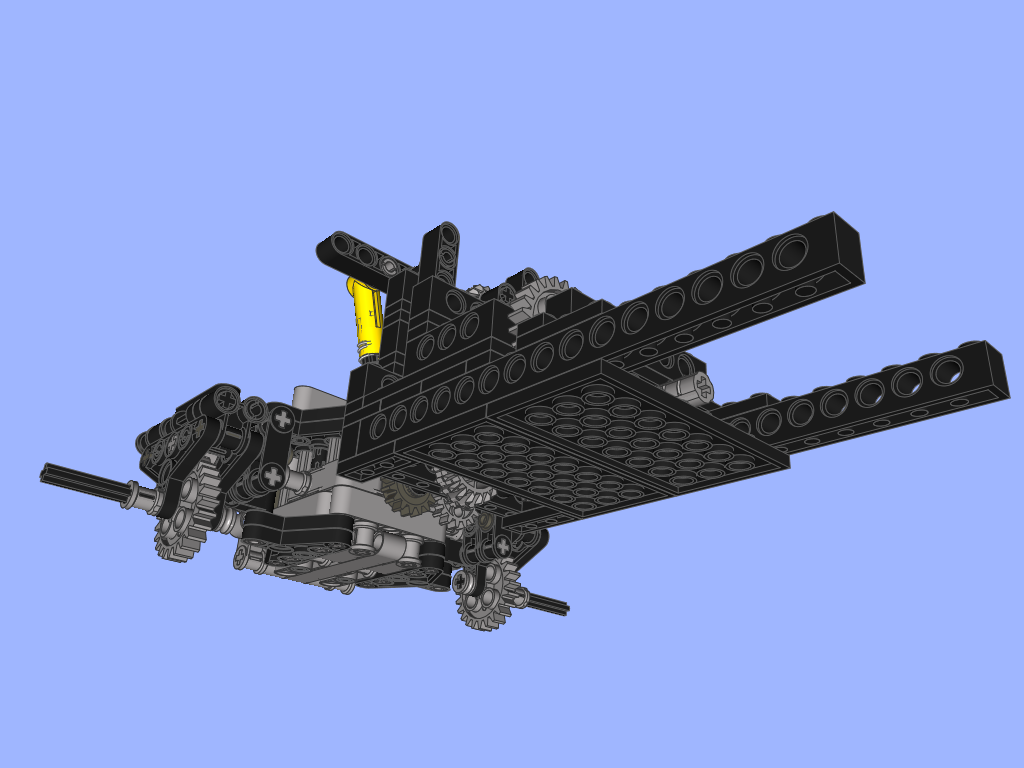


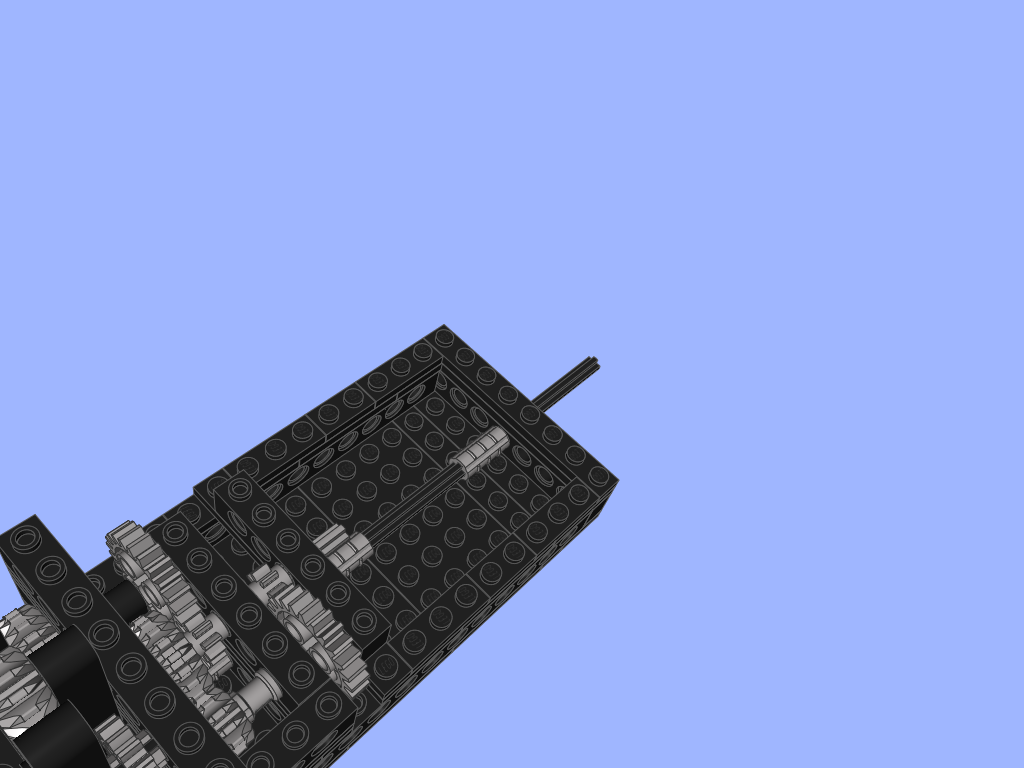

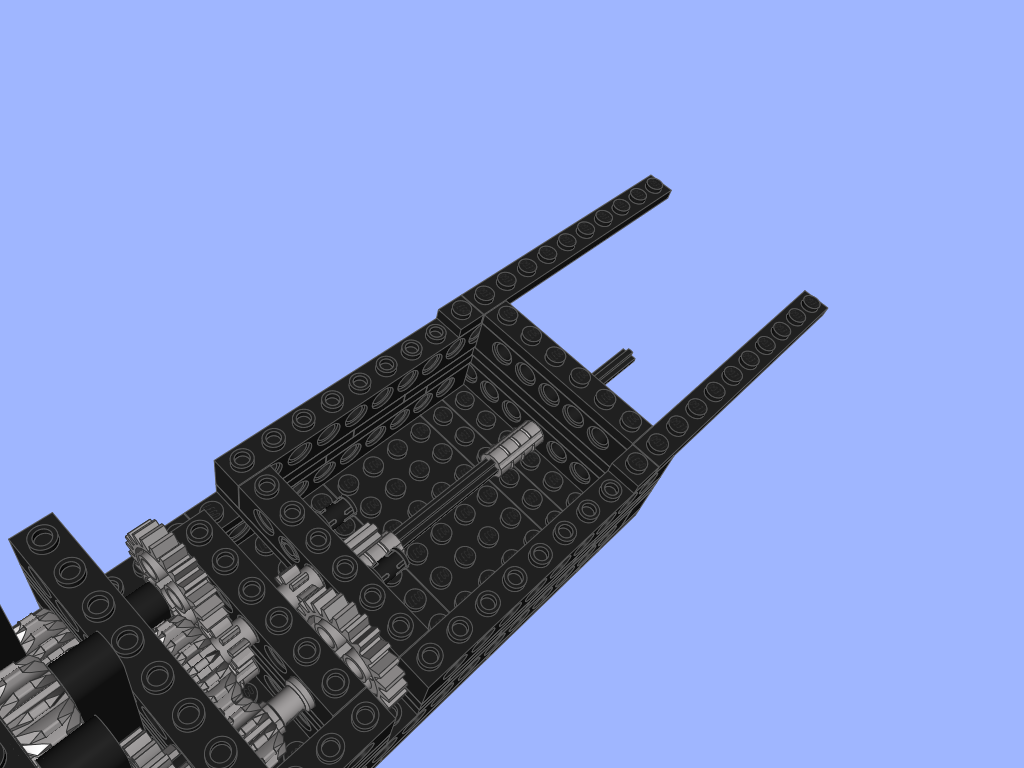
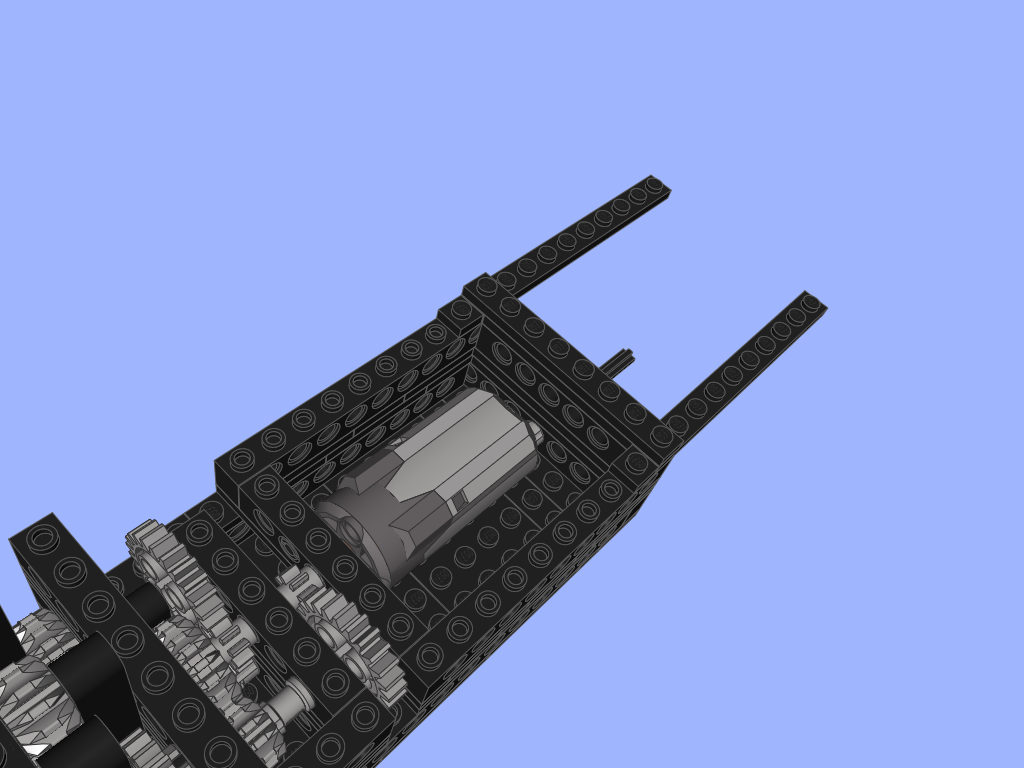
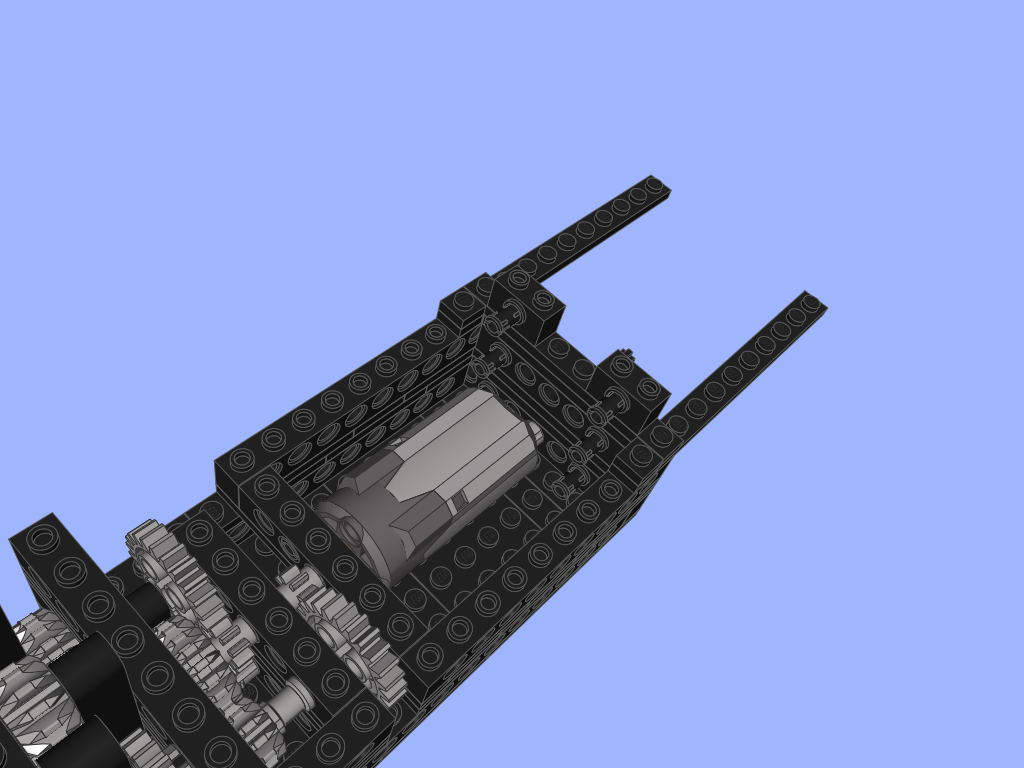

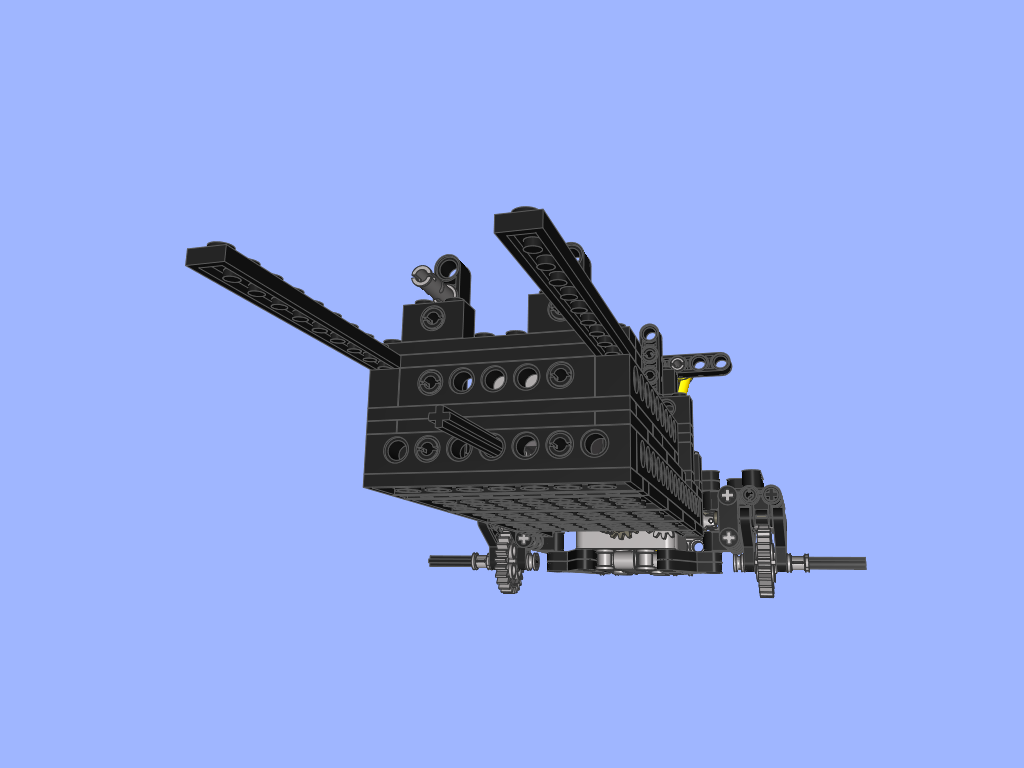
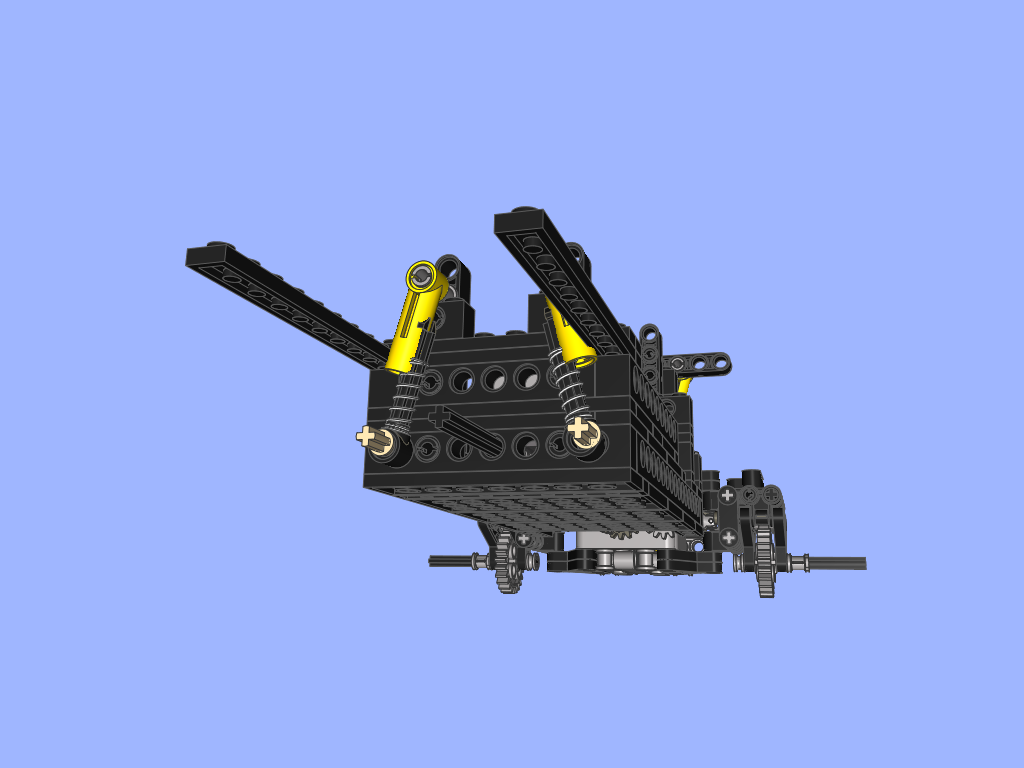
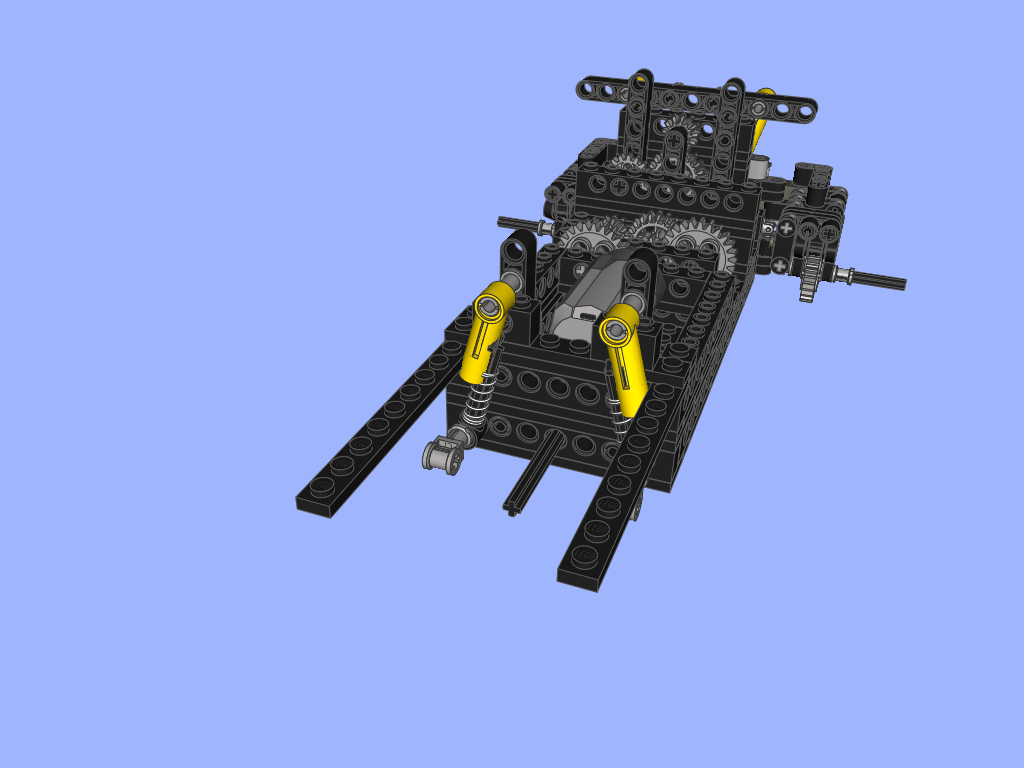
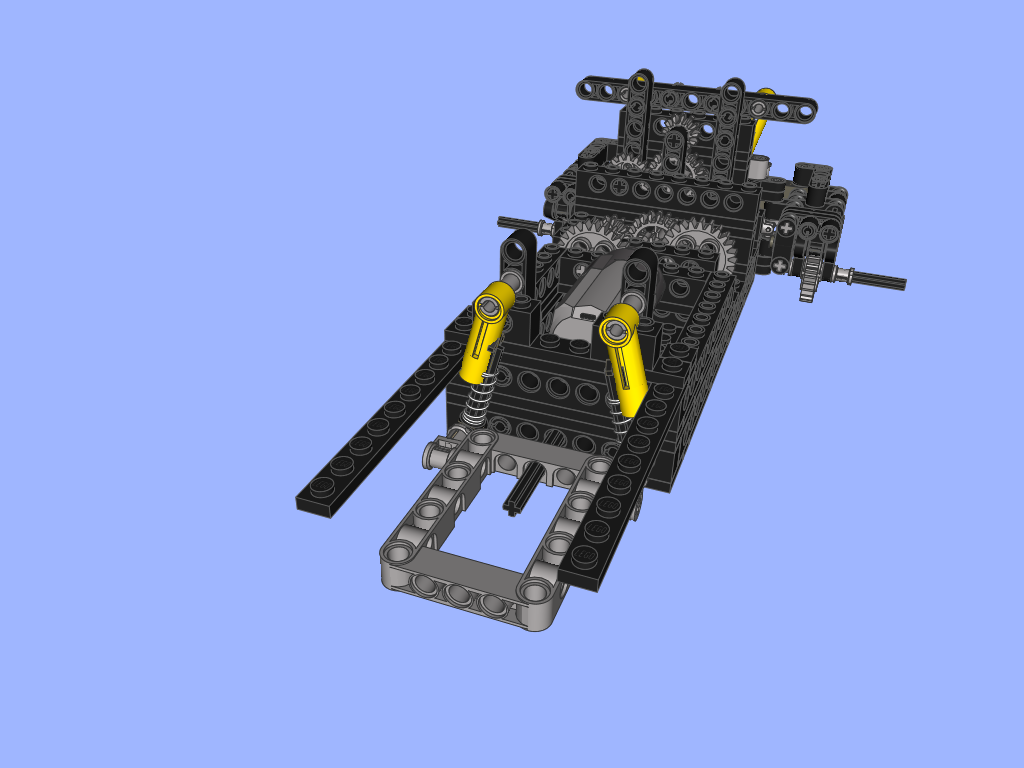
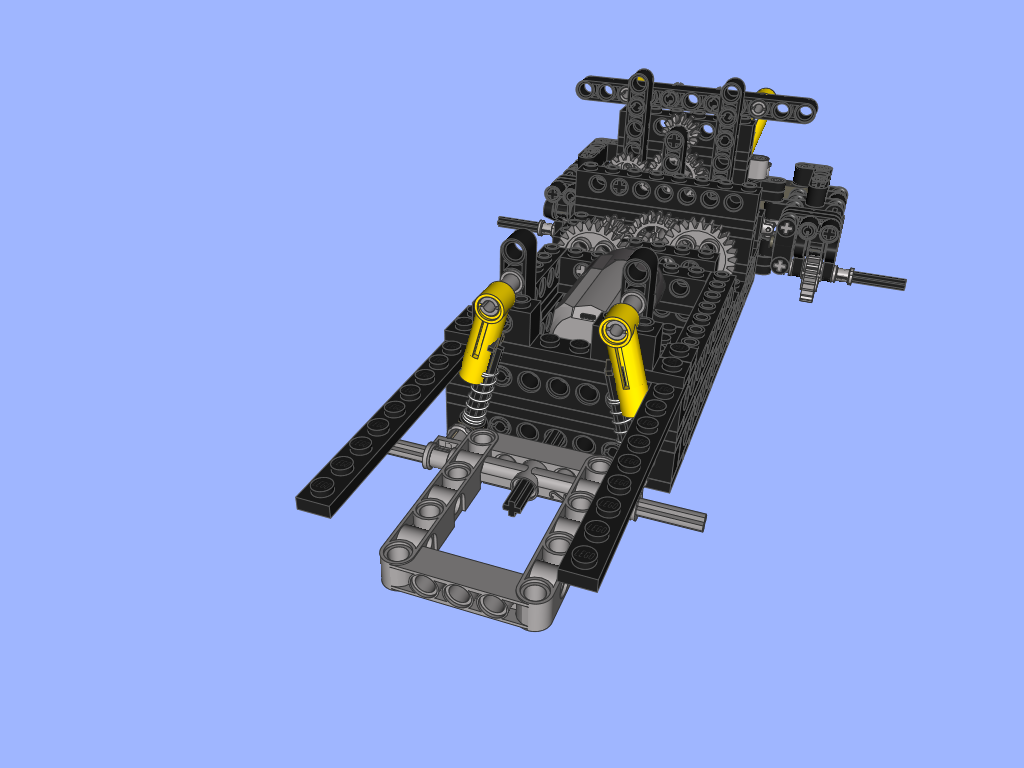
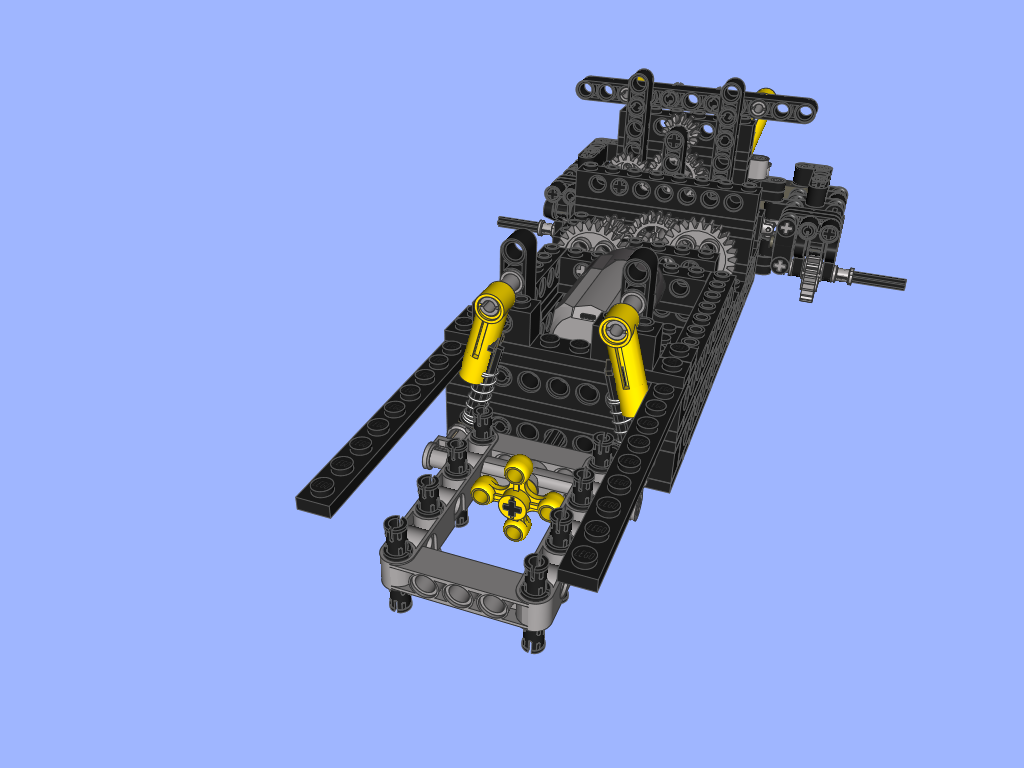
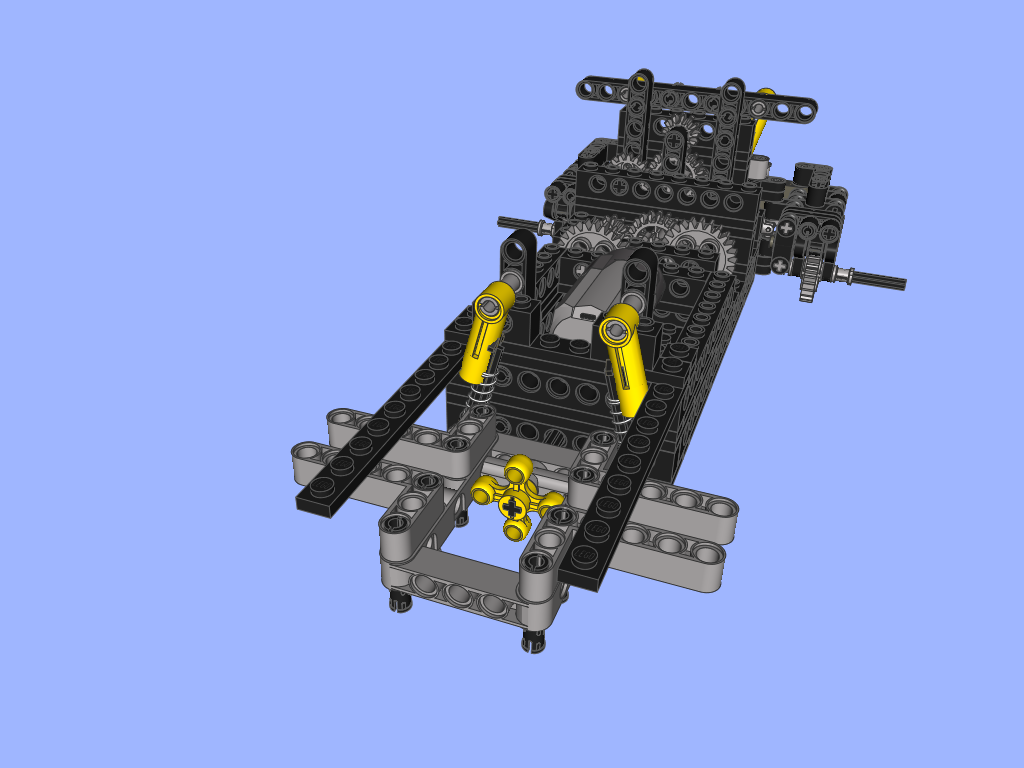

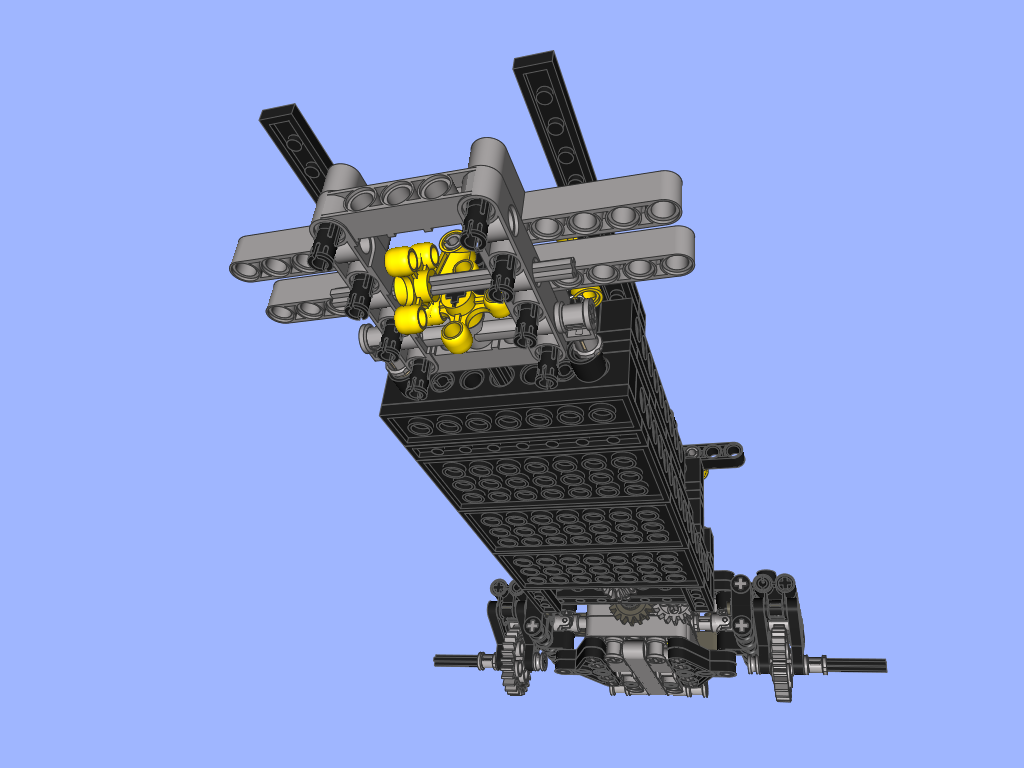
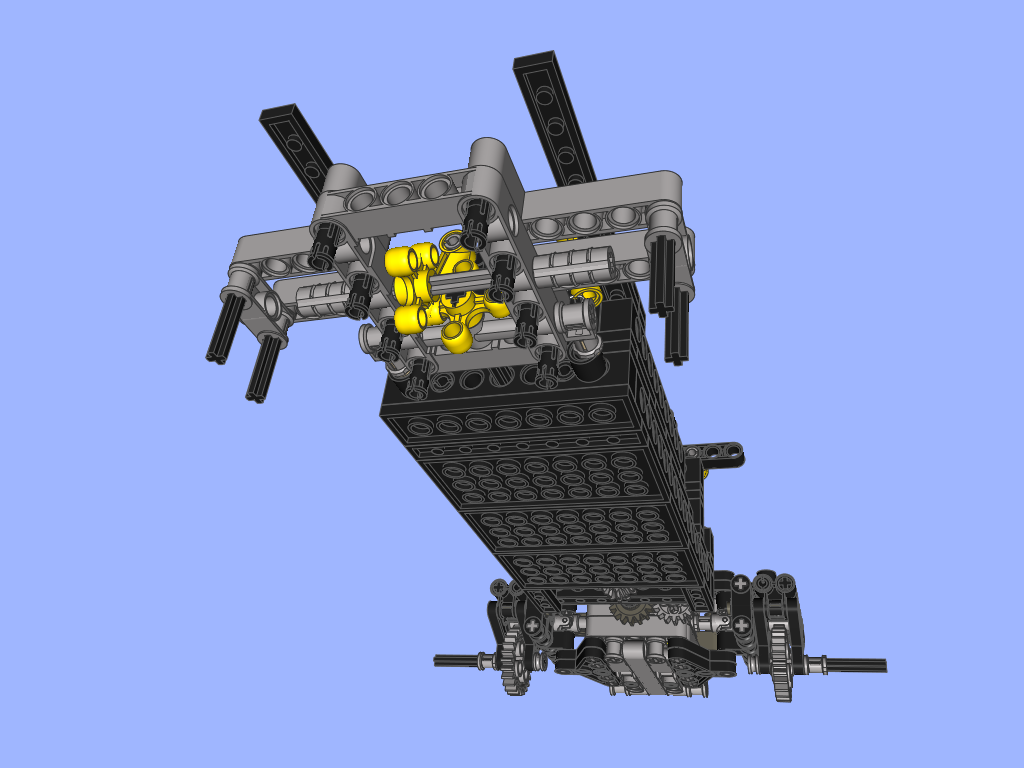


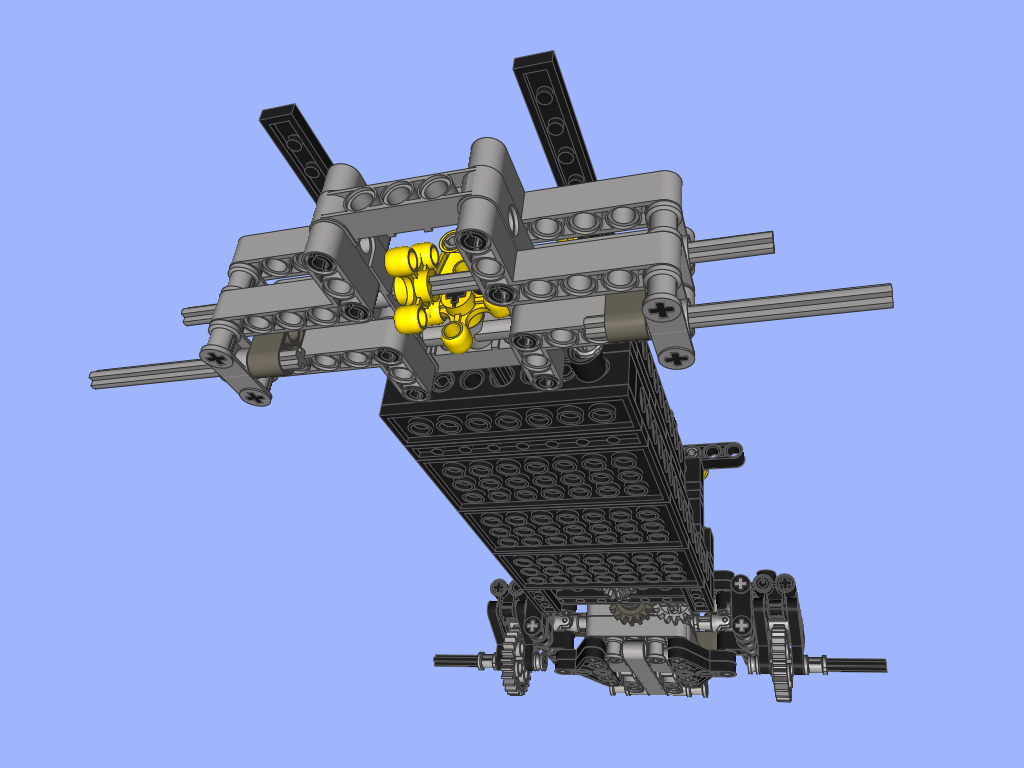


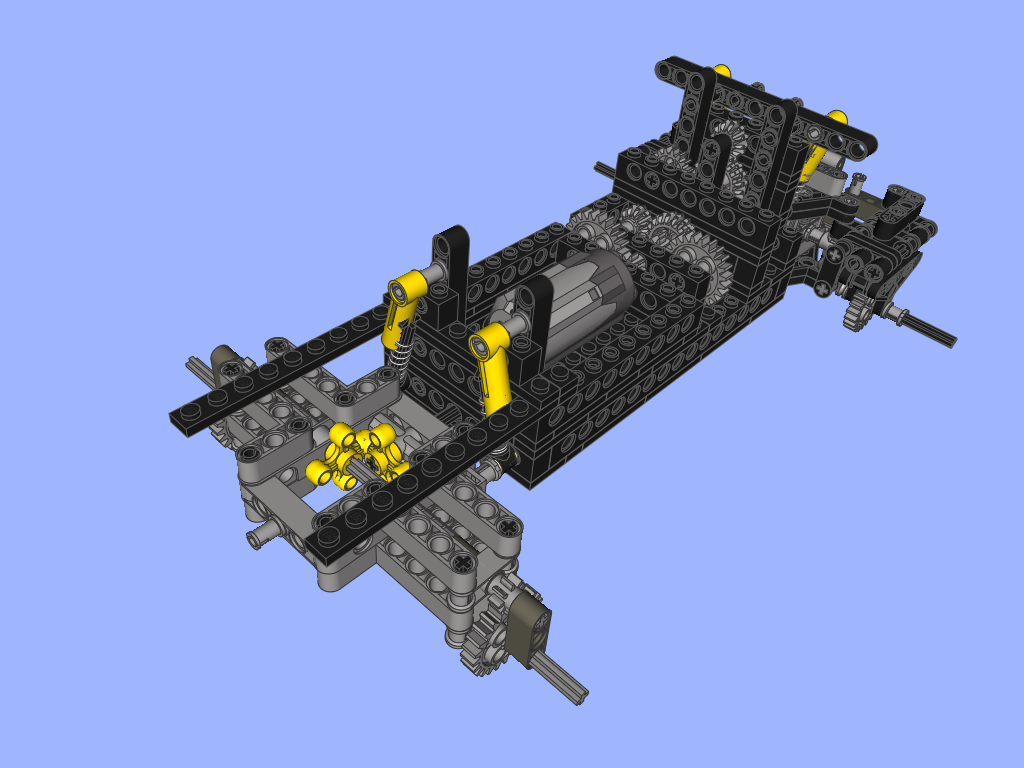

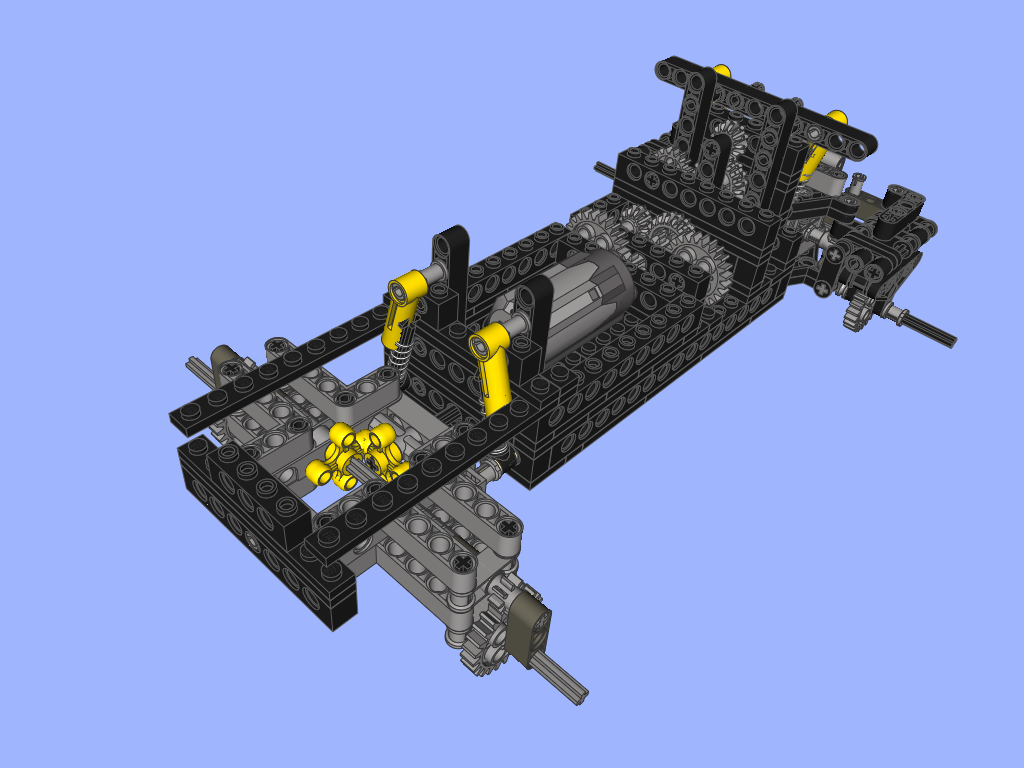

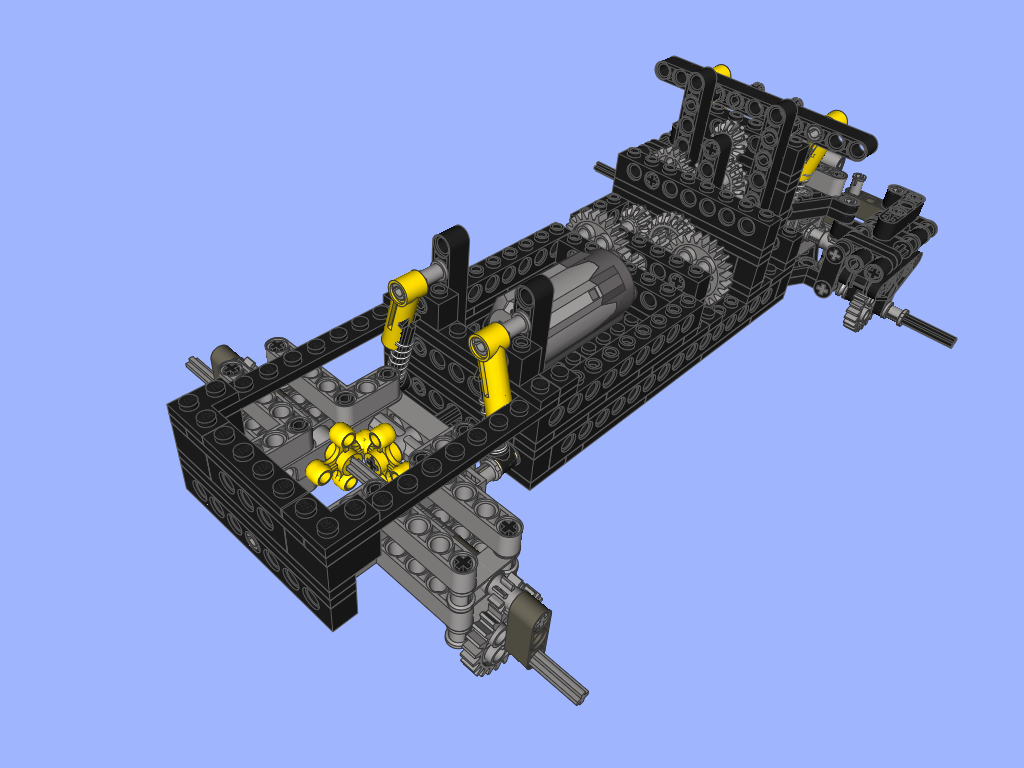
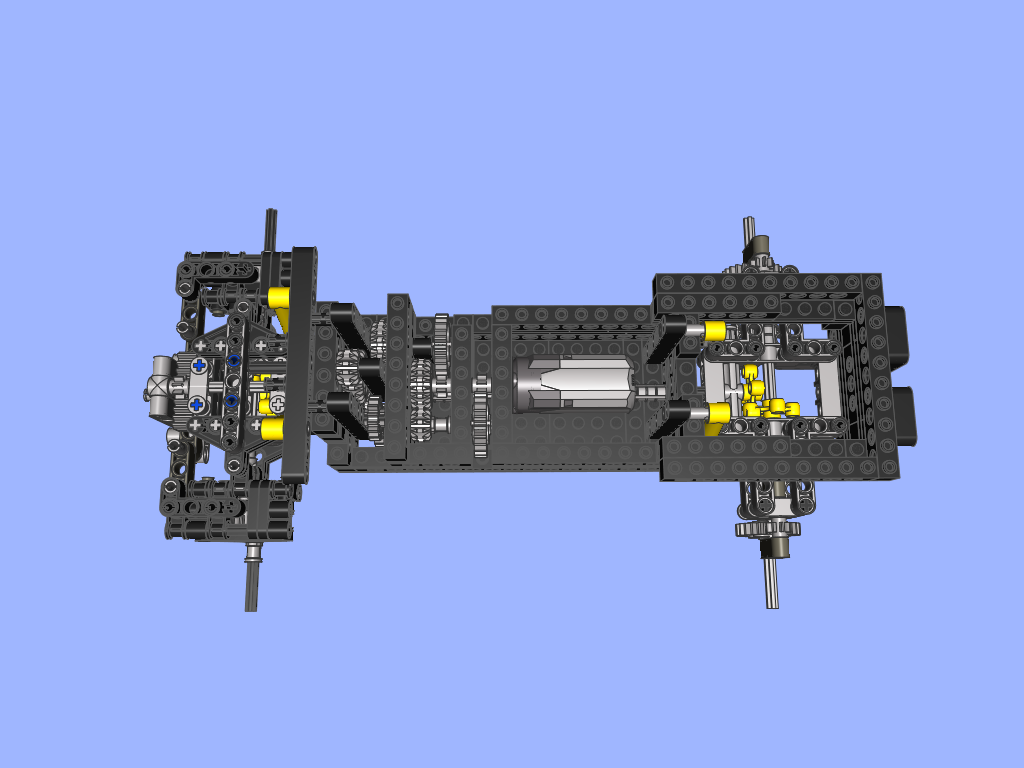
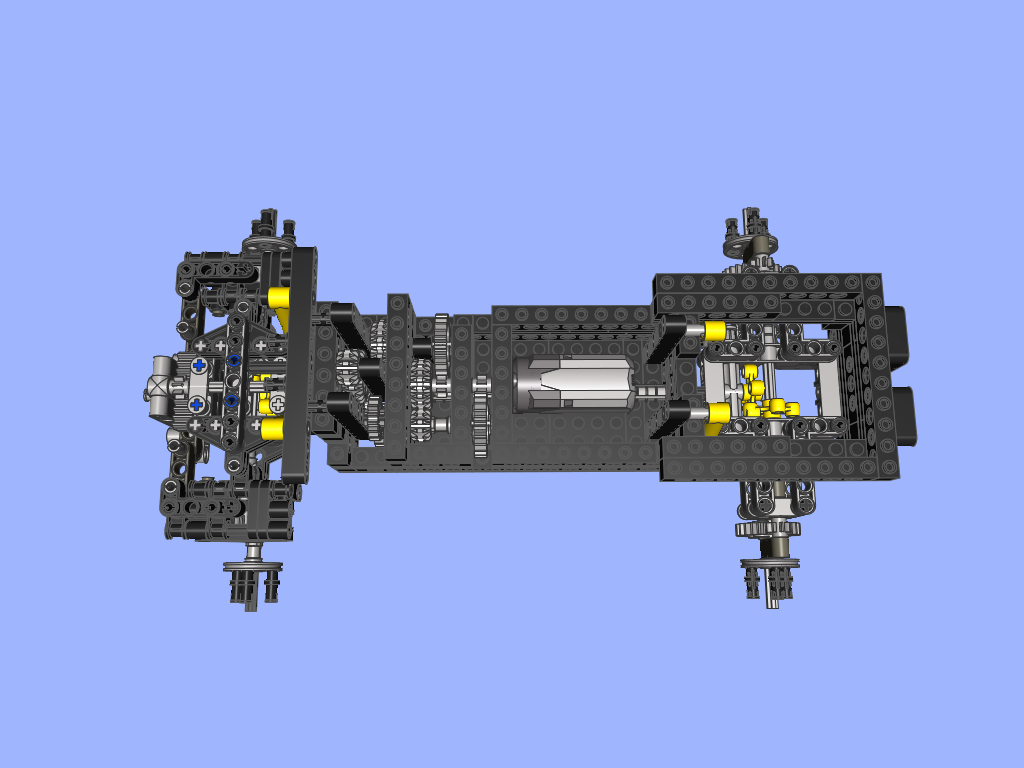
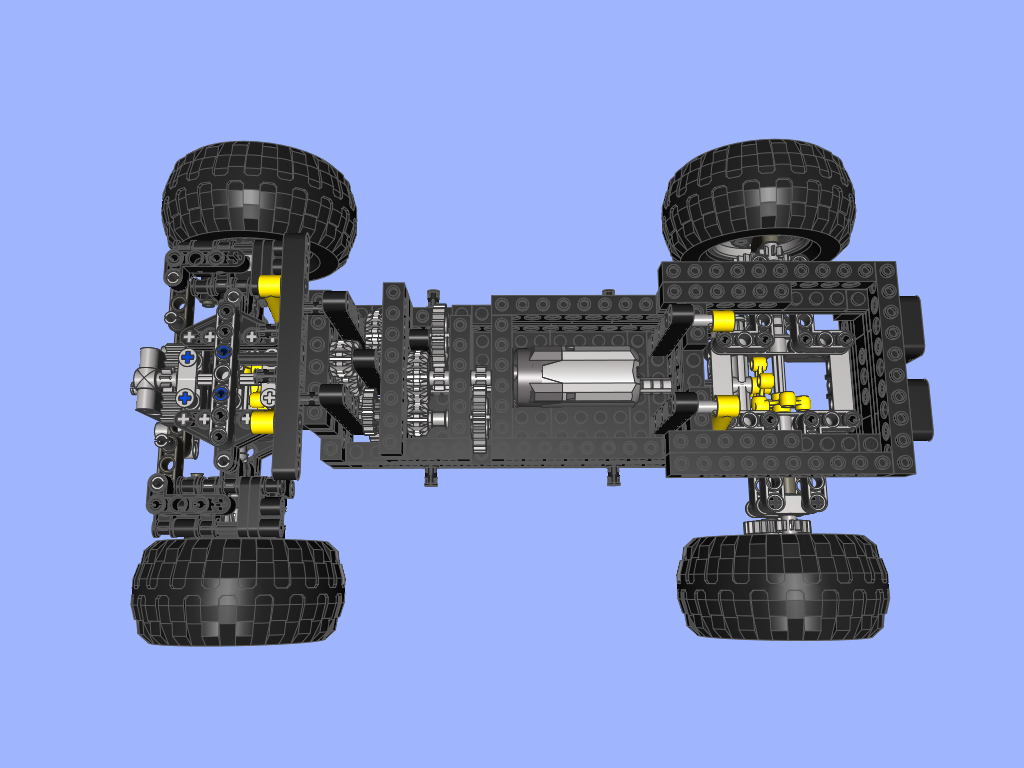

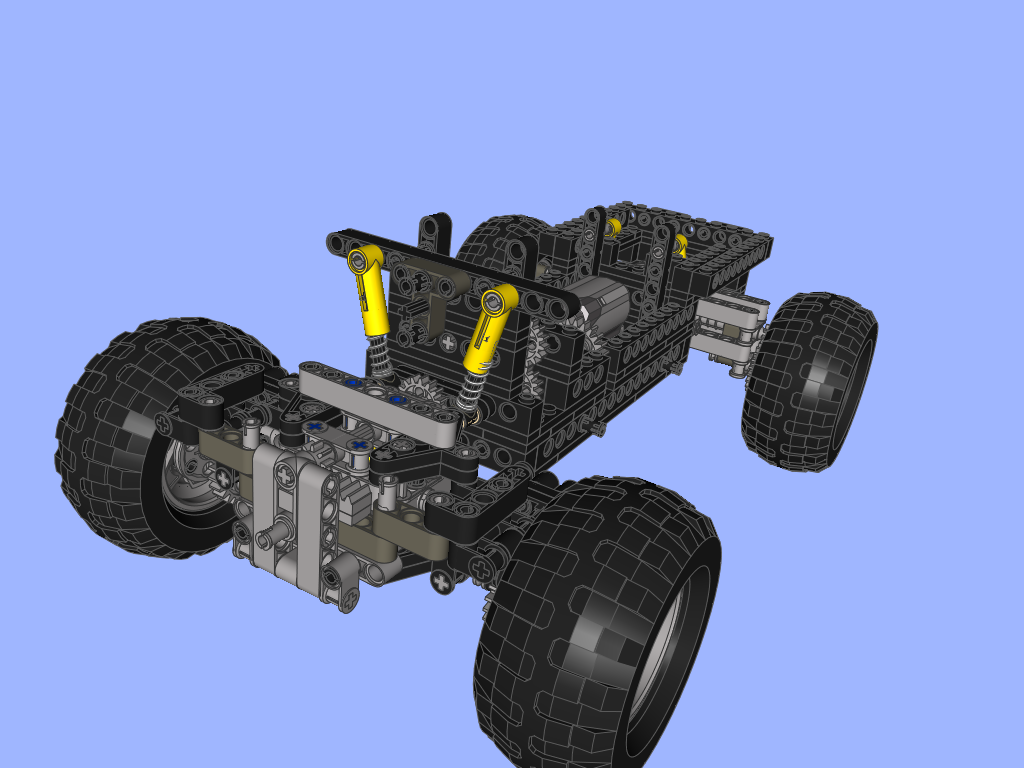
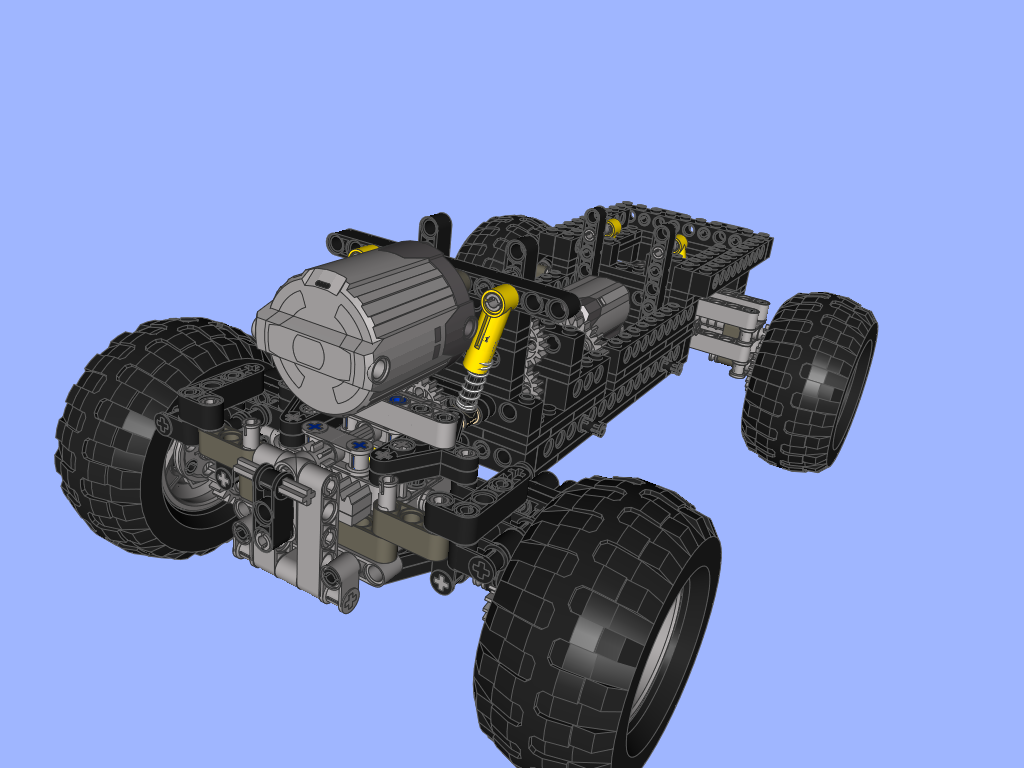

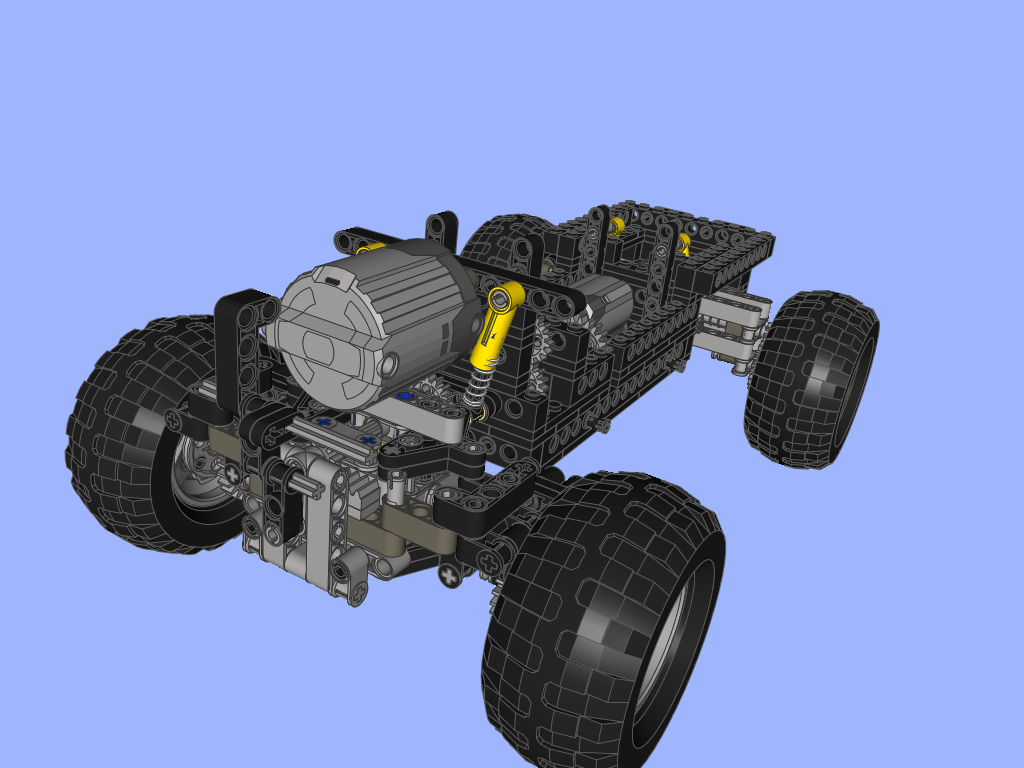
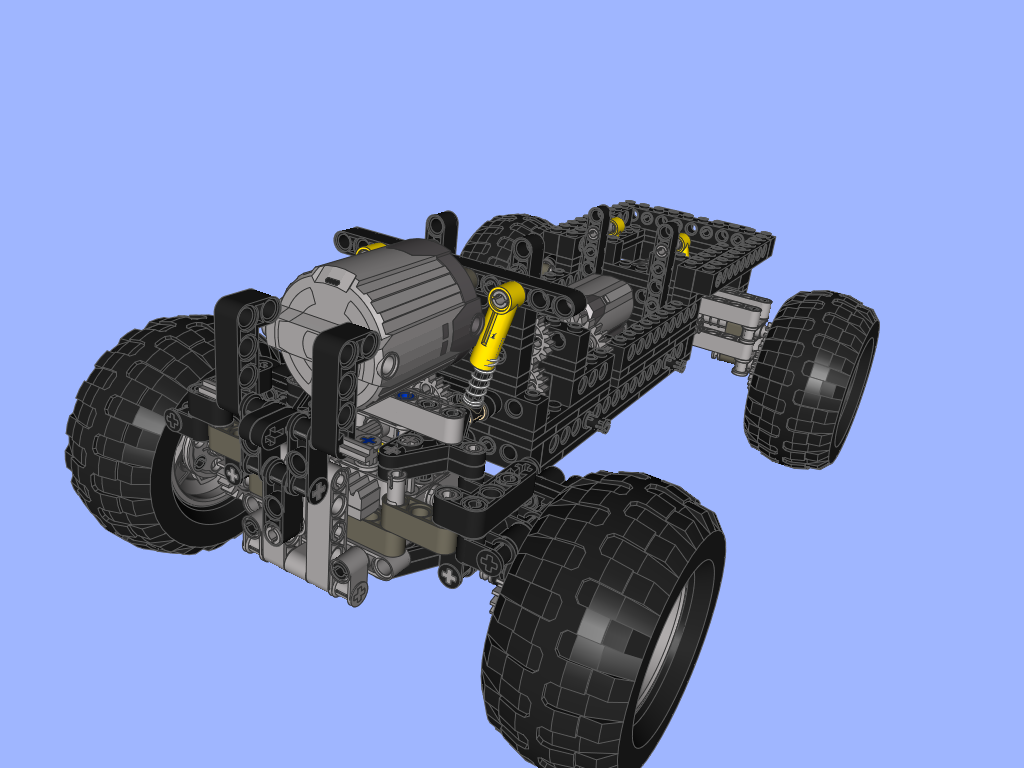

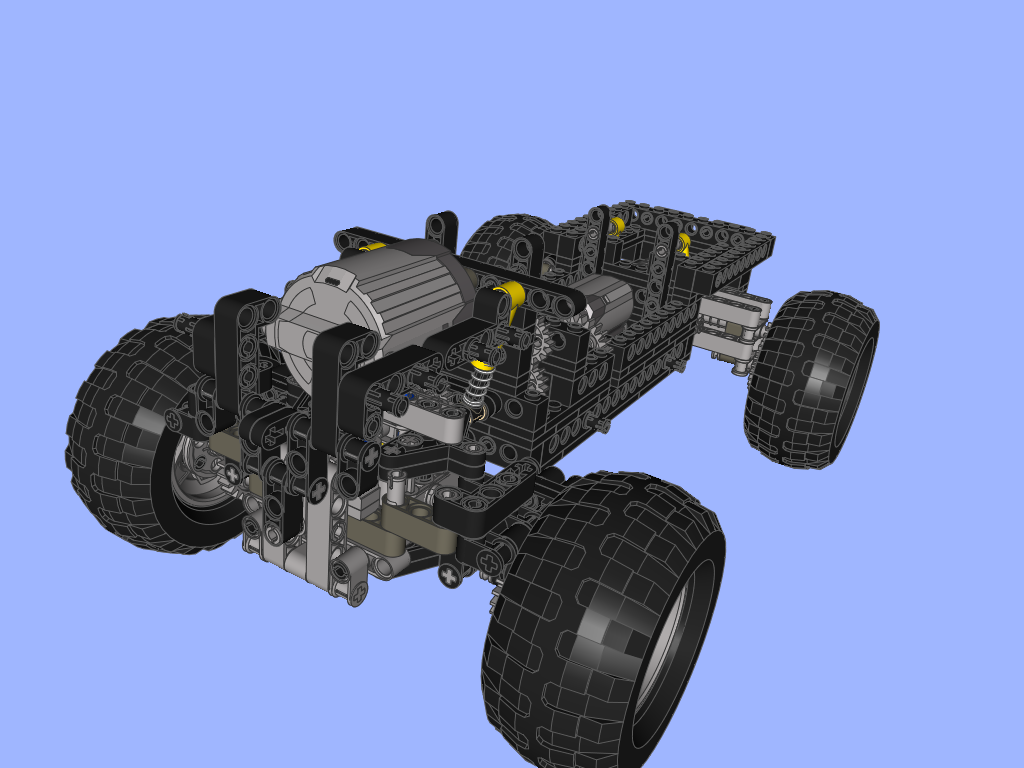

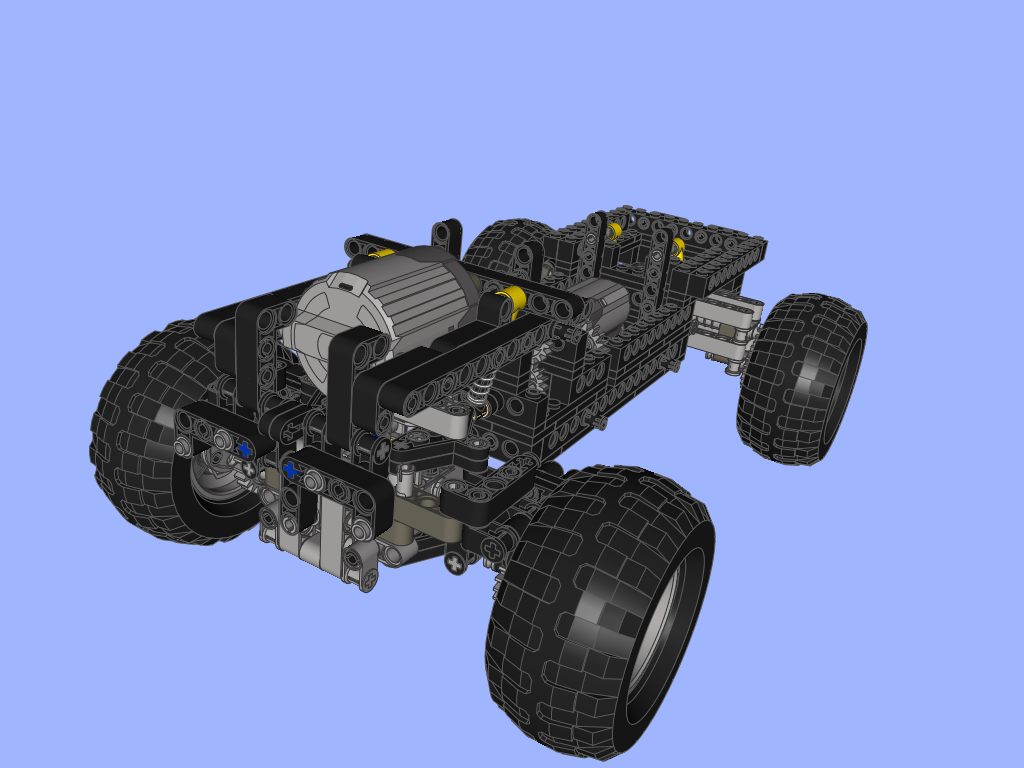
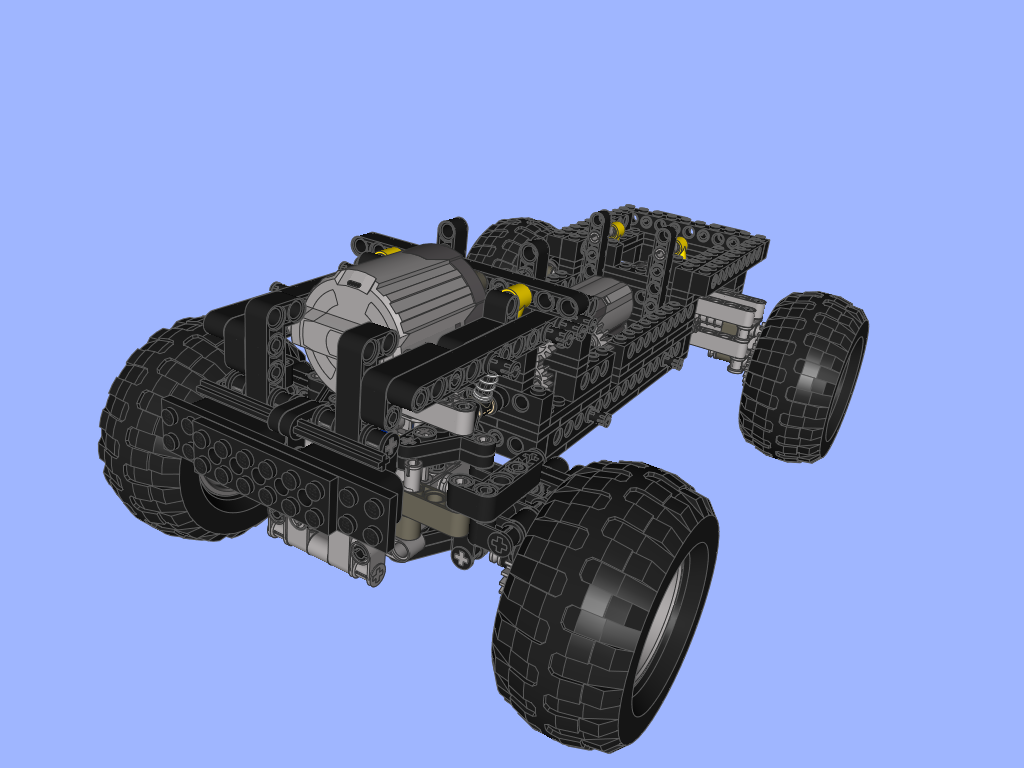
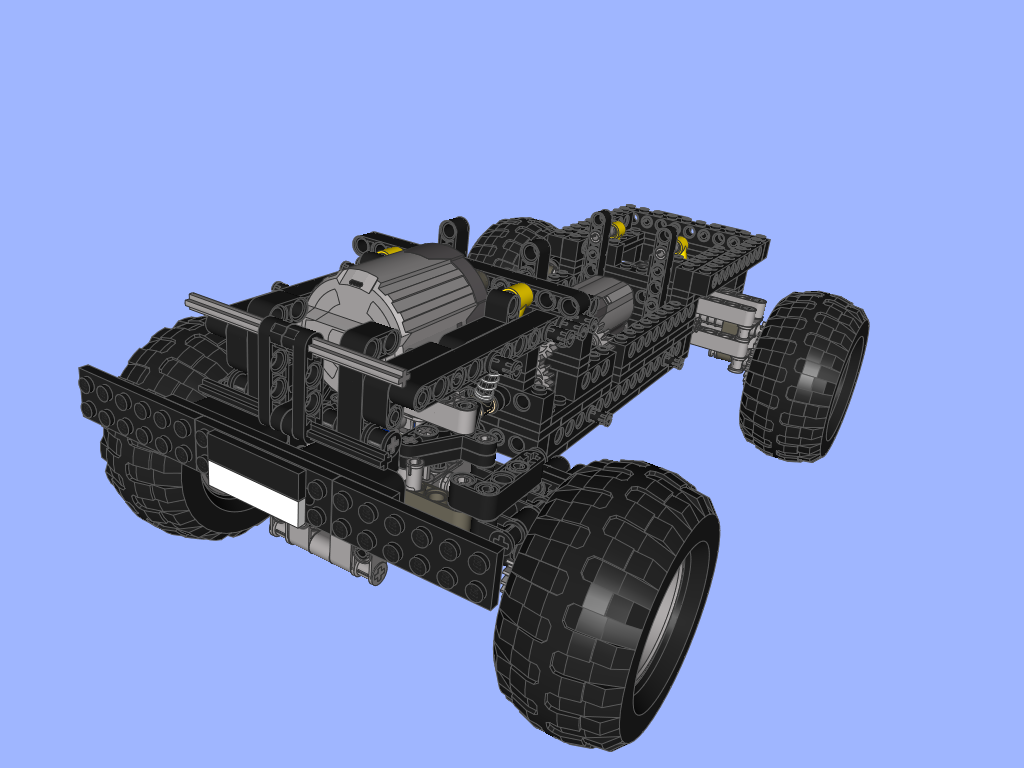
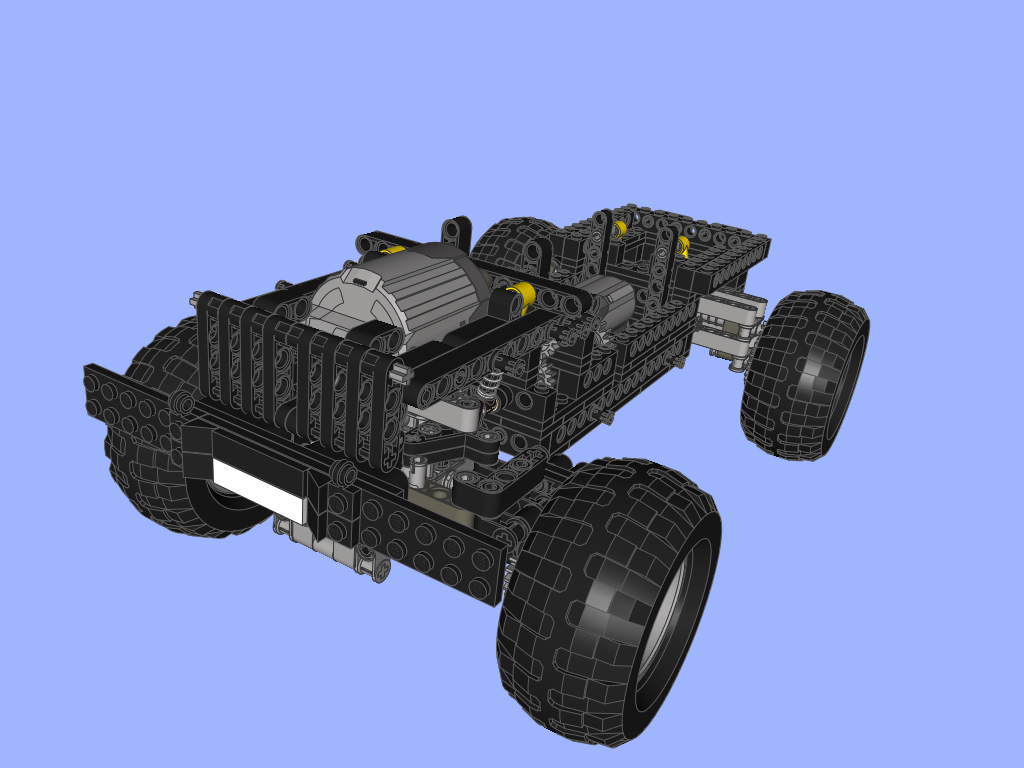

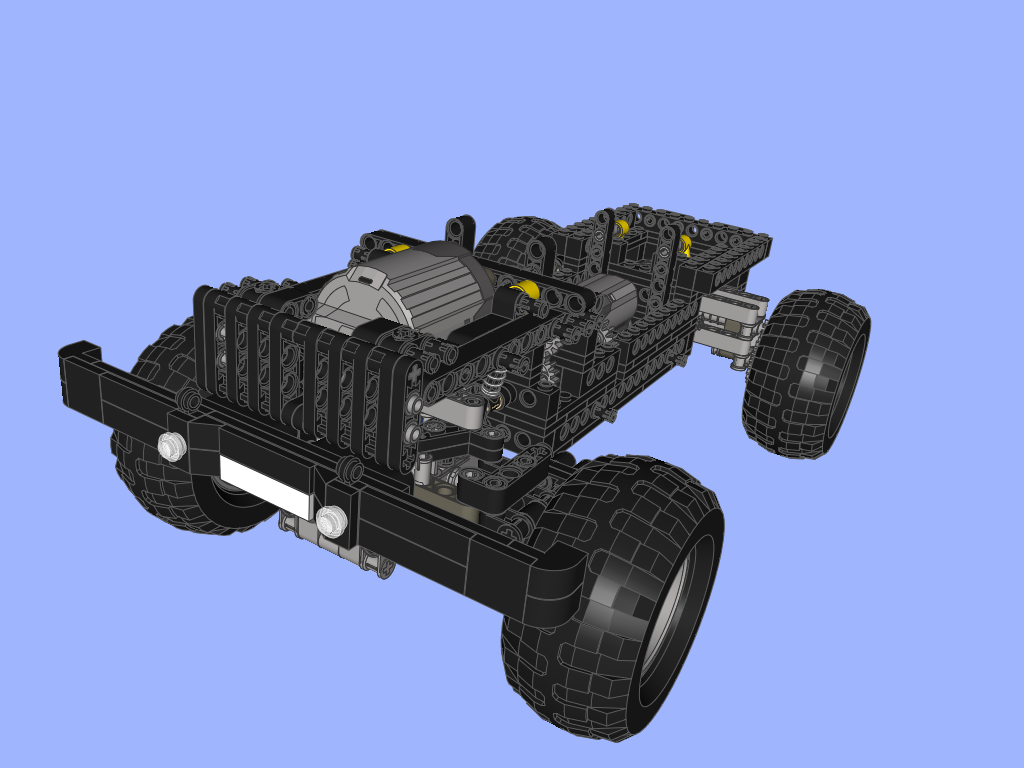

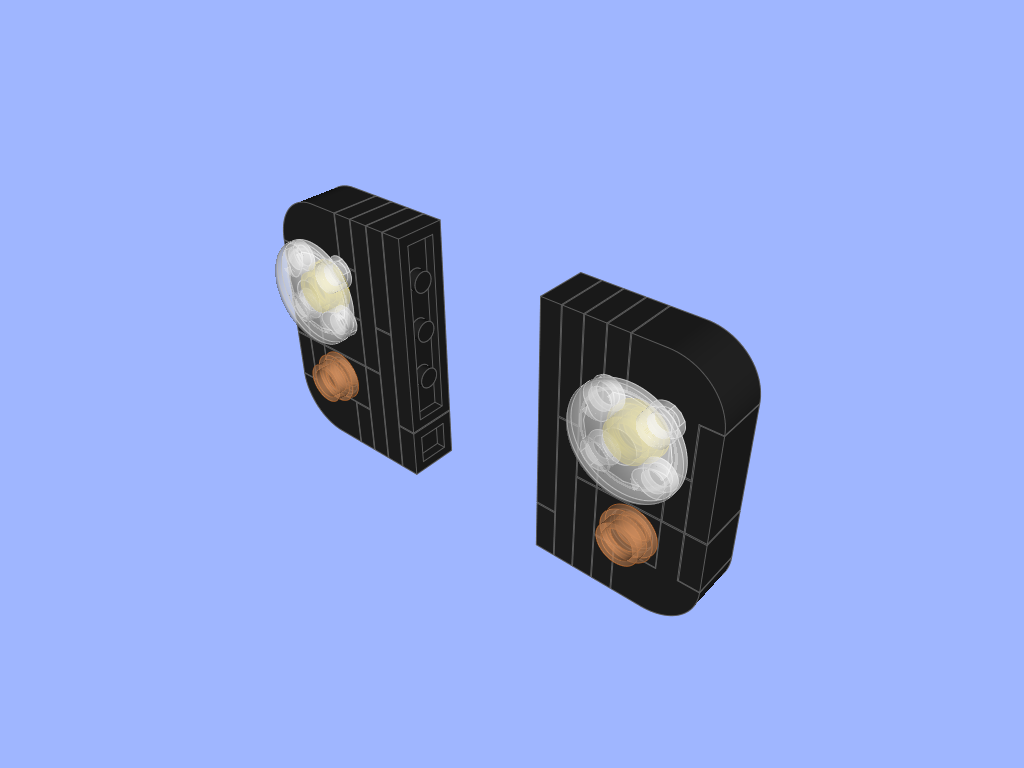
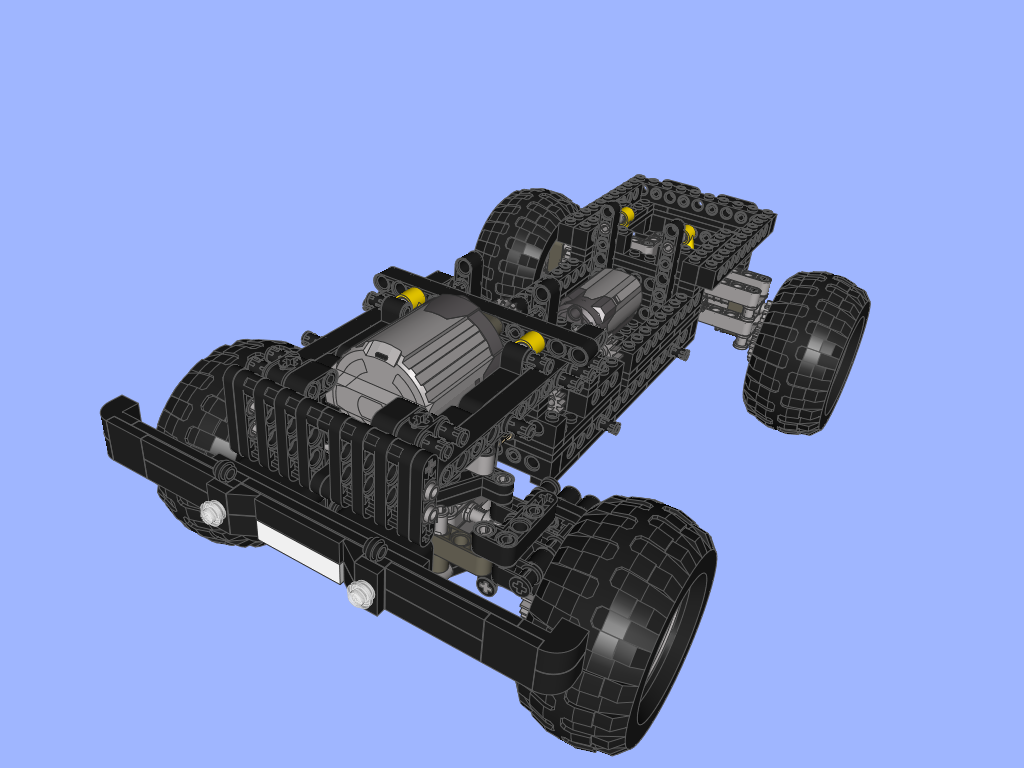
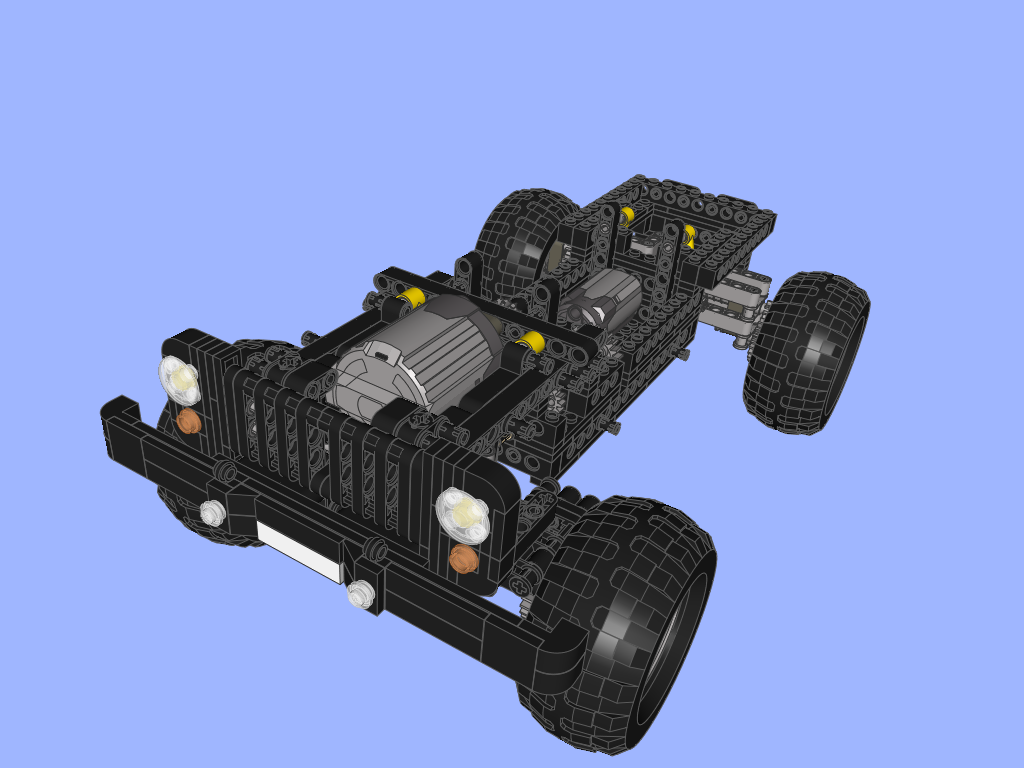
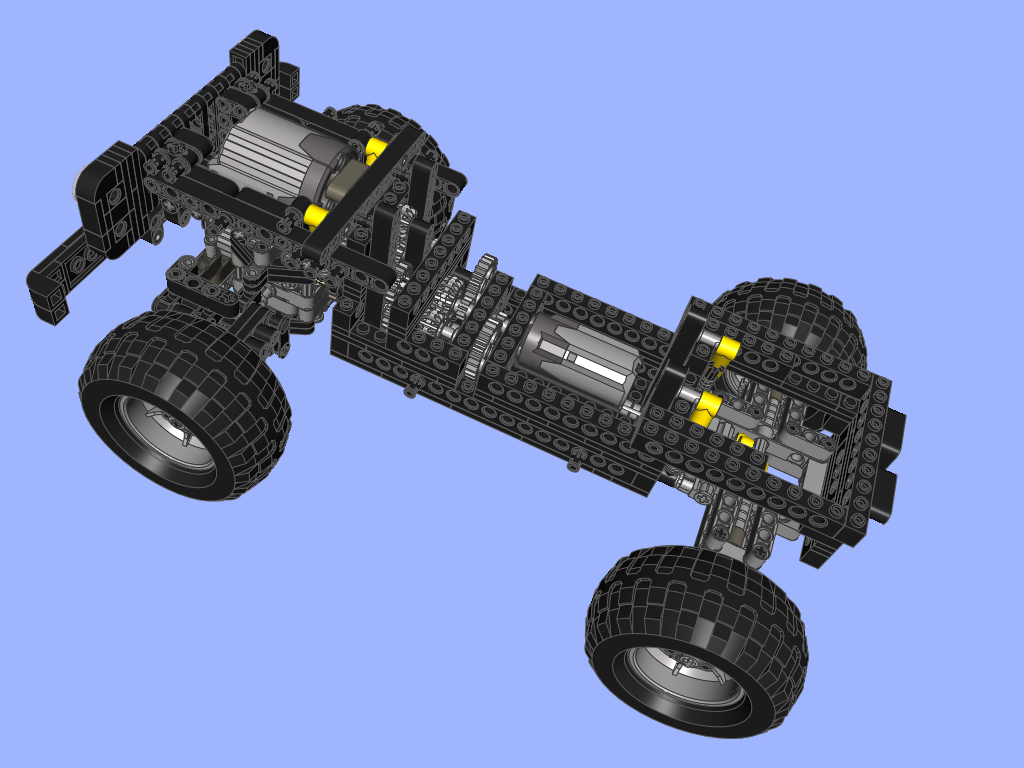


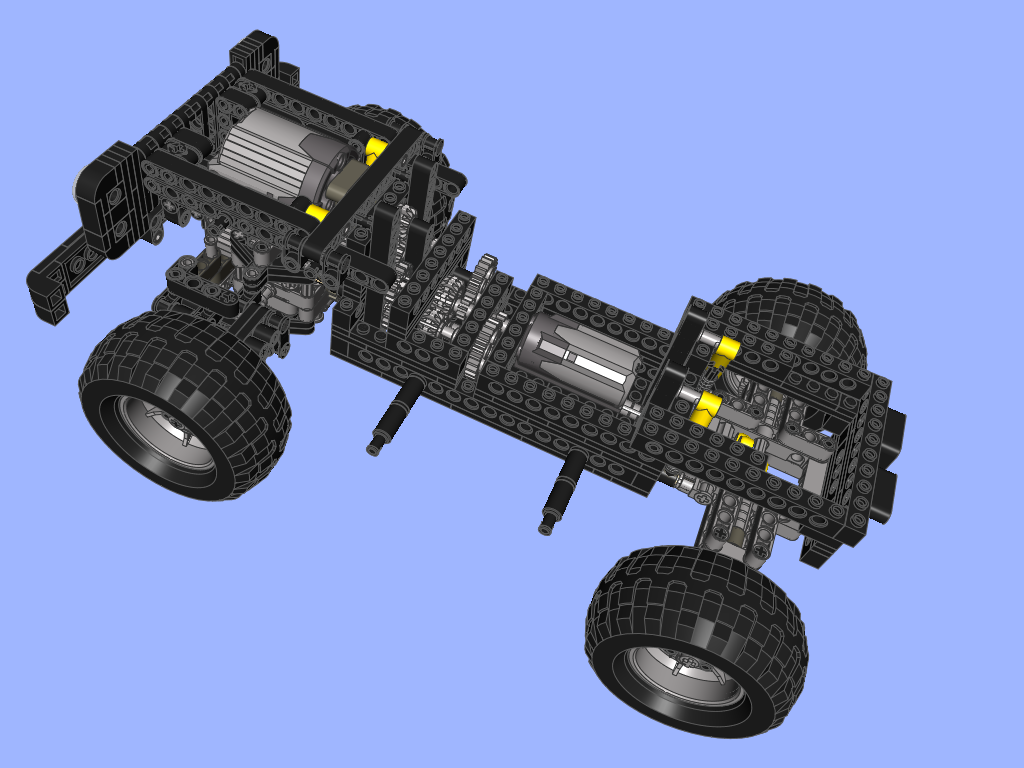
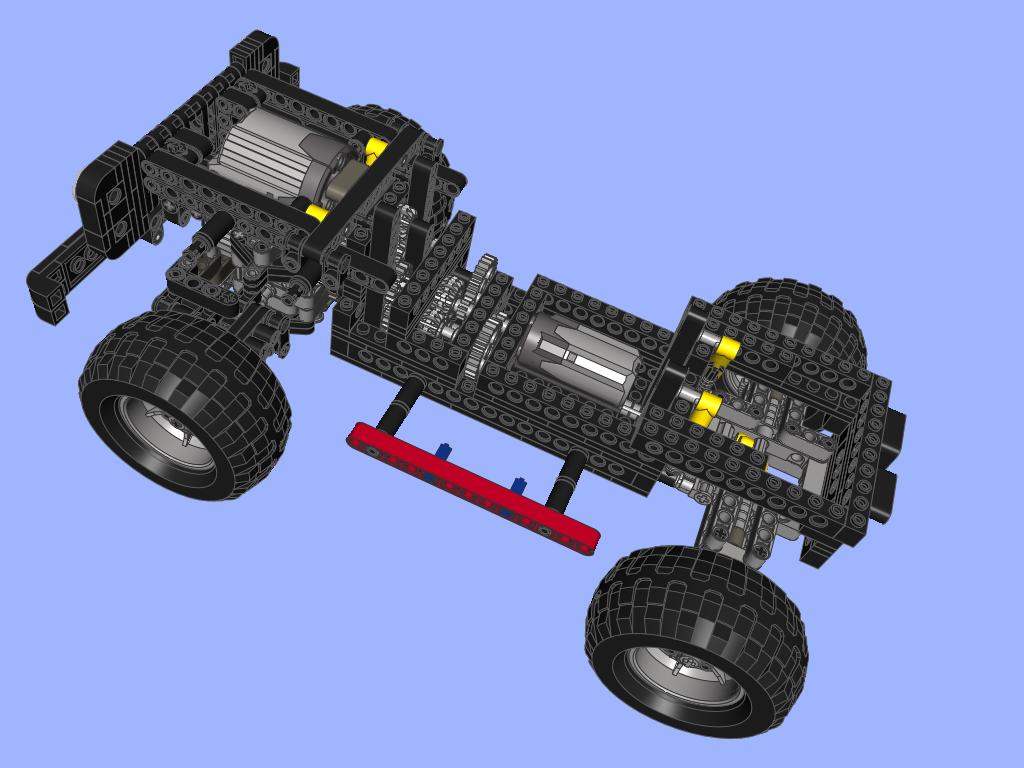
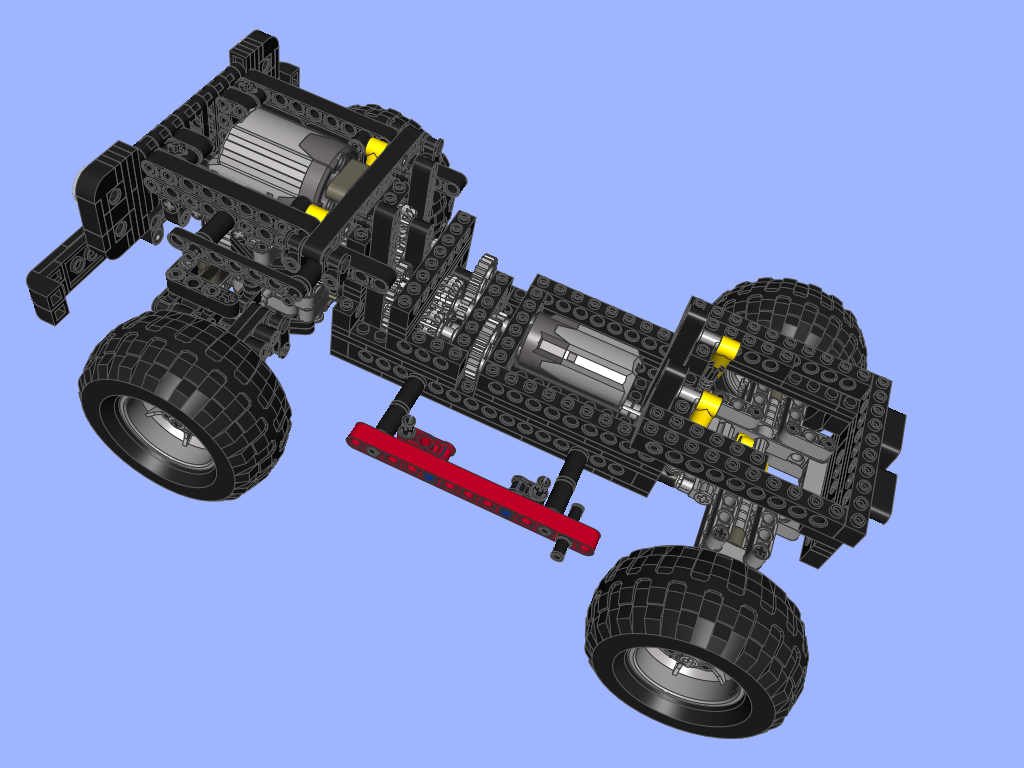
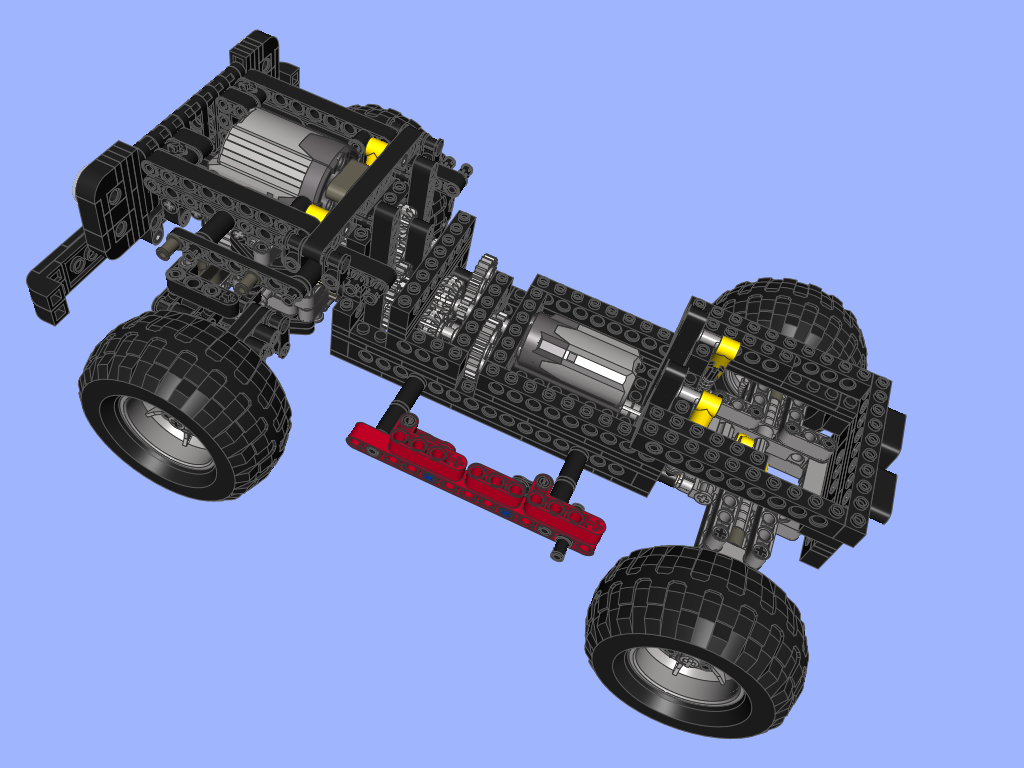
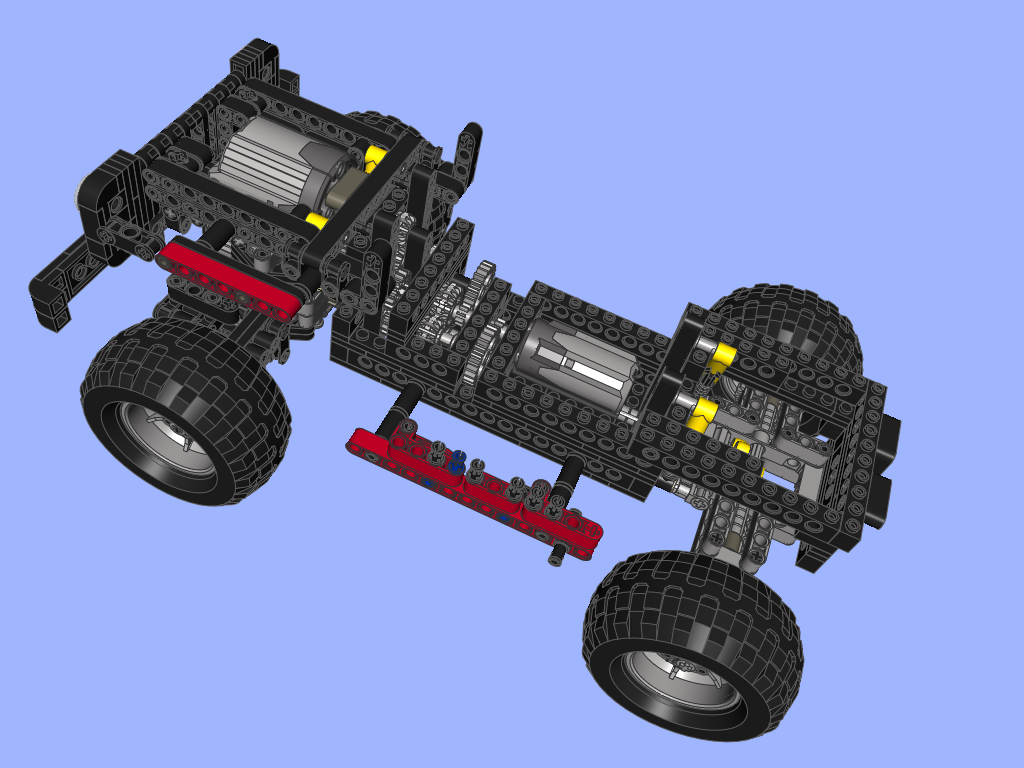
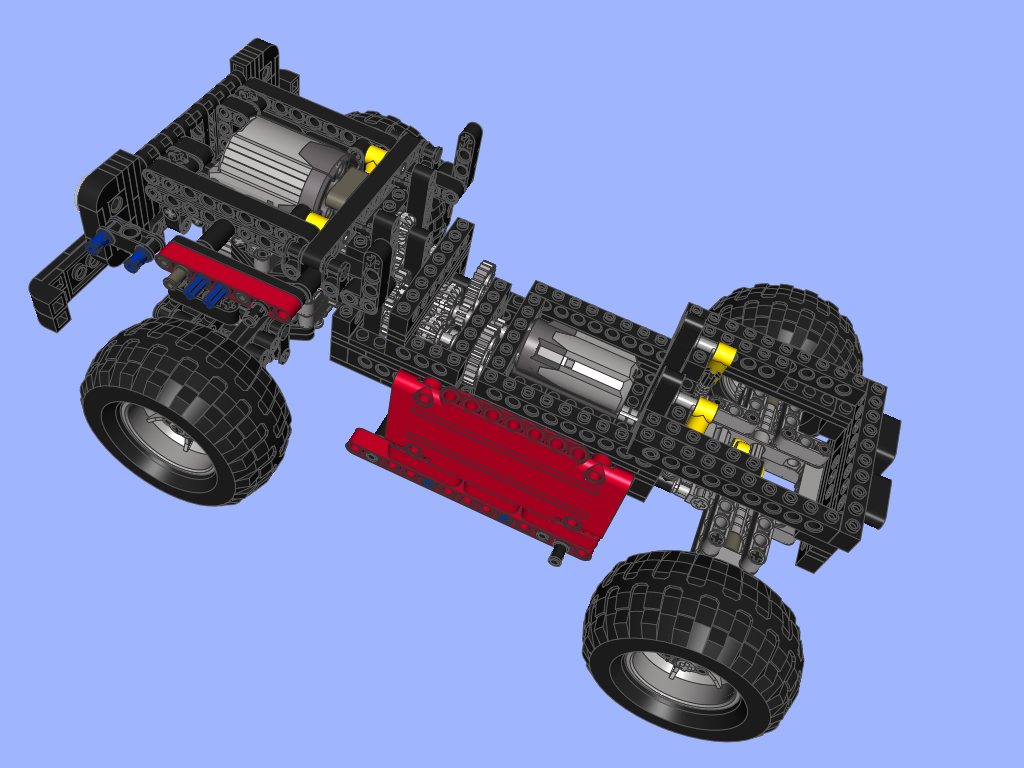


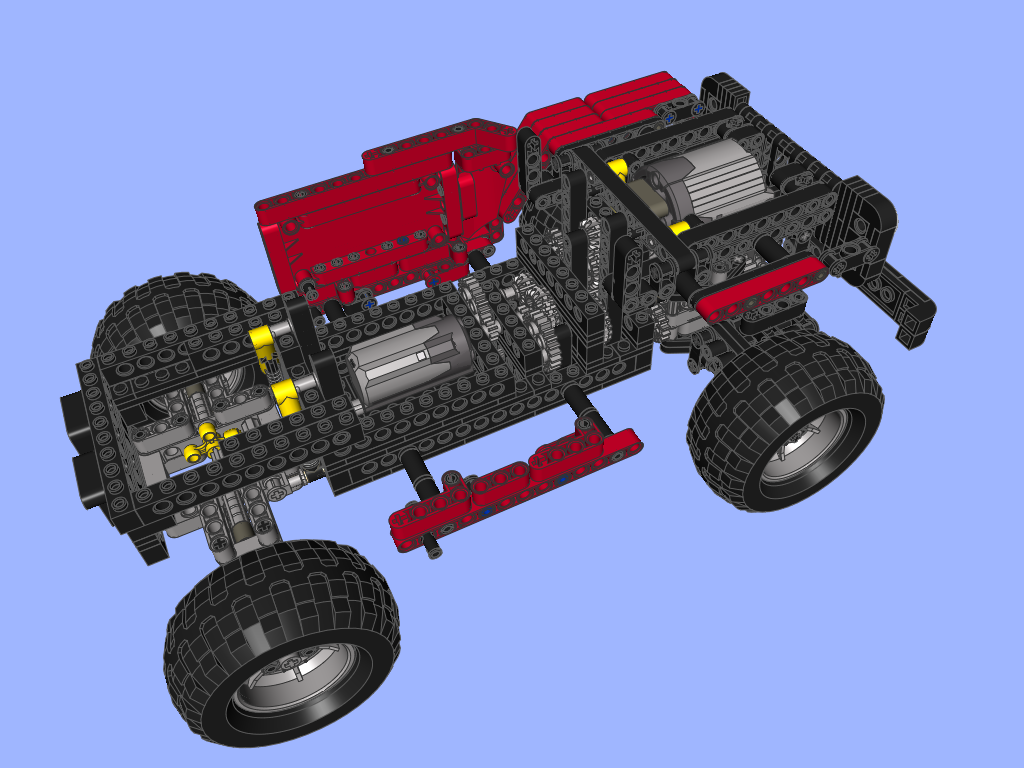

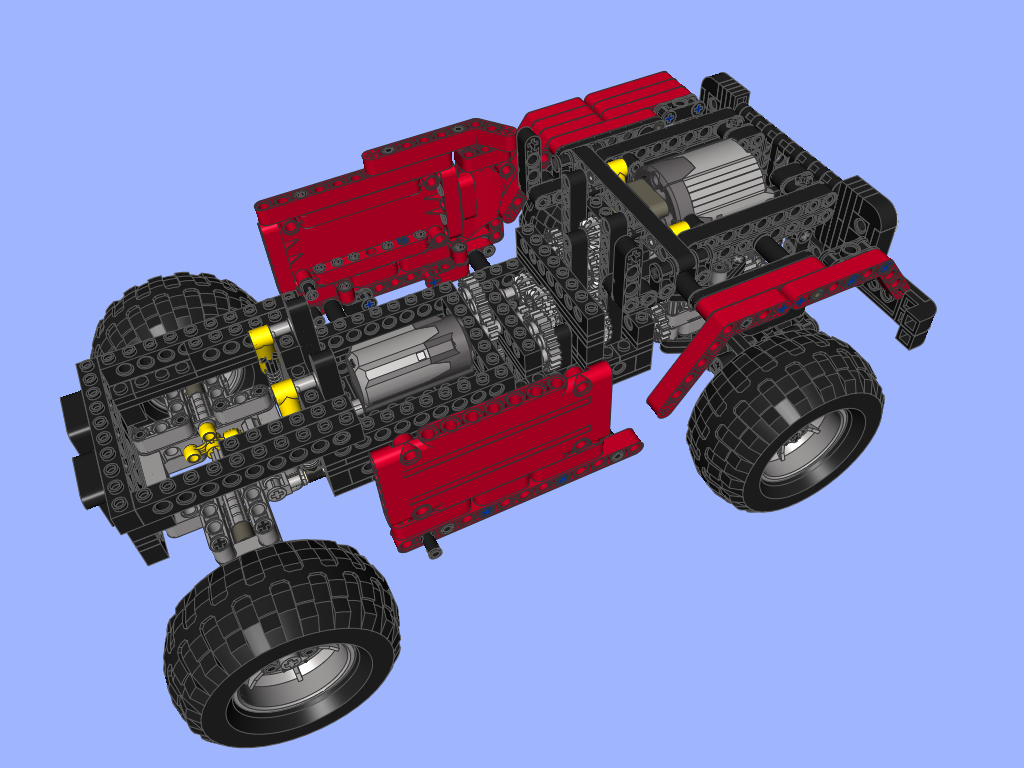
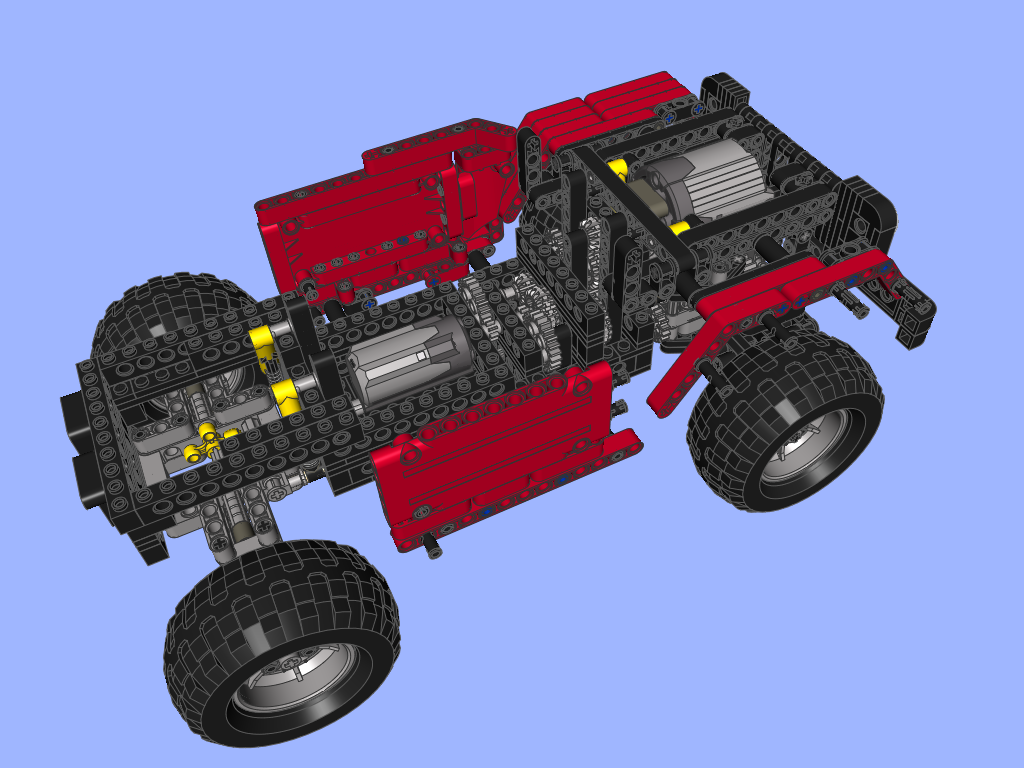

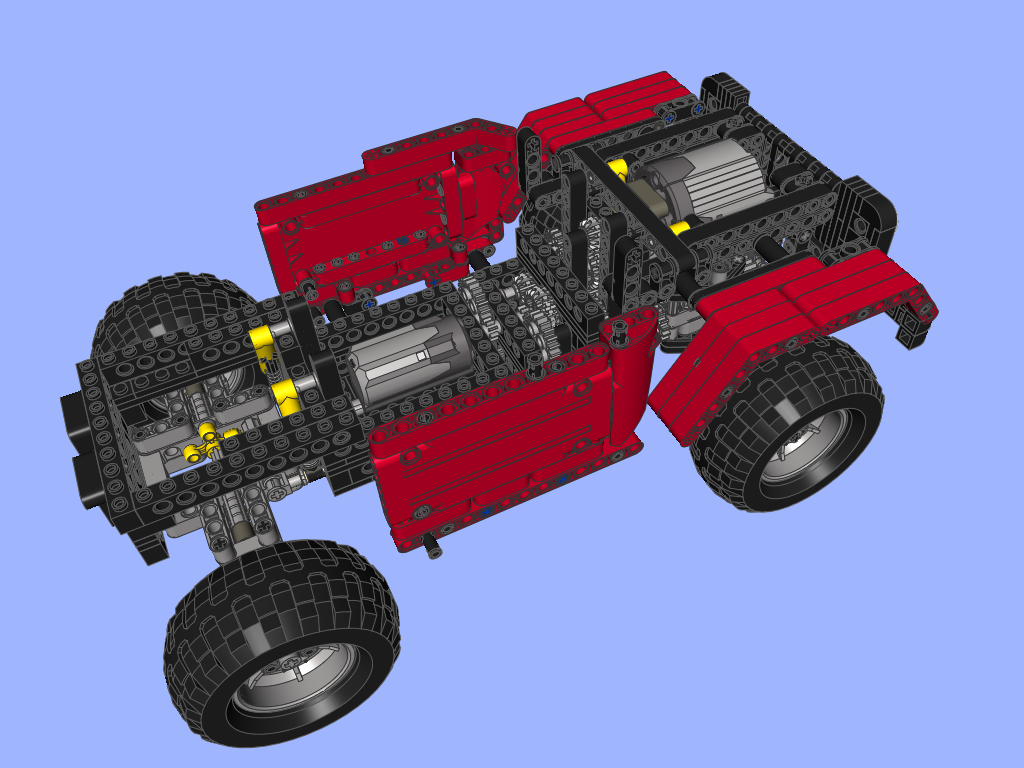

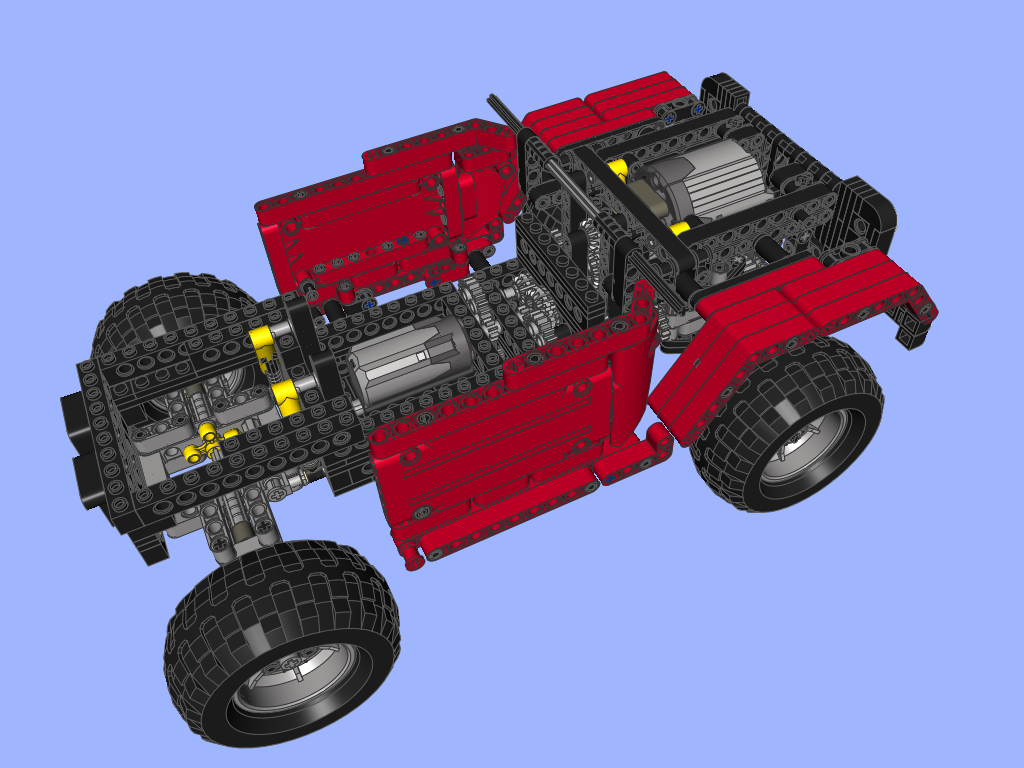


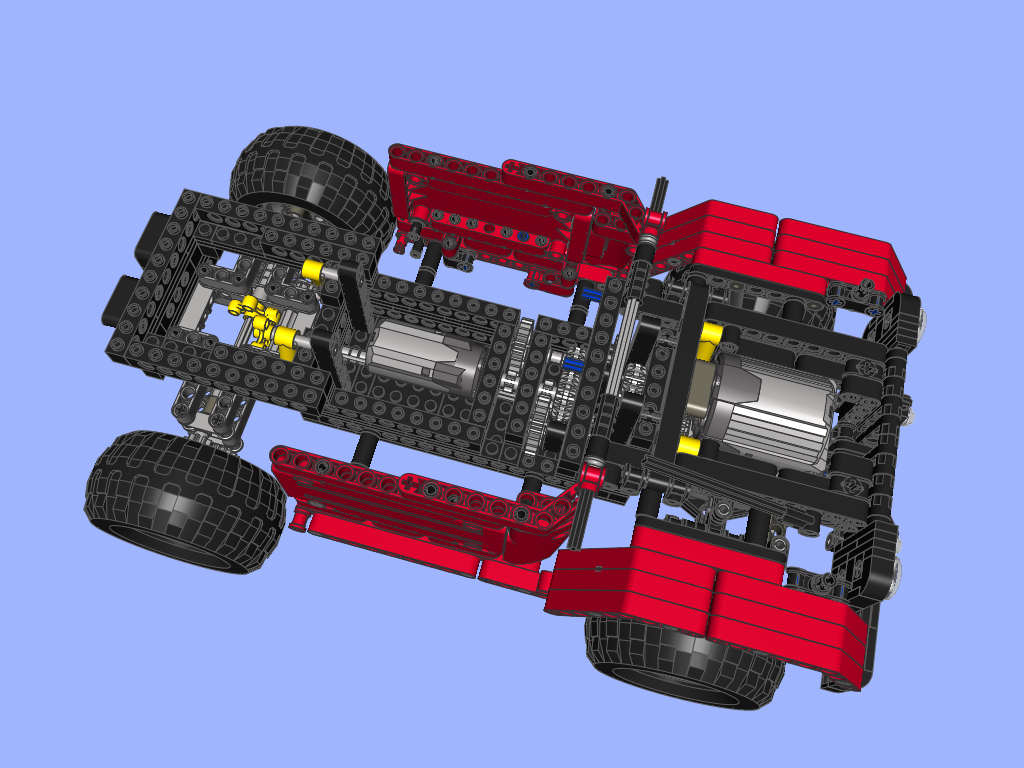
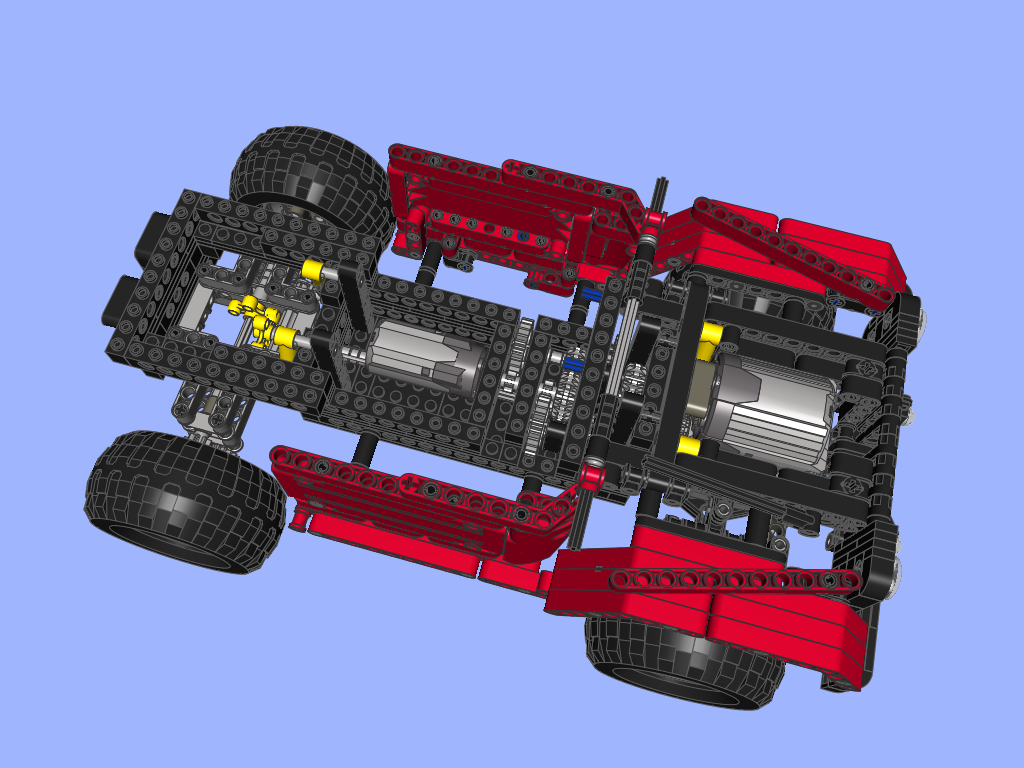

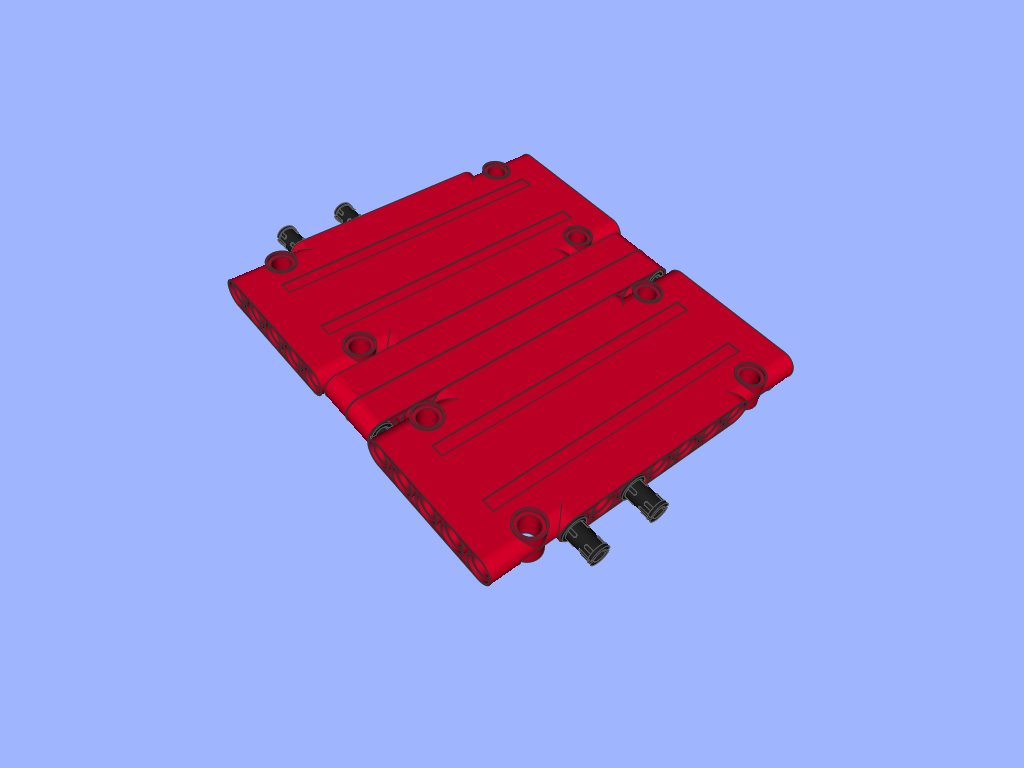


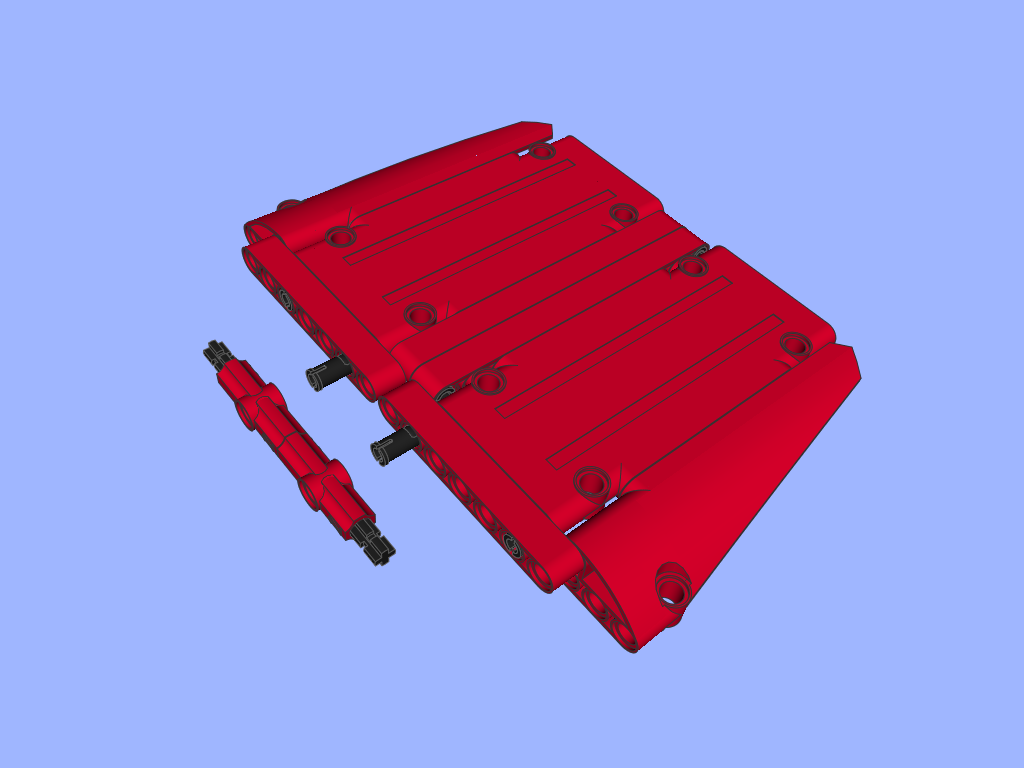
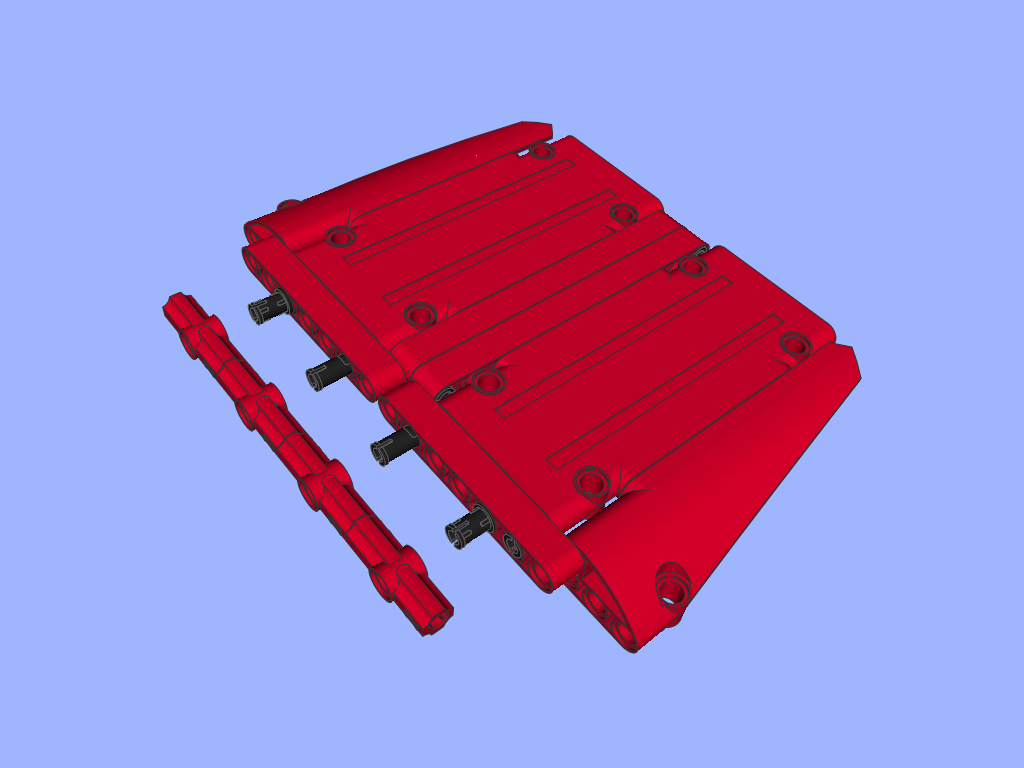
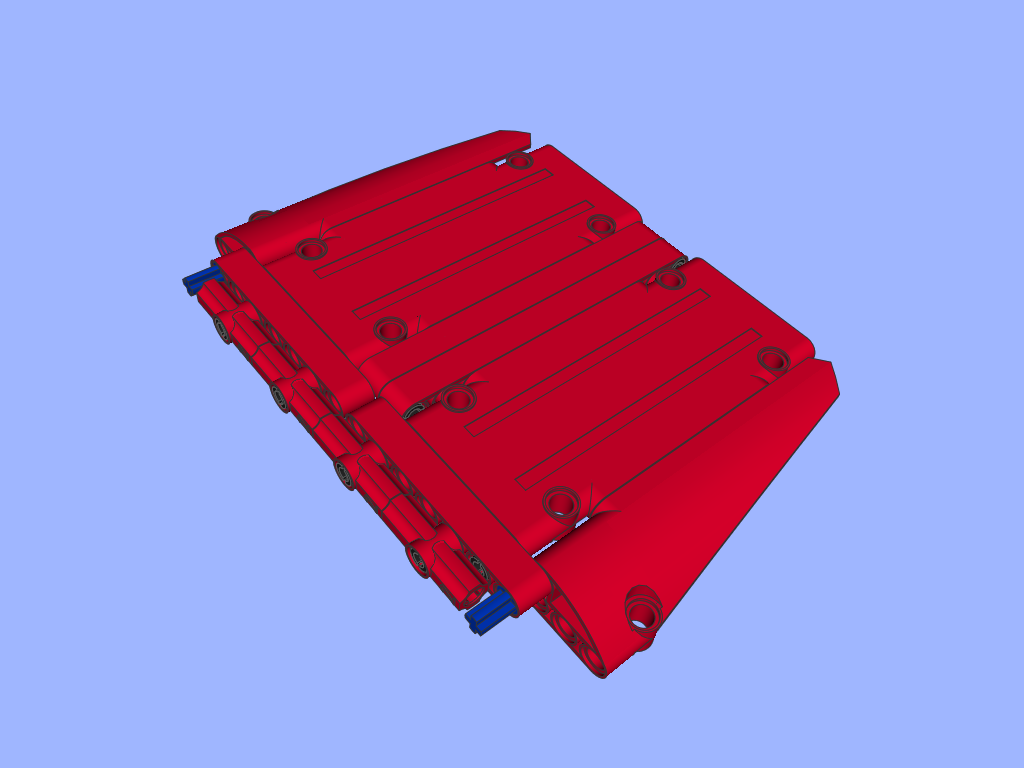
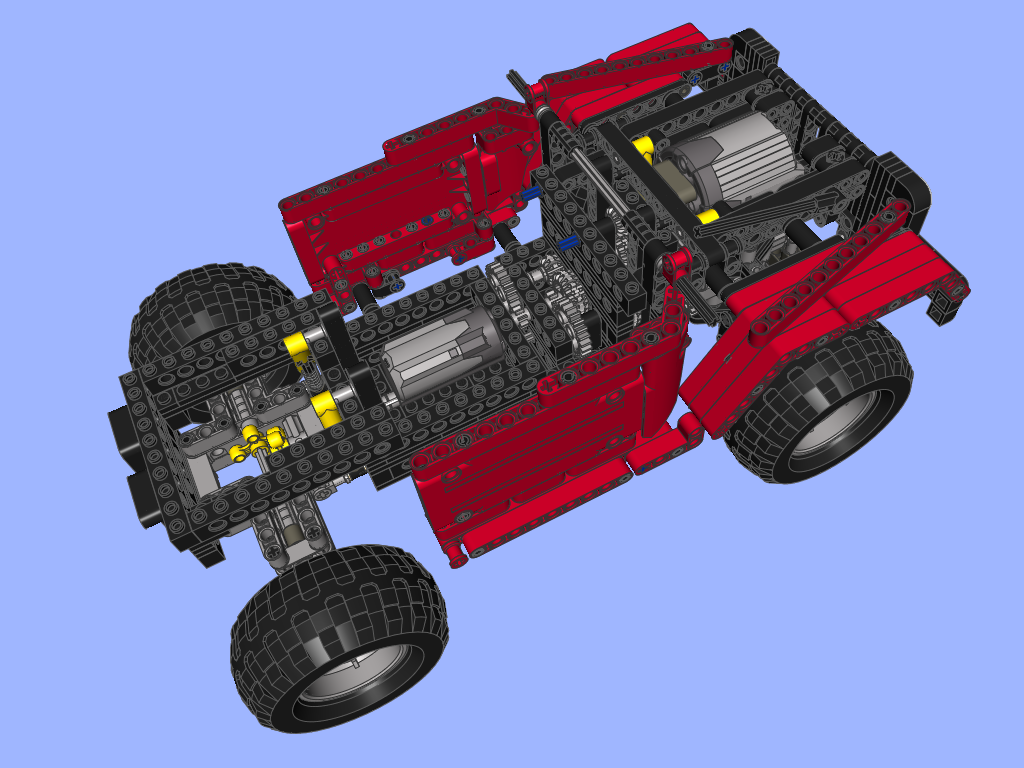

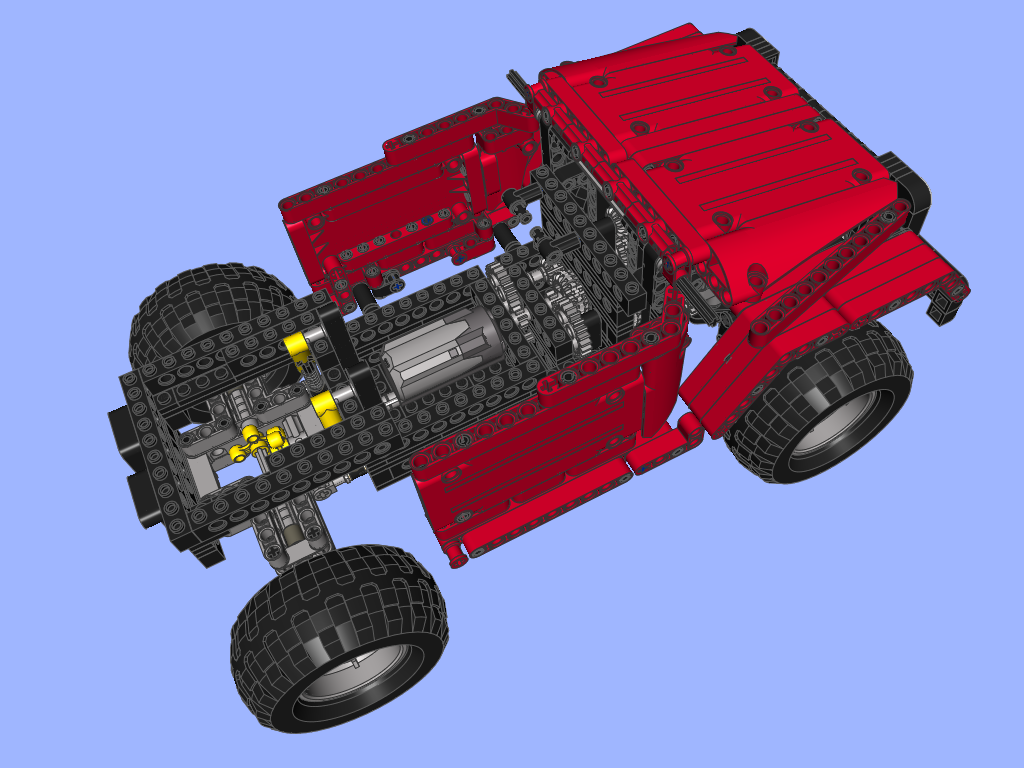


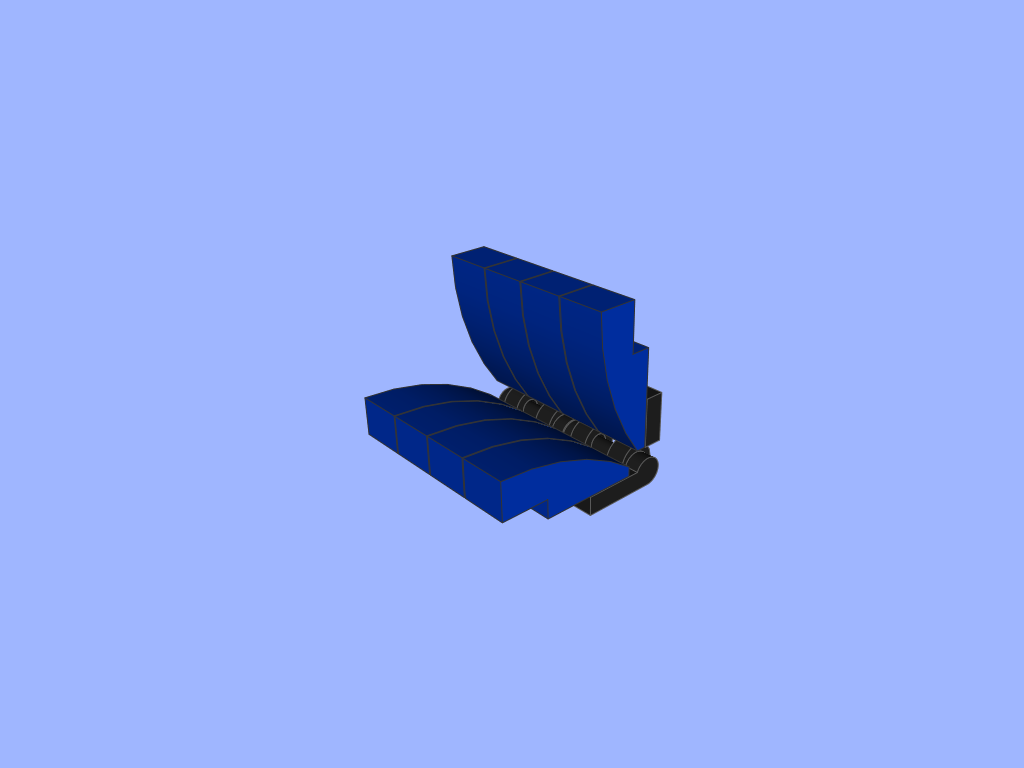
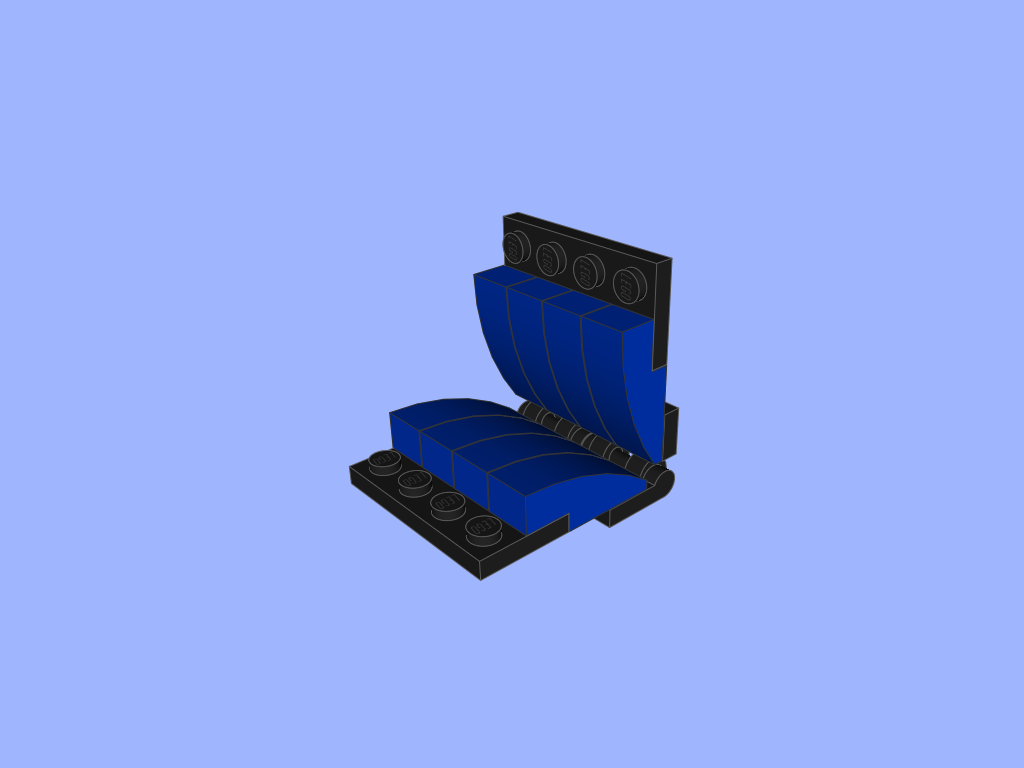

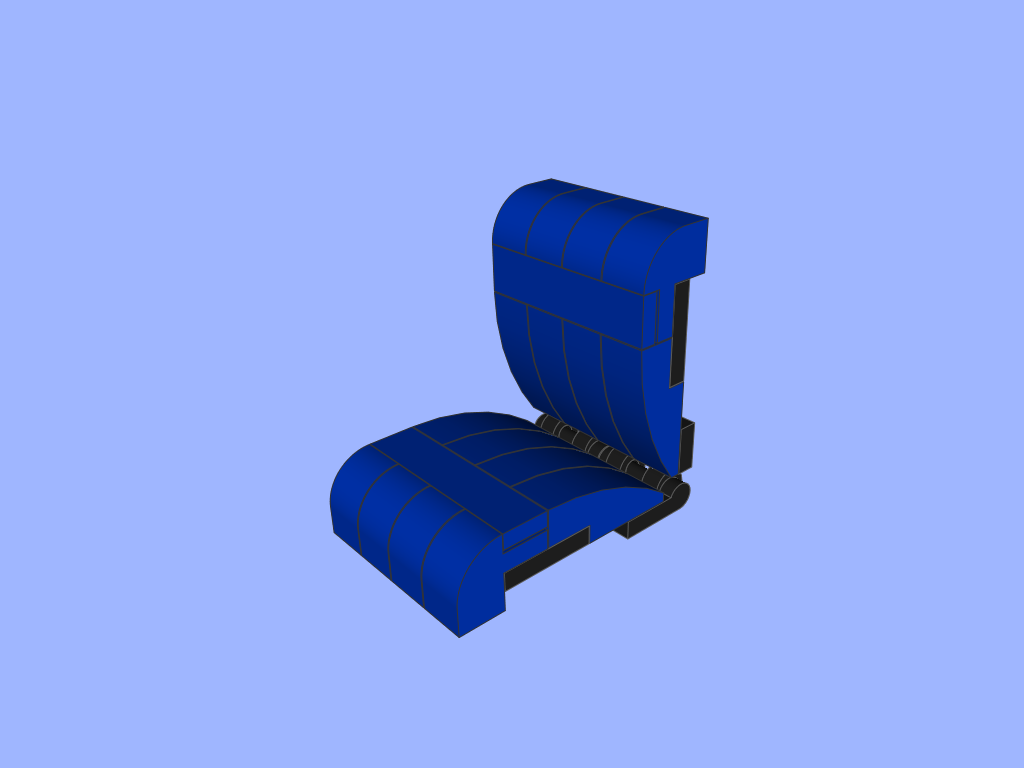
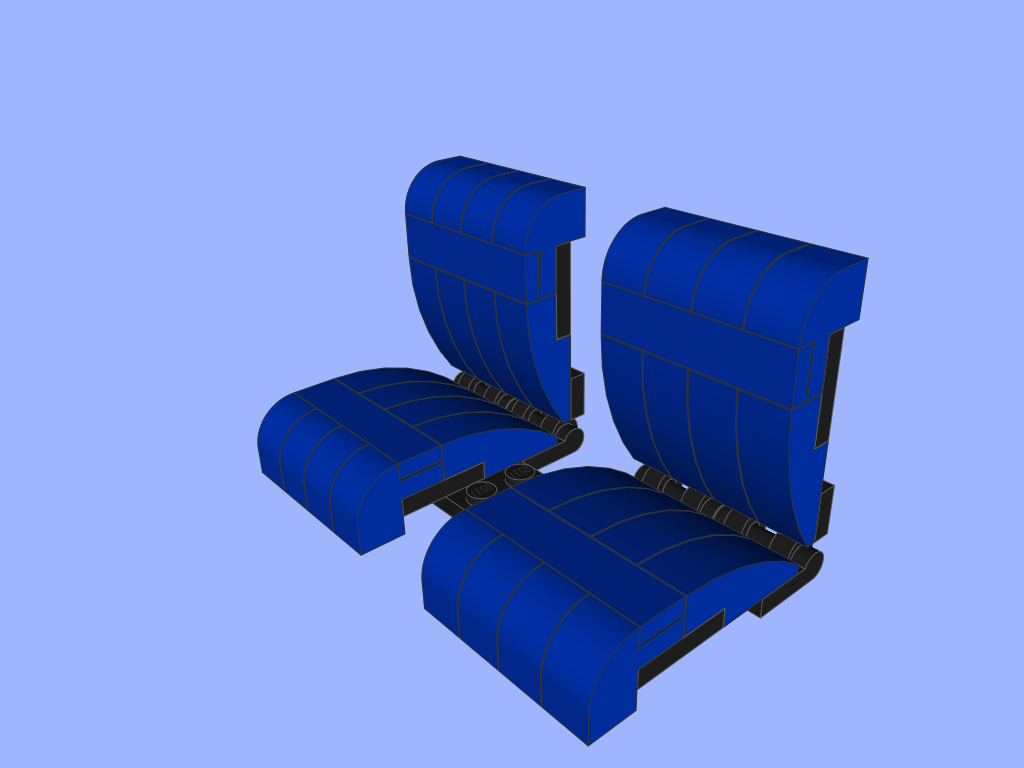
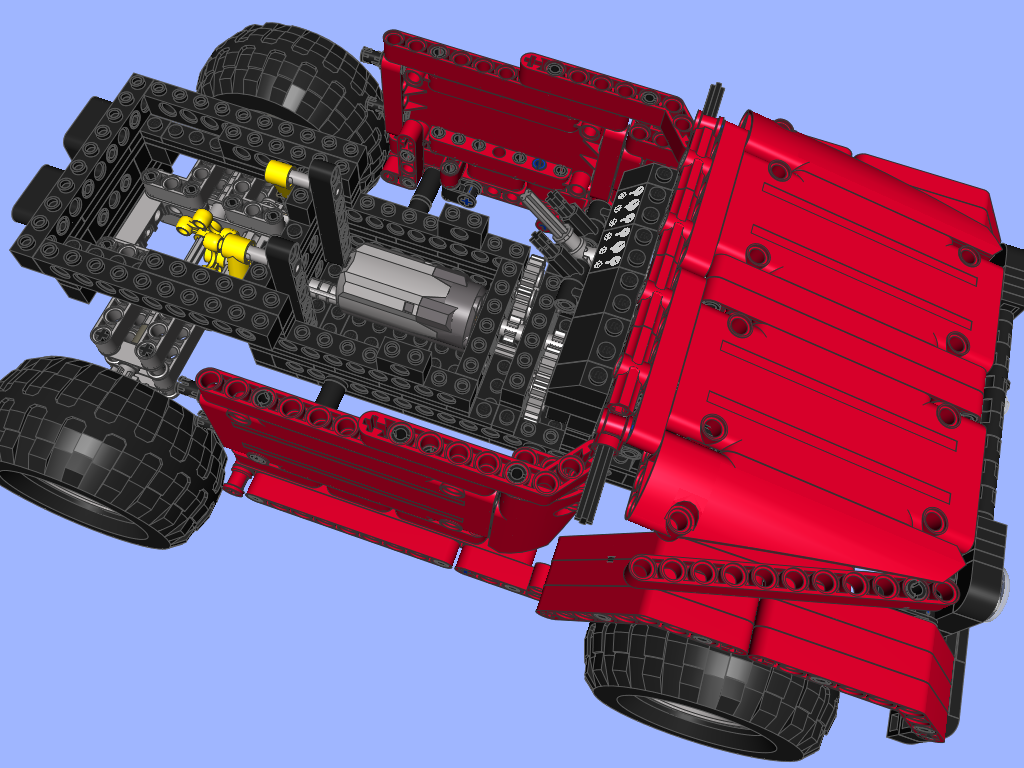
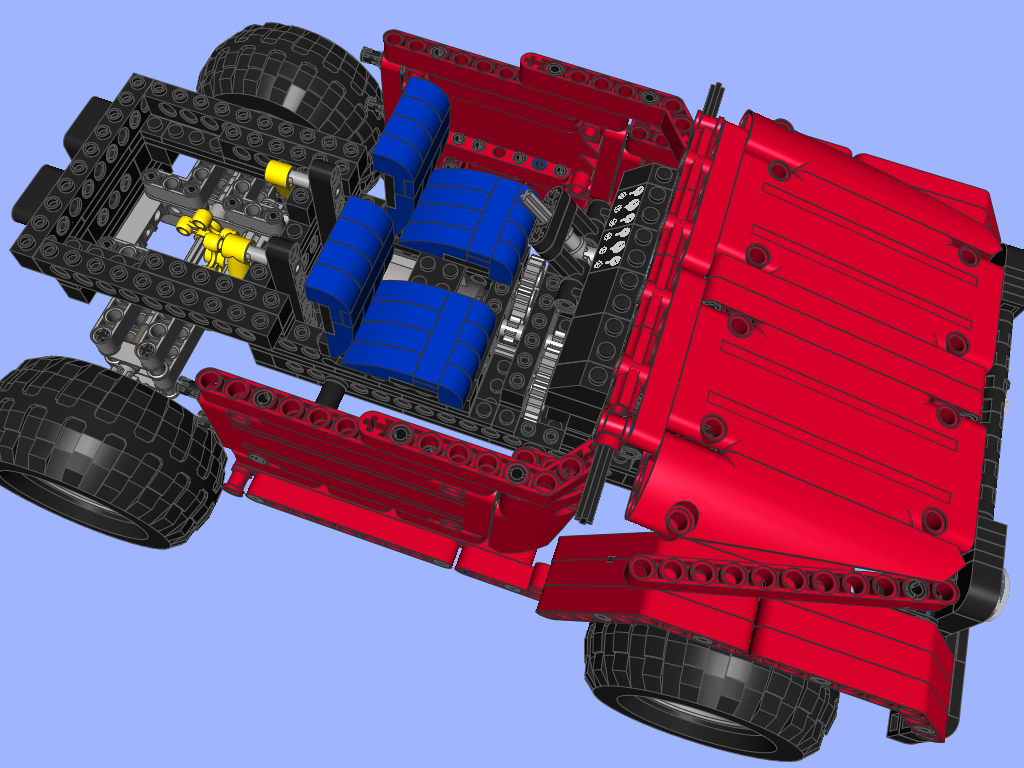

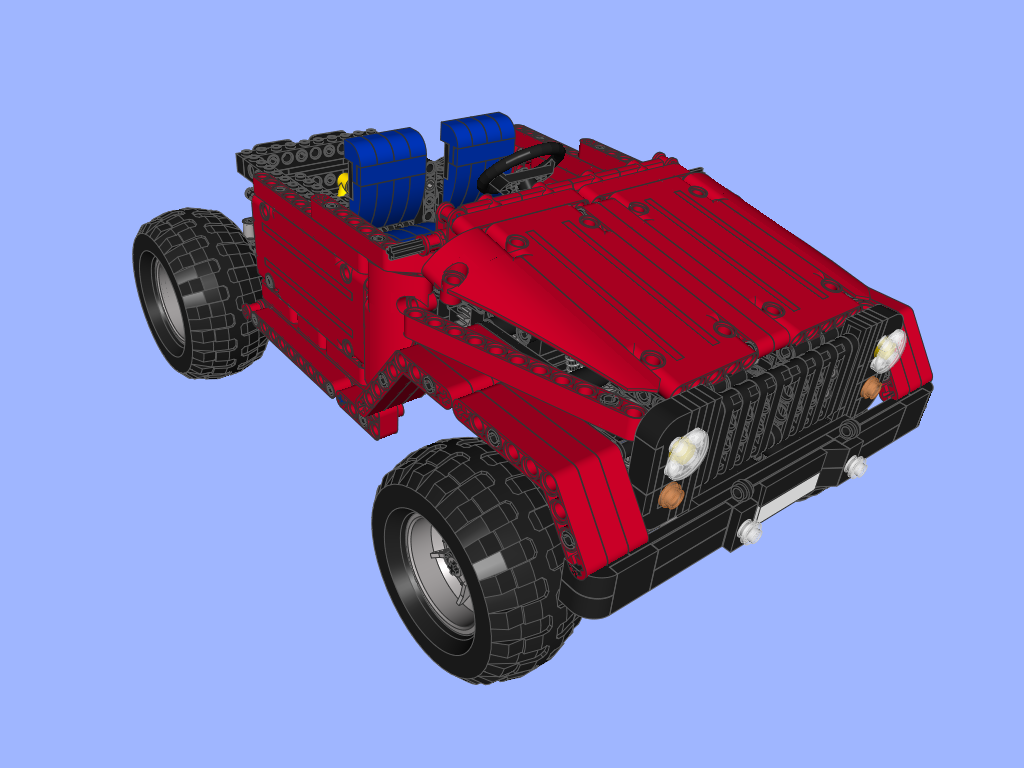
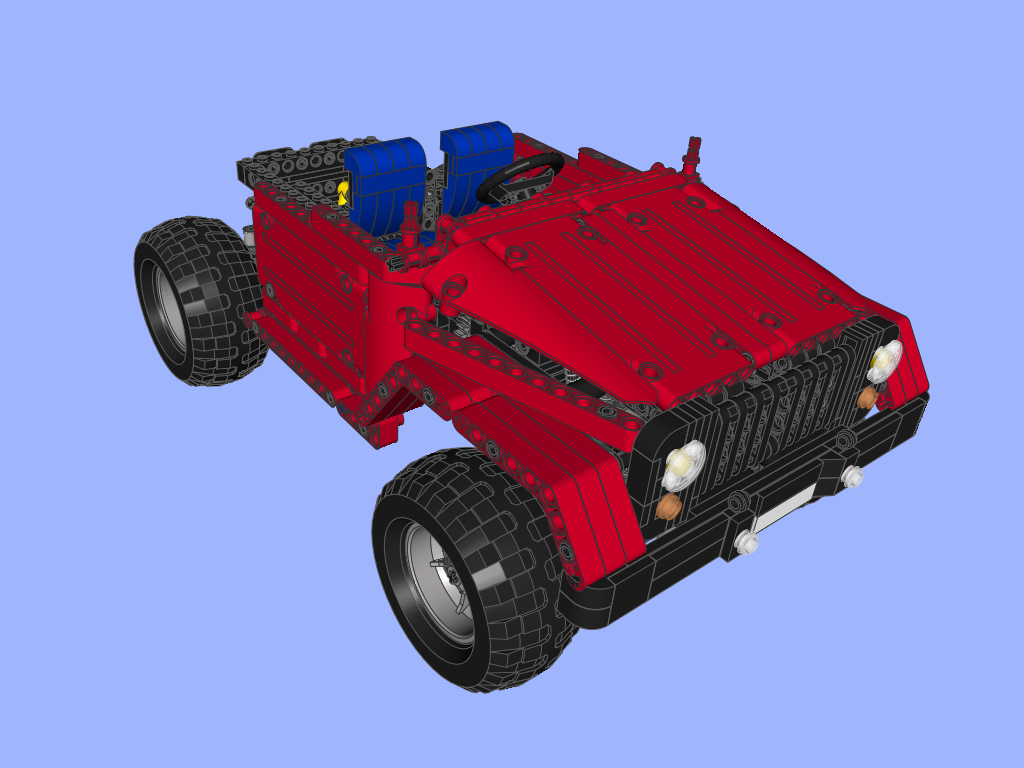
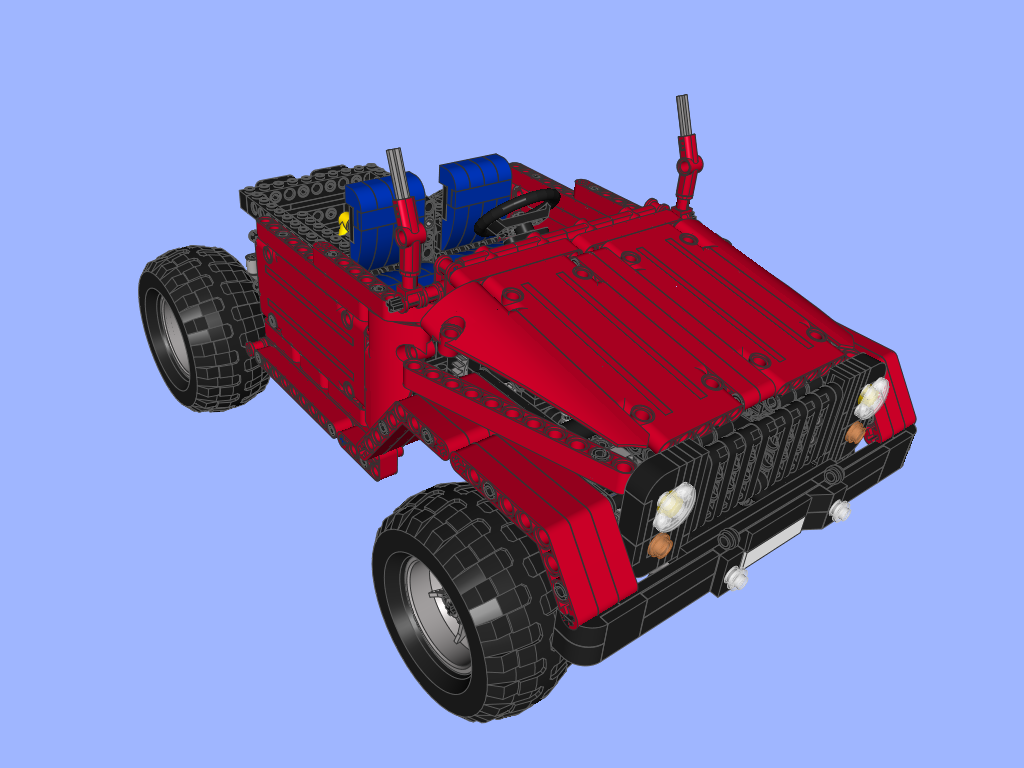
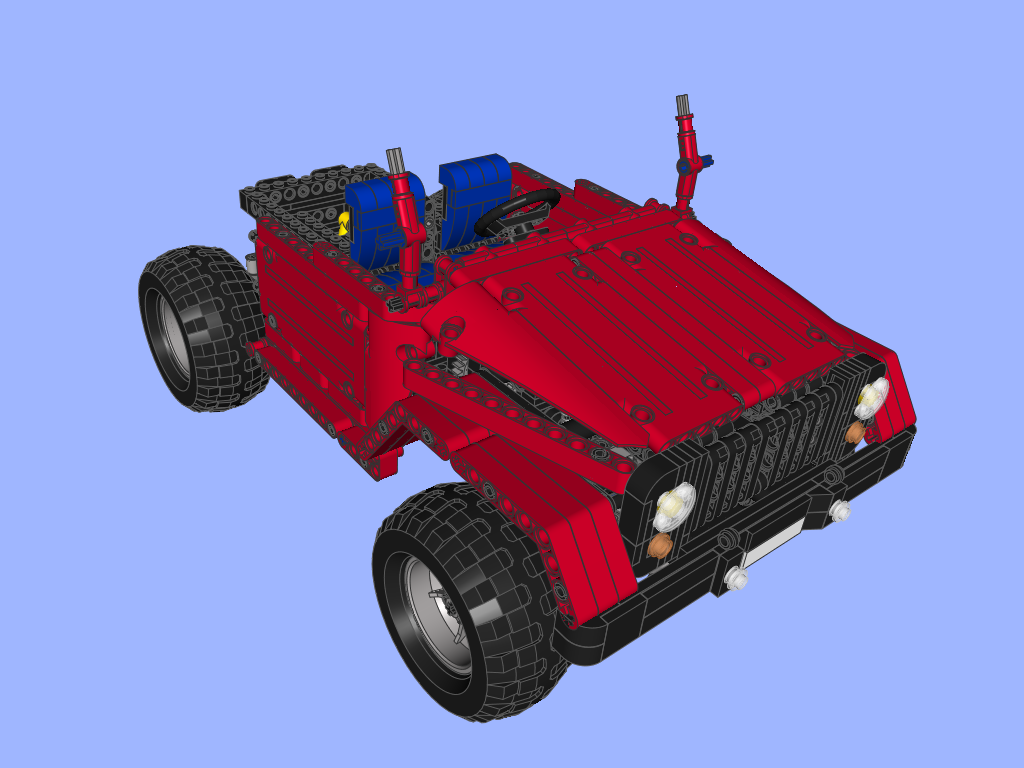
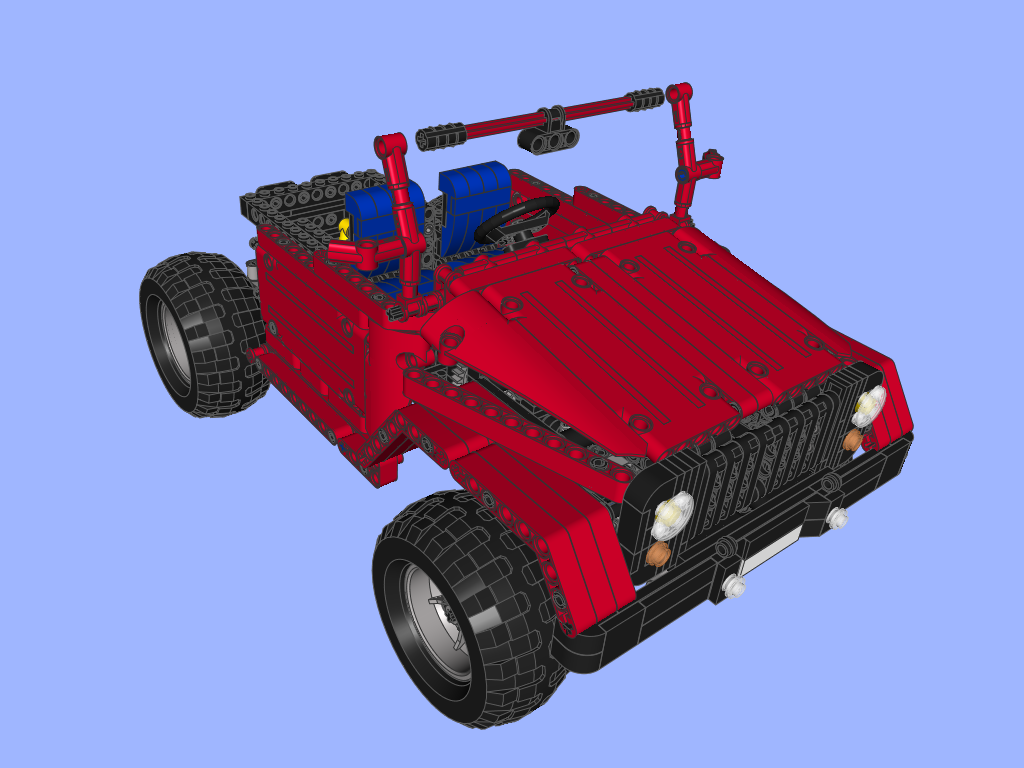
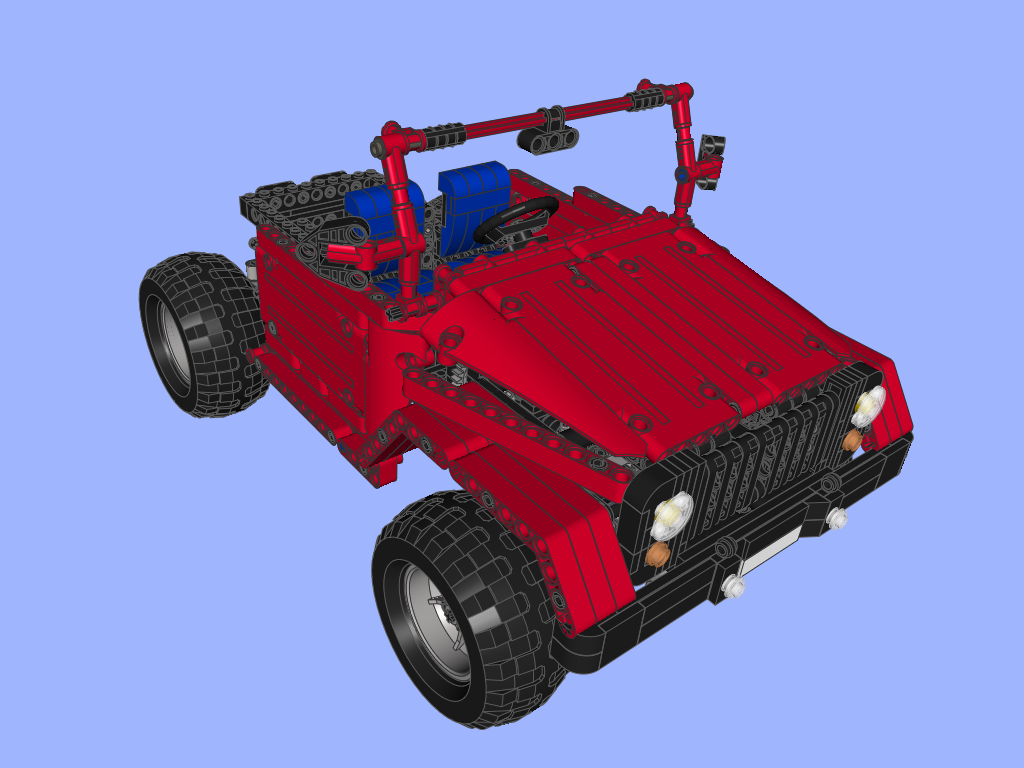


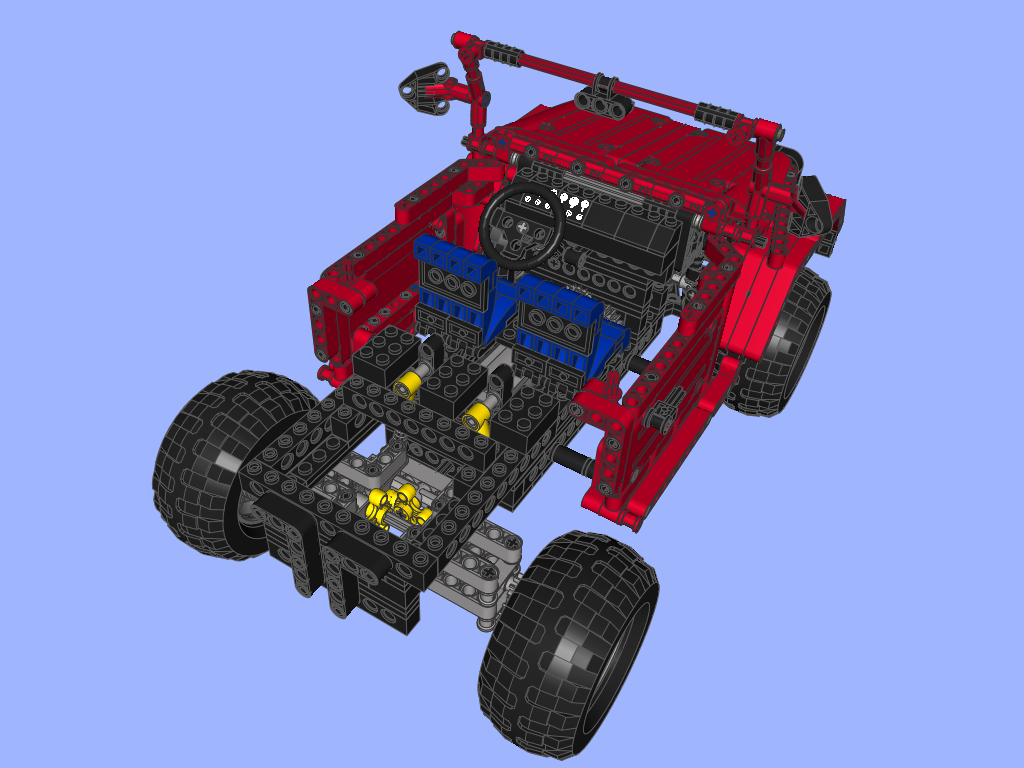
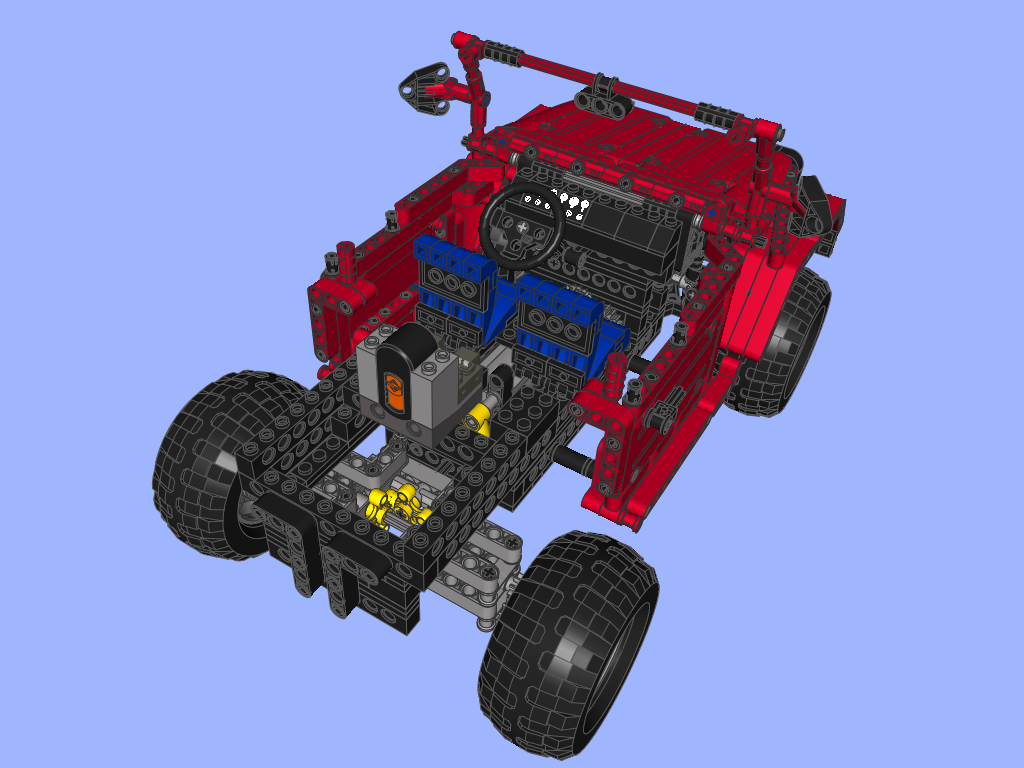

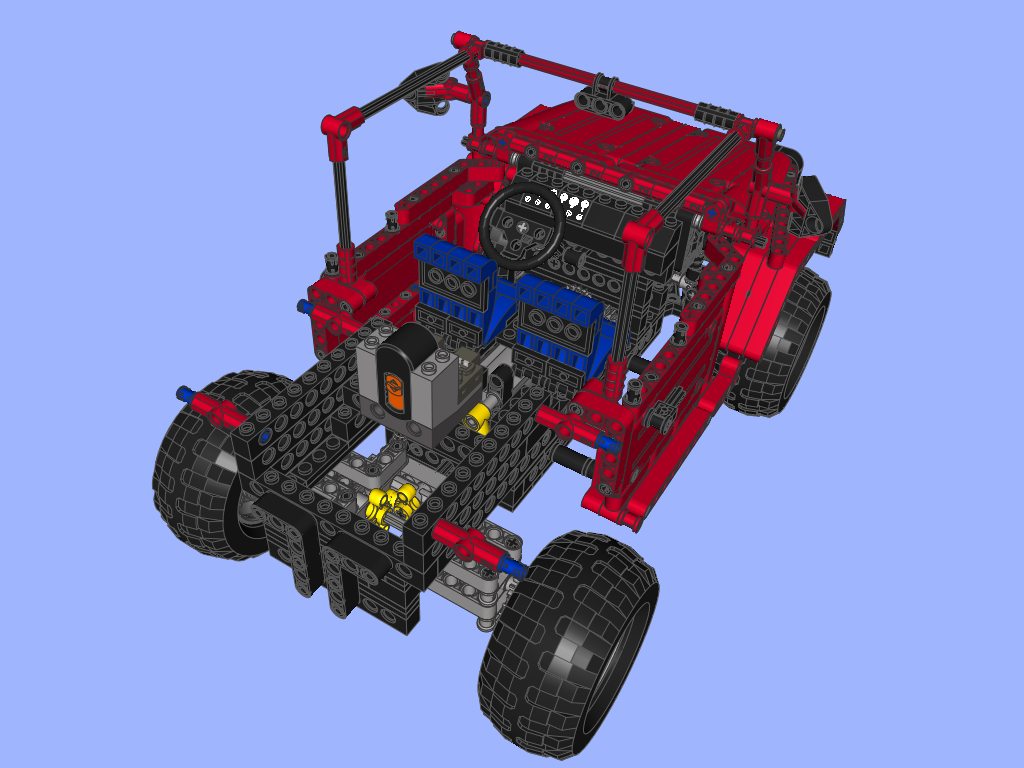
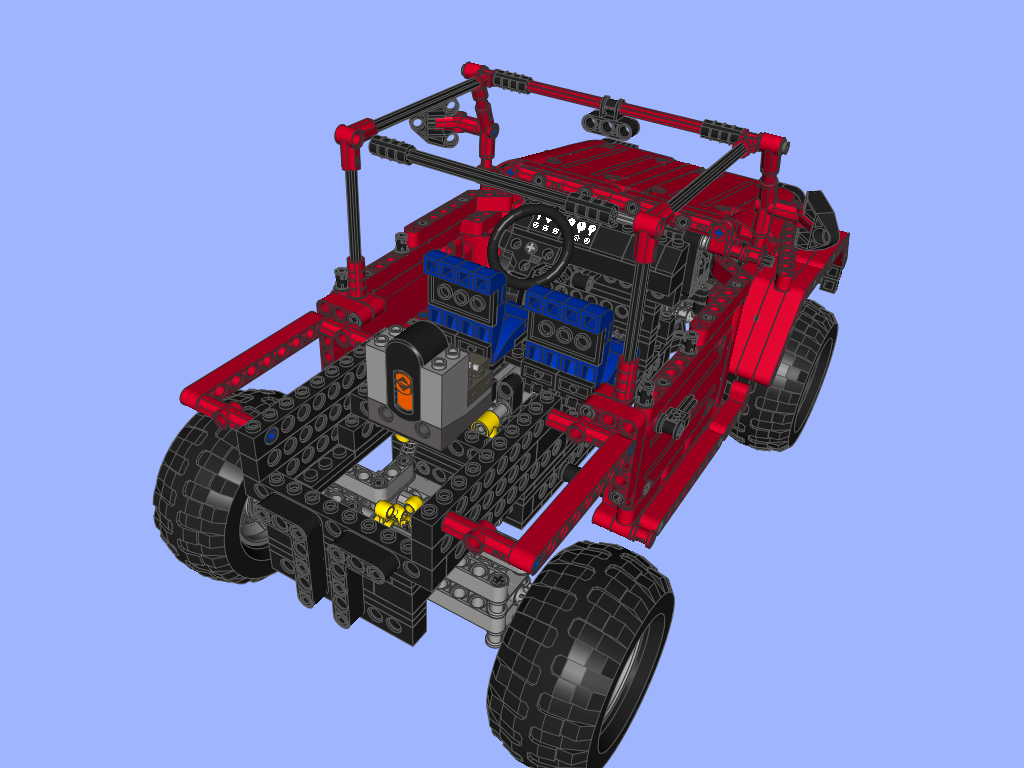
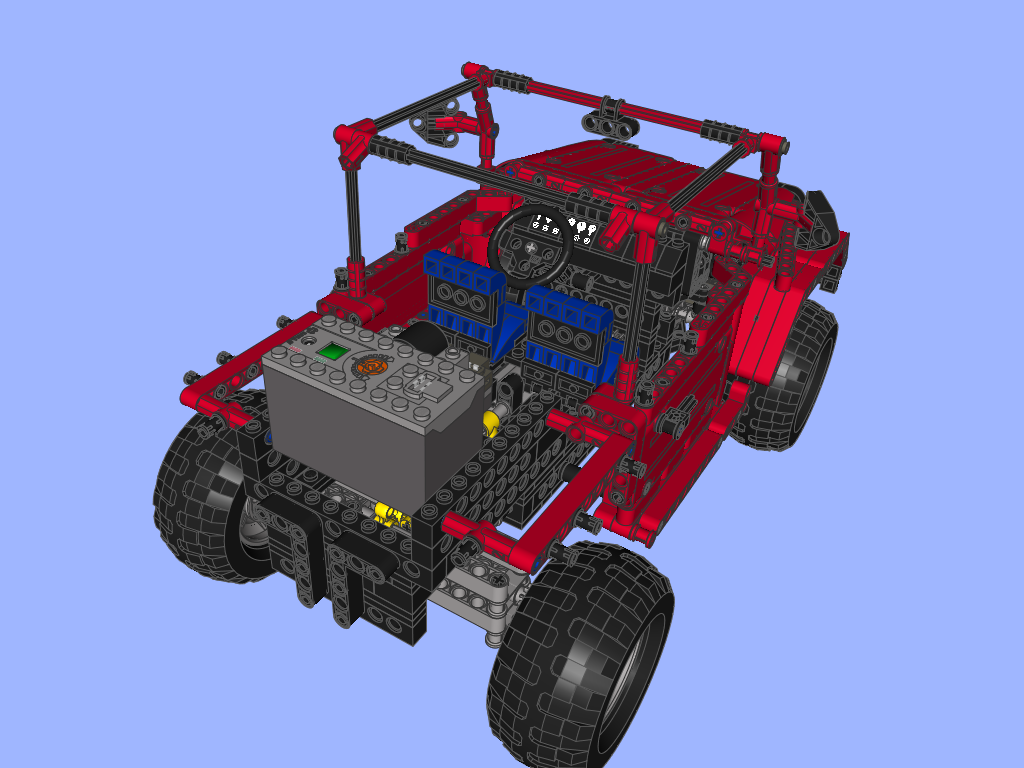


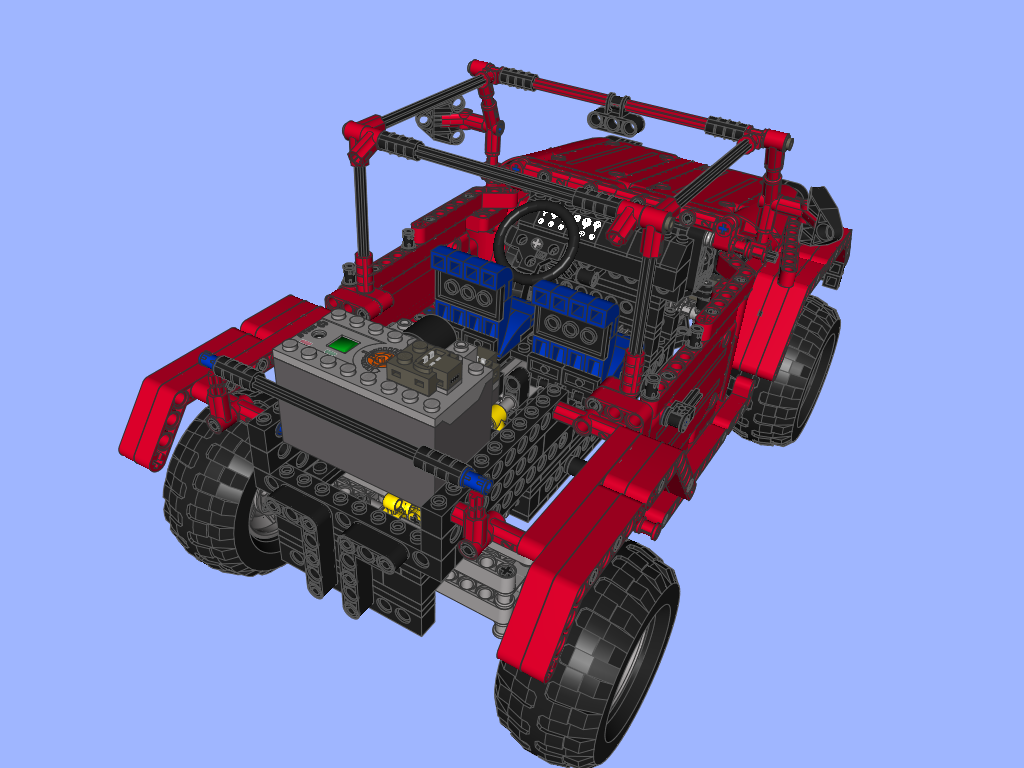

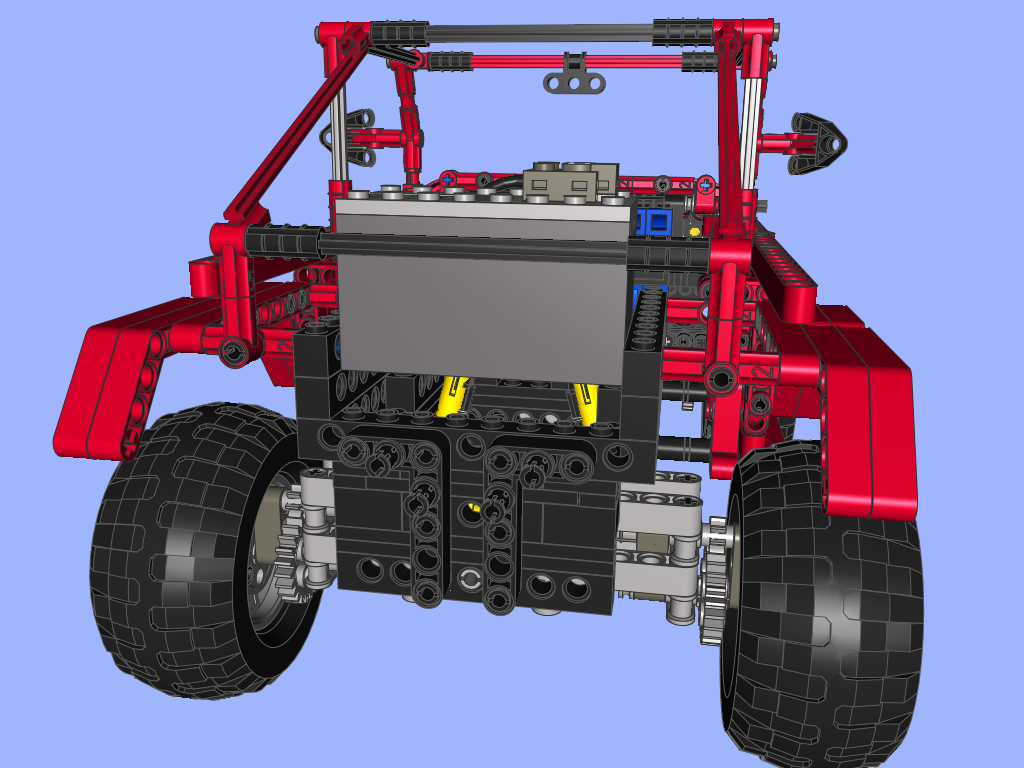


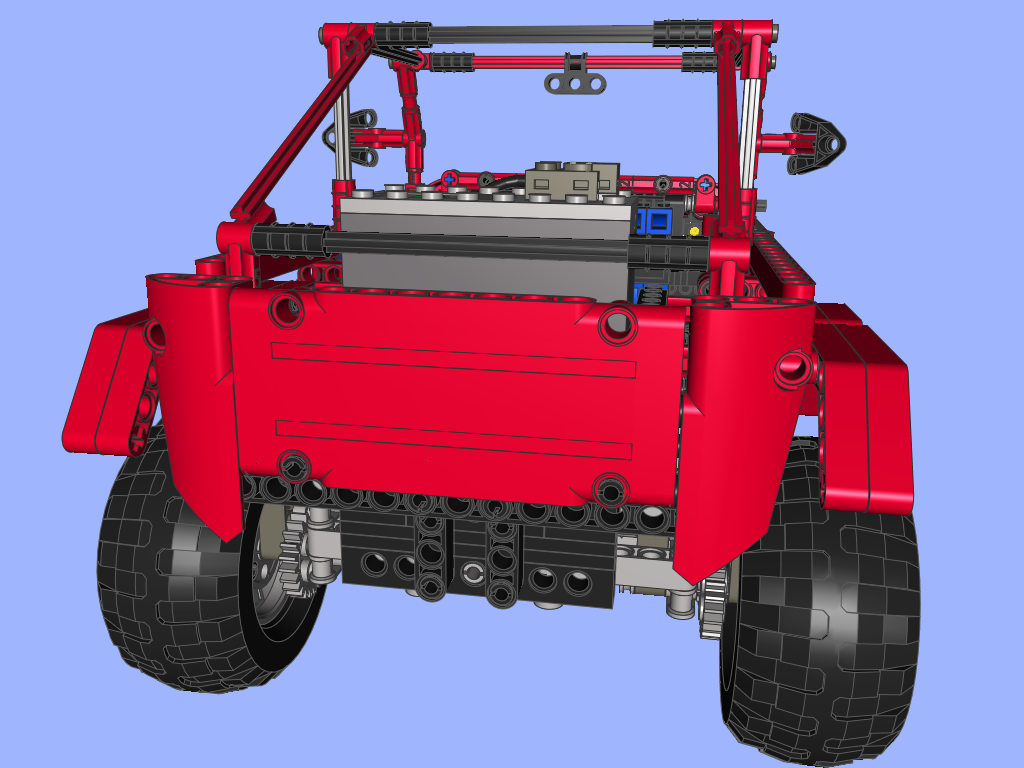
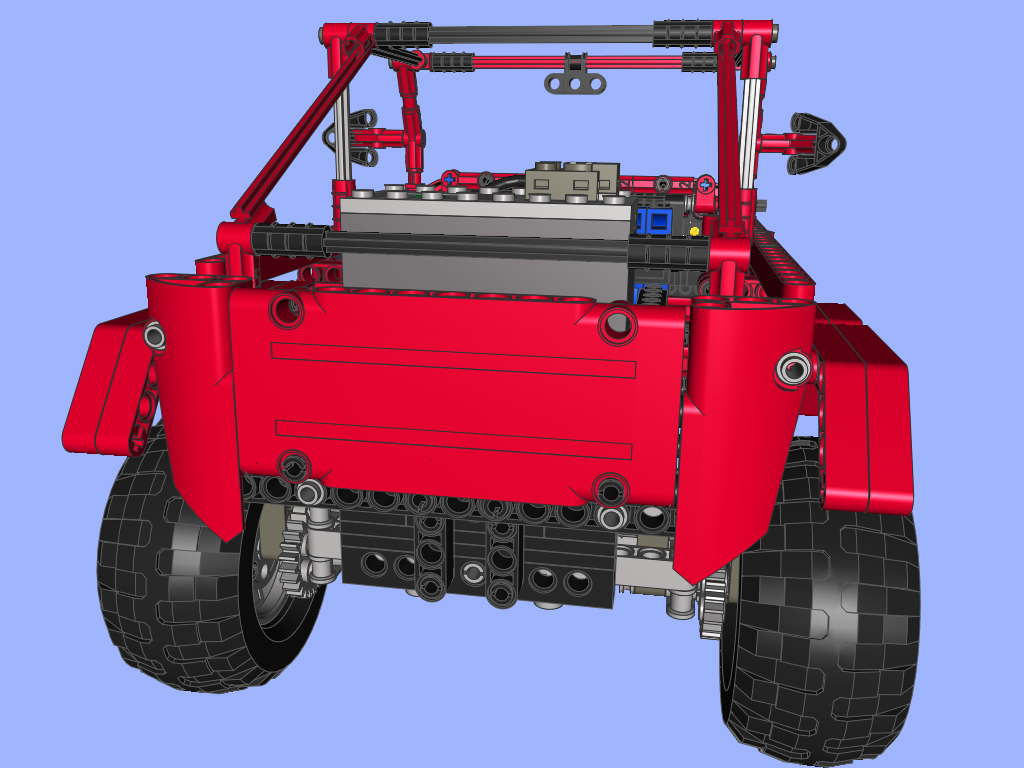

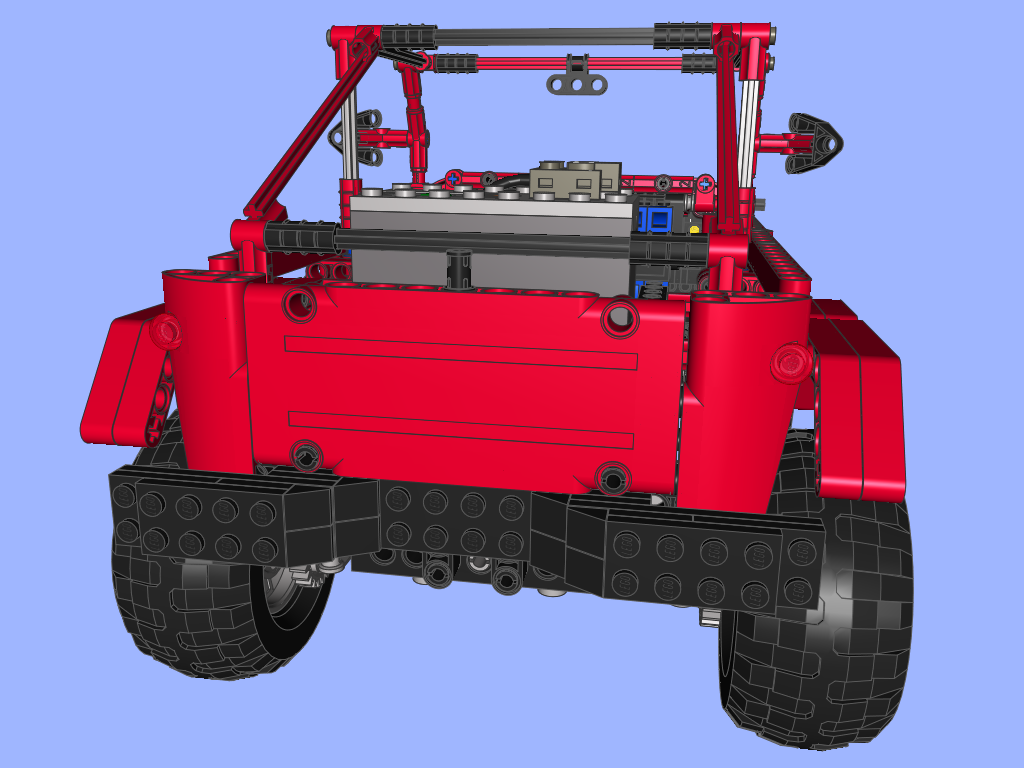


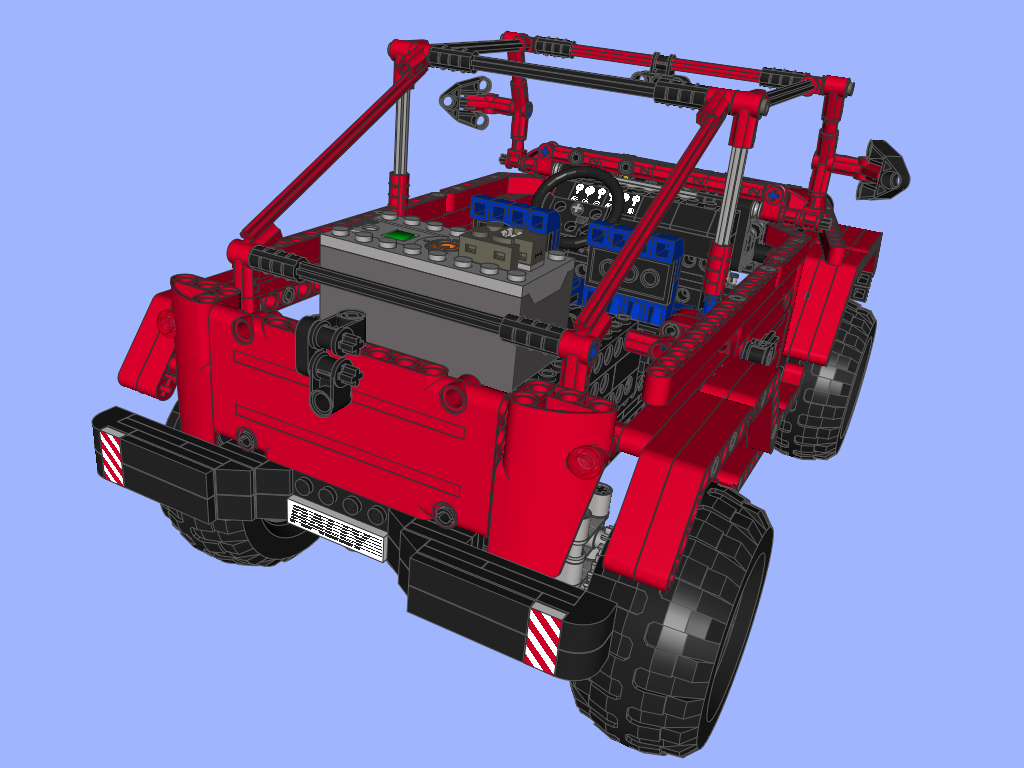

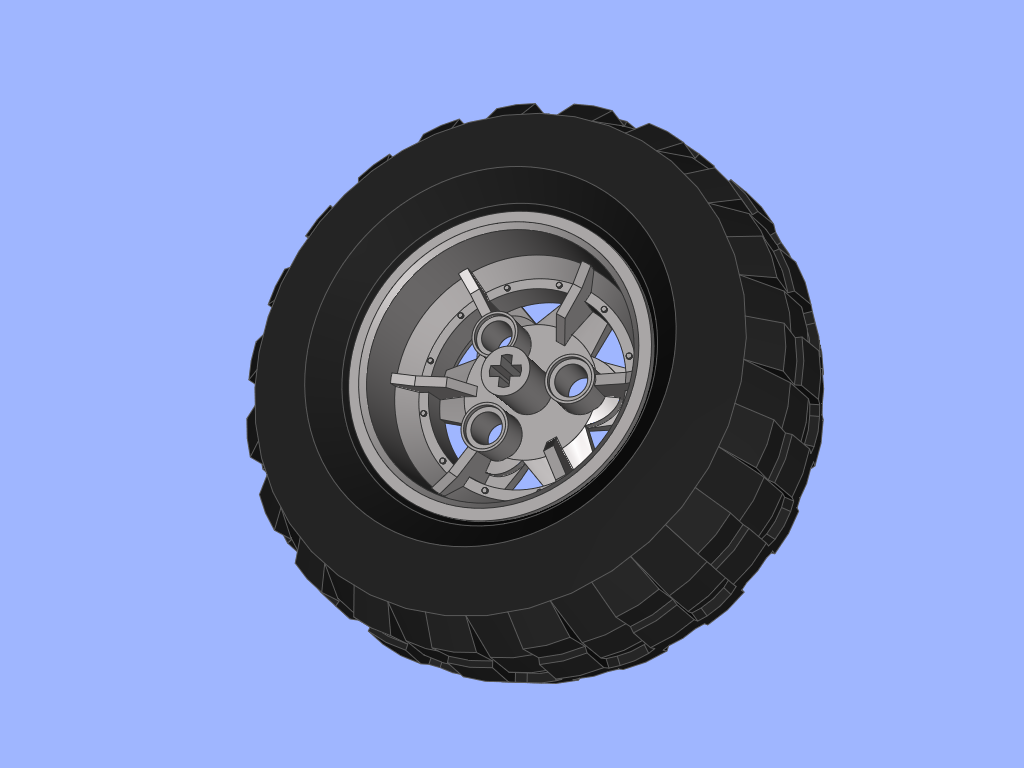

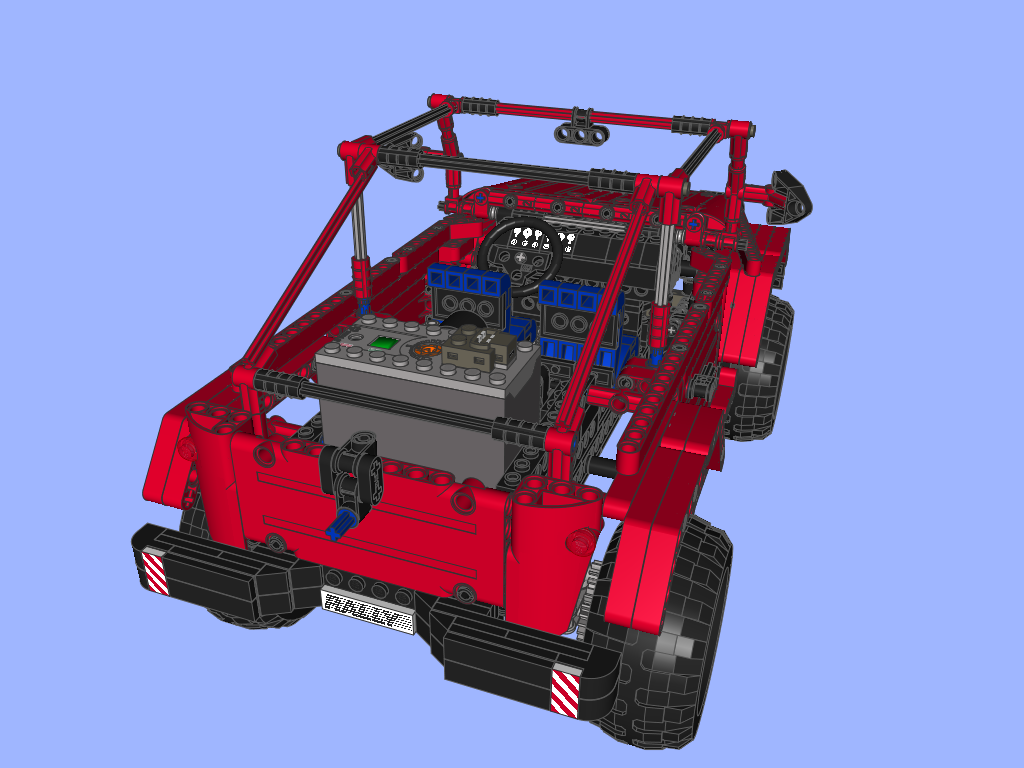
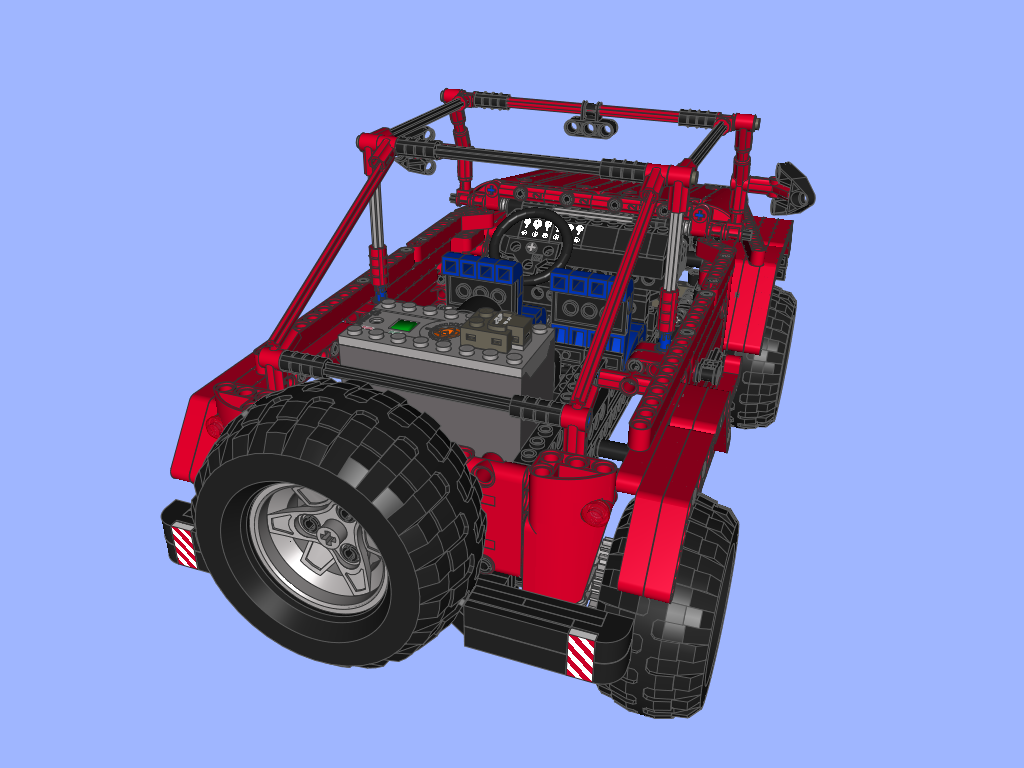
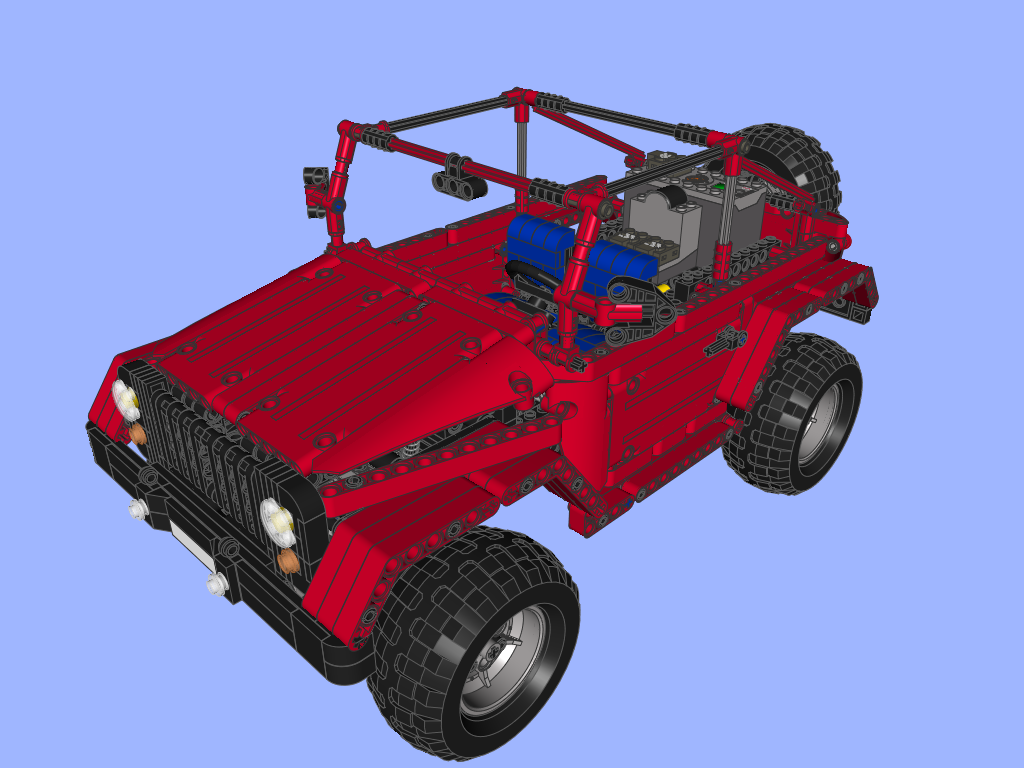
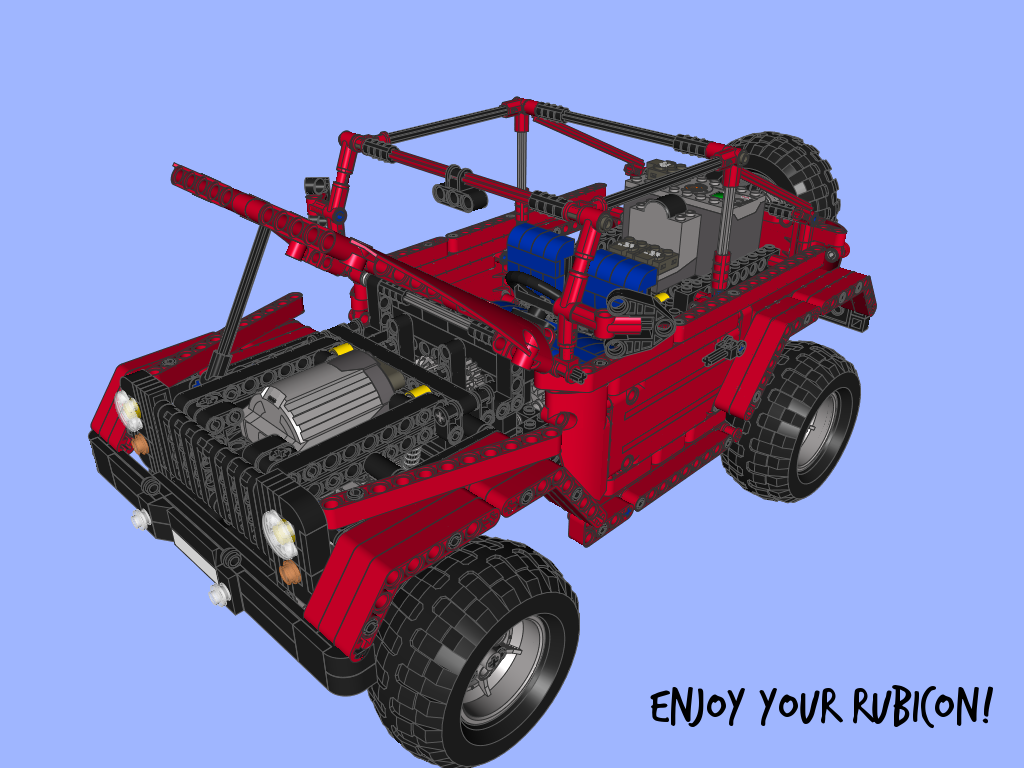
Photo-instruction for the whole model:


@Keith
Look at the instruction.
which shock absorbers where used in this model? -thanks
@Dc
Nope.
can you put all of these instructions in to PDFs?
Wonderful! The jeep looks very nice and I’m sure that it works very good. I don’t like the idea of droppable modules, but I love the compact chassis and the body design that seems more compact than others, like the hummer h1’s. Great job!
@Cody
Still, there’s no point. It would require Jeep’s license to be turned into a set, and Lego rejects every Cuusoo project that involves license.
The point being that people would not have to hunt down all of the pieces.
@Cody
What’s the point, if you can easily build it yourself?
Sariel, if this doesn’t use too many Parts or motors would you consider putting it on lego cuusoo?
@hp+torque=success
Of course.
What if your trial truck runs out of juice during a trial competition, are you allowed to put fresh batteries in it?
@Orion Bazzell
Thank you for your kind opinion. I would very much like to help you, but I’m afraid it’s not possible for a number of reasons. Most importantly, I don’t have the time frame to build this model for you either, as I am in the process of finishing my book on LEGO Technic and I have deadlines to meet. You may be interested in the book, by the way, it’s coming out this Fall and you can order it already: http://www.amazon.com/Unofficial-LEGO-Technic-Builders-Guide/dp/1593274343/
I really encourage you to try and build this model with children – they may be interested in the actual building process. You can find the parts list here at my website, and you can buy parts at Bricklink. There is a large number of US sellers available there, and shipping will cost you a fraction of what a shipping of assembled model would cost.
Sariel, first let me say that your design work on the Jeep Wrangler was amazing. My name is Orion Bazzell and I am from Louisville, KY. I work as .the Head-Teacher at an English Village in South Korea. The children that come to our village participate in many different activities and projects involving the use of the English language. We have started a CONNECTS class group and the children come with their own material some of them are very well equipped. I have long been a fan of LEGO sets and wanted to get them more interested in what can be designed with them. I think that having your very american style vehicle would be the perfect sample that would get our parents interested in purchasing the items needed to create their own vehicles. I read what you said about purchasing the design assembled and understand what you mean, however we do not have the time frame to construct this and would appreciate a price quote on a completed truck. I would preferto here from you in person by phone I have a “Magic Jack Phone” and can be reached at my american number (1-502-713-5806) Thank you and Best Regards
Orion Bazzell
@Tony Stone
Sure, if you don’t want to drive it remotely.
is there a way to build it without a IR receiver & remote??????????????????????????????
@Chris
You have to ask someone, not me.
i couldnt find lots of the parts at either suggested website. is there any way i could pay someone to find and buy all the parts for me??
@greg
Of course.
is it possible to make it a dual pf m motor mounted?
@Ryuduck
Because my trial trucks aren’t good enough.
grat performance of your jeep wrangler rubicon…this is one of my favourite model created by you……Why you don’t make more trial truck?
@Elvis
You’re wrong – they’re 30% bigger. I’m surprised you were able to fit them in there at all.
I built the car with your plan, but the front wheels contact the “fender”. There is only the difference that I used the wheels from the new Unimog like you used them for the RG 35 because I think they have the same size…
@Technic200
You know, there’s the video like 100 pixels above your comment.
@Sariel
which is the trial with the Jeep in? i want to see it blow the course away!
@Sariel
this thing is absolutley fabolous in terms of stability, it can descend vertical steps :))
@LinkDestroyer33
The diameter is 81.6 mm.
When you use the wheels from your Jeep Wrangler Rubicon in your models, how big in mm are the tires?
@wyatt
Try the first link here: http://sariel.pl/downloads/
can i get the blueprints for this, im making a jeep wrangler rubicon JK unlimited i could use some help. thanks
@will
I think so.
are the instructions/parts list on re brickable?
@Jake
Yes, I have partial chassis for the Ford and I wanted to experiment with the green thingy before continuing. But I’m really busy right now and the weather is bad. Maybe this weekend…
By the way… how are you doing with your green offroad `thunderbolt` 😀 When do you think it will be ready? And whats with your Ford GT 40, have you began to build it?
@Sariel
Thank you!
My Battery Box just came in! 😀 Now there are only batteries and custom lights missing…
@Jake
I’m glad to hear you like it. Have fun!
I`ve just finished building your jeep and it`s just WOW!!! It`s good looking and it works very well Indoor! Just waiting for a new battery box and an extension wire. Can`t wait to take it on a offroad trip!!! 😀
@Mecho12345
It’s much more robust and narrower than independent.
Why is pendular suspension on trial trucks so popular? Is it just far easier or is it actually better than eg independent
Update on ‘jumping gears’, it turns out the clutch idea didn’t work to protect the steering transmission. I did find the noise came from one of the gray axles turning inside a 16 tooth gear in this system. I’ll just live with it, it hasn’t broken!!
I just finished building your Jeep, what a great build with so few parts. I’m impressed with the strength of the whole drive-train and the jeep looks pretty good too!
I’m thinking of adding a clutch gear right after the 8 tooth pinion on the steering transmission @ the motor. When I reach steering extremes I hear ‘jumping gears’, I hope this solves that issue.
I want anyone to play with this model and not worry about breaking parts.
@Sariel
Feel bad for you 😛 so many (retarded) people asking to buy your stuff : / and other dumb questions.
But anyway love your stuff! Inspired me to get my lego out after 3 years 😀
Goodluck with your building 😛
@mindstorm addict
yes, at the same way of the tractors. I think so.
@mindstorm addict
That depends on the type of surface and obstacles.
Will the wheels of the Unimog U400 be better for trial truck than thoses that you used in this model?
@Sariel
I know…
@mindstorm addict
This is exactly how you made me feel: http://forum.tayyar.org/members/iron-maiden-albums-various-picture2293-facepalm.jpg
Ah ok I already buld it, but without suspention XD
@mindstorm addict
Why don’t you build it from the instruction and see for yourself?
@Sariel
I don’t understand how it works, is it the axes of motorization and for the steering that make the suspention stay at the good place?
@patrick
What price?
hi what is the price ?
thanks
@mindstorm addict
Um… it’s an off-road 4×4 model. What’s so weird about the fact that it has suspension?
Why is there a suspention on the front wheels, because the steering and propultion axes can’t bend?
Thank you for sharing instructions for this awesome model! I built it in yellow/black with modified body and interior:
http://www.youtube.com/watch?v=mMbO4cfyCKA
Unbelievable that you created it in just 4 days!
I wish you another 1000 models in the following decades, and maybe a little bit more instruction for us 🙂
@Jacob
I doubt there is a real solution. Both things you mentioned are simply disadvantages of using pendular suspension without turntables. Lego makes specialized suspension pieces that are better suited that anything one can build with basic pieces, but they are not really fit for serious off-road driving.
Really admire this design. There’s great artistry in the construction, particularly considering the speed at which you built it. I have two small questions, if you don’t mind. The first was actually raised by Nico above, the suspension creating friction on the drivetrain because it’s the pivot point in the assembly as I understand it — which I assume is why you used turntables in the Rover chassis. My second question though concerns the very small clearance between the universal joints on the front axle and their respective pivot points. When the uv joints bend their diameter increases just enough to make them rub against the confines of the pivot points, causing significant friction and wobble, particularly at the wide end(s) of the turn radius.
Is there a solution for this? I don’t think I built it wrong. I’ve built it 3-4 times now. Thanks for sharing your building instructions. What an education.
thisn is a awsome car jeep
@vishal
It’s not a product and you can’t buy it.
Hey i need to buy this products From where can i buy this?
Vishal
+919886208118
From India
Please help me….
@brandon
I don’t have any name at Bricklink. You can’t buy my Jeep nor other creations.
Listen Brandon, how about you stop commenting at my website and come back in a couple of years when you grow up and start managing things yourself? I can help, but I’m not going to nurse you. If buying a handful of bricks is too difficult for you – well, you have a problem.
Next stupid comment gets you banned from the website. Sorry, but this is getting nowhere.
i need help wat is your name in bricklink and how do i buy it your jeep and other creations are amasing i need the jeep thow i have a 1997 and i just needed a rc vurson but i hated all of the real ones because the dont have tork or basicly an inside i have spent 1500 on other stuff but this is much better then all of it combind please tell me how to do it please
can you make me a set comeon
i did that
@brandon
I suggest you visit Bricklink help section: http://www.bricklink.com/helpMain.asp
how can i use bricklink to bild that exzatly
@David
If you build the chassis properly, it’s strong enough to resist the shock absorbers.
@Sariel
Oh, how did you keep them from breaking the beam they connect to?
@David
Yes, they are.
Are the shock absorbers compressed in the front and back because my shocks were bent outwards and the back and front were the shocks connect just snapped i had that problem with the landrover
@Ruben wynia
What makes you think they buy ideas?
why you don’t sell all your ideas to lego?
@David
Not really, it will still be fairly light.
oh ok I wasnt sure what to use, if i do use the normal battery box do i have to worry about weight problems
@David
You can power it with whatever you like. Also, it would be nice if you improved your English a little.
oh ok yea i kno wht u mean i made a trtr with it but is the rechargable battery box that good
@David
Sure, but your vehicle won’t have much torque then.
can i use the M motor for driveing the truck cuz i dont have a XL motor
@Alessandro
I haven’t, but I heard it can get overheated. It’s no good to put it to a heavy strain for a long time.
Hello Sariel
I wanted to ask, have you ever had problems with the motor Xl, it was never burnt or broken?
I have to follow some rules to get the best of my jeep?
thanks in advance =)
@Alessandro
Of course you can do this. No, I haven’t experienced problems with the steering.
Hello Sariel,
I would like to build a jeep wrangler, however, I would like to make some changes:
1) I would use the Turntable as for suspensions in the jeep land rover
2) I would use the classic battery pack;
Do you think you can do all this?
Just one question, there are problems with the steering?
Thanks in advance ^. ^
@Black_Omega63
It should work, NXT motors have very similar parameters to those of PF XL motors.
Hi Sariel,
I have an NXT but no power functions parts. I also do not have all the pieces for the exterior and I do not have those wheels. Would it be possible to replace the LPF parts with NXT motors? Would it still work, considering that the chassis would be greatly modified for the shape of the NXT motors?
Thanks, Black_Omega63
No więc chyba logicznie będzie dać pudełko z przodu. Z resztą montując silnik z przodu miałbym problem z brakiem zębatek (starczy mi na styk).
@mientos
Zależy. Pudełko jest cięższe niż jeden XL, więc jak dasz je z przodu to powinieneś mieć lepszą zwrotność (przednie koła bardziej docisnięte) i lepiej się wspinać (środek ciężkości bardziej z przodu więc jak wjedziesz przednimi kołami na przeszkodę to reszta pójdzie już łatwo).
A i jeszcze jedno. Czy “pudełko” na baterie będzie leprze z przodu zamiast maski a silnik z tyłu czy jak u ciebie puełko z tyłu i silnik z przodu? (estetyka nie gra roli mam dużo paneli i coś wykombinuje)
Wiem… wygląda jak monster truck z kołami malucha (no bez przesady ale jednak)
@mientos
No, to wyszedł Ci prawie samolot 😉
Trochę mnie to zdziwiło. Zadałem to pytanie gdyż buduję coś na wzór rubicona i nie wiedziałem jaka tu będzie wysokość. U mnie wysokość mostu to ok. 7 studów i wysokość belki pod drzwiami 11. Chyba trzeba będzie to zmienić gdyż użyłem opon 68.7 r 34 i trochę komicznie to wygląda.
@mientos
W tym miejscu to ok. 5-6 studów, ale pod mostami prześwit jest mniejszy.
Jaki tu jest prześwit? tj. wysokość tej belki pod drzwiami bo z instrucji tego się nie powie a nie mam tych kół. Jeśli nie pamiętasz to chociarz prześwit land rovera
@Birch
Sorry, I’m busy enough with my own MOCs.
@Sariel
could you help me with a new lego design i’m working on? It’s a G6 Howitzer,
her is the link: http://sadfgroup.org/e-g5g6.html
if you have an idea, you could email me on: mini-birch@hotmail.com
Plz help, i really love your work.
@Birch
Sorry, this model was supposed to work well rather than look good.
@Sariel
no no, but when i do it it looks bad :(, i would just hear if you had an good idea 😀
@Birch
Oh please, is it really so hard to put a battery box in there?
can you maybe make a instruction to me with the nonrecharable battery?
same literówki .. bardzo go przypomina i dalej ..zamyśliłem się..
pomyłka chodzi po prostu o land rowera 2 a nie discovery 2 .Nie licząc przodu bardzo disovery 2 zamyśliłm się czy go nie zrobic i literówka. Przepraszam