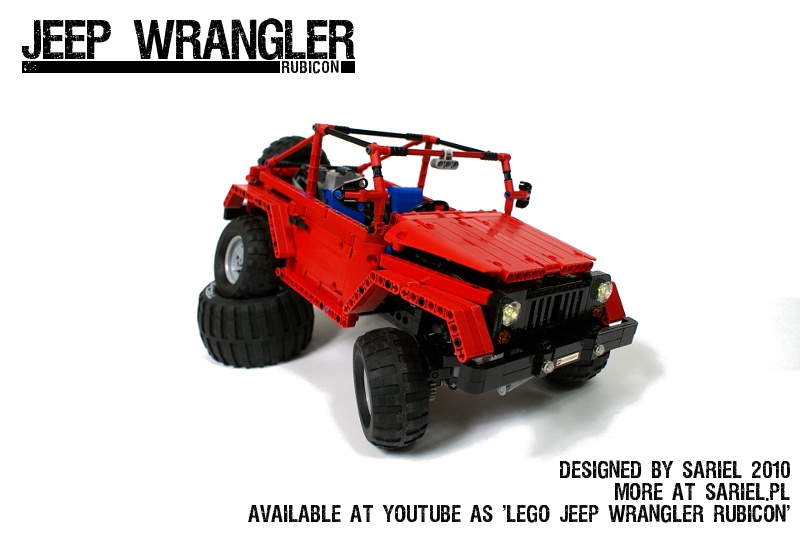
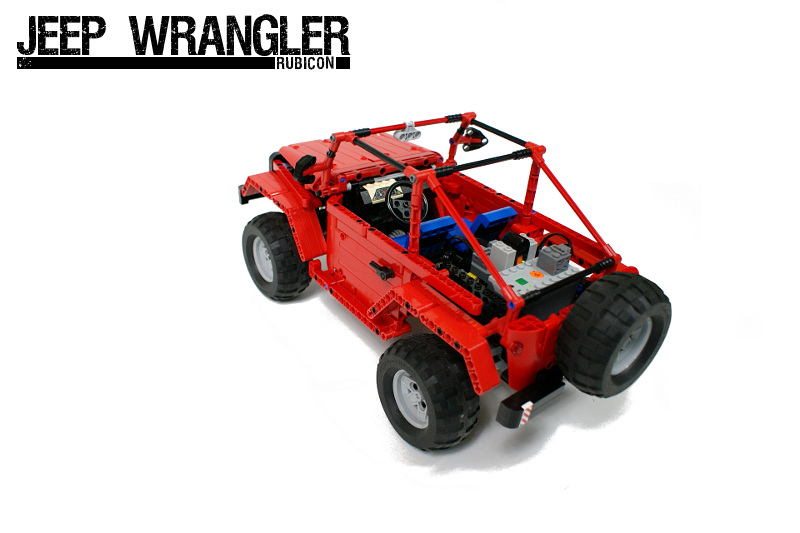
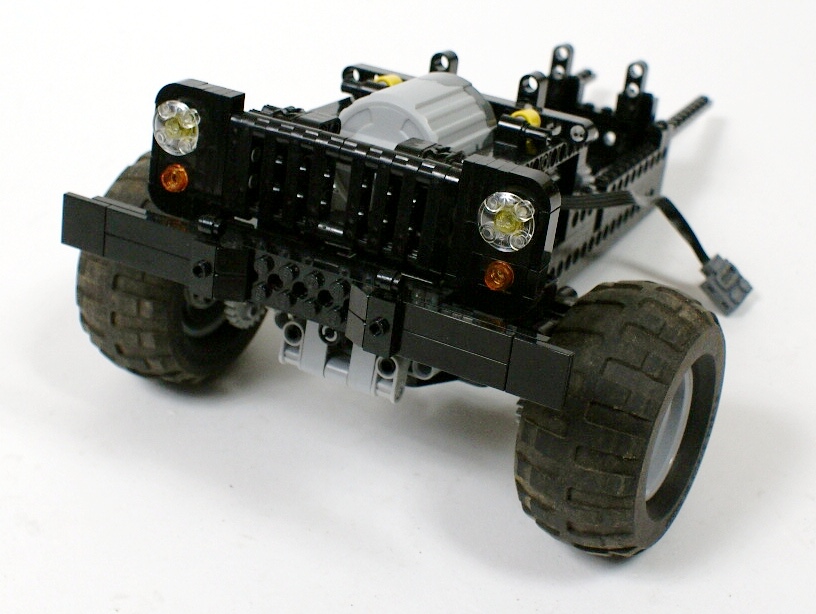
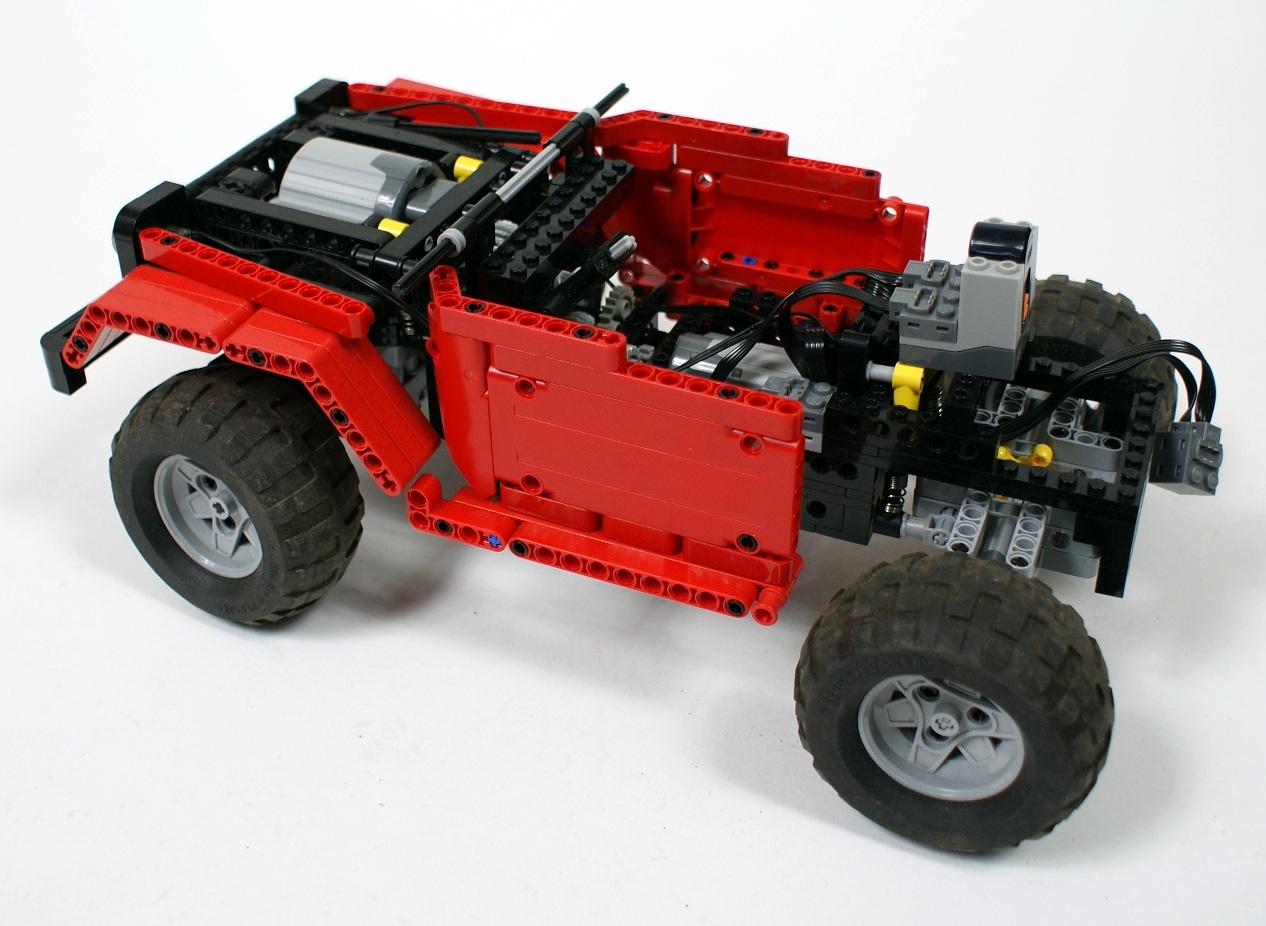
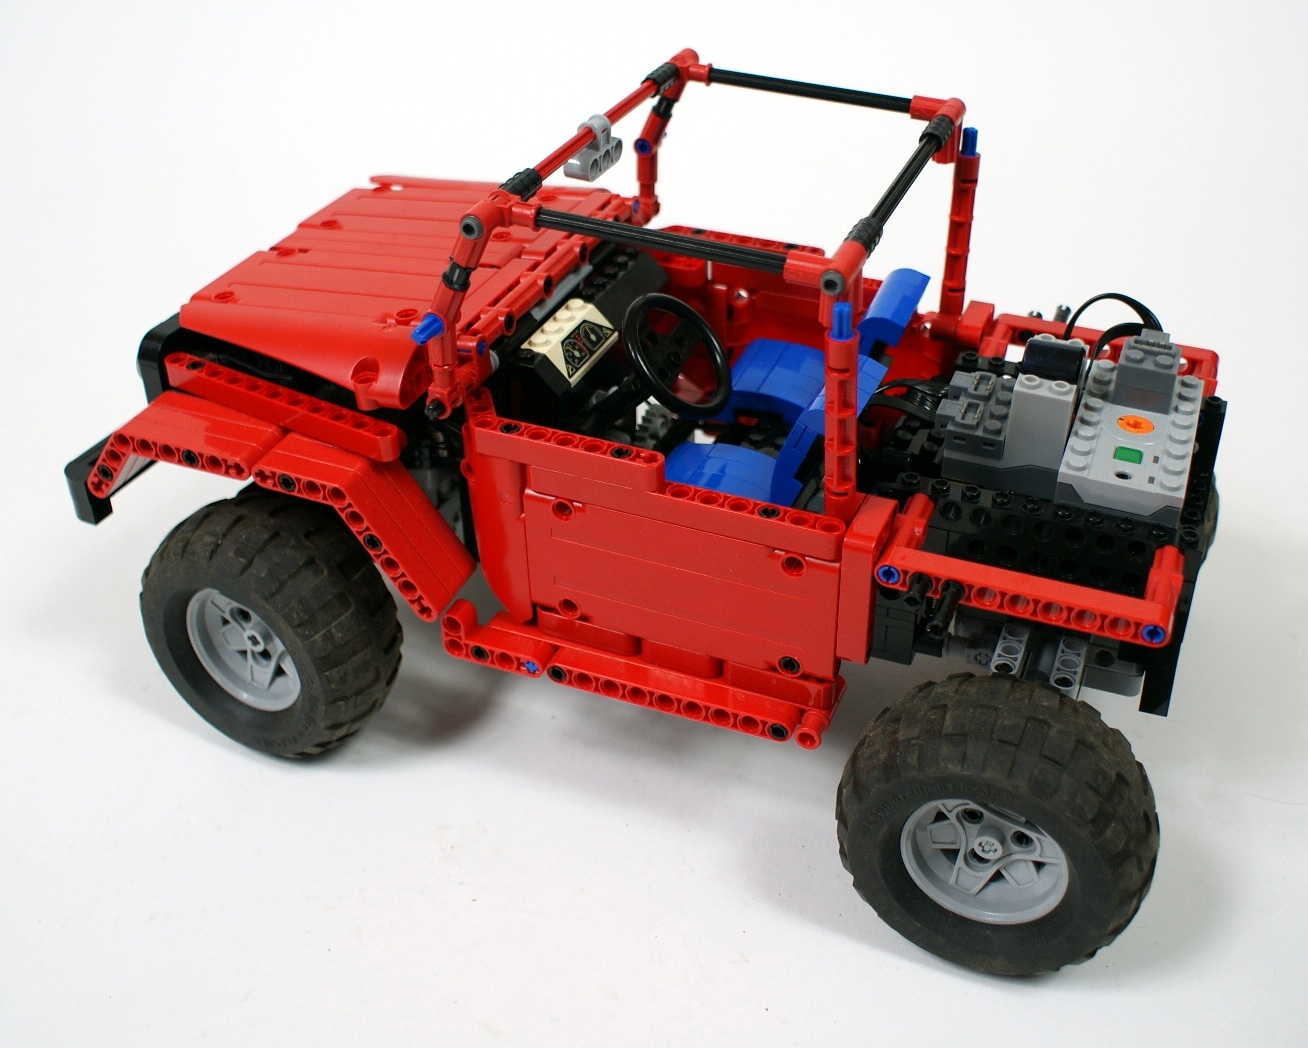
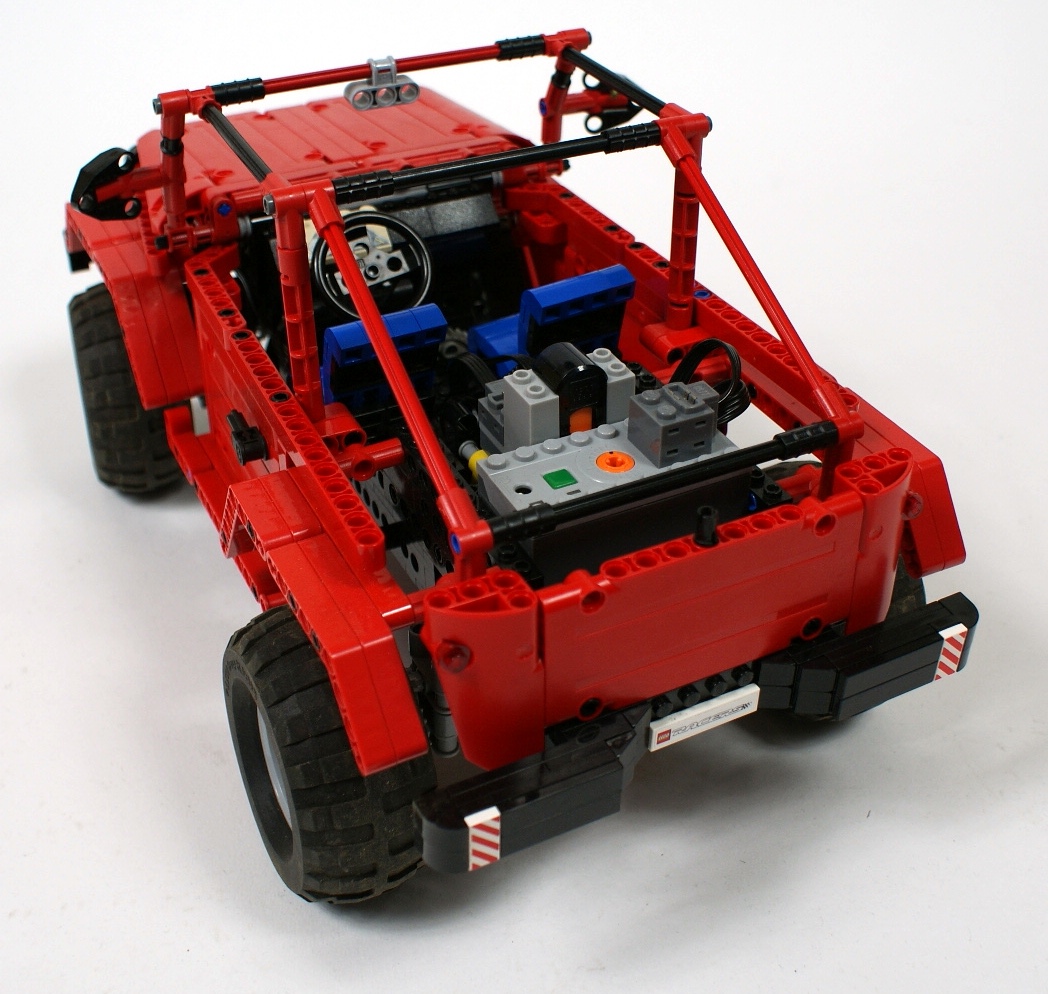
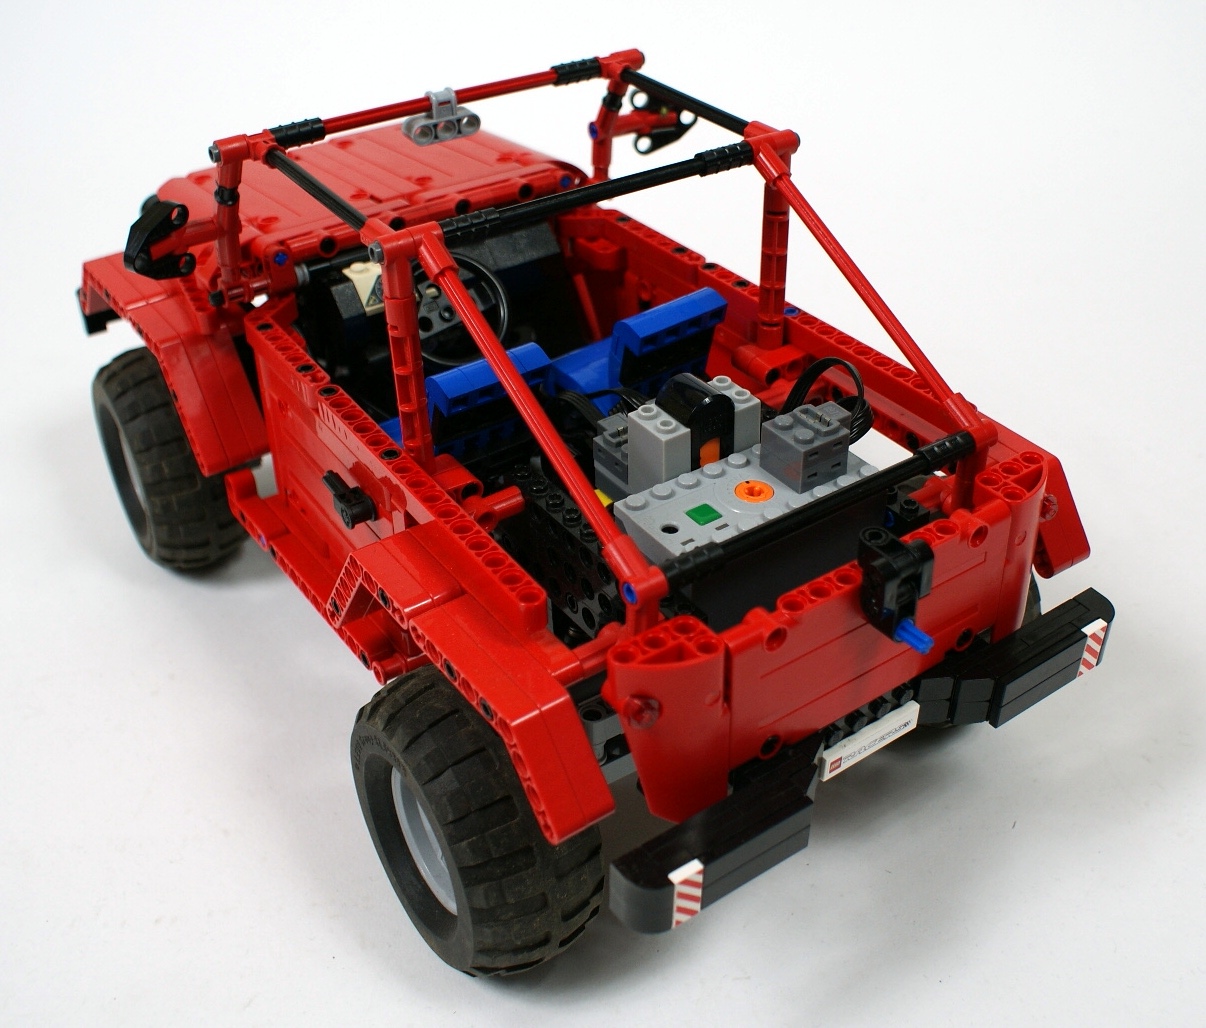
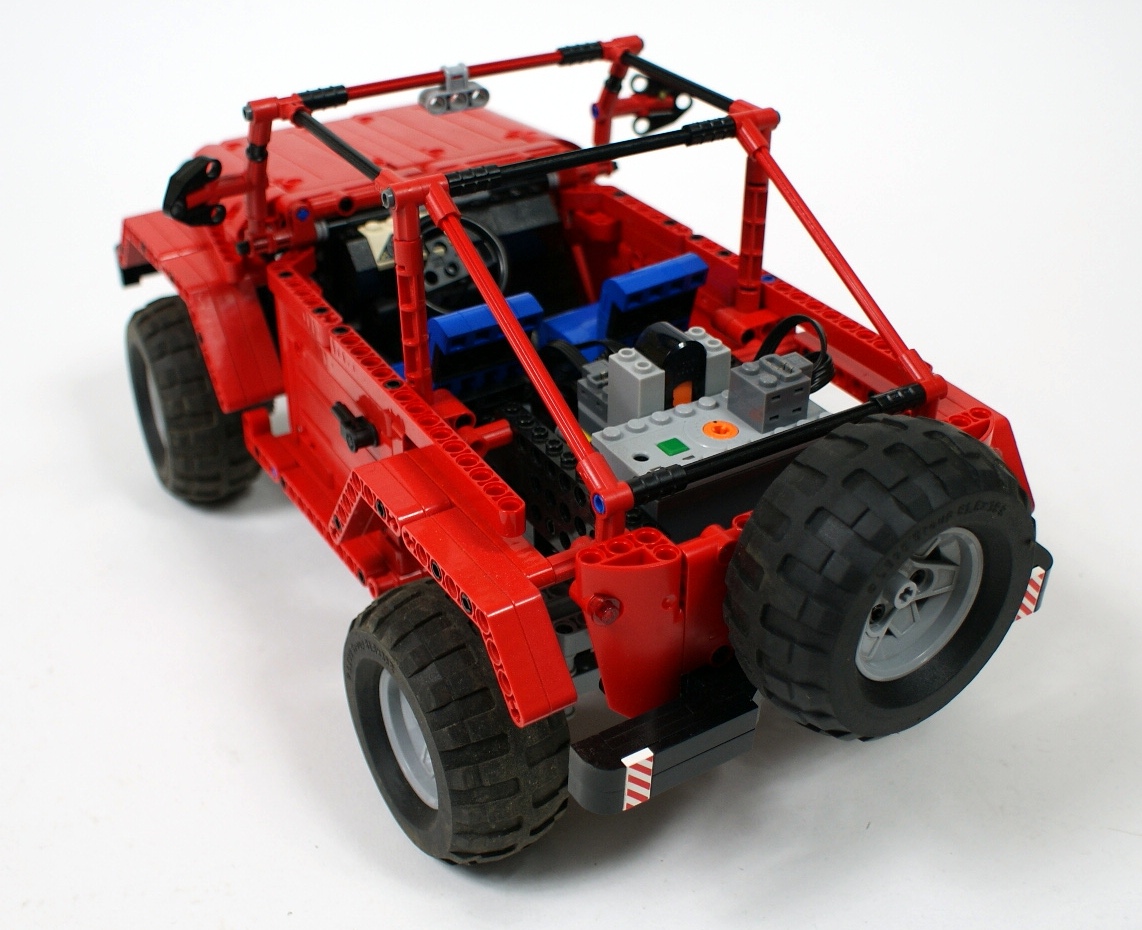
Jeep Wrangler Rubicon

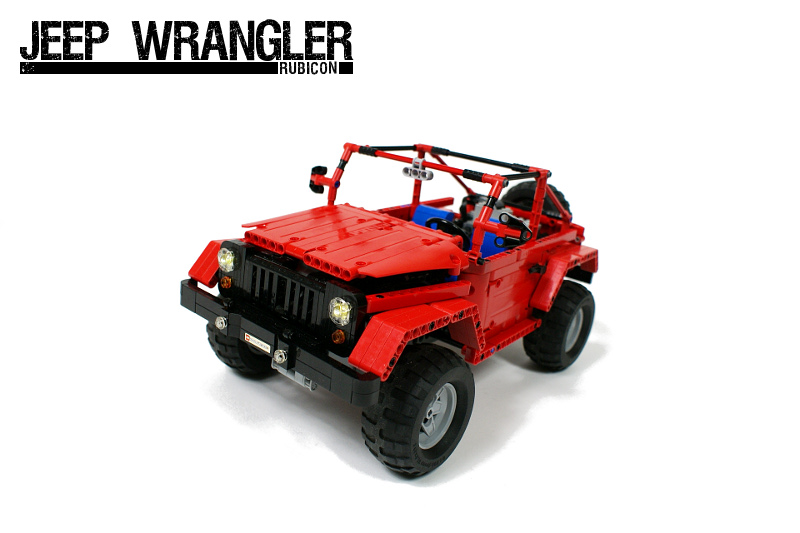
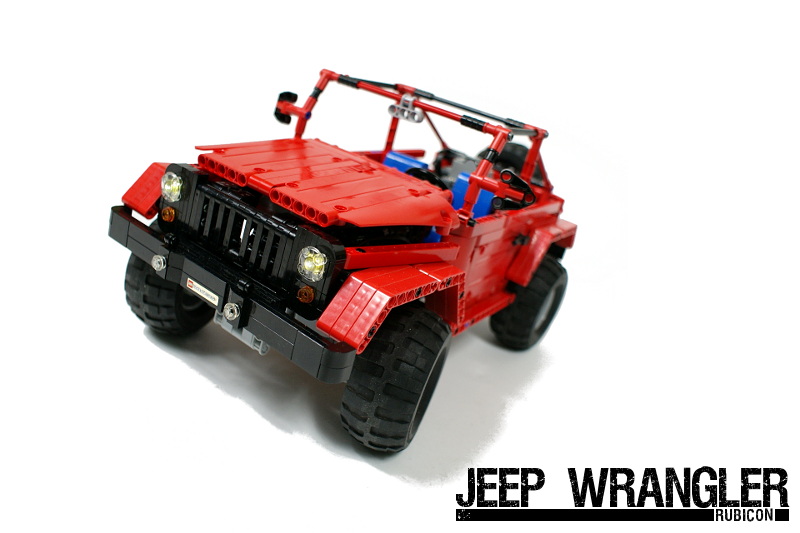
My second 2010 Truck Trial vehicle, and the first vehicle designed for this competition other than a truck. Features 4×4 drive, pendular suspension, lights, modular body design and an openable bonnet. Update: a complete set of instructions added.
Datasheet:
Completion date: 18/04/2010
Power: electric (Power Functions)
Dimensions: length 47 studs / width 24 studs / height 23 studs
Weight: 1.224 kg
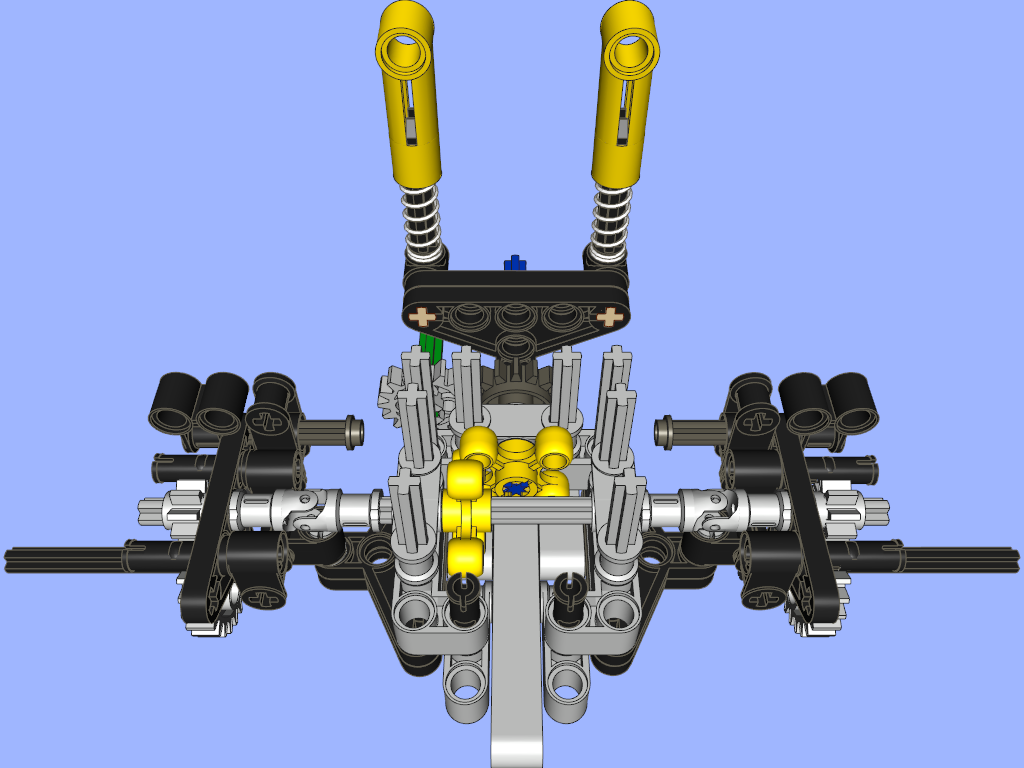
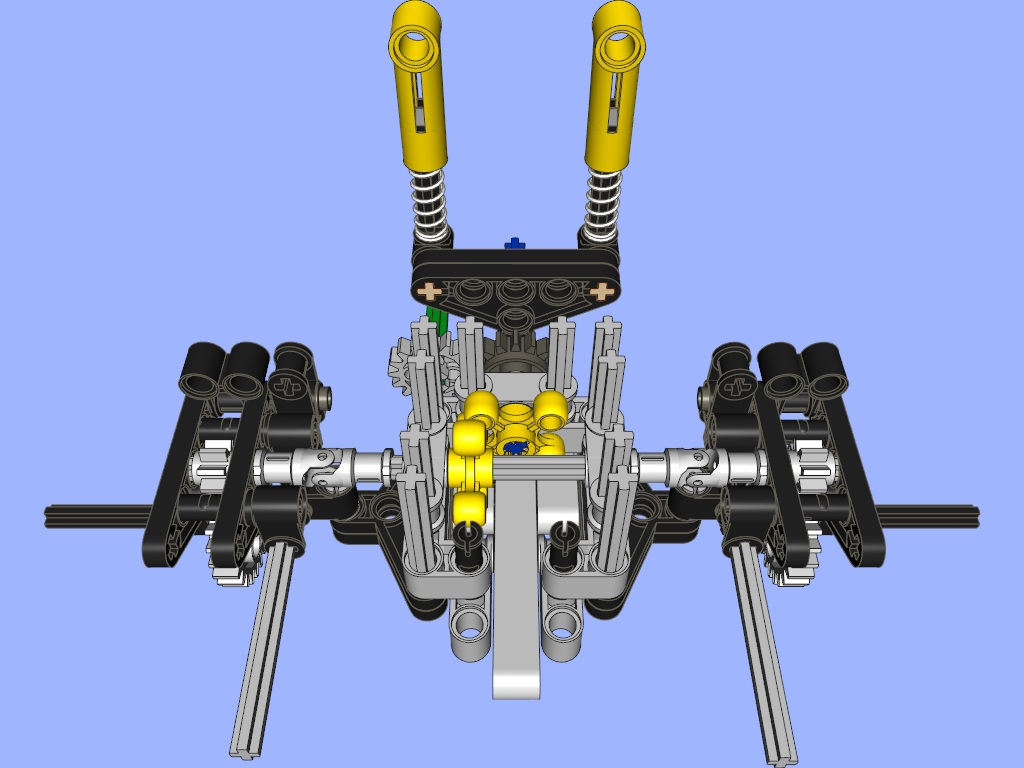
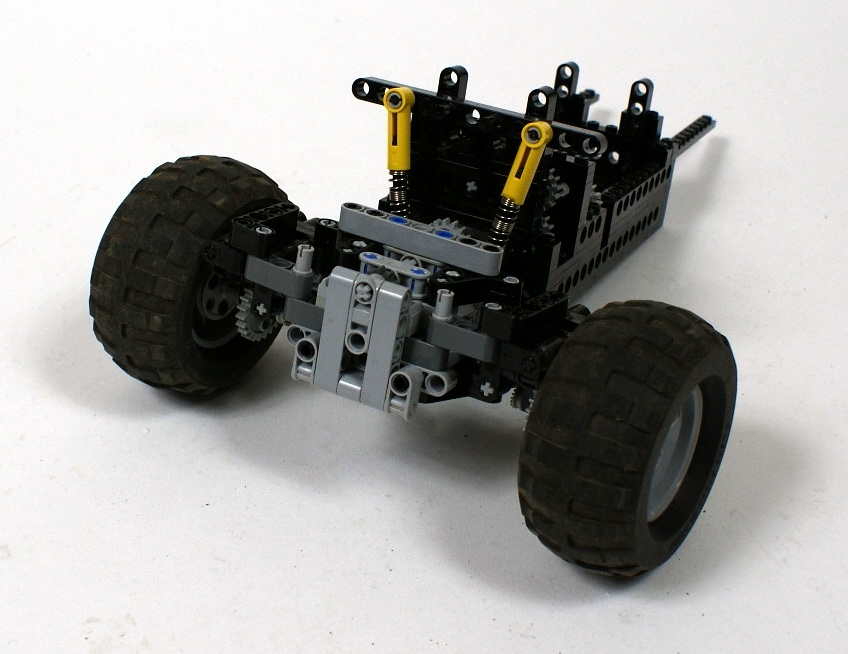
Suspension: pendular, stabilized with 2 shock absorbers per axle
Motors: 1 x PF Medium, 1 x PF XL
After the disappointing failure of my Tatra T815 truck, I was left with less than two weeks time until the next race. Re-using Tatra was out of the question, so my only option was to build some simple and small 4×4 vehicle. Since our current rules allow this type of vehicle into competition, I decided to model the iconic Jeep Wrangler in the acclaimed Rubicon version. It was built in roughly 4 days.
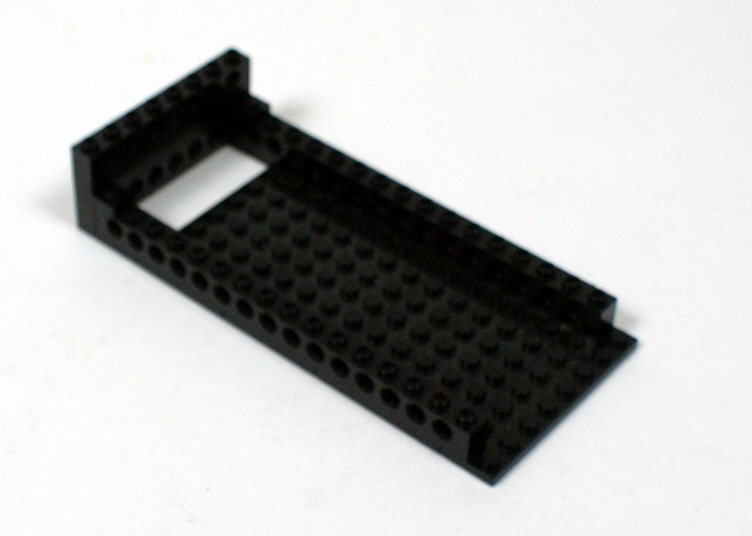
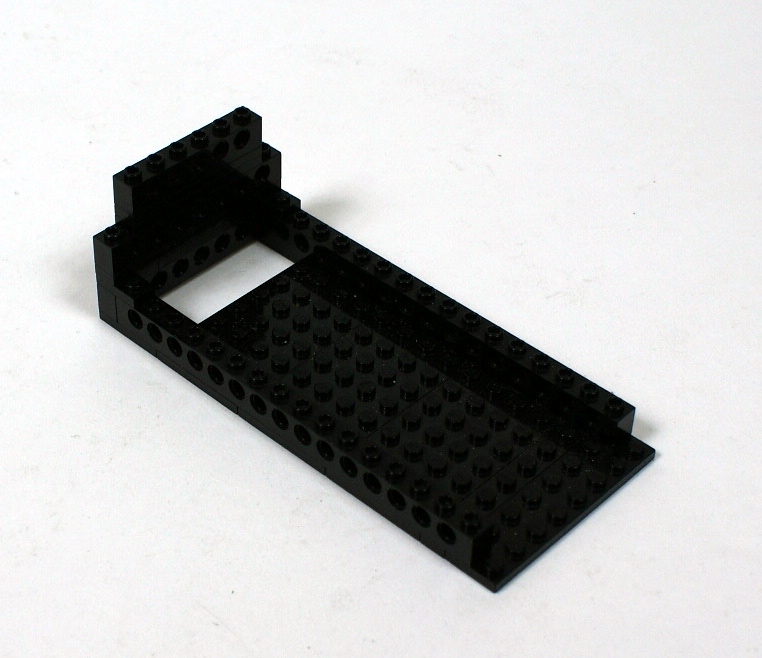
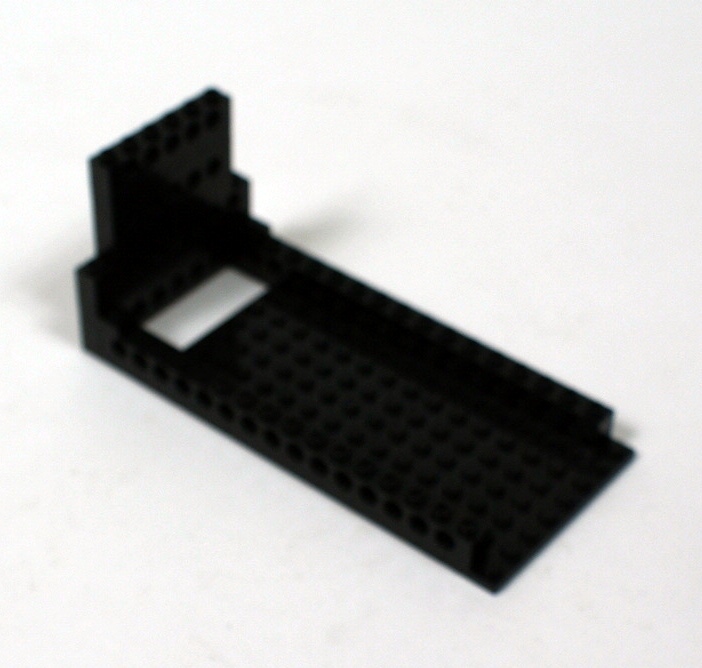
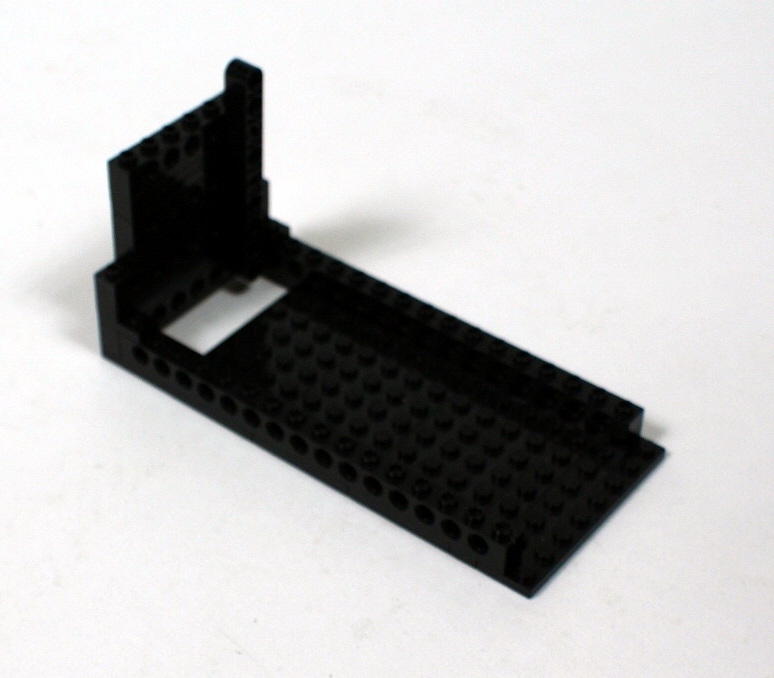
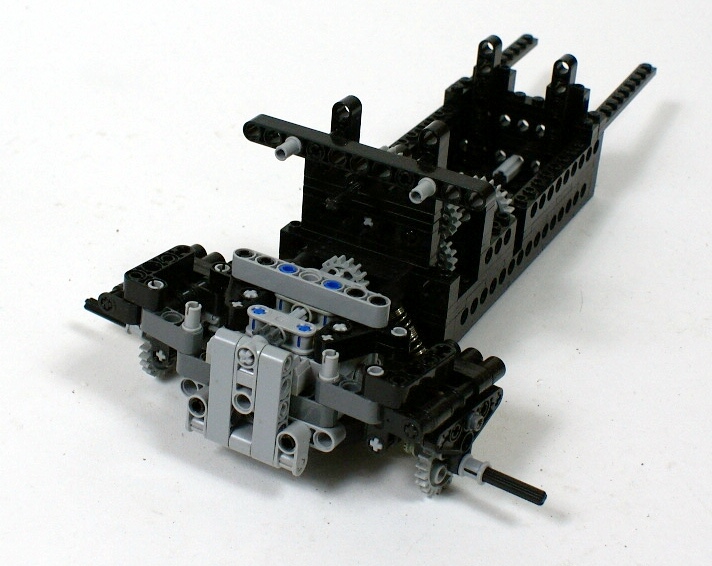
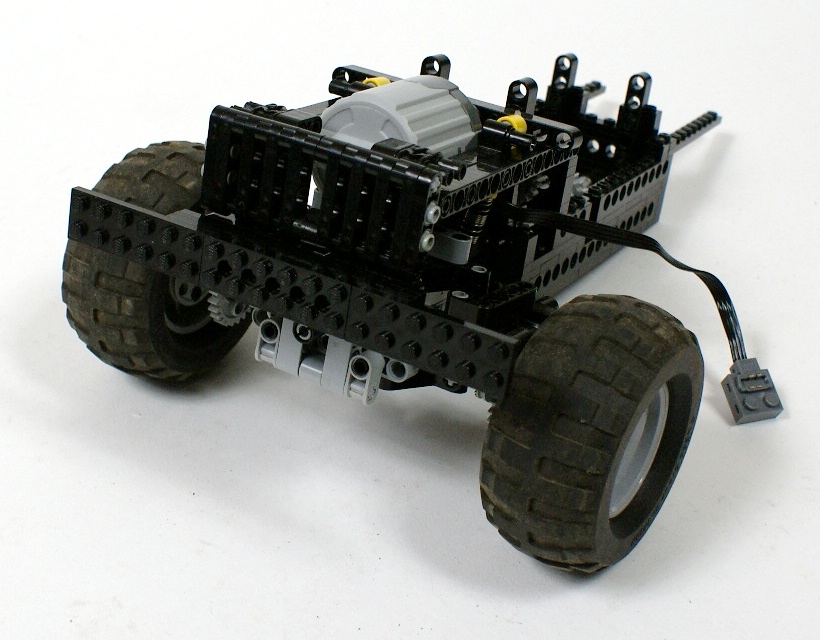
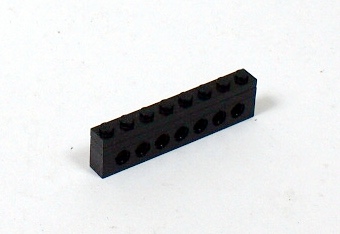
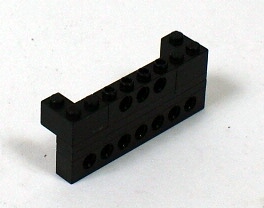
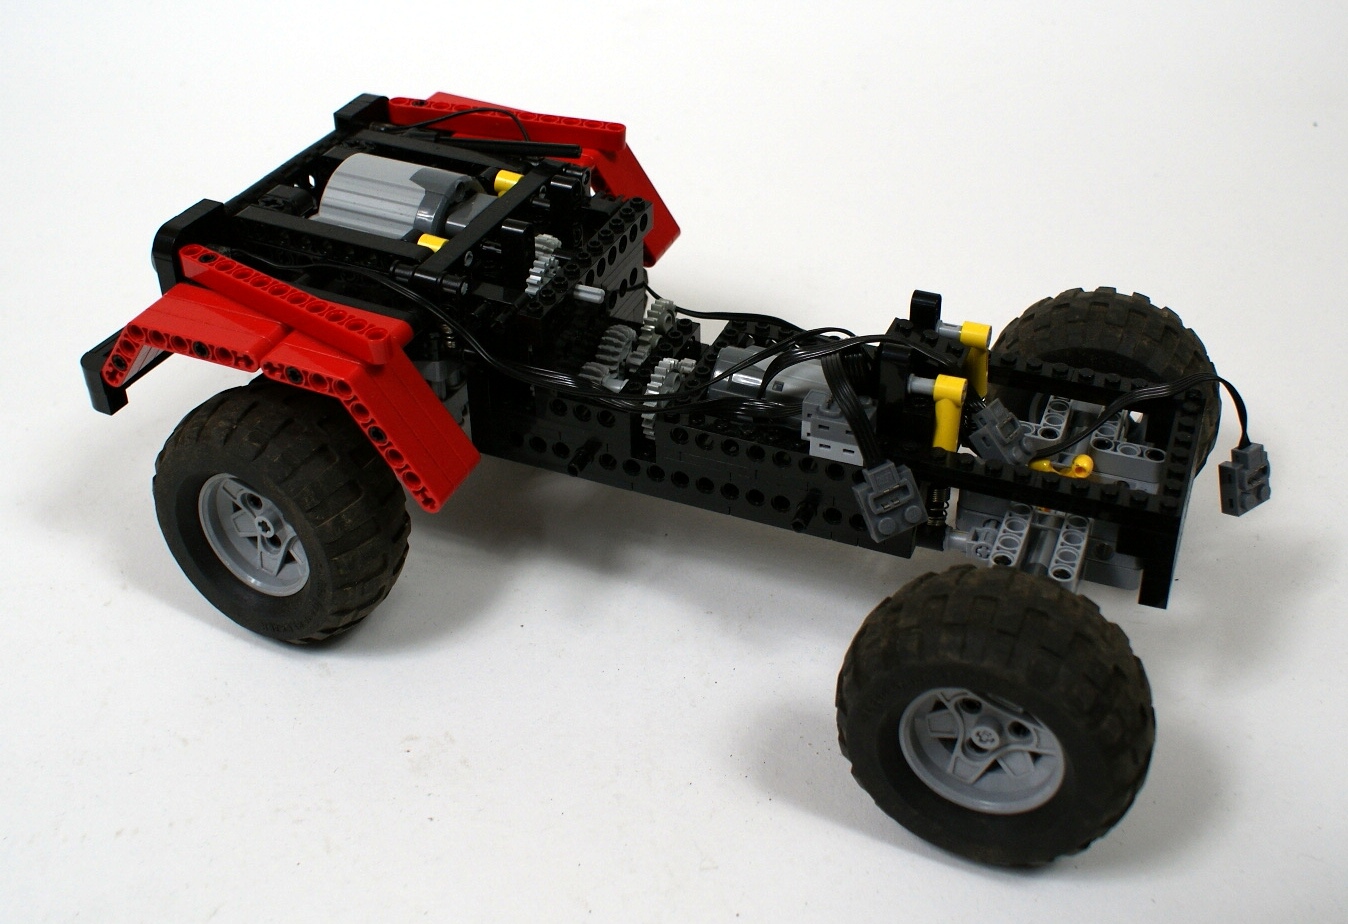
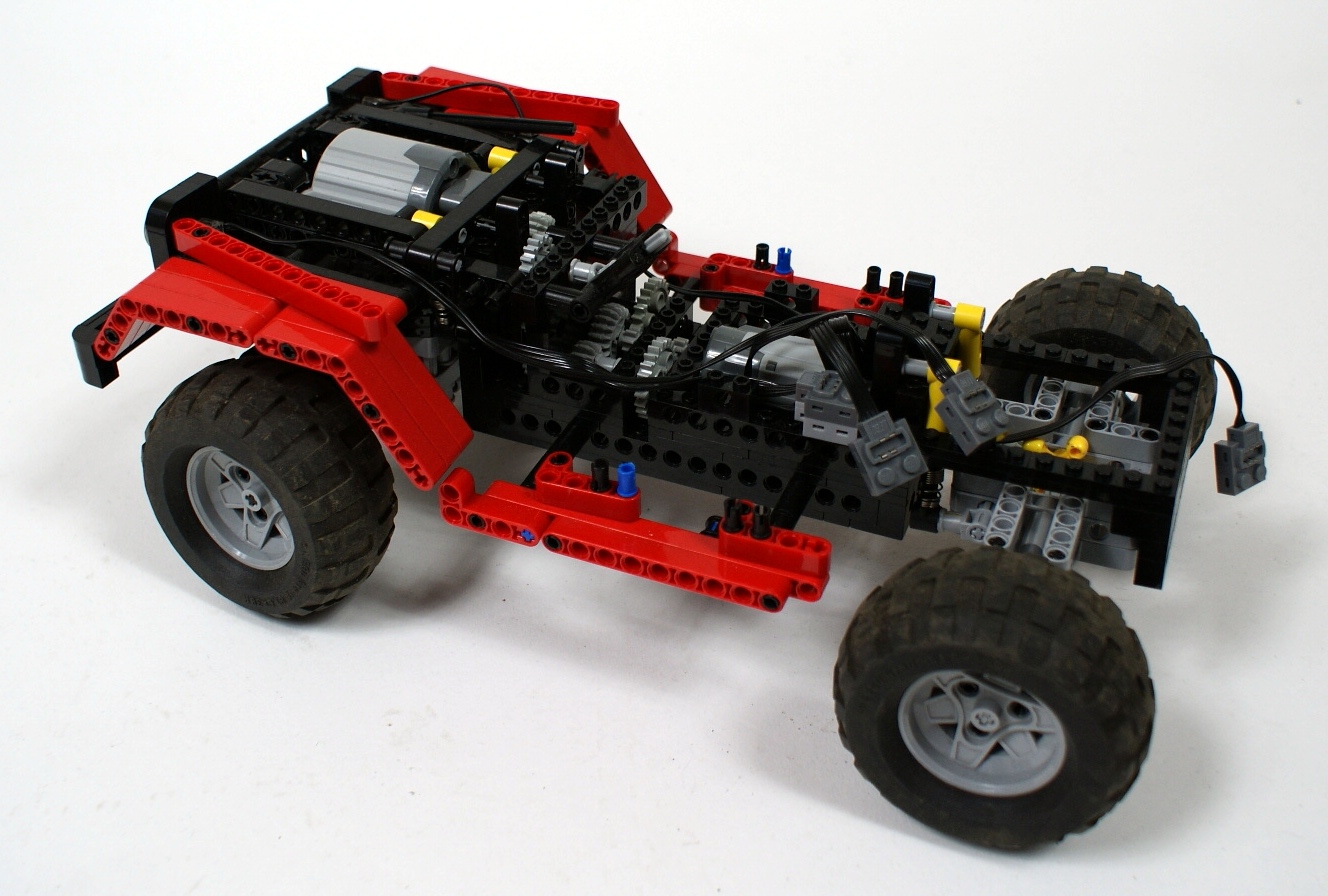
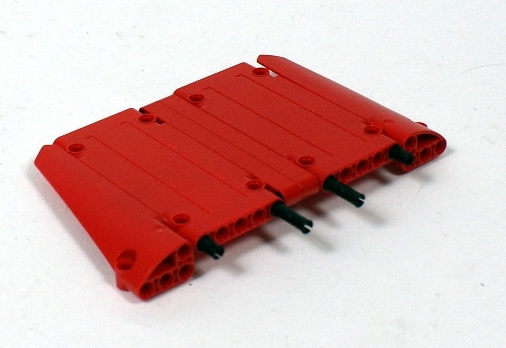
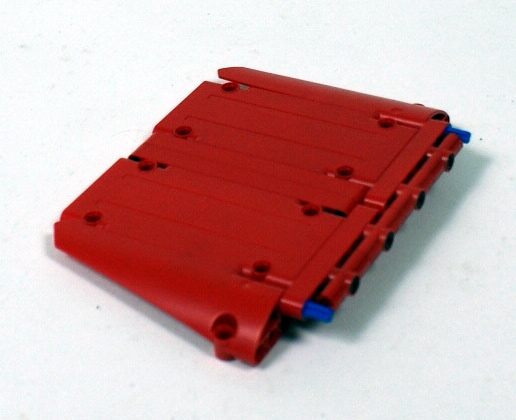
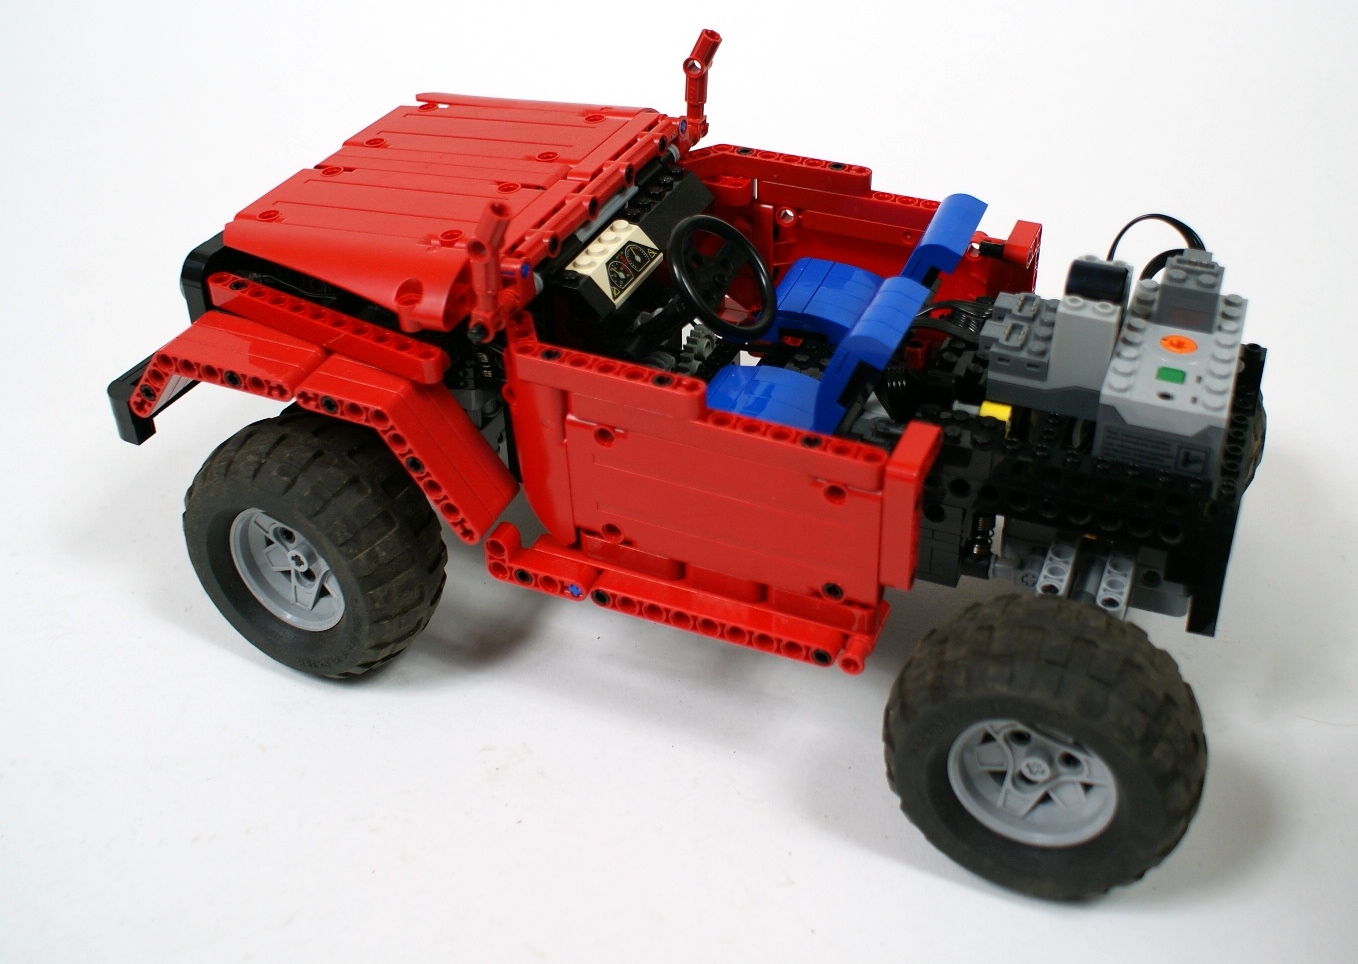
The basic rule of this construction was to keep everything as simple as possible and to reduce the weight to minimum. This is why the body was built with the new Technic panels, which provide the best combination of stiffness and lightness. Both front and rear axle are built entirely with liftarms, but the frame that connects them is built with Technic bricks. The reason to use bricks was that I wanted to build a roofless version of the Jeep in order to obtain low center of gravity, and since the sides of the cabin are made of single panels, the whole model had to be kept together by the cabin’s floor. Therefore there are bricks in the floor, that provide excellent stiffness and robustness while keeping the floor thin.
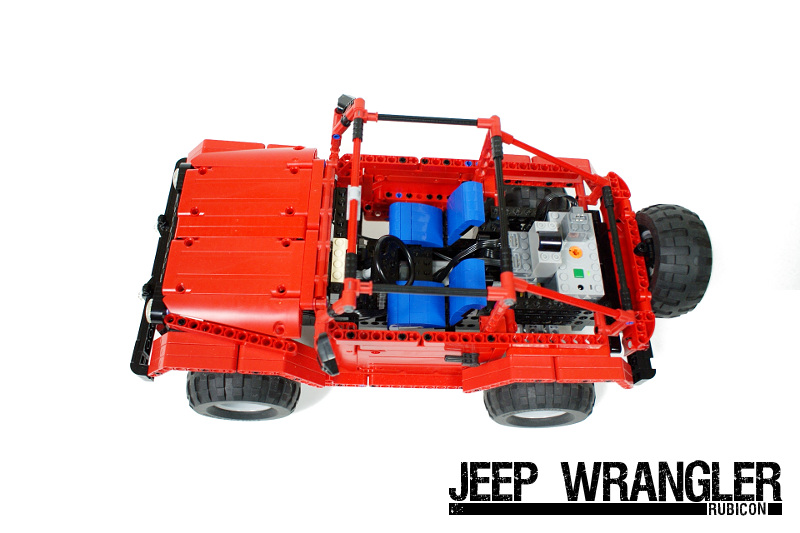
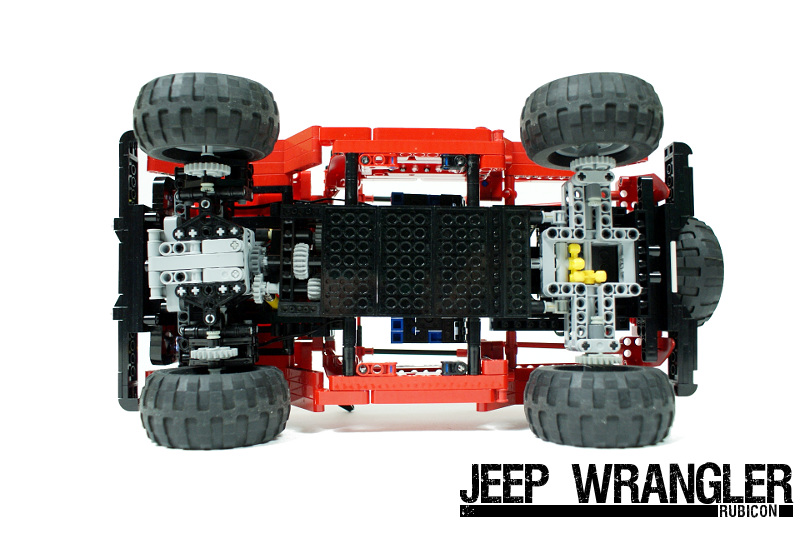
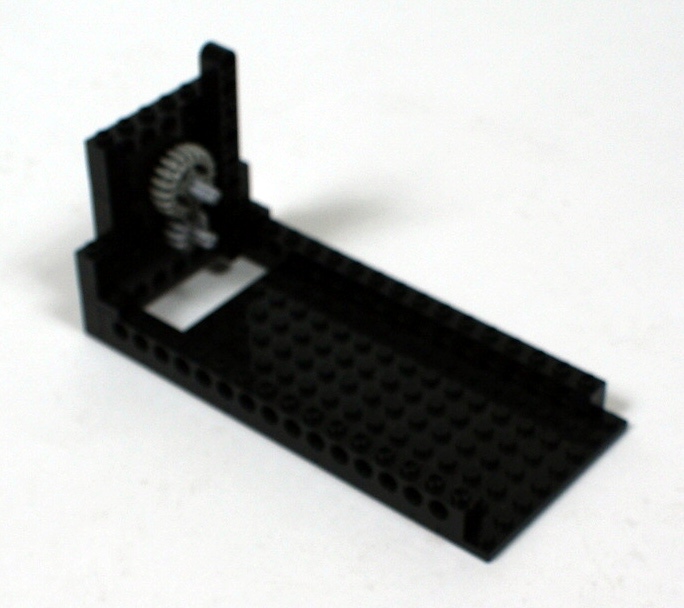
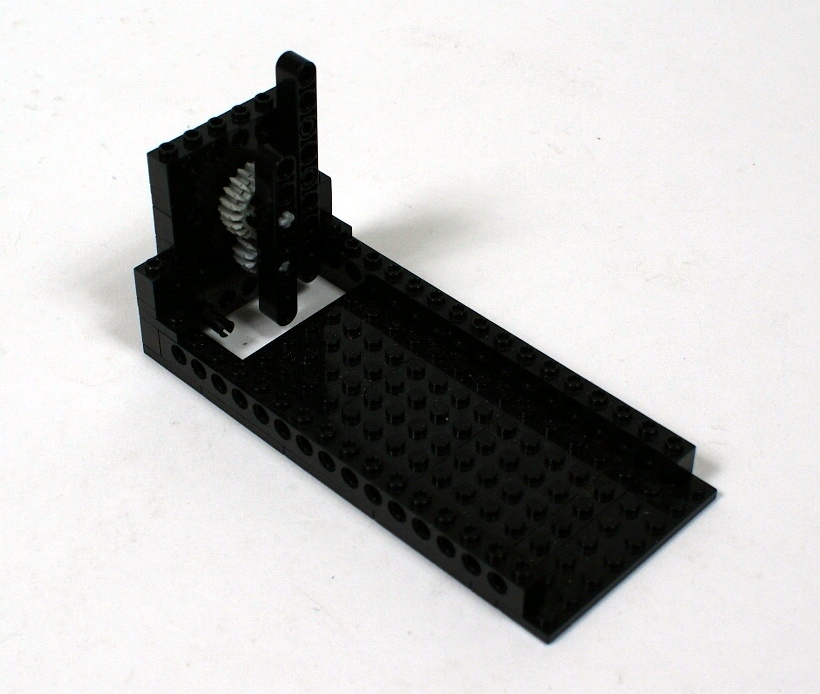
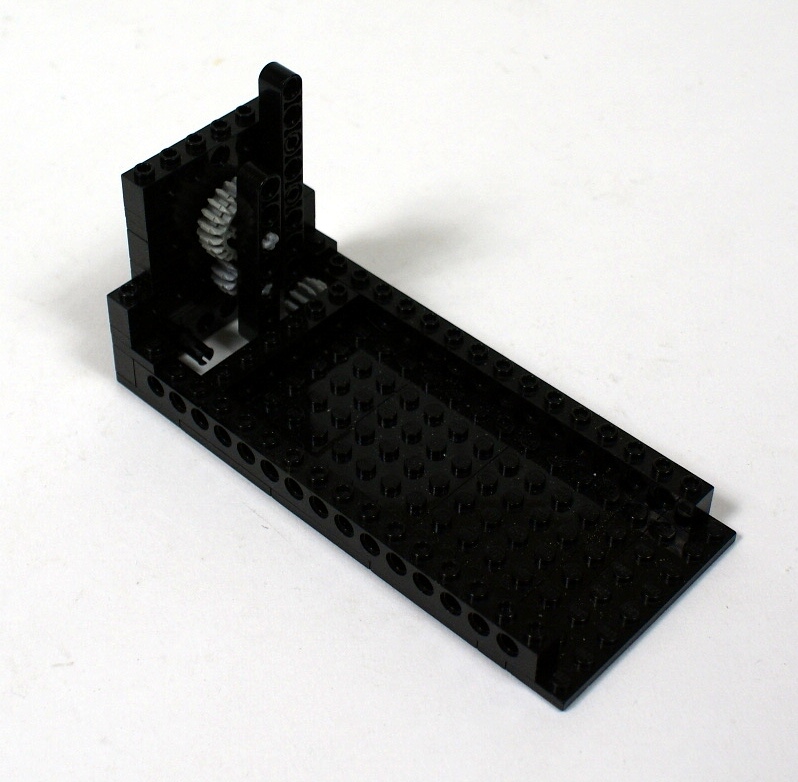
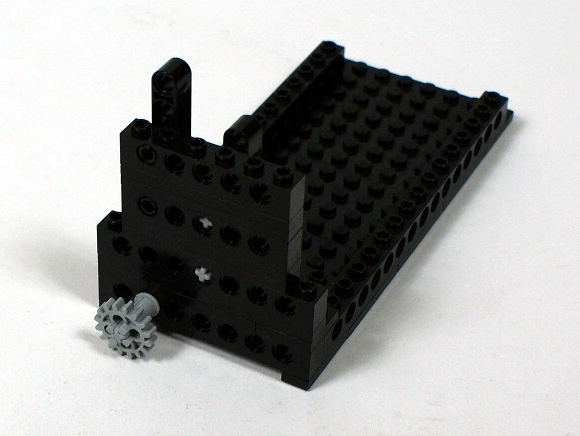
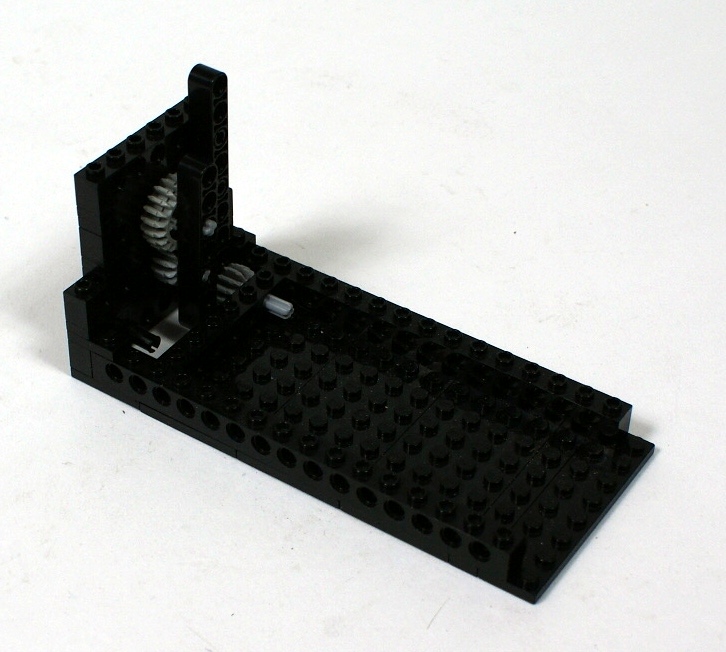
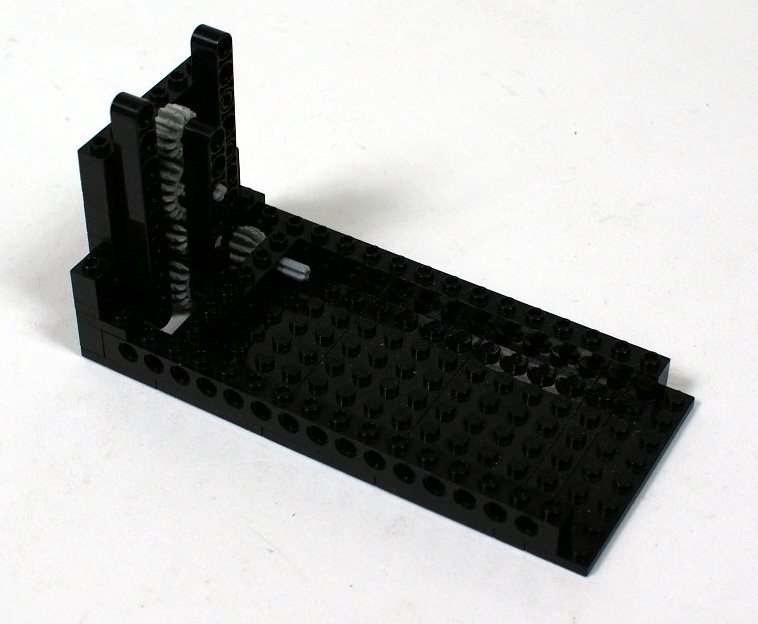
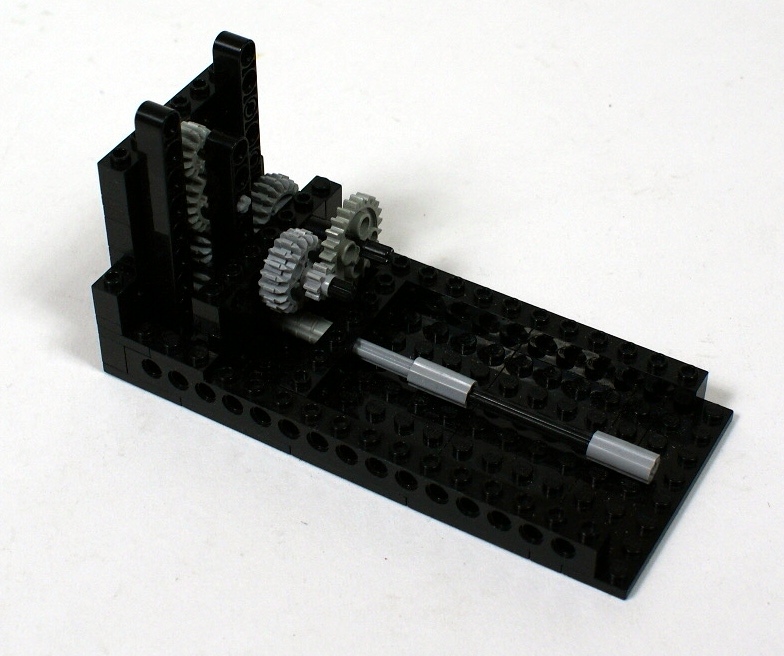
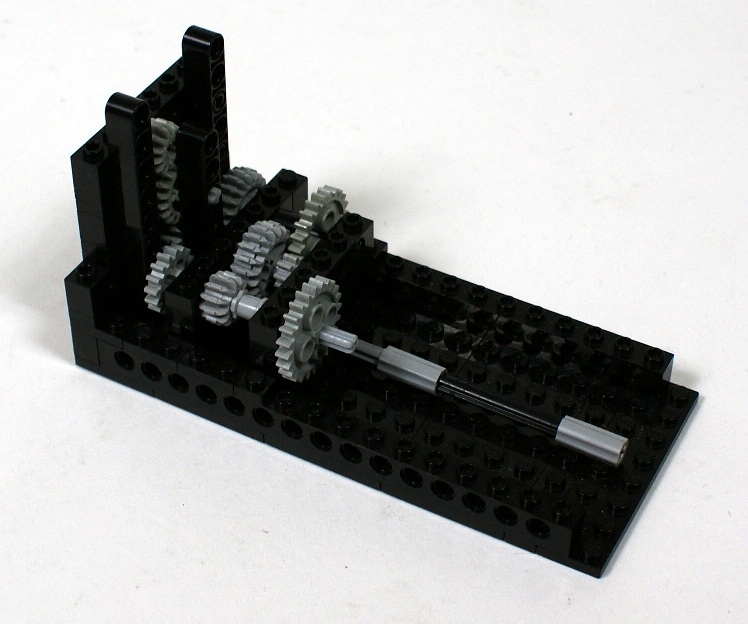
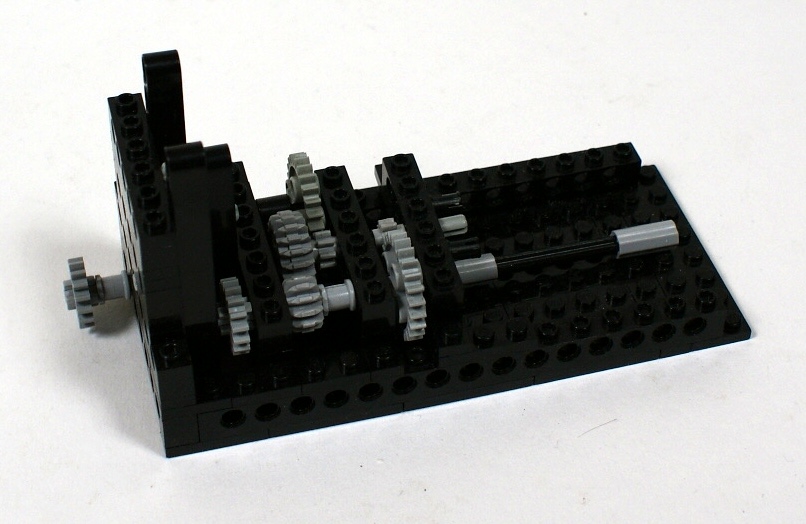
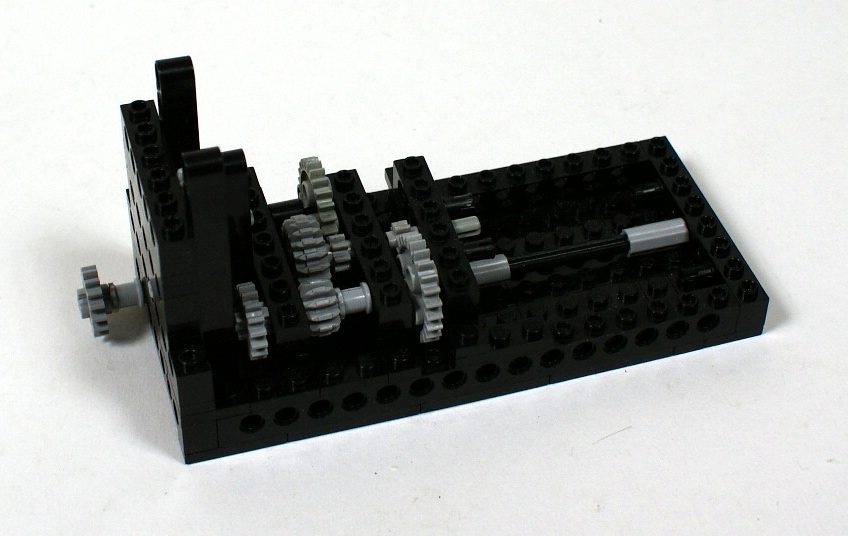
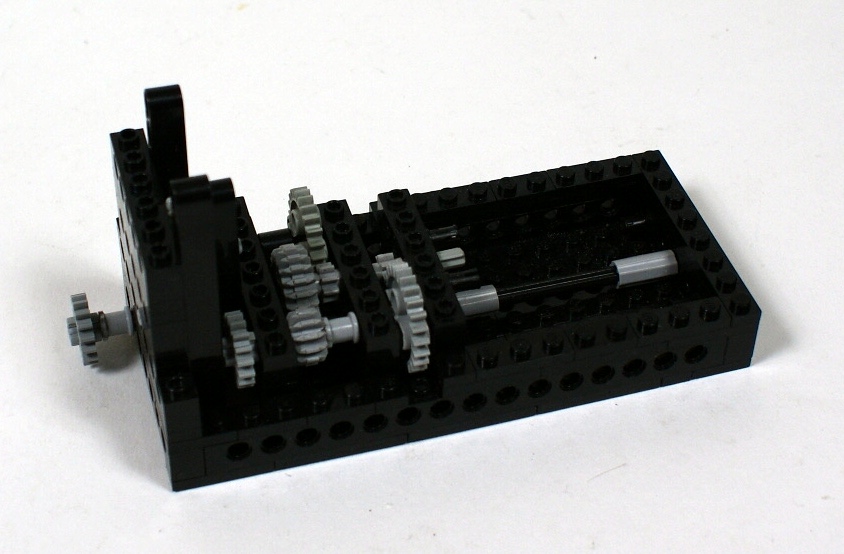
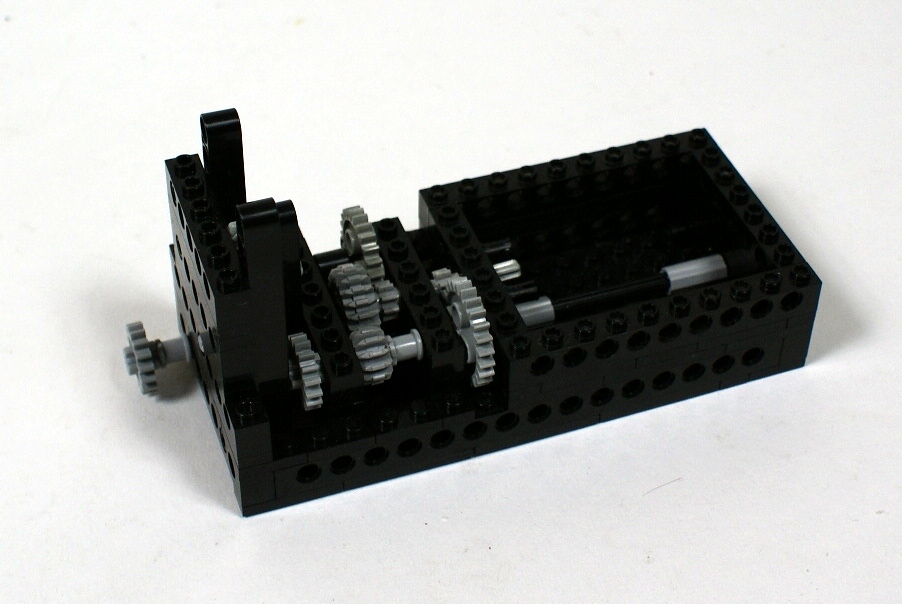
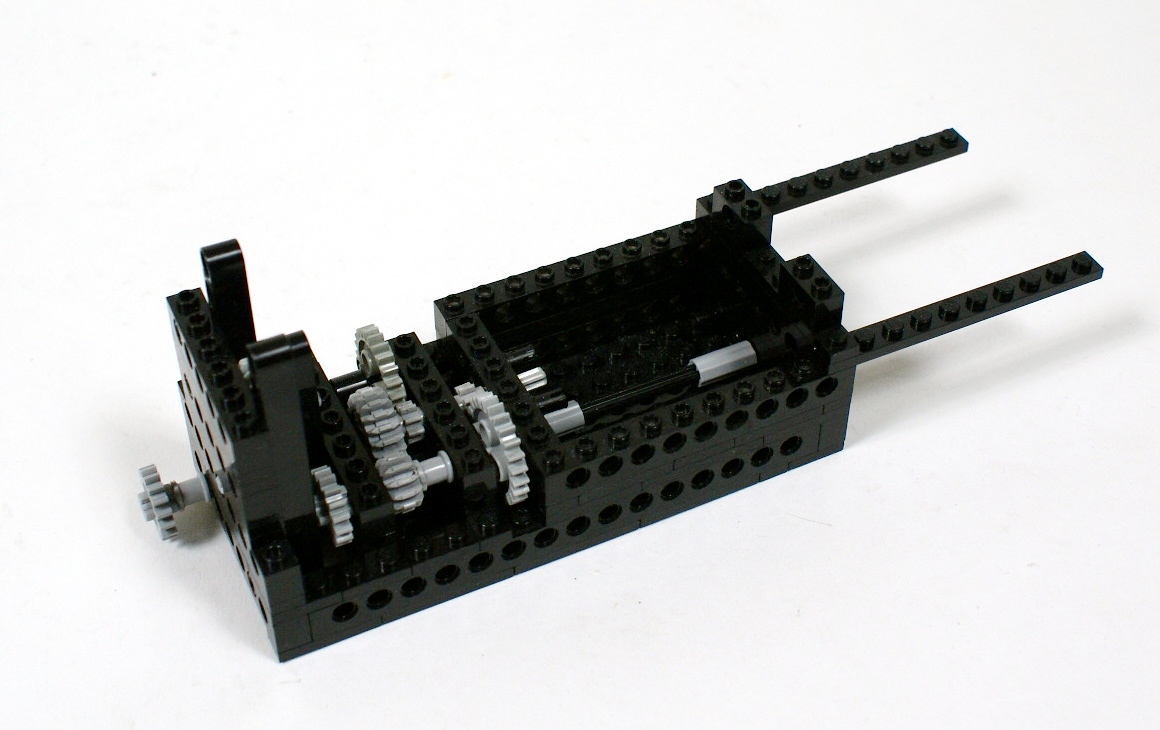
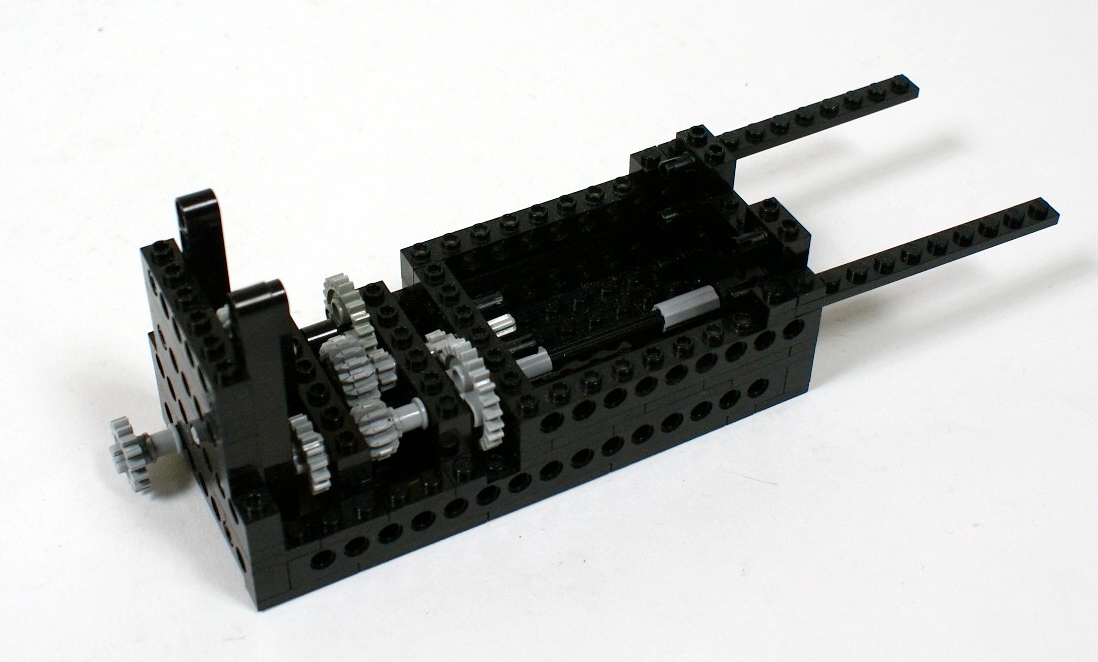
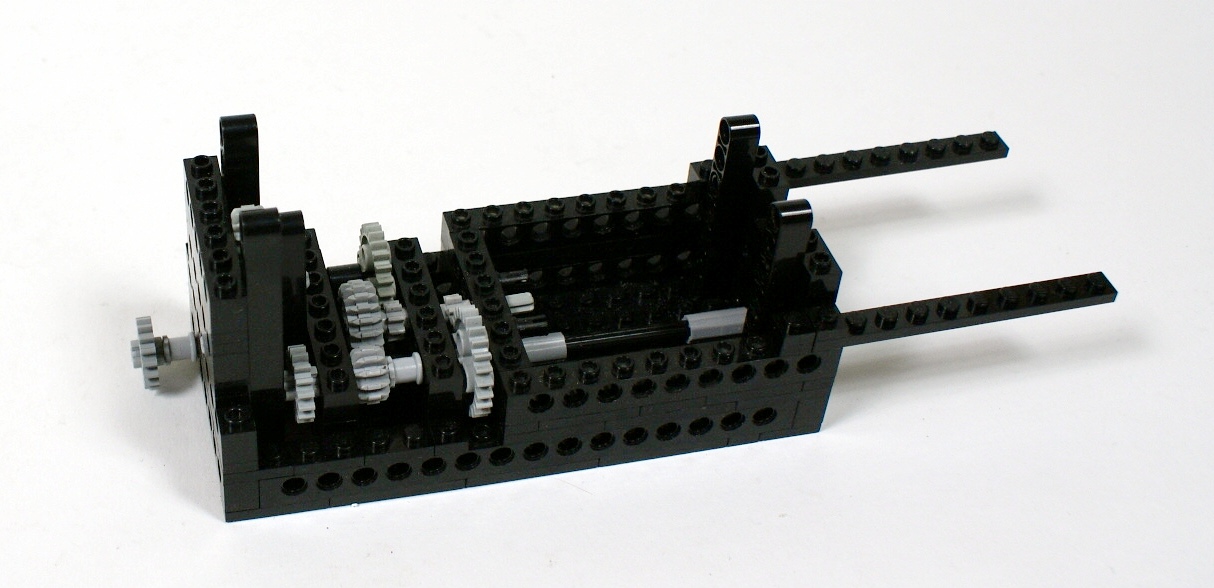
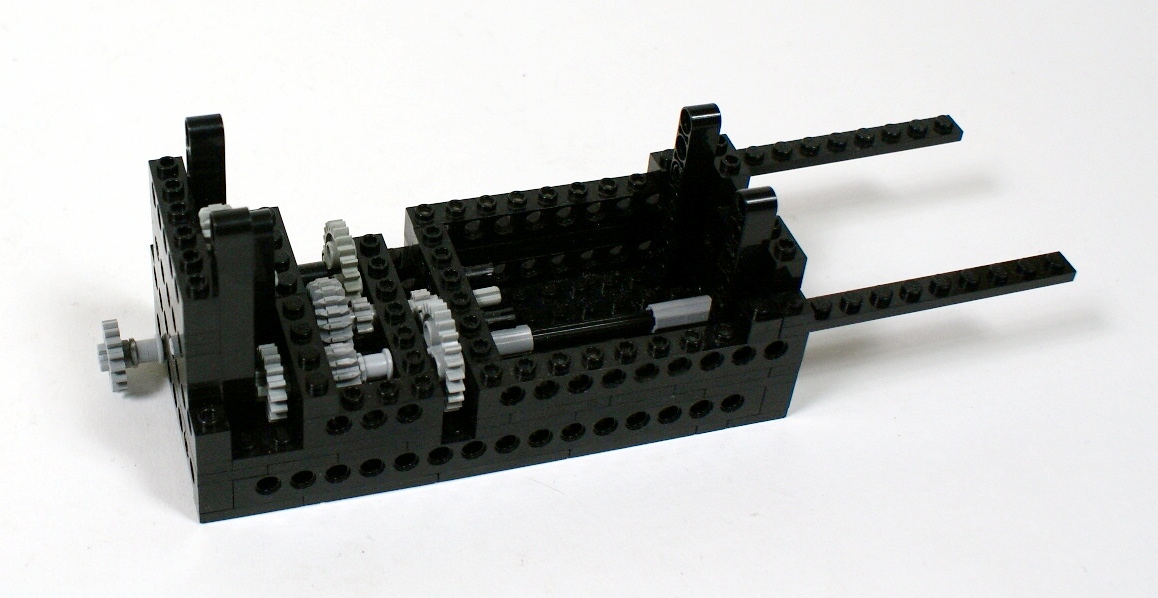
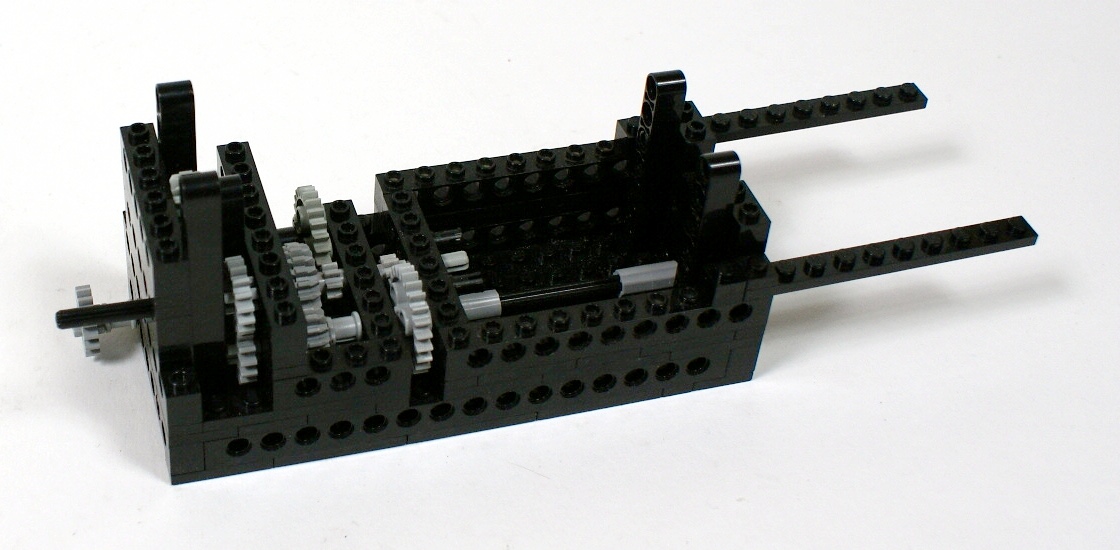
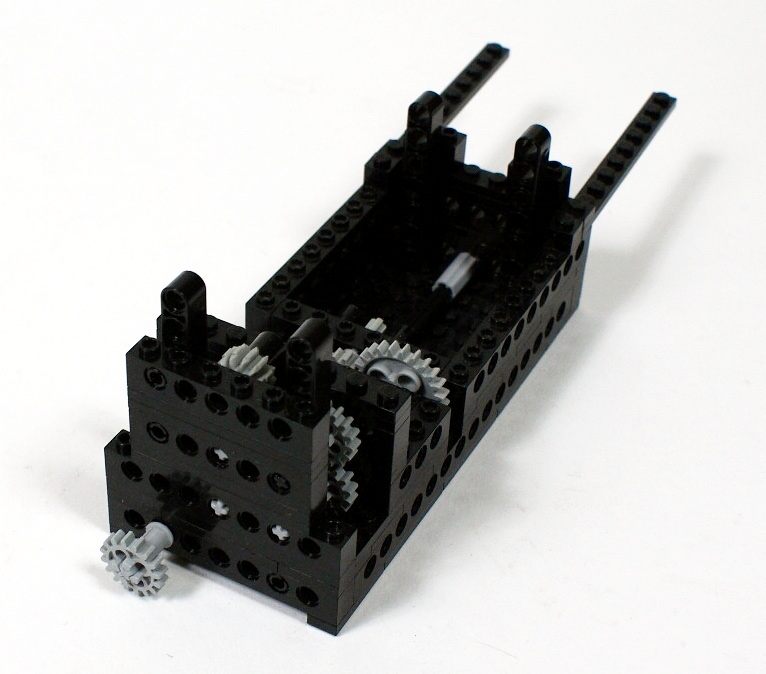
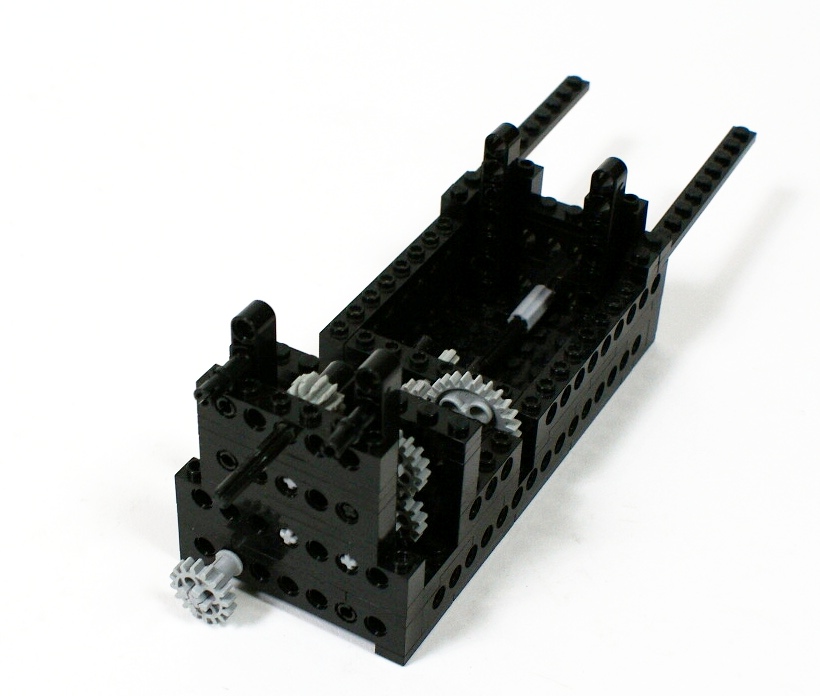
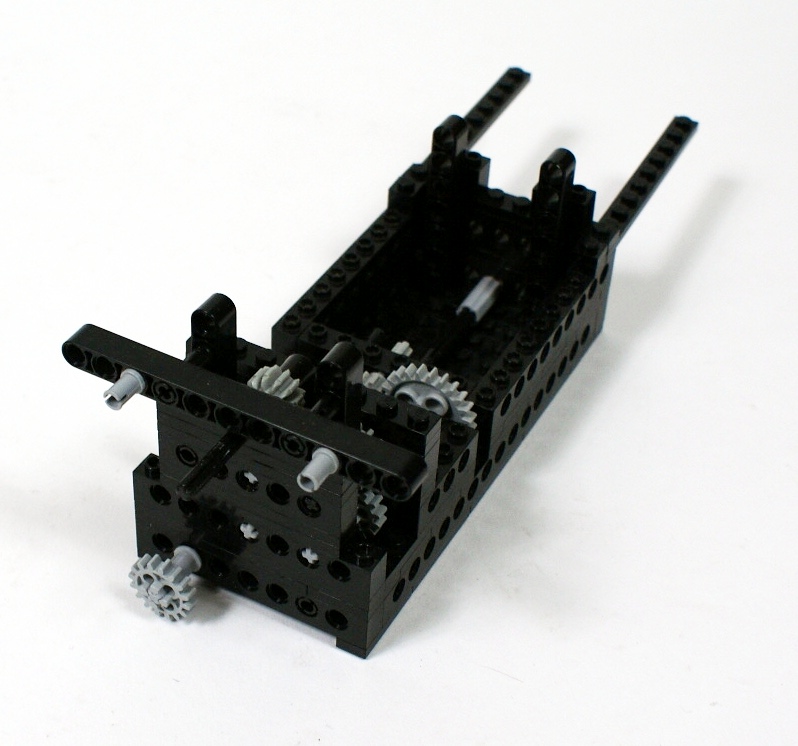
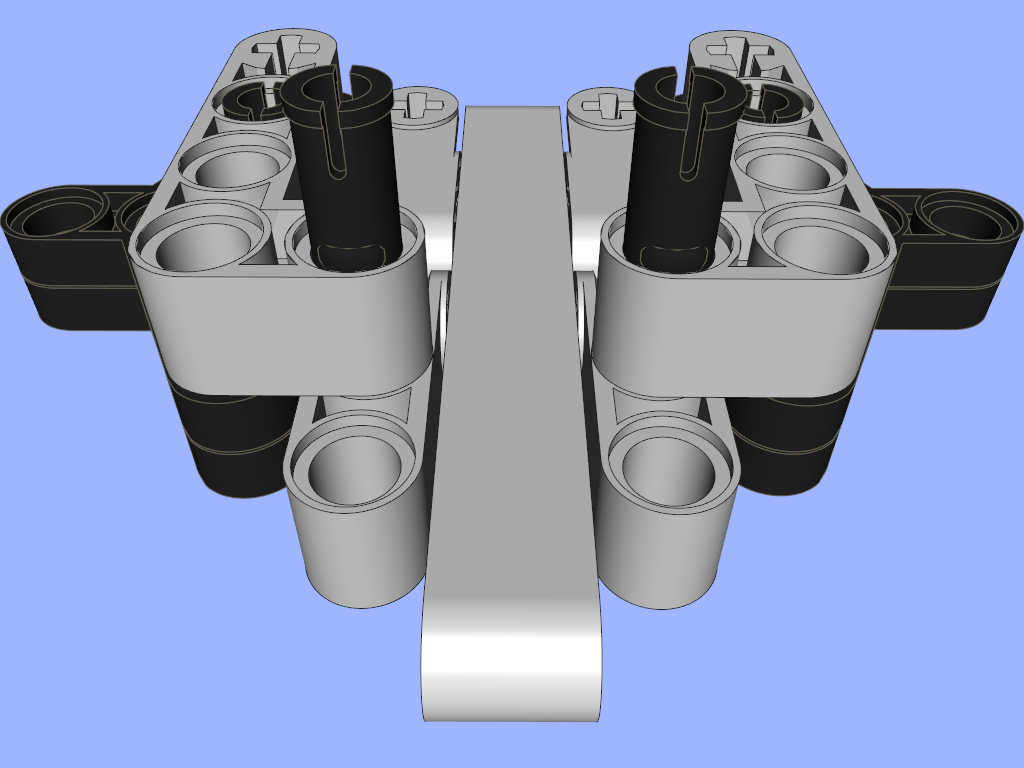
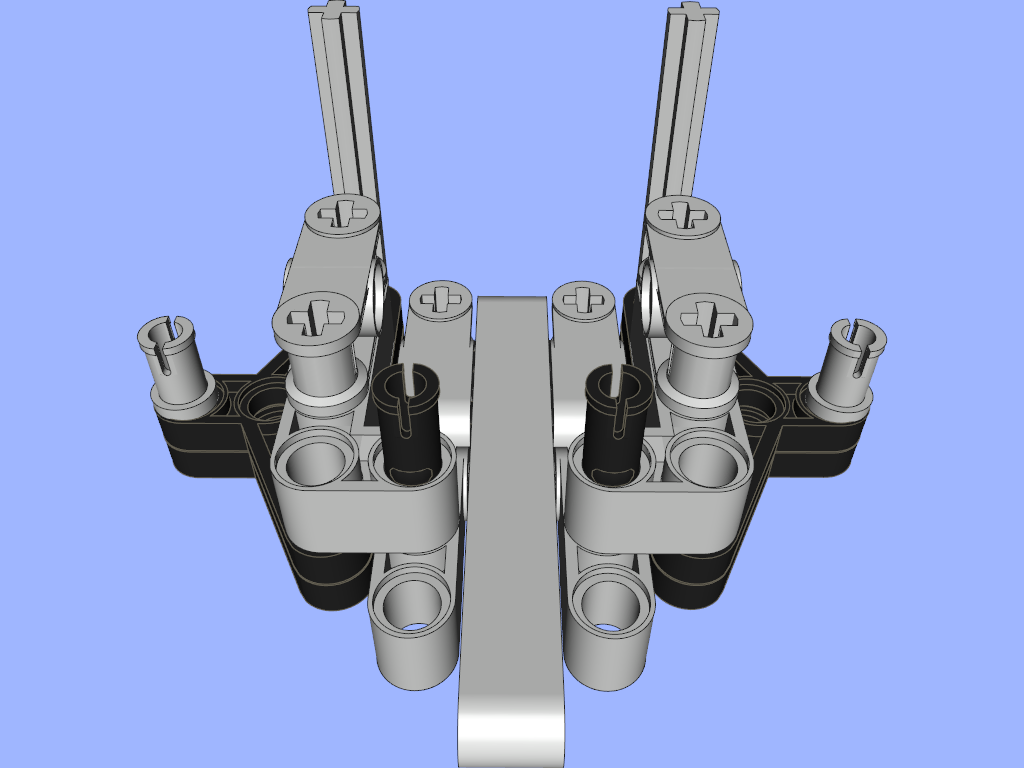
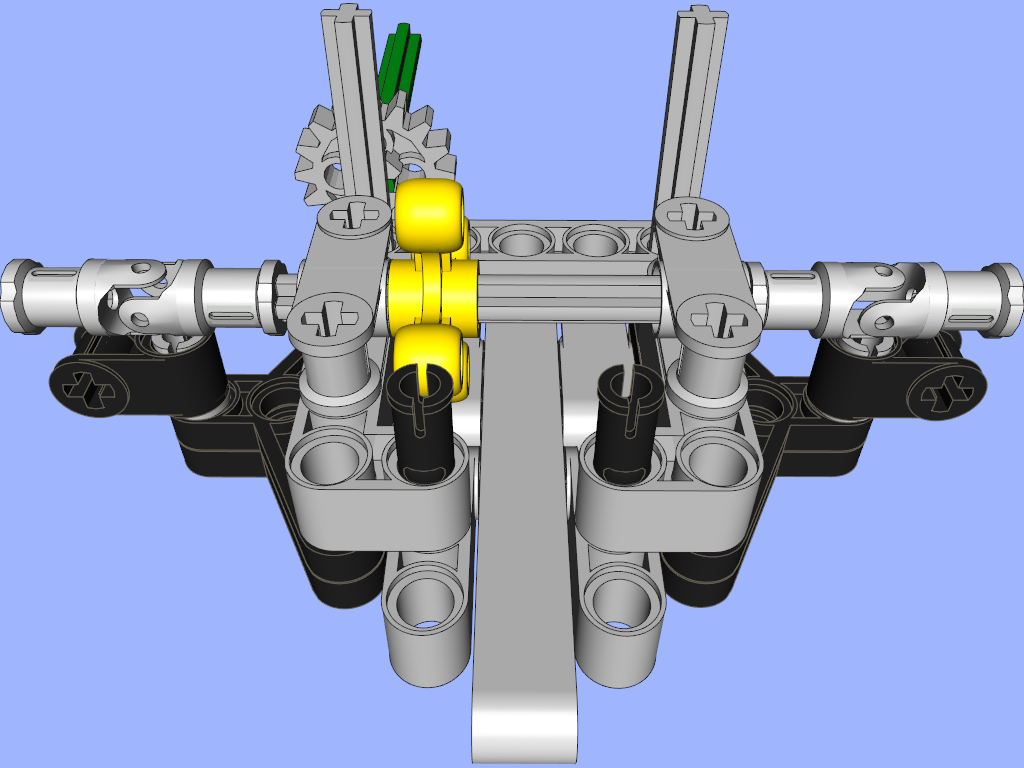
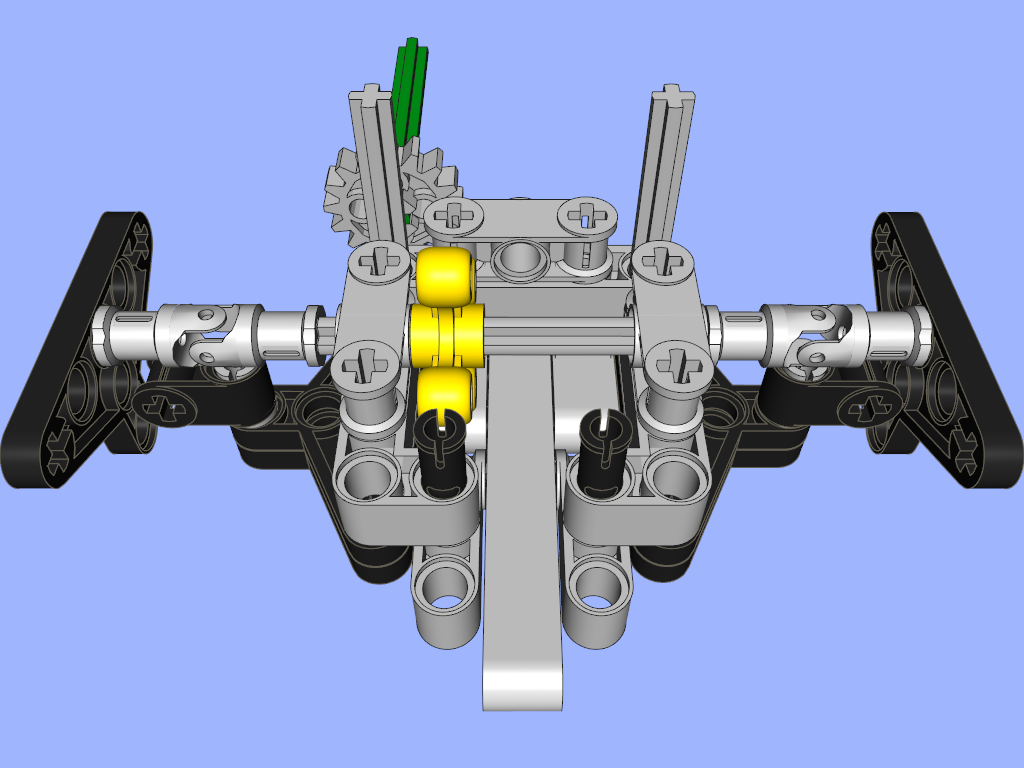
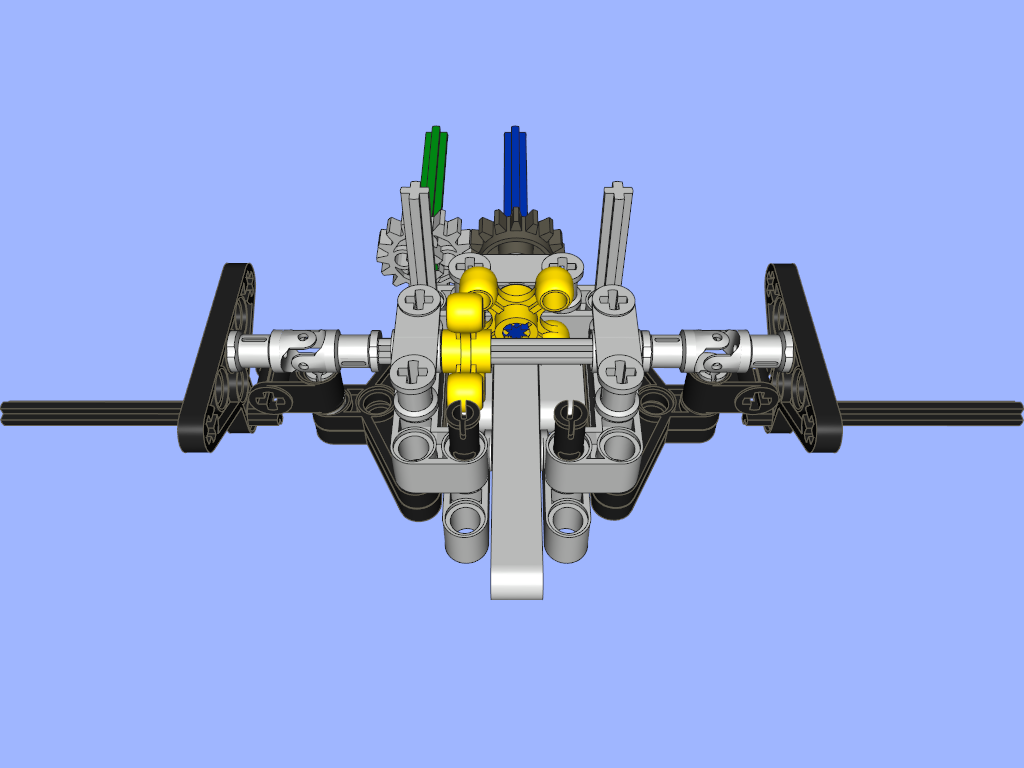
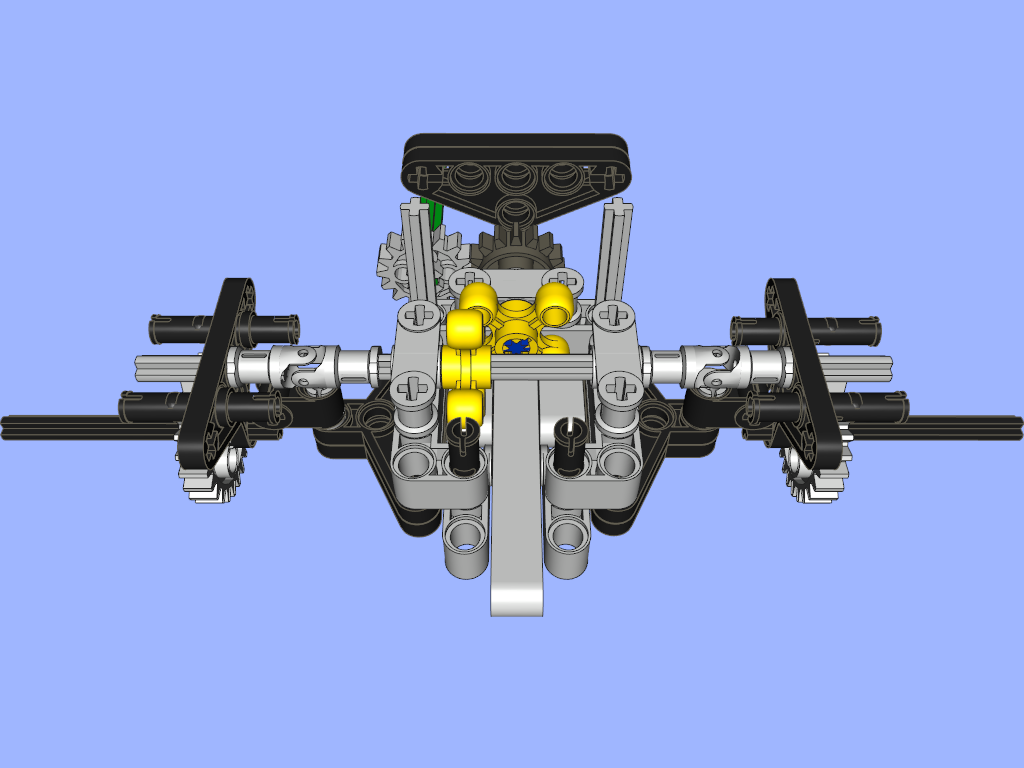
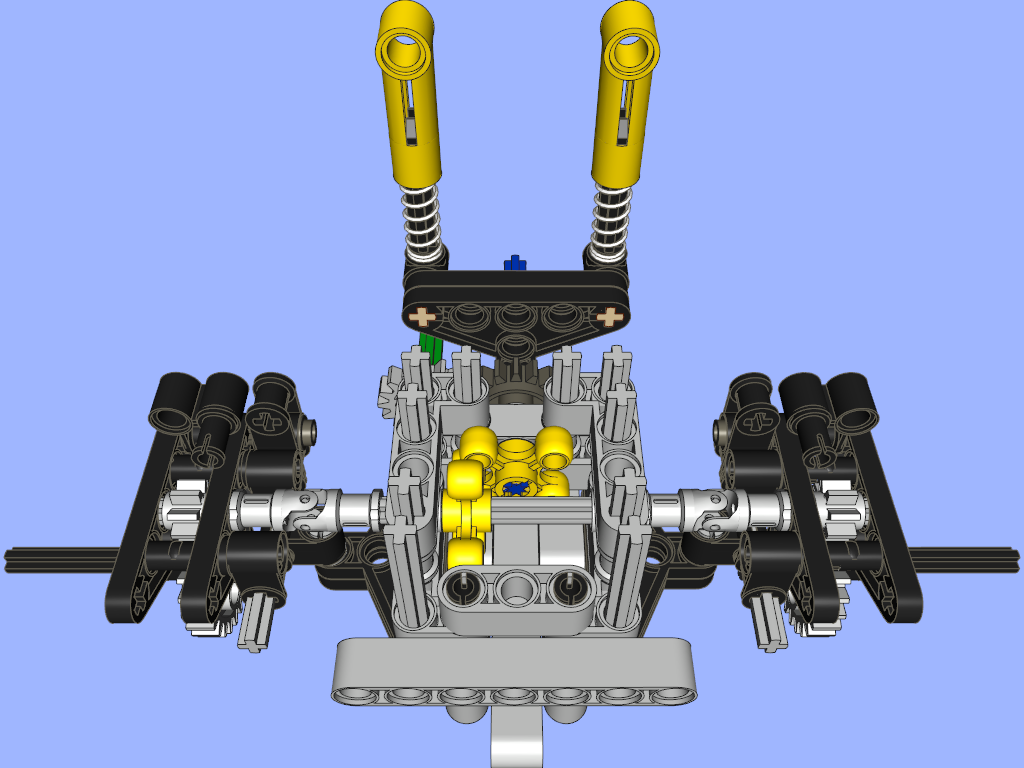
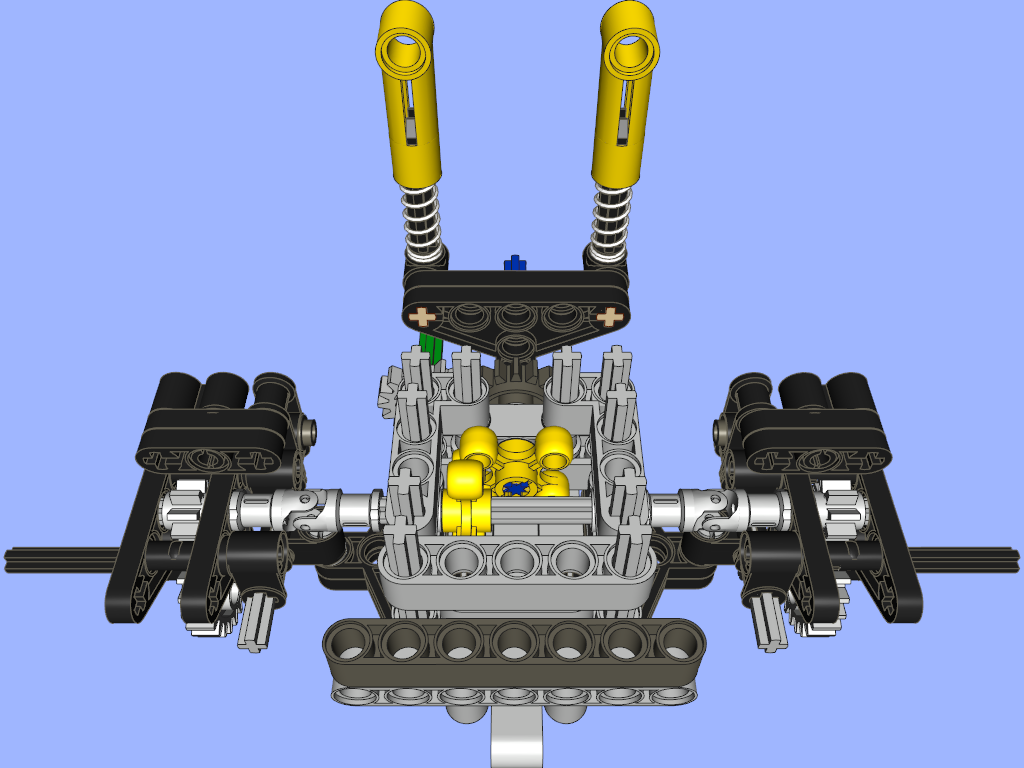
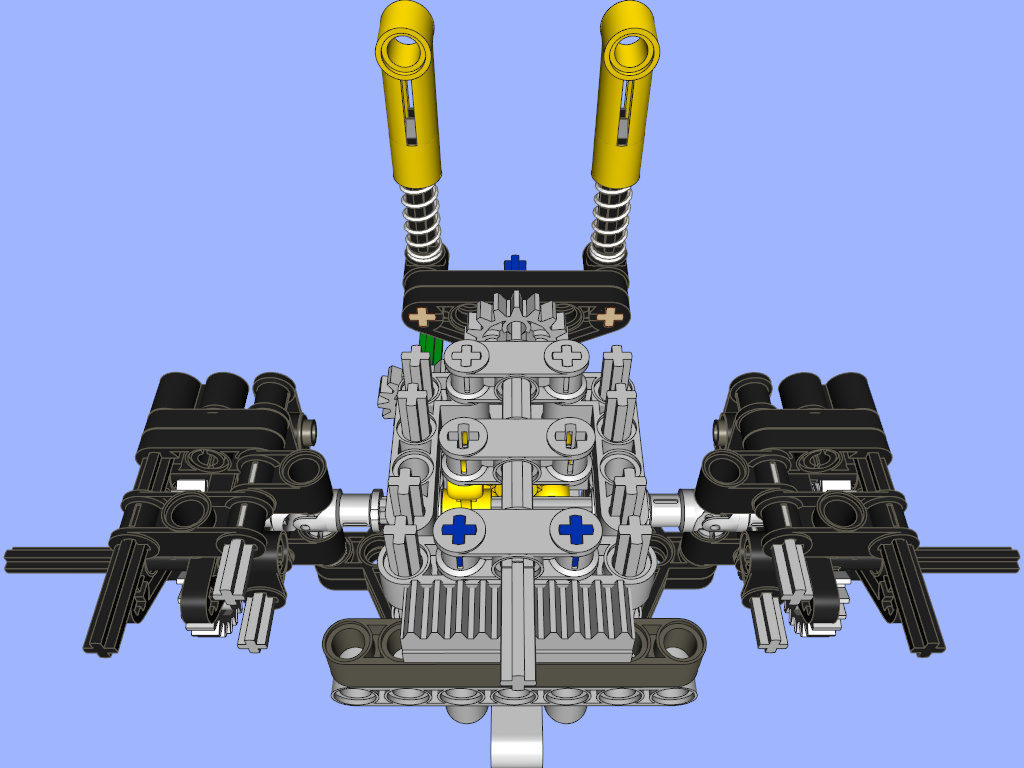
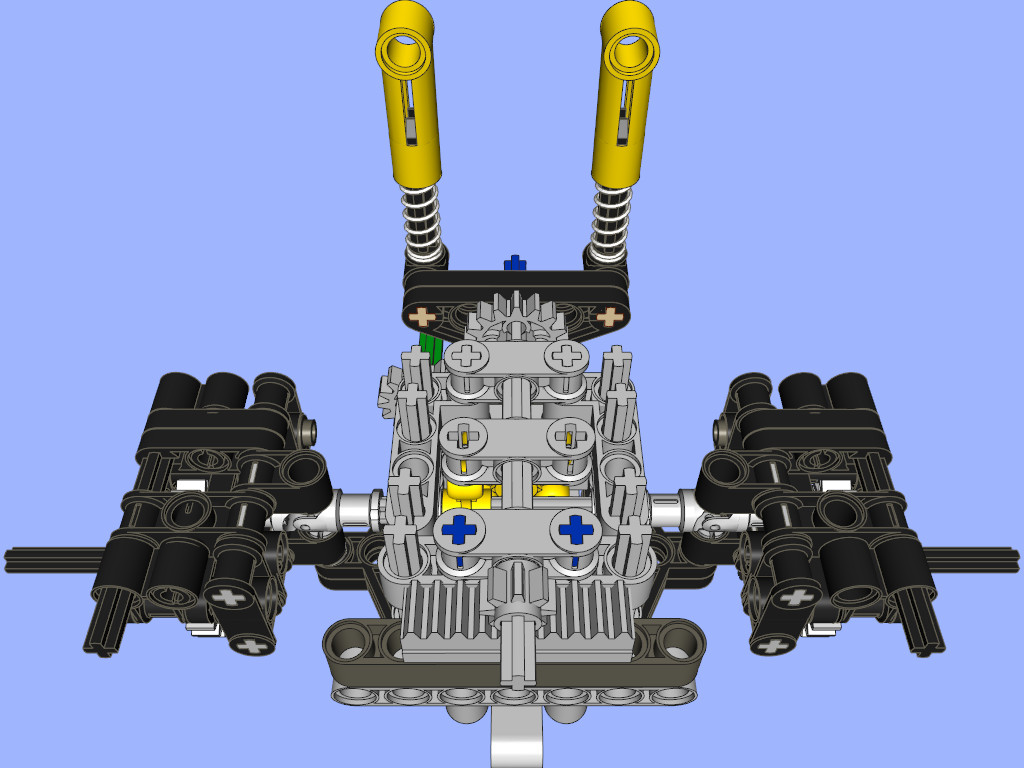
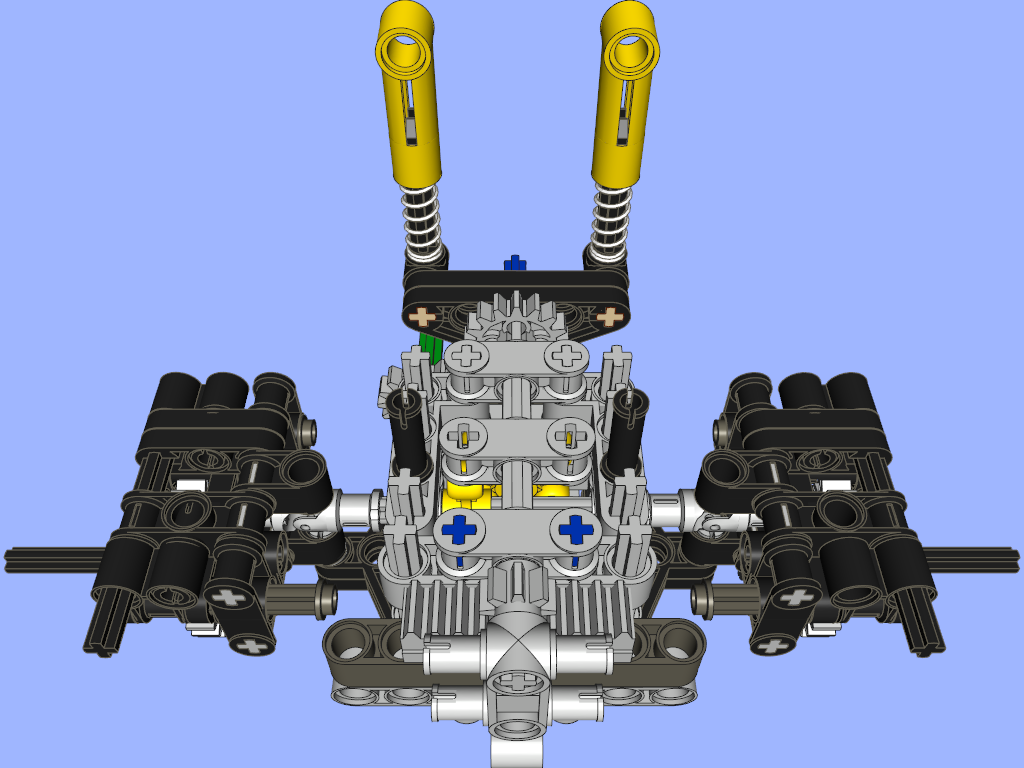
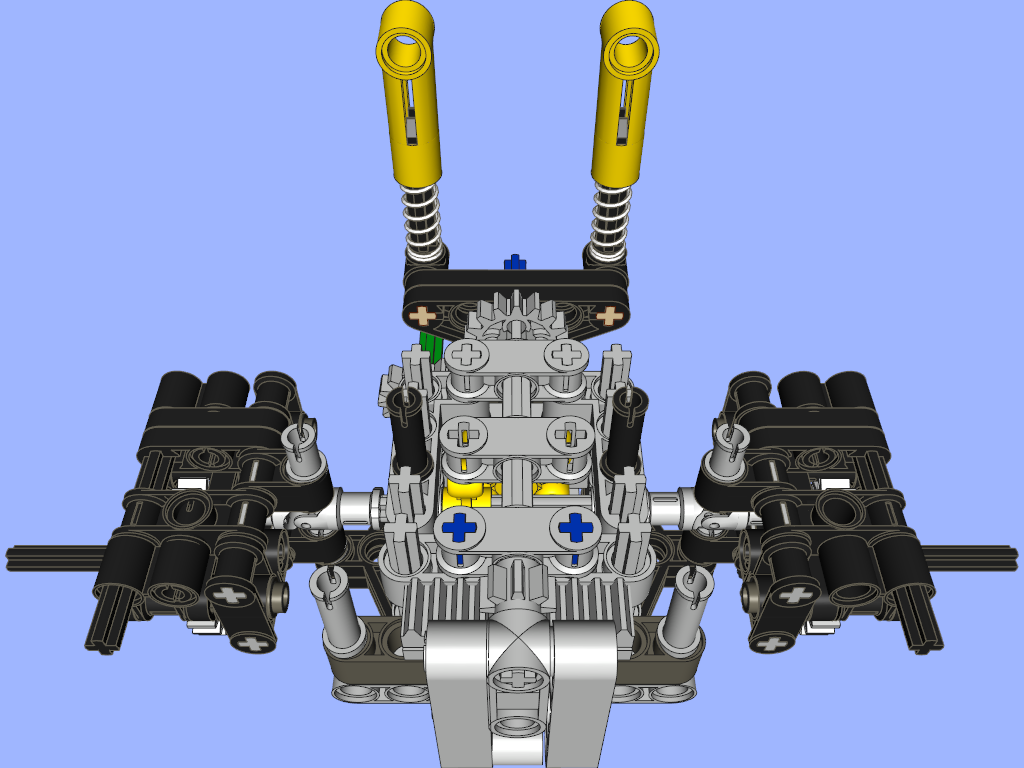
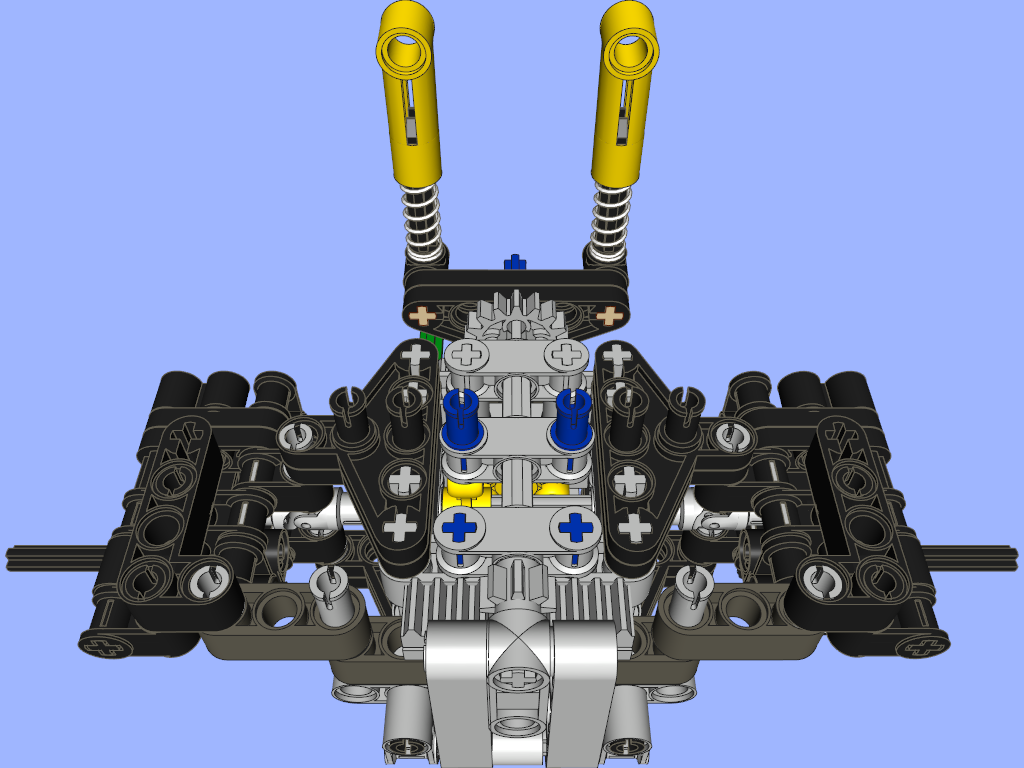
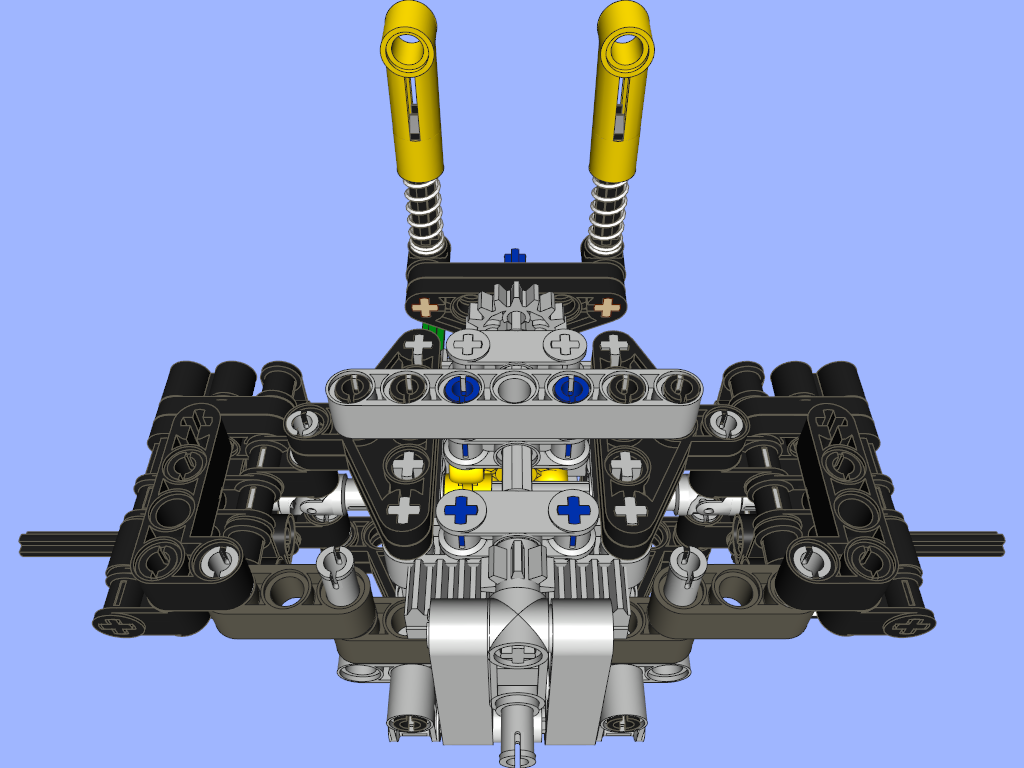
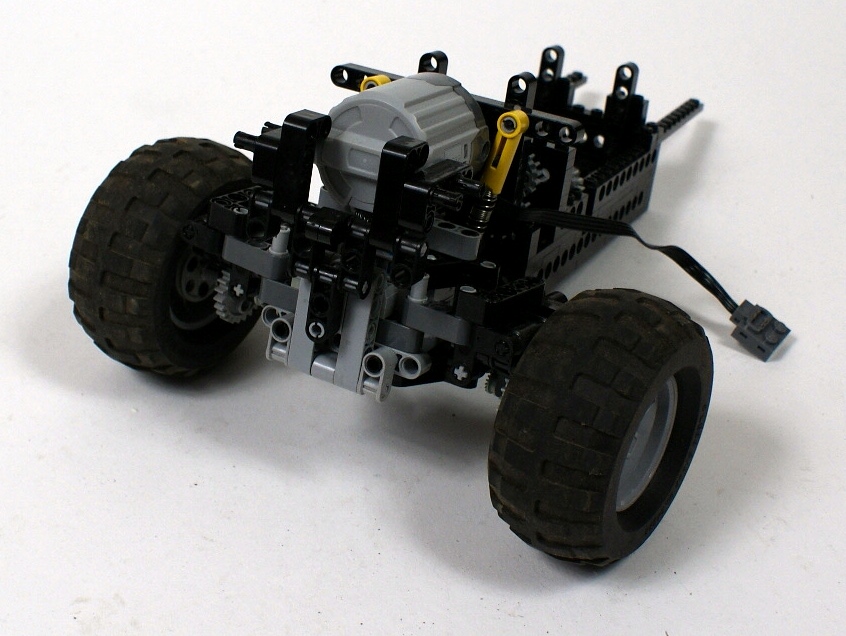
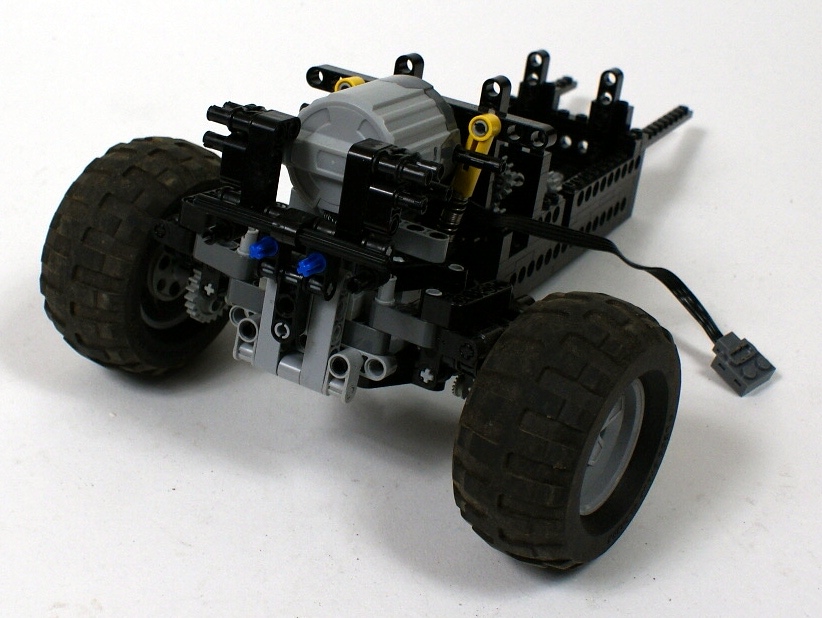
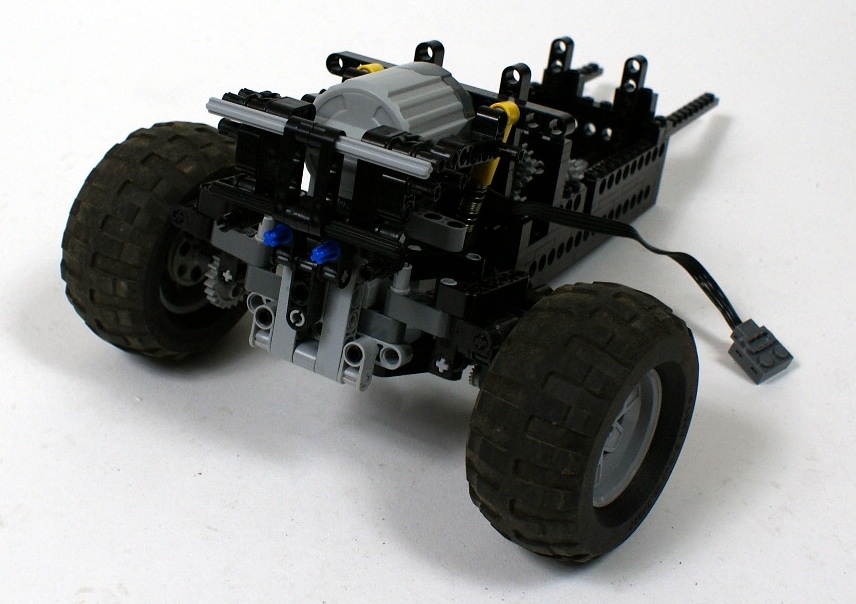
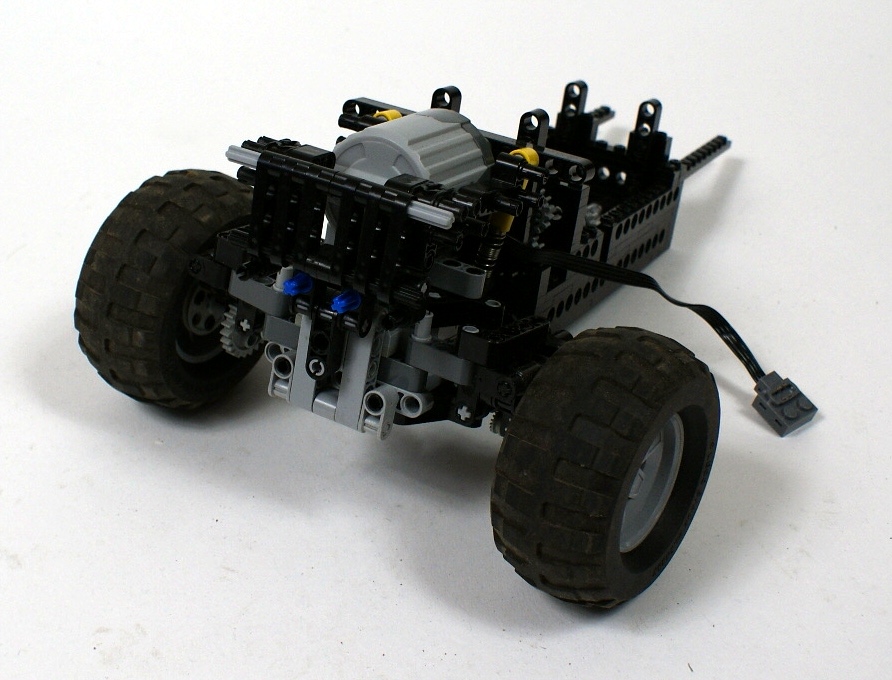
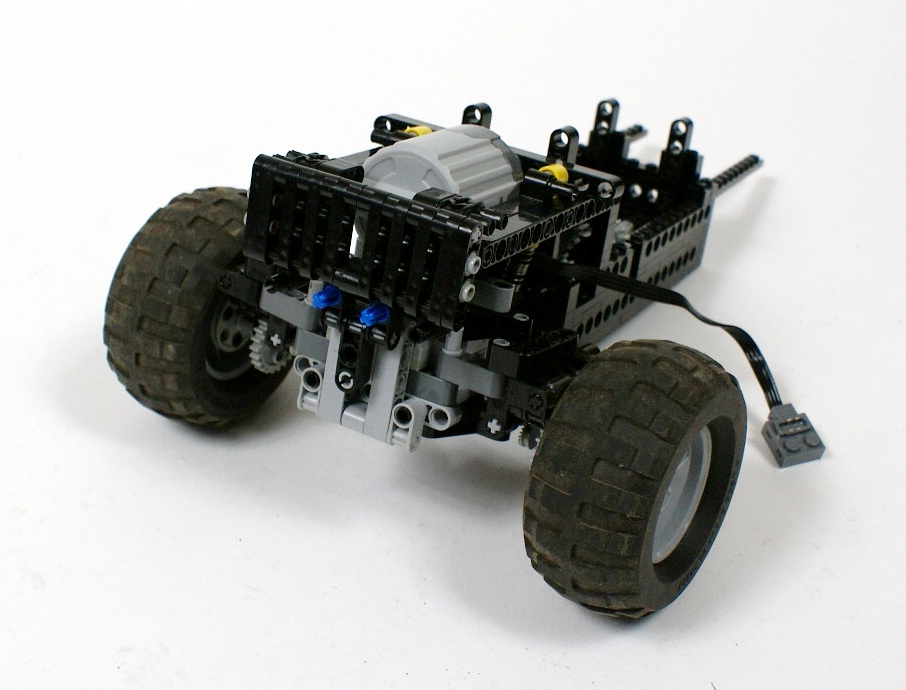
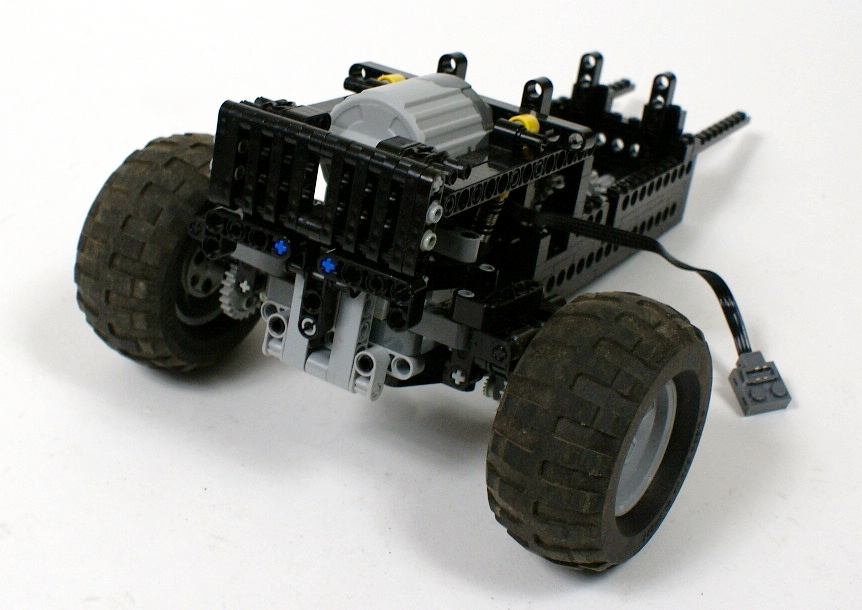
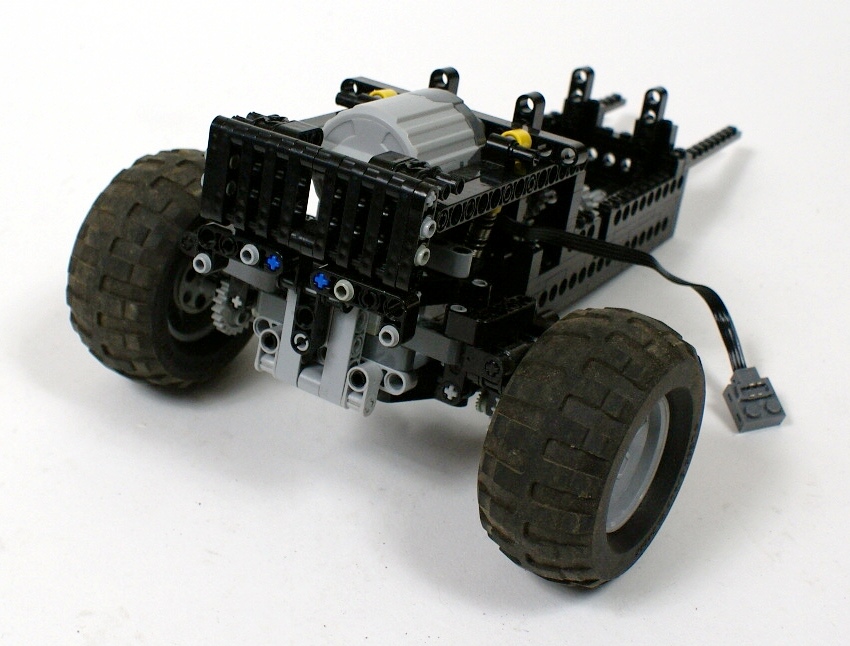
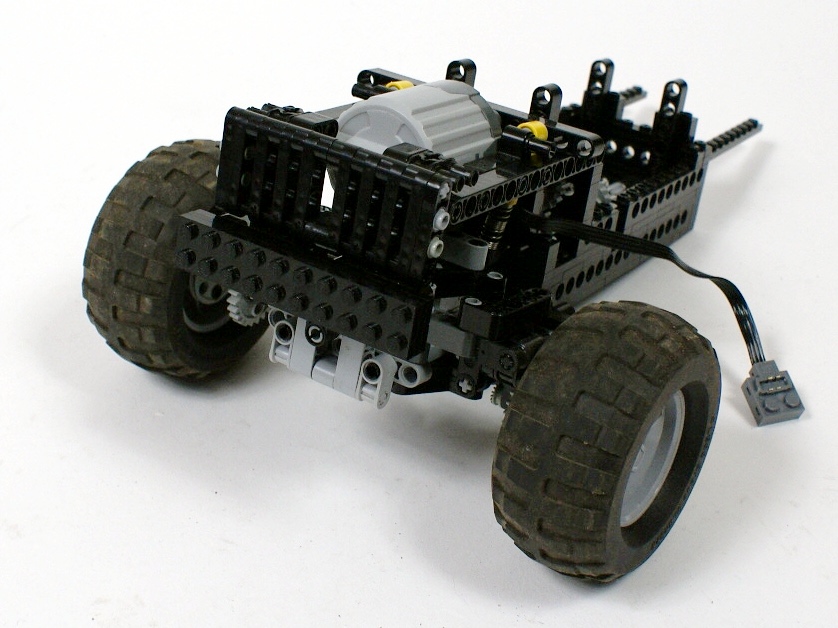
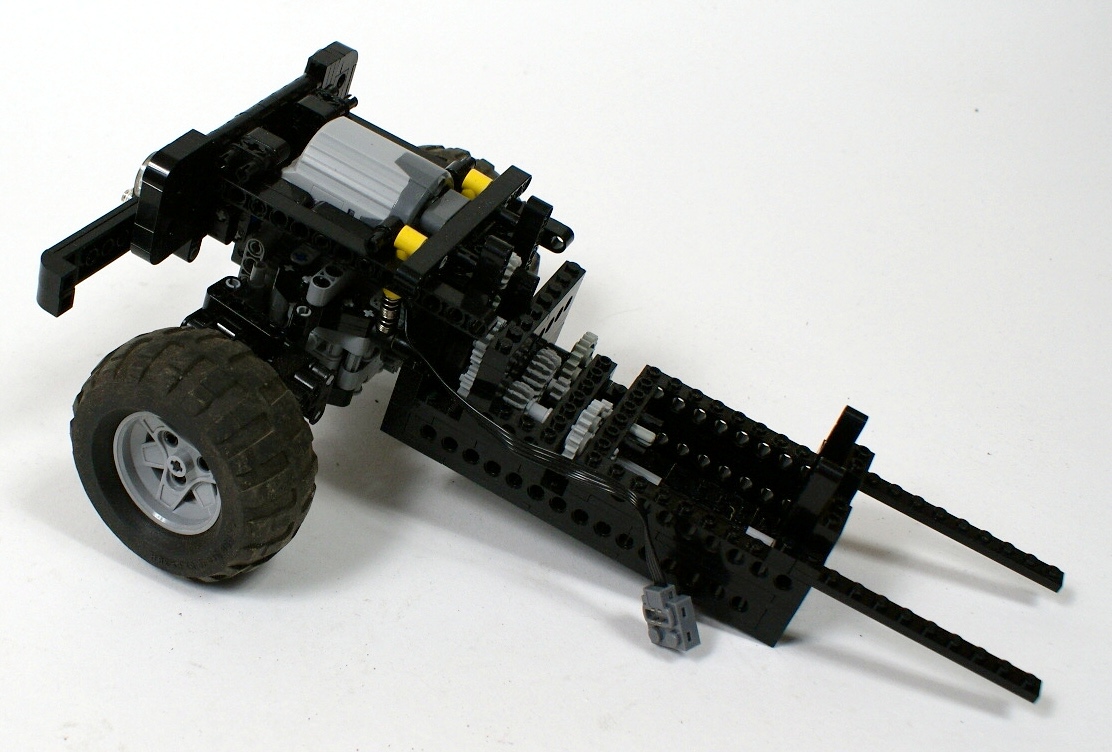
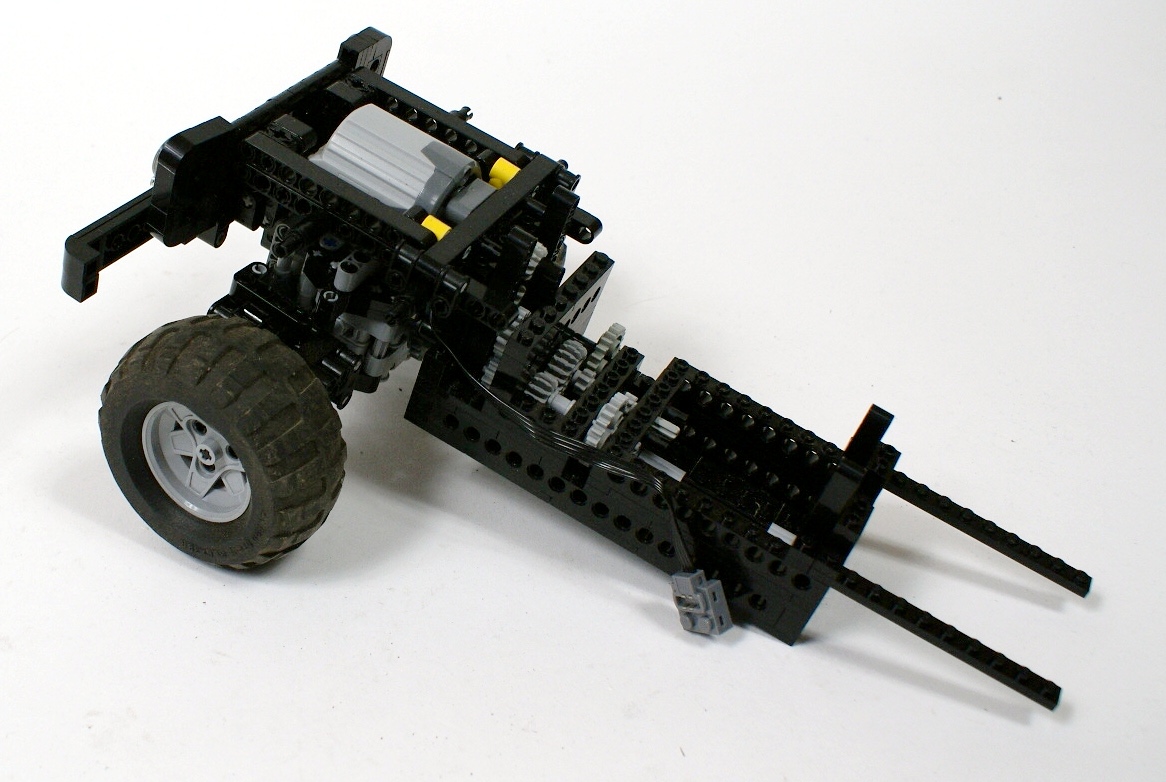
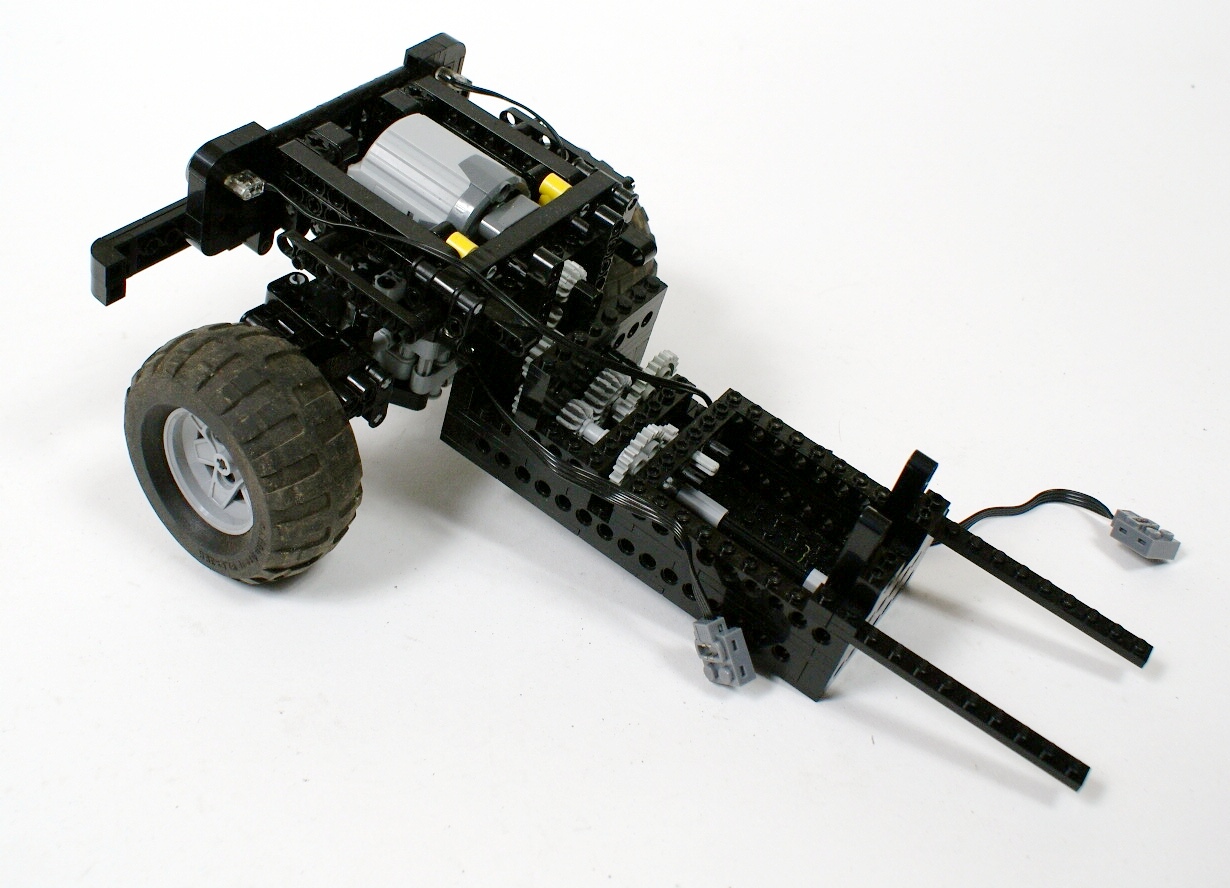
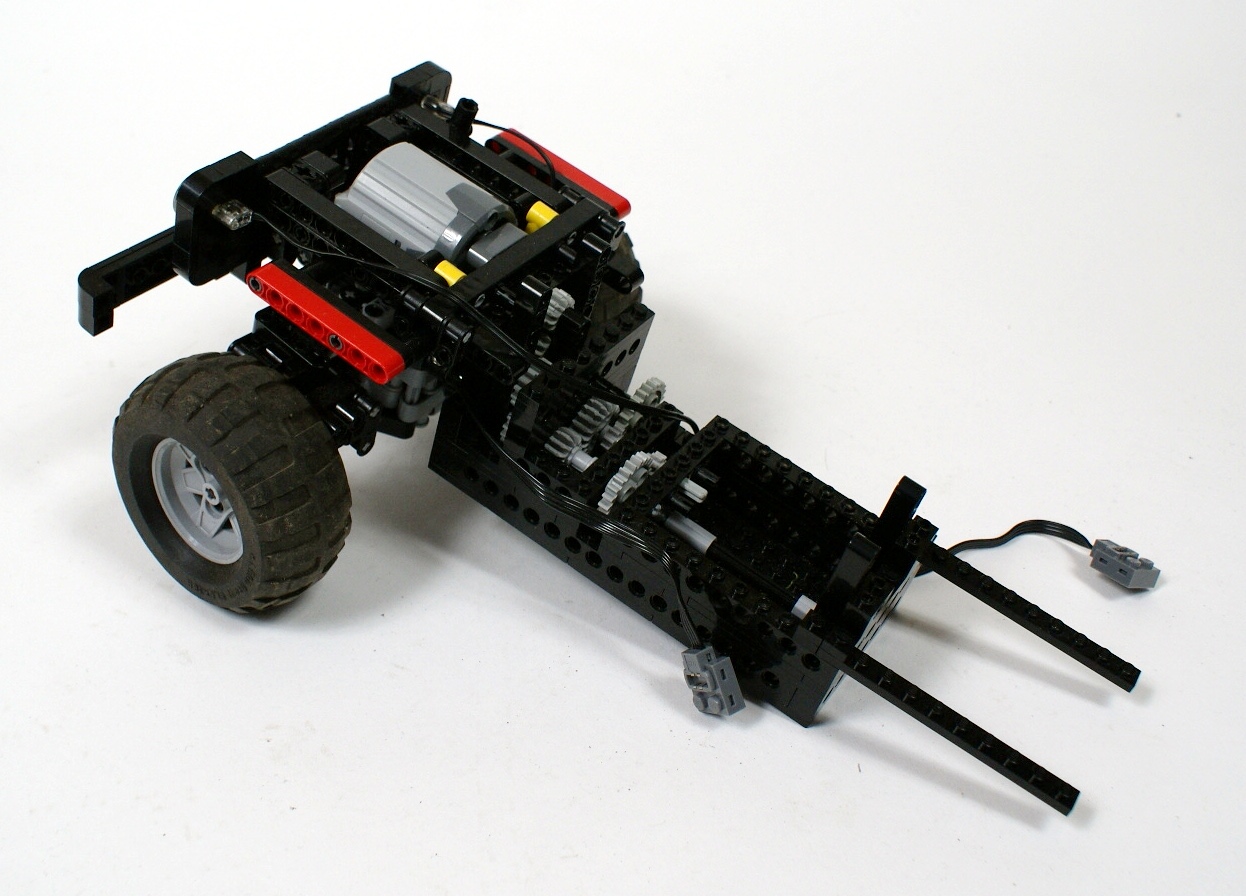
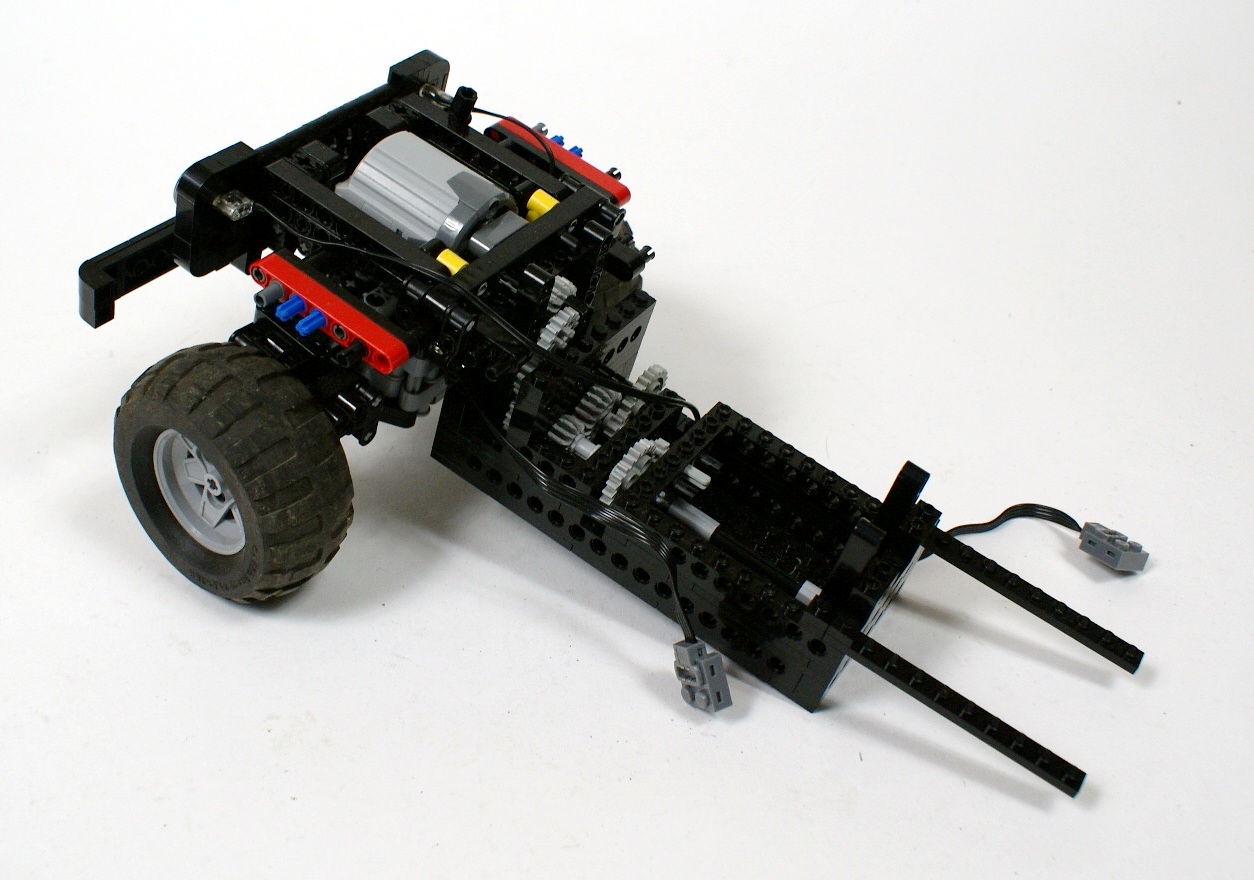
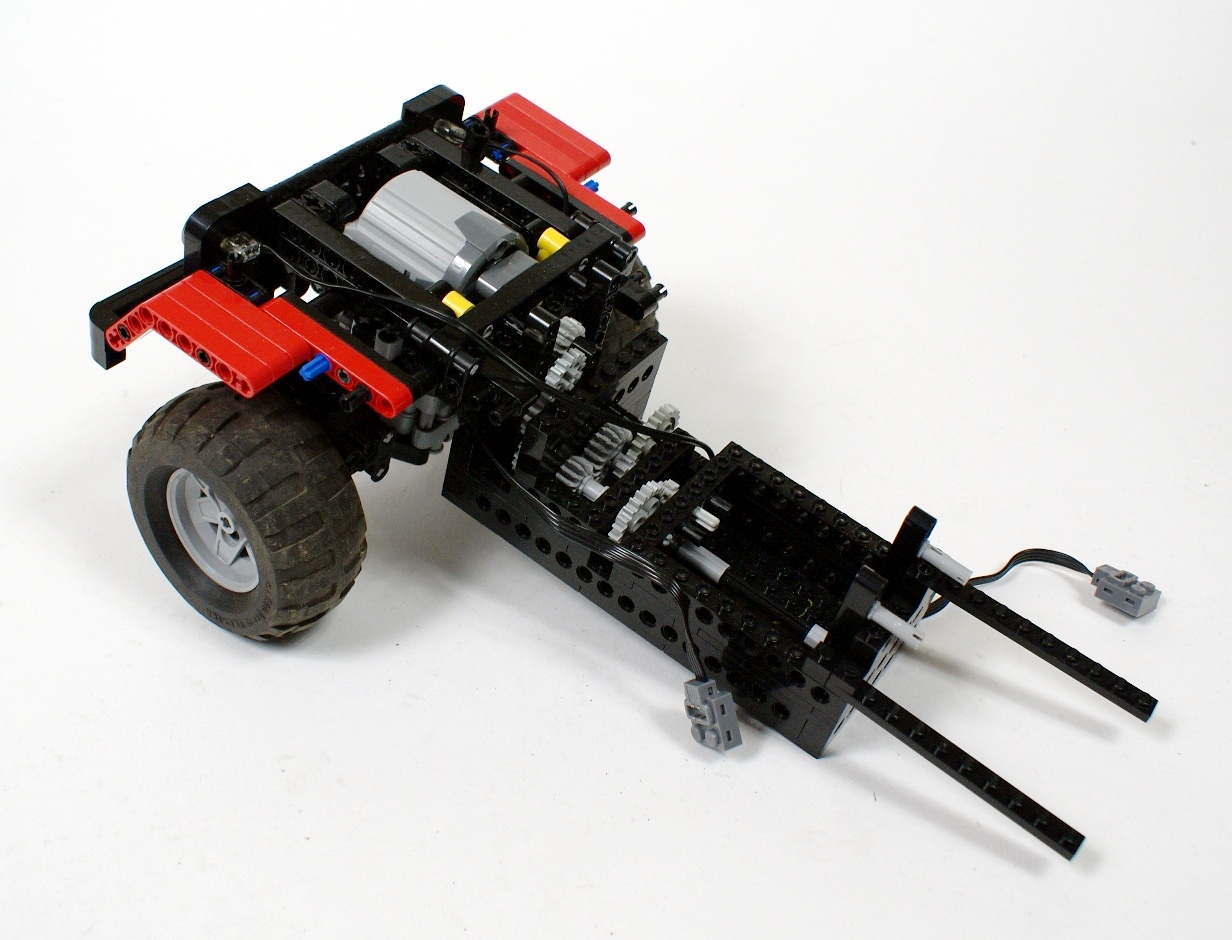
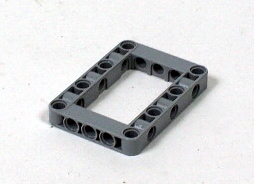
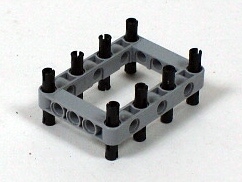
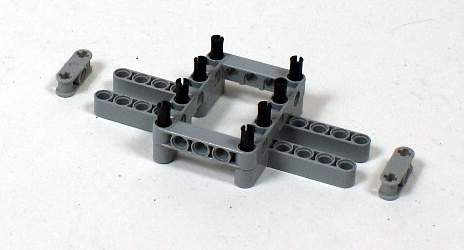
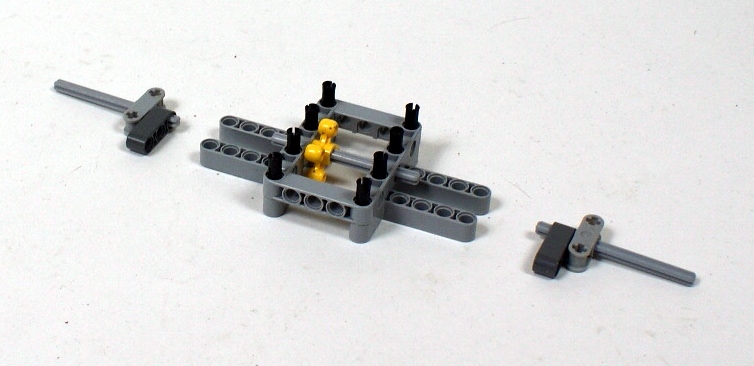
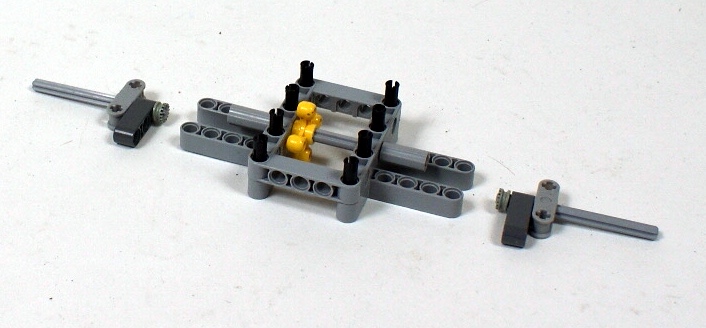
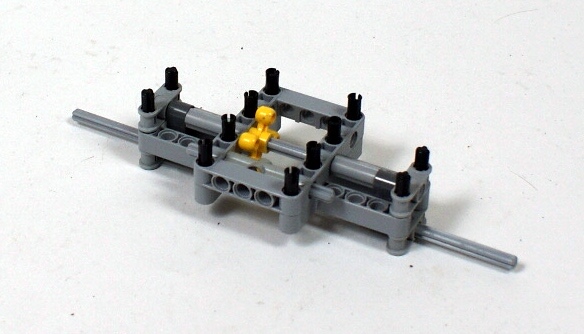
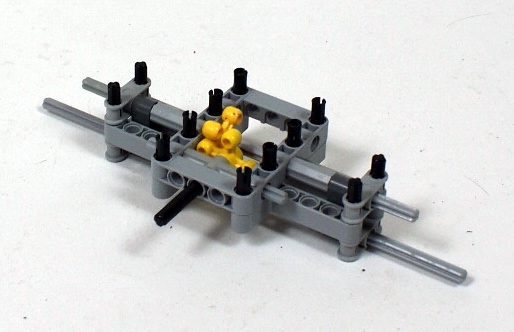
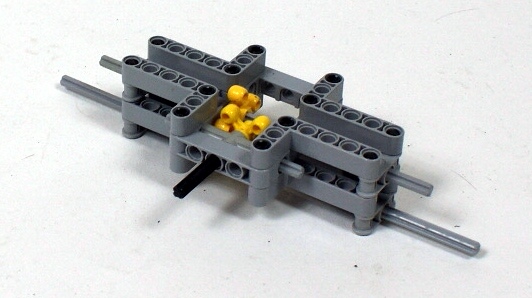
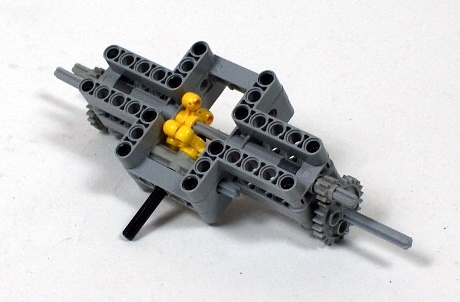
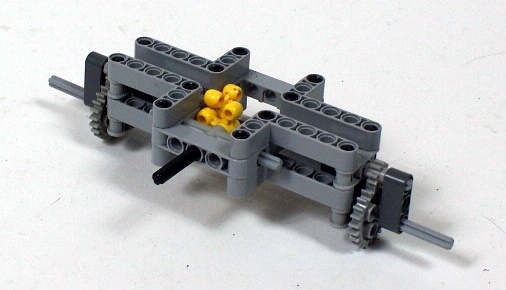
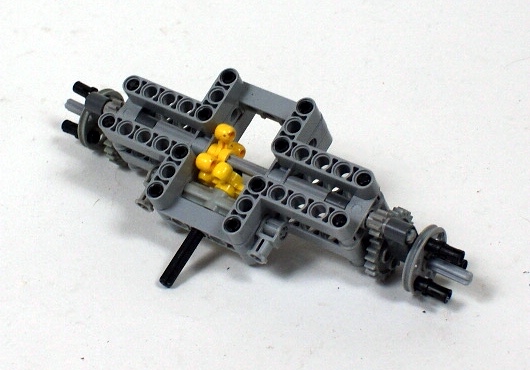
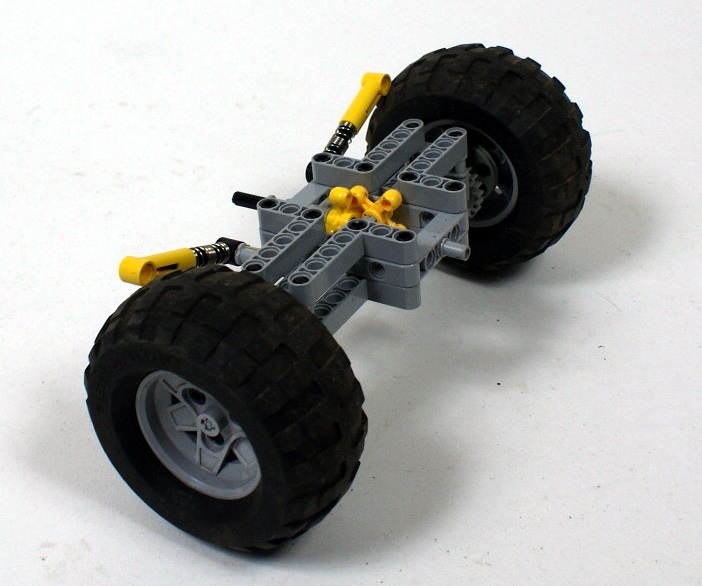
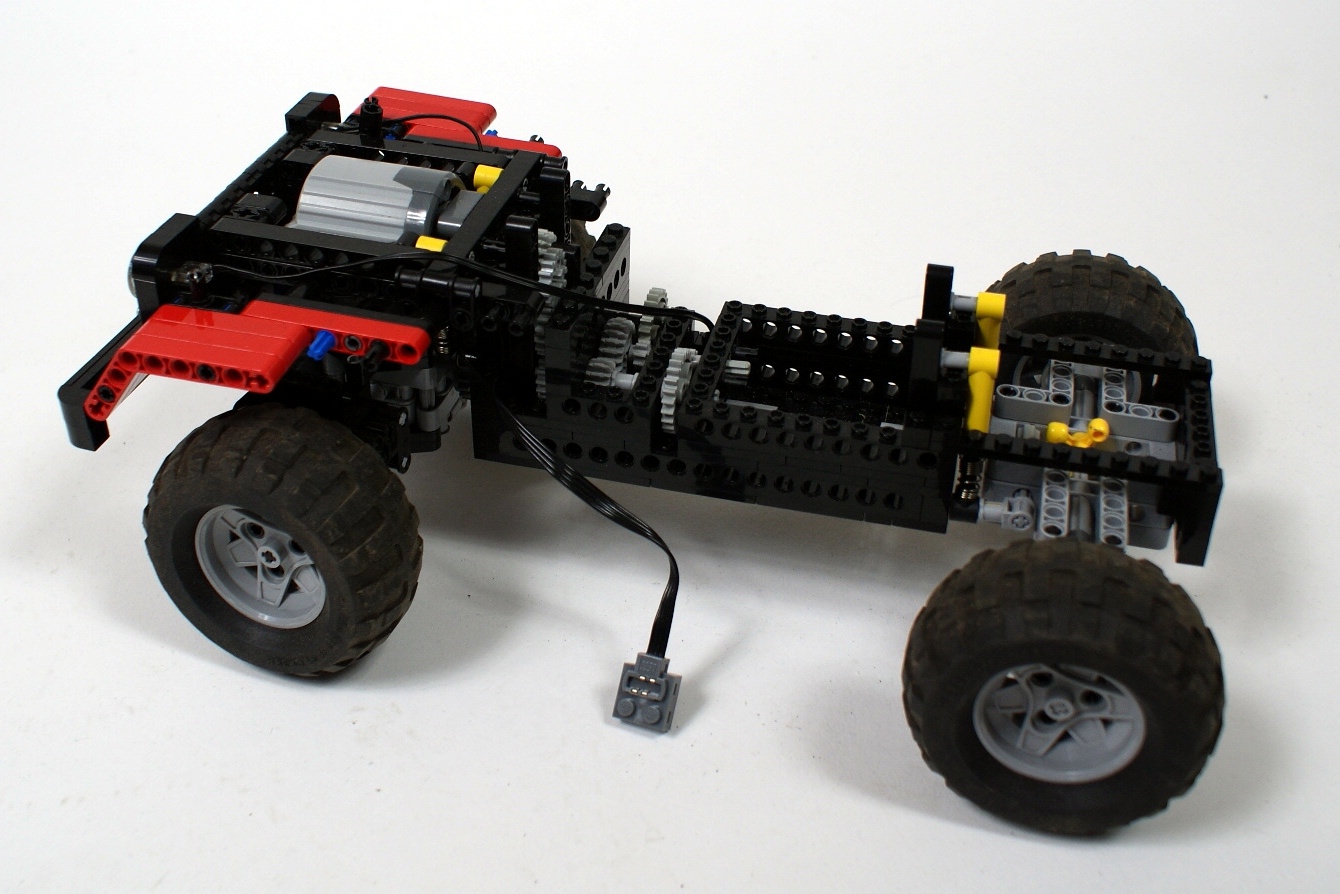
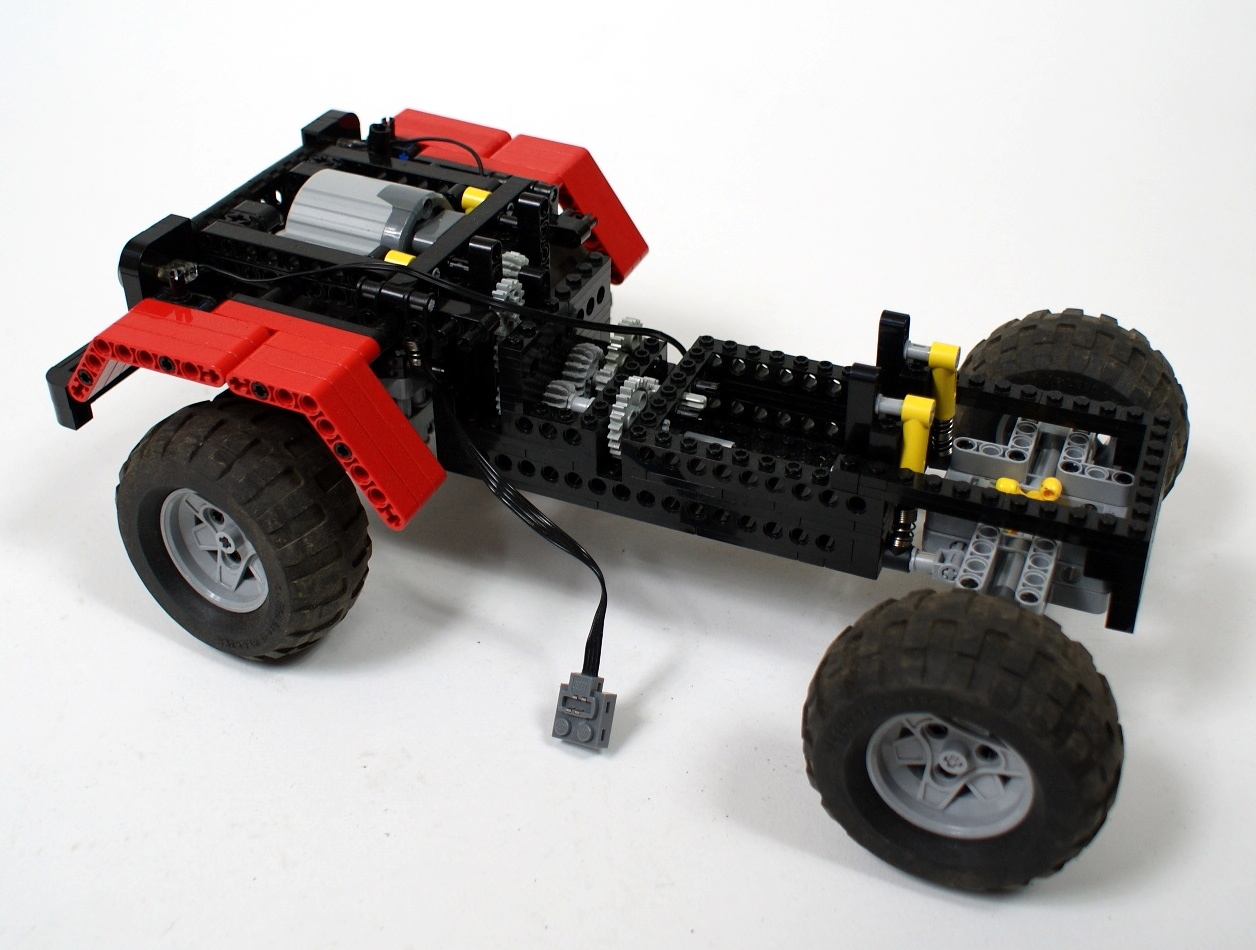
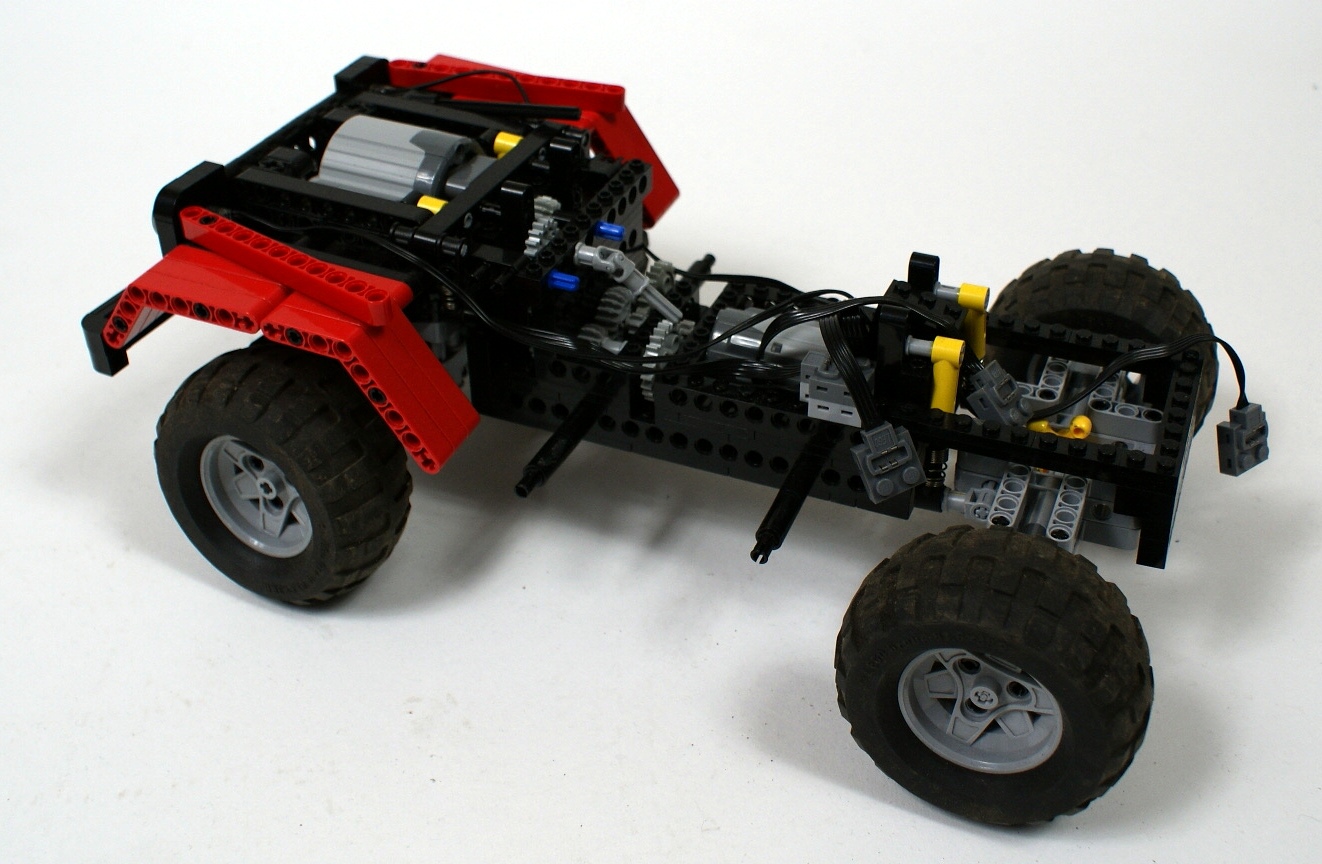
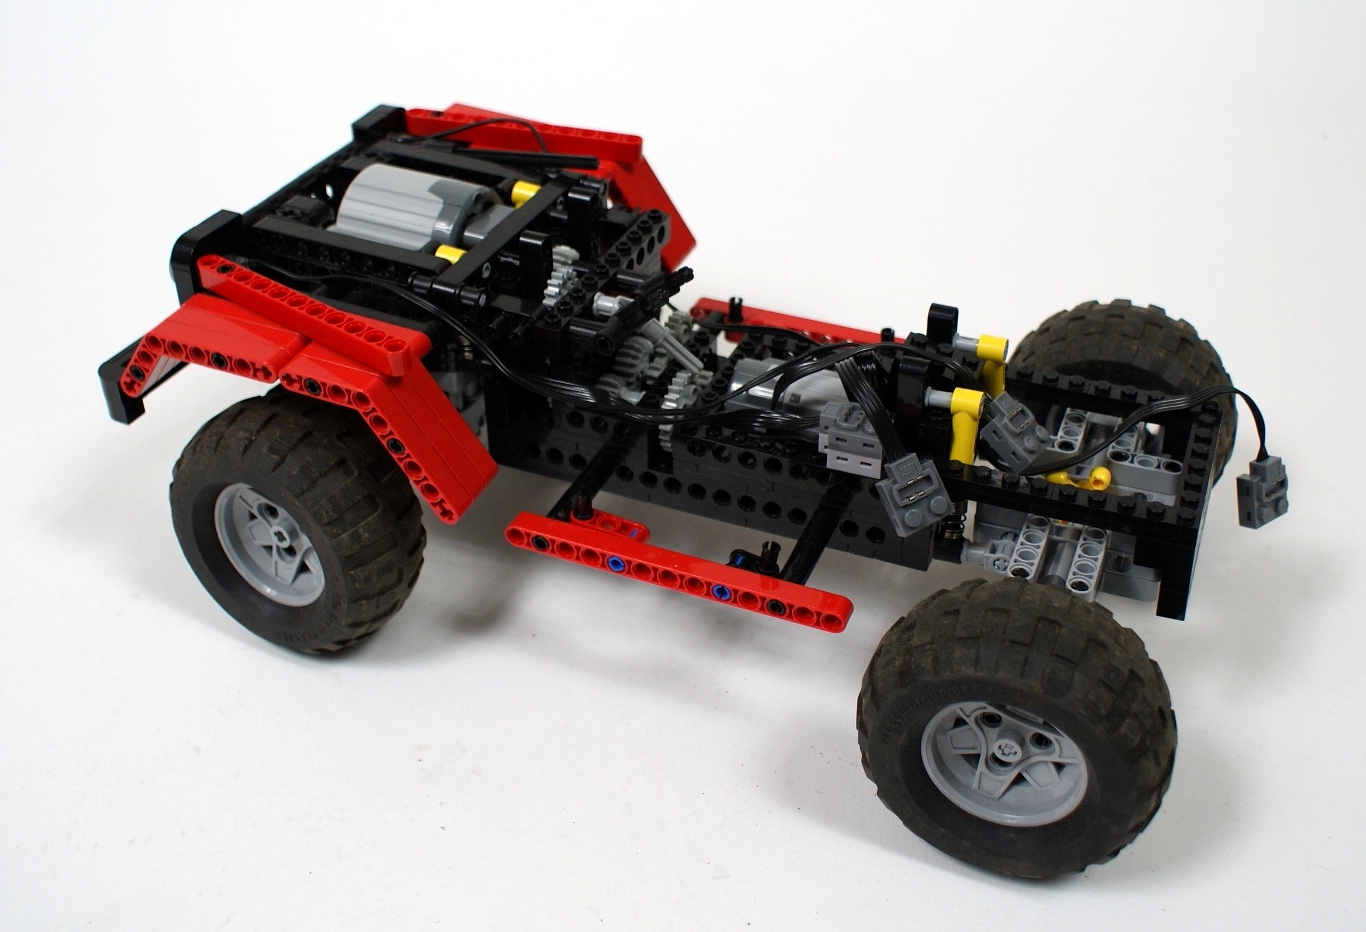
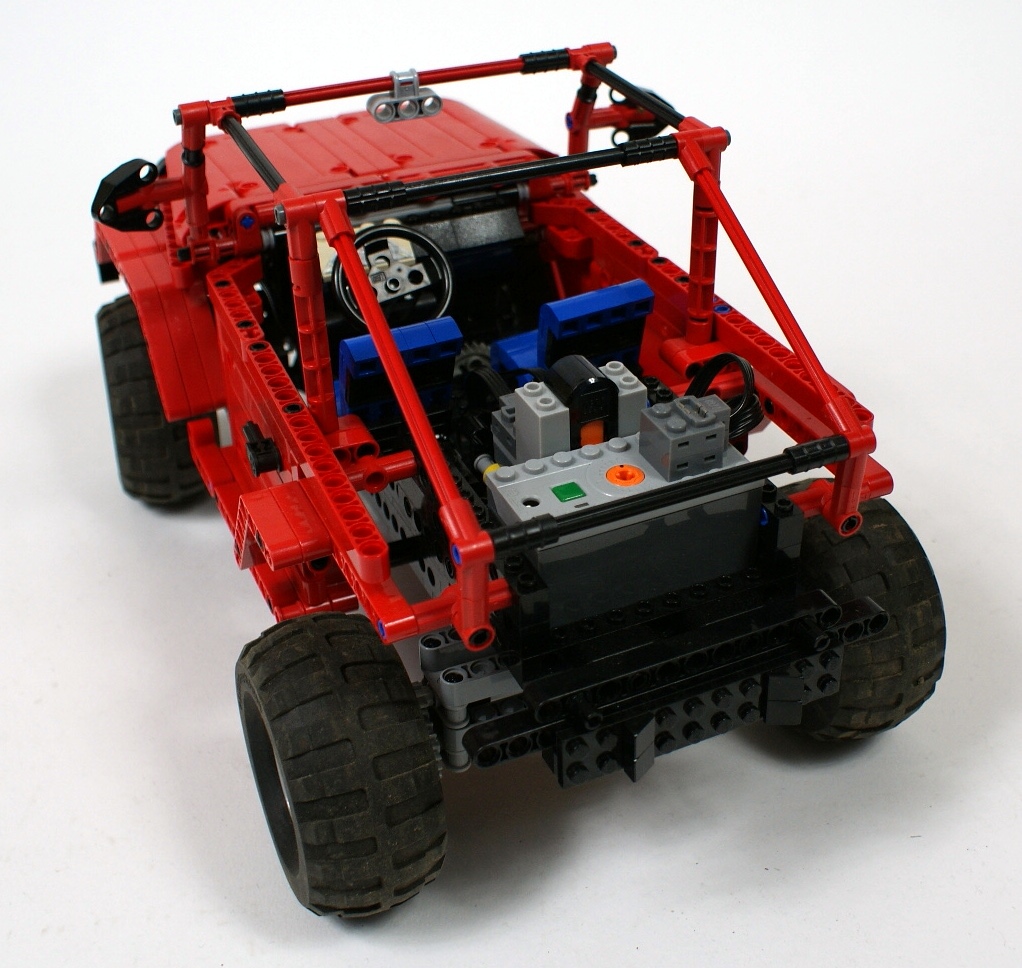
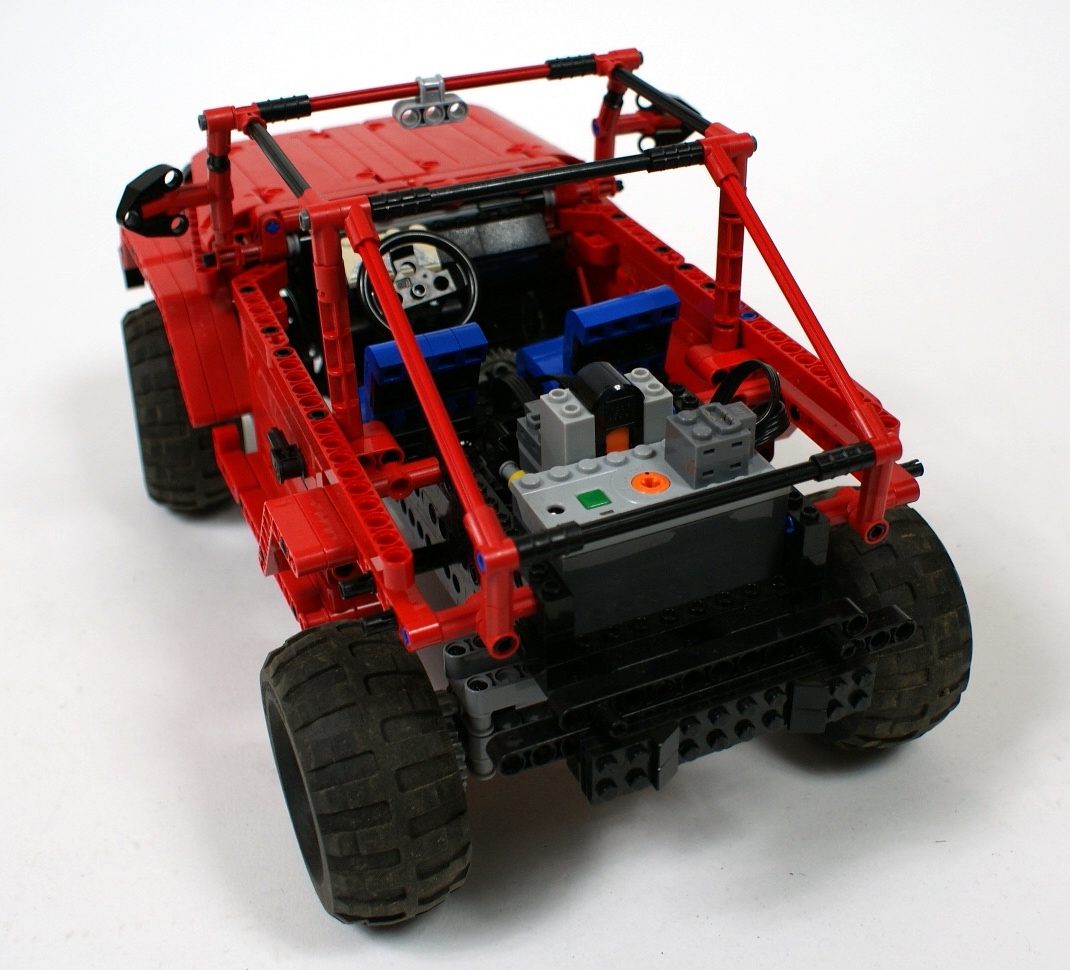
The chassis, which weights just 0.75 kg, consists basically of the studfull frame connected with studless axles. Since there is very little space in front of the front axle, both drive and steering had to be transferred to the front axle from behind. This was achieved by placing a 16-teeth gear with a clutch on the driveshaft – this gear works as an idler gear between two other gears, thus transferring the steering independently to the drive. Front axle is compact but massive, strong enough to handle much heavier vehicle, and it’s bottom is entirely covered with liftarms to prevent it from getting stuck on an obstacle. It should be noted that both axles use knob wheels instead of differentials, and both are portal axles with an integrated 3:1 gear reduction. Each axle is stabilized by a pair of short shock absorbers located between the axle and the frame for maximum structural integrity. In order to minimize the effect of central driveshaft’s torque tilting the body, which occurs when only pendular axles are used, the axles are stabilized with the hardest shock absorbers available. The rear axle is built around the 7×5 liftarm frame and is not covered from below.

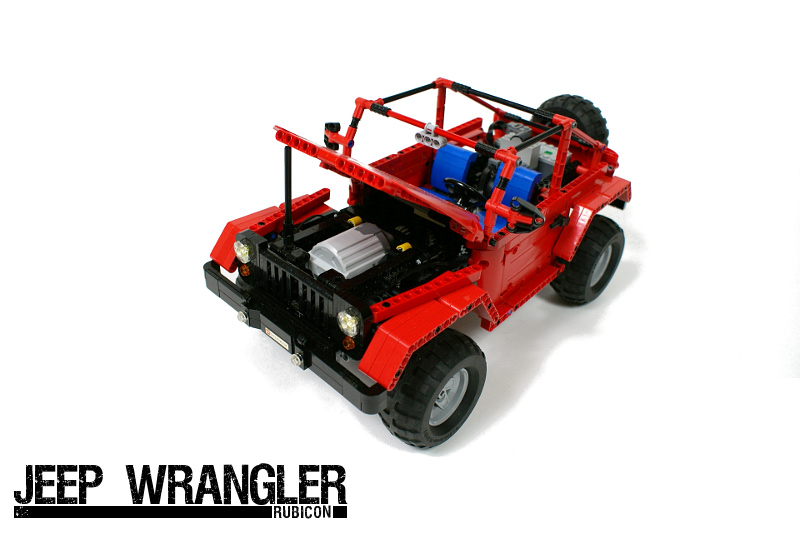
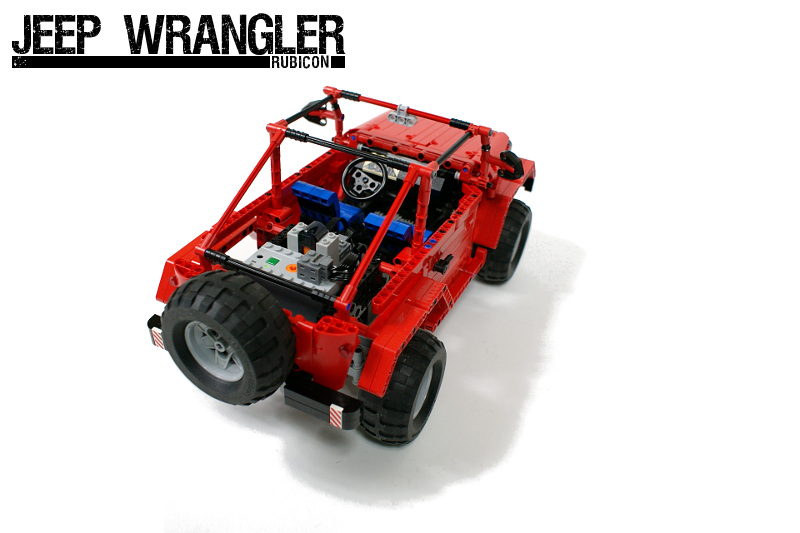
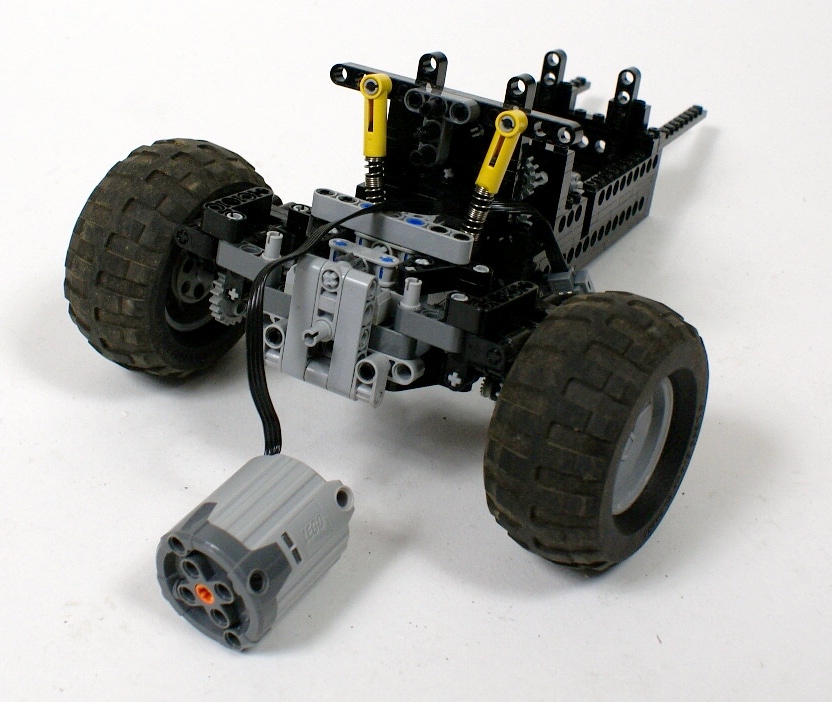
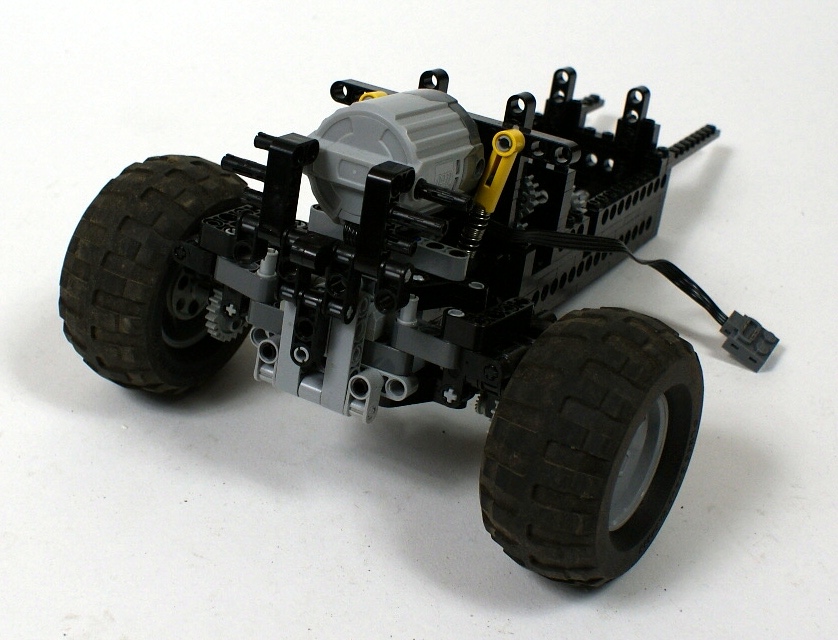
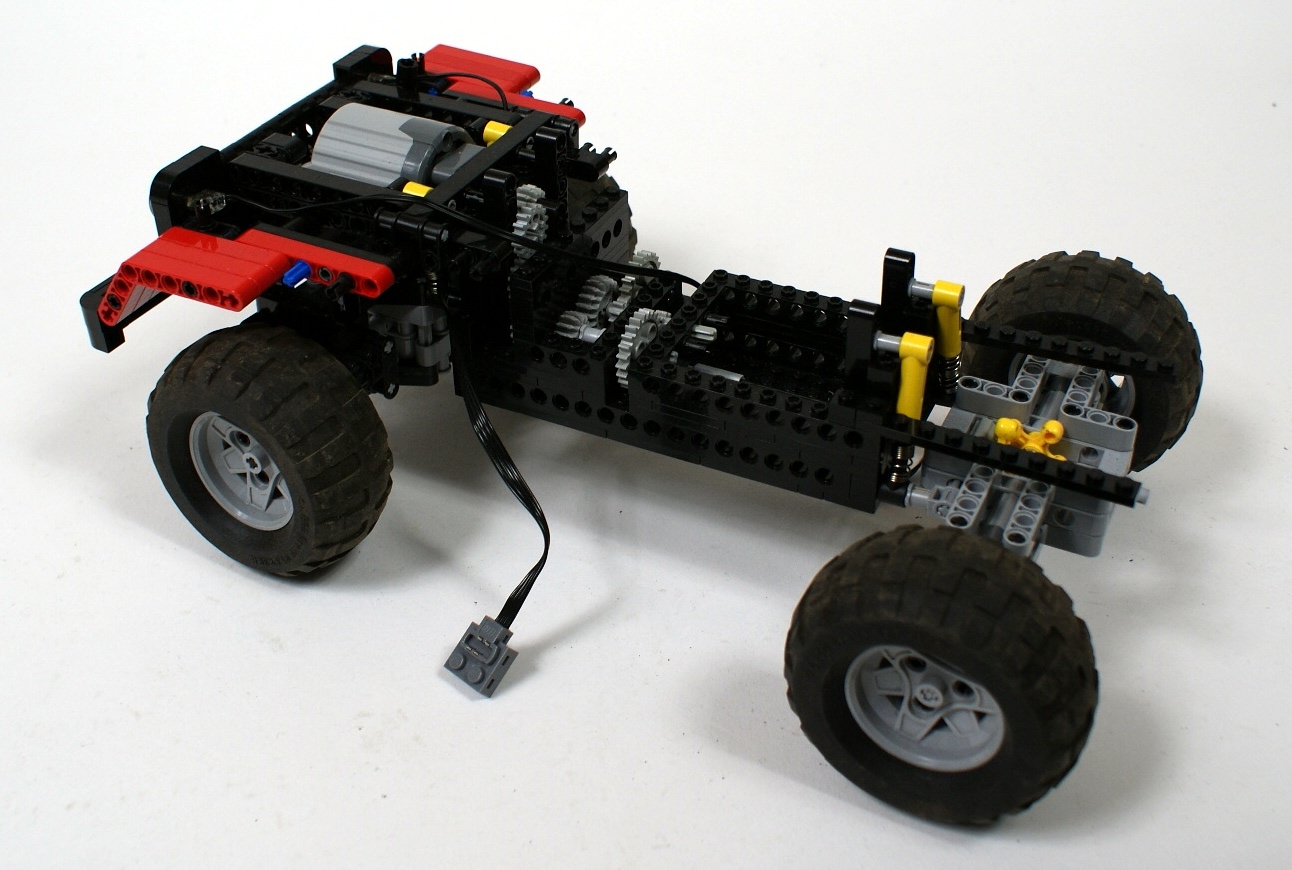
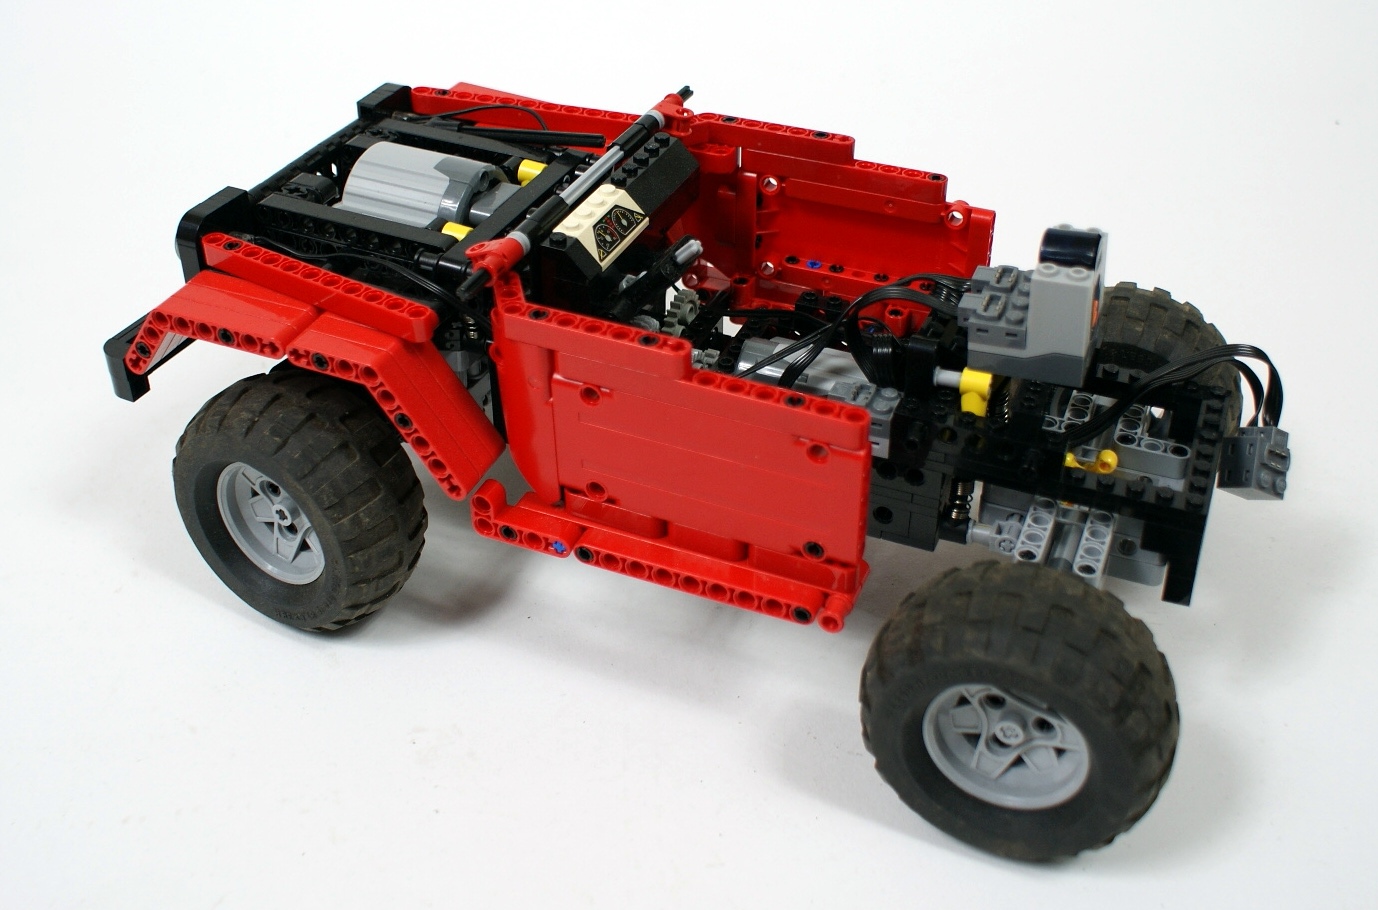
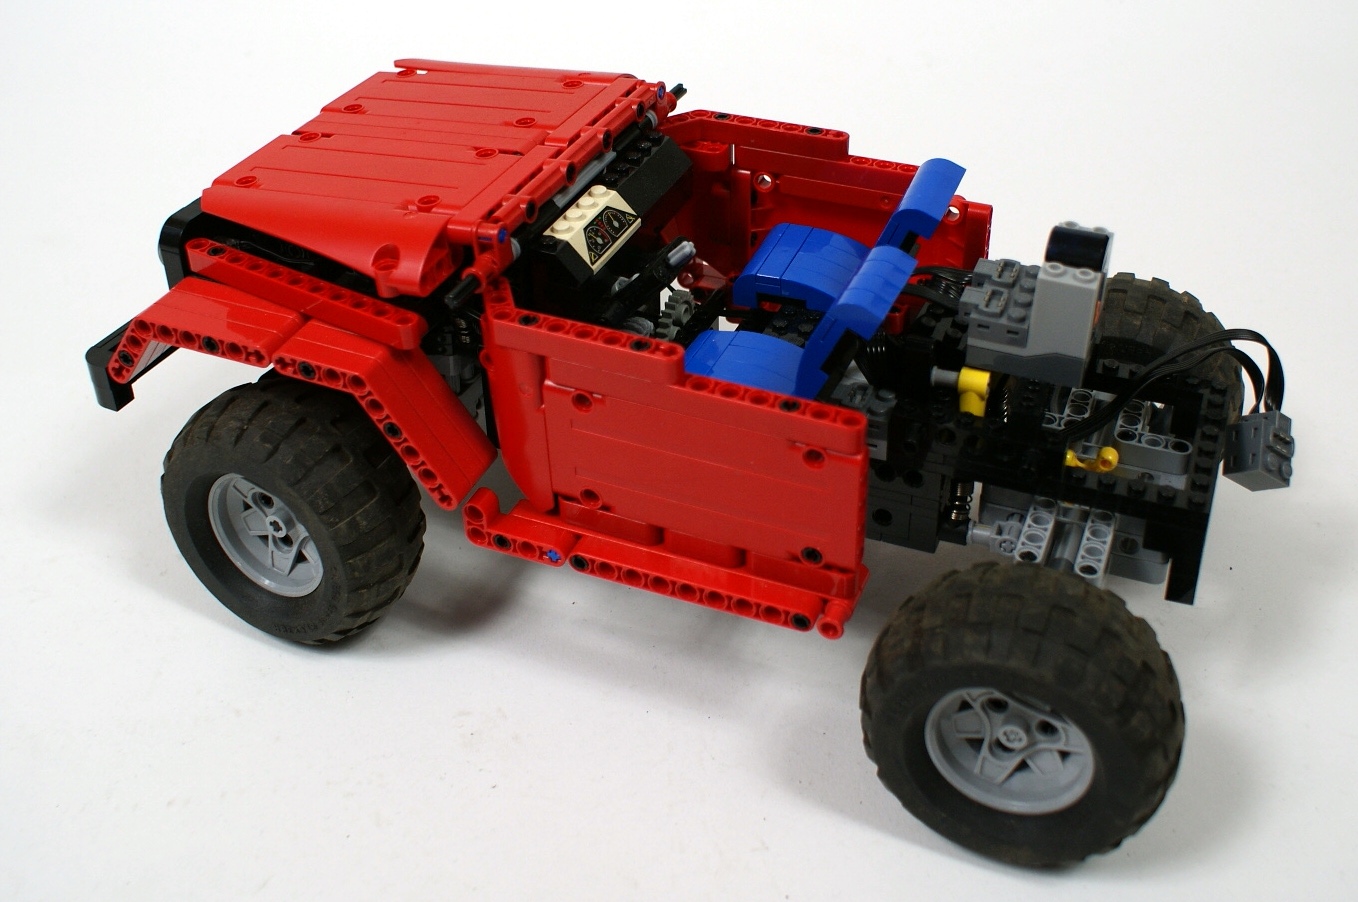
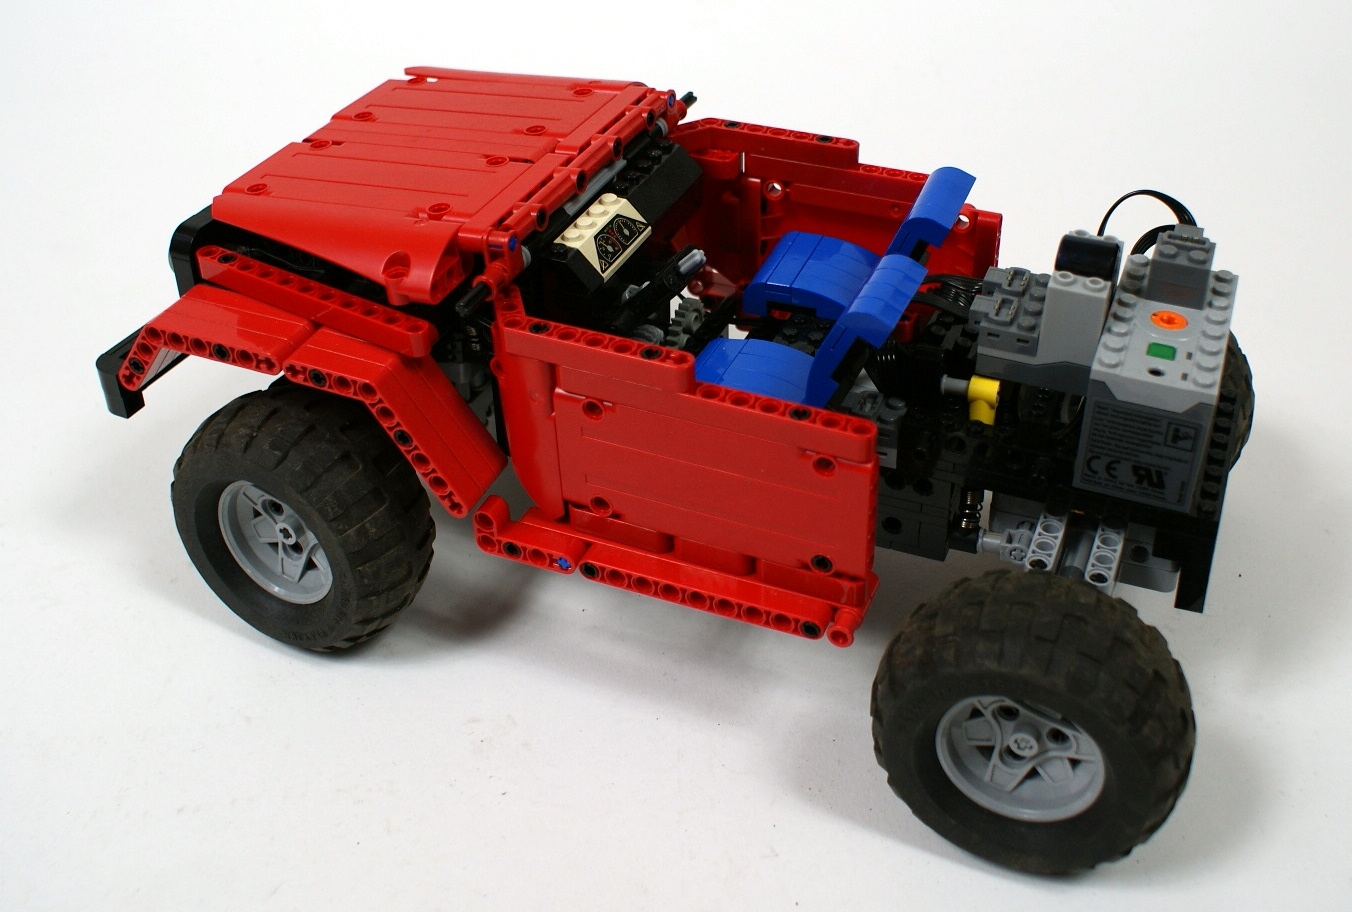
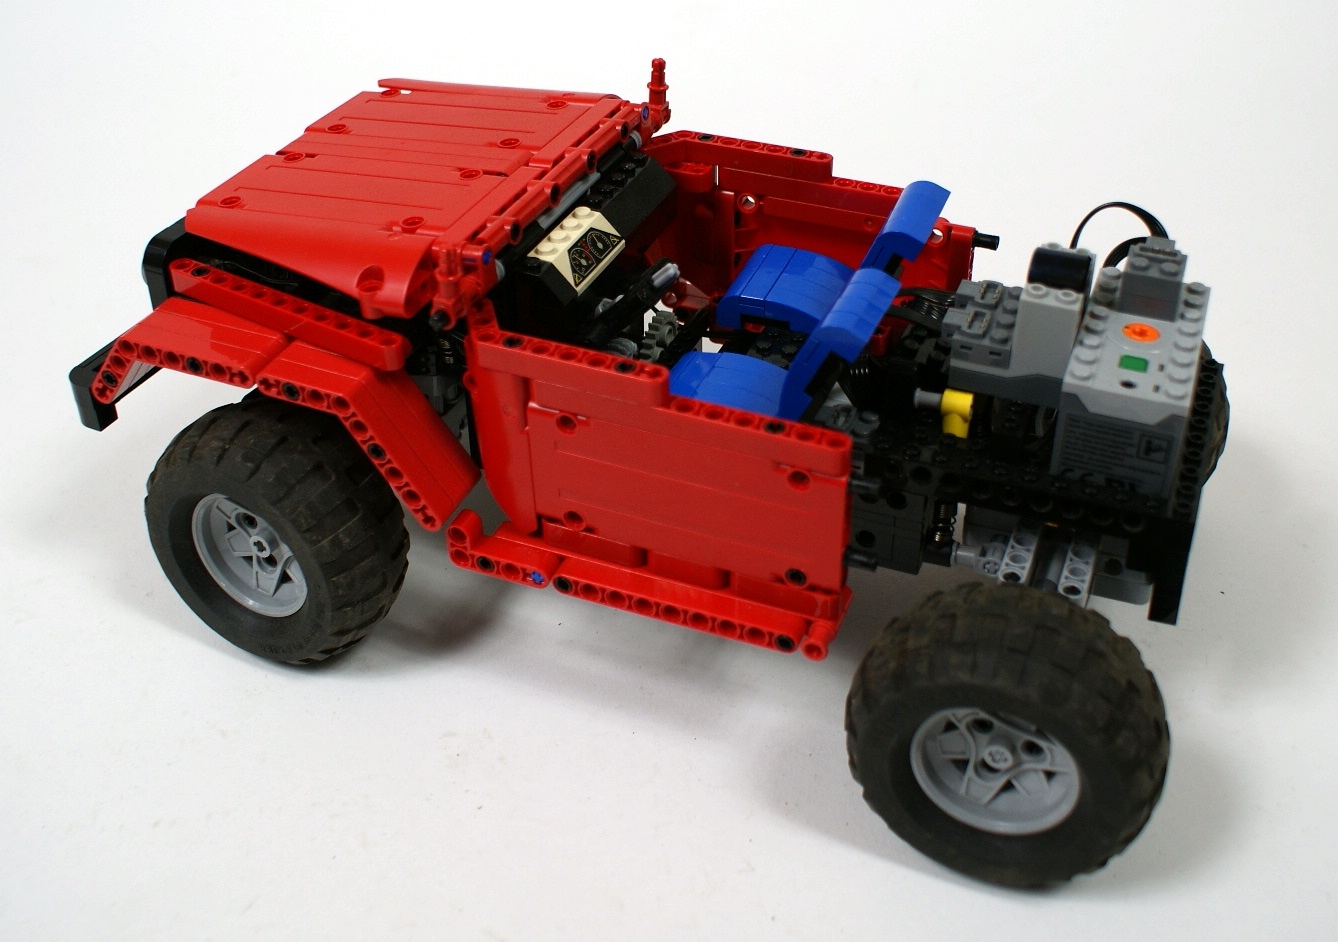
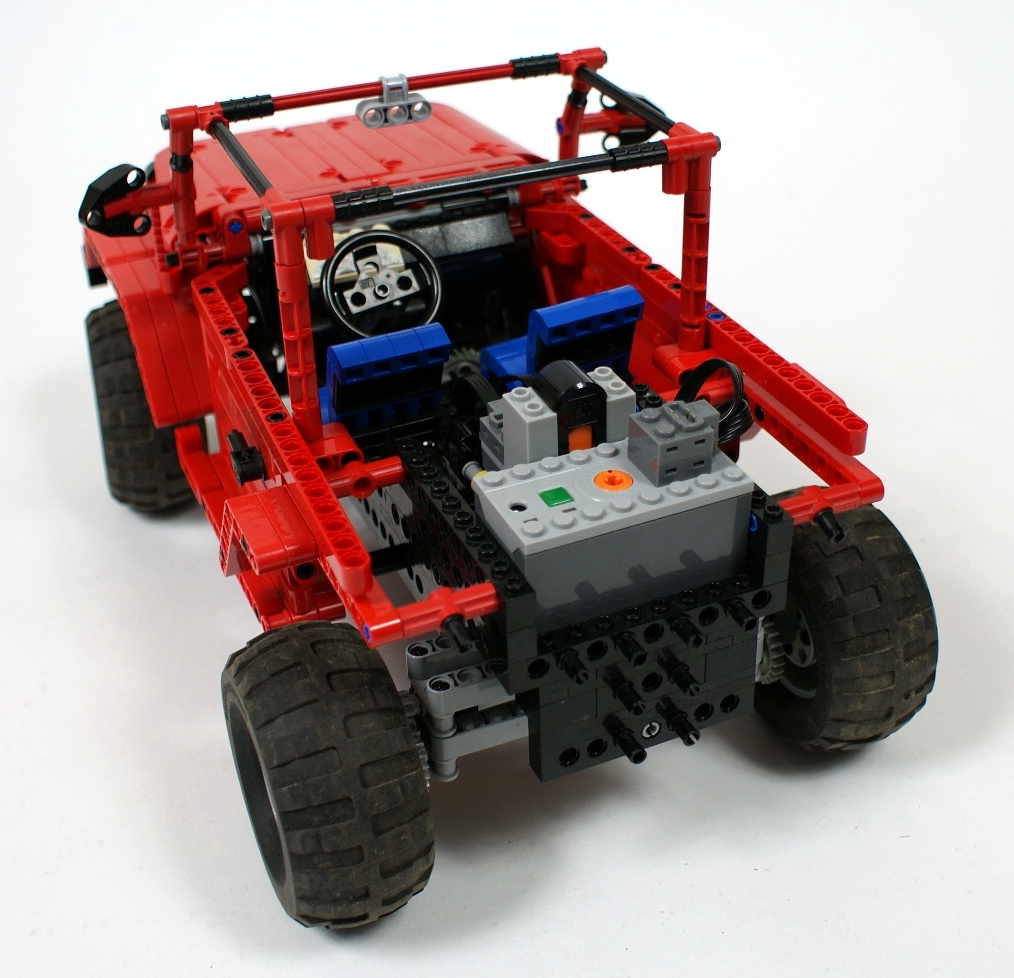
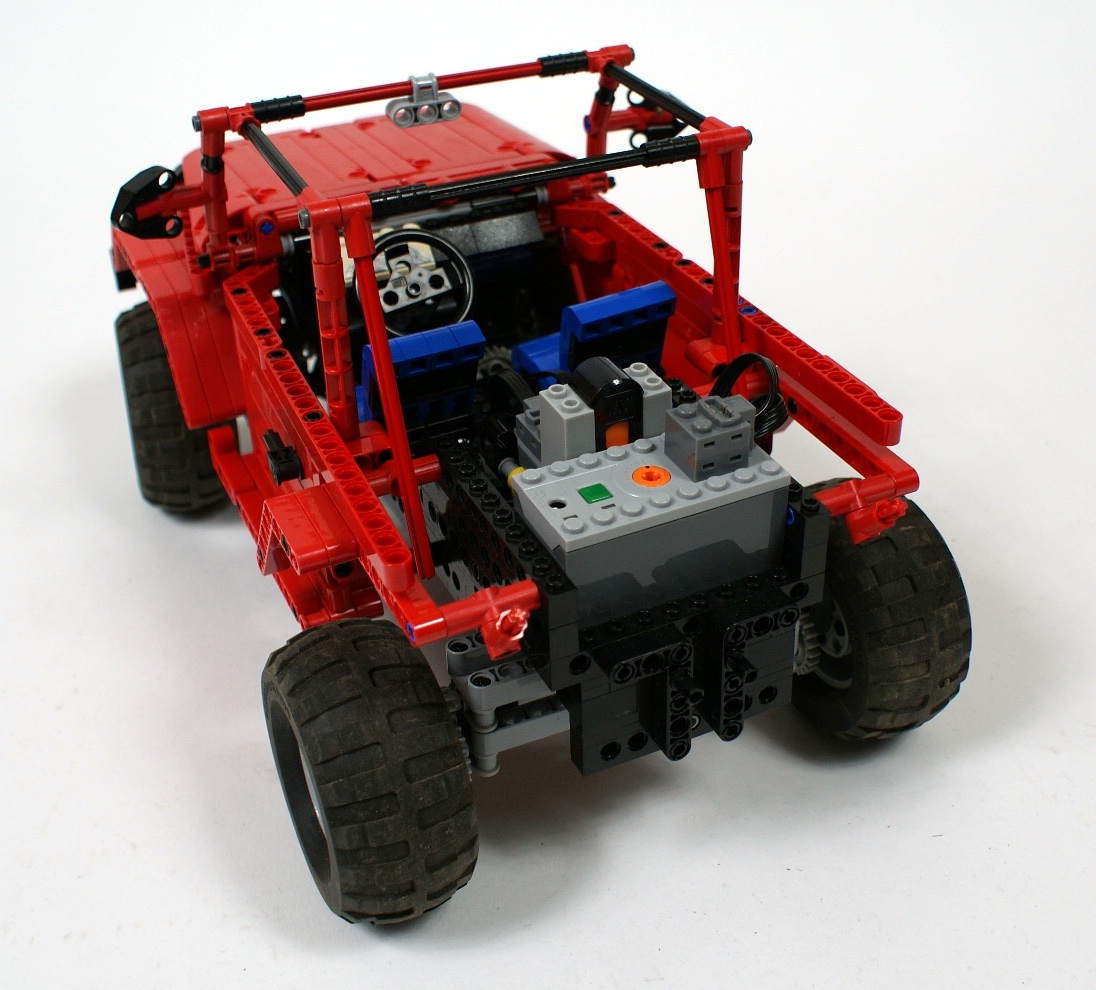
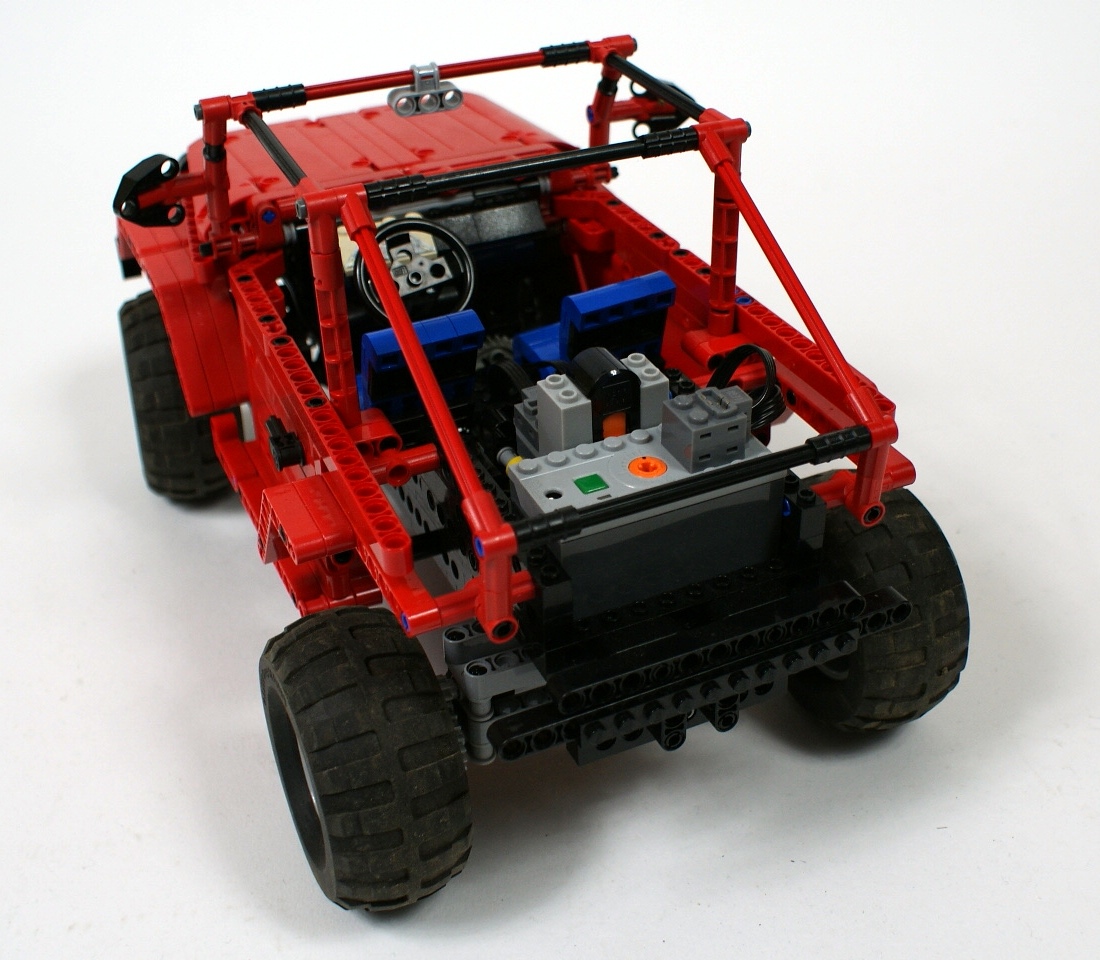
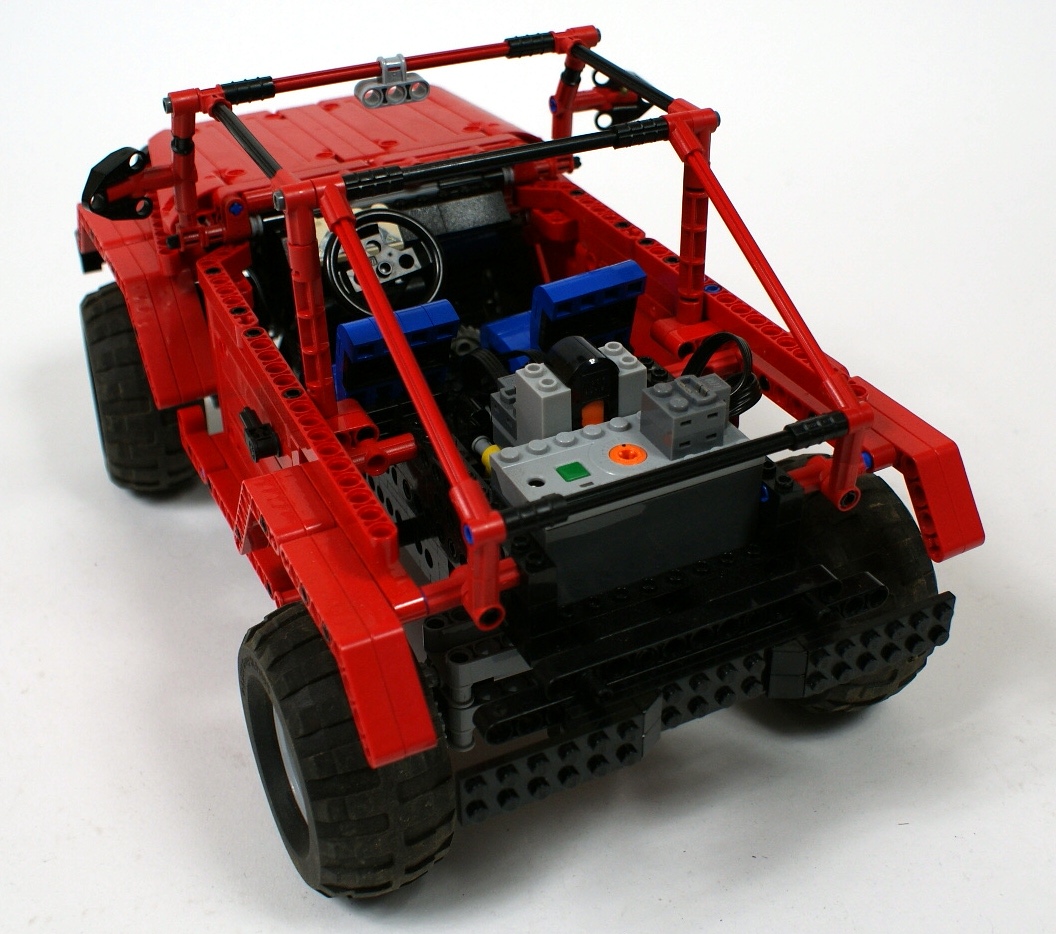
The model is driven by a single PF XL motor with a total 5:1 gear reduction, and the motor’s location is strictly related to our current rules. Our rules state that every model has to be equipped with a piston engine whose set-up and location are consistent with the original engine. This rule, however, can be omitted if the drive motor is located exactly where the original engine is. This is Jeep’s case – the PF XL motor occupies exactly the same place that is taken by the original engine in a real Jeep, hence there is no need for the piston engine and the model can be simpler and lighter. You can see the top ends of the front axle’s shock absorbers next to the motor. It should be noted that the PF XL motor actually touches the front axle, but because it’s located in the center of the chassis and because it has a round shape, the axle can still oscillate under it. Such a trick was necessary to fit the XL motor under the bonnet.
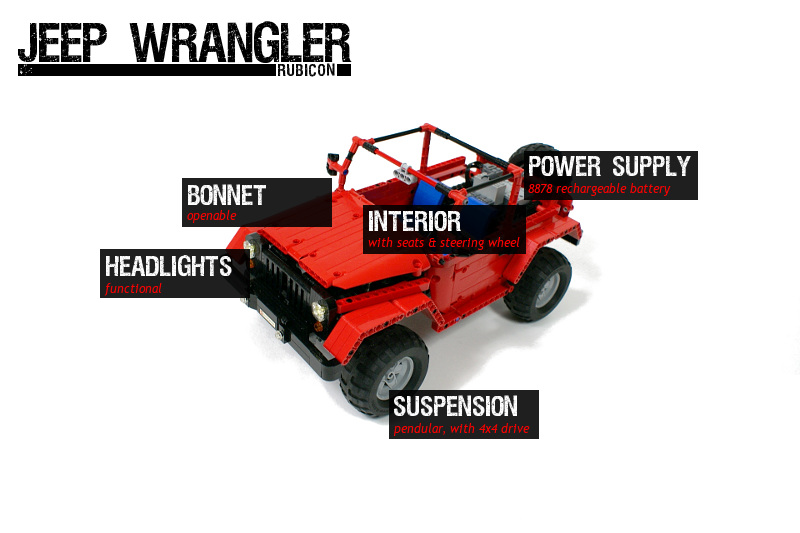
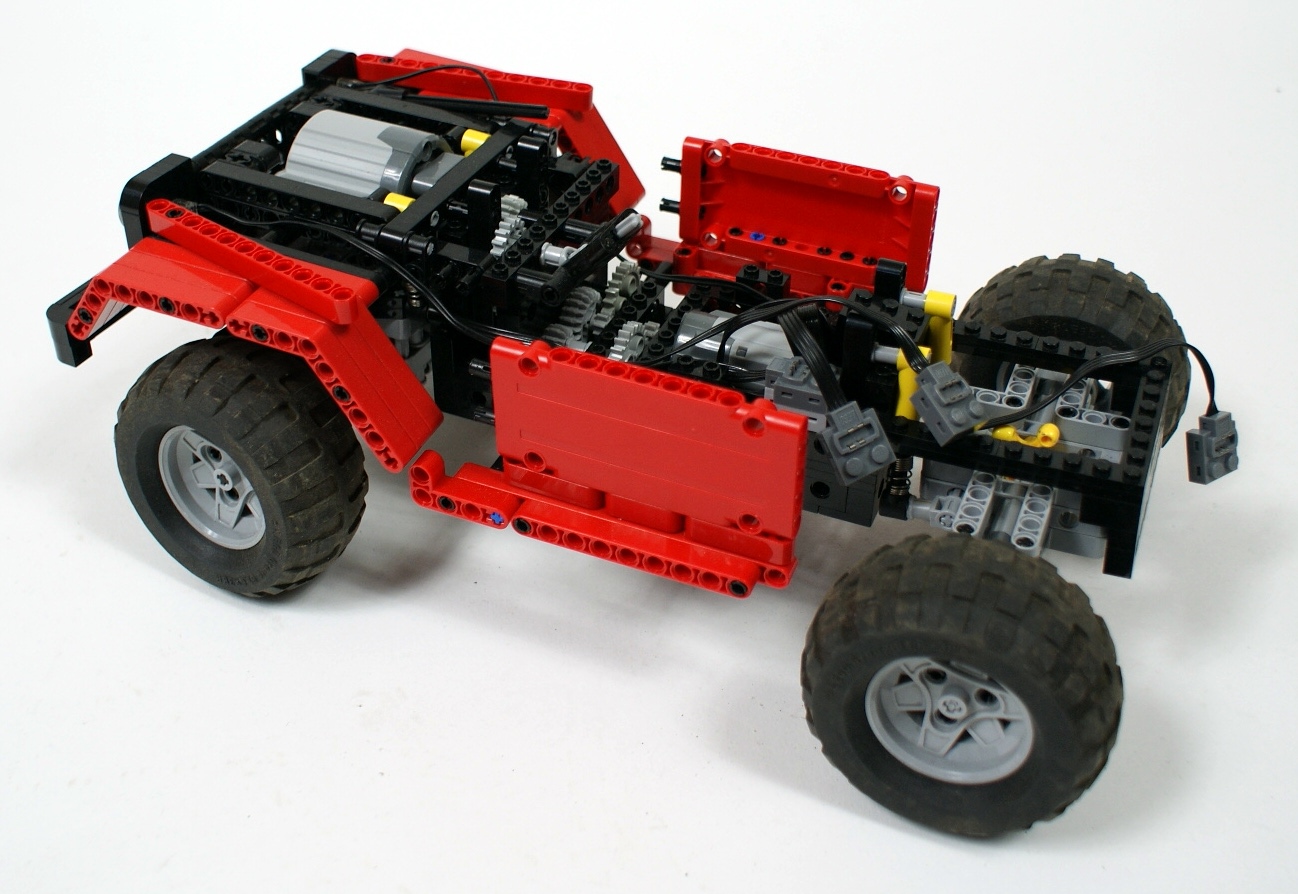
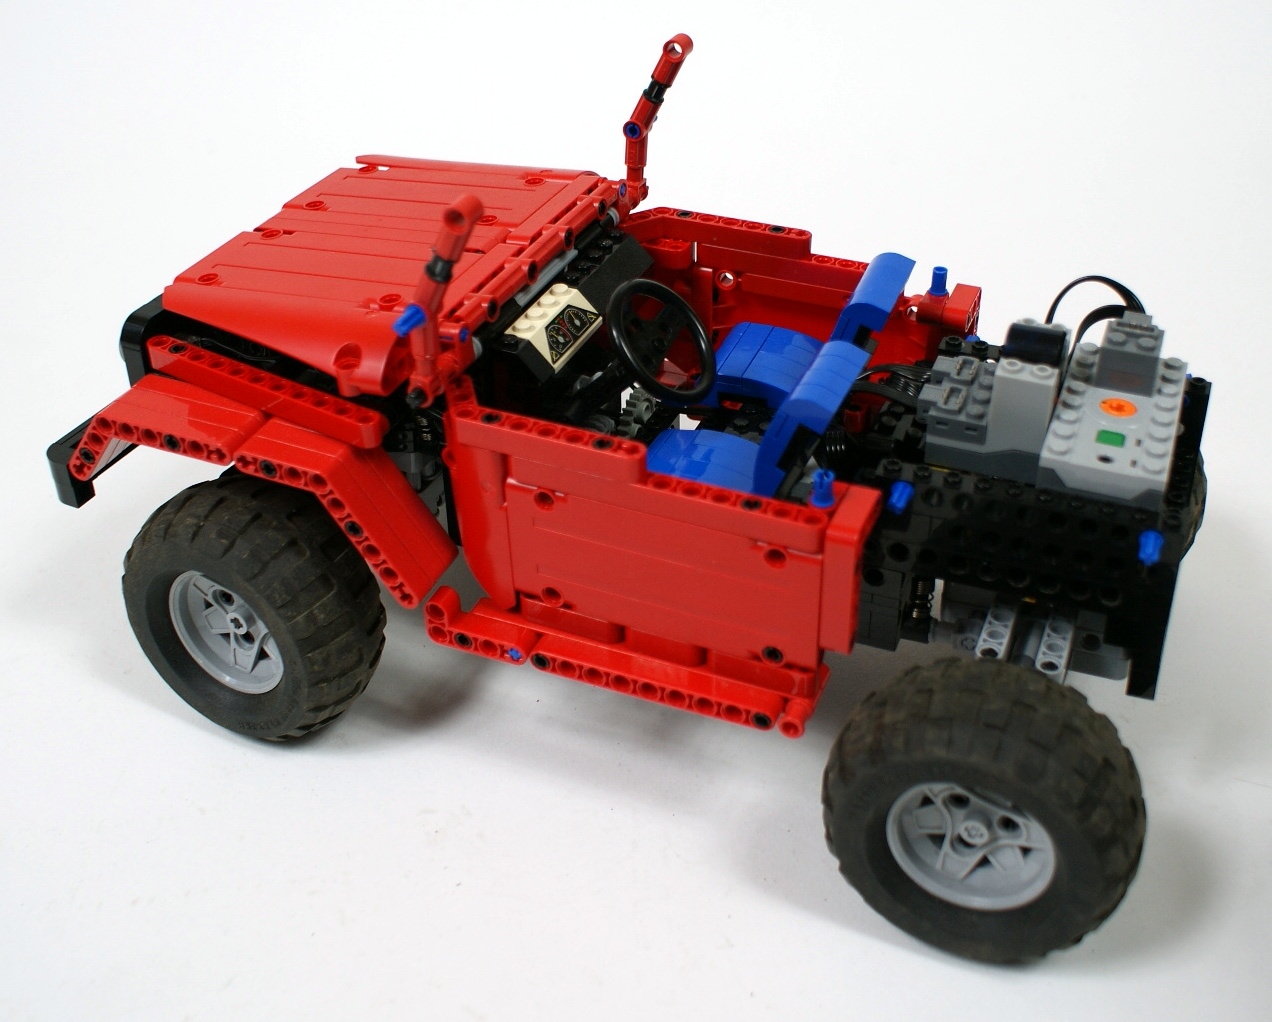
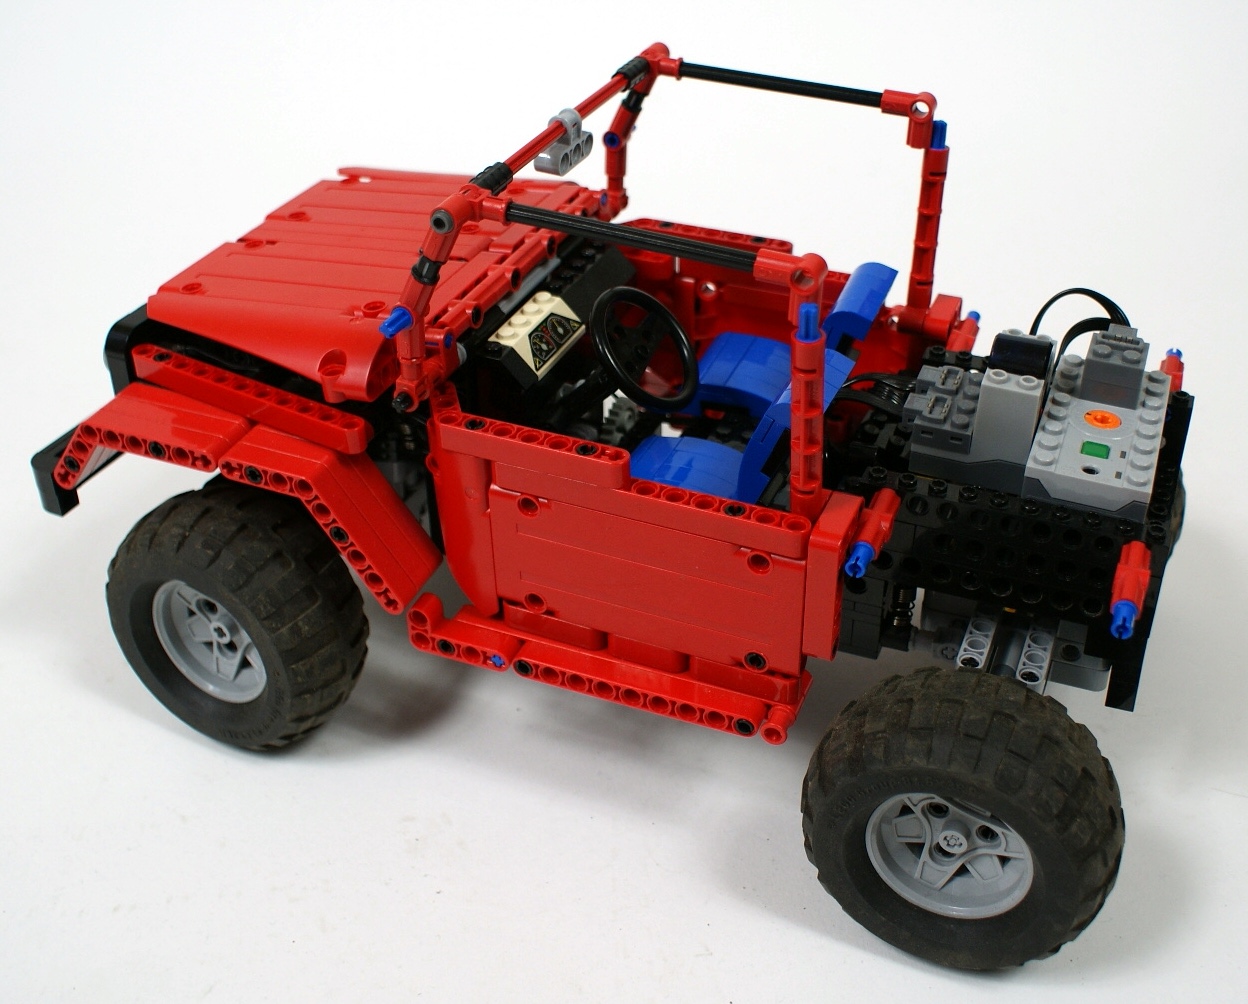
The steering is controlled by a PF Medium motor with a 9:1 gear reduction. The motor is located between the seats in the cabin, and the steering wheel is connected to it. The cabin has a safety cage built on top of it, which is strong enough to survive a turnover without any damage. Finally, there is the 8878 rechargeable battery box and the IR receiver located over the rear axle, as a counterweight against the PF XL over the front axle.
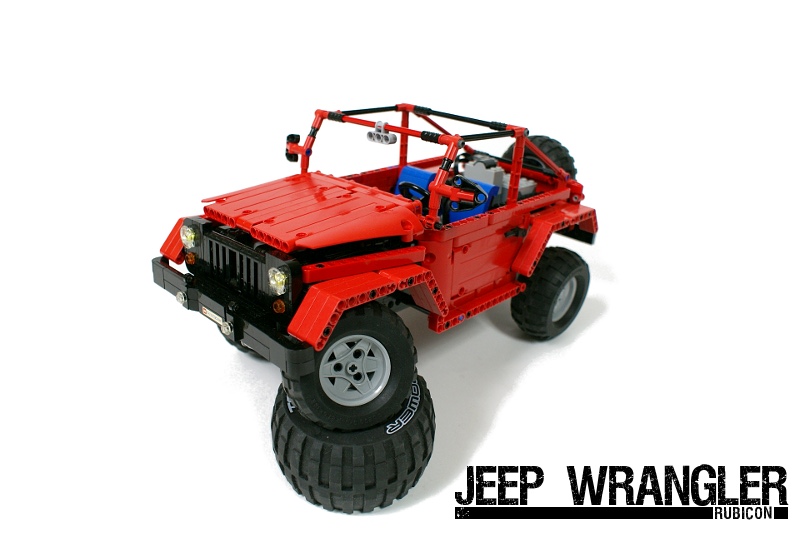
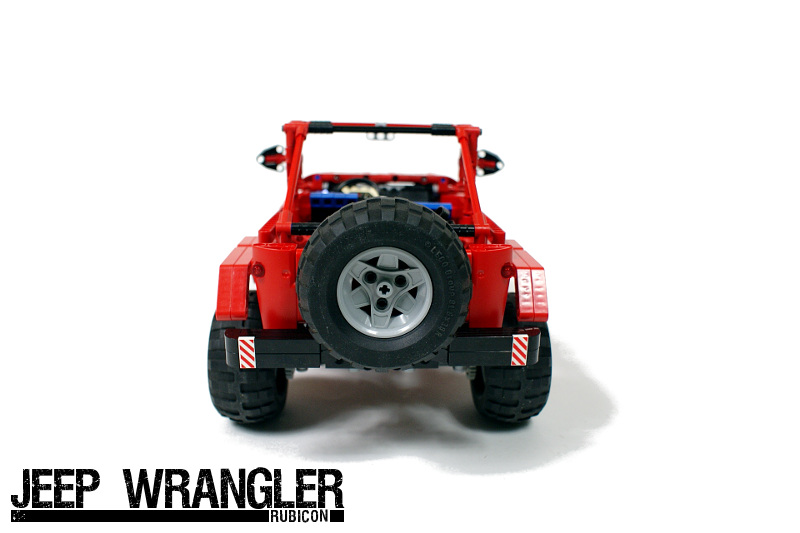
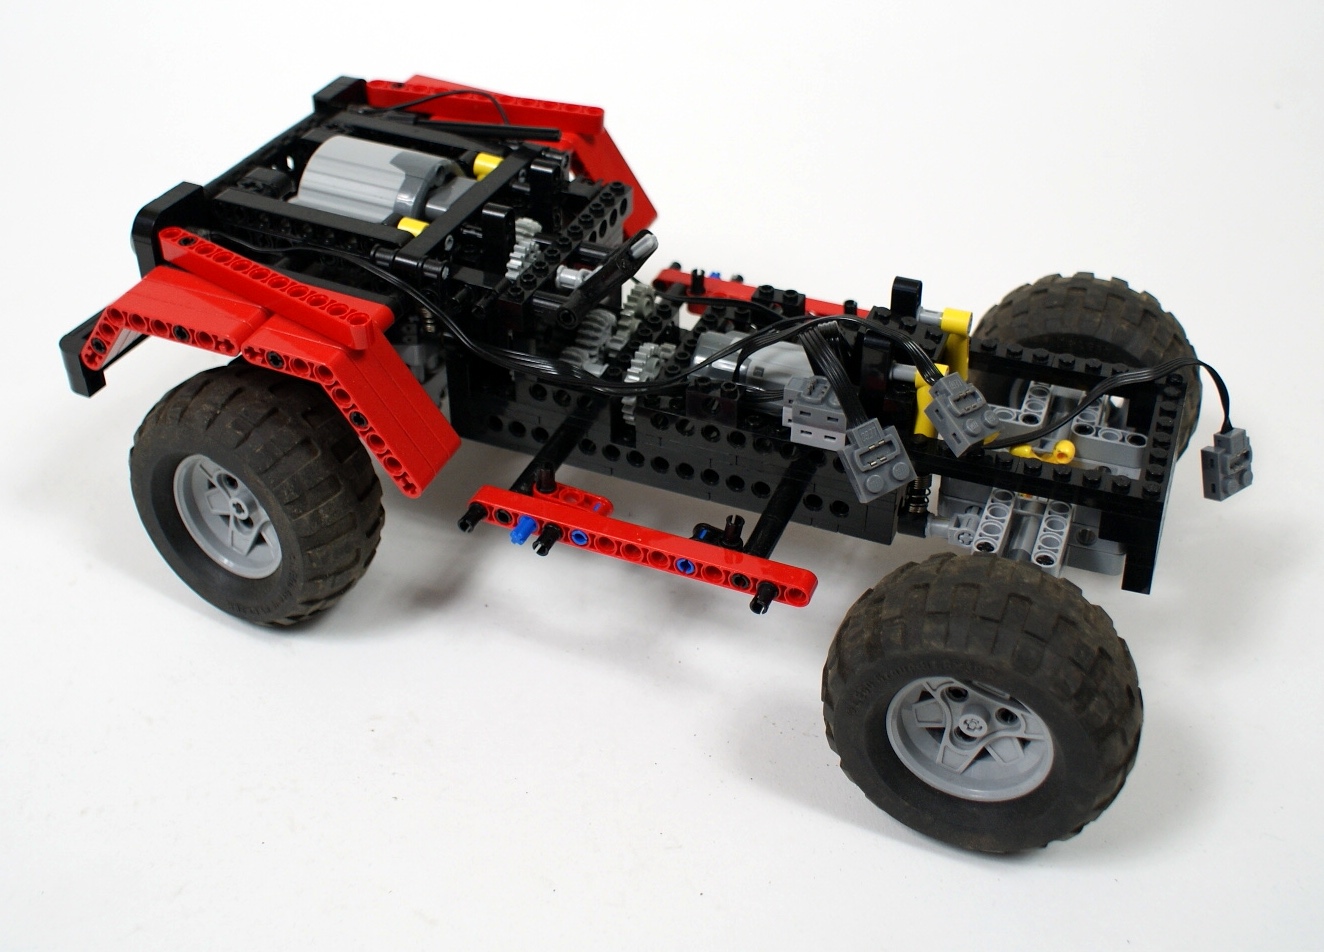
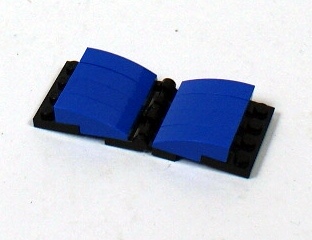
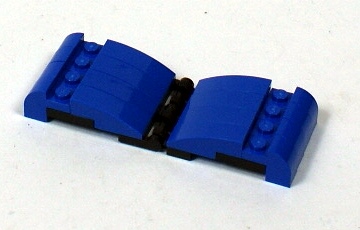
One special feature of the bodywork is a droppable modules design. The obstacles used in our races are often larger than the ones the real vehicles are designed for, so the usual practice to handle this difference is to increase the model’s ground clearance. I wanted to avoid it, however, to keep the Jeep’s center of gravity as low as possible. It meant that some parts of the body are very likely to touch the ground e.g. when the approach angle proves to be insufficient. Therefore I designed a number of body elements as independent modules that would fall off when stressed, on assumption that it’s better to drop something than let it get the whole vehicle stuck. The list of droppable elements includes front and rear bumper, rear spare wheel and front mudguards. The sides of the cabin are somewhat elastic too. This design is also helpful when the front wheels’ steering lock makes them collide into some parts of the body.
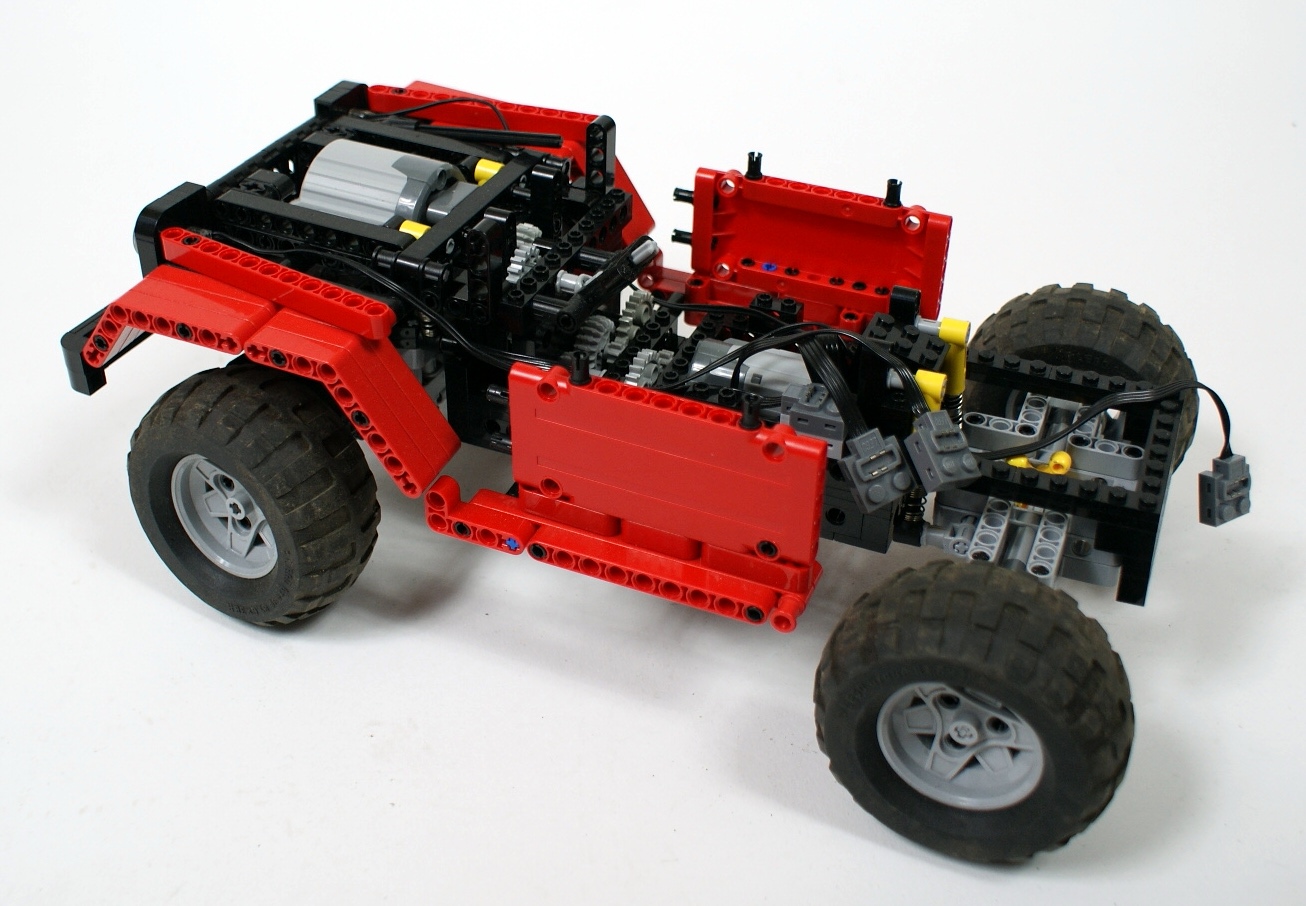
The model turned out to be pretty stable, with a well performing suspension and an excellent amount of torque available. It was my goal to prefer the torque over speed, since I did not want the model to get stalled under any circumstances while its speed didn’t seem crucial. This is second model of a Jeep used in our races, and it’s much different from its predecessor, the Jeep Willys built by Atr. Among other things it is heavier, larger and slower. Observing the two models compete against each other and comparing their performance will be certainly a great experience.
The main disadvantage of this model is its size. The standard scale used for vehicles in our races is 1/13. I was in hurry while building the Jeep, so I picked up the wheels I found most suitable and scaled the whole model accordingly to their size. Eventually it turned out to be in 9/1 scale which is much different from the required one, and will probably result in letting this model race outside the official ranking (in a so-called ‘open class’). Still, building and testing this model was a valuable experience, and driving it in a race will be so too. It was also acclaimed by other builders and race contestants for its look, its authenticity and its performance. If it turns out to be successful in the race (meaning that it suffers no fatal malfunction and doesn’t end up last), I will prepare and publish a complete step-by-step instruction for it, as well as schemes of front and rear axle along with their individual instructions.
Update: since the Jeep performed well at the race, the instructions are under the photos.
Photos:


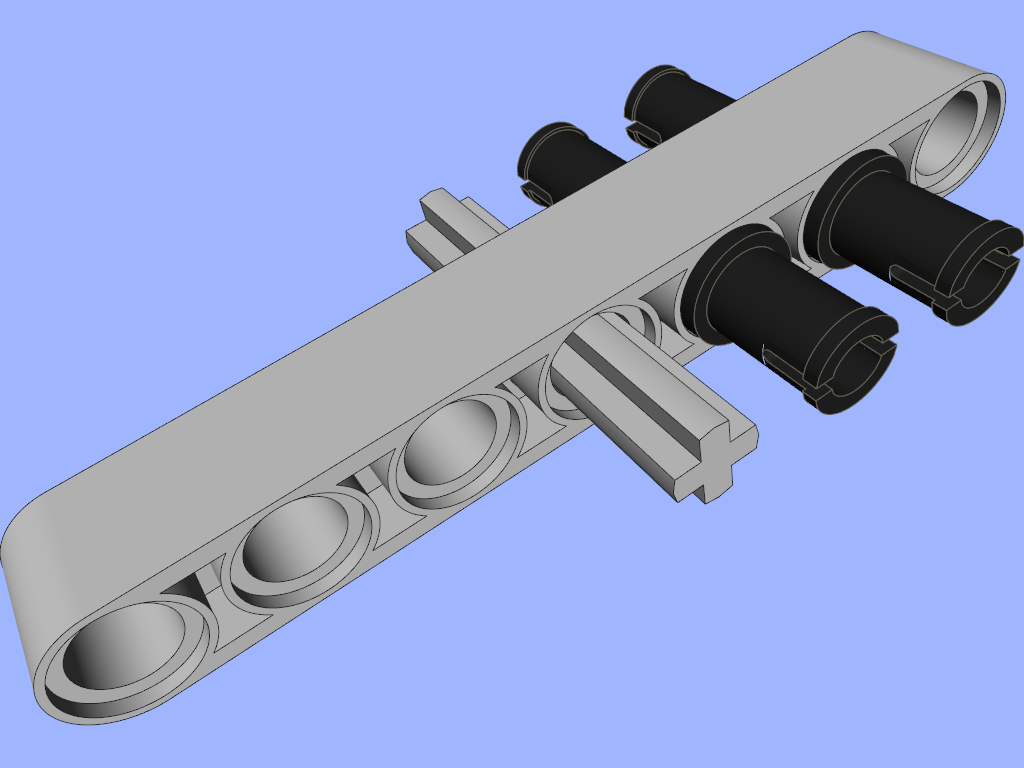
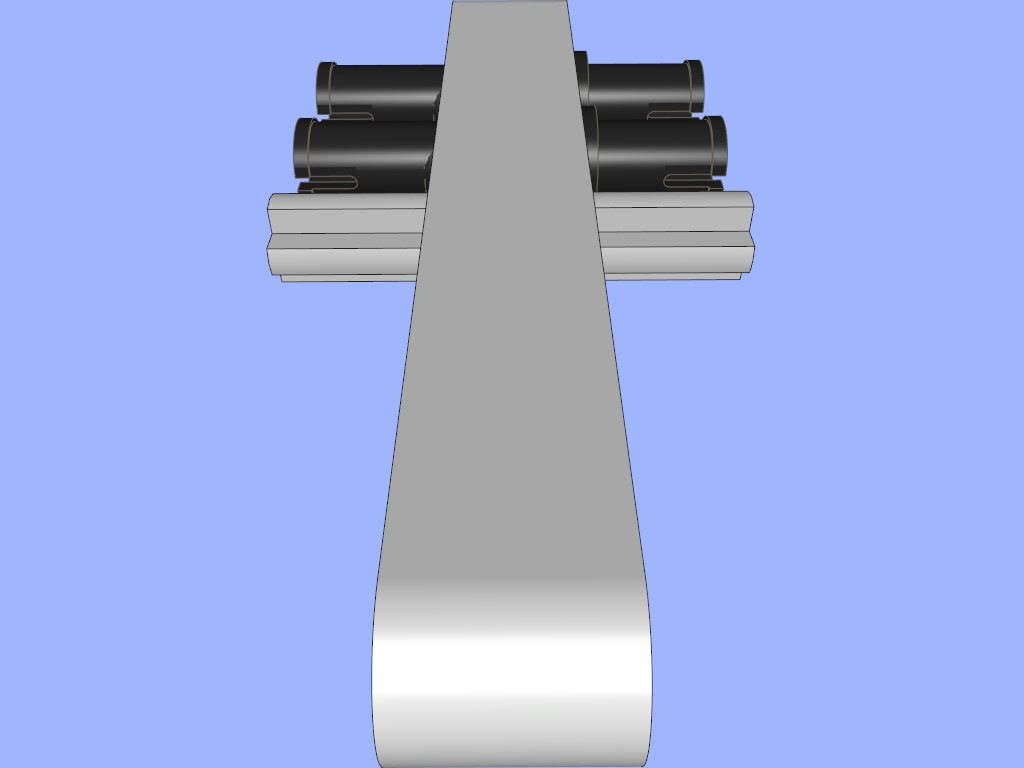
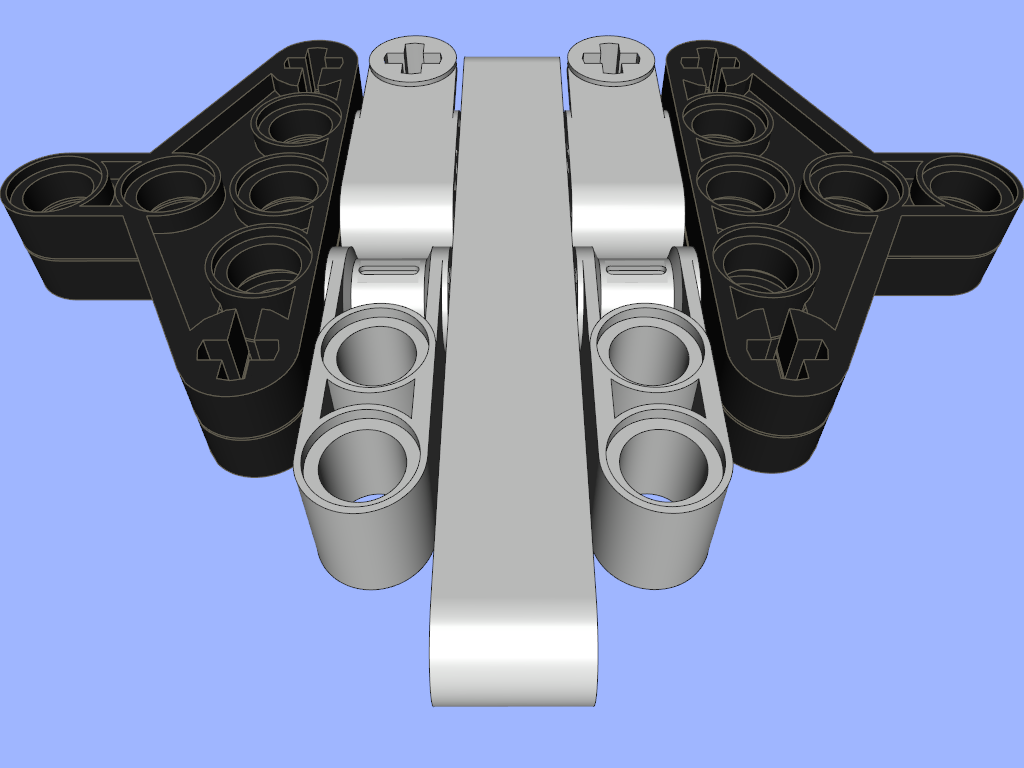
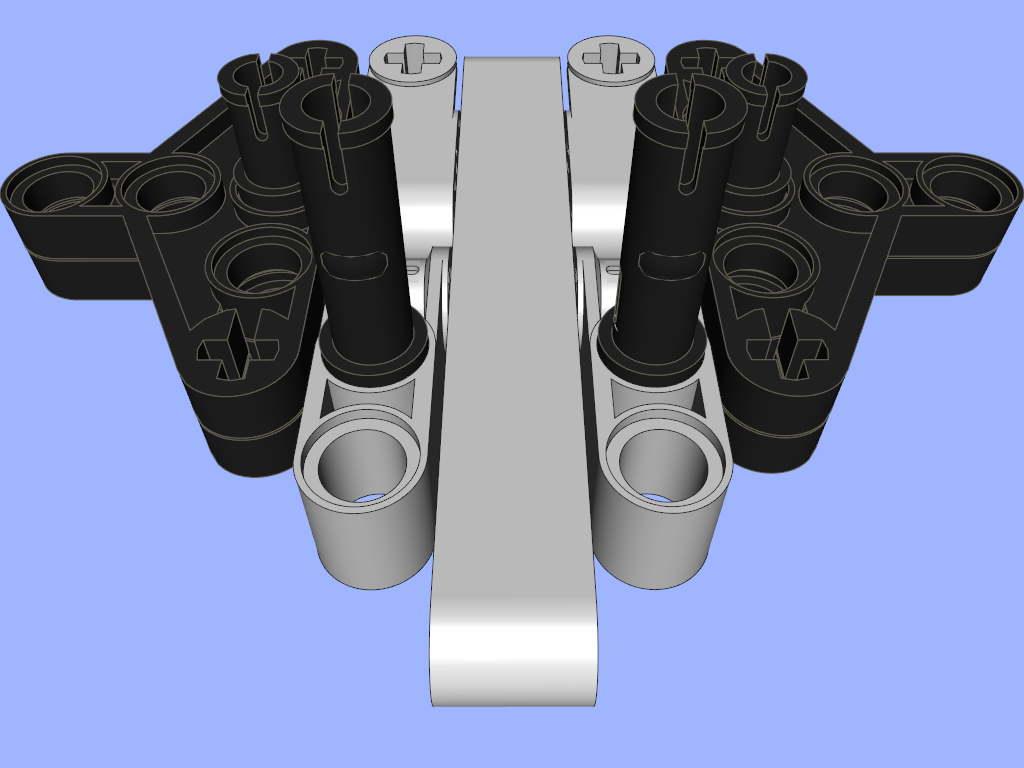
Full instruction with parts list:


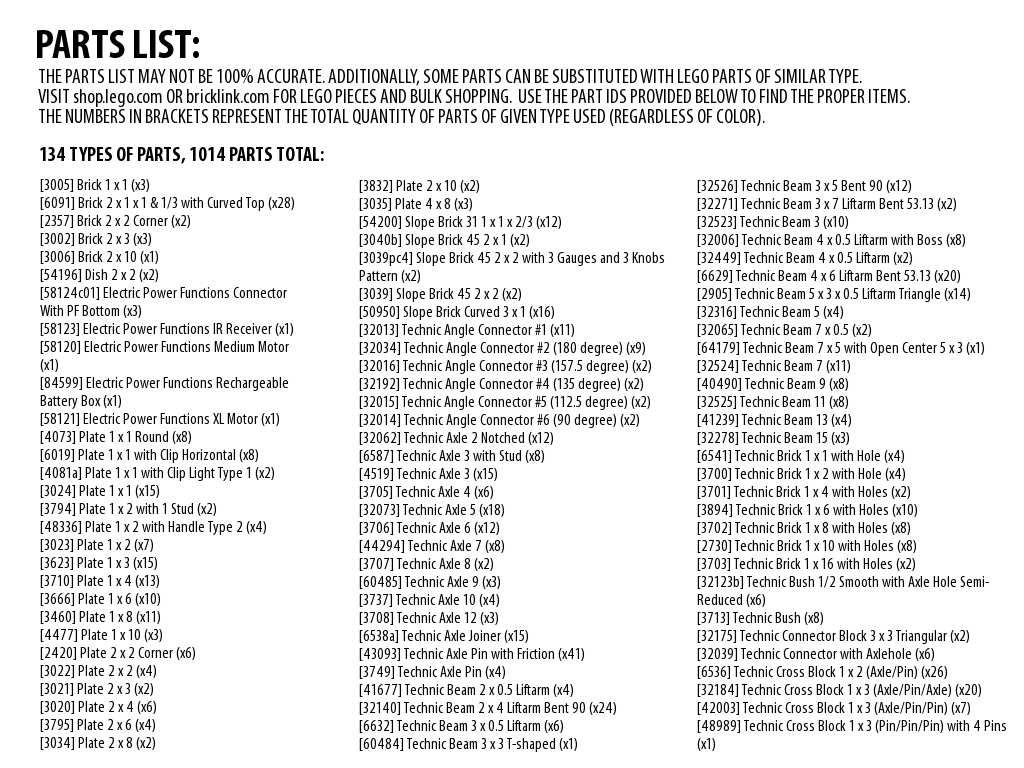
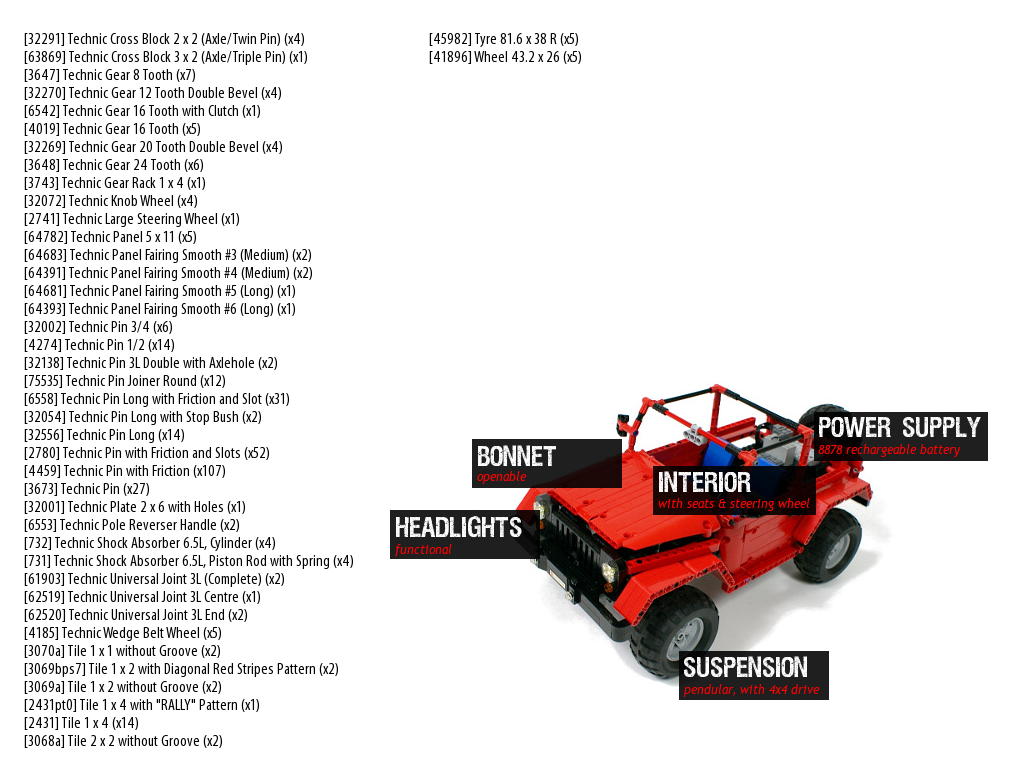

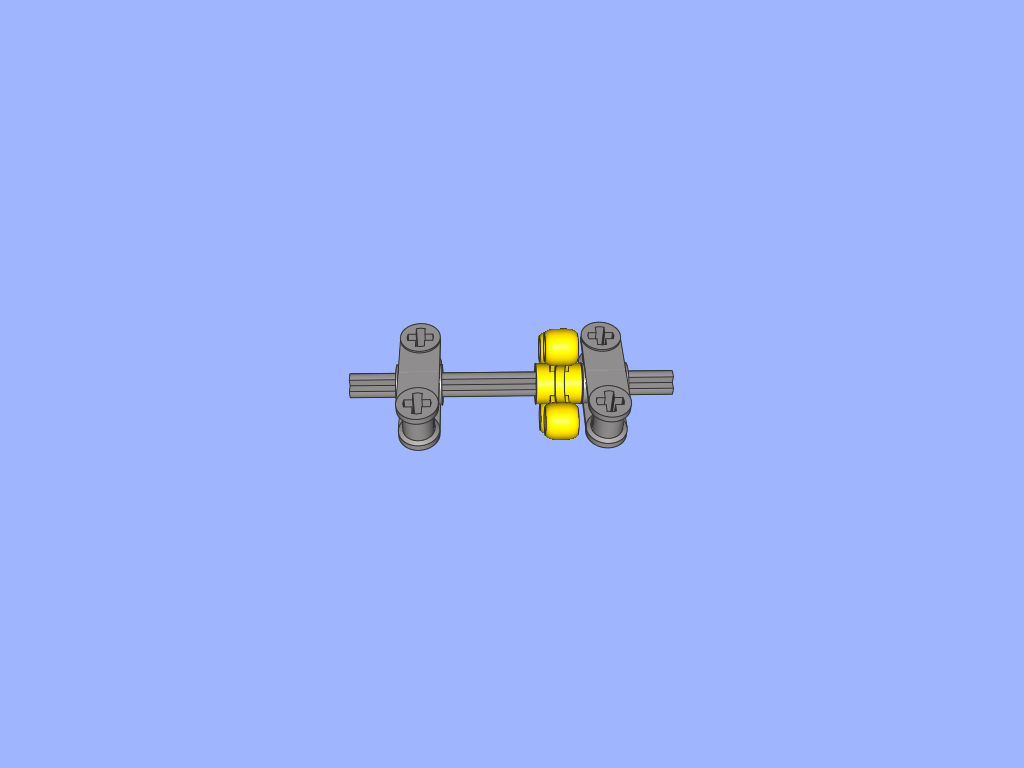
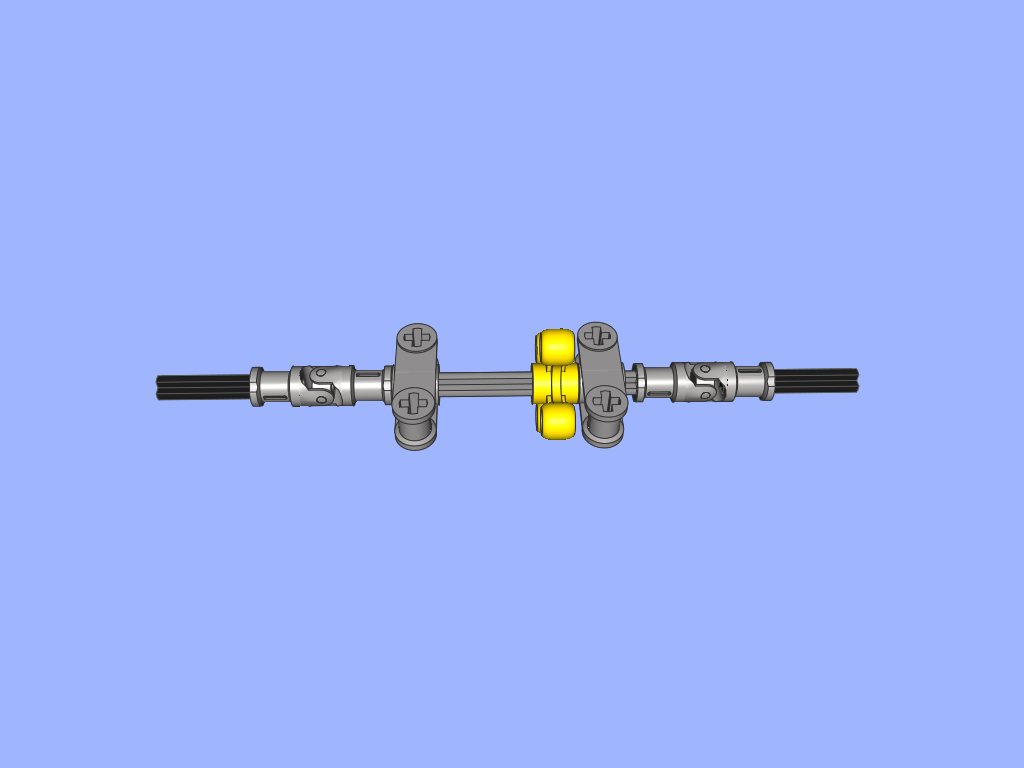

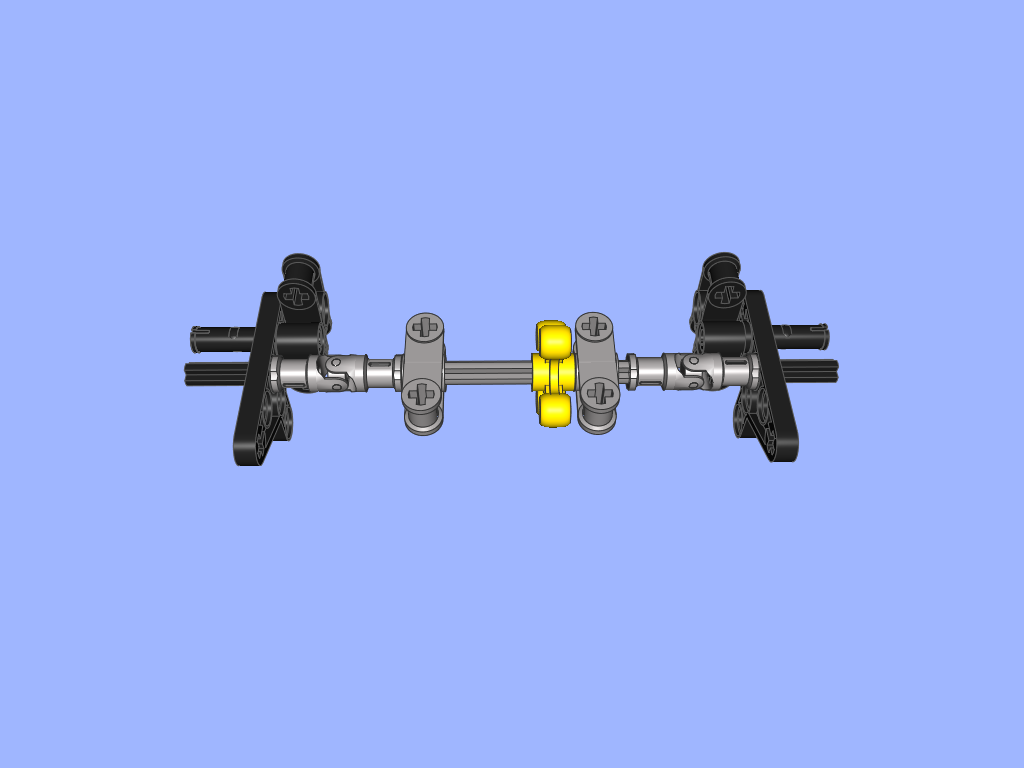

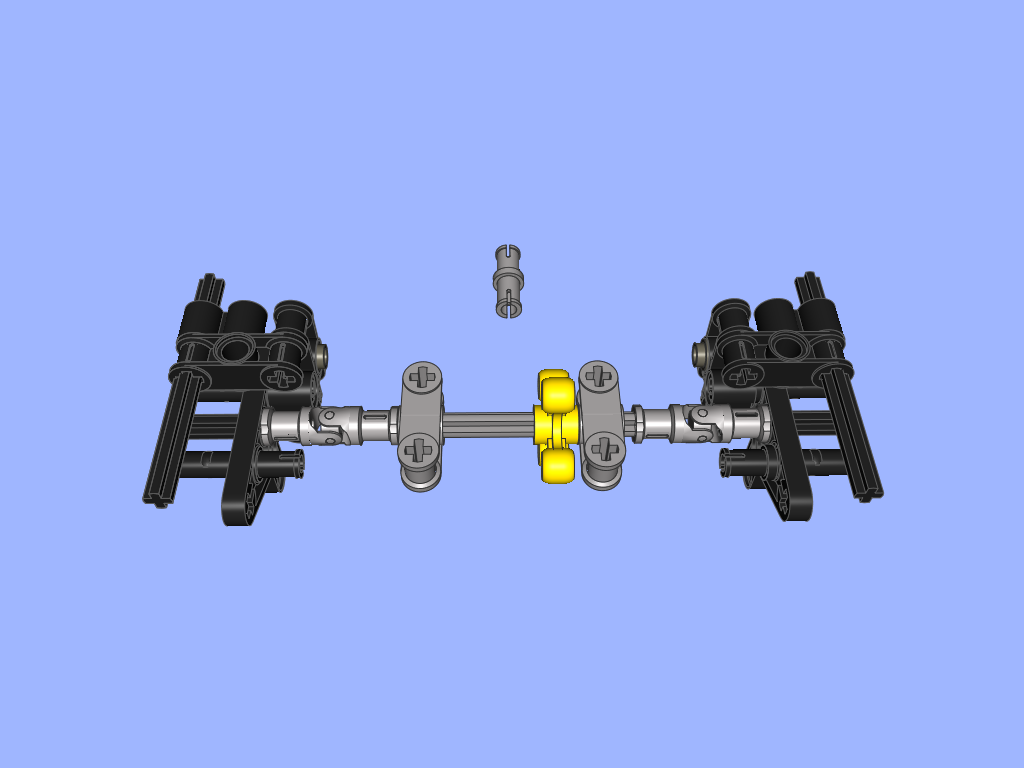
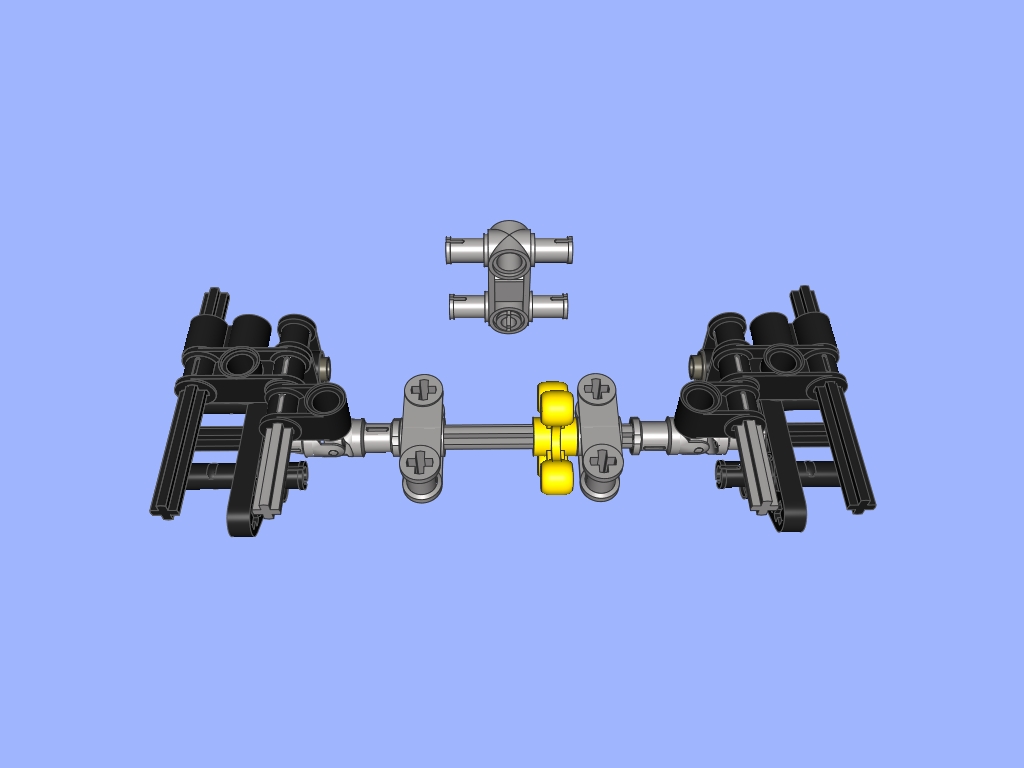
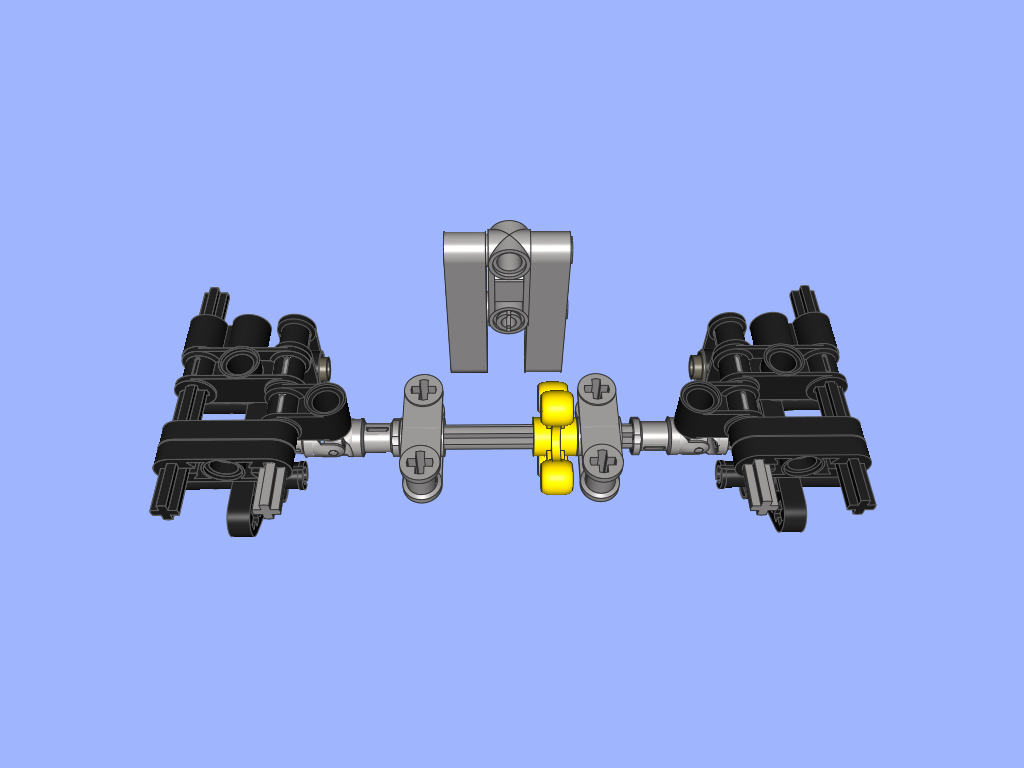

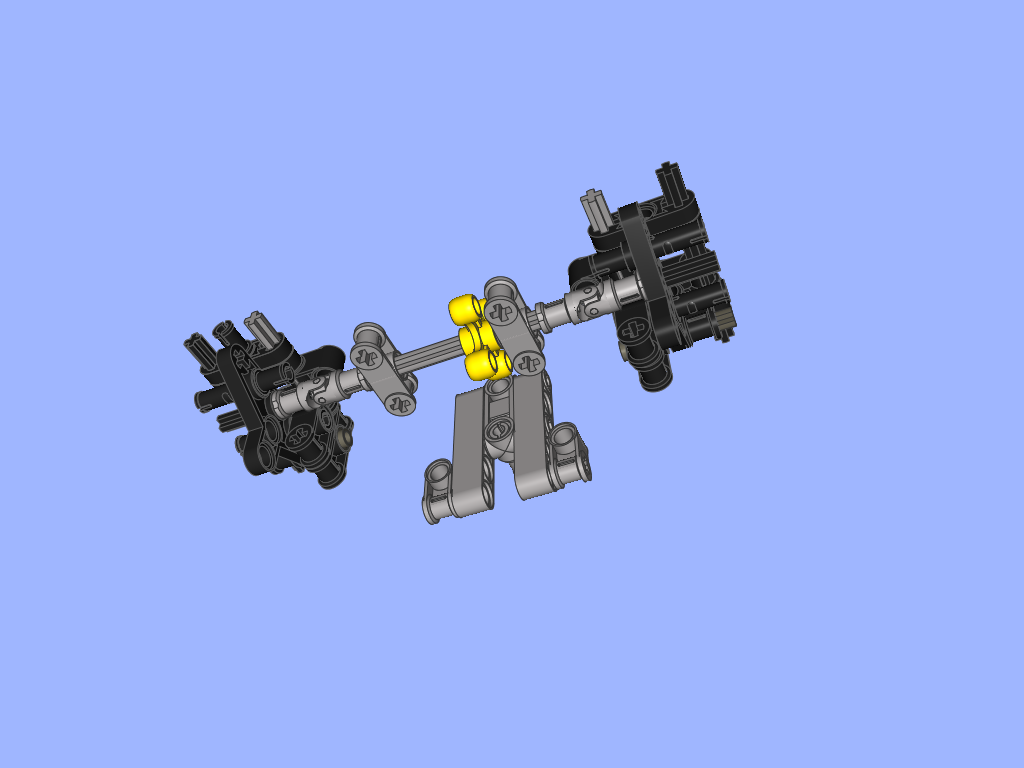

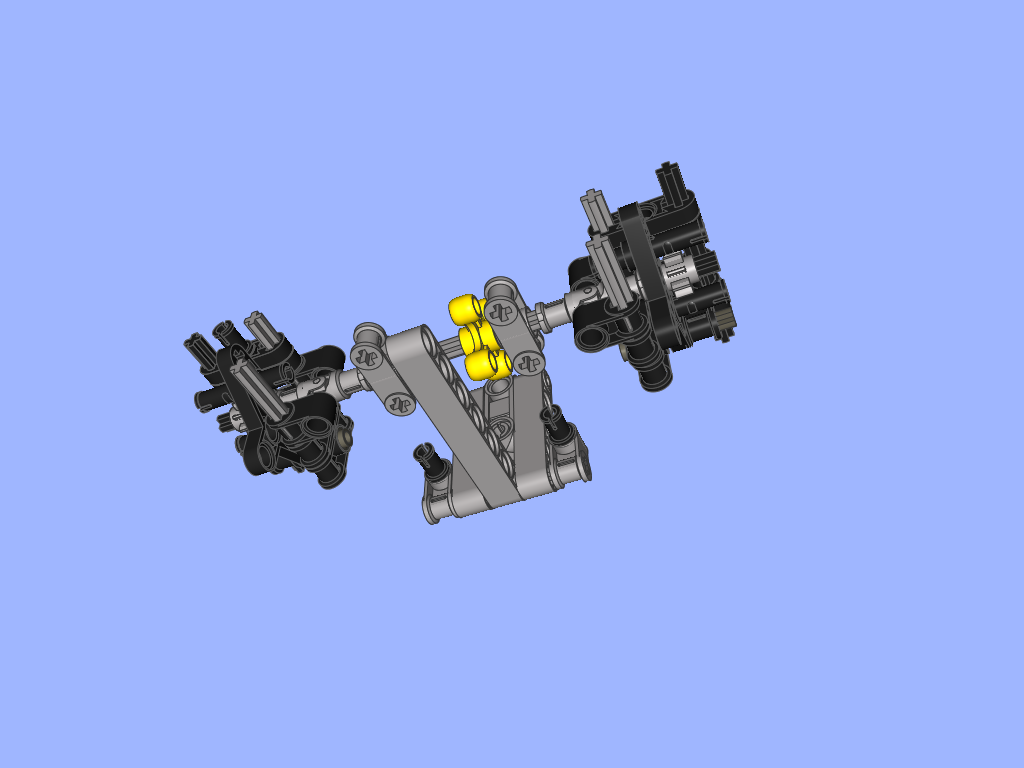

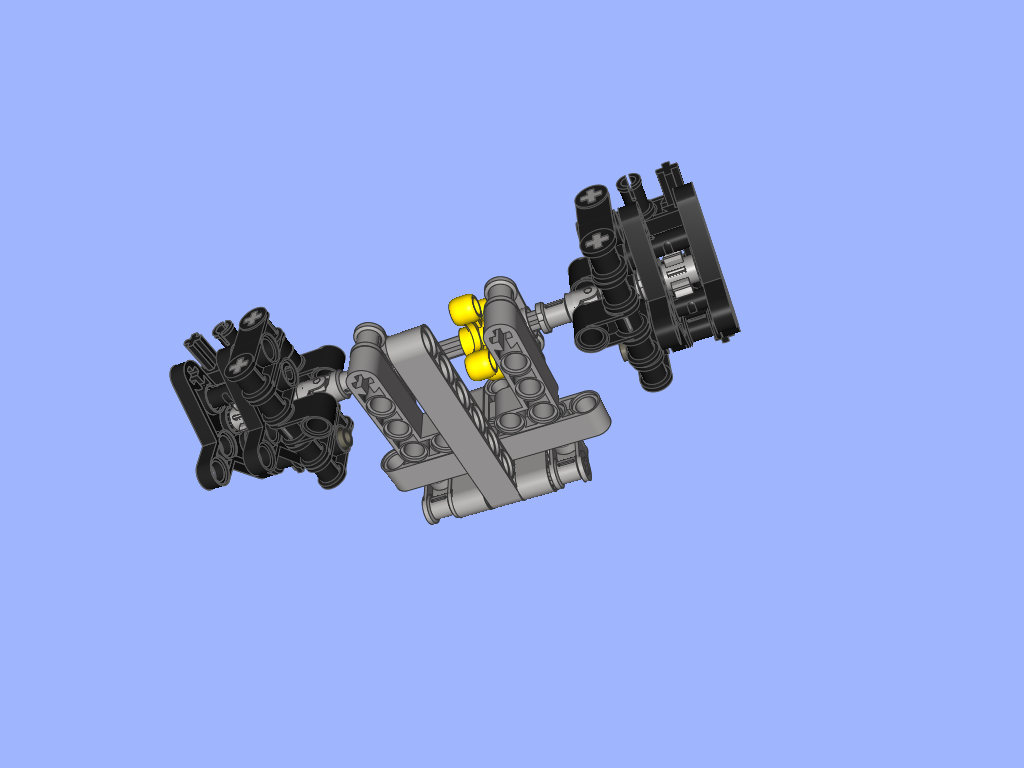
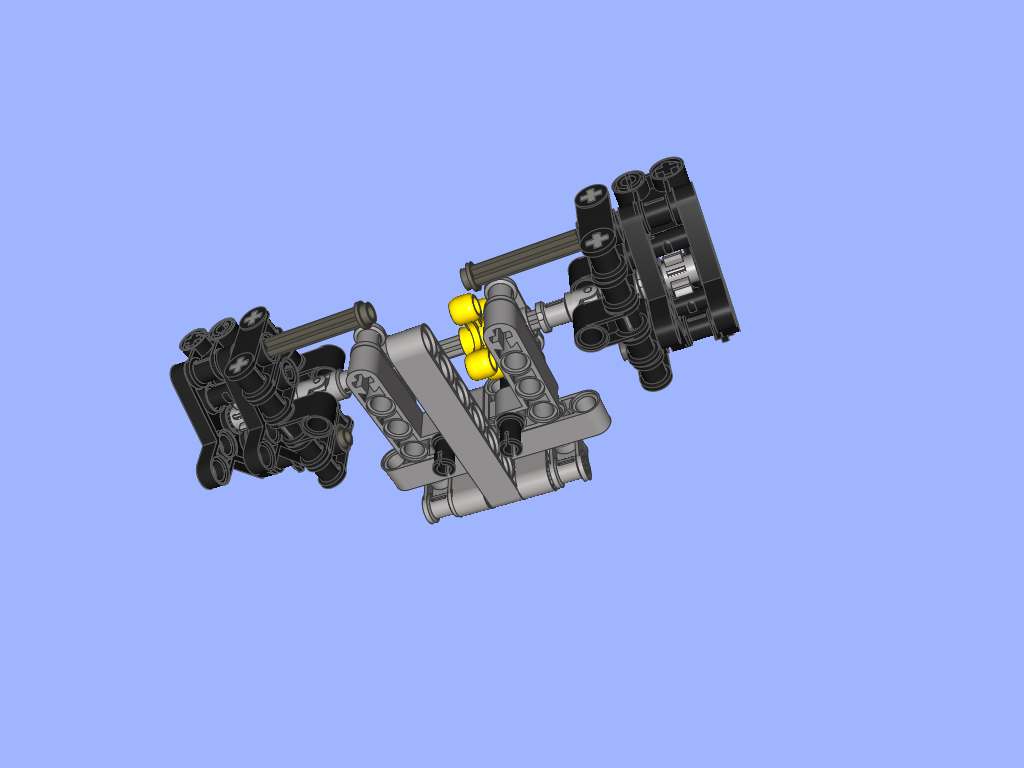
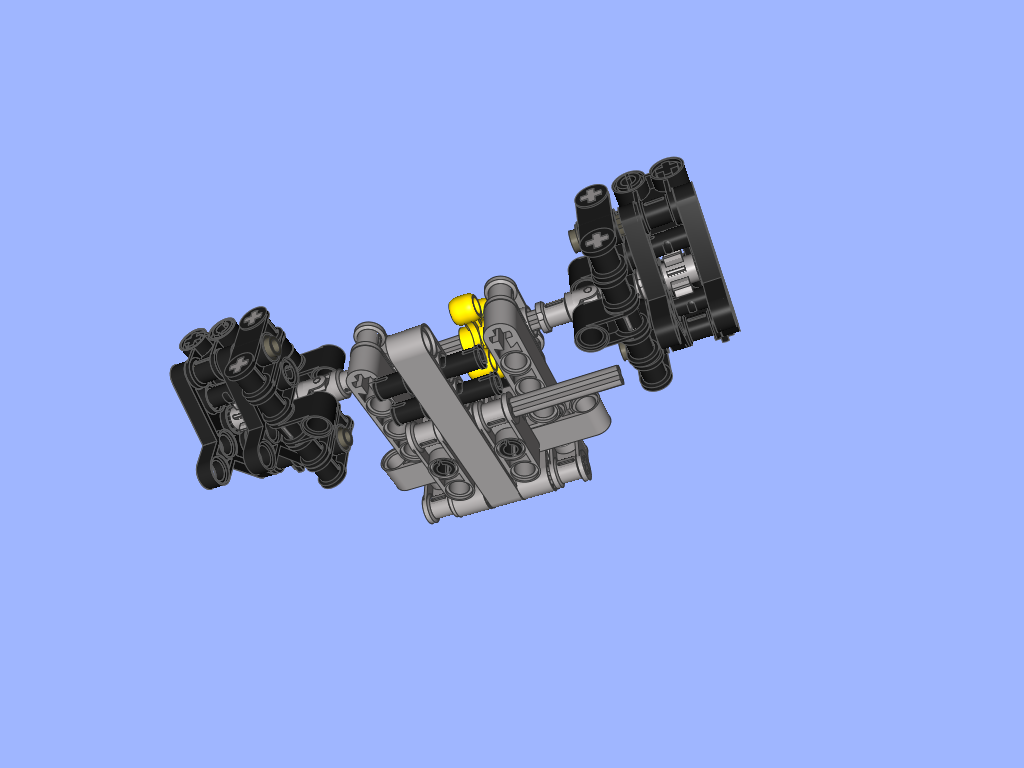
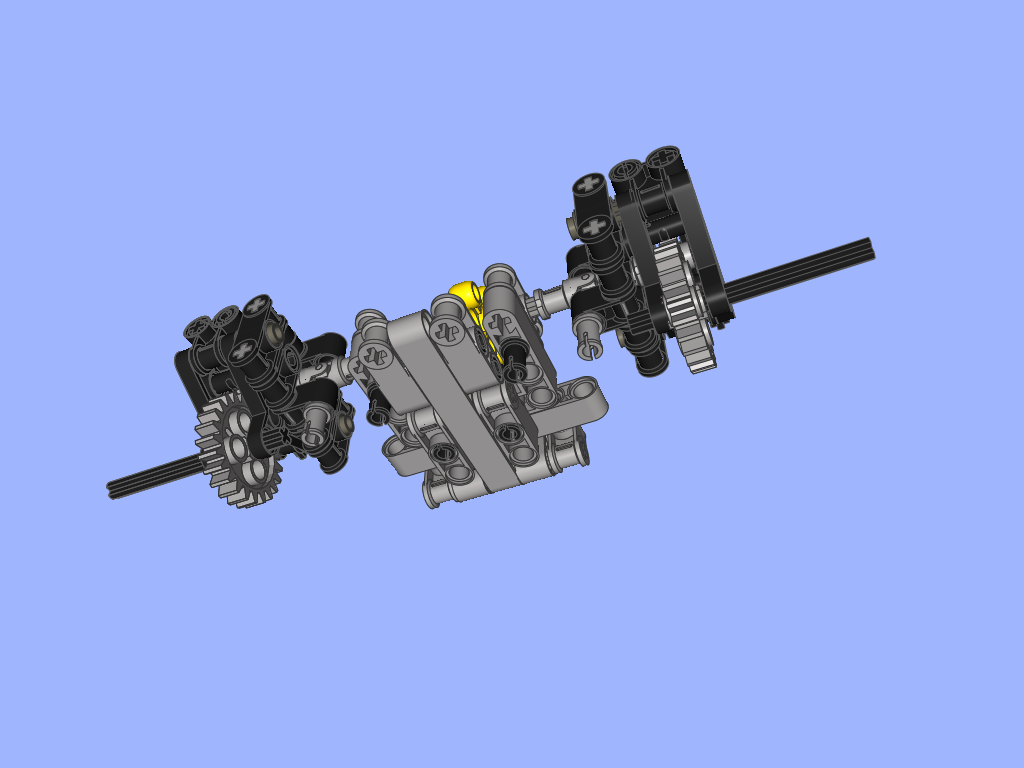
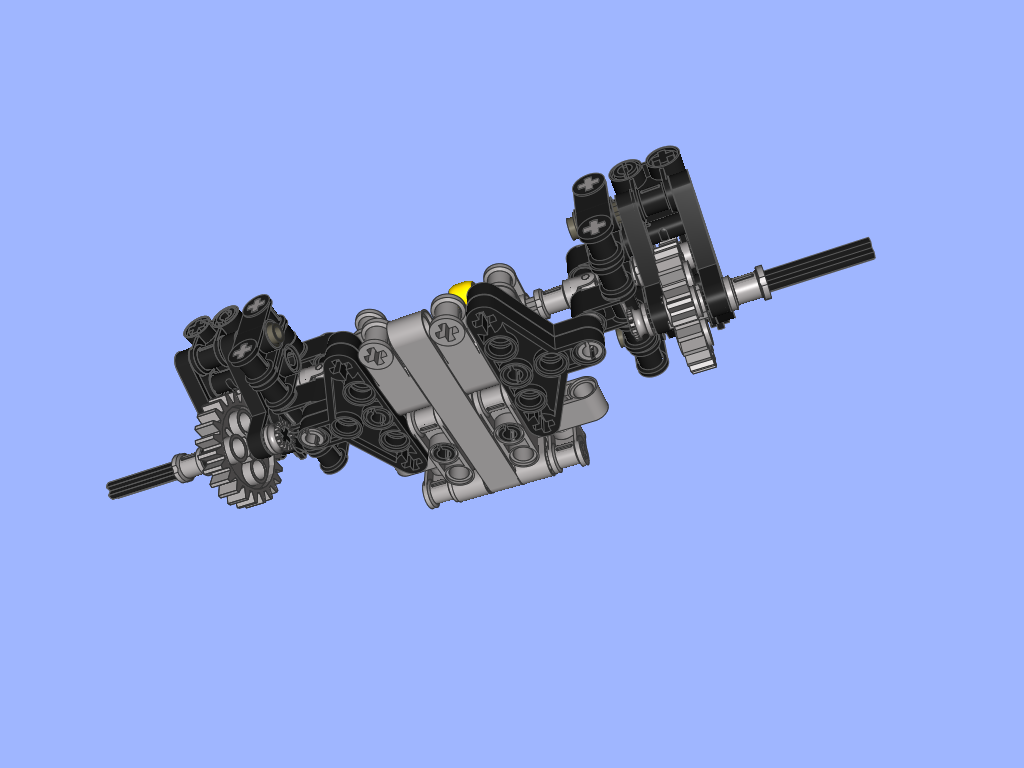
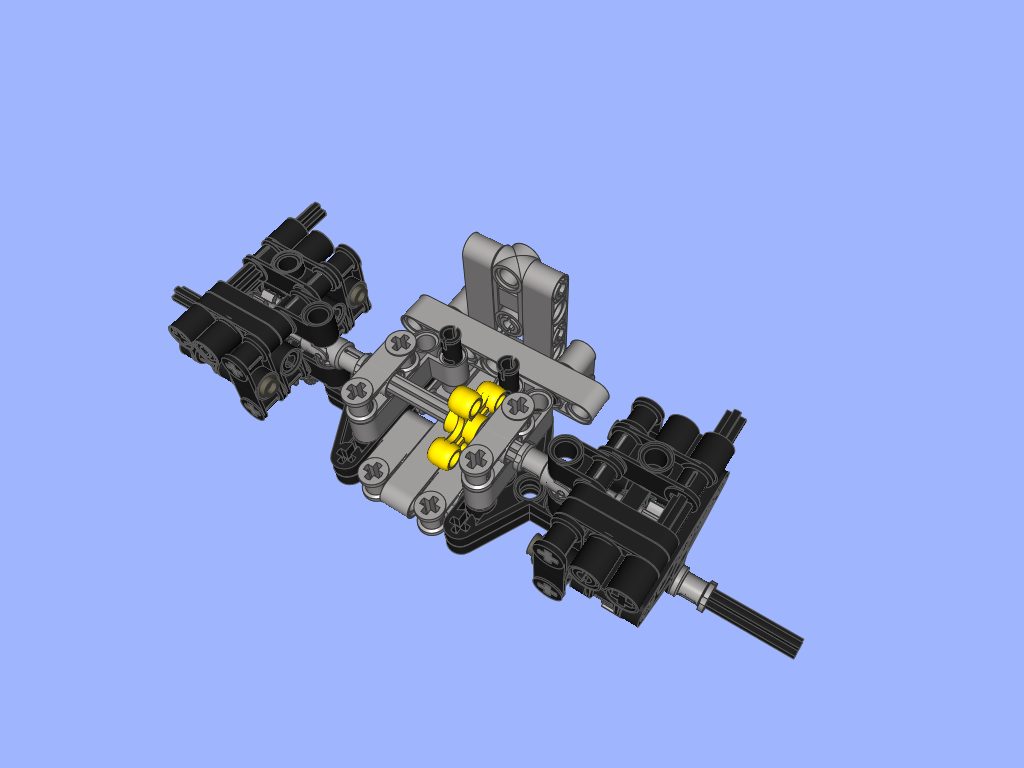
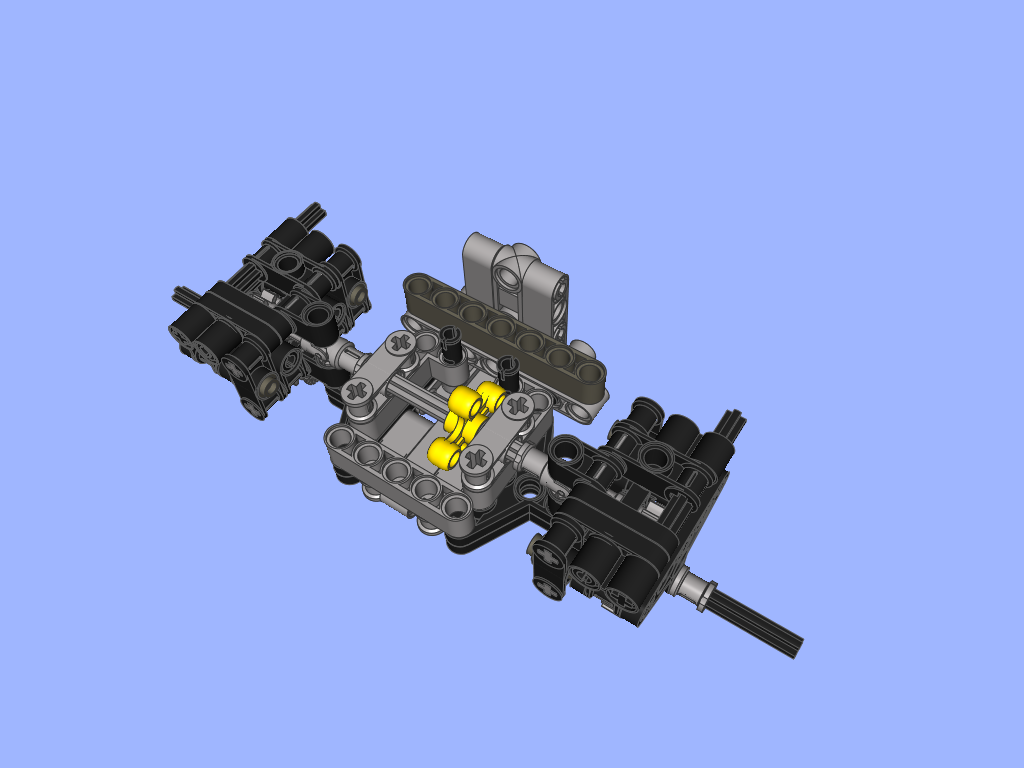

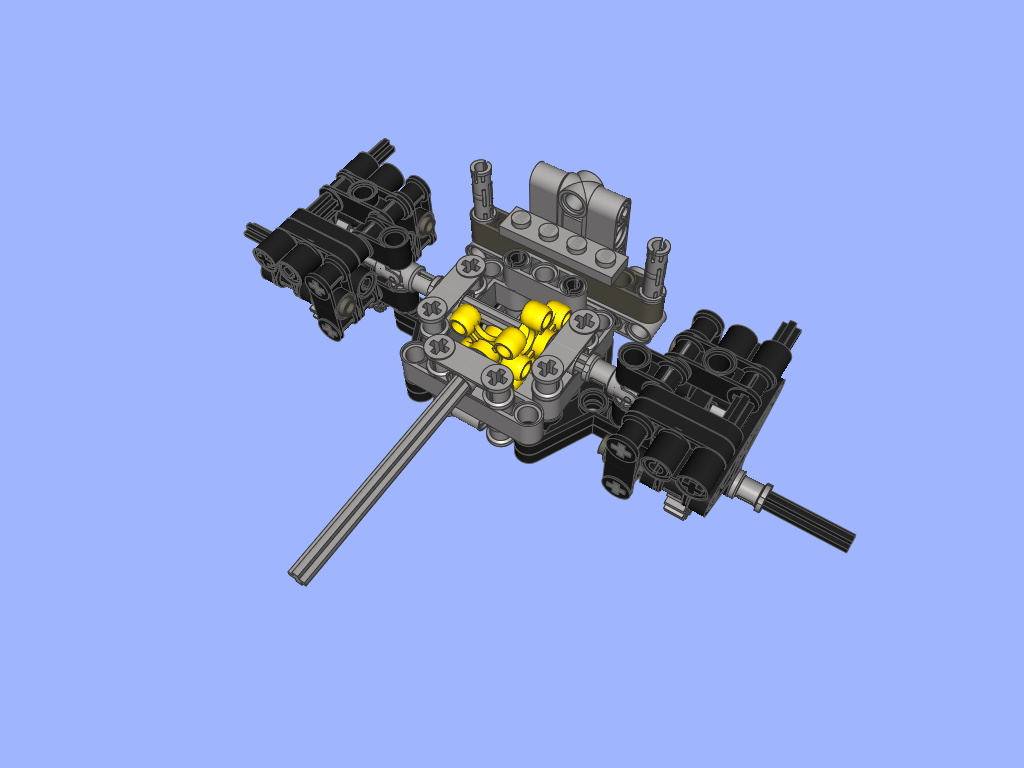

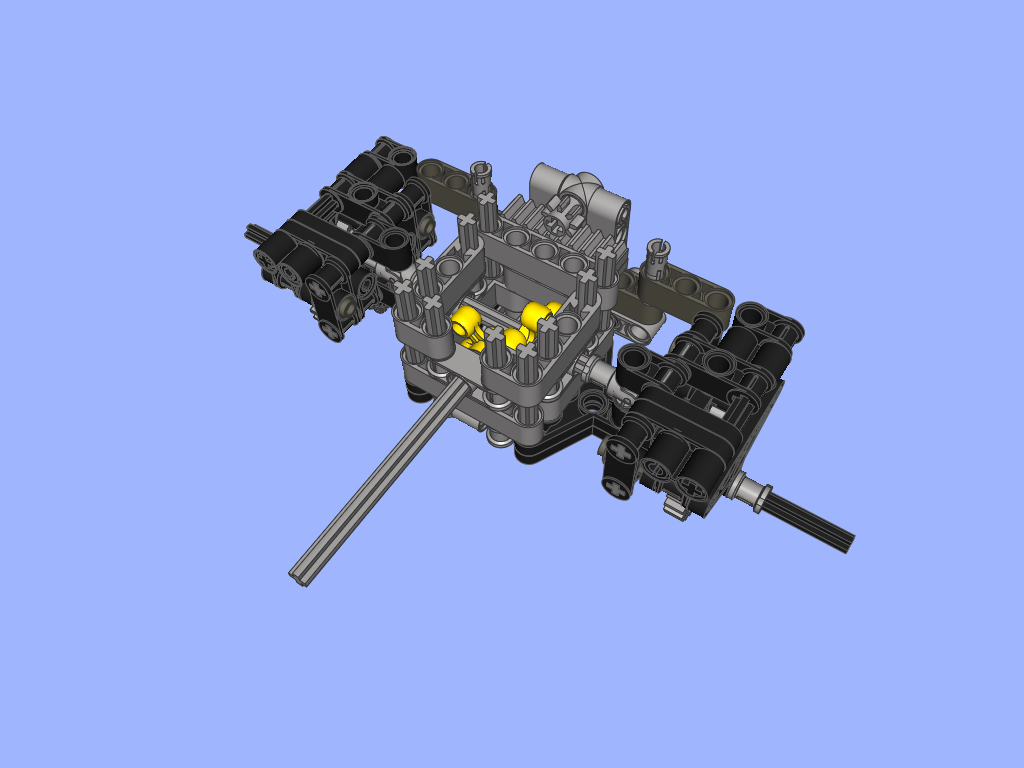

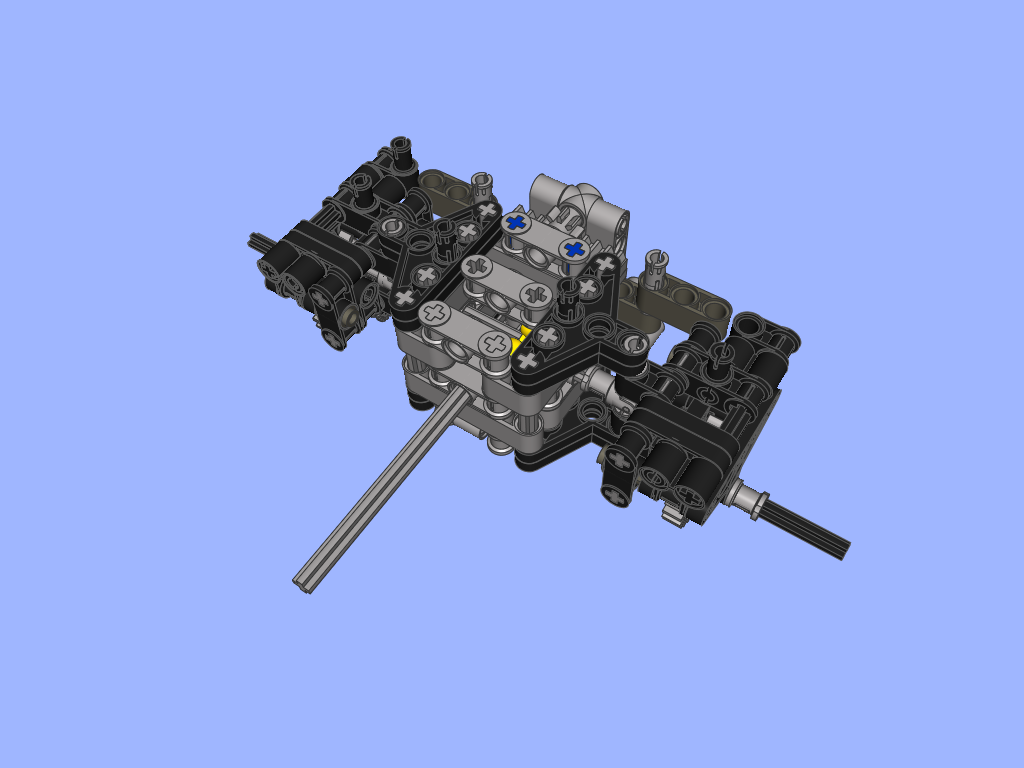

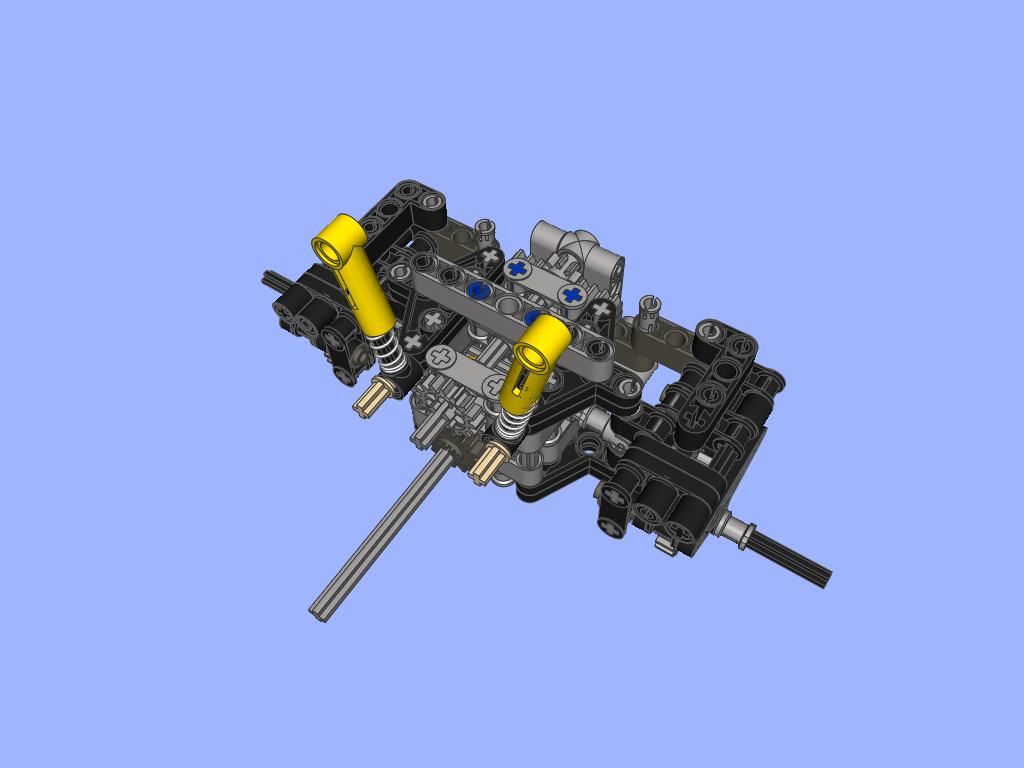

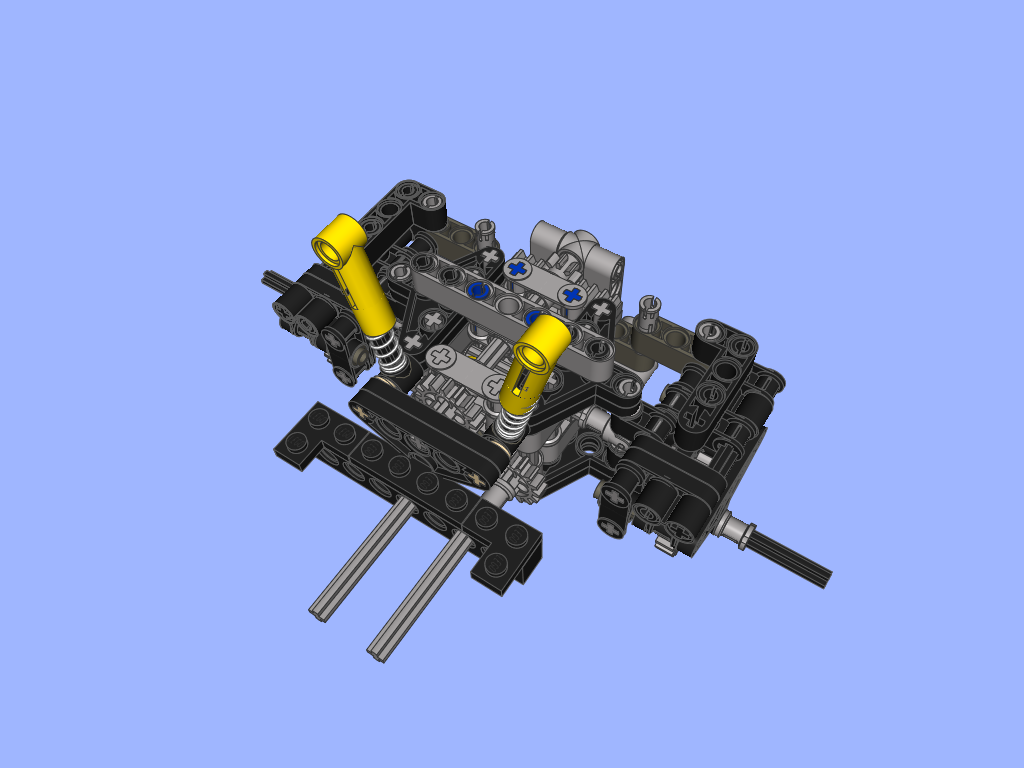
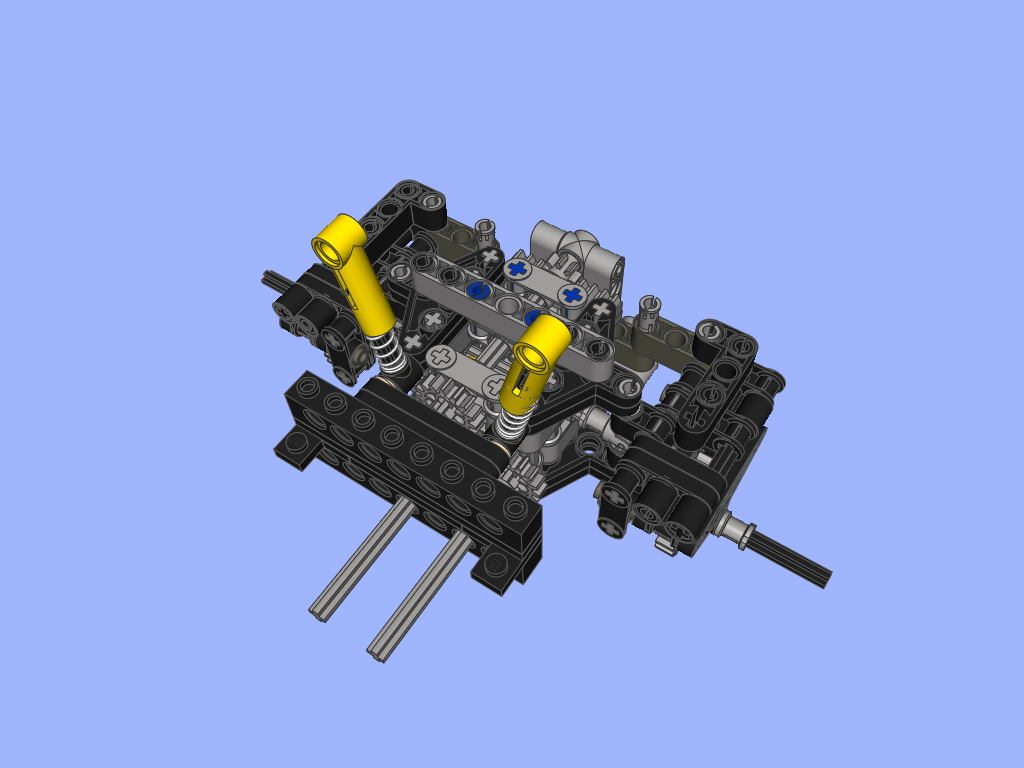

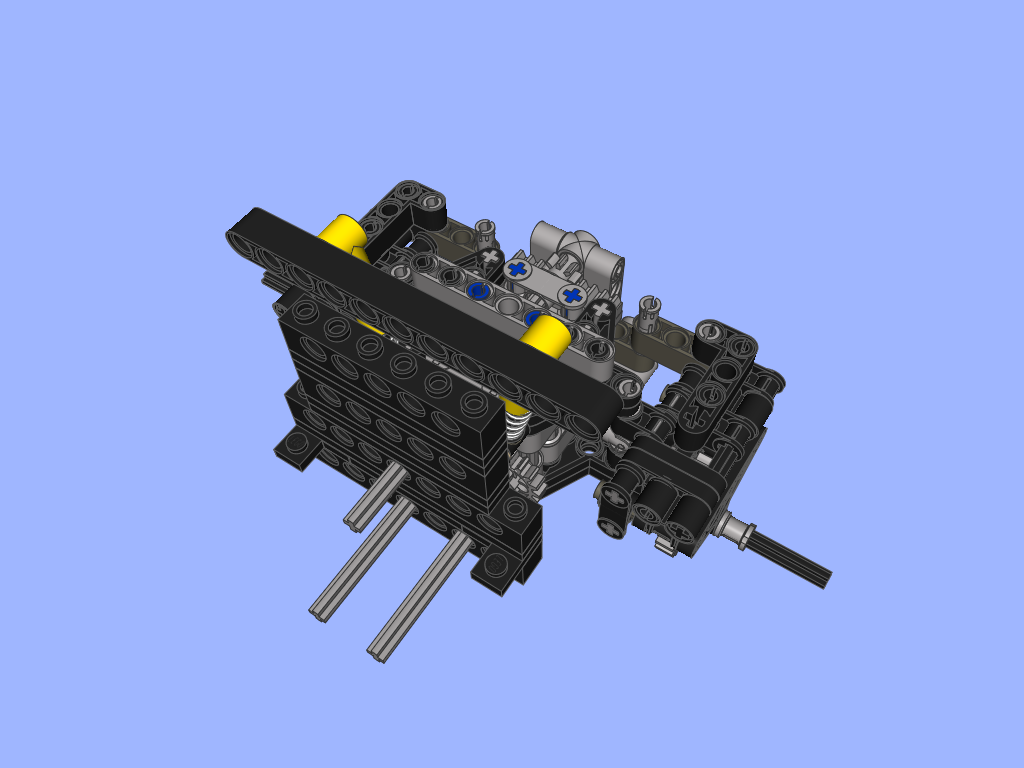
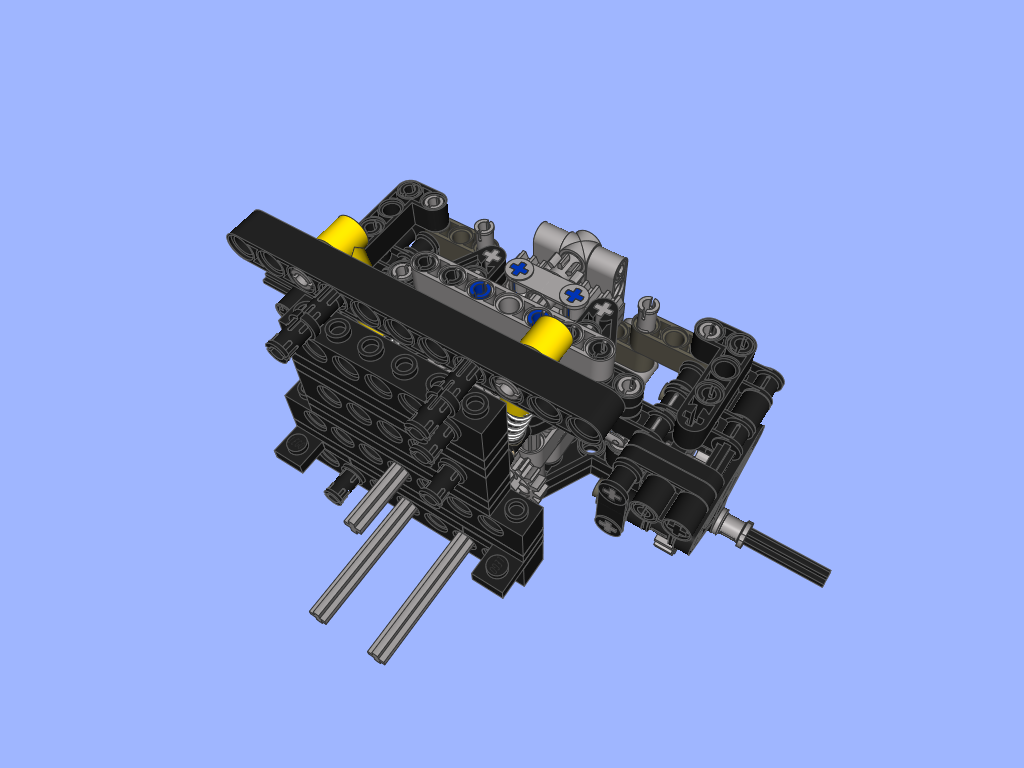
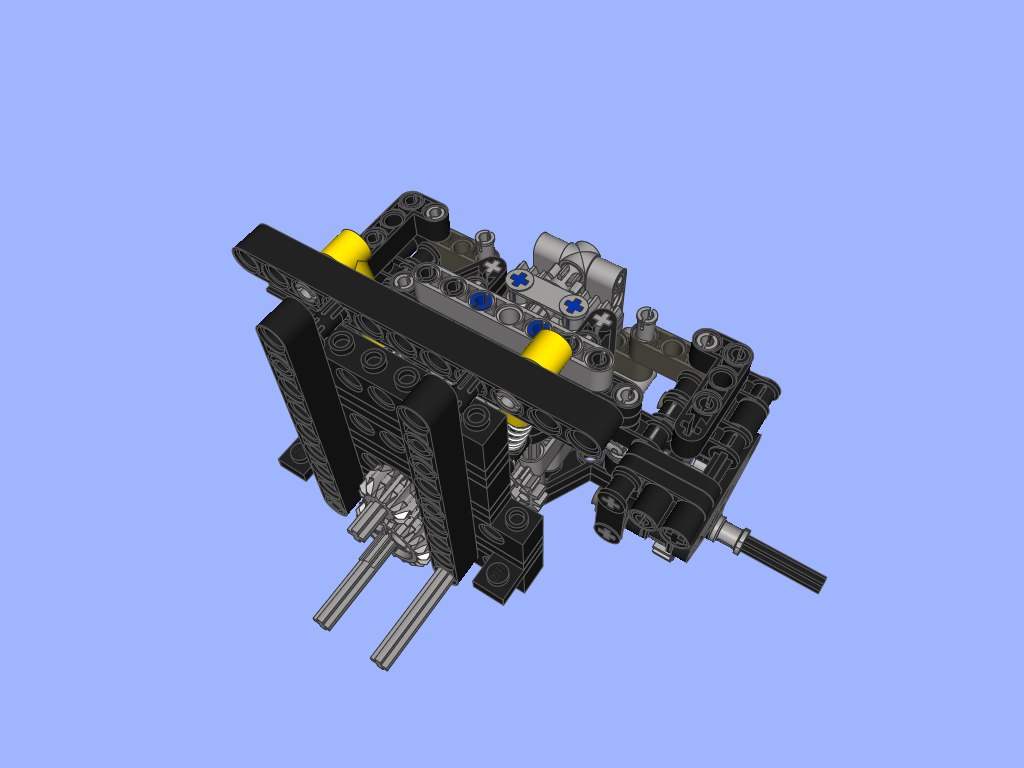


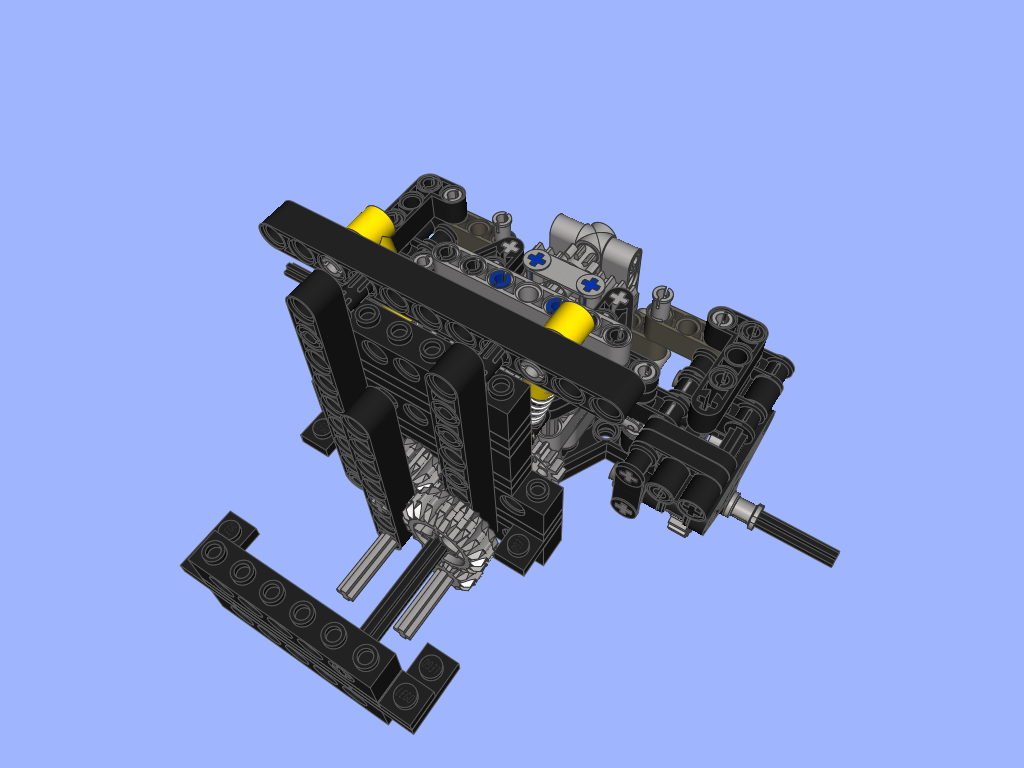
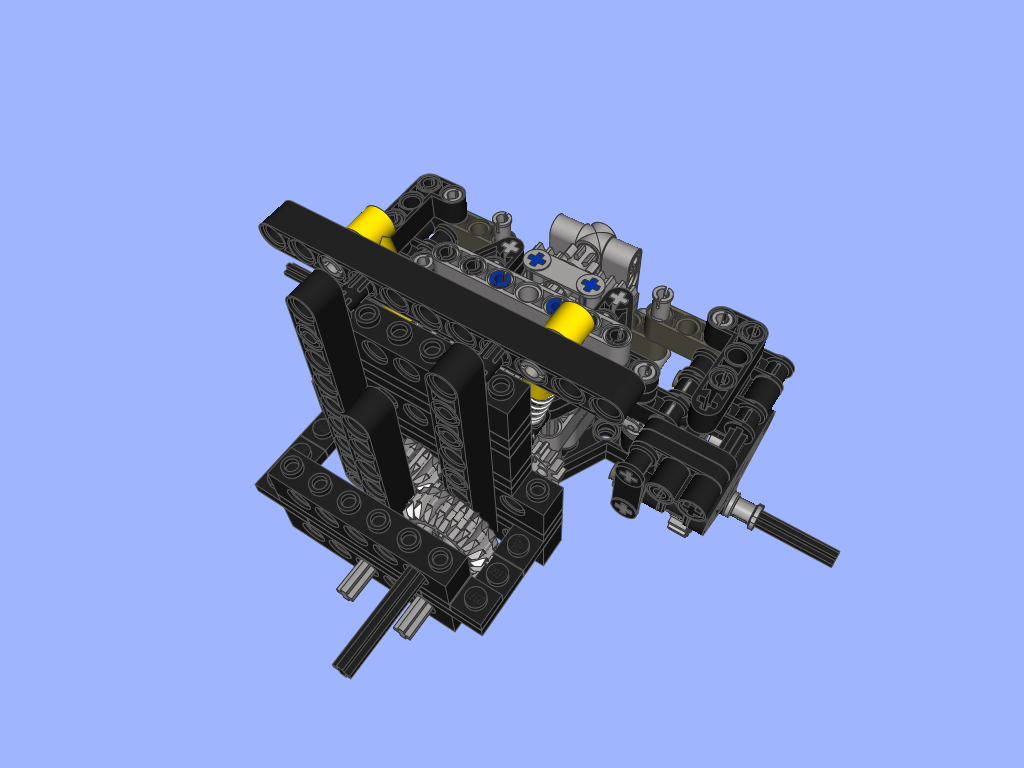
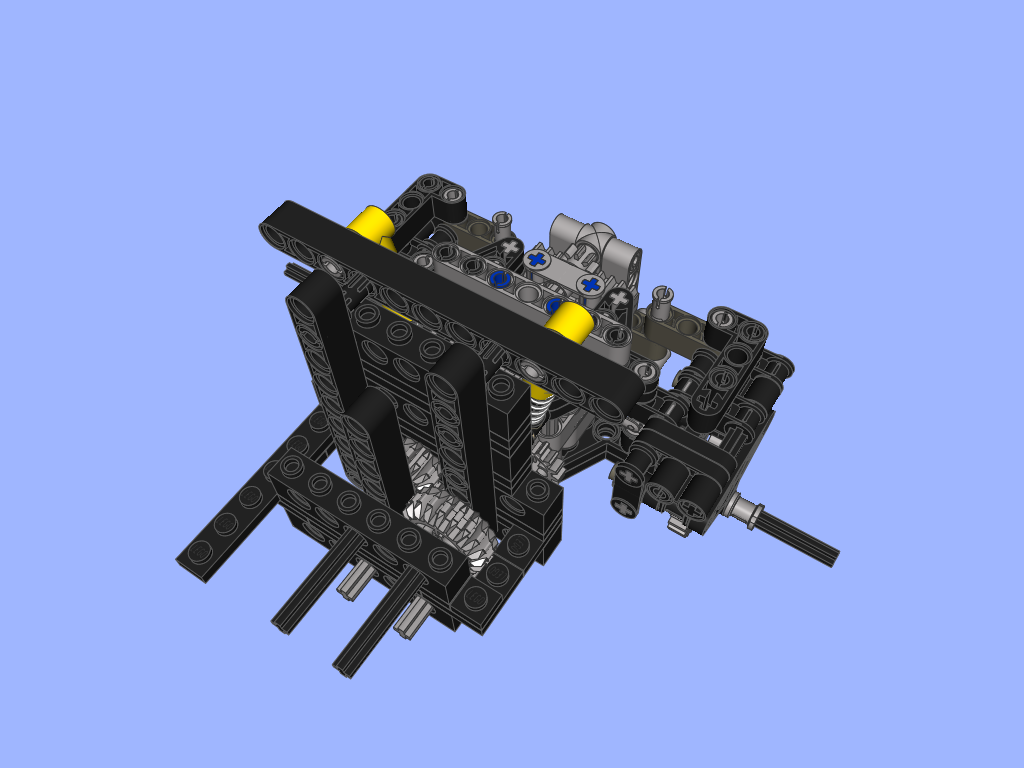
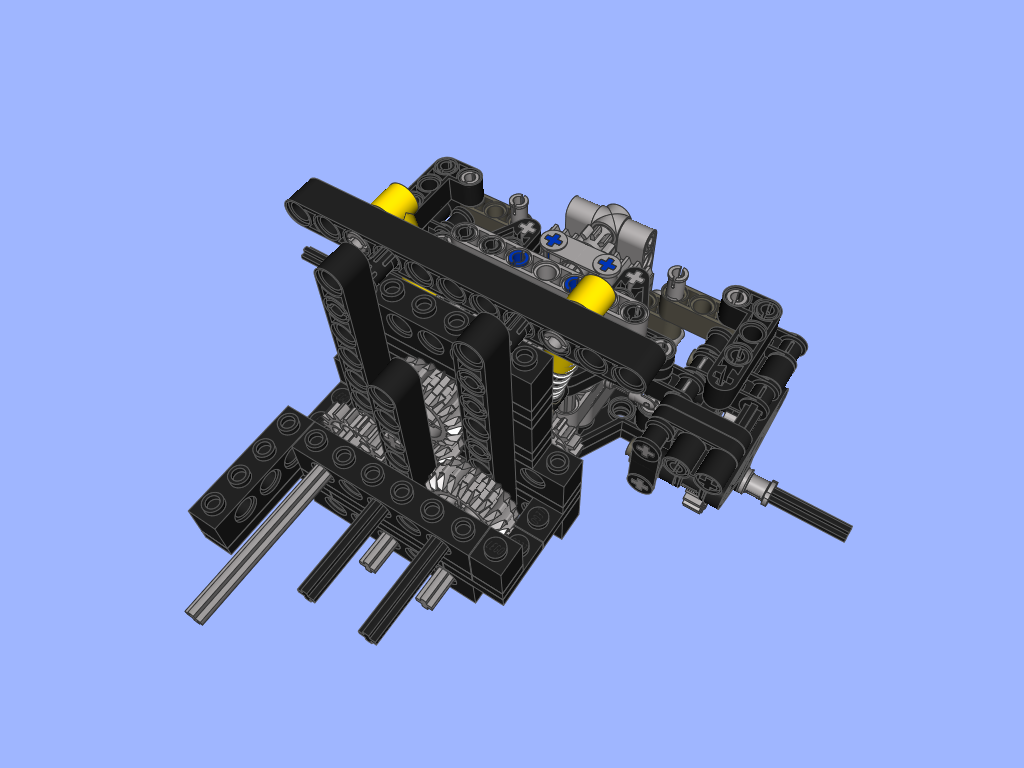
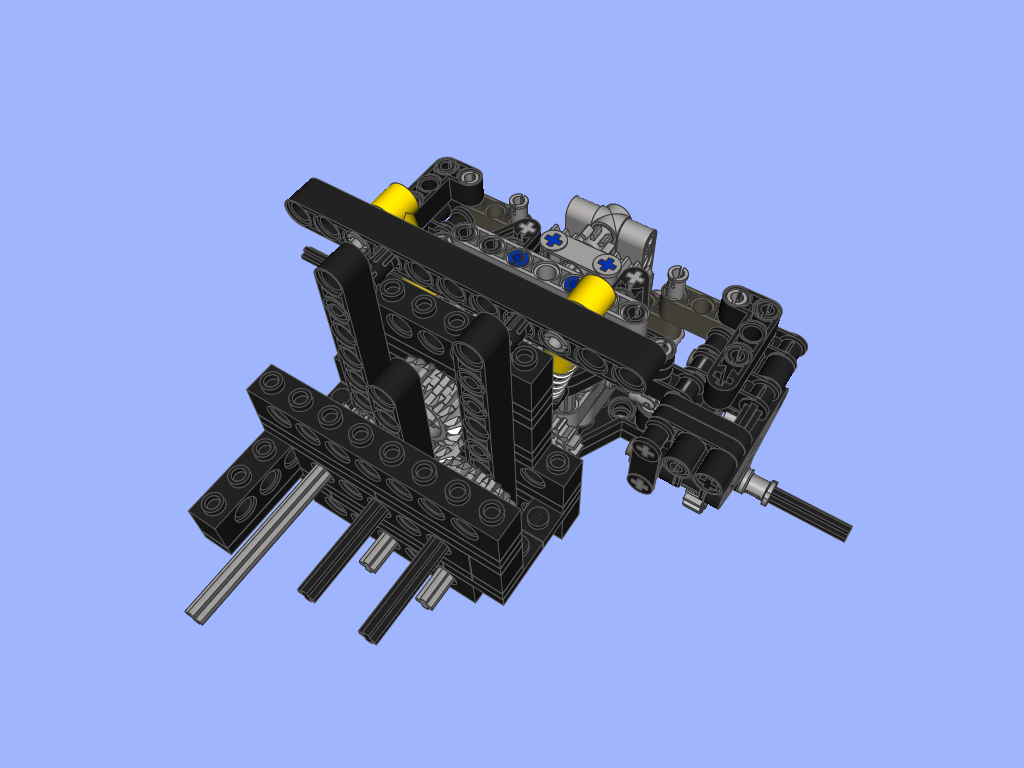

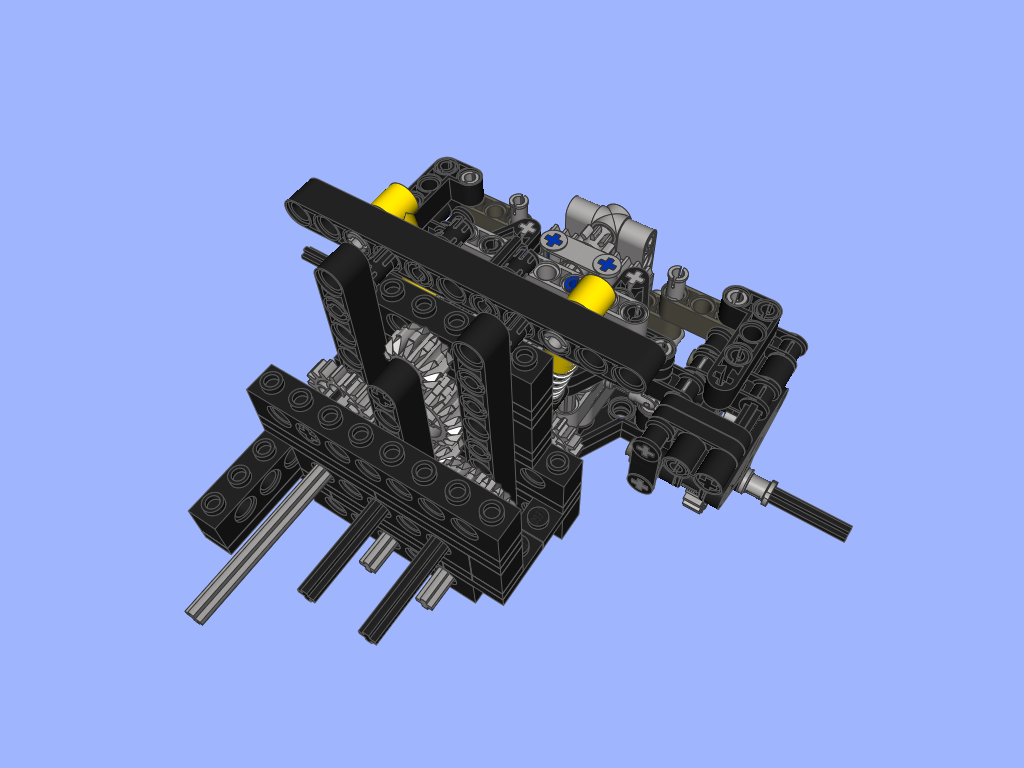
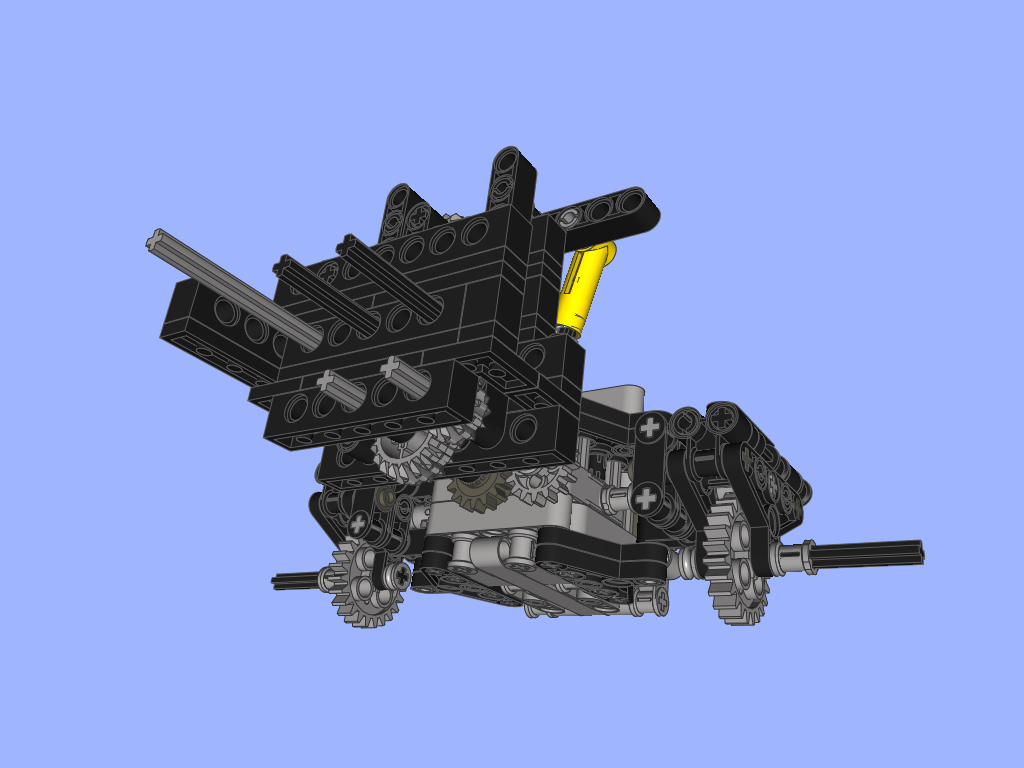
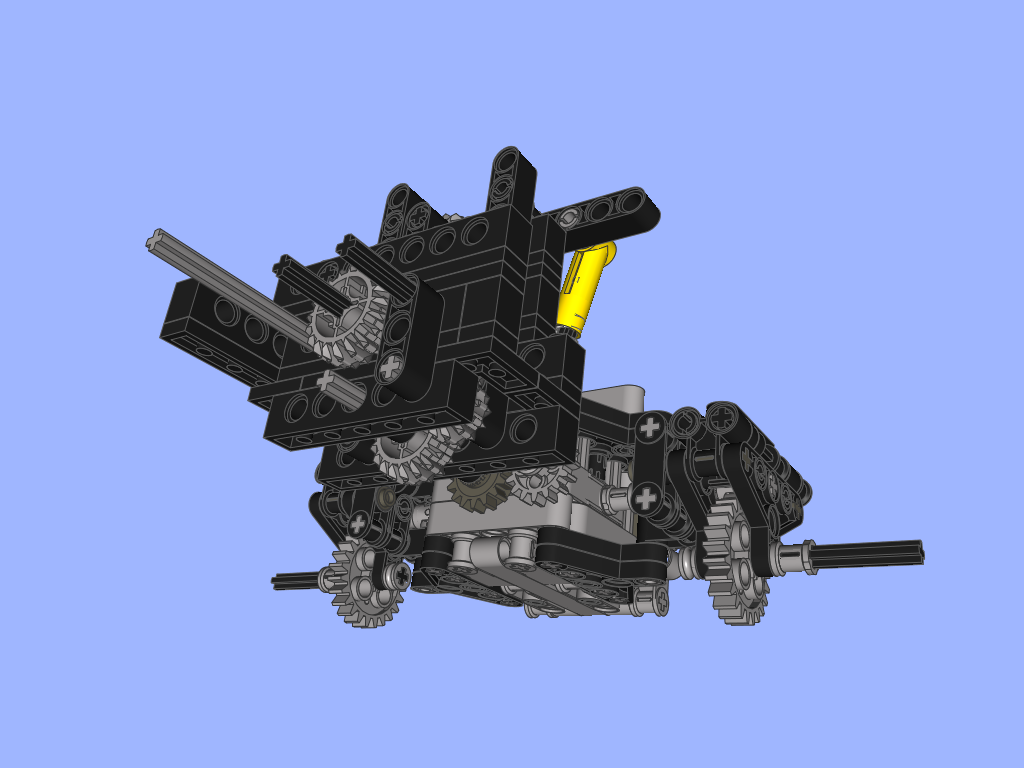
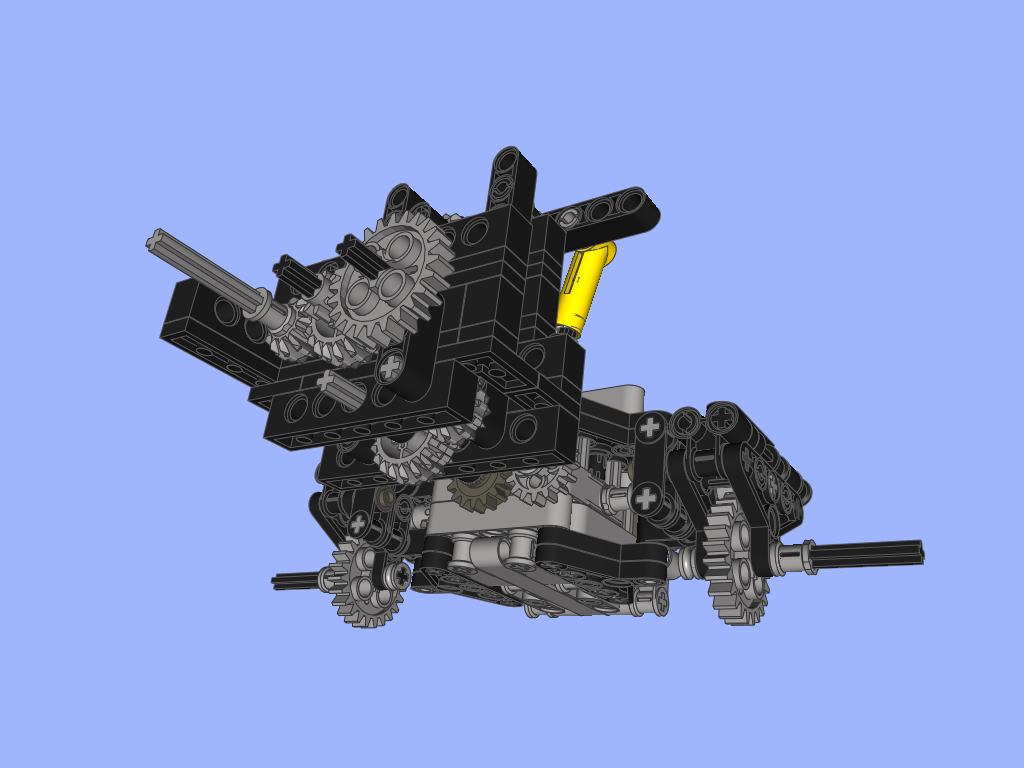
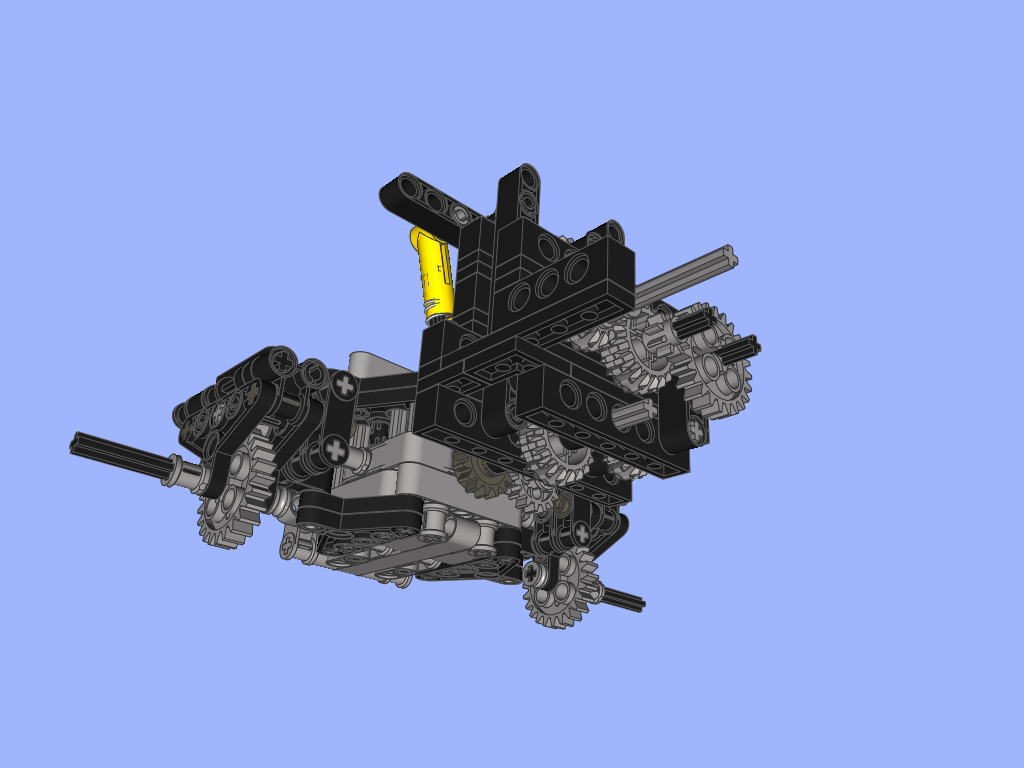
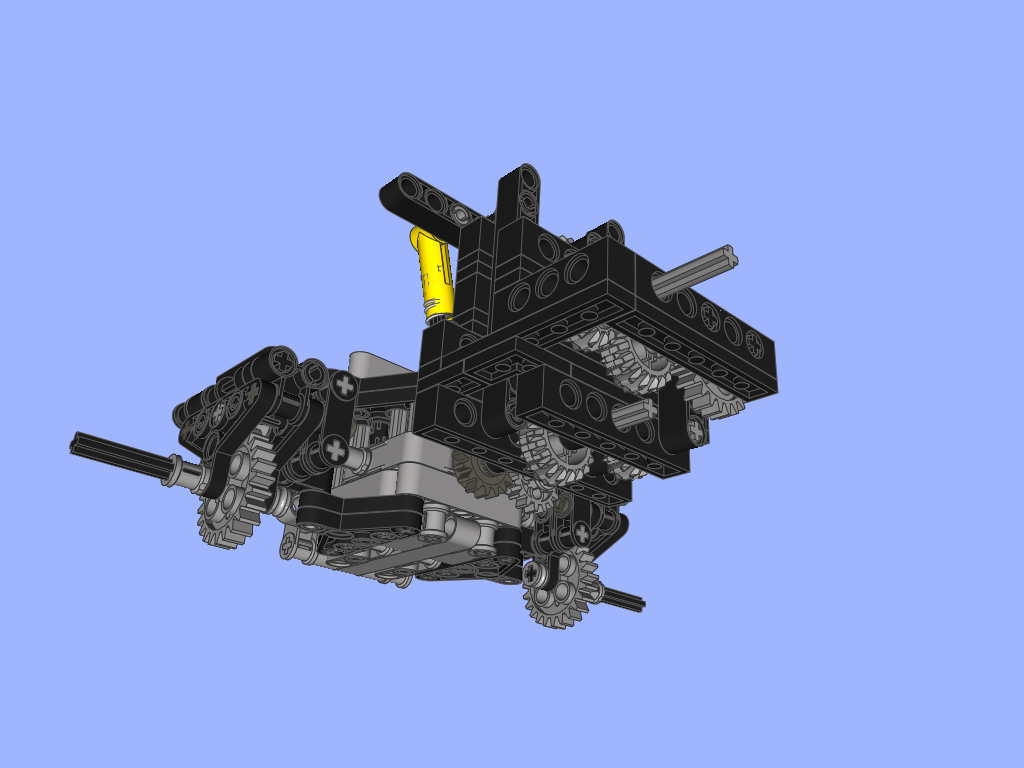
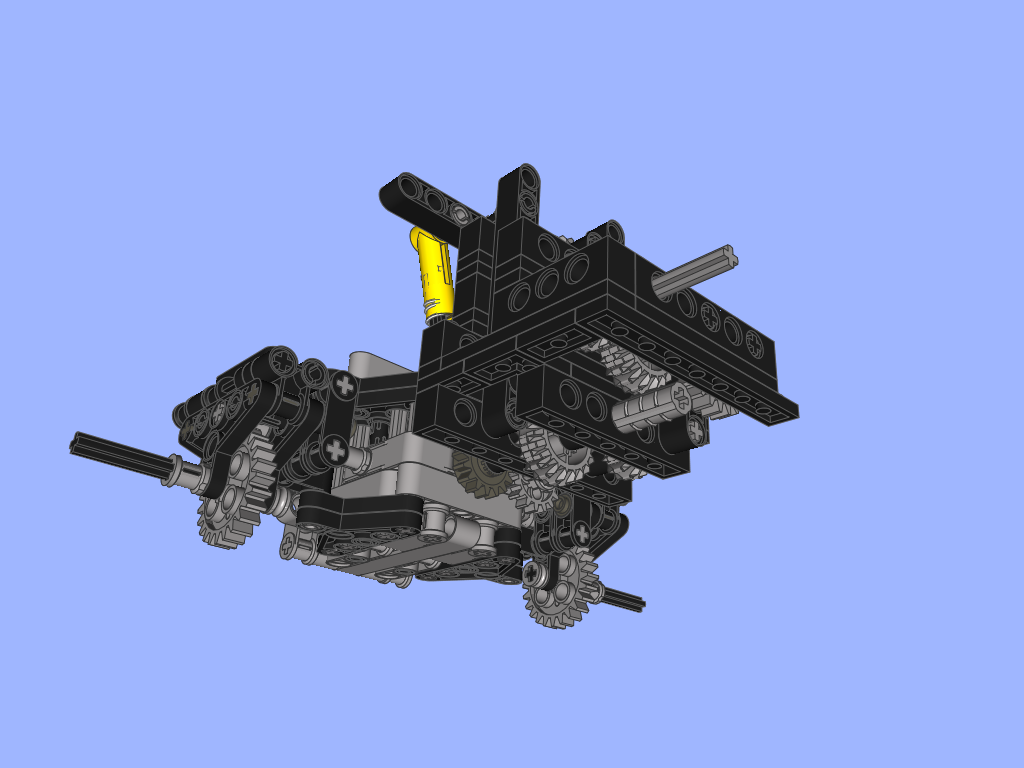
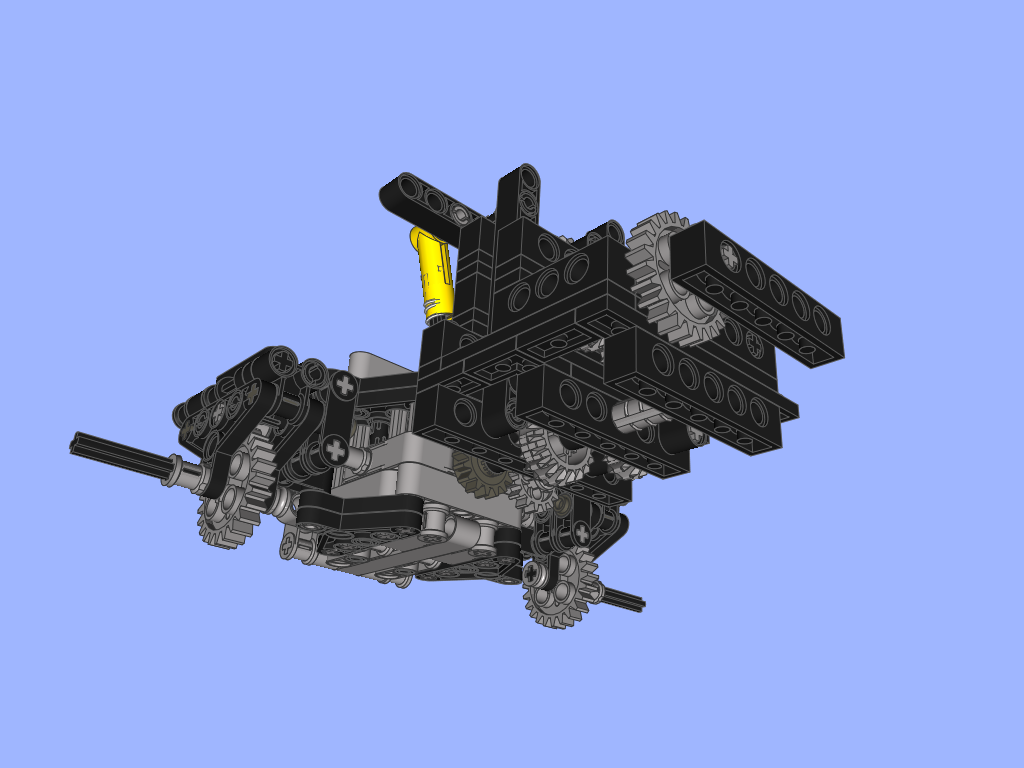
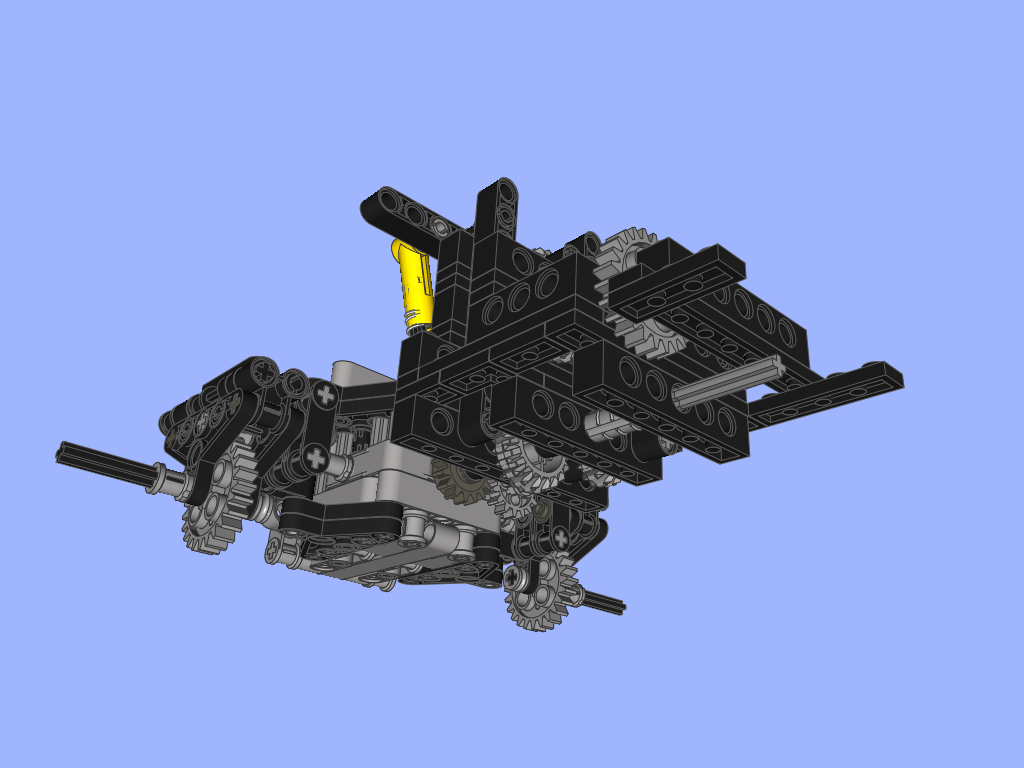
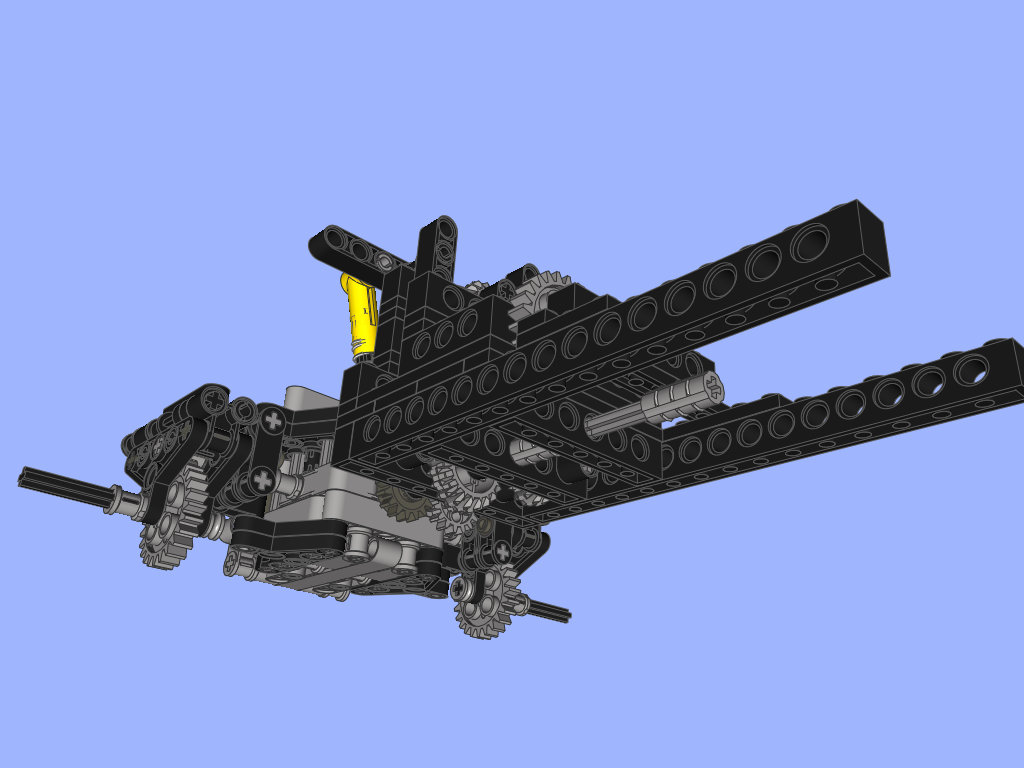
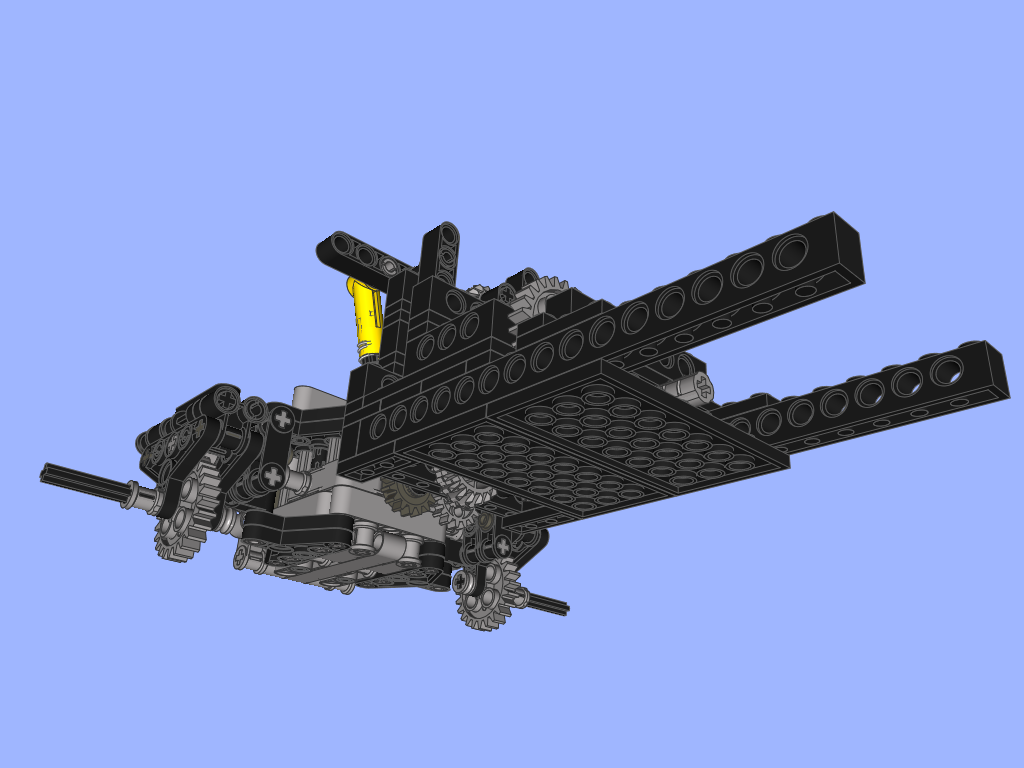


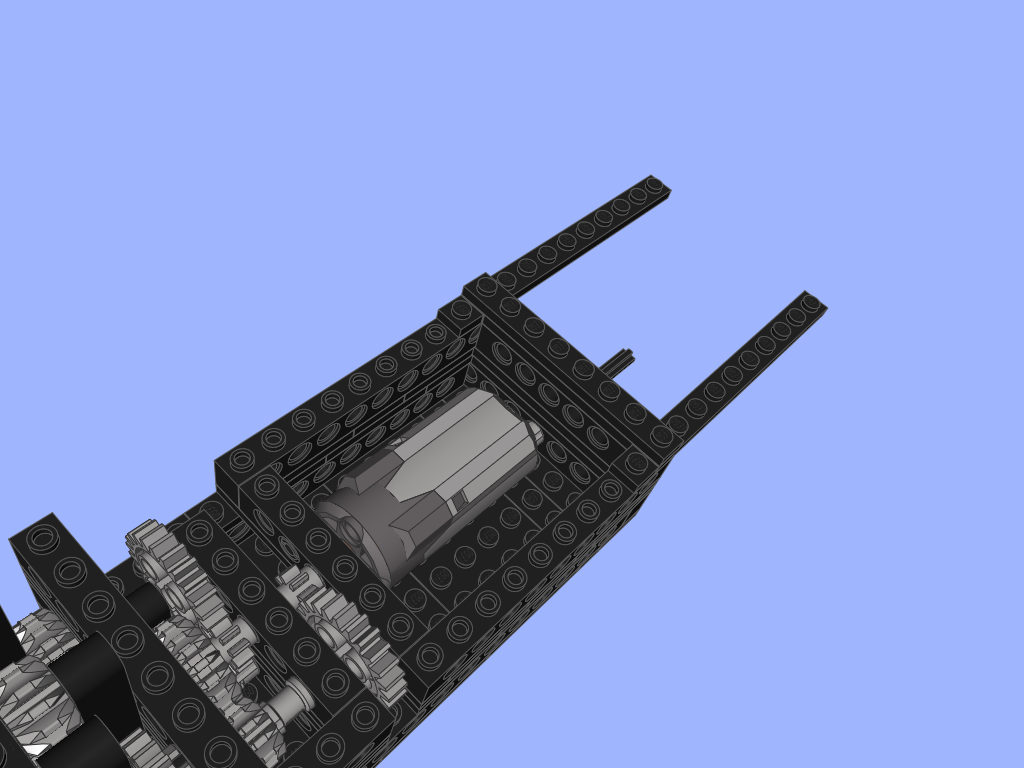
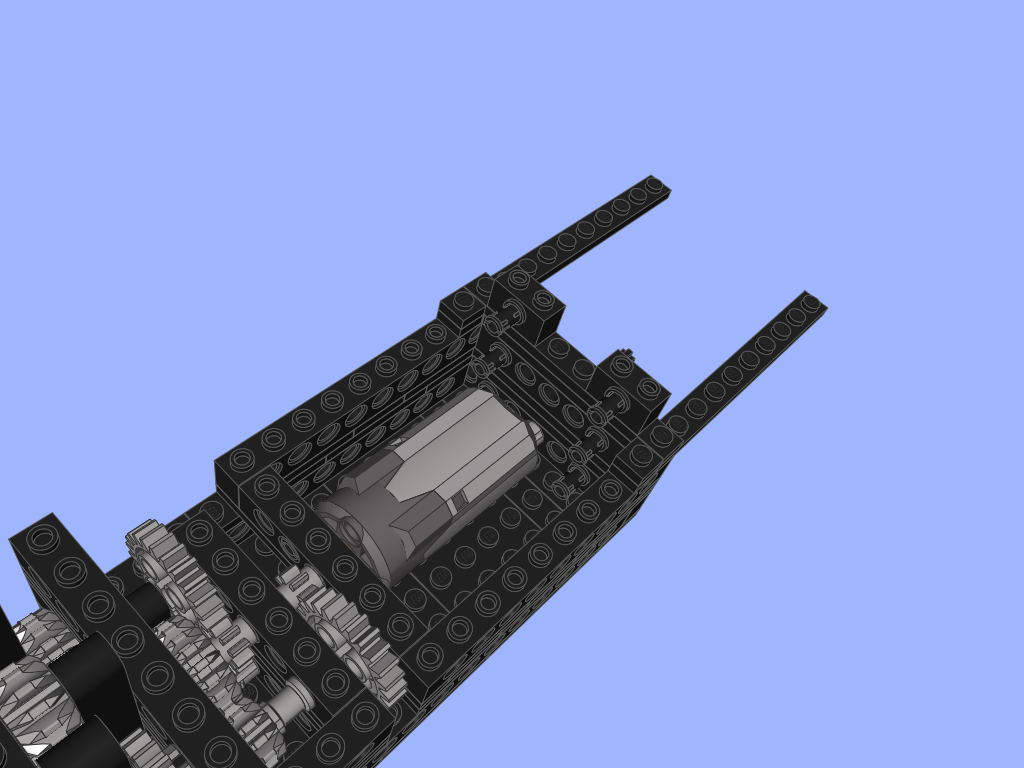

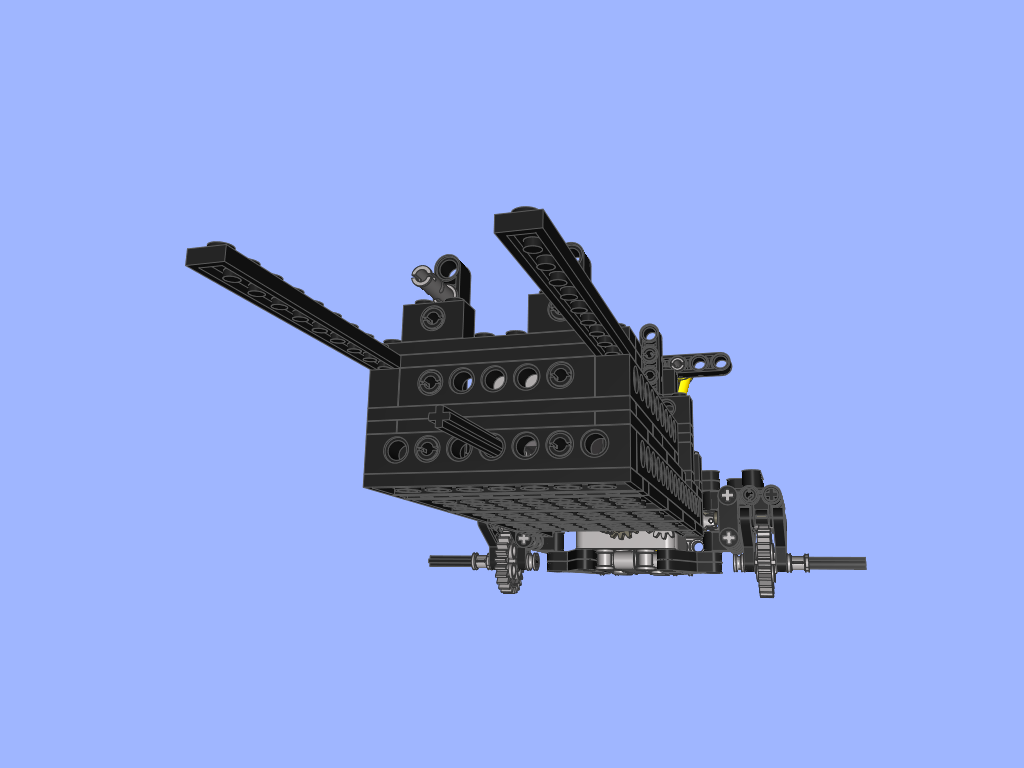
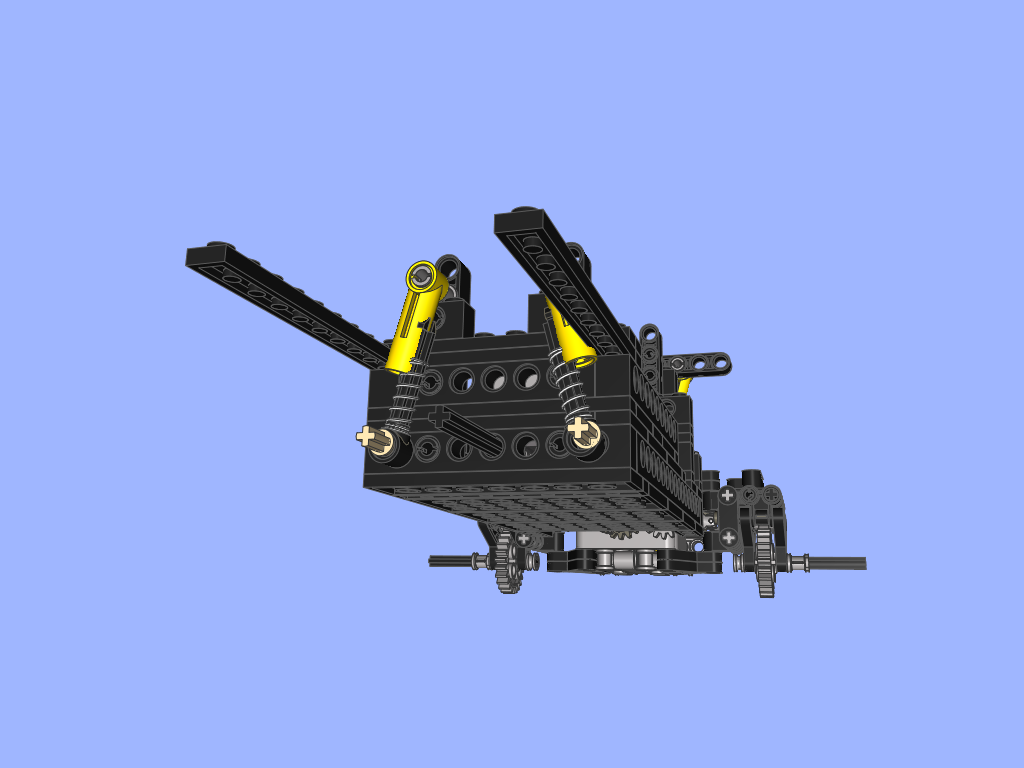
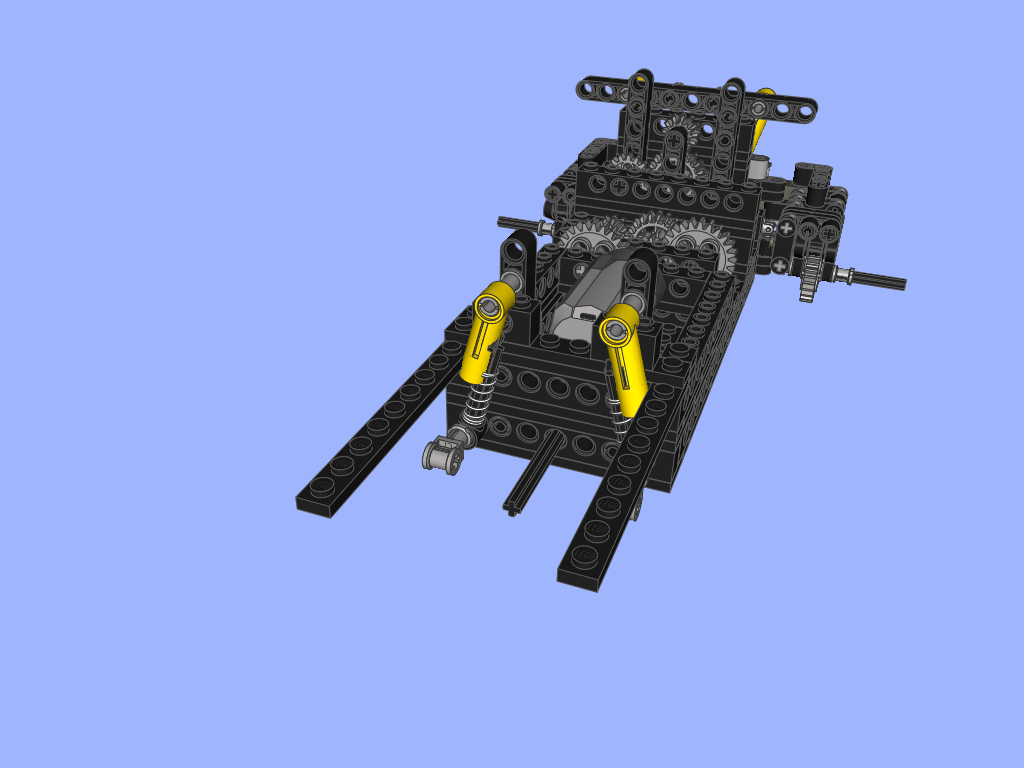
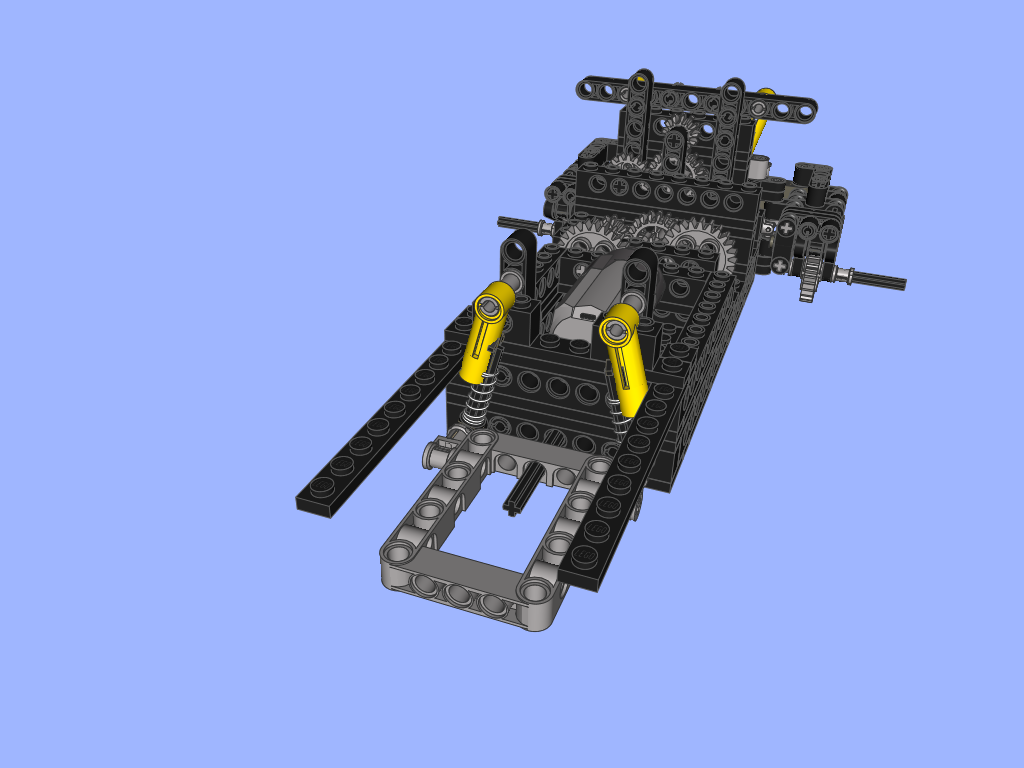
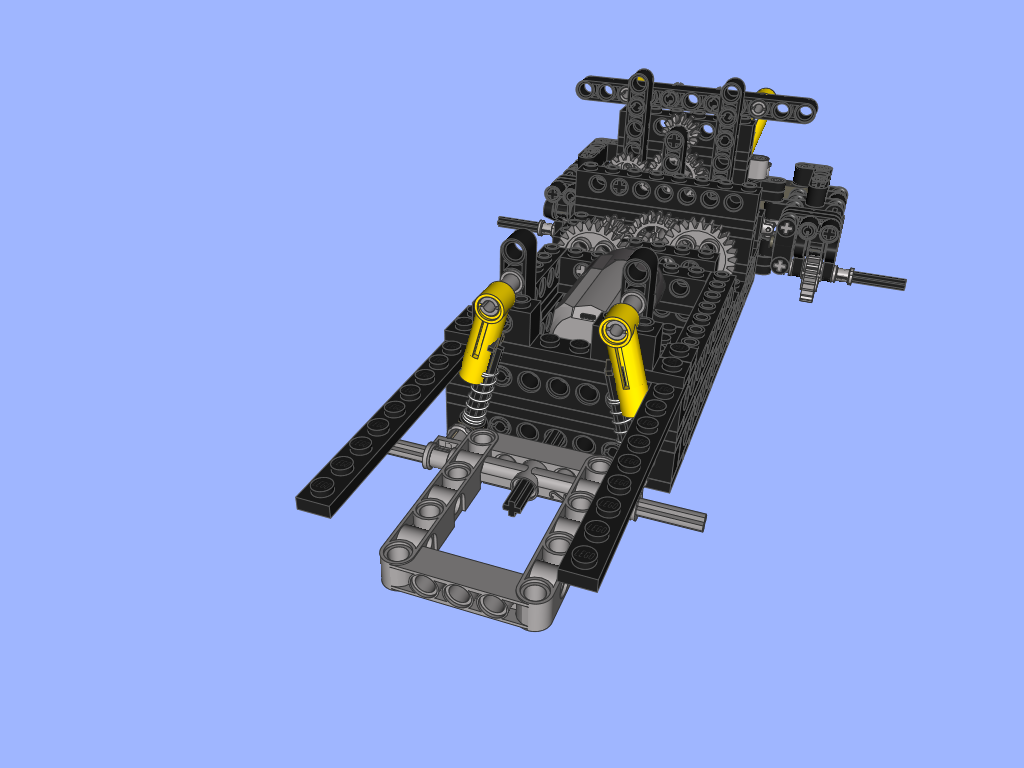
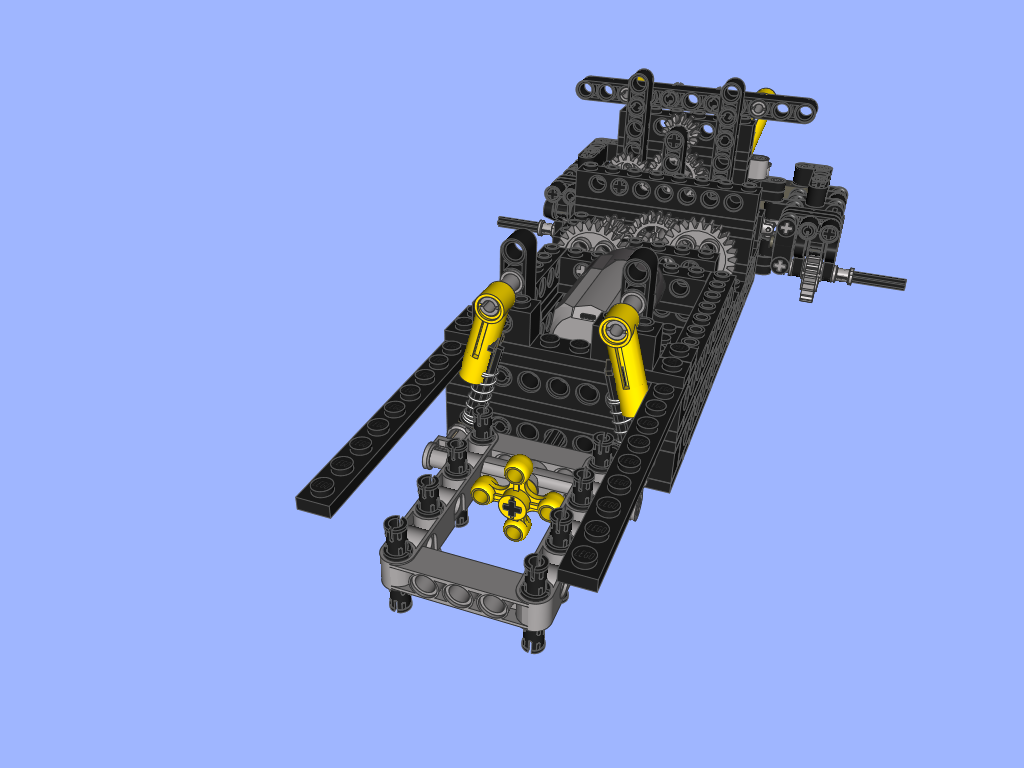
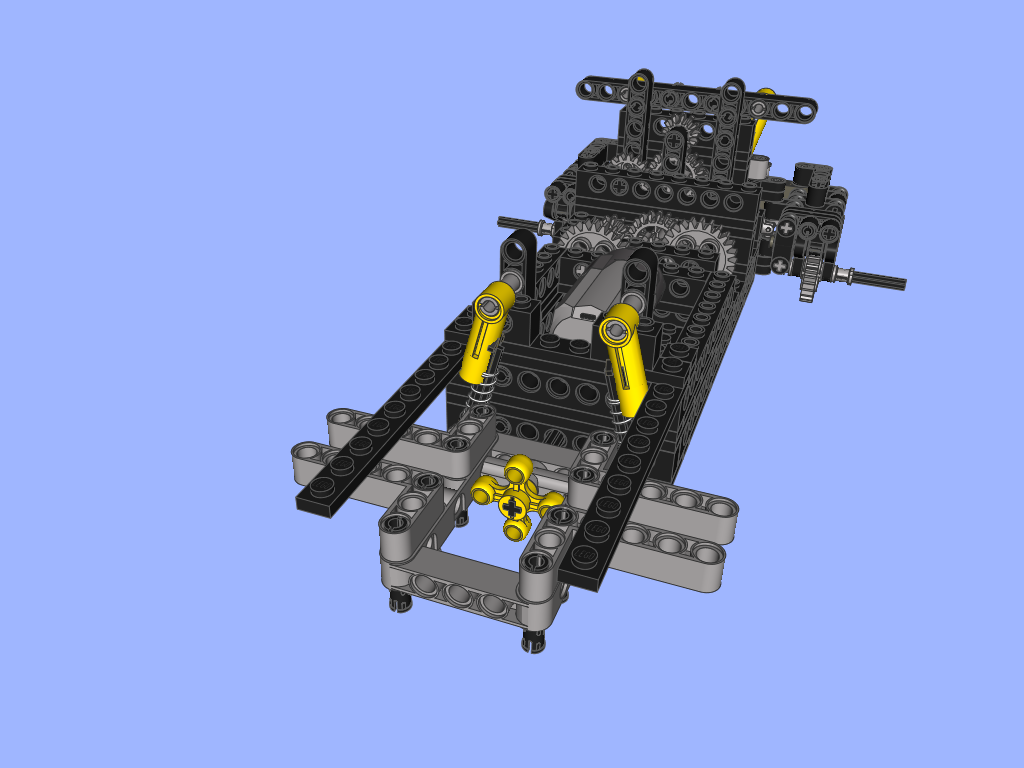

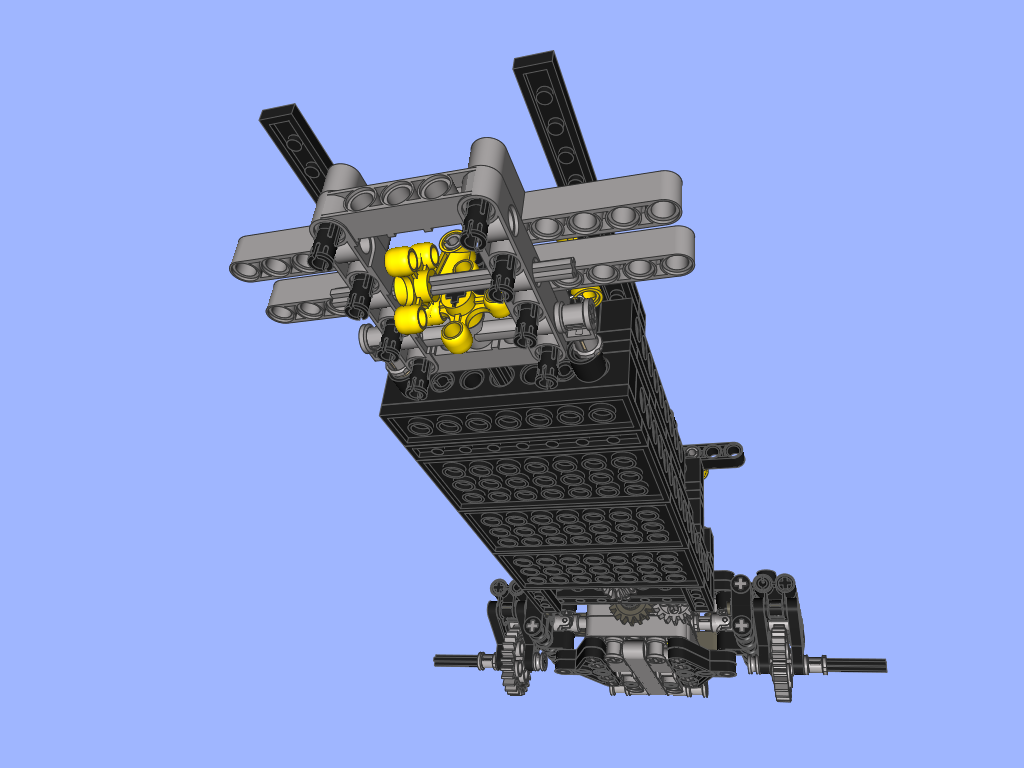
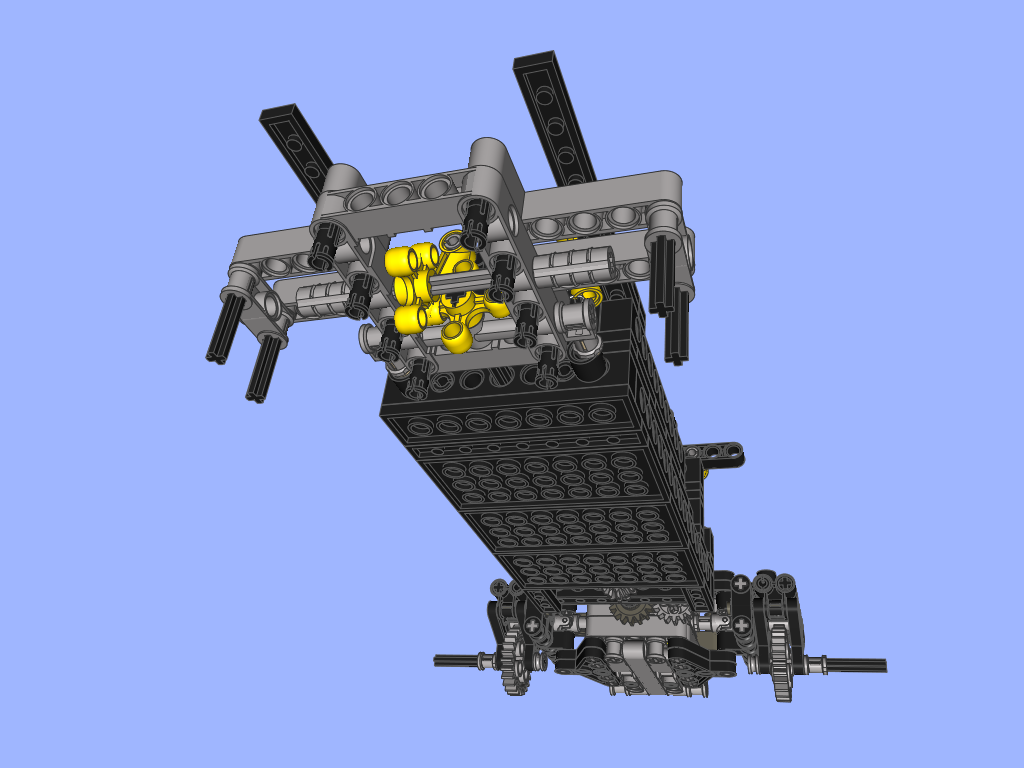


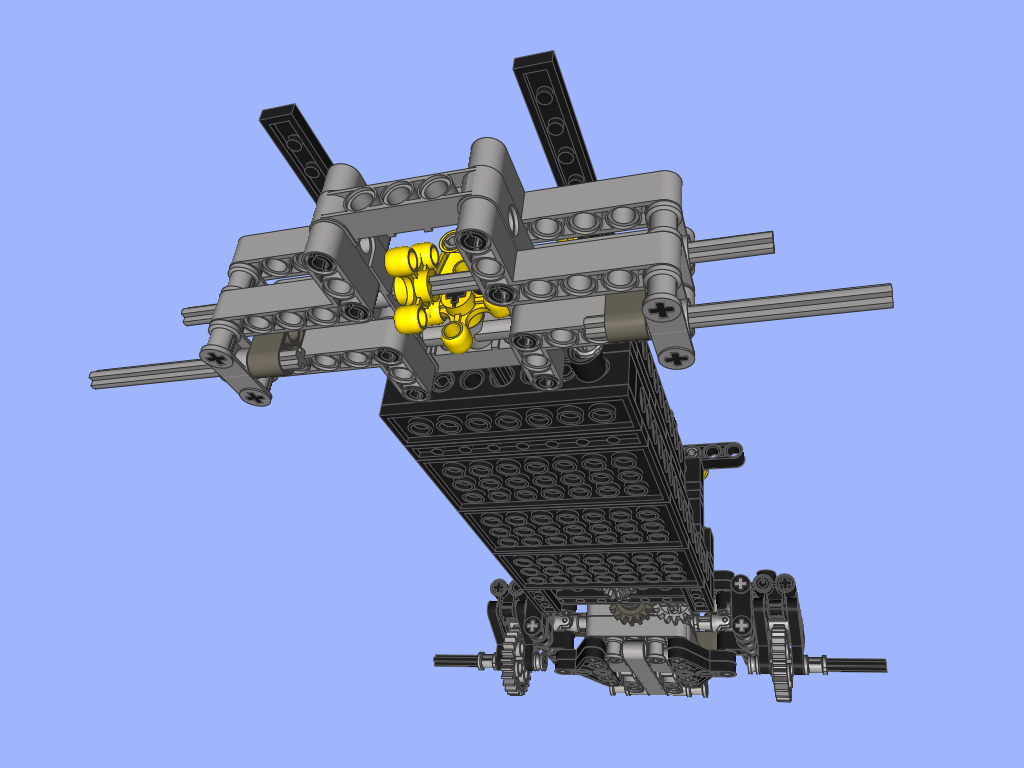


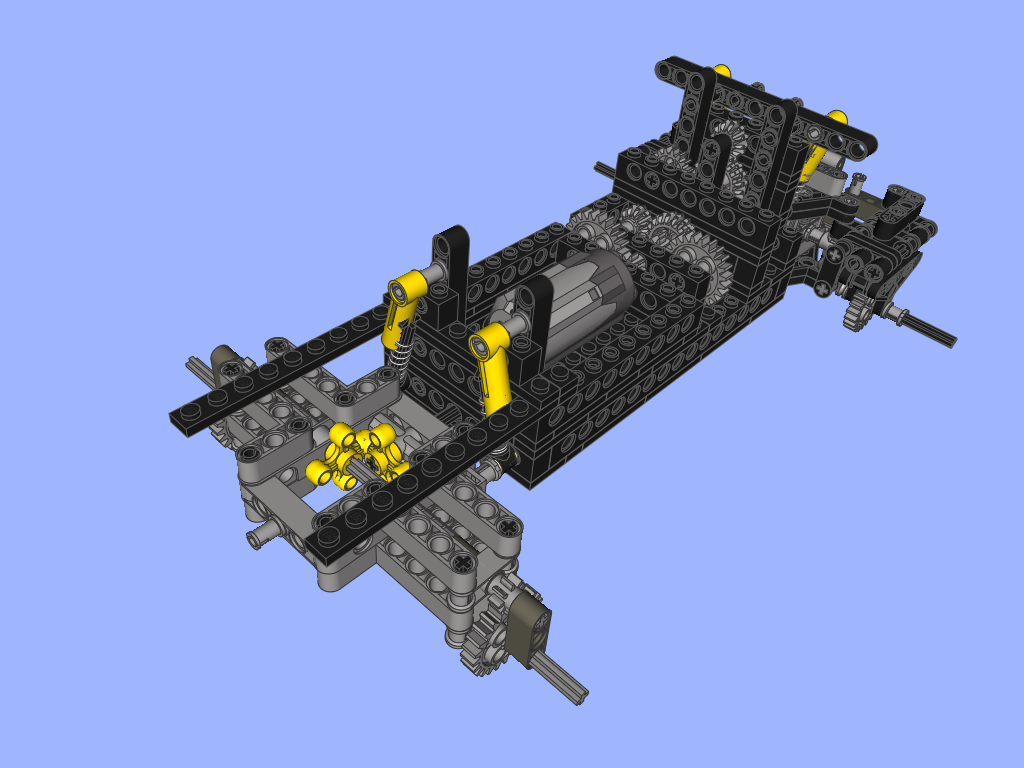

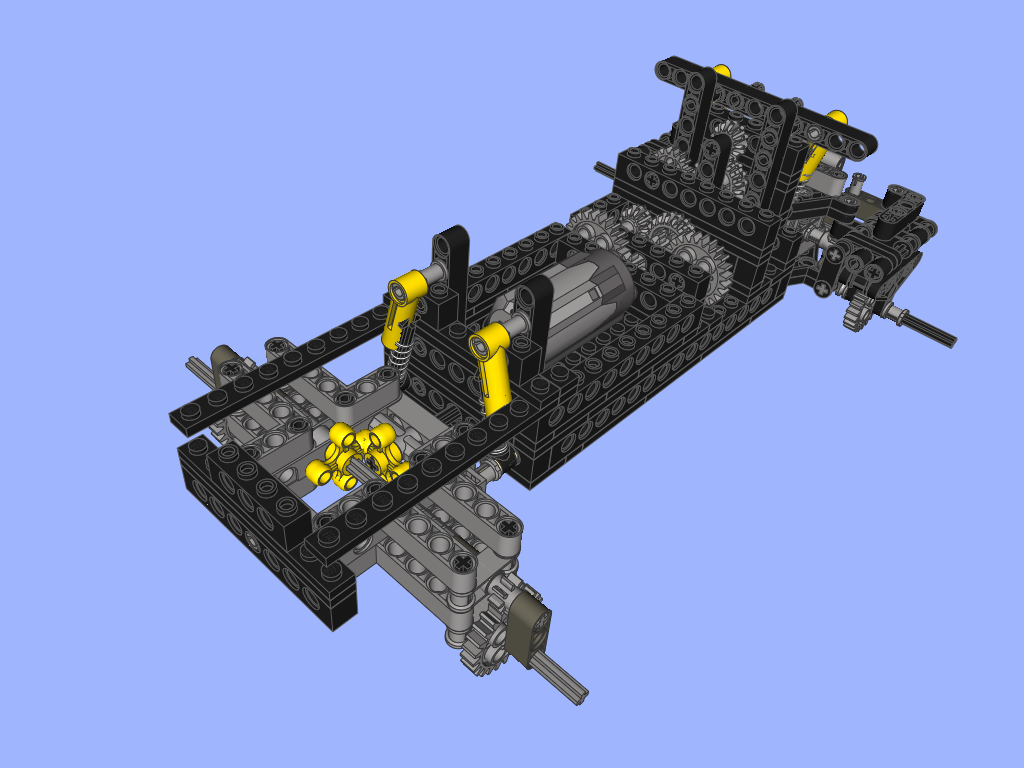

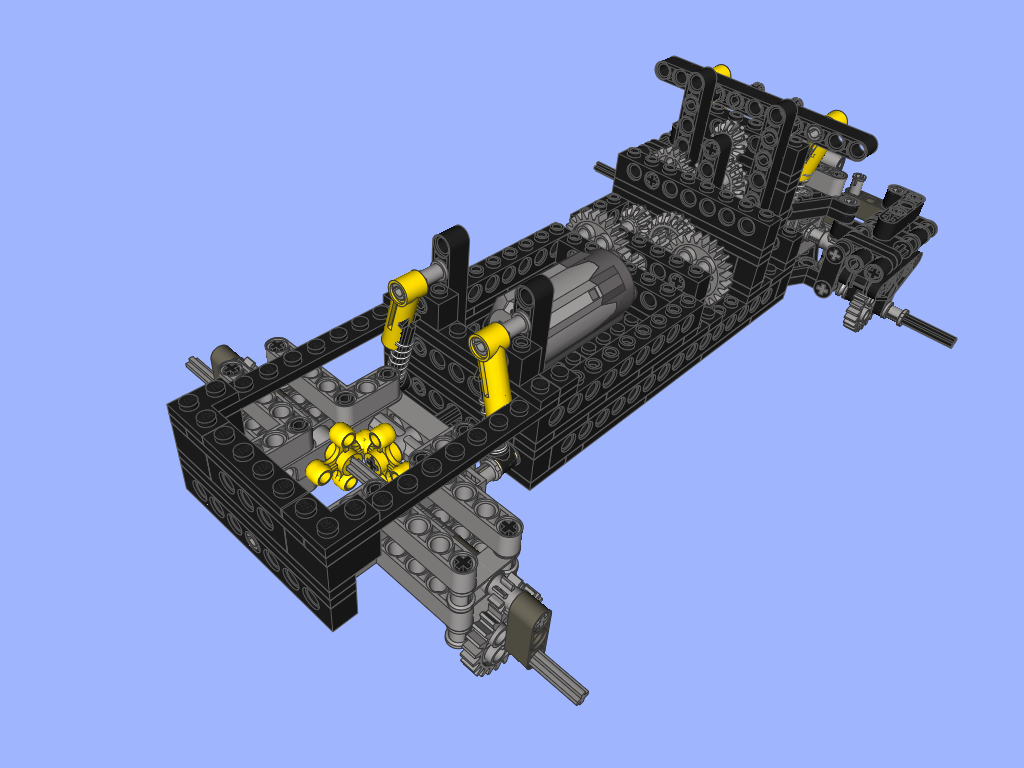
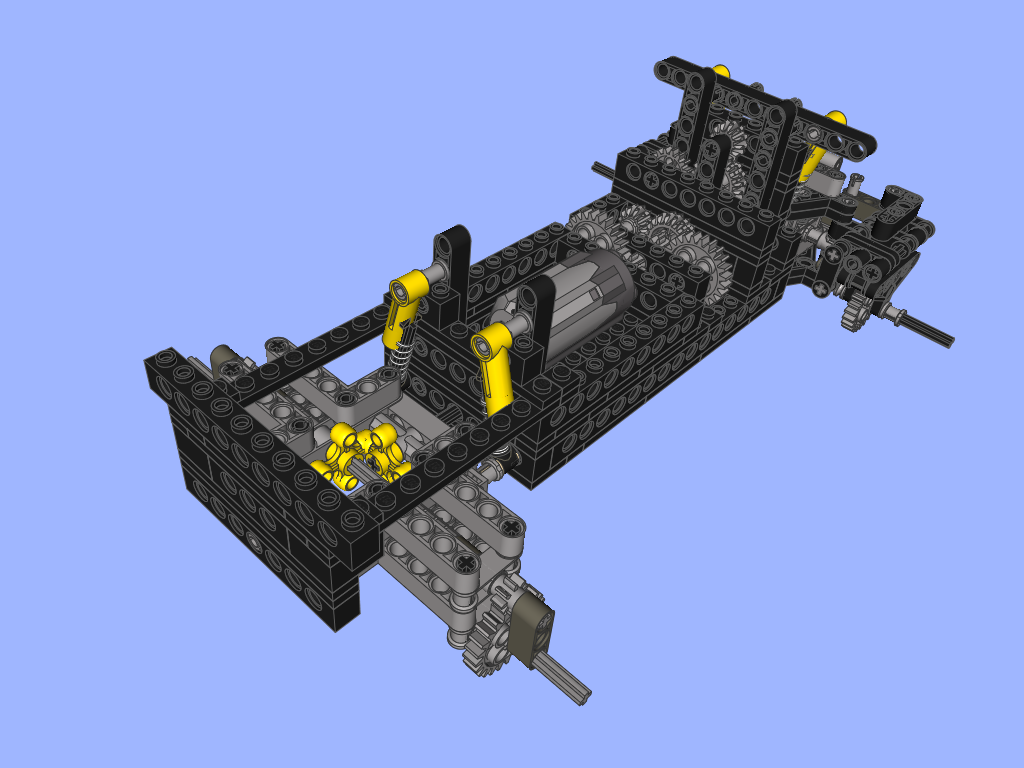
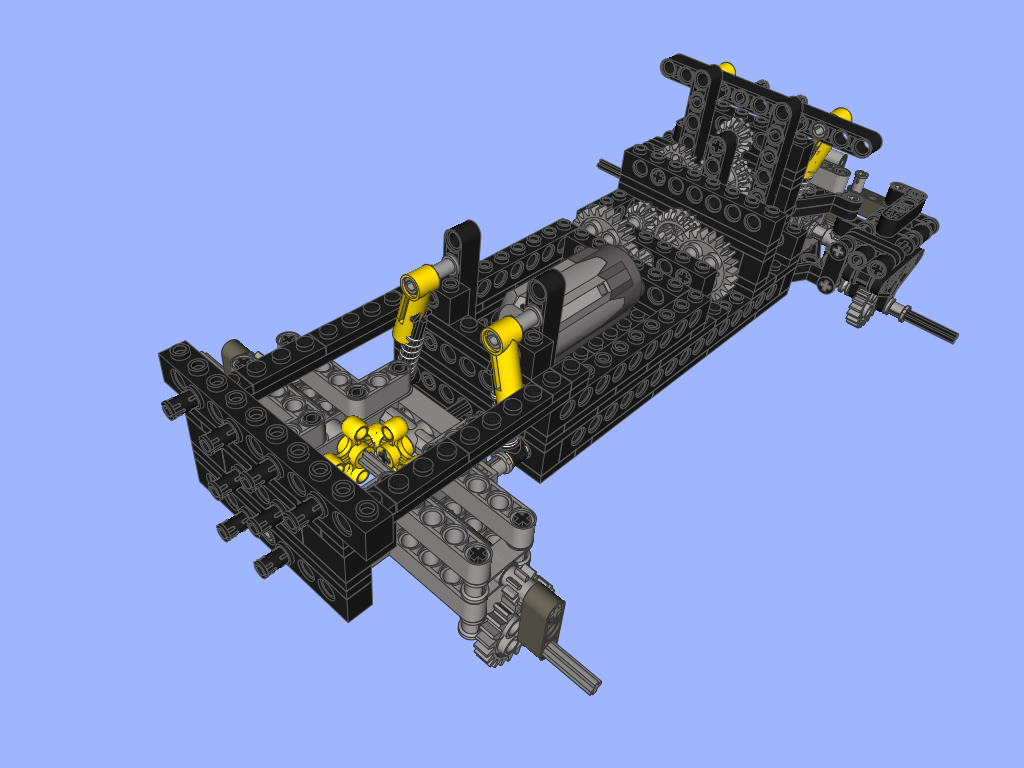
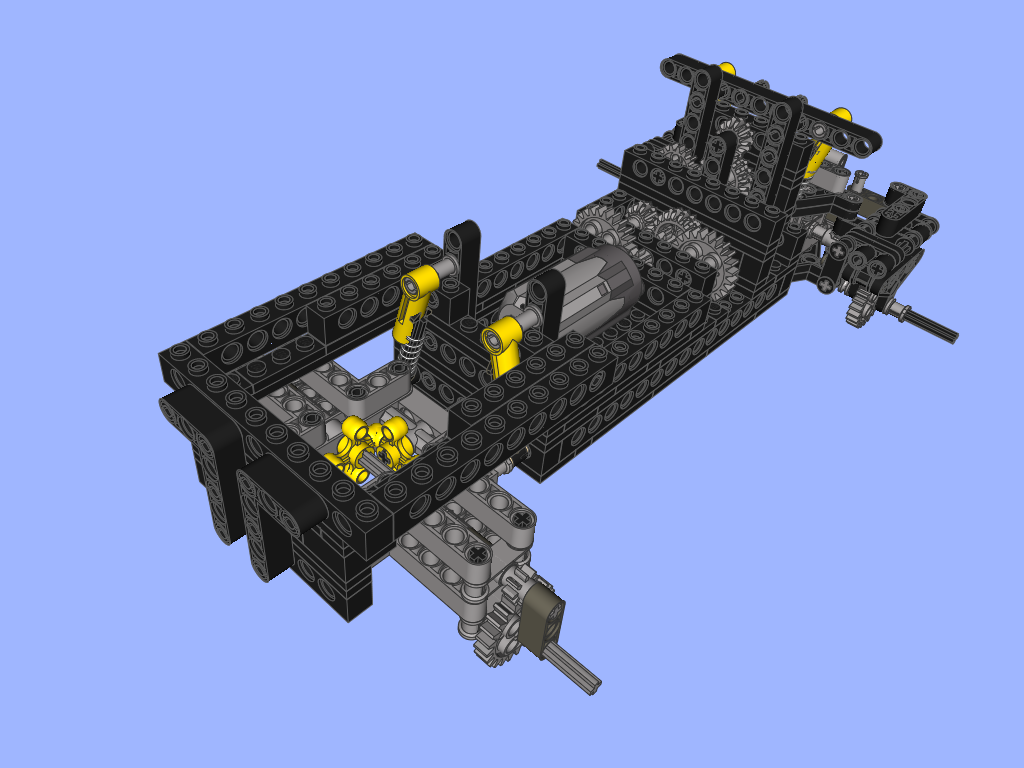
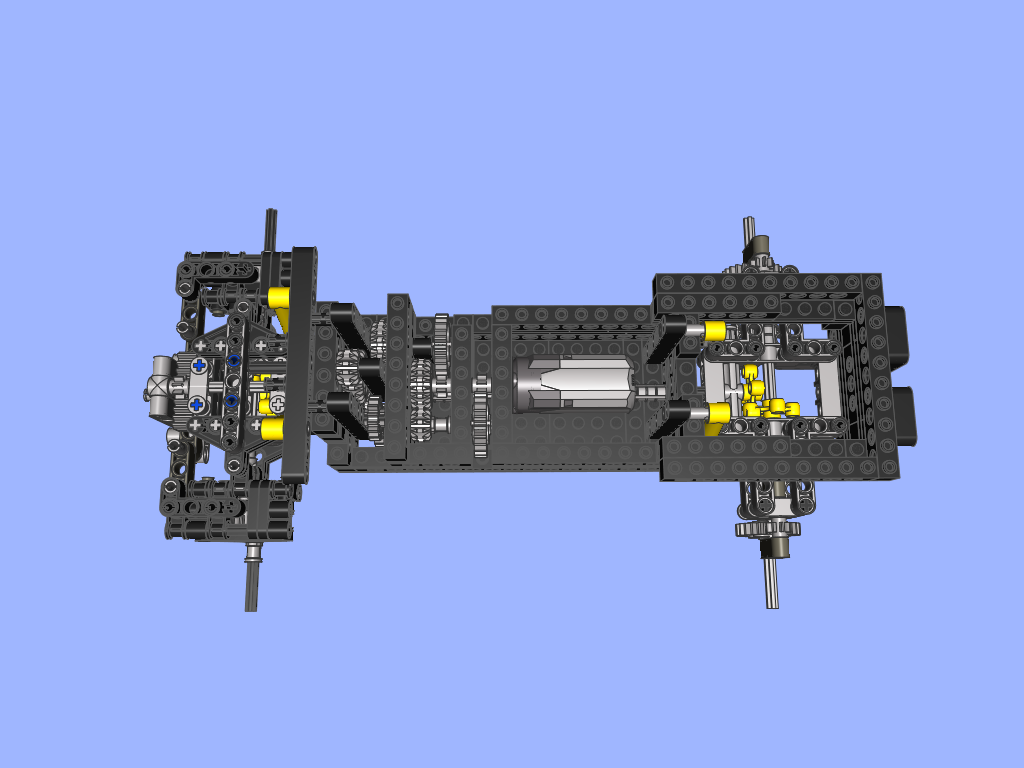
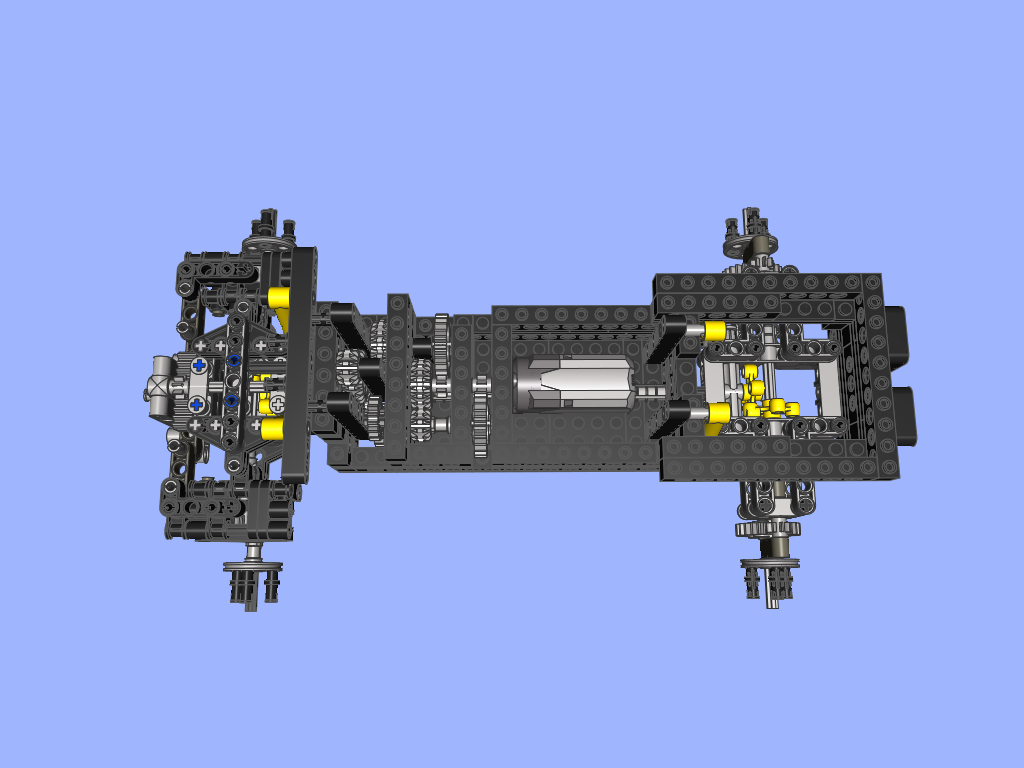
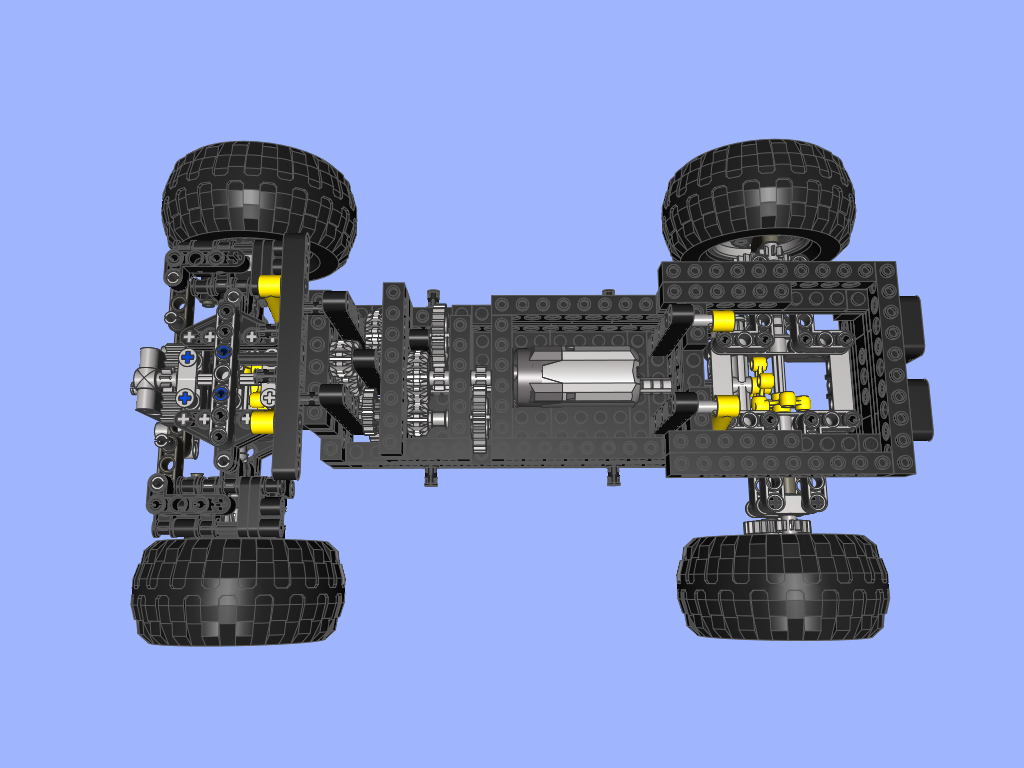

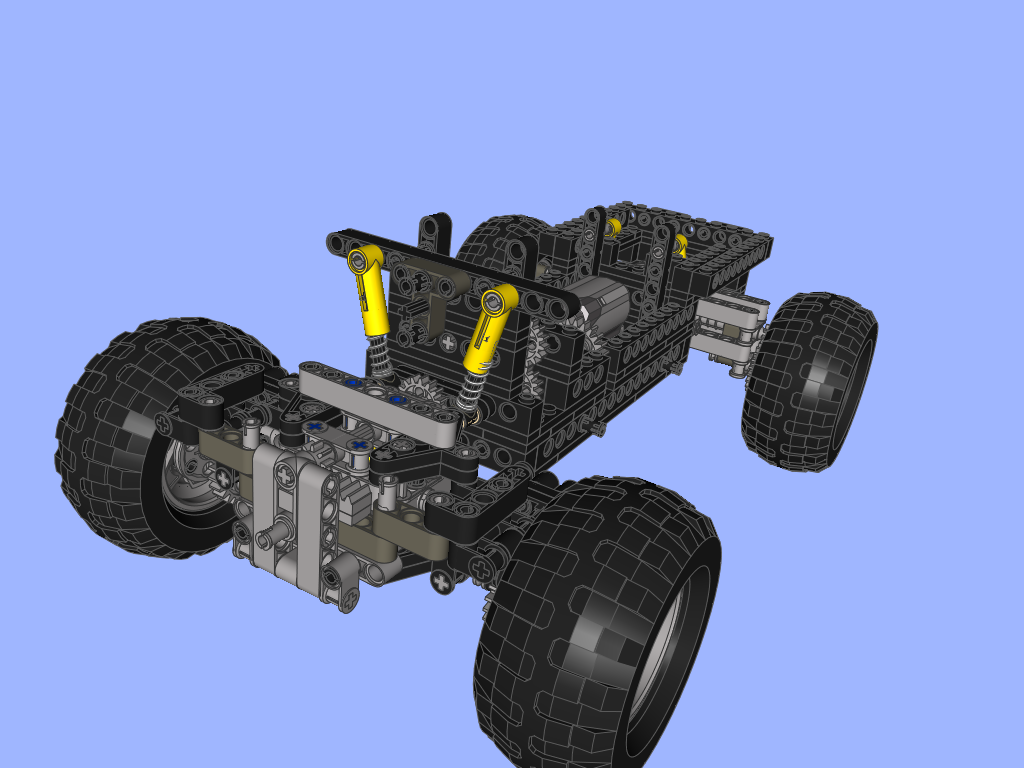
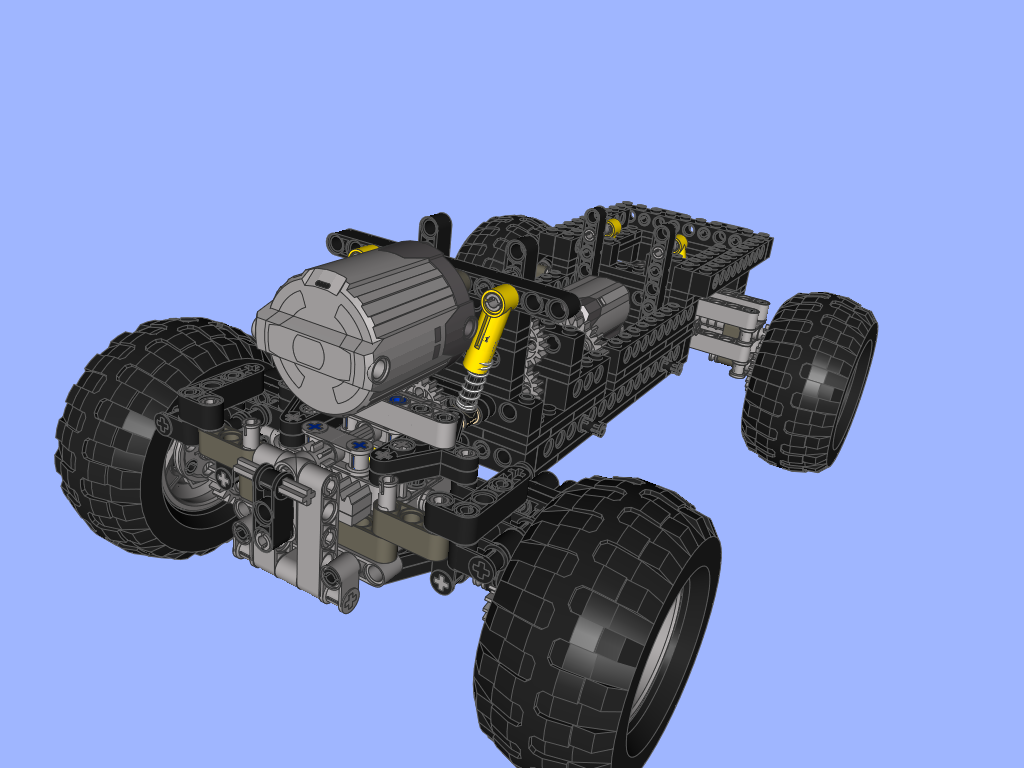

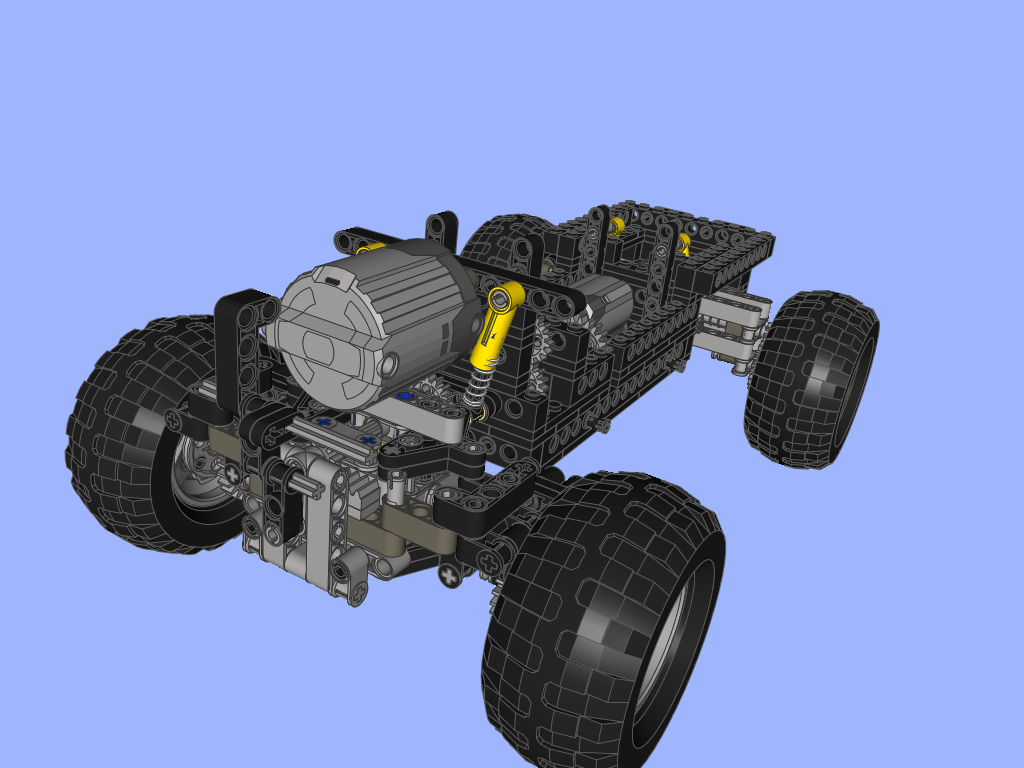
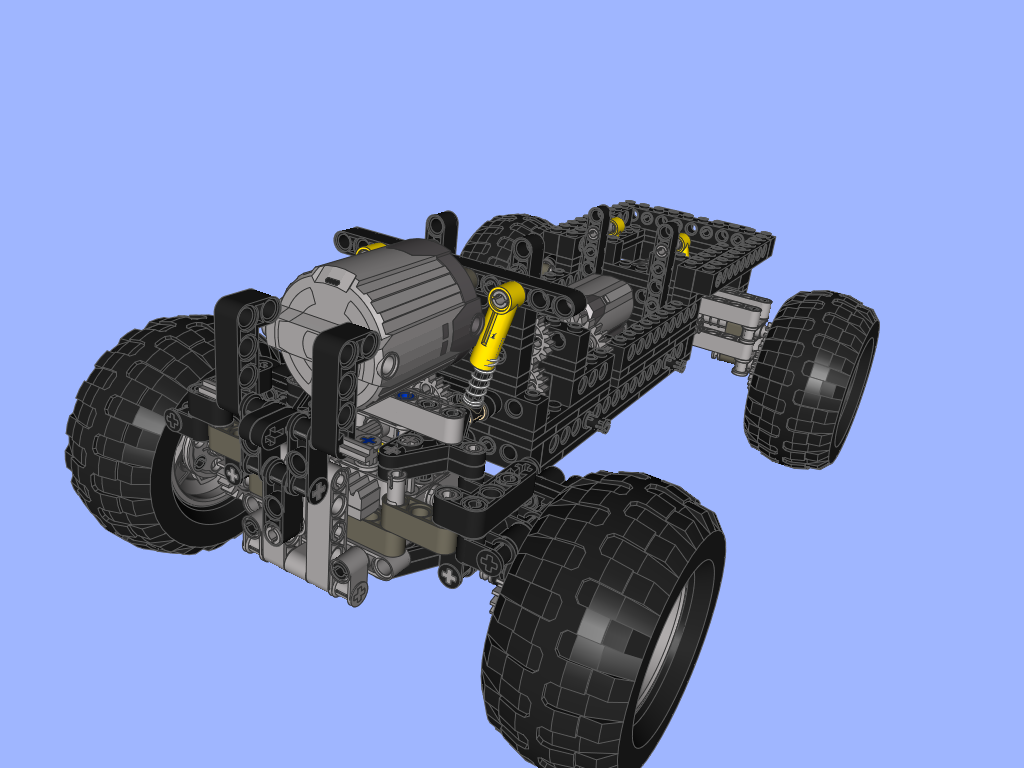

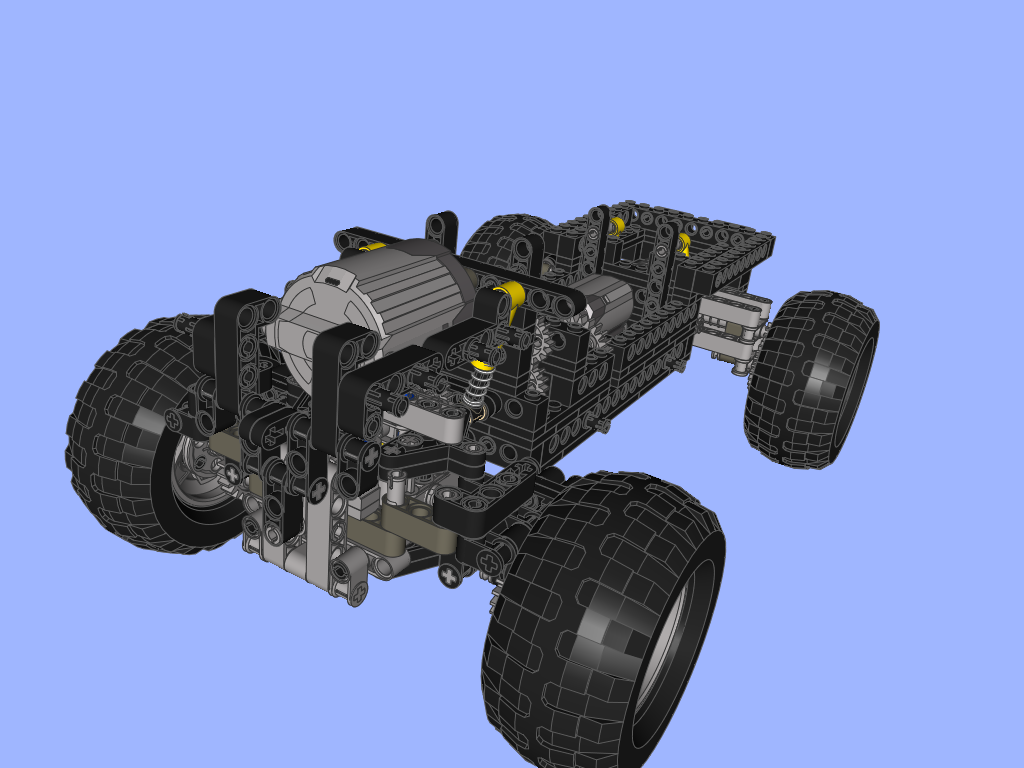

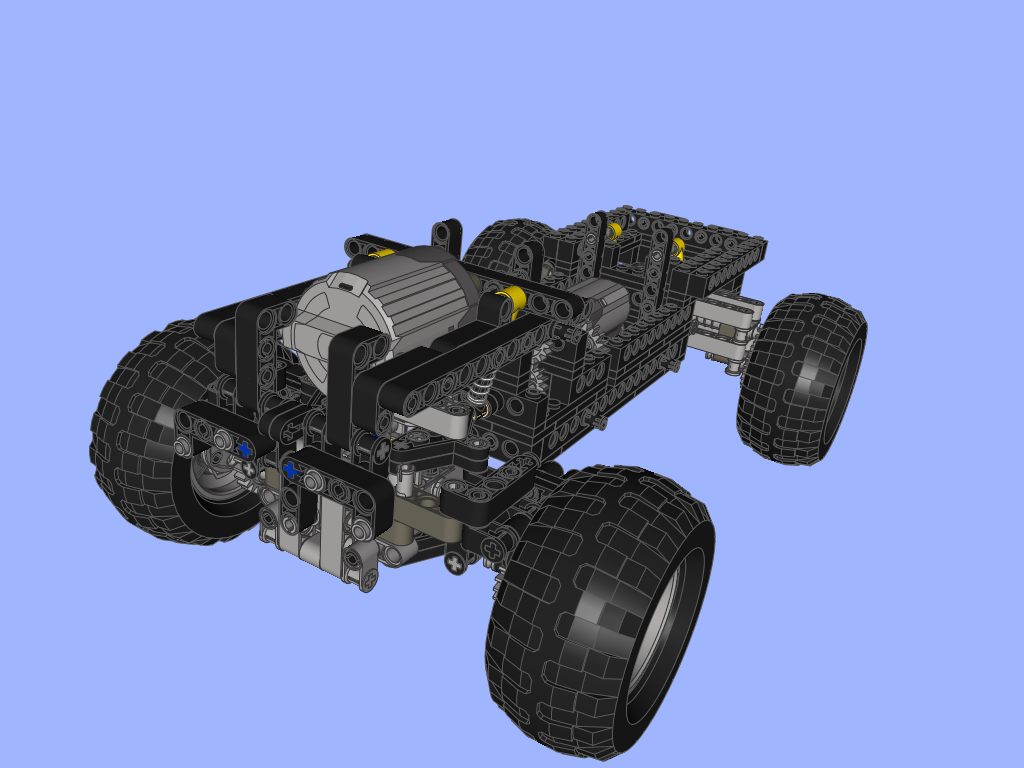
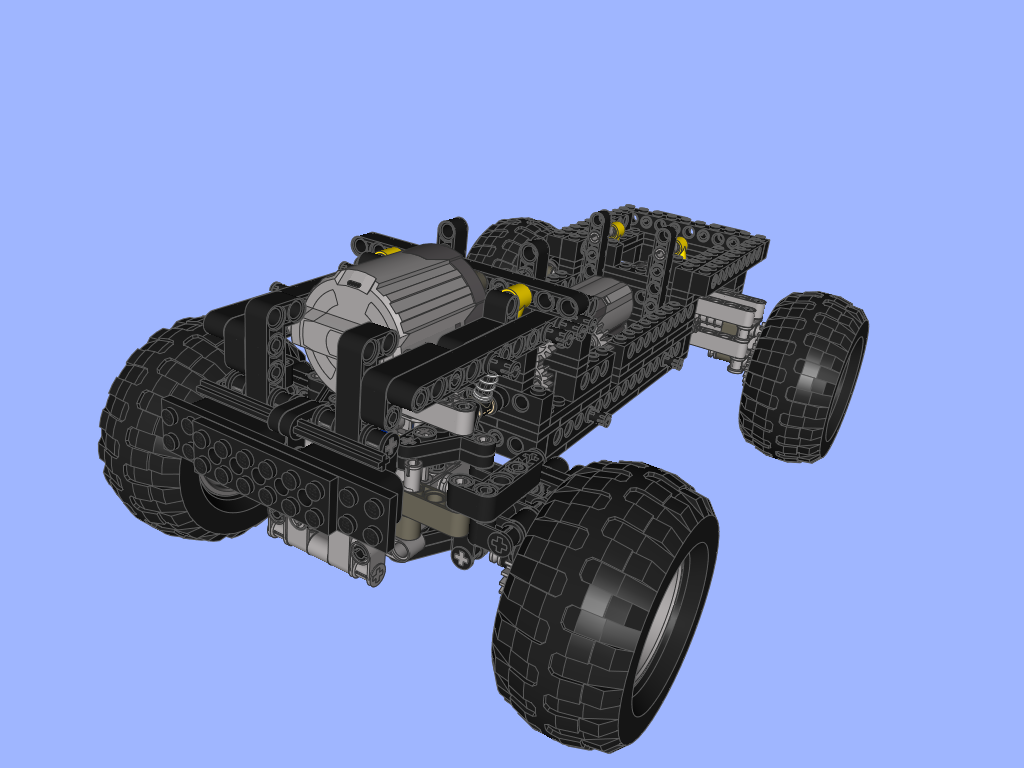
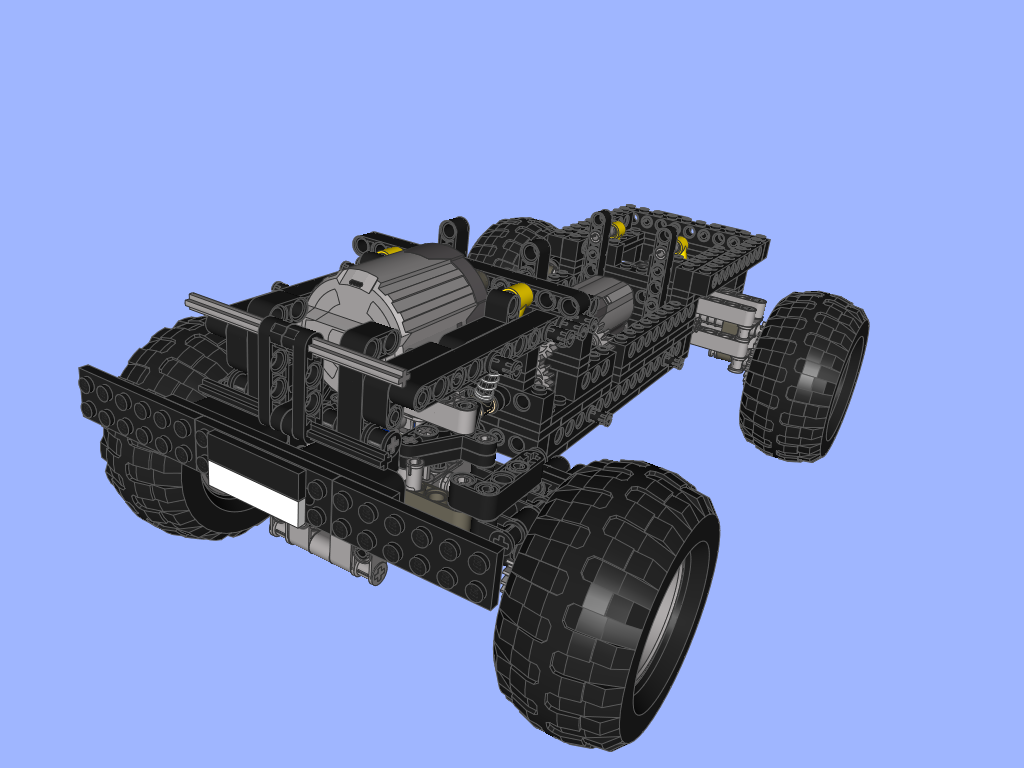
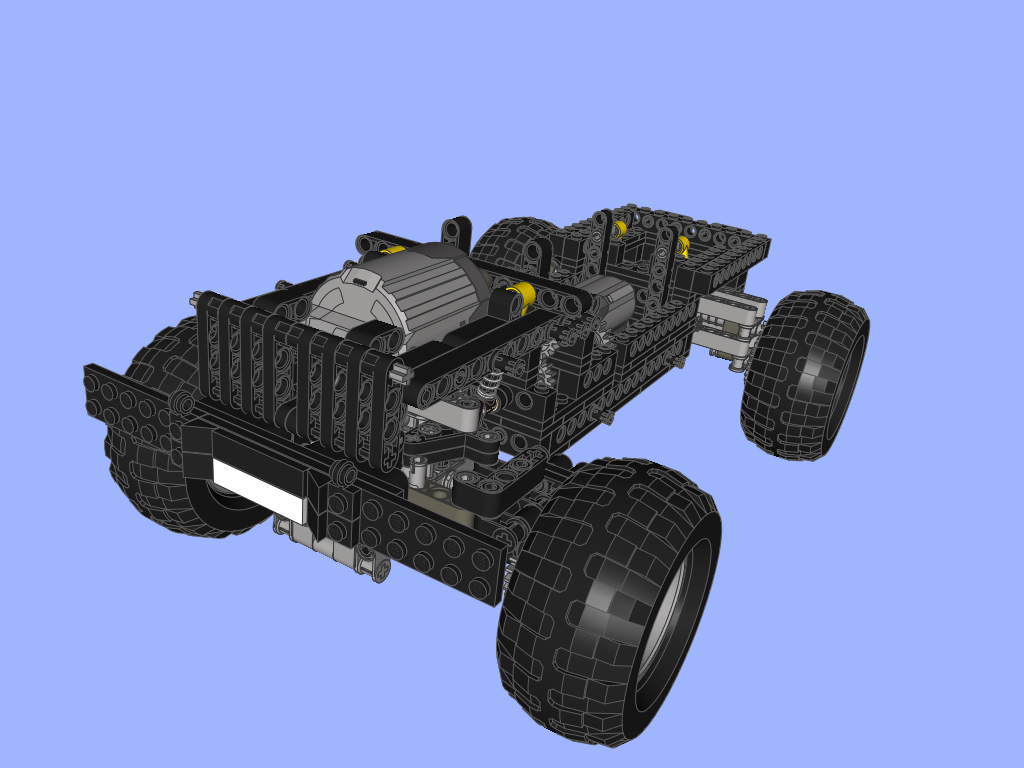

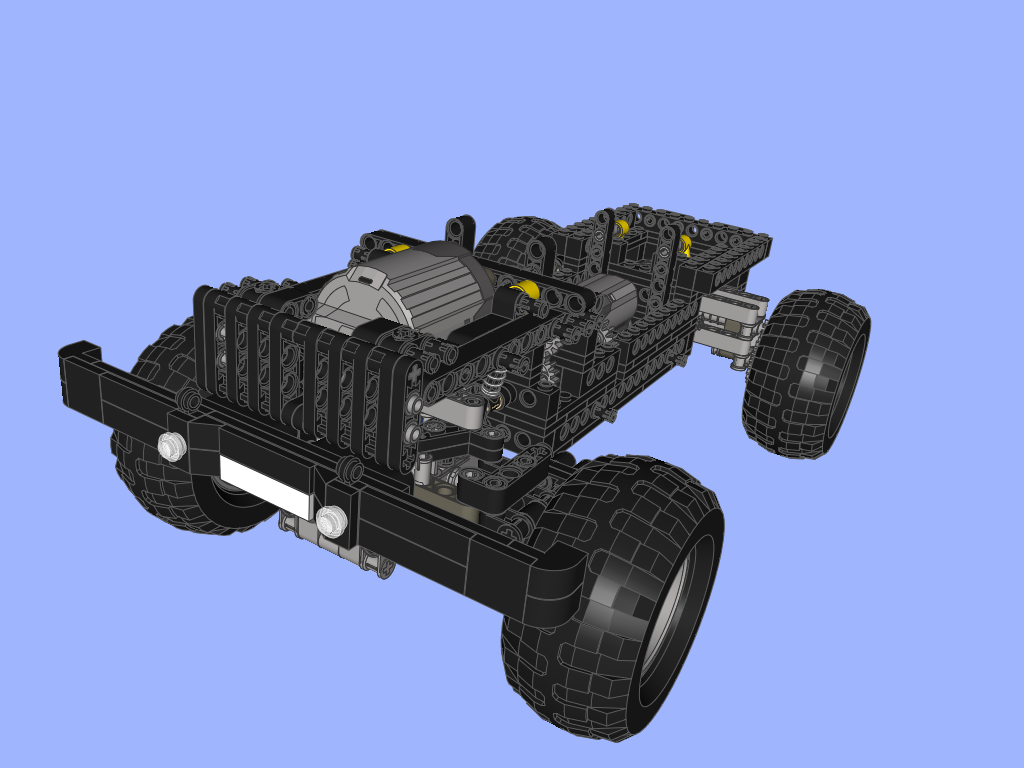

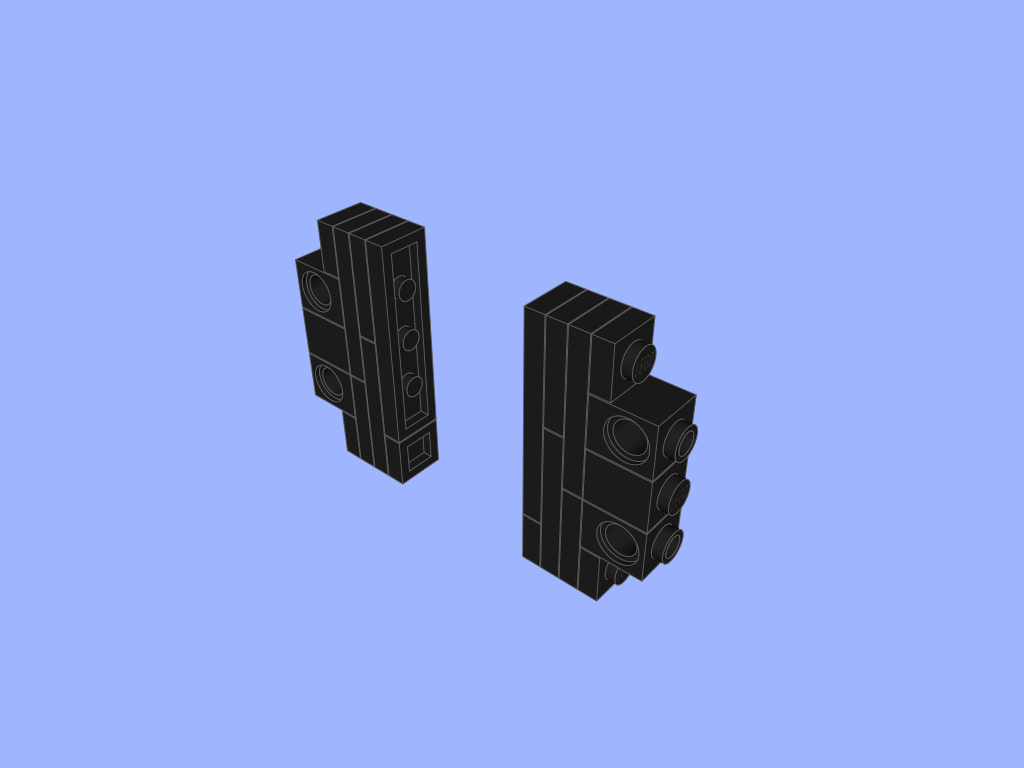
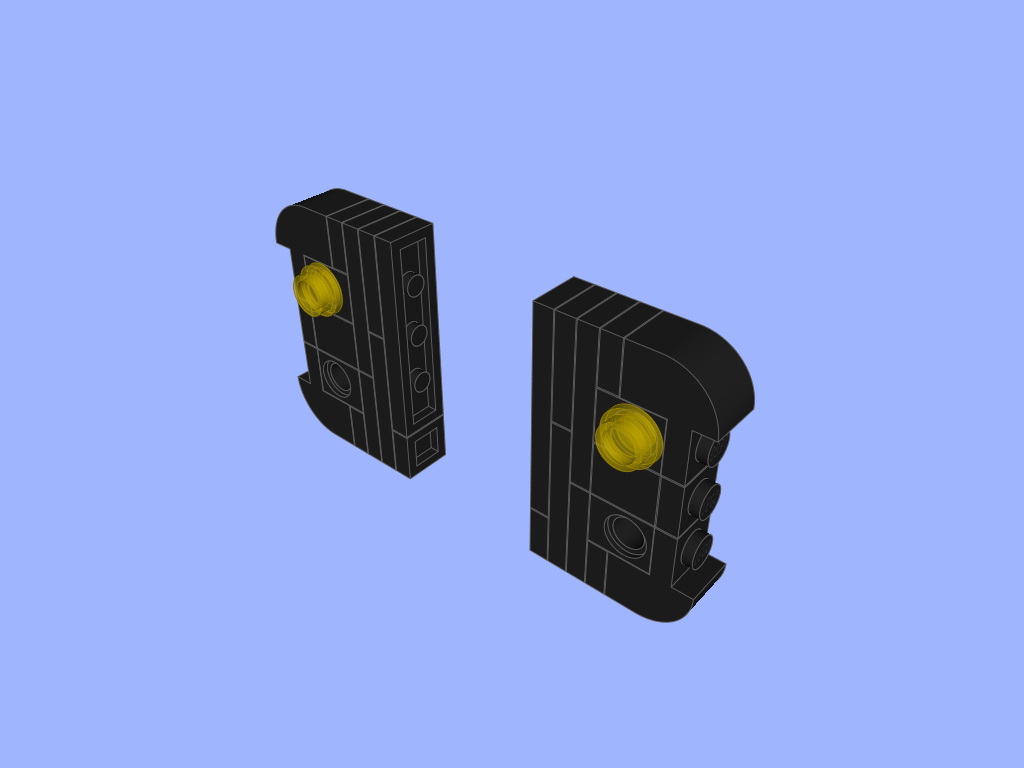
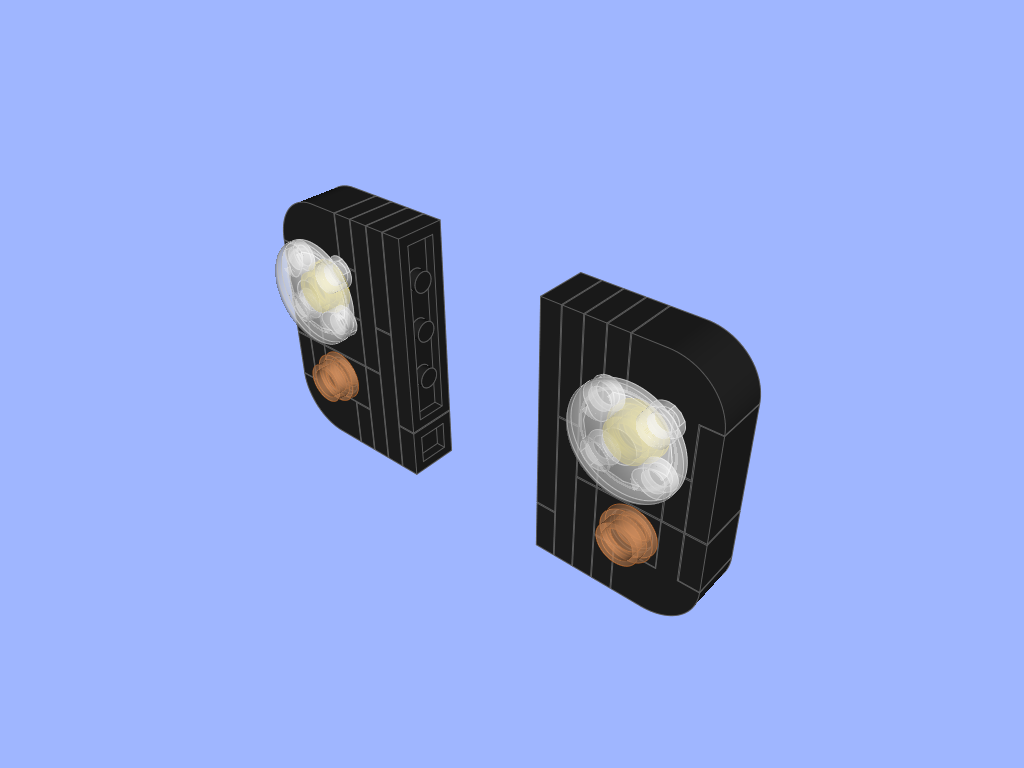
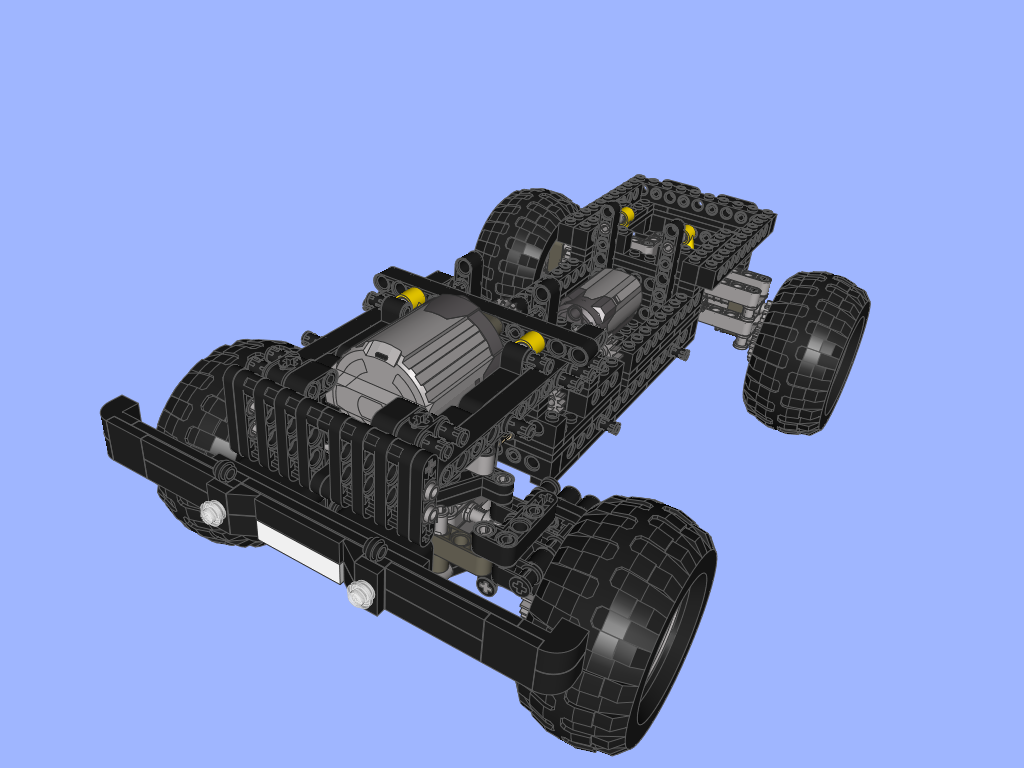
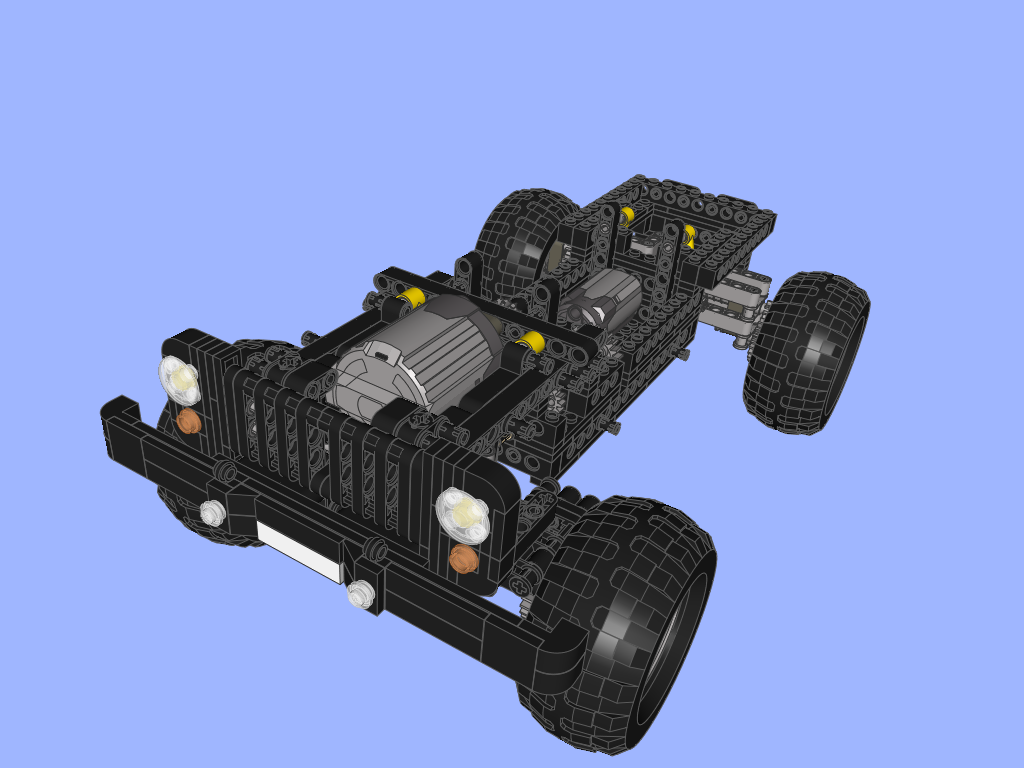
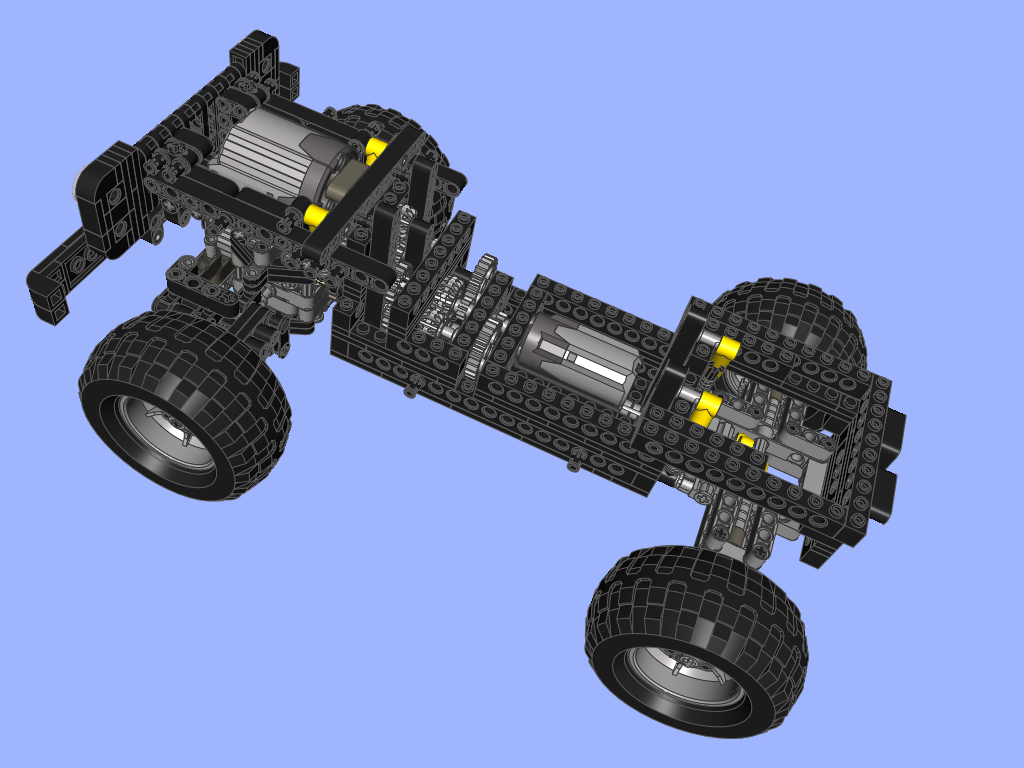


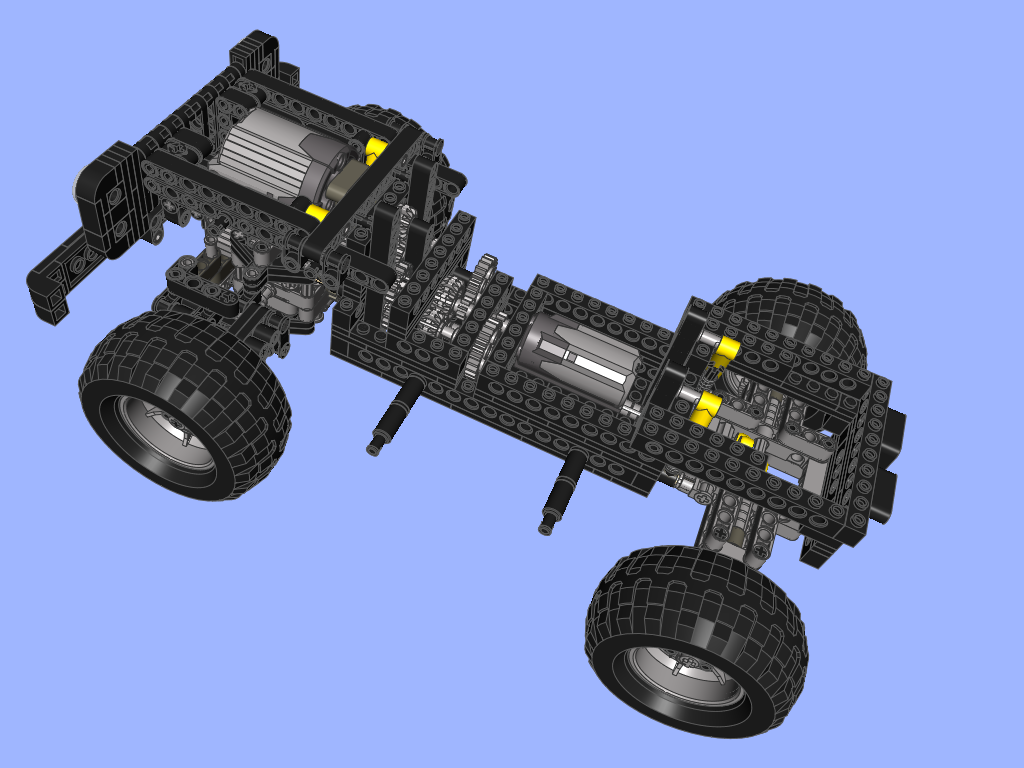
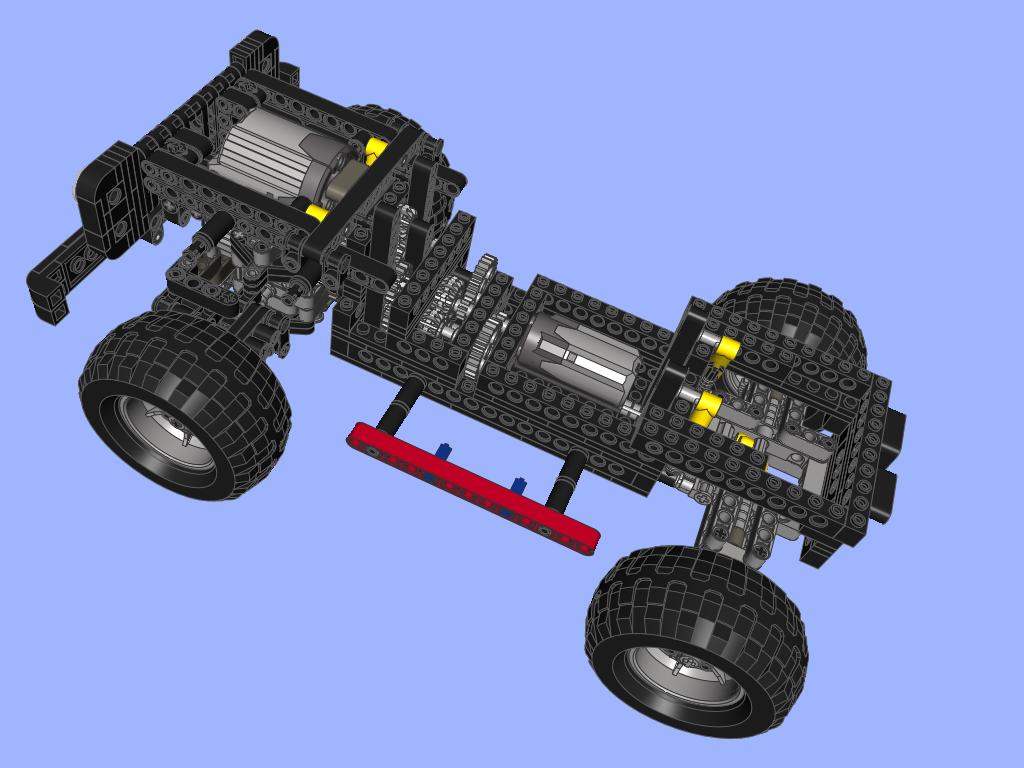
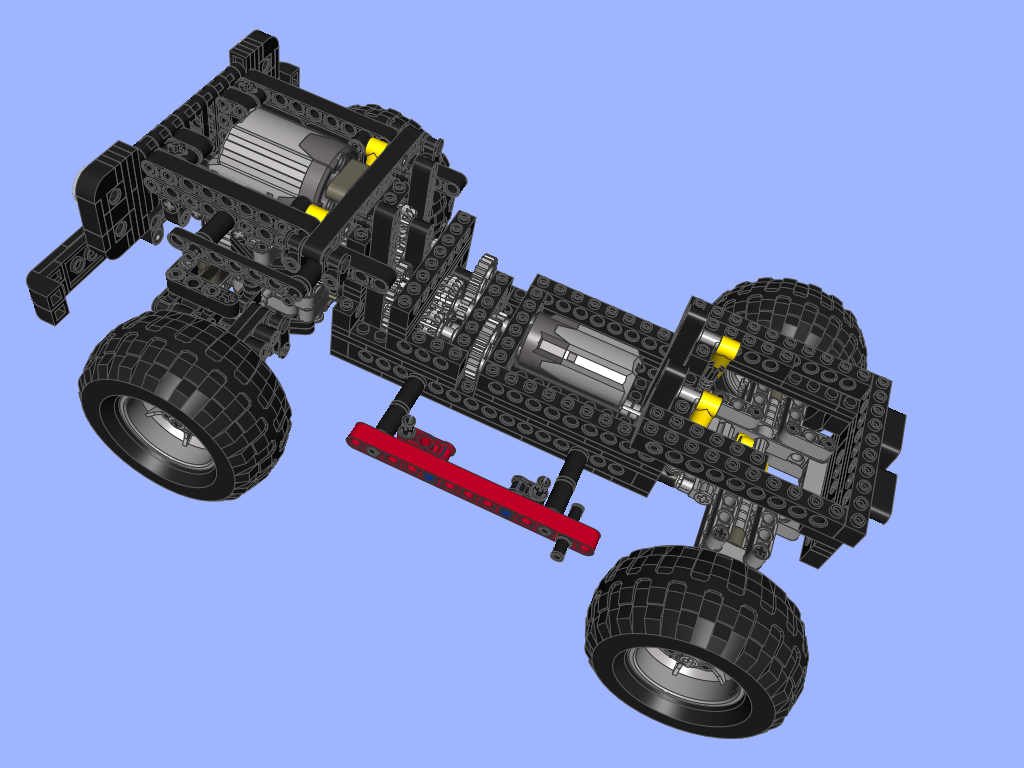
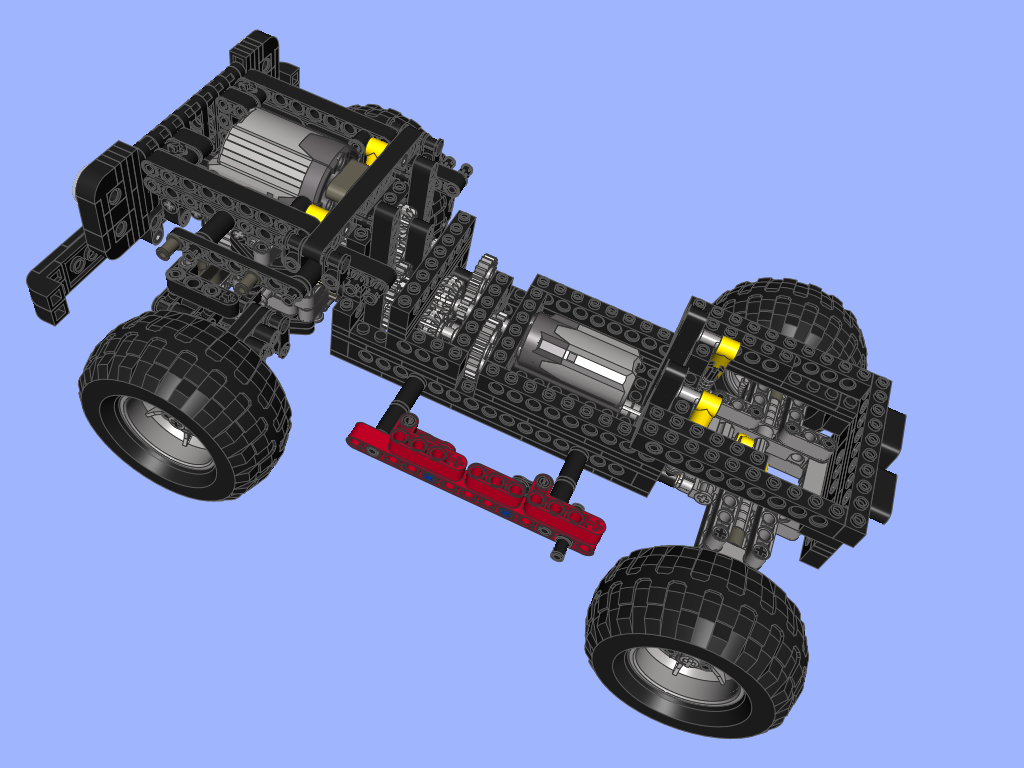
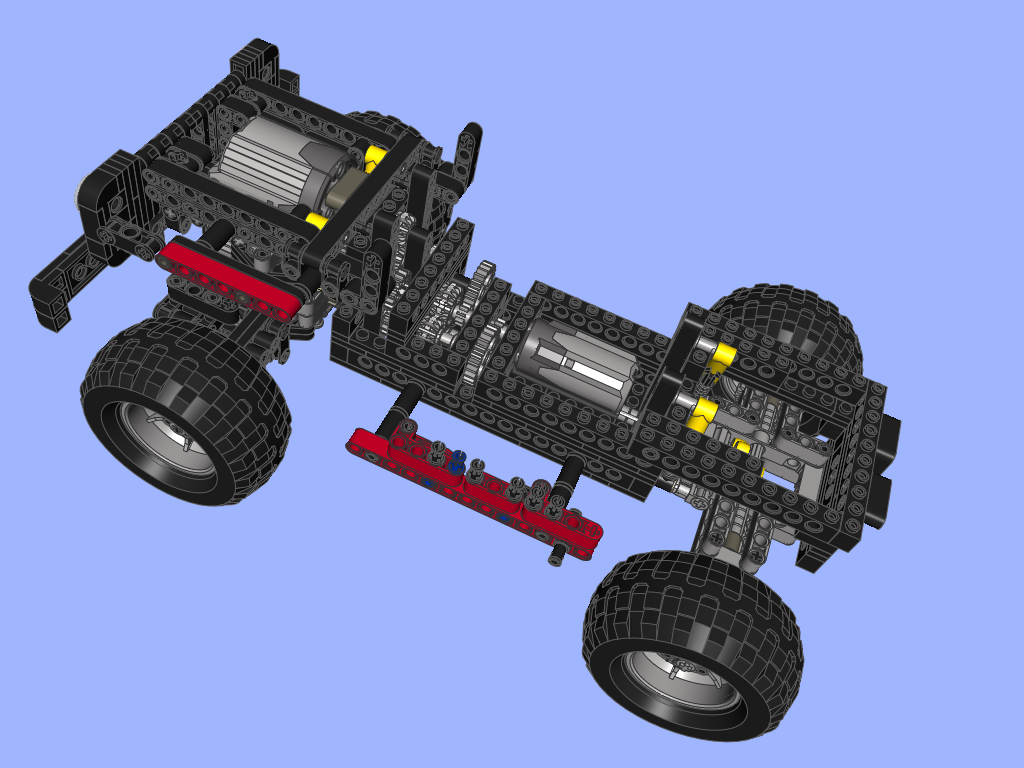
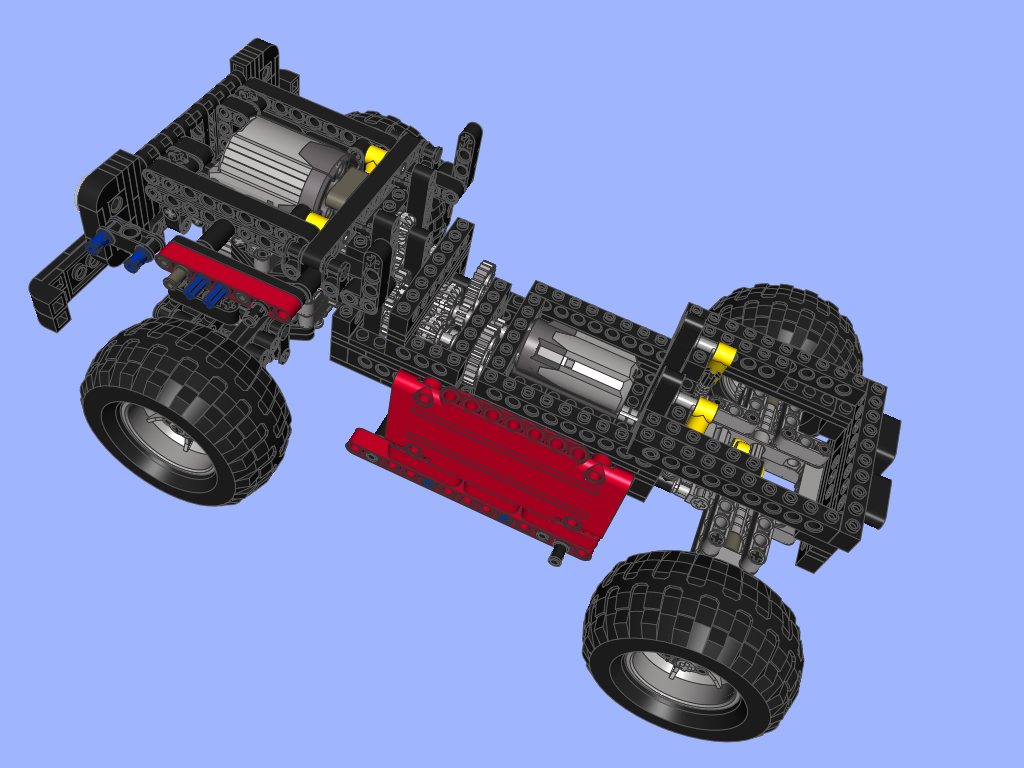


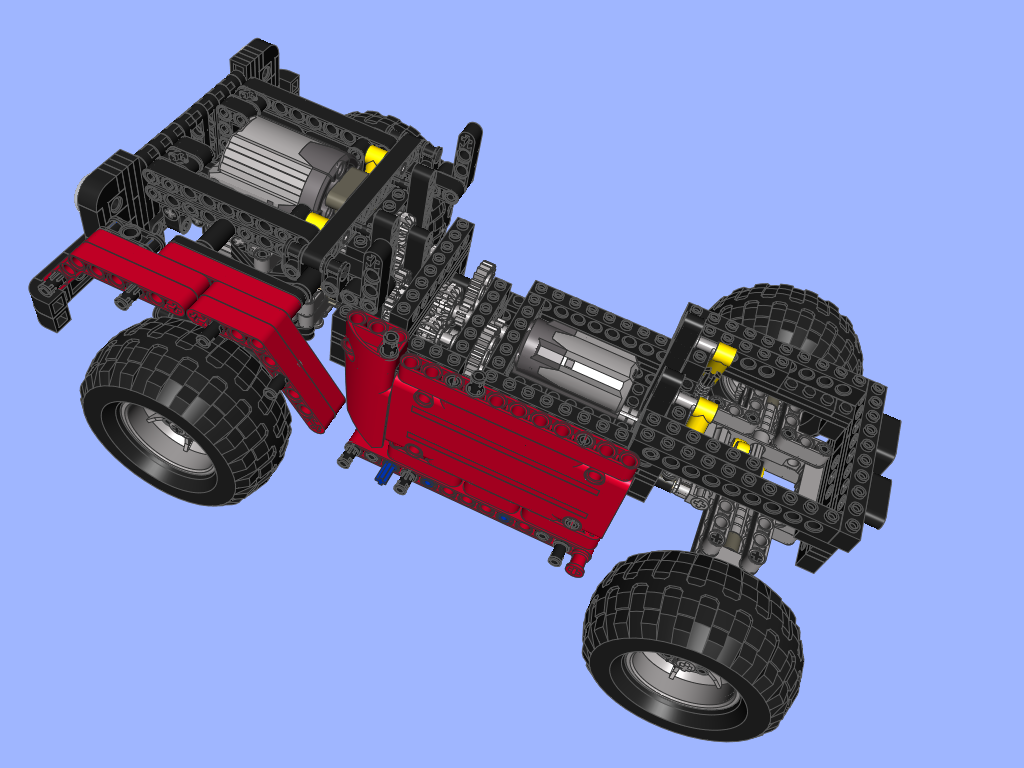
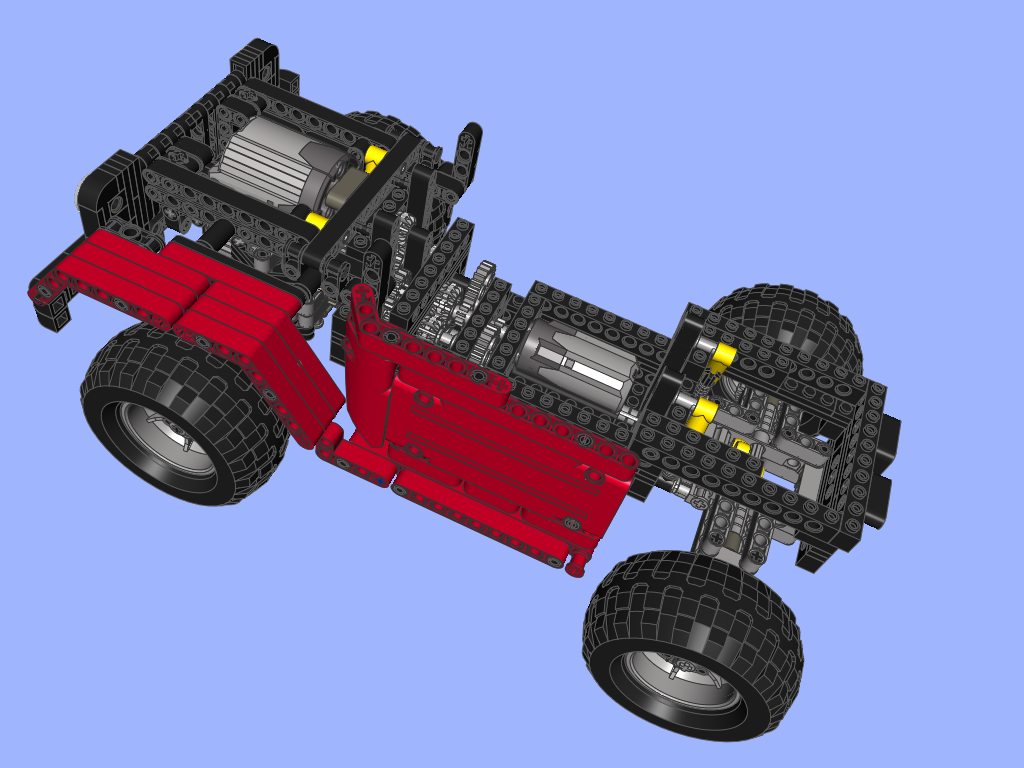


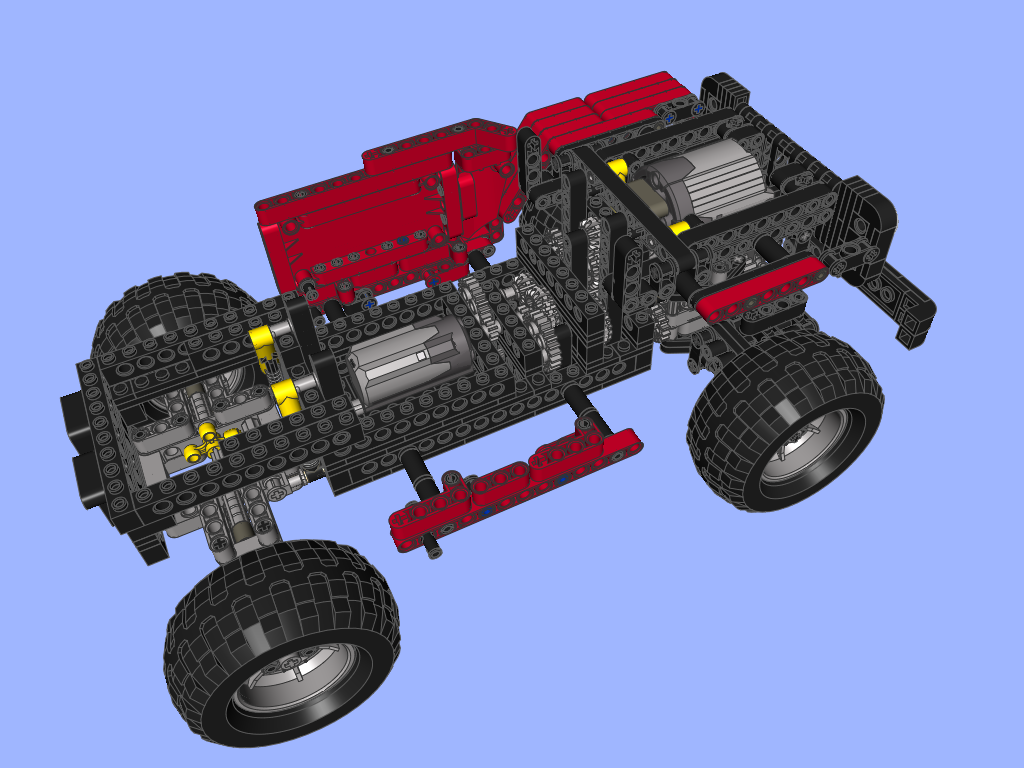

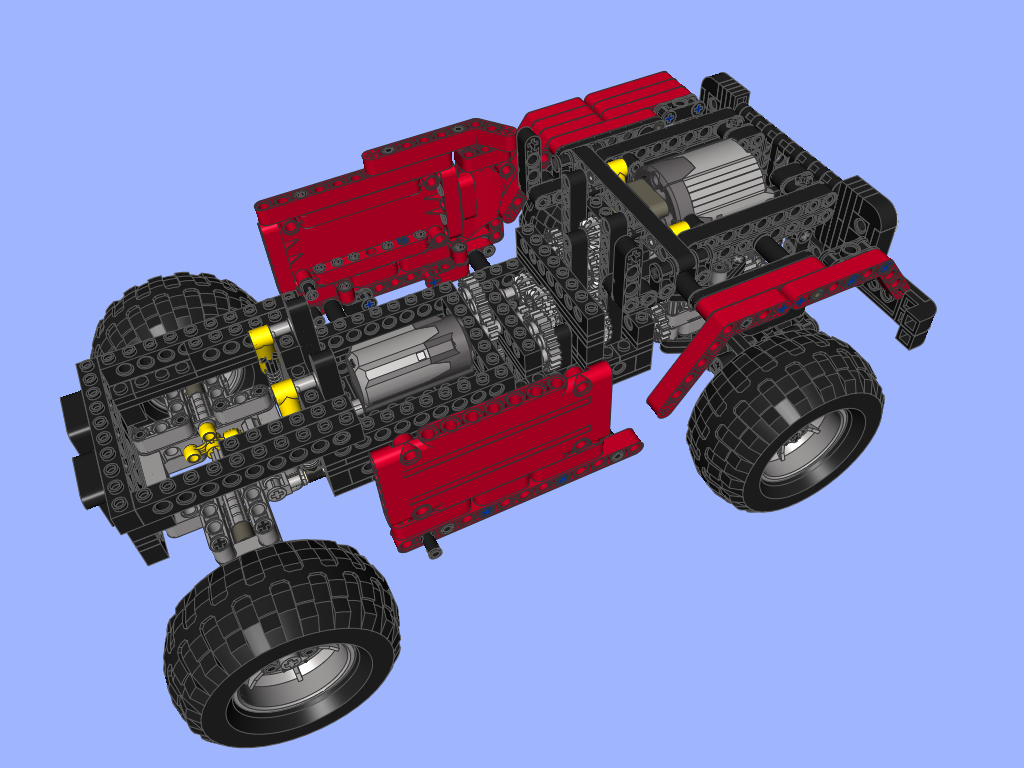
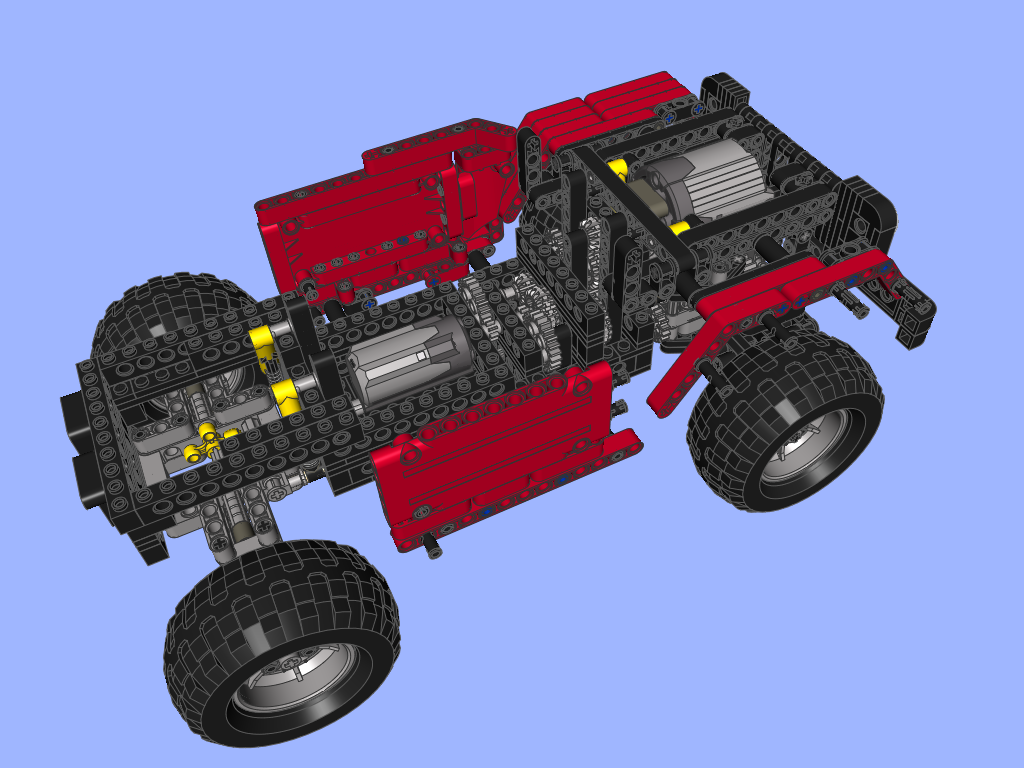

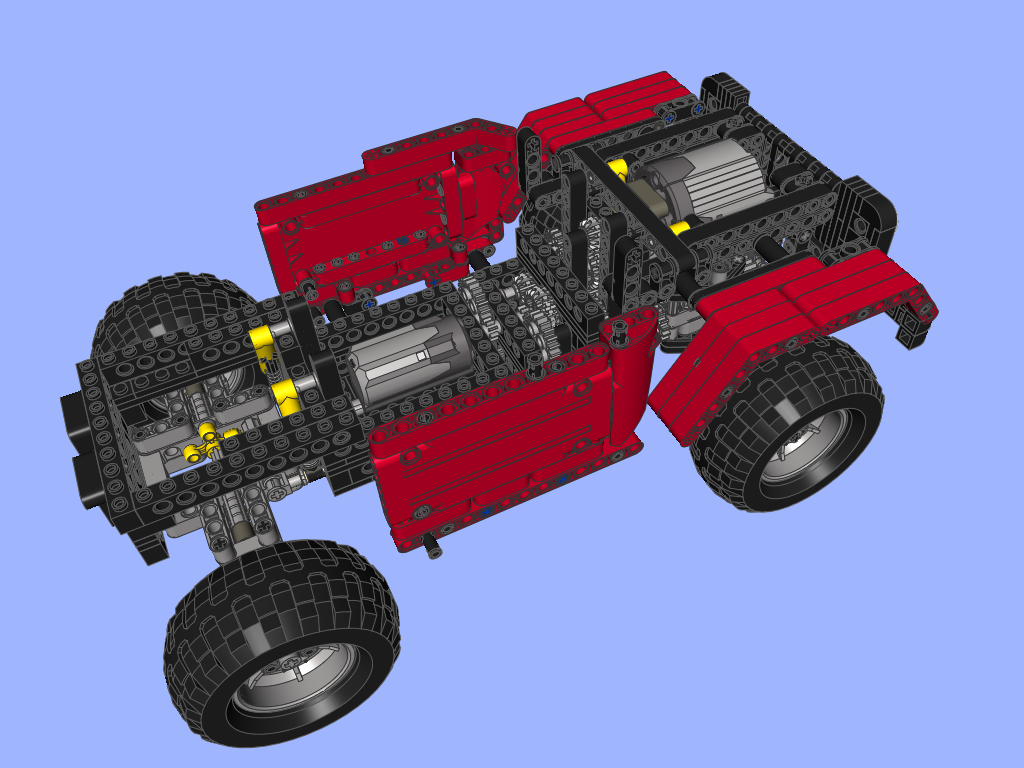

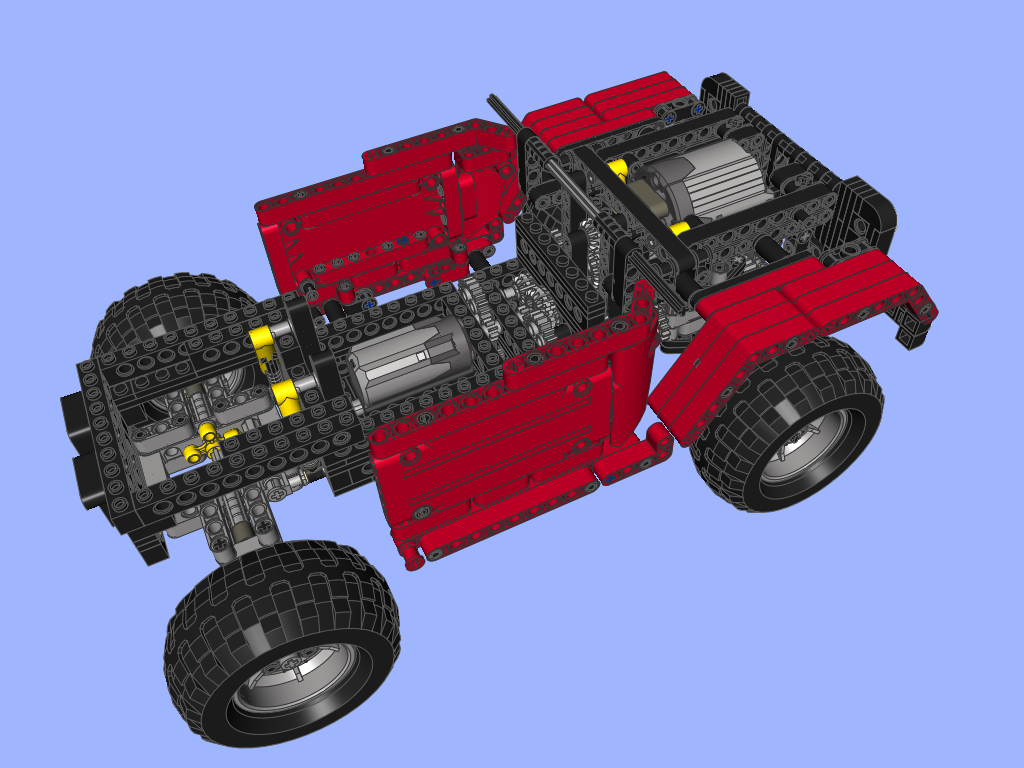


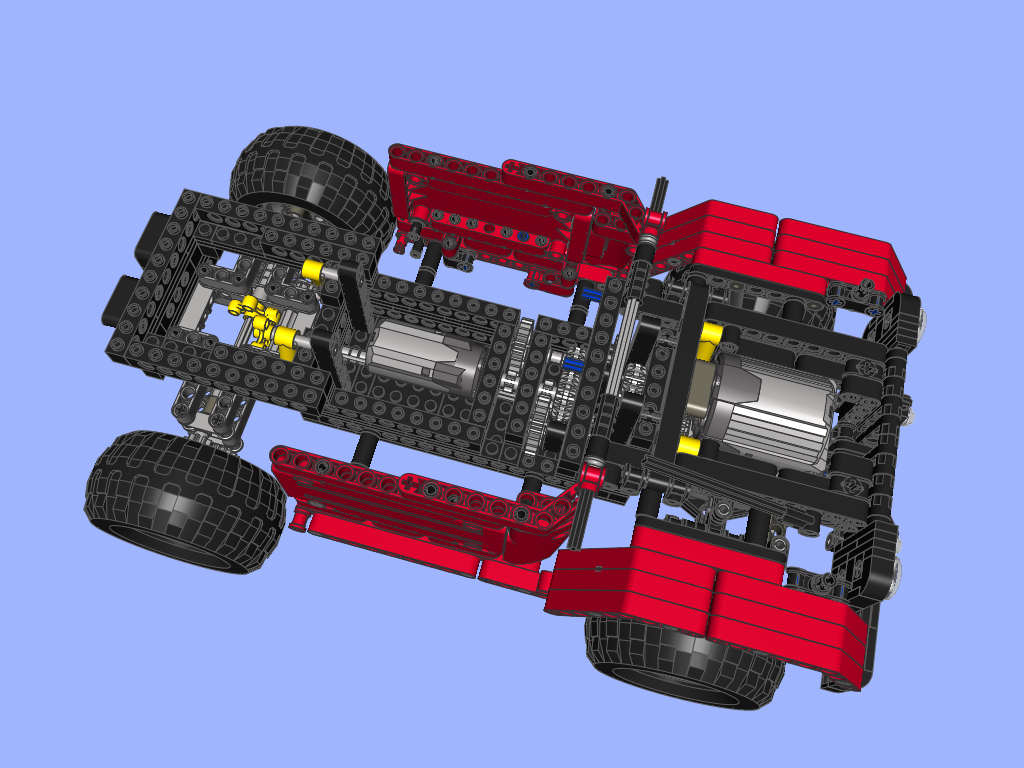
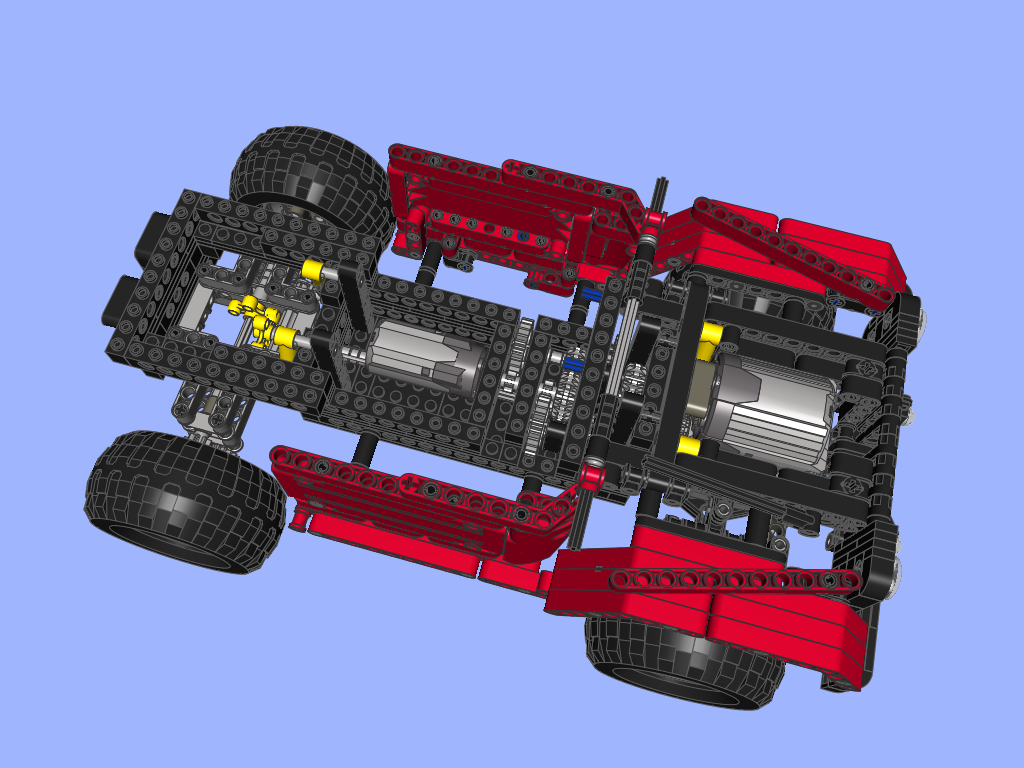


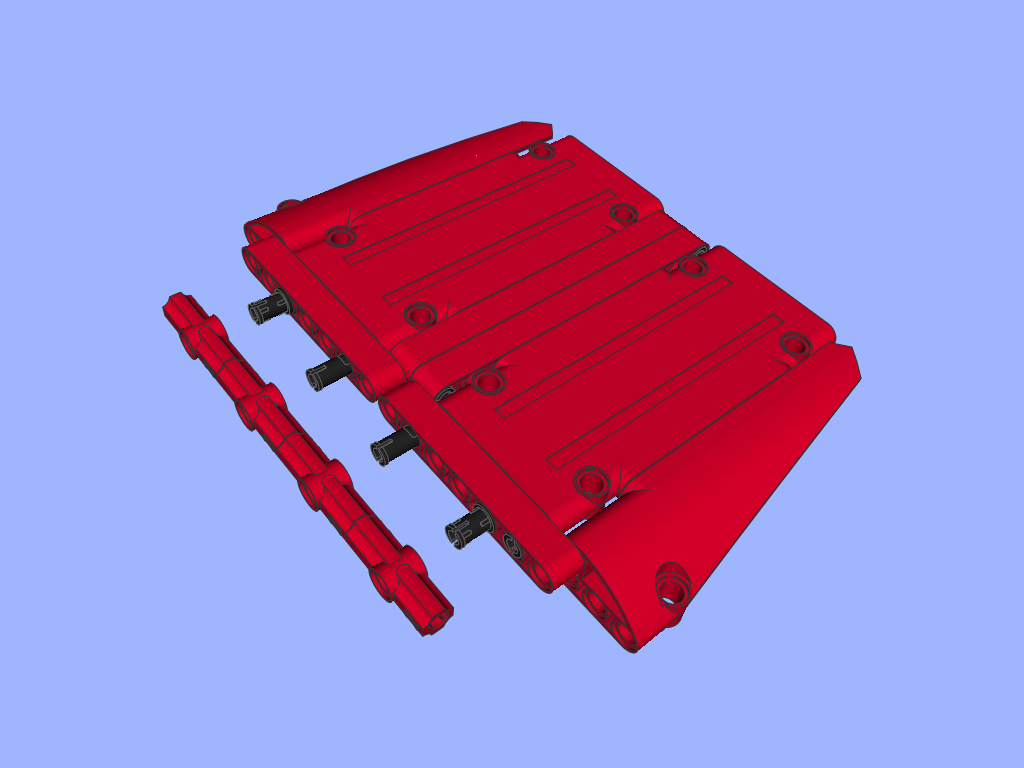
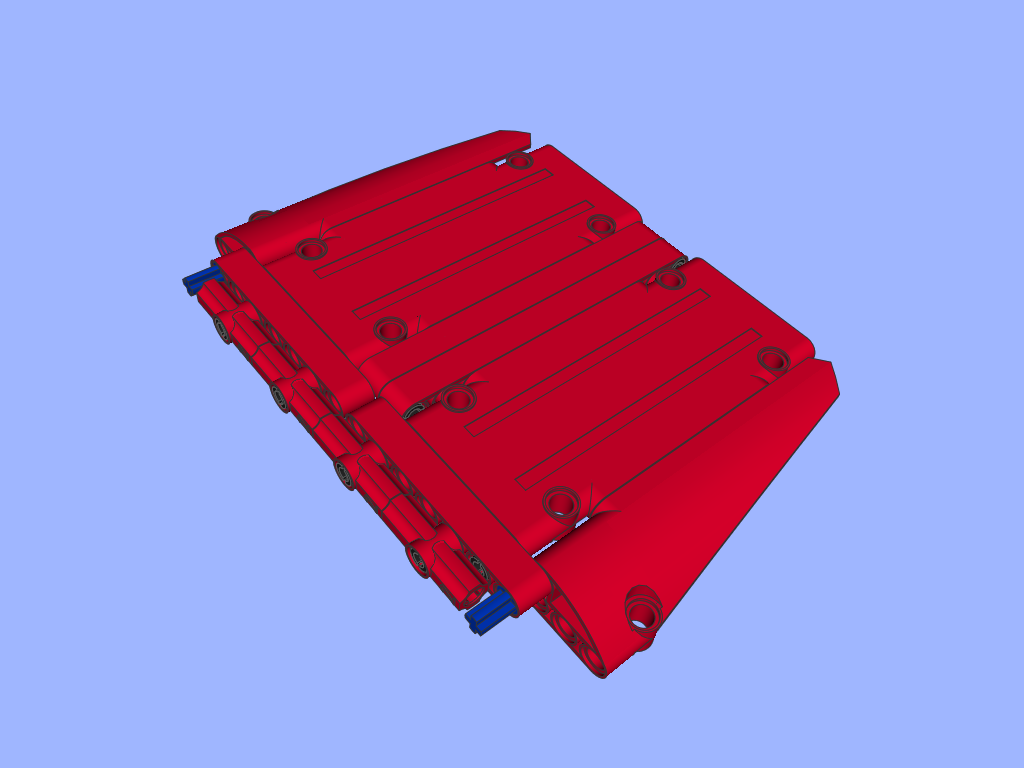
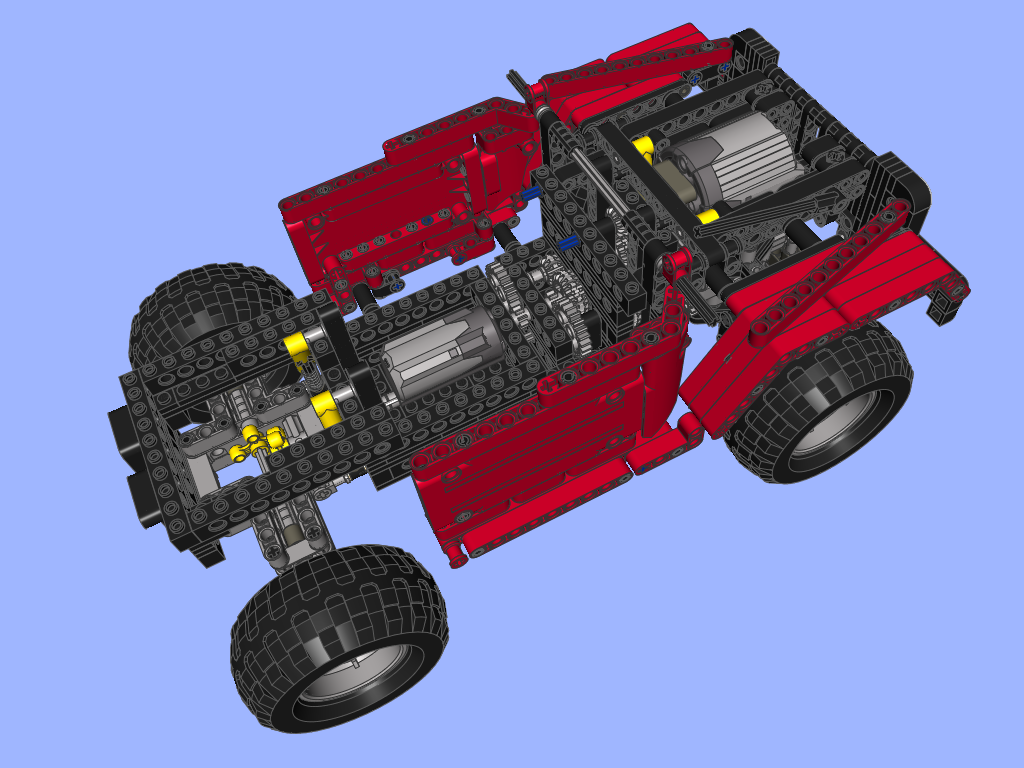

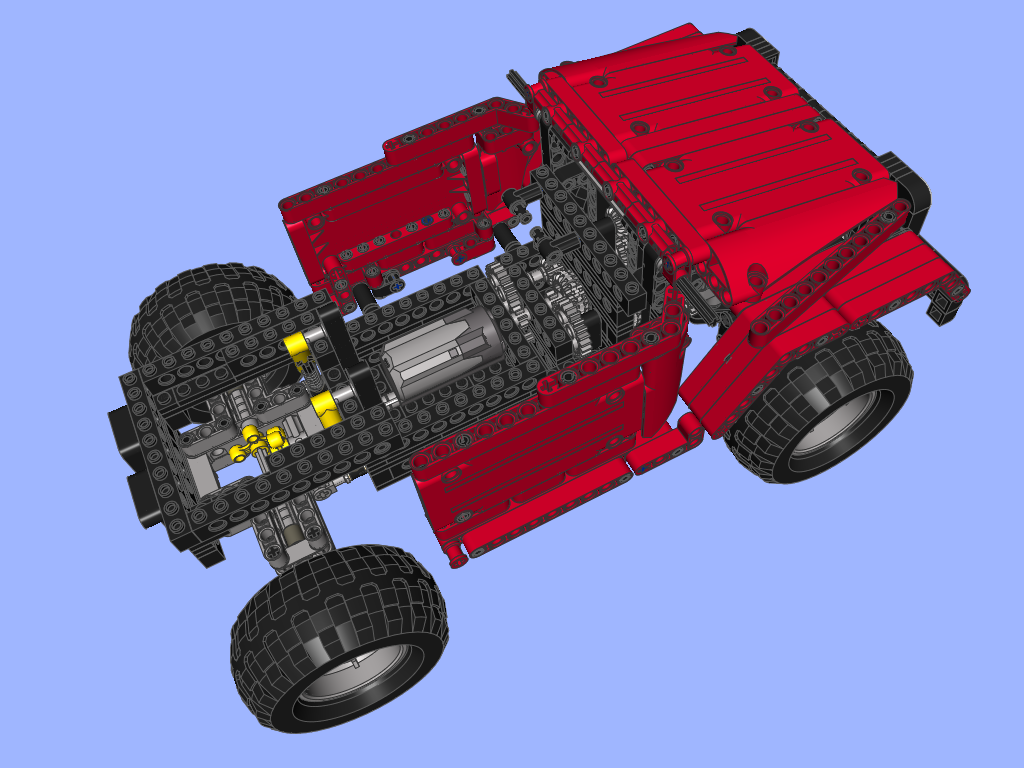


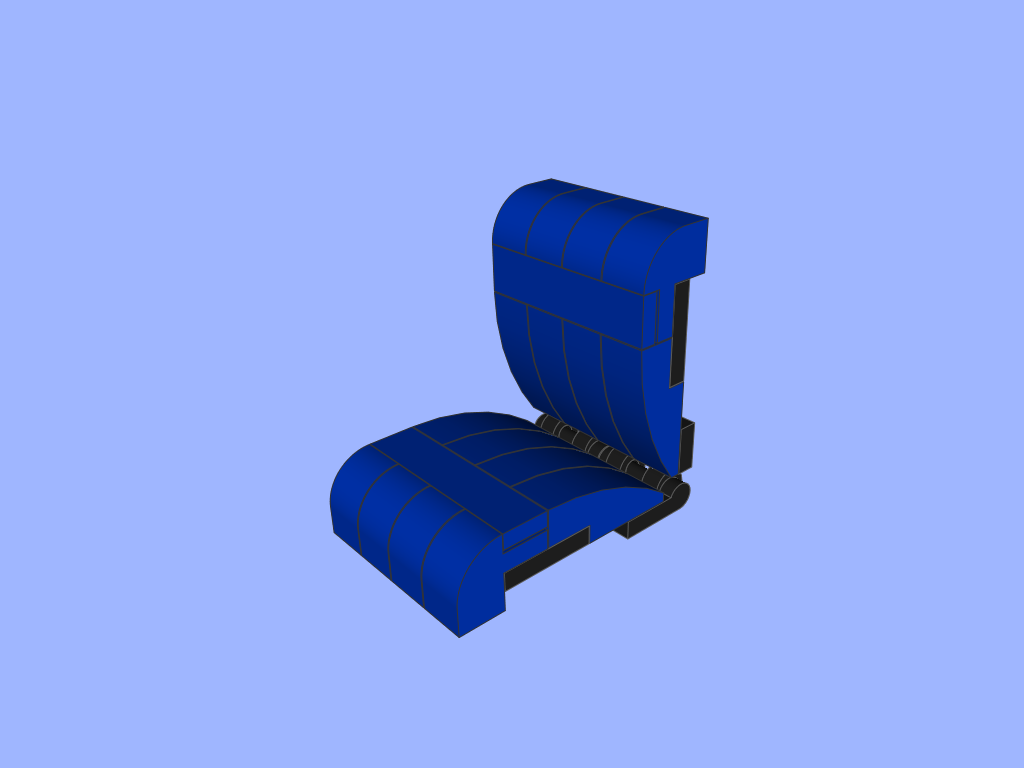
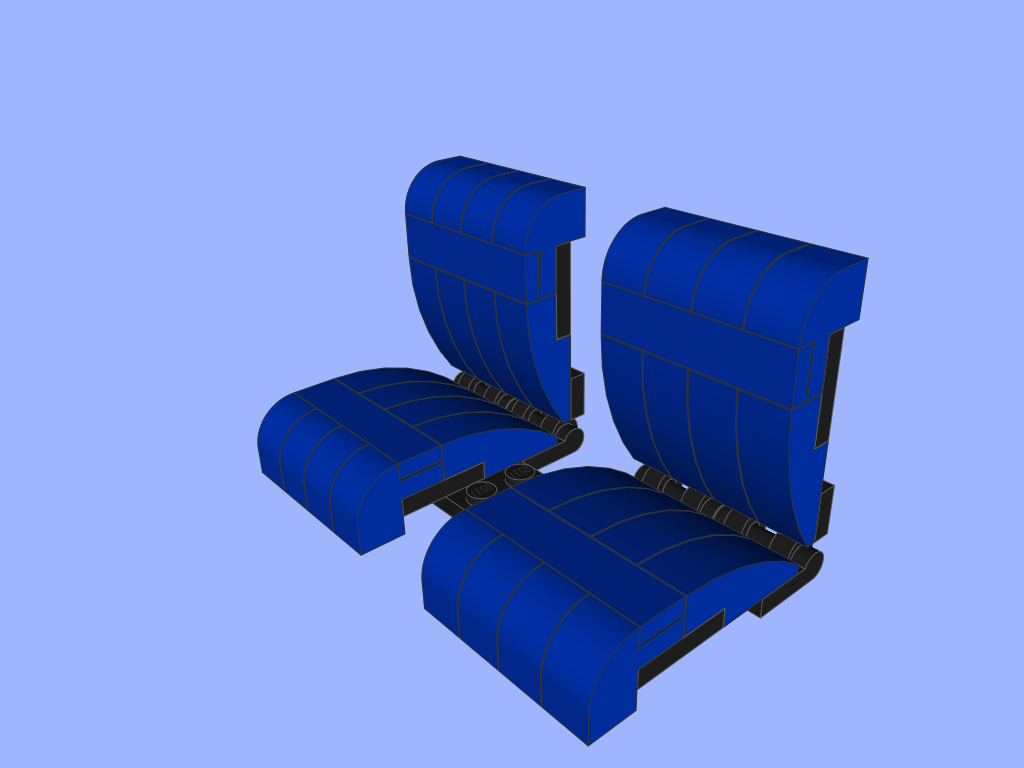
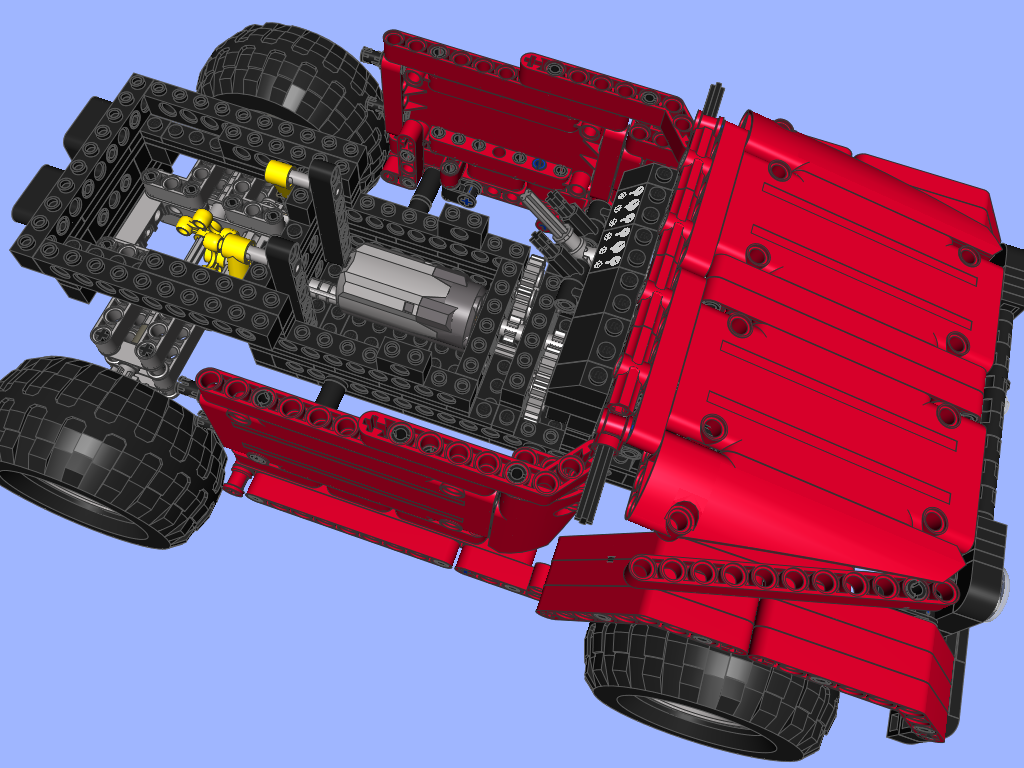
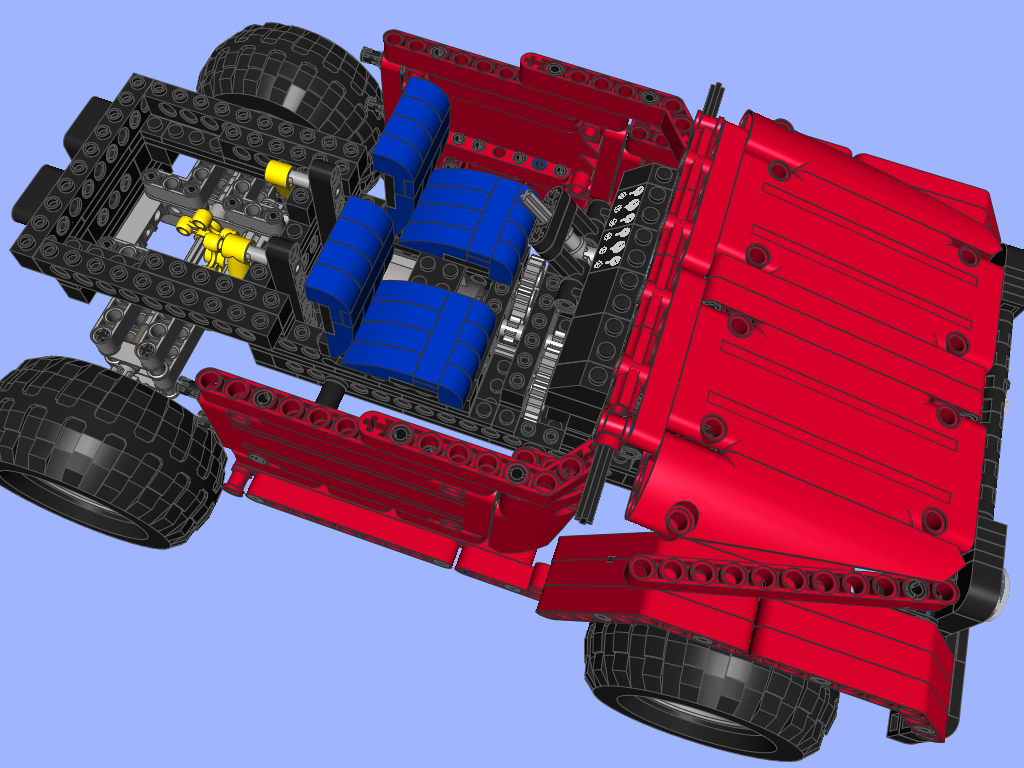

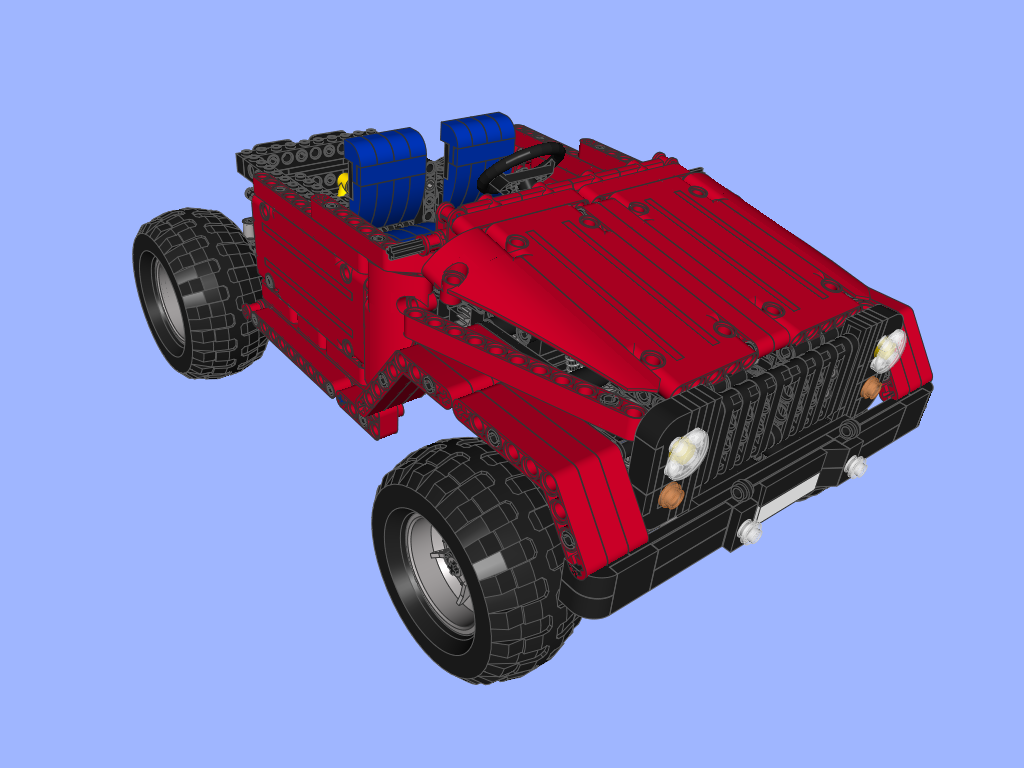
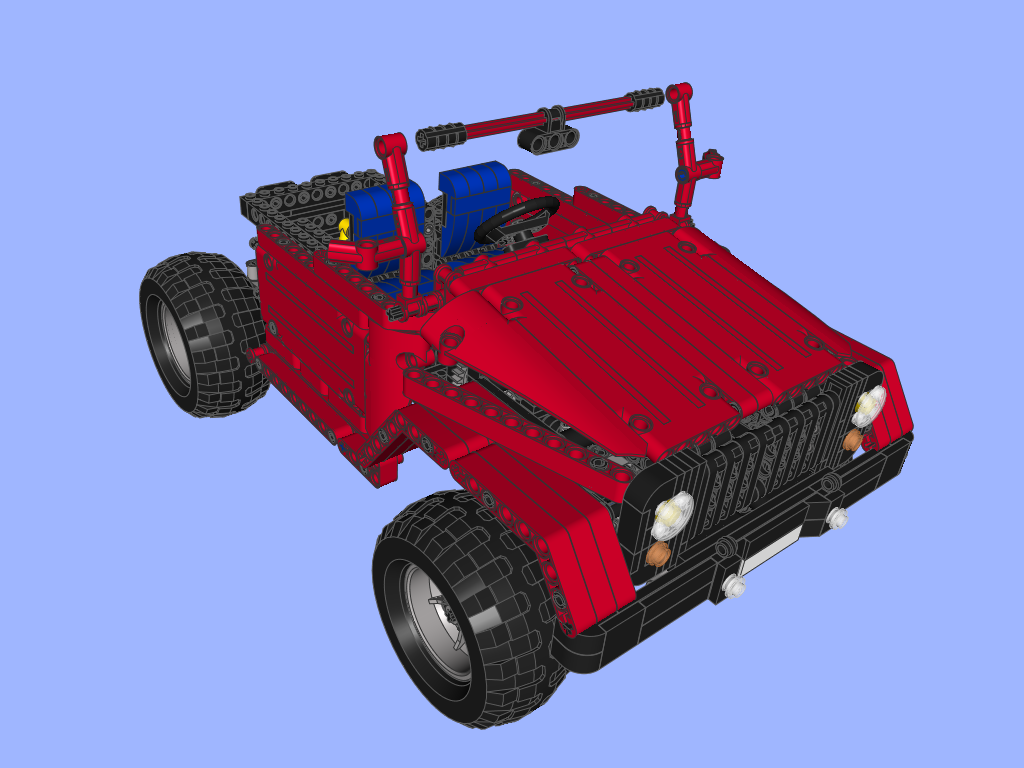
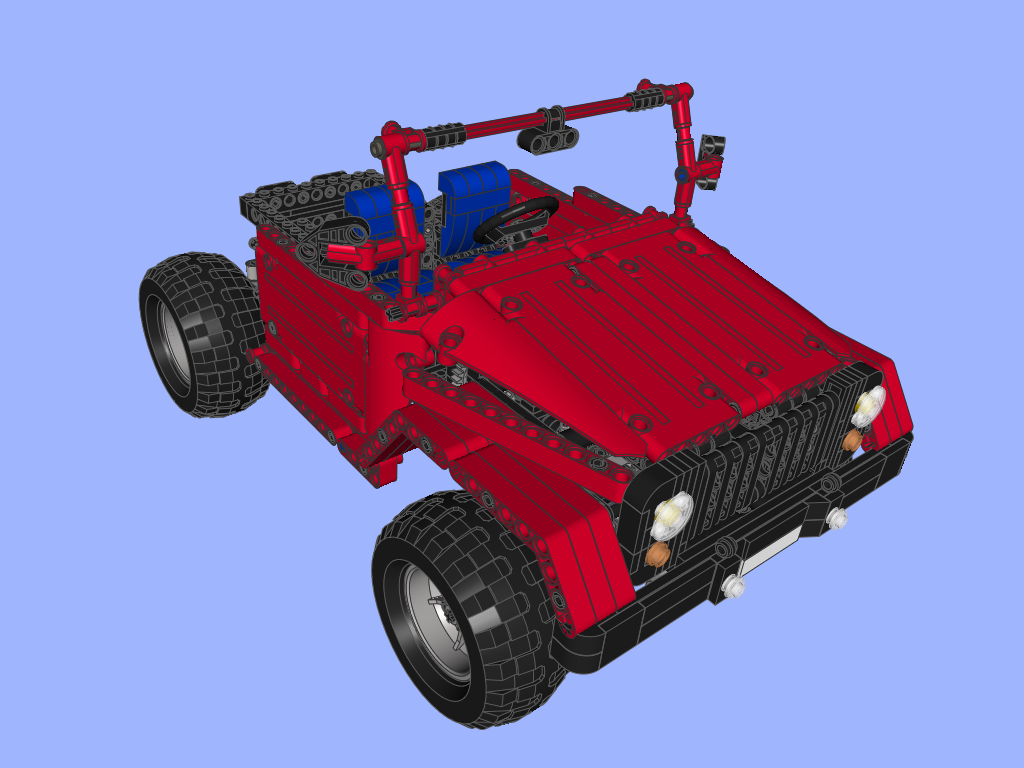


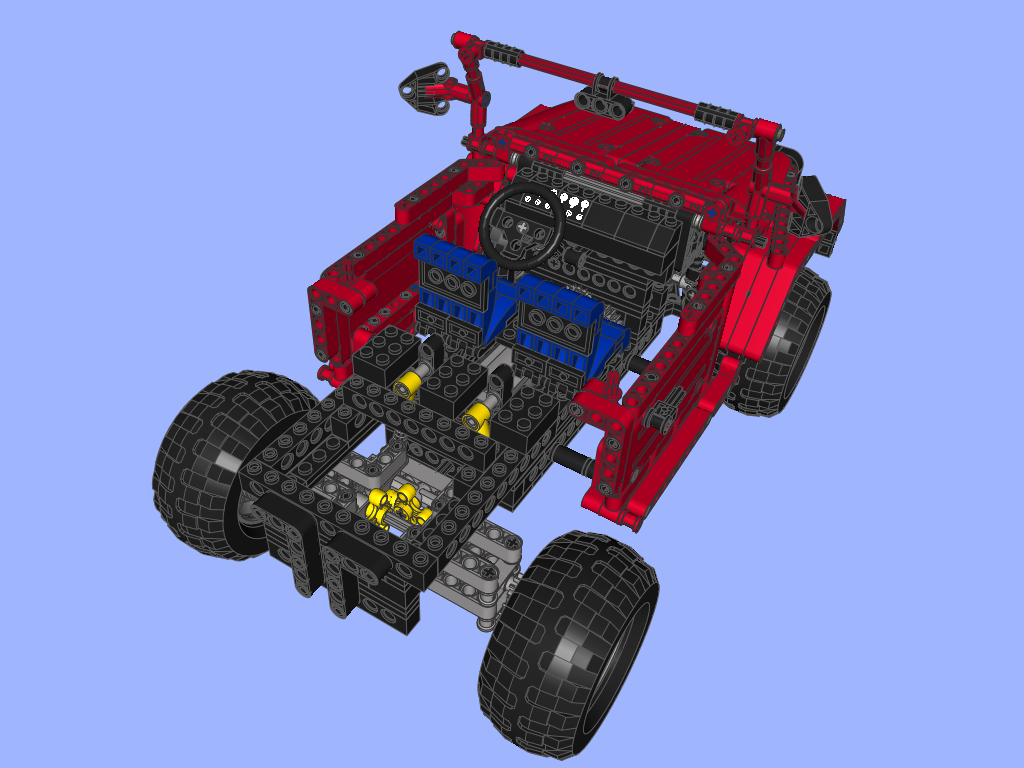
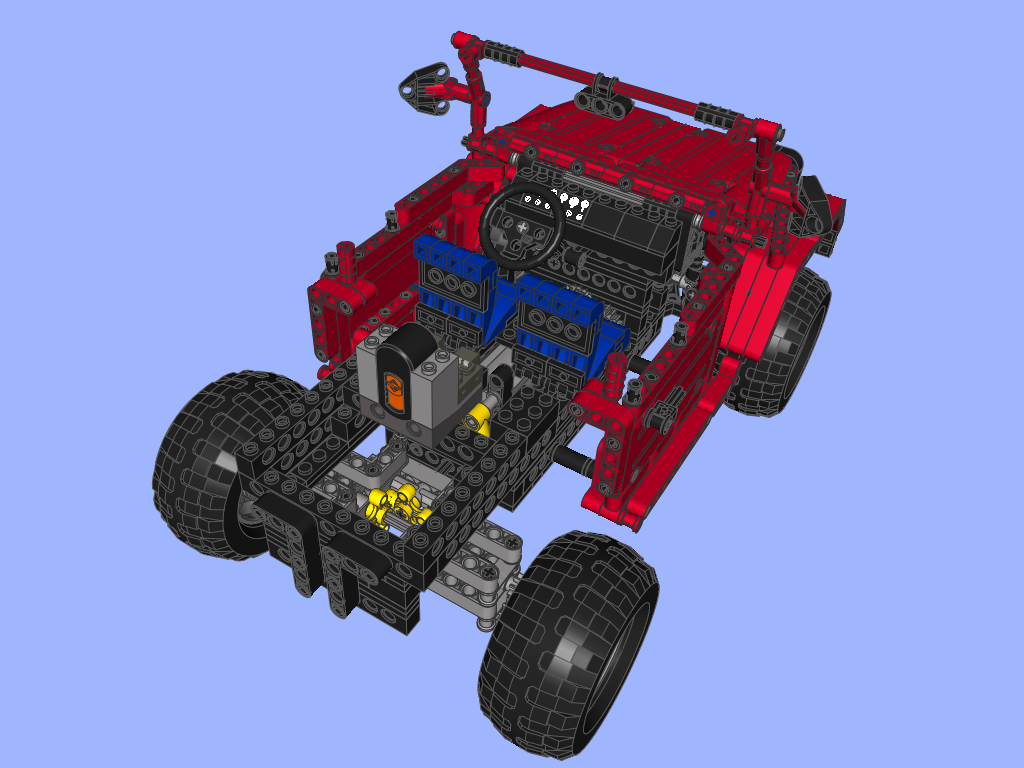

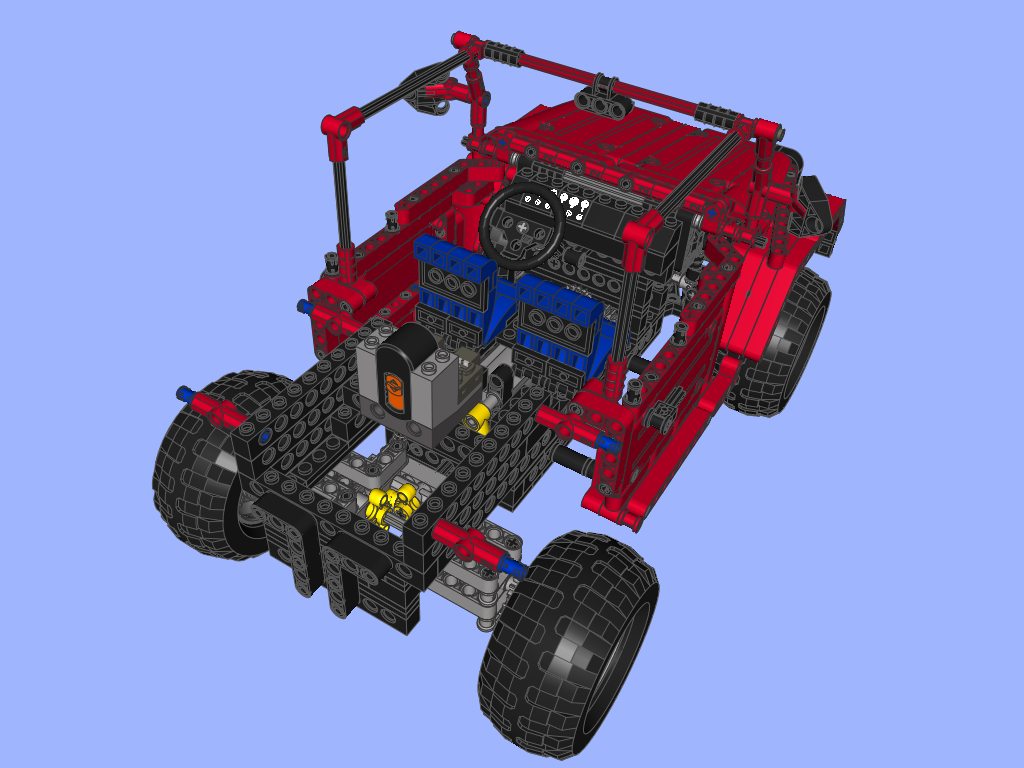
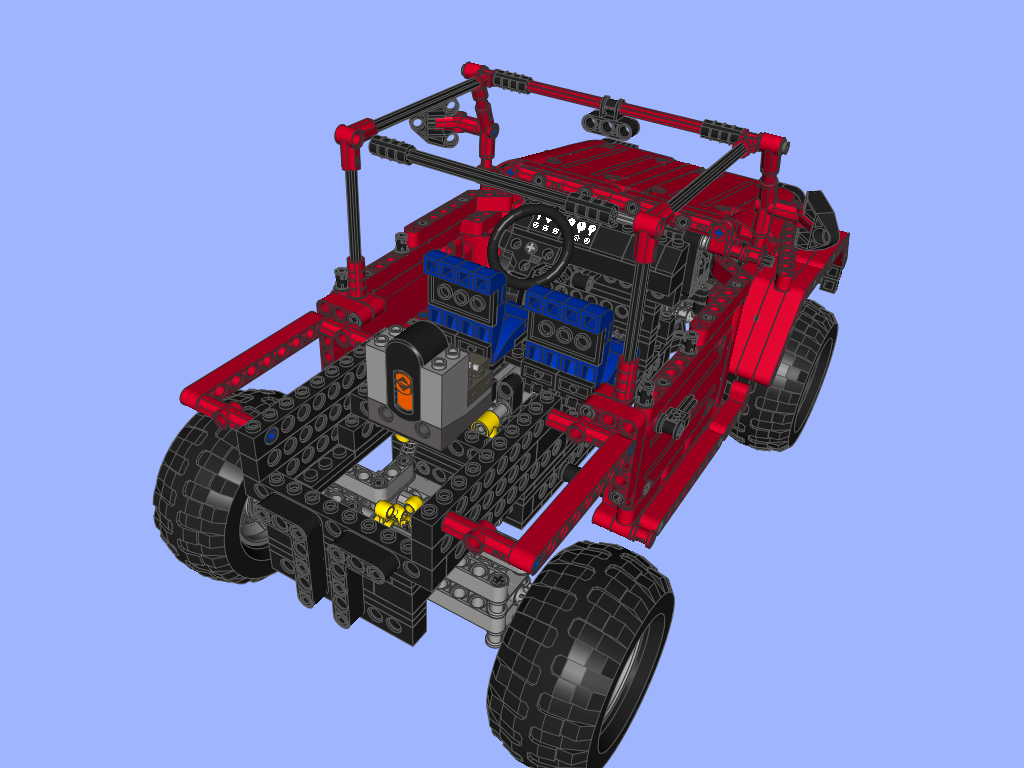
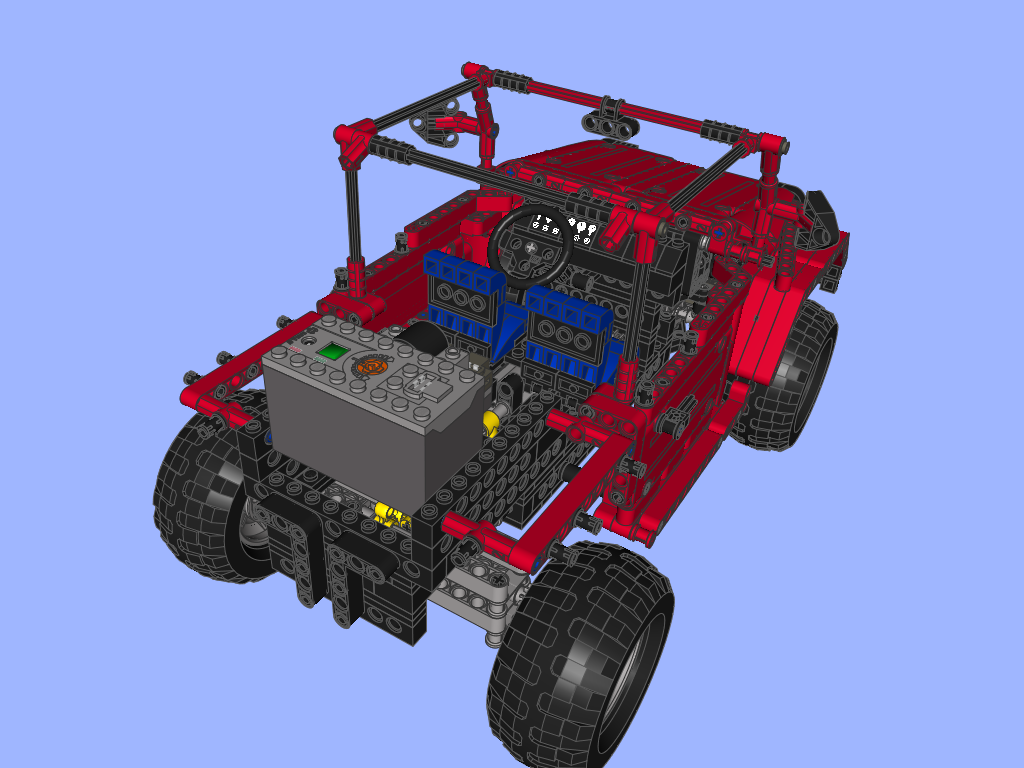


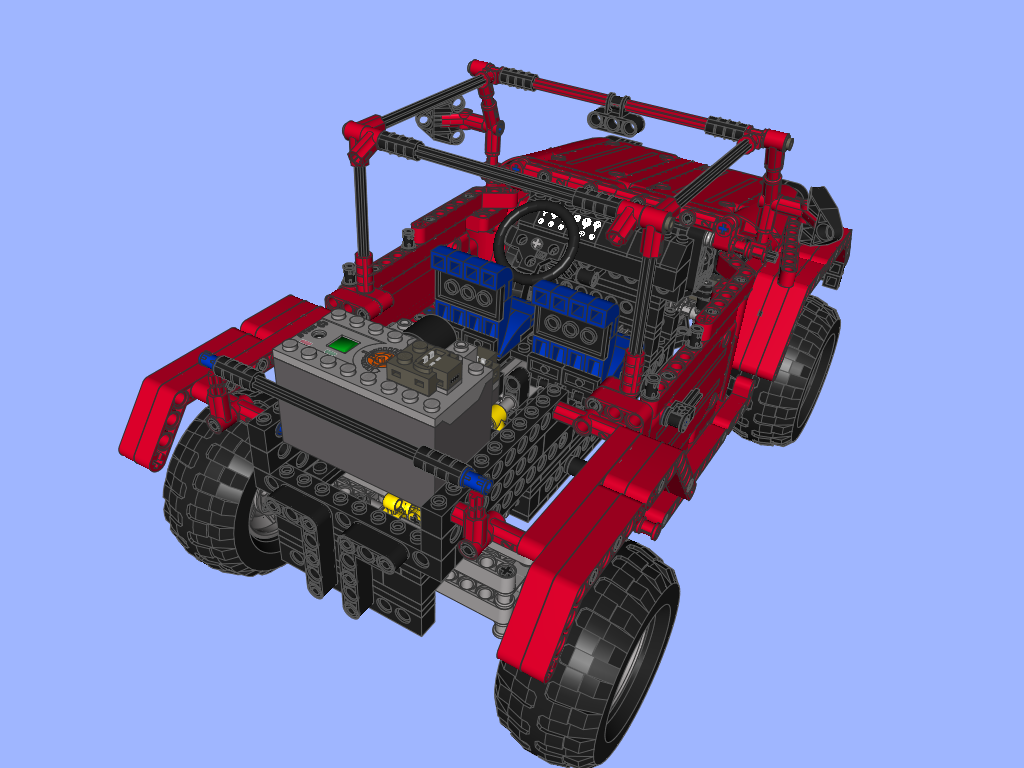

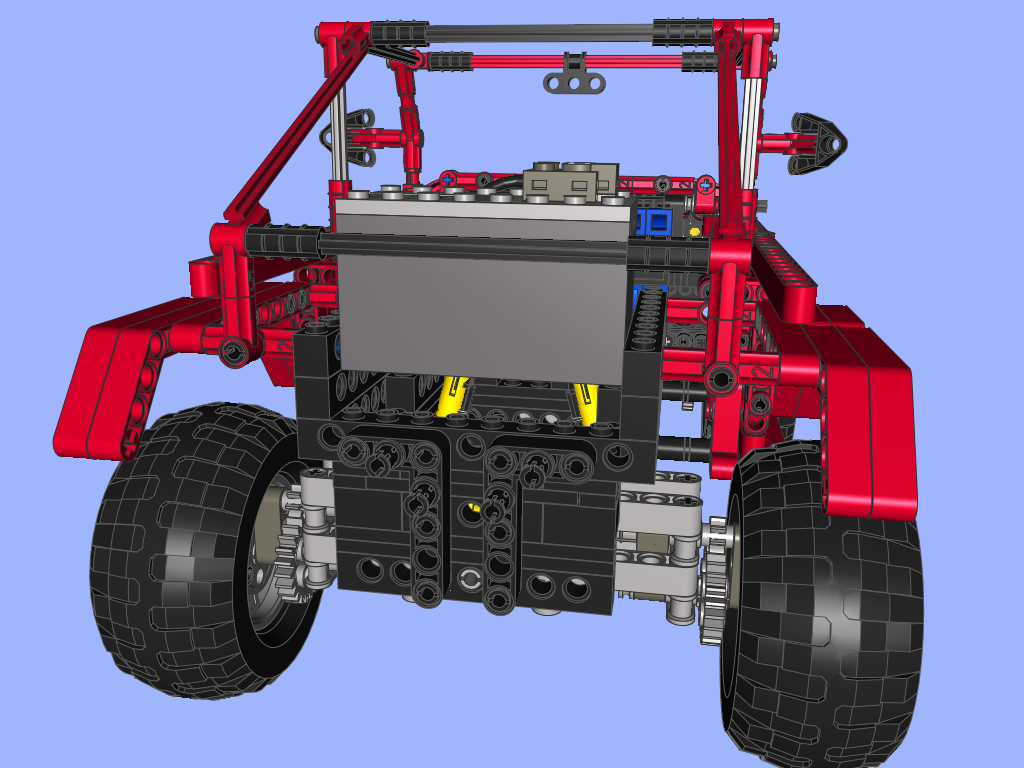


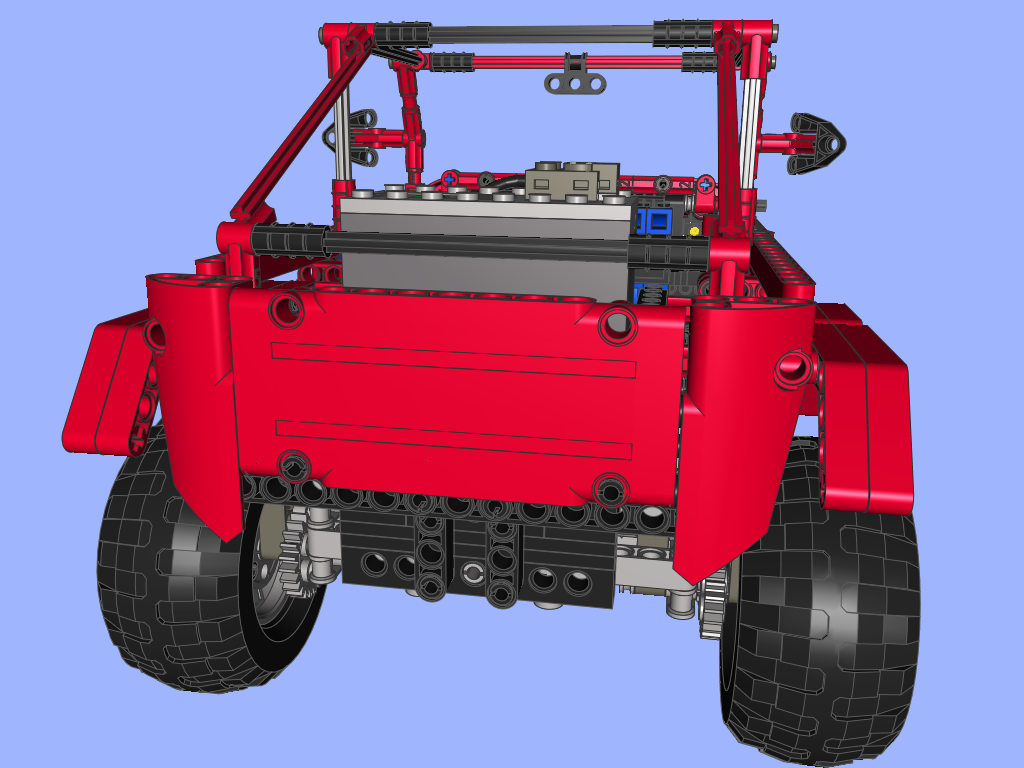
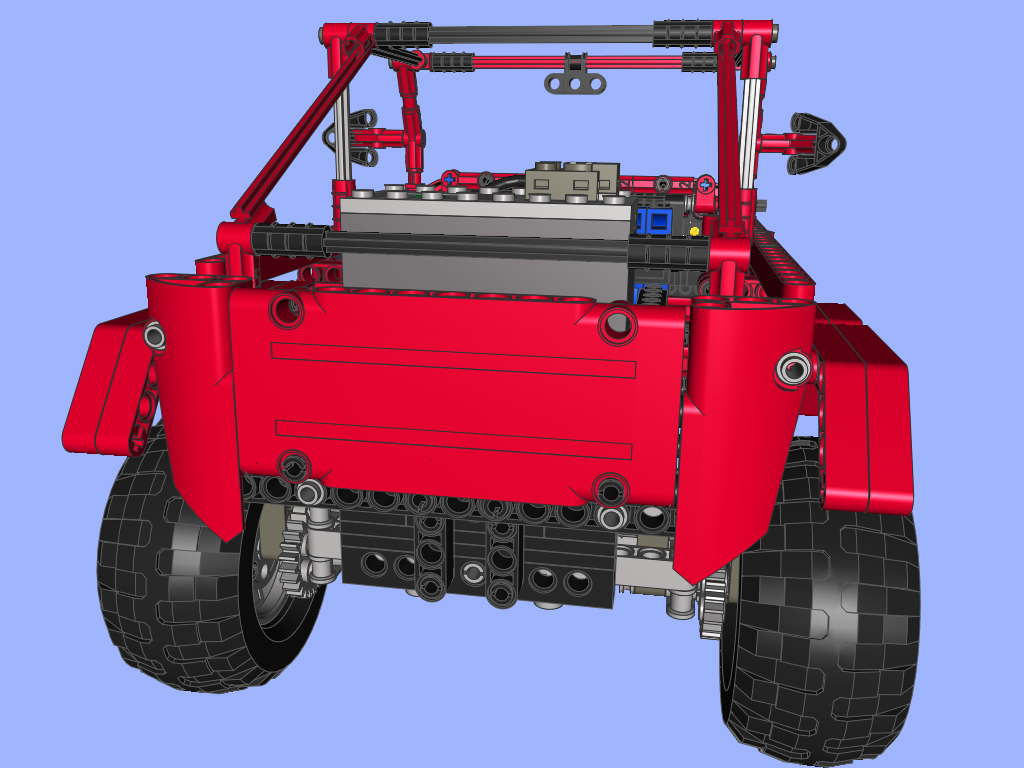
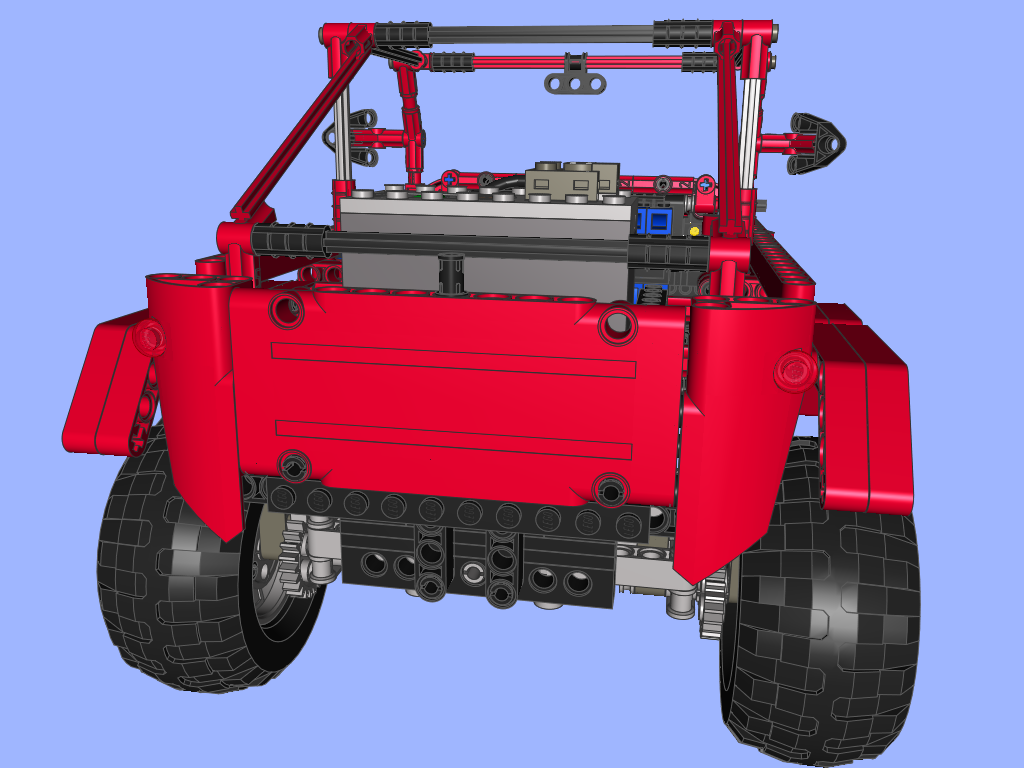
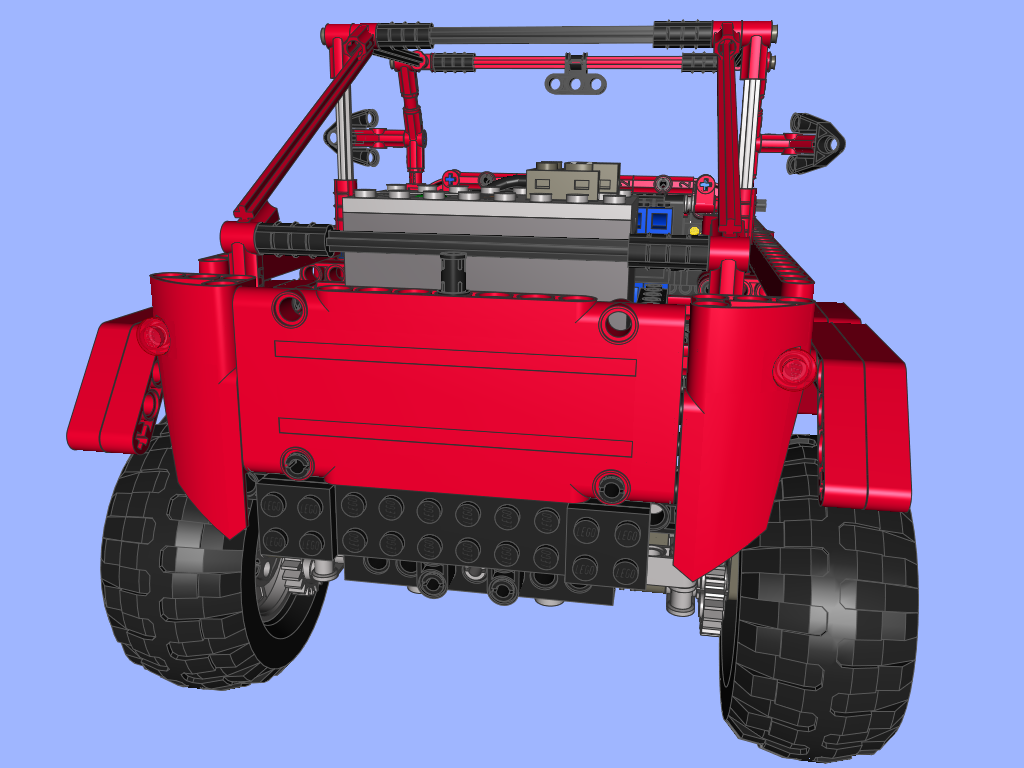
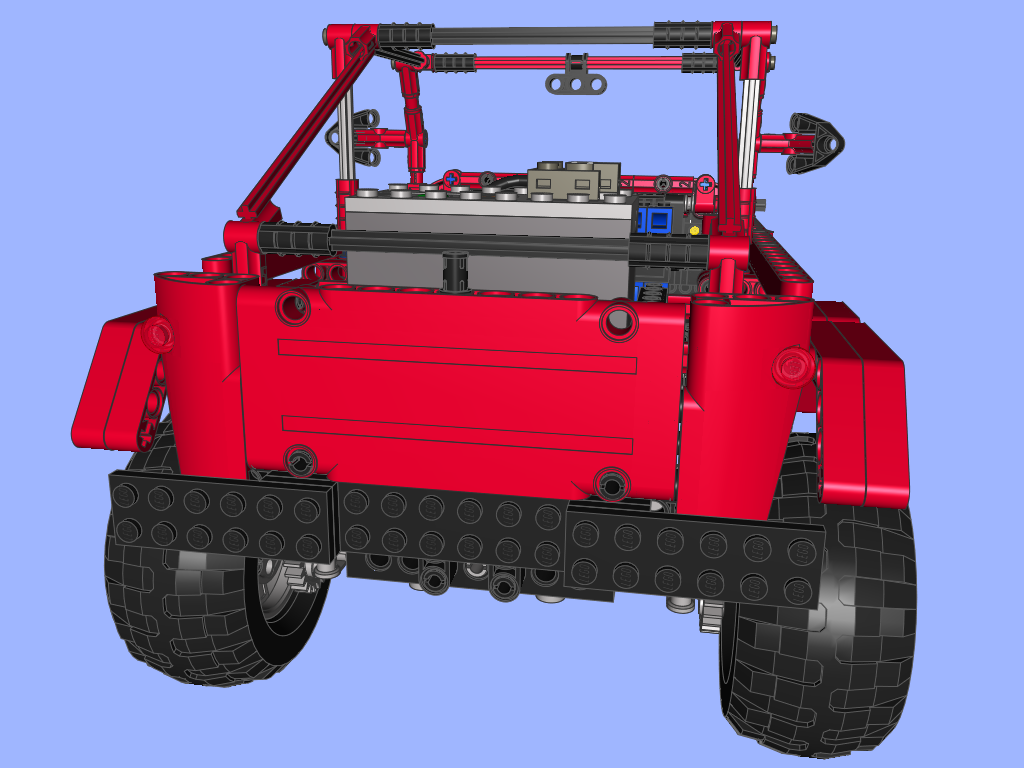

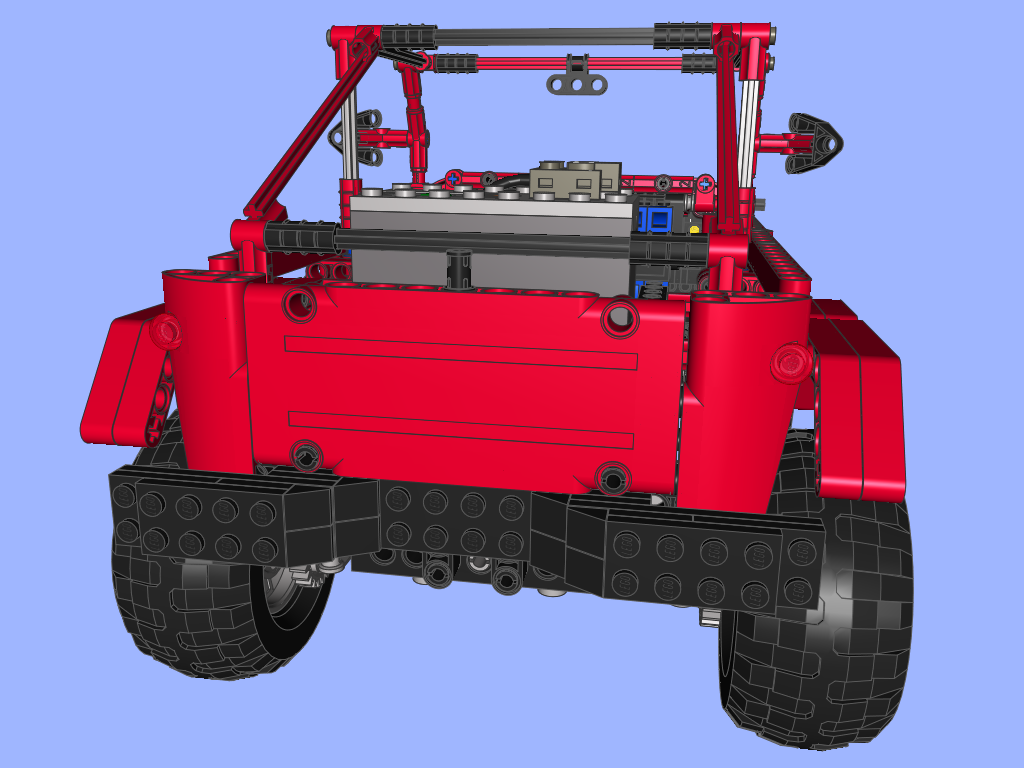


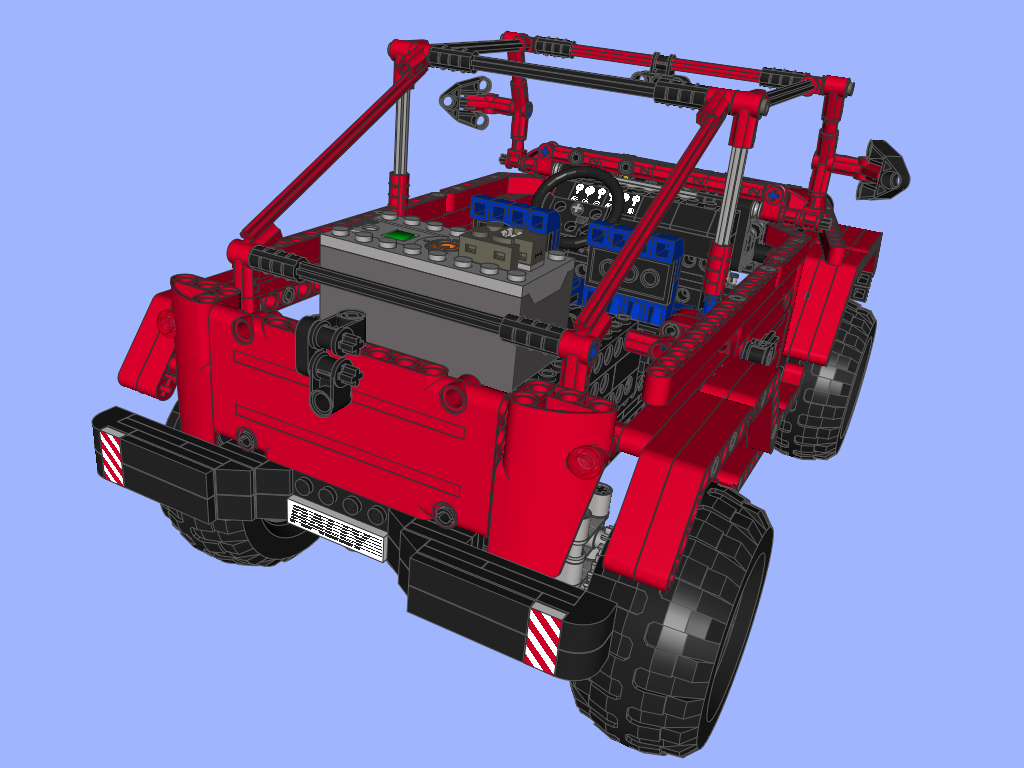

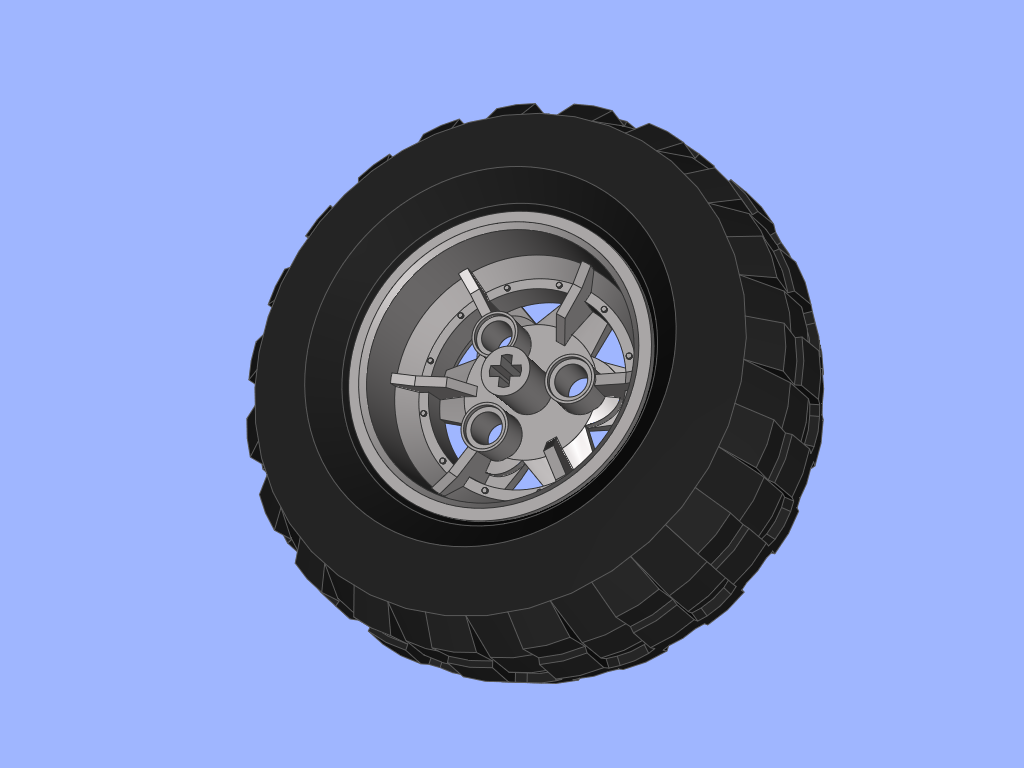
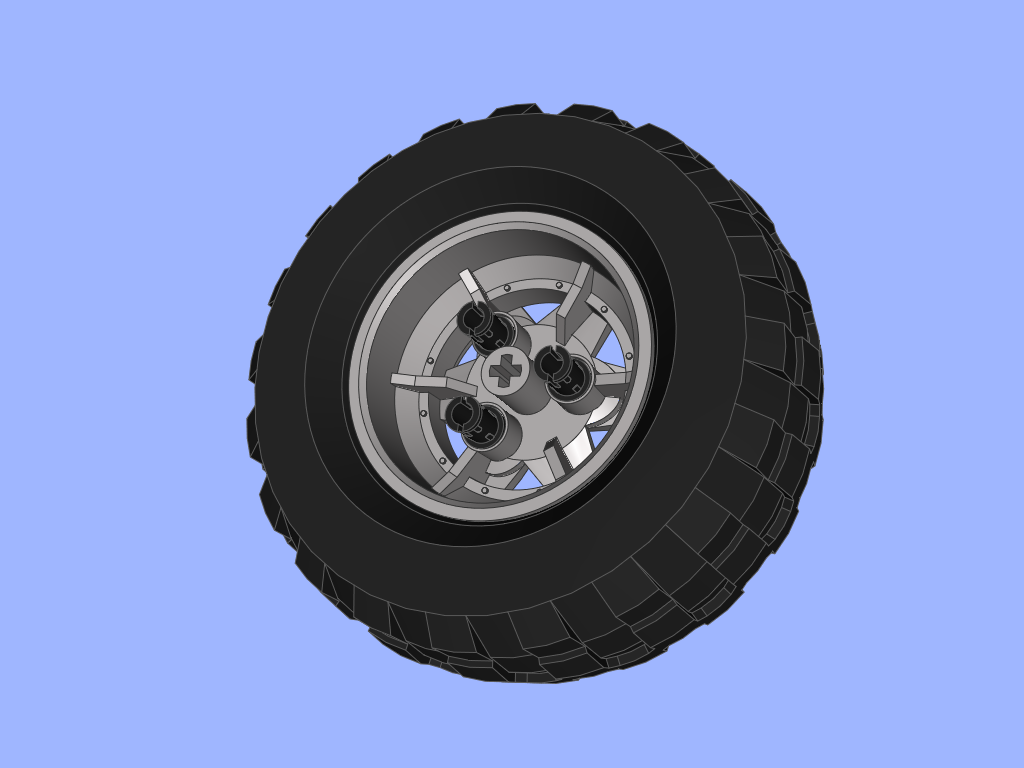

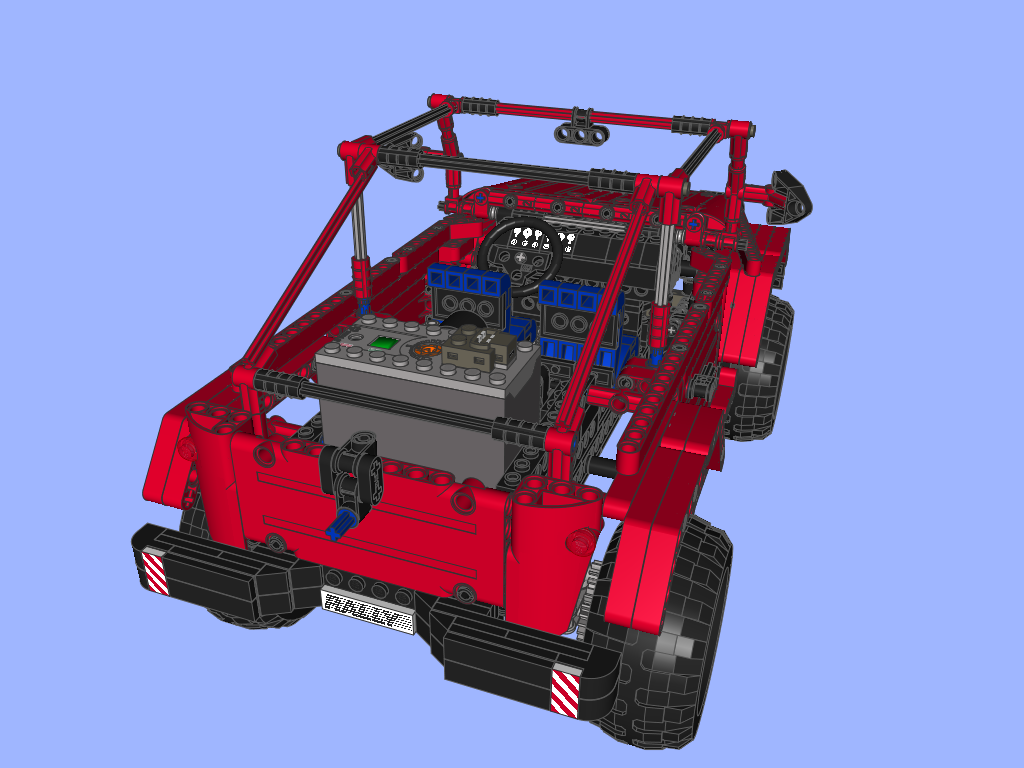
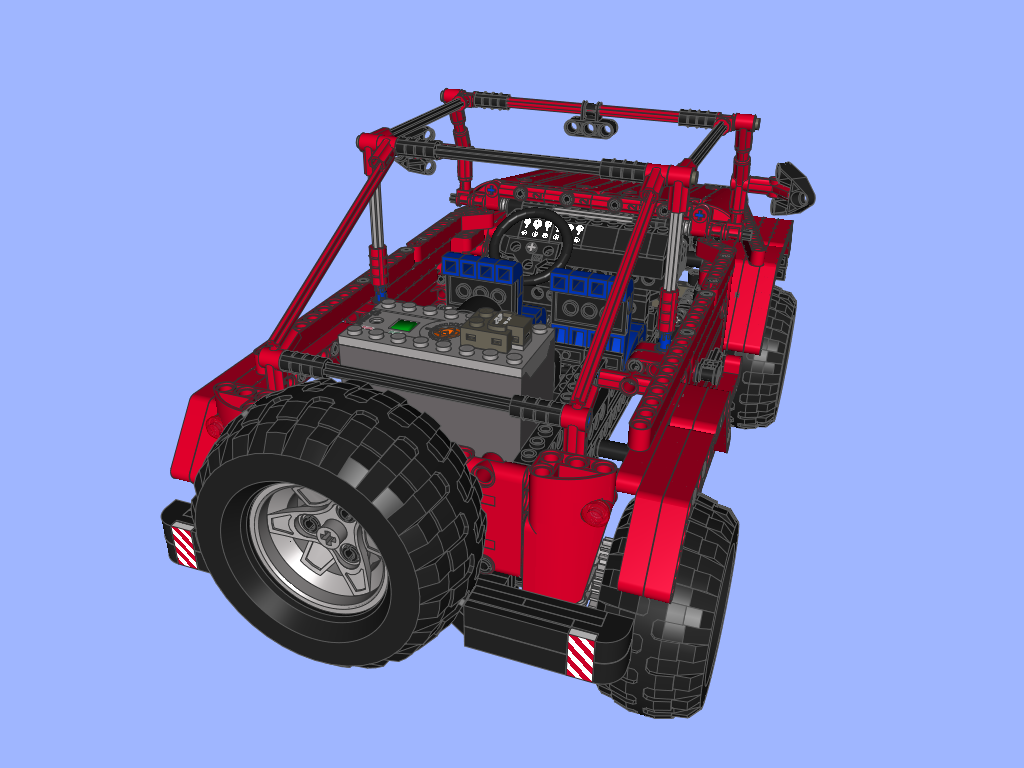
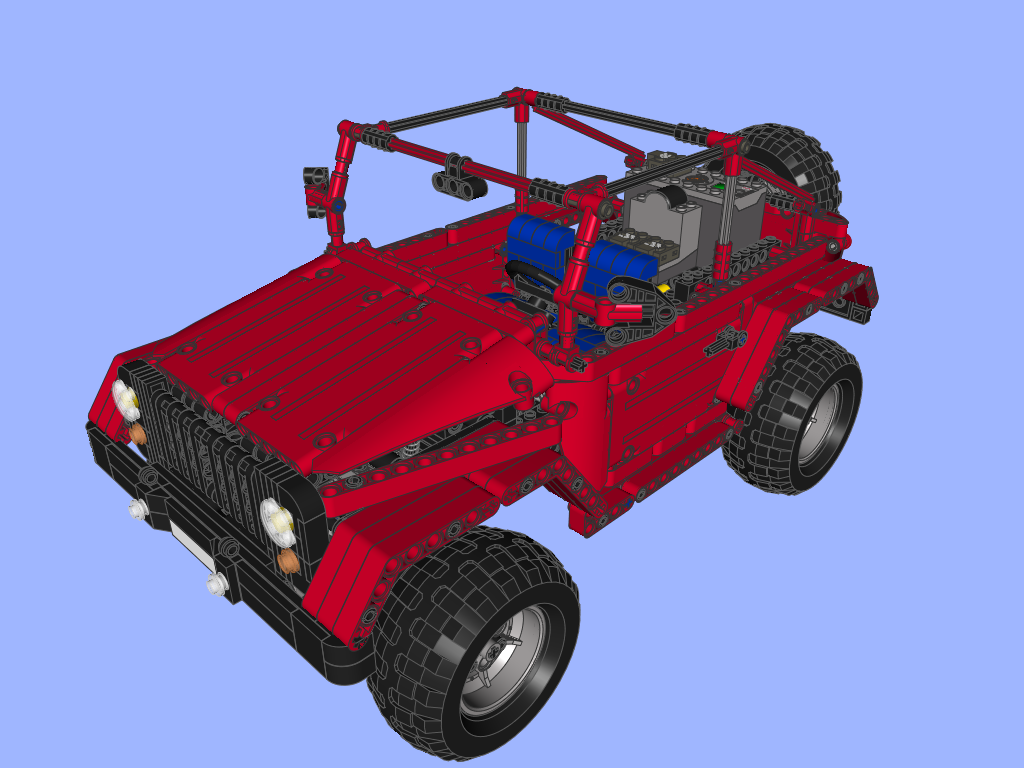
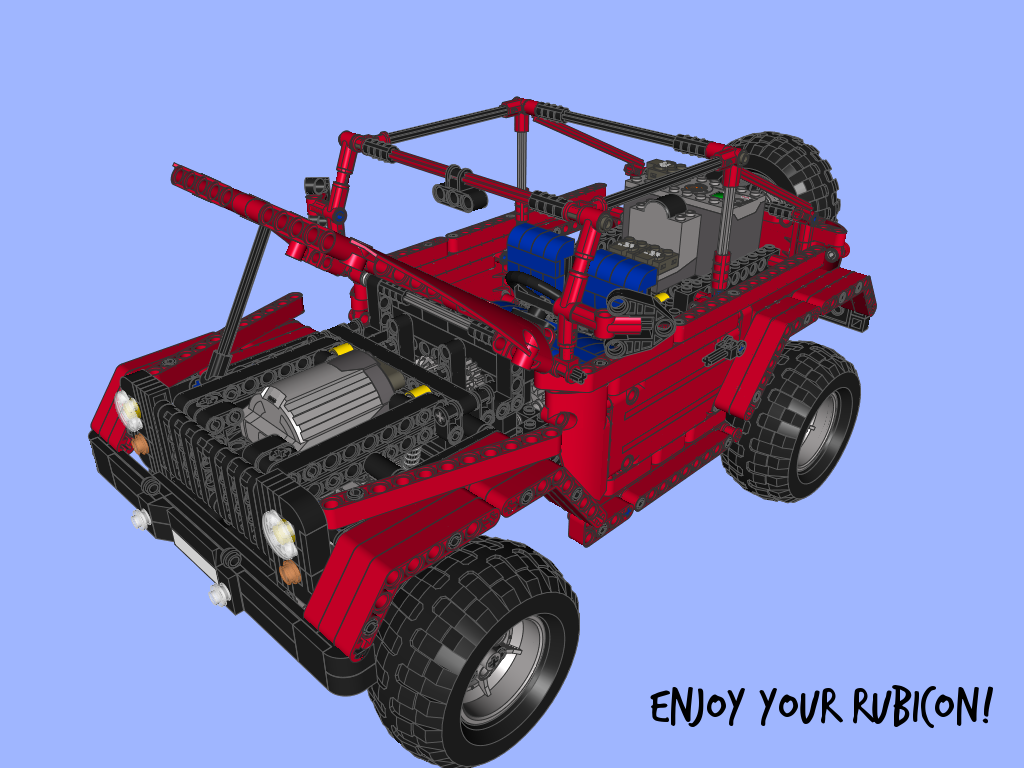
Photo-instruction for the whole model:


@mientos
Świetnie, ale ja nie znam tego filmu.
Trasa jest dokładnie taka jak w filmie o discovery 2 w 3.21 ale na początku są kamienie
Fakt. Jednak nie jest to tradycyjna gładka trasa (na wyższych odcinkach owszem) ale na początku jest zjazd z niewielkiej górki po korzeniach i tu będzie problem . Ale myślę że używając trochę mniejszych kół powinienem miec jakąś przewagę dzięki skrzyni która na 1 biegu jest bardzo dobra na “wciąganie się” po stromych zboczach na 2 dobra do zwykłej jazdy i 3 dający duży moment obrotowy (sprawdzając na prostej konstrukcji na mokrym asfalcie koła buksowały czy jakoś tak na oponach 68,7x34r ale to raczej przez lekką konstukcję bez wnętrza , amortyzatorów czy czego kolwiek)
@mientos
Do uphillu to powinno wystarczyć coś prostszego. I jeśli chodzi tylko o jazdę pod górę to duże koła nie są najlepszym rozwiązaniem, bo wymagają naprawdę dużej mocy.
akurat kupuję ten model (wolę kupowac zestawami niz pojedyńcze części chyba że chodzi o PF) i zamierzam go przedłużyc żeby zrobic miejsce na skrzynię biegów (3 biegi + wsteczny którą niedawno zrobiłem ) . Sądziłem że z tymi oponami zrobię twojego wranglera jednak teraz zauwarzyłem wagę 1,224 kg a potrzebuję zejśc poniżej 900g +- 100g gdyż potrzebuę go na zawody uphillu na czas , a kąt podjazdu przekracza 45 stopni
@mientos
Nie. Byłyby za duże.
Tutaj użyte są koła min. z zestawu 8297 tj extreme off roader 2 ?
@mientos
Nie istnieje, ponieważ taki pojazd na naszych trasach by utknął. O ile wiem pojazdem z najmniejszymi kołami w trialu był mój Hummer H1 na kołach o średnicy 64mm który nie wieszał się na przeszkodach tylko dlatego że miał osie portalowe.
zauwarzyłem że wszyskie terenówki są na oponach 68.7×34 (lub tych większych) . Czy istnieje model albo będzie na oponach 56×26 czyli modele raczej lekkie . sam zbudowałem taki pojazd i jako terenowka jest świetny ale rozsstaw osi nie może przekraczac ok.15 cm.
@nate
M motors won’t work for Truck Trial.
do you have any thing thats like the rubican that can use m motors?
@nate
Sure I could, except it wouldn’t drive too well.
do you think you could build the jeep wrangeler rubicon with m motors insted of xl motors?
in the video the raisens look square (this has nothing to do with the jeep)
Hi Sariel,
I had combined your instructions with the parts list by blackbird and almost completed building my own copy of your Jeep Wrangler with some minor enhancements to your design, mainly aesthetics like adding a Lego exhaust pipe. I had corrected some parts that were listed or counted wrongly as well. If you are interested I can send you a copy of the parts list once I’m done with the building =)
Thanks for sharing your step-by-step instructions it was very very helpful and I really enjoyed my time building the Jeep! Two thumbs up!
No, I don’t mind. Blakbird is a good friend of mine, and we have been exchanging emails regularly long before he started to work on these renderings.
Hey, Paul (Do you mind if I call you Paul?) there are some really good renderings of your Rubicon on bricklink, by someone named blakbird
http://www.brickshelf.com/cgi-bin/gallery.cgi?f=430531
You might’ve already seen those, but I thought I’d show you anyways.
Damn!
Thats the best jeep i’ve ever seen !,
i’m gonna build you chassis !
Nice work;)
But I have written a couple of tutorials already.
Hi Sariel . OK, i understand you .
What do you think about write a book ? do you consider this idea ?
I think you can make some money and help a lot of dummies ( like me 🙂 ) .
Bye !
I don’t sell on a principle, as I take apart every model. If I had to sell something, it would have to be very expensive given the usual amount of parts and level of complexity.
Sariel , congratullations for your work . You are one of the best !
Can you sell any of your models ? I really want to buy OR ask (pay) for an exclusive model ( project ??) . Can be a car or a truck .
Thanks !!
Bye .
I know, I’m working on it. Sorry for the inconvenience, will be solved soon.
this new website design has some problem btw sariel. For exmaple i cant view ur pics as a slideshow, i know im being pushy, but can u try and sort it out so it’ll be easier to view ur instructions?
Yo sariel, the suspension of this vehicle is puzzling me, i tried adding suspension rods to my pendualr suspension but when one spring squeezes, because it is pendular, the other rod opposite needs to extend (which it doesn’t because there are barriers on the rod which prevent the axel from coming out) so both rods act like lift arms and dont do anything… how do i fix this???
@linetti mattia
Quickly.
how did you make instructions?
Yo sariel, ur a really hard worker! ive been studying this car and something tell me ur practising for your supercar range since it is ur first time building them
@Mythbror
No, but there was a clearly visible wear on drivetrain components.
@seriel Were any pieces broken while using your model?
@Peter M
There are minor problems. Turning radius is larger that it would be with the differentials and the drive motor is strained while turning. But the offroad performance is way better than with differentials.
Hi!
When using knob wheels instead of differentials, don’t you get a problem with the steering then? I mean, when you are turning the vehicle it will try to move forward and the front wheels will slip, or doesn’t they?
@Jonas
Then perhaps you should look more carefully, because I have listed links to shops at the end of the first video, in the instruction and in the FAQ section as well.
hi
i am building trial trucks too, but i dont get the parts.
can u tell me from where u buy your parts.
ive been looking for a store for years…
@ Sariel: Thank you for this instruction to clean tyres. My tyres will also get clean in that way!
@Gert
First I fully submerge the whole wheels in warm water, and then I simply brush the tires clean. Sometimes I need to brush them twice, but they’re perfectly clean after that. Sorry about the dirty tires in instruction, but I was pretty tired and there was a lot of people waiting to see the instruction.
@ Sariel:
I have seen in the building instructions that the tyres became very dirty.
How do you ever clean them? I was wondering about that.
@NeuroMimetis
It loads for me. Maybe I’ll produce a PDF later.
Hi Paul,
Another great MOC !
So at the end, you have decided to produce complete building instructions… Thank you very much for that !!
It sounds like that image #25 for front axle does not load properly. Is there a way to download all the images at once (zip file or whatever) ? As you see, the more you give, the more we ask 🙂
Neuro
Miłe oku usytuowanie silnika pod maską. Poza tym reszta też, zwłaszcza strona techniczna. Czekam na Publikację Hummera 🙂
@echo3367
I did it in reverse.
i was wondering how you did the instructions.. as in you did it in reverse, or took apart the entire thing and rebuilt it…or the third option of taking a chunk apart, then rebuilding it, taking pictures step by step..
and thanks for the instructions ^^
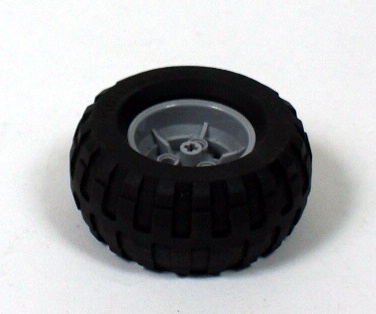
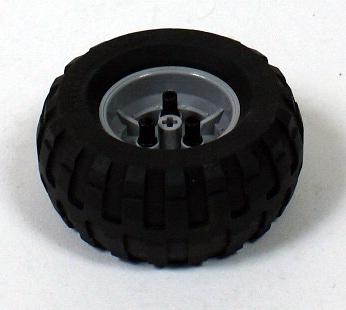
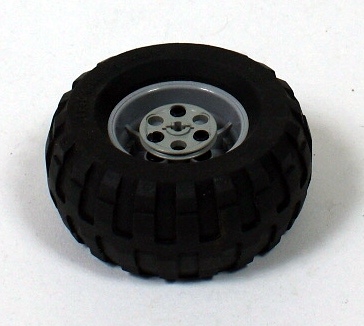
@Eric Albrecht
These are 81.6 x 38 R tires. They seem to suit it better than any other.
Paul, what size tires are these? I can’t quite tell from the photos.
Thanks a bunch for sharing the instructions to your Jeep Rubicon. It’s a fantastic build and now when I have the instructions I’ll try to make one of my own. Great work, and again, thanks for sharing.
będe go powoli składał 🙂
ale inne nadwozie i większe koła 🙂
@Ogden
I’m sorry but I can’t. It’s several hundreds various pieces and can’t imagine counting them all together, not to mention that I put them back with other pieces already.
Could you give us a parts list for the instructions? I’m buying some parts off bricklink and I want to make sure I’ve got all the pieces I need.
@Pontoos
Nie mam pojęcia, kupuję na Bricklinku.
można gdzieś w wawie kupić części do zawieszenia (wszystkie)?
pozdrowienia dla Luciusa.
this is what im going to do with the instructions that sariel so kindly gave us. im gonna make
2 of the steering modules and put them together with each other. obviously mirror each other so the steering is very tight. this method will solve many problems especially the one with “steering radius”. what do you guys think?
steering/power steering/power steering mech
/ /………..\ \
[“““`]________________[“““`] ] ]
o _________________ 0 ]…………]
[…………..] […………..] / / \ \
connected drive shaft (side view) top view
im trianing to be a certified AutoCAD designer. i love to design and draw.
@Alex
Erm no. If you mean how is the effect created, this is a Lightbox script.
Hi..can I ask you which program do you use to format the pictures in your slide shows? is it powerpoint? thanks
@Chili
I think 6×6 TrTr will come sooner, and Hummer will come first of all.
@darksheep
Yes, obviously.
hi what if you made a car with 2 of the frot axils would it turn better and tighter ?
@nxtinventor
First of all, the size of that car would be huge, thus making the car expensive, very expensive.
LPE team doesn’t even make that much things to their cars.
@Sariel, make Reventon then? :DD
Are you going to make a 8×8 TrTr soon?
@blarson
None.
@nxtinventor
I don’t like Gallardo. I like Reventon much more.
you should make a lamborghini gallardo with independent suspension, awd, brakes, gearbox with clutch, working door handles, working windshield wipers, working spoiler, working lpe power engine, cooling fan for that, power adjustable seats, working throttle, working steering wheel, steering, opening hood, working a/c, and a telescoping wheel! like nicjasno and ivan do. it would be much better than any of the things you have ever made.
What kind of gear box did you use?
absolutely fantastic model can’t wait for the rest of the instructions (soon i hope) i will change to land rover tho if u dont mind 🙂 11/10 fro this model which should be described as pure genius rather than just “a model”.
@Chili
There is going to be instruction for the whole Jeep.
Is there going to be an instruction for the rest of the jeep, or just front – and end axles?
@owen
On this page.
so how are you going to post the instructions? on this page or by its self?
ok i didn’t know if it was the same as the picture or not
@lewis
I think the instructions show that pretty well.
is the suspension mounted vertical or diagonal if so is it wide at the bottom and short at top or the other way round???
Great that you made Instructions on this one 🙂 !
@Fabian
MLCad.
Hi Sariel,
which cad programm do you use to make the instructions??
PS: Very cool car.
now i can finally build and improve on a 4×4 design. i wish these instructions came out along time ago but it don’t matter. i can now build that fast 4×4 i always wanted. THANK YOU!!! you are awesome man.
@Mihály Stépán
This is a very ‘slight’ Ackermann geometry 🙂
Did I see it right, you used Ackermann geometry in the front axle? Deliberately, or it just turned out this way? 🙂
@blarson
I came 7th, you can read more at my Facebook page.
Did you place?
@blarson
I did well. Working on the instruction right now.
How did you do in the race?
@Sariel
That’s nice, it takes weight away from the chassis. I tried to make a live front axle, but connecting rods would simply be too weak to handle steering power even in a non-offroad vehicle.
@Mihály Stépán
By shaft with u-joints. Some people simply integrate the steering motor into the axle.
@Sariel
One more question: what’s the usual way of steering the live axles? With pushrods like in real trucks, or by shafts with u-joints?
@gimba96
Various.
@Mihály Stépán
Live axles are used in TrTr. I think they offer better performance but worse stability, because they usually make the chassis much higher.
Saw your answer to nxtinventor, but apart from that, are live axles used at all in TrTr? Do you think they offer better stability, manouvreability than pendulars?
Like your Jeep, simple, effective! Would look great in black, with those chrome rims as decorations! 😉
Nice small creation!
One question: What is the distance between teh mounting points of the shock absorbers?
@Manne
Read the last sentence of the description.
Are you going to publish instrucktions for the front axle?
Wow grate M.O.C if you do publish instructions i will have to hop on yo bricklink get the parts and build it 🙂
@nico71
Not really because the weight is small. But this friction could be reduced by changing the set-up of the shock absorbers – at this moment they push the suspension down and press on the driveshaft.
Drivetrain axle is for pendular suspension and drivetrain, does it cause lot of friction due to the weight ?
Nice MOC, as usual paul !
@matthew
I’m not sure the Dodge will participate the nearest race, but still, there will be Atr’s Jeep Willys to stand face-to-face against.
If you’ll publish instructions I’ll try to make a yellow one.
I’m away that weekend from my computer, make sure that when I return you have won.
You could have a 1 to 1 head-off with that dodge ram!
@lewis
April 24th.
Looks awesome, nice idea using pendular suspension =D Good luck in the race! =D
when is the race?
@Vikke
I will make the whole instruction if the Jeep succeeds in the race.
Can you get a good picture about the front axle?
yes, there is a rubicon edition 2010 jeep wrangler, it adds locking differentials. i do see your point with the lack of space, but the live axle would be more stable and better for off-road. ALSO with center diff you do not have to use a shock casing. make a custom one without bevel gears. I am not trying to be critical, i just want to help! 🙂
VERY NICE!!! I hope this wins you something at the Truck Trial. I like the Technic panels, and the flat stud plates. I think it does nicely on the climbing tests.
@nxtinventor
You know, live axles need some free space around, and there is no space available in this model. It’s simply too small. As for the central differential, it would make the drivetrain more complex and less effective, it would be prone to mechnical failure if the bevel gears inside it break, and it could cause some slip situations. This is small vehicle with short wheelbase, the profits of using a central differential when there are no differentials in the axles are practically none. The disadvantages, on the other hand, are many.
Also, the 2010 Jeep Wrangler is not the Rubicon version.
hmm… why not live axles? the real 2010 jeep wrangler has front and rear live axles, pendular suspension is only used on the front axles of tractors. also, why no differential in the back? i can see that maybe that would conflict with a gearing system in the front, but why not then use a center differential? other than these few criticisms, your jeep looks very realistic and is very competent on difficult terrain!