Tower Crane

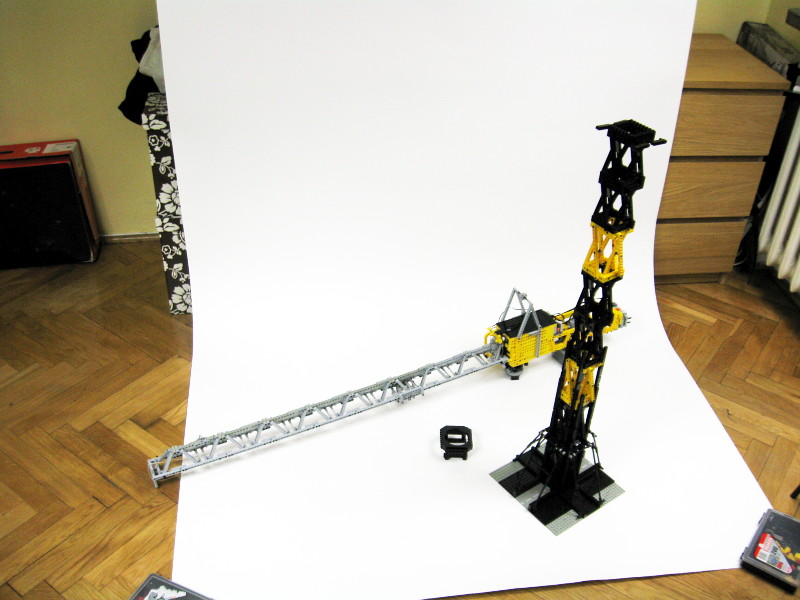
A typical truss tower crane. Features three types of truss, movable trolley and counterweight, and unusual rotation system.
Datasheet:
Completion date: 15/03/2009
Power: electric (Power Functions)
Dimensions: length 184 studs / width 19 studs (not including the baseplate) / height 159 studs
Weight: 2.89 kg
Load capacity: accidentally collapsed at 438 grams
Suspension: none
Motors: 1 x PF Medium, 1 x PF XL, 2 x 71427
I’ve been fascinated by truss constructions for a long time, and it felt natural to eventually build a simple truss crane. Or, to be more specific – I thought a tower crane was simple until I actually started to build one.
I have used two important points of reference: a tower crane by Philo, and a bigger one by Thomas Avery. The crane was meant to be realistic, and thus was built pretty closely after a typical scheme:

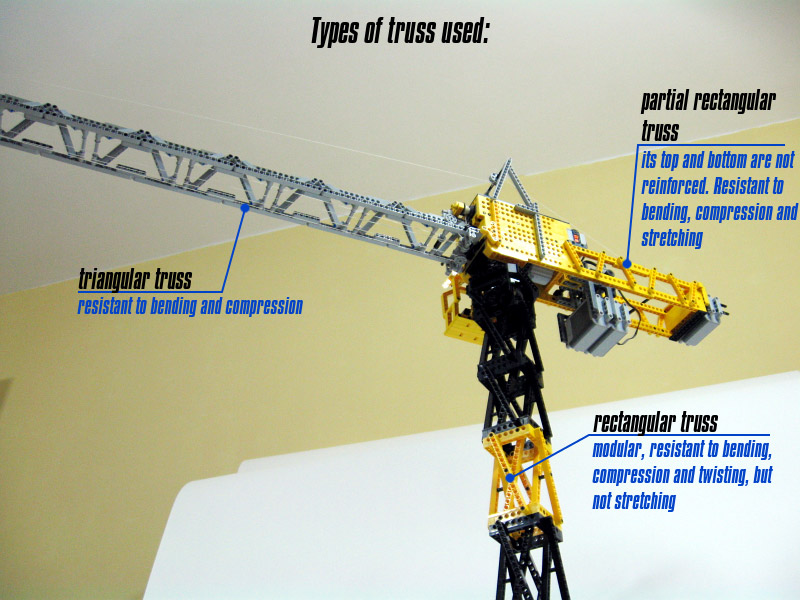
The most important part are obviously truss modules. Typically, a truss can be a subject to up to four factors: bending, twisting, compression and stretching. It is possible to build a truss resistant to all these factors, but such a truss is heavy and rarely has to actually bear all four factors. It is therefore a good solution to use the lightest truss possible, designed to bear only specific factors. This is the case of this crane – out of three truss types used none is capable of bearing all the mentioned four factors.
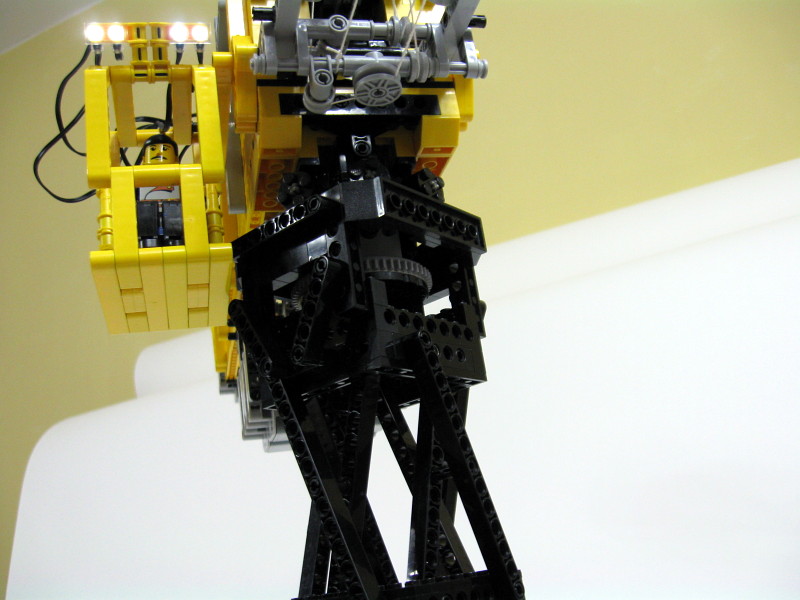
First, there is the tower mast. I have designed something I could call a perfect truss module for it, but it turned out to be too parts-consuming. Such a module can be built with bricks and beams, in a rectangular shape. It consists of vertical 9-studs long beams connected to a horizontal 10-studs long bricks, and reinforced slantways with 13-studs long beams. All these dimensions fit perfectly, and it’s very easy to stack such modules one upon another. I did not, however, possess enough parts to build a mast of desired height (I wanted the crane to be able to transport loads from the floor to my table) with such modules, so I used a simplier, less stiff version.
The tower mast is modular, with lower part reinforced by counterforts from four sides and by vertical beams on the edges. It would be perfect to reinforce the entire mast with the beams, but I did not have the sufficient number of beams in a single colour, and I was unwilling to make the crane multi-coloured, nor to buy extra parts for it. The mast is resistant to compression, twisting and bending, but not to stretching because of its modular construction.
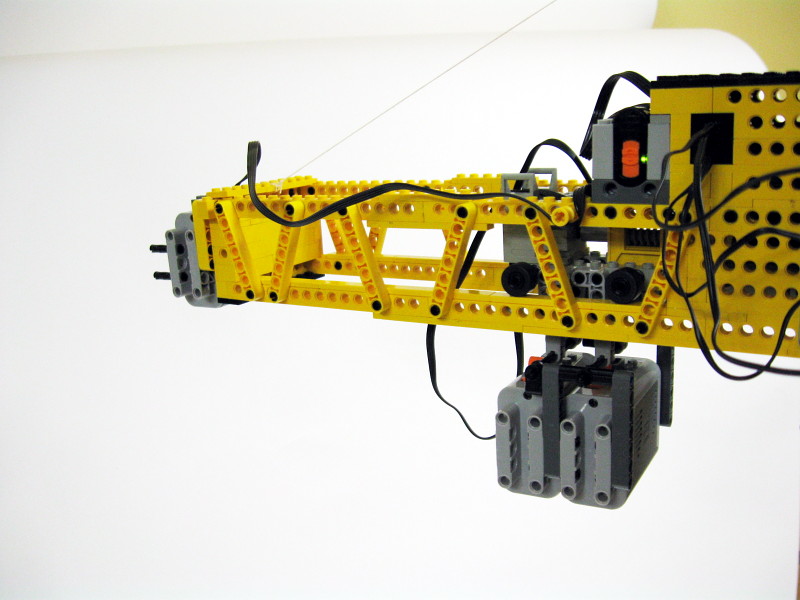
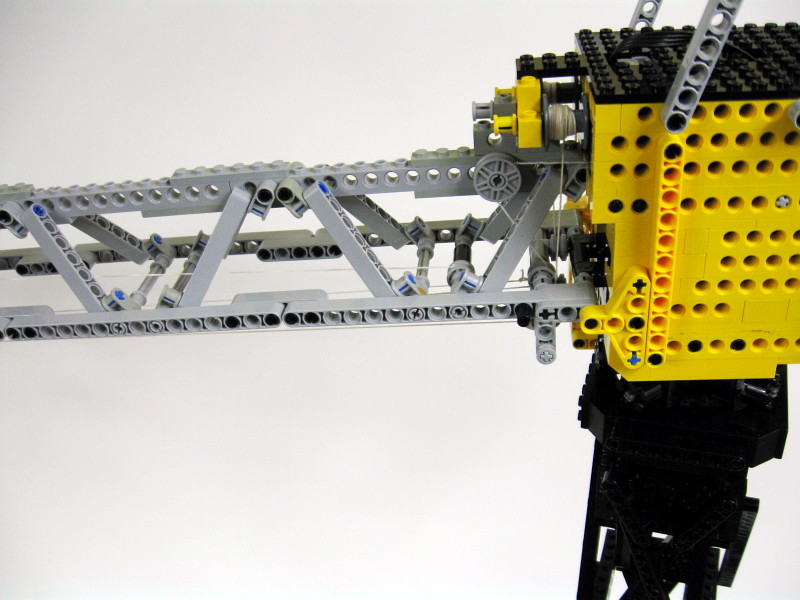
Secondly, the counterjib. It was meant to have empty space inside, so I used a rectangular truss with only two sides reinforced. It is resistant to everything except twisting.
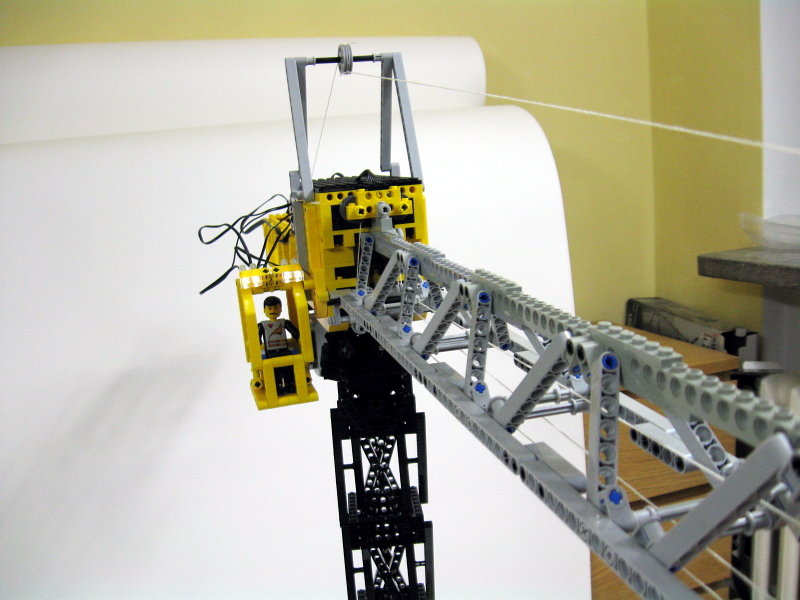
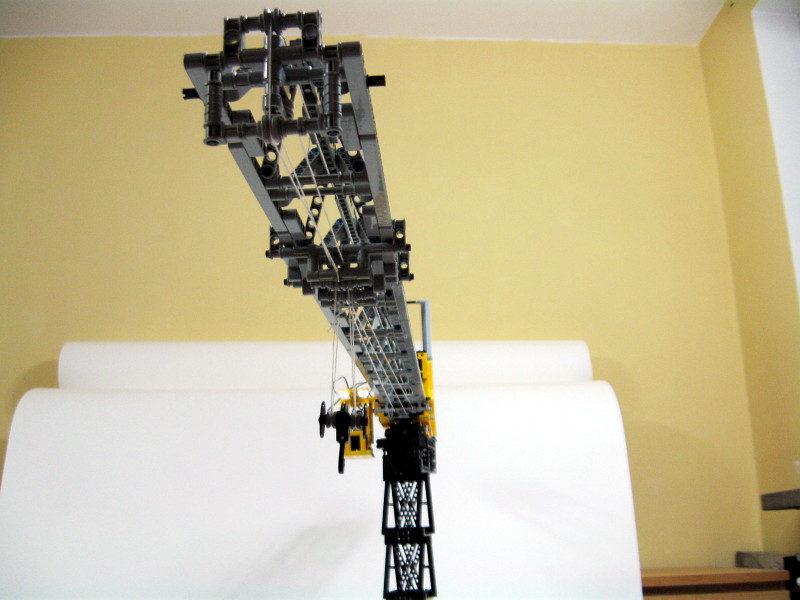
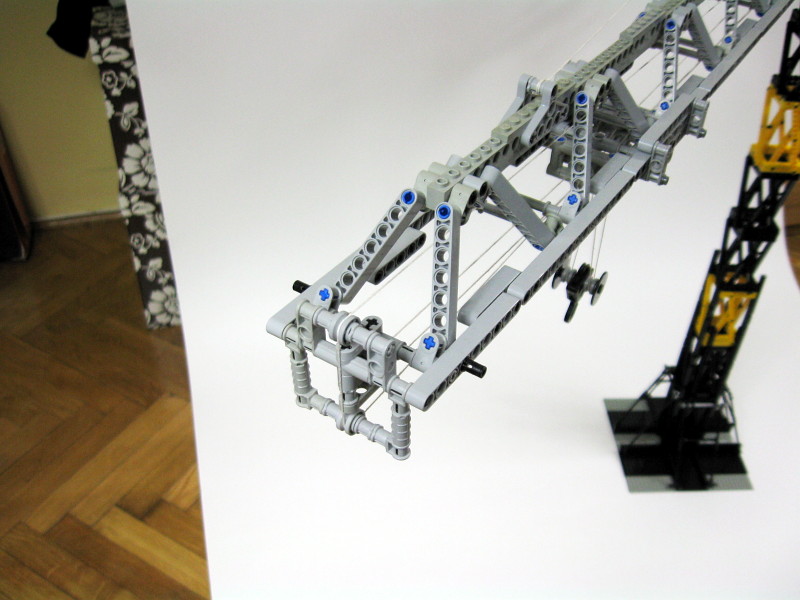
Finally the jib. It was quite a challenge to make it triangular, just like in real cranes, but the triangular truss is much lighter than a rectangular one of this size would be, while being resistant to bending and compression. It is prone to twisting and to some extend to stretching, but is secured from the latter by a stay. It was very convenient to use as a crane runway.
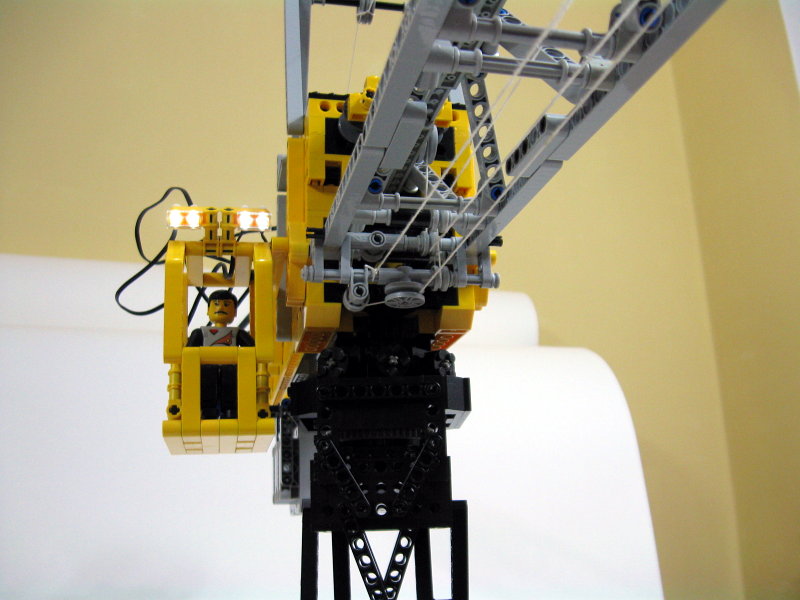
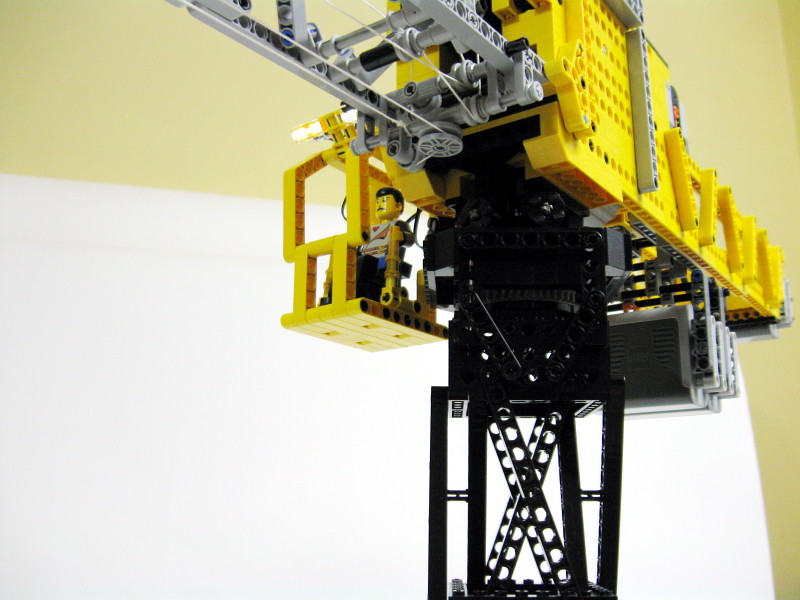
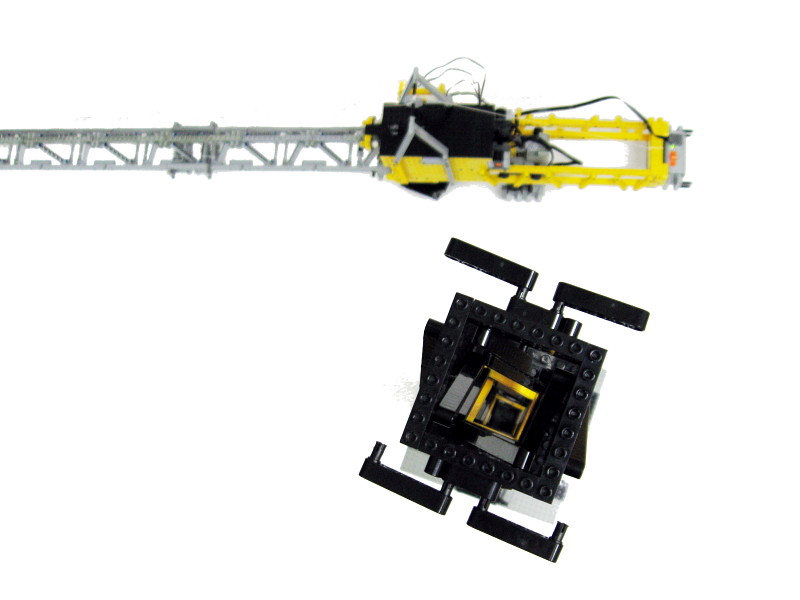
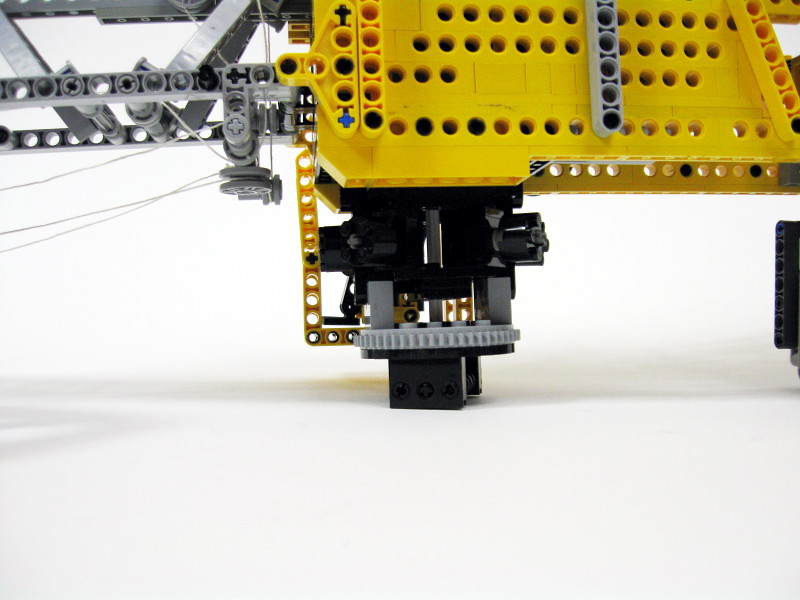
The entire crane is obviously modular: it consists of the tower mast, the upper arm (jib and counterjib together) plus a turntable crown. The turntable is not a usual one. There is a regular Lego turntable used to connect the upper arm to the mast, reinforced by six rollers (in two sets, 3 in front, 3 in back) located above it. The rollers rest on a crown that encloses the turntable. Up to this point it is quite a usual solution, but it’s the first heavily reinforced turntable I’ve ever built, and it performed flawlessly (largely thanks to the rollers being located several studs above the turntable, I guess). Now, the unusual thing is how the crane rotates – it does not use the actual turntable. Instead, as I’ve learnt from Thomas Avery’s work that any rotation-transferring mechanism may be prone to twisting at this size, I have used a vertical 16-studs long axle from the Jumping Giant set, which is made of a more flexible material that the usual axles, and the entire crane rotates around that axle. It goes through the entire turntable, its lower end is fixed to the turntable’s lower part, and the upper end is set inside the upper arm structure so that it may rotate inside. Thus, the axle is deliberately twisted by rotation, and softens the jib’s movement when the rotation motor starts or stops. A motor speed control would come very handy here, but it was only possible with the WeDo system at the time. In fact, I have successfully tested the rotation mechanism with the WeDo set, controlling the rotation speed, but it was very inconvenient because the crane had to be placed near a computer, and connected to it by a wire.
The counterjib contains two counterweights – a fixed one at the end, and a movable one inside. Note that a movable counterweight is as far as I know a purely fictional idea, not used in the real cranes. I have used it on assumption that it would help to balance the jib’s load and thus improve the crane’s load capacity – which it did. Initially, I planned even to make the counterbalancing automated – by means of the stay connected to jib and counterjib, and to an axle in the middle of the crane. As jib would lower itself under load, it would pull the stay and move the mentioned axle, which would then turn a PF switch on, thus activating the counterbalance’s drive system. I believe it was a theoretically correct idea, but in reality it turned out impossible to calibrate the PF switch’s sensivity and the movement range of a loaded jib relatively to the middle of the crane.
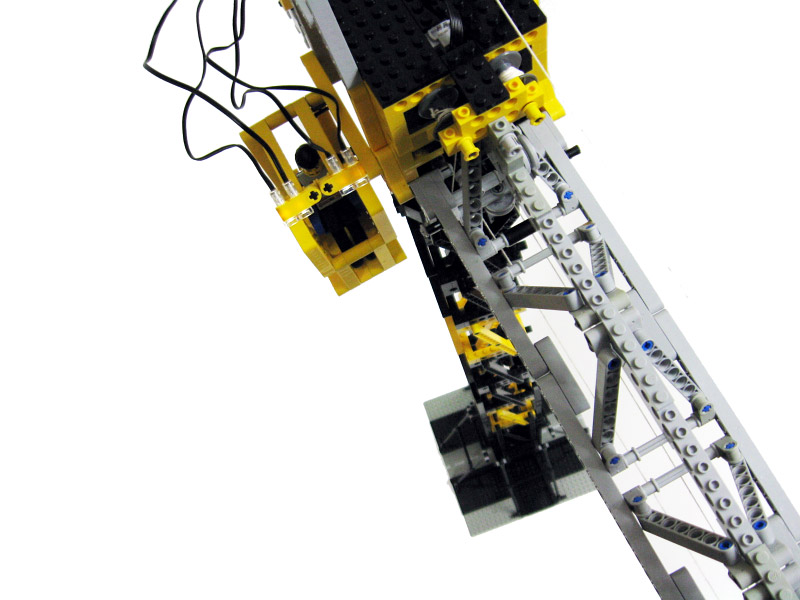
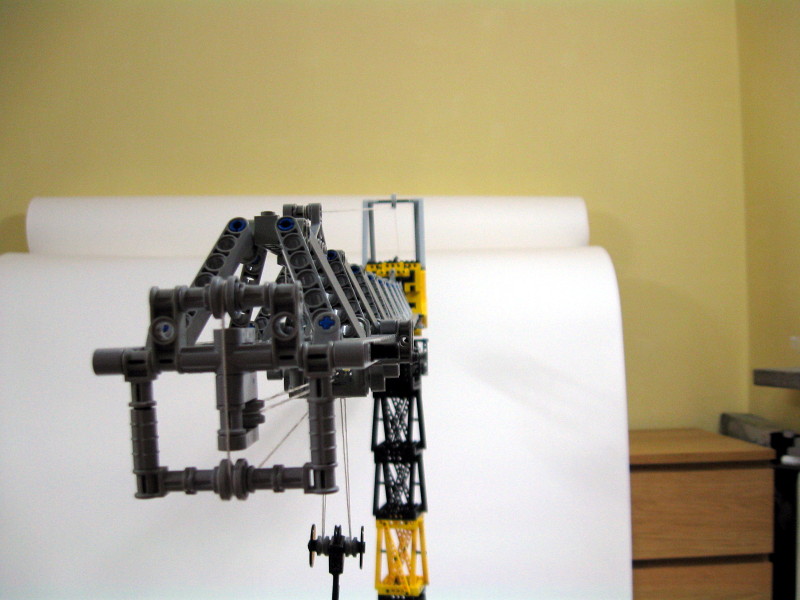
Inside the jib, there are two sets of ropes. Both are connected to individual hoists; one of them lowers/rises the hook, while the other one moves the trolley along the jib. Because the space in the counterjib was taken, I could not use a very convenient and realistic solution present in the Philo’s crane – that is hoists located in the rear part of the crane. Instead, hoists are located on the top of its middle part, and there is a complex system of pulleys that connects the hoists’ drums to the ropes inside the jib.
First set of ropes controls the height of the hook. It consists of a single rope, which through a system of pulleys makes it possible for the hook to maintain constant height while the trolley moves. It is obviously possible to operate the hook and the trolley at the same time, and the entire arrangment is shown below.

I have decided to use two drums in the hoisting block in order to have the hook suspended on 4 sections of rope, thus limiting the hook’s side sway while the crane rotates.
The other set of ropes, controlling the trolley’s position, doesn’t work so well. Philo has used a brilliant solution in his crane, where a single rope is kept tight by a shock absorber, and it goes through a single hoist drum that moves it. I tried to reproduce this mechanism, but in my case the rope tended to slip on the drum. Expecting heavy loads to be moved, I have dropped this idea and used two separate sections of rope on two separate drums (driven by a single motor). It is much more complex and much worse solution, because the drums work unevenly and the ropes get loose or strained all the time, depending on the trolley’s position. It was not possible to make their tensions even with a shock absorber, because the difference is simply far too great. So, the system I have created works, but not as smoothly as Philo’s one, and it needs manual corrections of ropes from time to time.
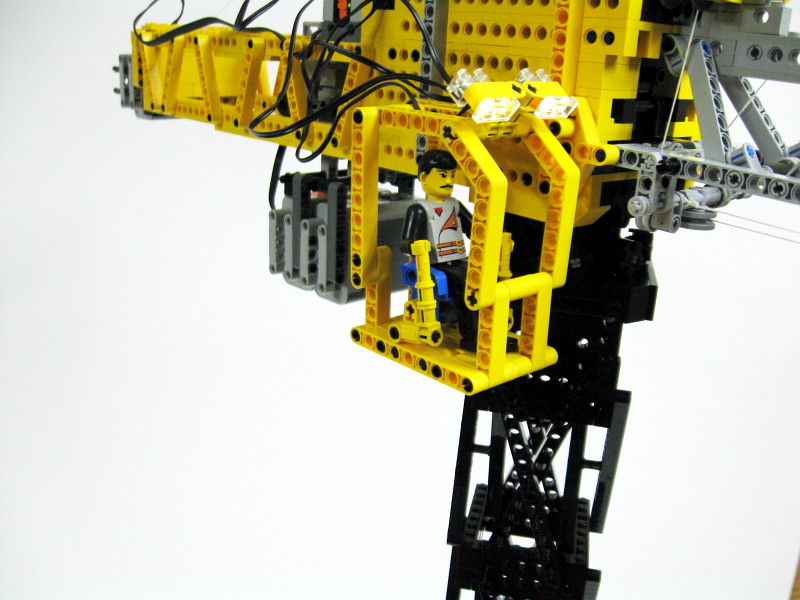
The crane was impressive due to its size and the regular truss modules. It was the first time that I was able to sit under my construction, or that I was forced to get out of the way as it rotated. It went through a lot of testing, but collapsed before I managed to have some actual fun with it. It was really tiresome to build, but I consider it a precious experience that will be useful for my future constructions.


super awesome design!!! At those extreme test forces – your tower crane could have benefited from a high power fishing line over regular string. As long as nobody is hurt – I’m all for destructive testing because it shows us the limits of a design and materials. Thanks for doing all that work for us!
@shaibpm
No.
hi how r u?
can i buy models from u ?
thanks
@russell
No.
Nice crane! Do you have plans for it?
He’s probably one of those lazy people who doesn’t read long texts nor watches the whole video 😉 @Sariel
@gogolego
Yes. Purl is a special kind of string used for knitting. It’s relatively thick and elastic.
@Sariel
I already looked purl up before I asked what it was but I just found Knitting stuff so is that what I was supposed to find?
@gogolego
Here: http://lmgtfy.com/?q=purl
@Sariel
whats purl?
@gogolego
I’m using purl most of the time.
what string do you use for your cranes because I use thread and it breaks so easily.
just leting you know that this is my faverote lego ever, i love the idea of lego cranes and have made my own in the past nothing as good as yours though. mine didn’t have a turntame, it was fixed to one postion and i didn’t have the awson trolley and looked ramdom with its colour sceme any BEST LEGO MODEL EVER!!!!! ps. if you go to youtube and search ‘transporter de deluxe’ you will see my other all time favrote. thants kyle
@crash
I wonder how could you possibly miss the notices that THIS IS CUSTOM DESIGN AND NOT FOR SALE.
were can i buy one of these
that base sort of looks to small
tak,losowo je przeglądam gdyż oglądam te które mi się z wyglądu podobają. Mimo iż ten dźwig nie jest twym najlepszym dziełem,to i tak mi się bardzo podoba.
@kama12811
Mam wrażenie że przeglądasz moje konstrukcje losowo albo trzymasz się tylko tych starych. Ten dźwig powstał ponad pół roku temu i zdecydowanie nie jest najlepszym co zbudowałem.
nooooo,kolego teraz to się postarałeś,moim zdaniem to jest najlepsze twoje dzieło
@Julian
I was kind of tired and didnt look at everything lol. I now just need some gears
@Julian
Thanks. I’ve just put a nice photo of mr. Fluffy into the FAQ section 🙂
Thank you very much Sariel Have a good day and Mr.Fluffy too
Julian(the Lego kid)
@Julian
First of all – I don’t keep any photos hidden. If the photos I’ve published are not enough – sorry, there’s no more. But the turntable is rather simple, and it can be seen quite well here: http://www.brickshelf.com/cgi-bin/gallery.cgi?i=3771091
Ok first of all im 13 yrs old and you are my Idol no joke i love legos. I plan to build one of these myself and i need help. I hear the turntable was intact.. so if you dont mind could you upload a few pics of the turntable I will upload my progress soon. To the best of luck to you and hope you have a good day
Julian(the lego kid)
Loved the Idea of using the Flex Axle would like to see more pics of the turntable & mechanism if possible.. I opted for a very torsional rigid column design and used a direct worm gear to reduce gear slop.
BTW, You can also use an NXT & IRLink to speed control the PF motors.
‘I thought a tower crane was simple until I actually started to build one.’ Yes That is Very True! (I think a crawler crane is simpler) I think it could be one of the hardest items to build well! I spent soooo very long on mine! as I wanted it to have decent strength and capabilities.
My crane:
http://www.brickshelf.com/cgi-bin/gallery.cgi?f=349696
Another nice Crane:
http://www.brickshelf.com/cgi-bin/gallery.cgi?f=326276
Parax.
@John
Stinkhole – “Shave Me”
Jaką nazwę nosi ta nuta?
Very nice Serial,
I like it!
M4X1994
Wonderful crane! I especially like the true triangular jib. Too bad to be betrayed by a stupid cable!!!
@Jasper
Sure, but I prefer to proceed with next constructions that to build the same thing again.
very,very nice crane. I saw the clip and the end I tought noooooooooooooooooo. Big shame it collapsed!!!!!. But when it was on the ground, there were still big parts in one piece. Is it possible to rebuild it?