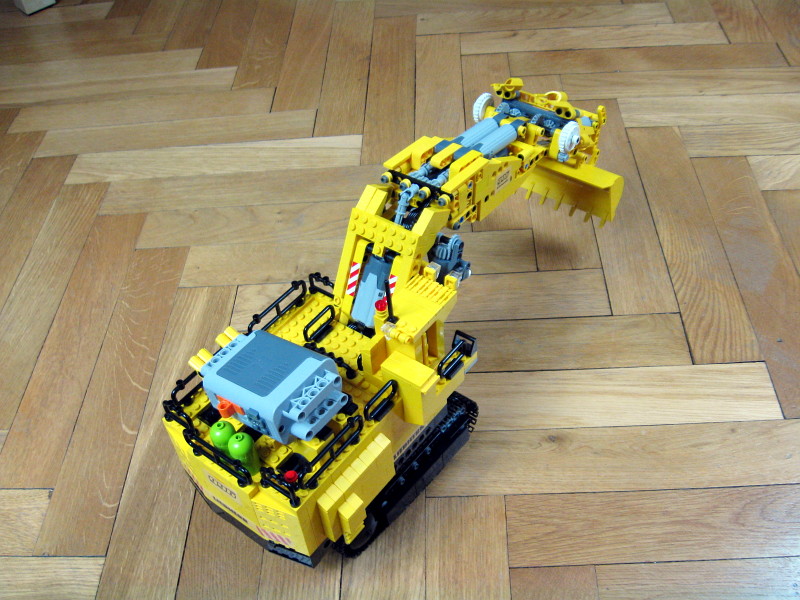
Liebherr R996

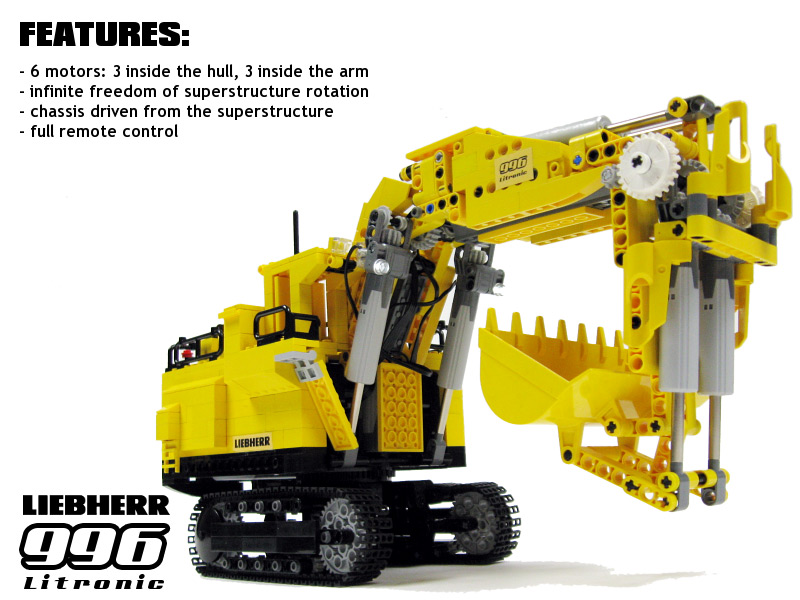
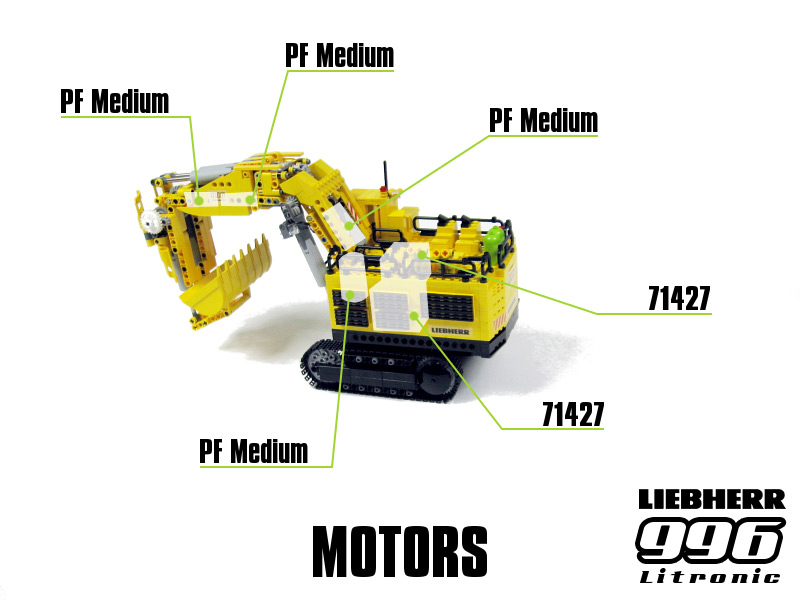
Model of one of the largest Liebherr excavators. Features 6 motors with full remote control, chassis driven from the superstructure and infinite freedom of superstructure rotation.
Datasheet:
Completion date: 12/02/2009
Power: electric (Power Functions)
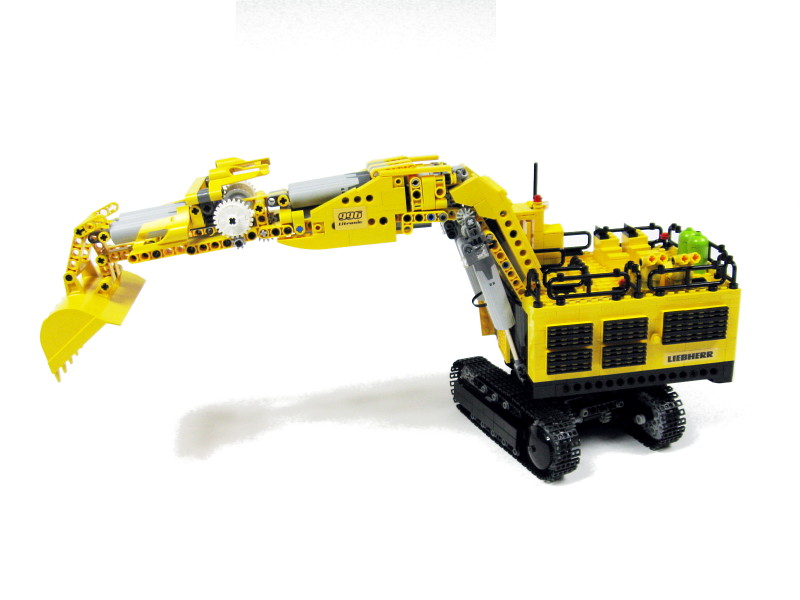
Dimensions: length 47 studs / width 18 studs / height 27 studs (with arm in transport position)
Weight: 1.52 kg
Suspension: none
Motors: 4 x PF Medium, 2 x 71427
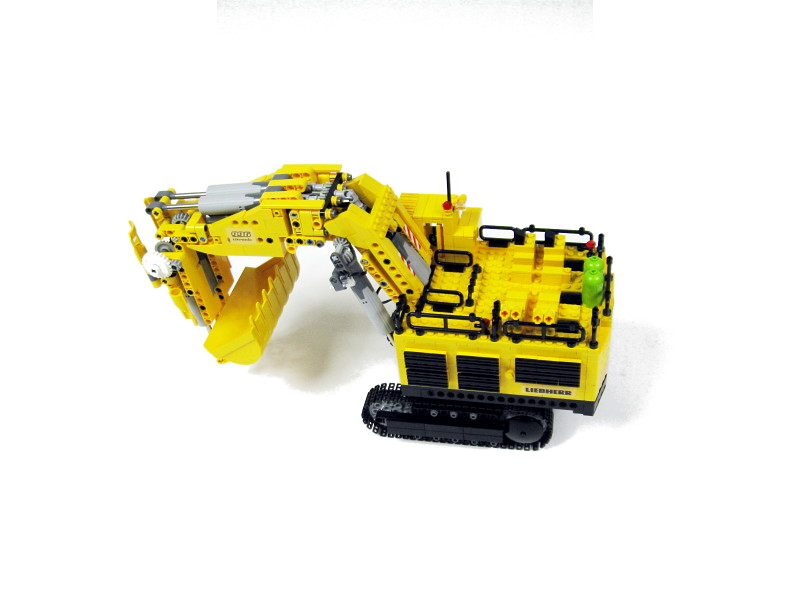
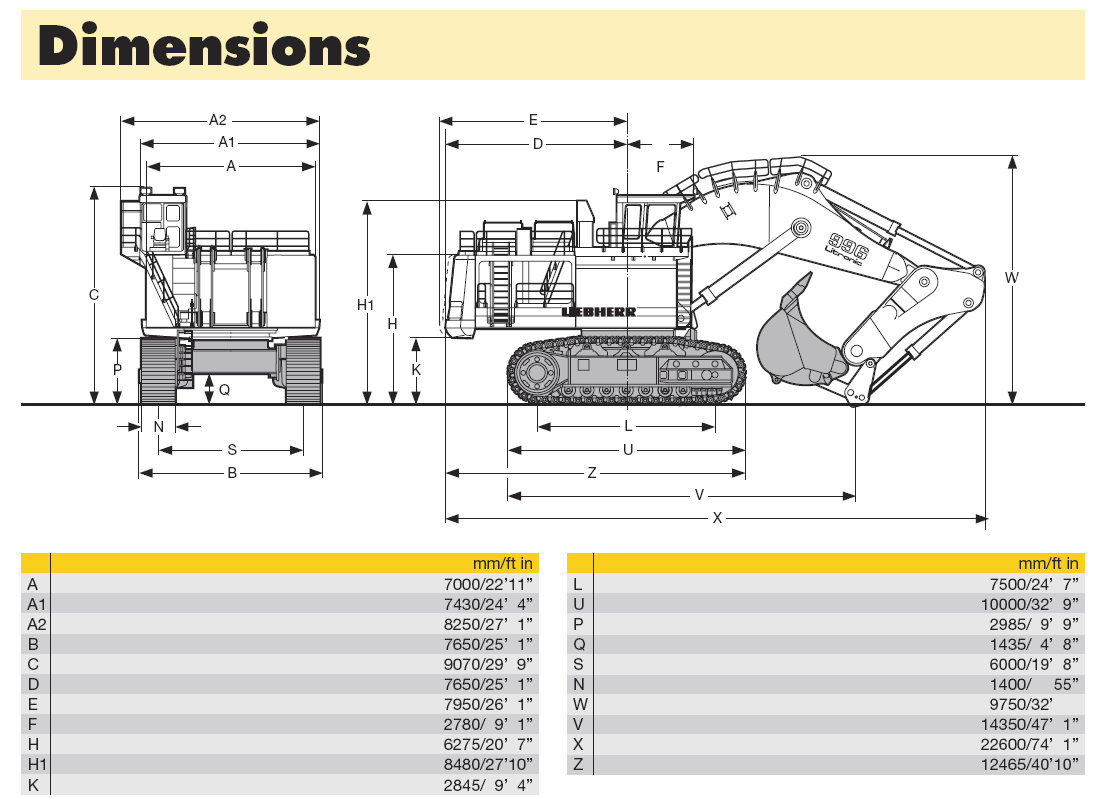
My goal here was to create a fully remote controlled, pneumaticless model of an existing excavator, while keeping it reasonably small. My long-time affection made me to turn to Liebherr excavators, and I have chosen the R996 Litronic model with the undershot arm, due to its hull’s shape and arm’s construction. It was scaled to the size of the 3-studs wide tracks, which also suited the size of the linear actuators quite well.
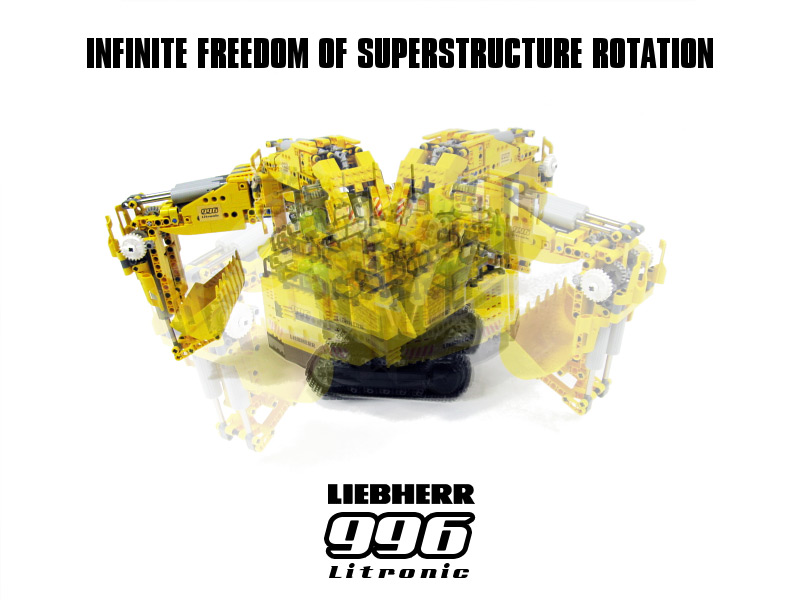
The priority was to reconcile a realistic drivetrain with an enclosed hull construction. In real excavators the chassis is basically driven by one or many motors located inside the superstructure, thus ensuring the infinite freedom of superstructure rotation. This is possible thanks to a hydraulic system, which can’t be modeled with currently available Lego parts. Therefore, it can be only solved by pneumatic or mechanical means, the latter solution being much more compact and reliable. An iconic example of the mechanical solution is the model of a JCB JS220 excavator by Jennifer Clark. The essential trick is to transmit the drive through the turntable by a vertical axle with a free rotating driving ring on it. The driving ring can be assisted by an extension driving ring to transfer the drive further vertically, and eventually is meshed with the t16 gears used in the gearboxes. Thus we have the vertical axle transmitting drive to one track and the driving ring transmitting drive to the other track independently.

The functioning of this solution is slightly affected by the superstructure’s rotation, as the position of motors in relation to the tracks changes. Usually it results in the tracks being slowly driven by the supestructure’s movement, but this effect can be greatly reduced by the gear reduction below the superstructure. Here, however, the use of 71427 motors plus the gear reduction and the model’s weight resulted in motors being driven by the rotation rather than the tracks. Still, the drivetrain worked flawlessly, which can be clearly seen on the video when the superstructure is rotated clockwise while the chassis turns in place counterclockwise.
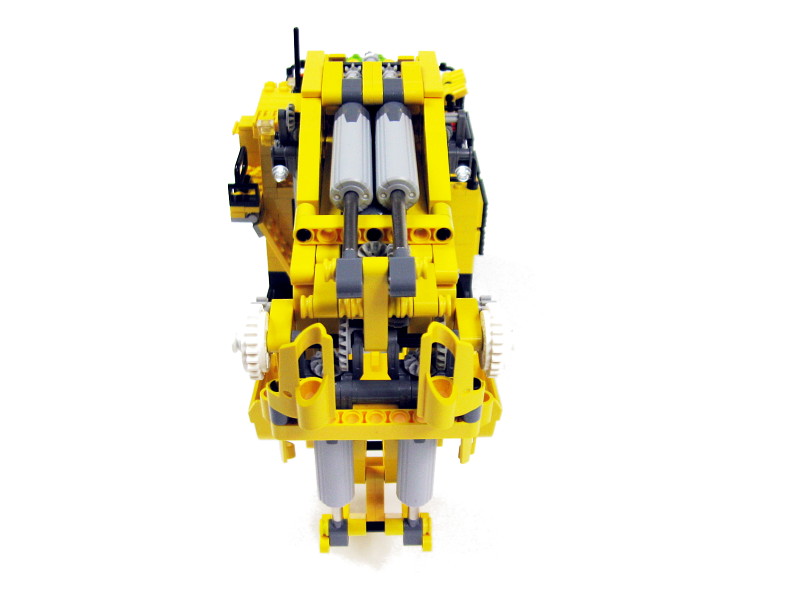
The hull’s construction was challenging from the very beginning. About half of its internal space is occupied by a battery box, and additional space is required by the IR receivers along with the wires. This leaves just about 40% or less of the internal space to be taken by the motors. I initially hoped to contain 4 motors inside the hull, but eventually only three fit in. The other three were incorporated directly into the arm, which helped to counterbalance the weight of the battery box and simplified the transmission system inside the arm.
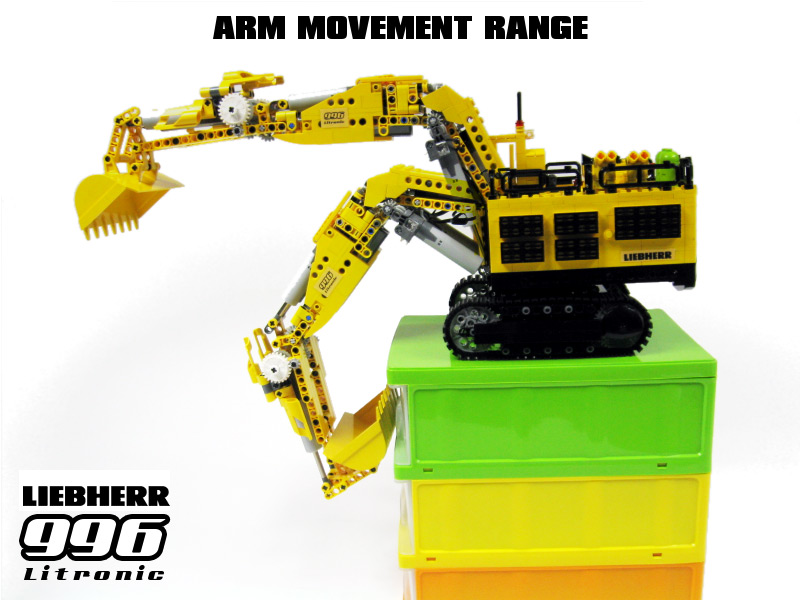
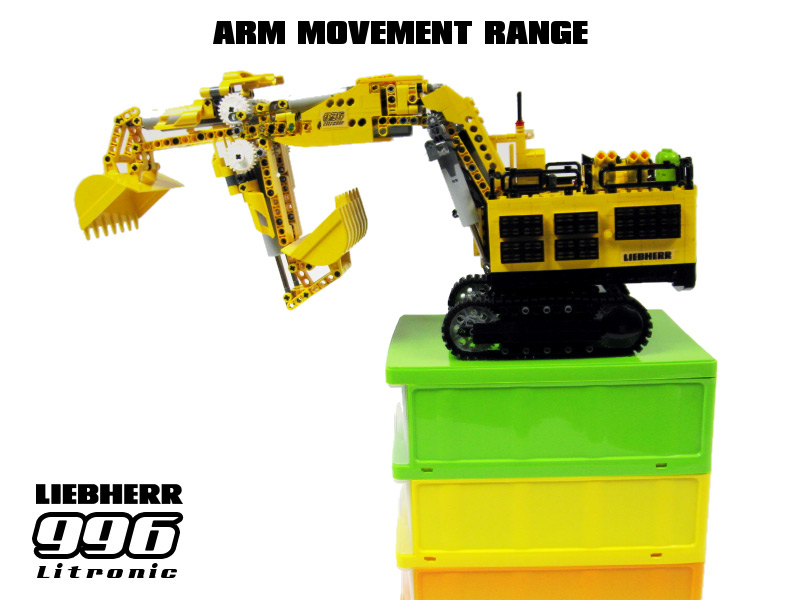
I’ve spent a lot of time working on the geometry of the arm, and in the end it’s range of movement is as close to the real one as possible, while the number and the location of the linear actuators is almost identical to the number and location of the real machine’s hydraulic cylinders. The model turned out to work quite efficiently, it had a good weight distribution (although it could use a little more weight in the rear part), passed all practical tests, and was able to easily support itself on the arm in order to e.g. lift the front part of tracks above the ground. I was satisfied with its performance and considered it one of my most compact constructions ever.


@Nate
I have used regular LEGO lights.
hey i had found one of ur videos on youtube and read some comments and found out u told some one to look at ur website for almost the same question but i have not found what i wanted to know about this build.
What i wanted to know is what r u useing for the lights flashing is it like a strobe or flasher add-on u can buy if so where could
@Wierdguy
oh, the one where it’s on the speed remote control? theres a video of it, but no instructions -> http://www.youtube.com/watch?v=655GY6h9GE8 <-
@Wierdguy
I never made any.
Can you tell me where to get instructions for the steering wheel on the remote control please?
Hey Thx For the idea of the Mlcad
Ok, no problem 😉
@GuiliuG
I don’t remeber.
I want to know what’s the reduction before the two La for the arm?
@Arnau
Ever heard of using Google?
Where can I get it?
@Arnau
MLCad.
which program do you use for making the digital designs?